В данной статье мы рассмотрим процесс установки (как установить) Windows Server 2016 с нуля от самого начала до конца, и немного затронем первичную подготовку к непосредственной настройке Windows Server 2016. А саму настройку, уже после установки Windows Server 2016 мы рассмотрим в следующей статье.
1) Первое, что нужно сделать — это скачать сам дистрибутив. Скачать его можете на нашем сайте по этой ссылке. Дистрибутив содержит в себе две редакции Standard и Datacenter на русском и английском языке. При установке у Вас будет выбор что именно нужно Вам установить.
2) Второе, что нужно сделать — это записать дистрибутив на флешку, сделав ее загрузочной. Это нужно для того, что бы Вы смогли загрузиться на флешку из под биоса для инсталляции системы. Подробная инструкция как записать дистрибутив на флешку по следующей ссылке.
3) Соответственно следующий шаг — это нужно загрузиться с загрузочной флешки из под биоса. Если Вы не знаете как это сделать, ознакомиться с инструкцией можете так же в нашем блоге на следующей странице.
4) Итак, мы уже загрузились с флешки и приступаем к непосредственной установке системы Windows Server 2016.

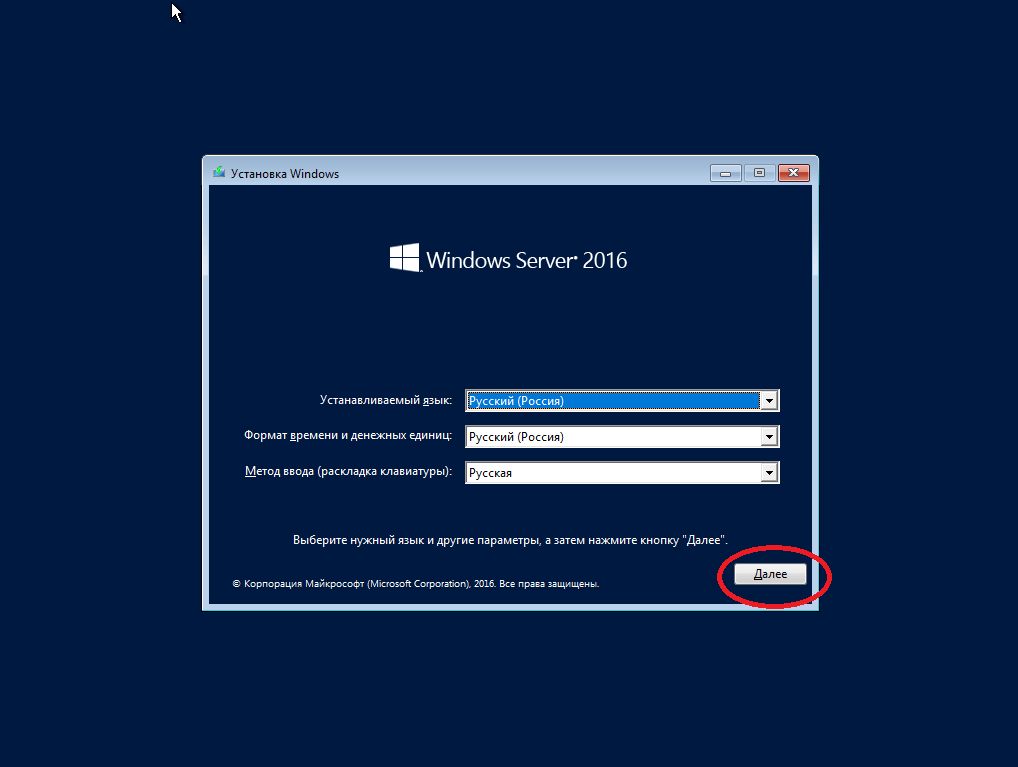
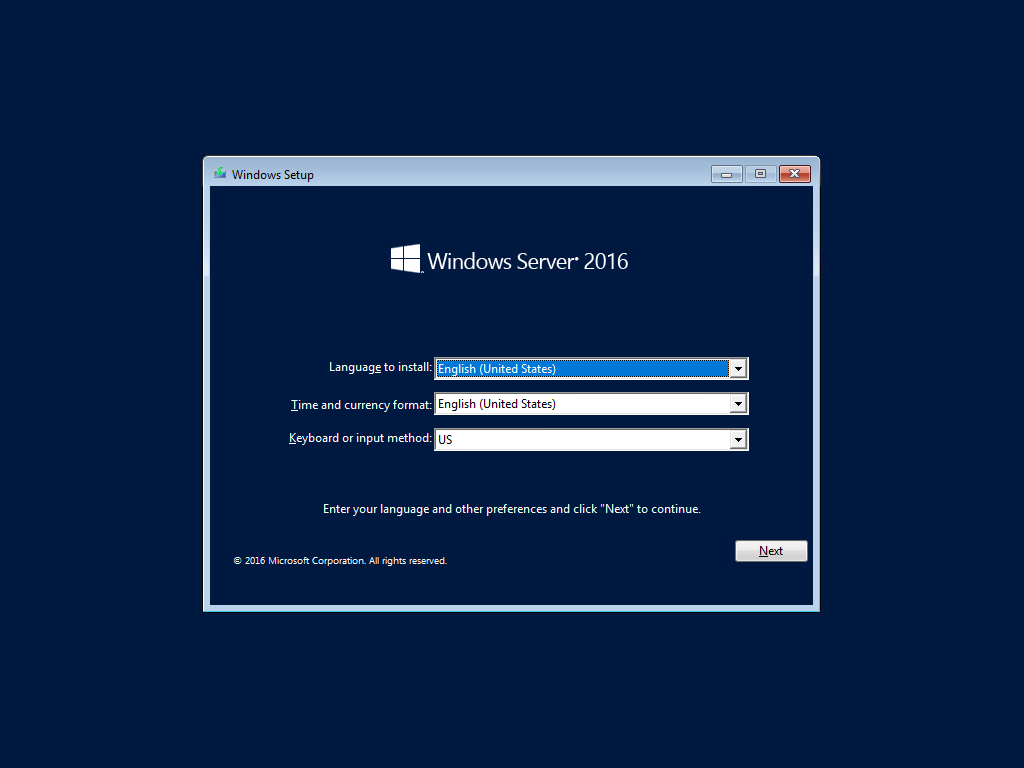
Выбираем нужный язык дистрибутива.

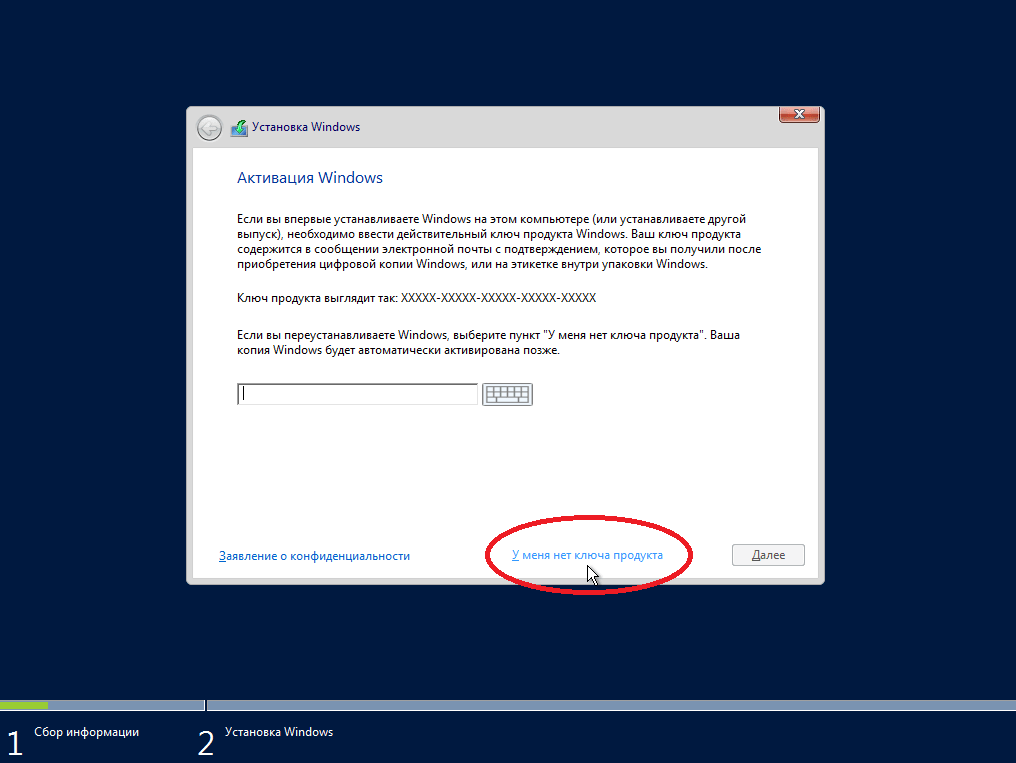
На следующем этапе у Вас запросят ключ активации для Windows Server 2016, мы его введем позже, уже в самой системе. А при установке выбираем «У меня нет ключа продукта».
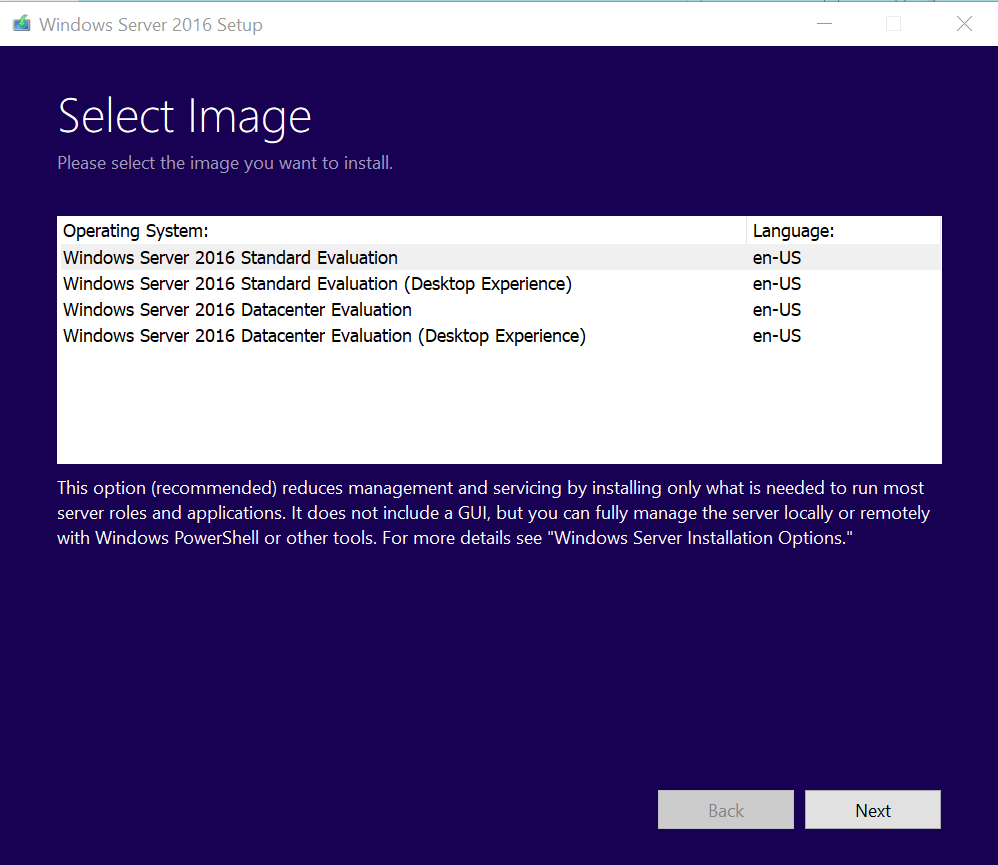
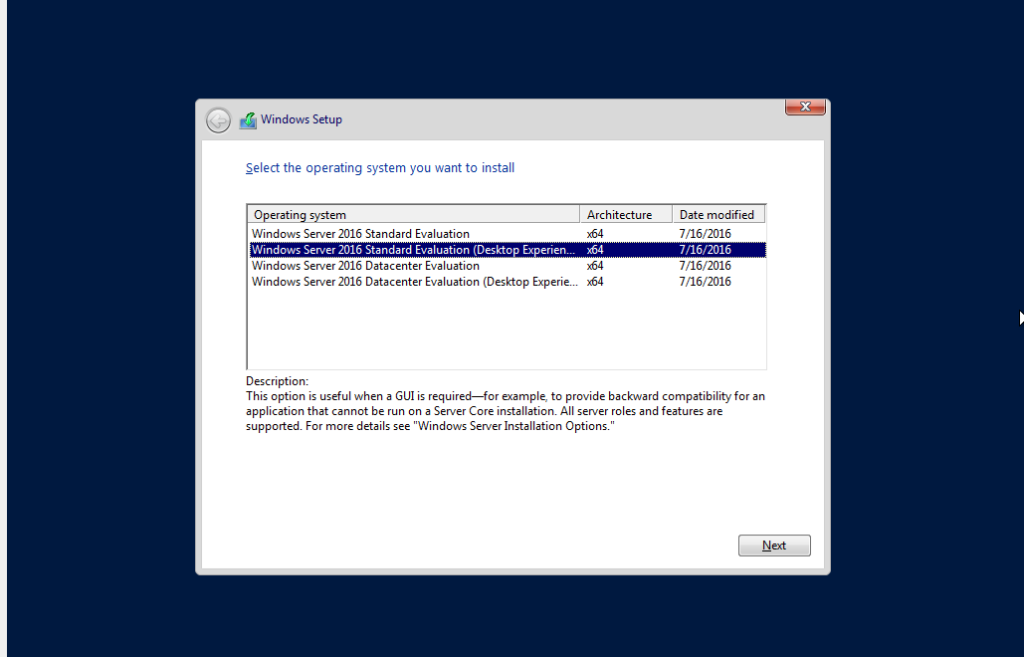
Далее Вас попросят выбрать какой именно версии дистрибутив Вы хотите установить Standard или Datacenter (на примере мы будем устанавливать Standard, но установка Datacenter ничем не отличается), а так же обязательно выбираем «Возможности рабочего стола», иначе система у Вас установится без графической оболочки и управление Windows Server будет доступна только из консоли.

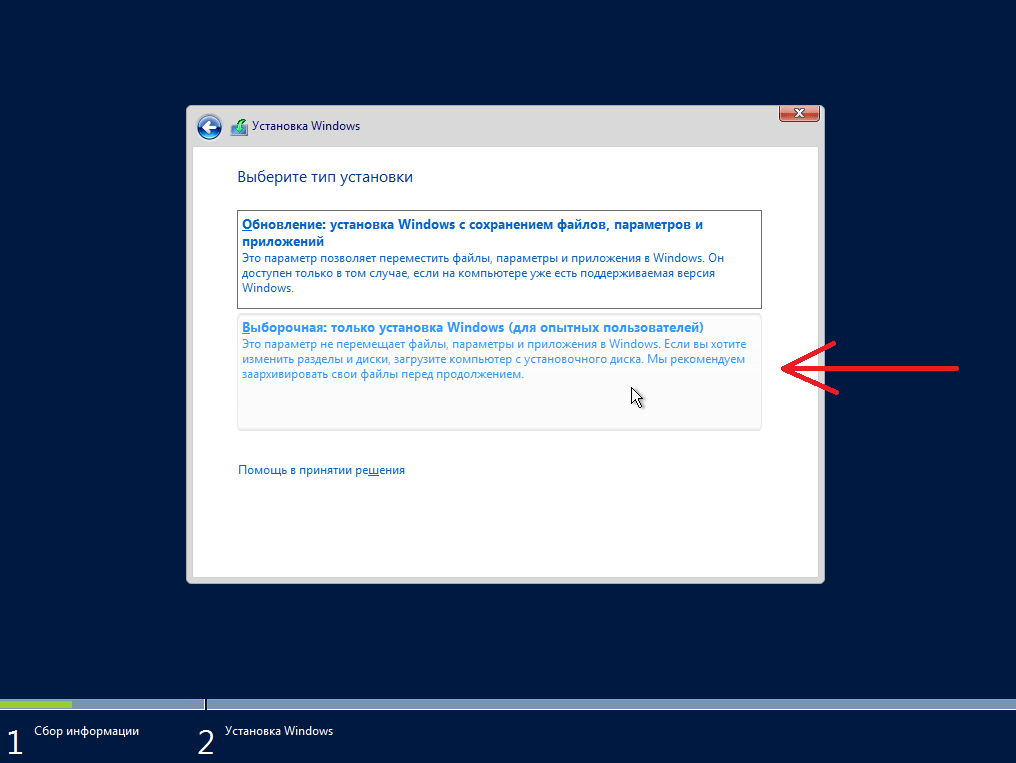
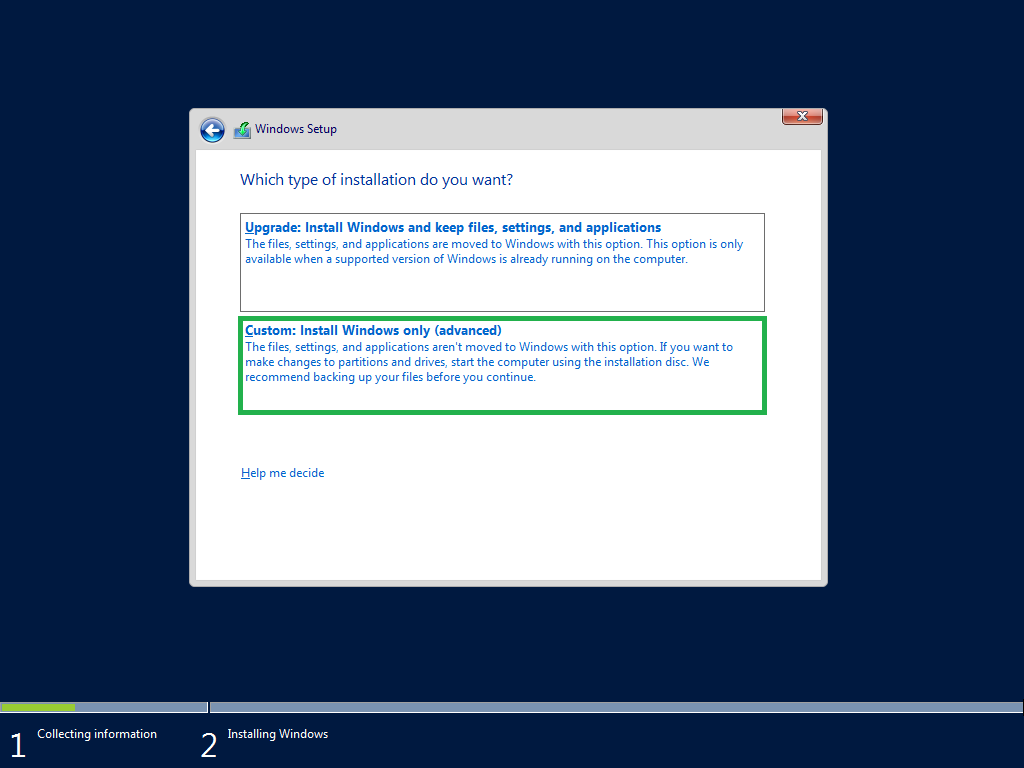
На следующем пункте выбираем «Выборочную установку», т.к мы устанавливаем систему с нуля.
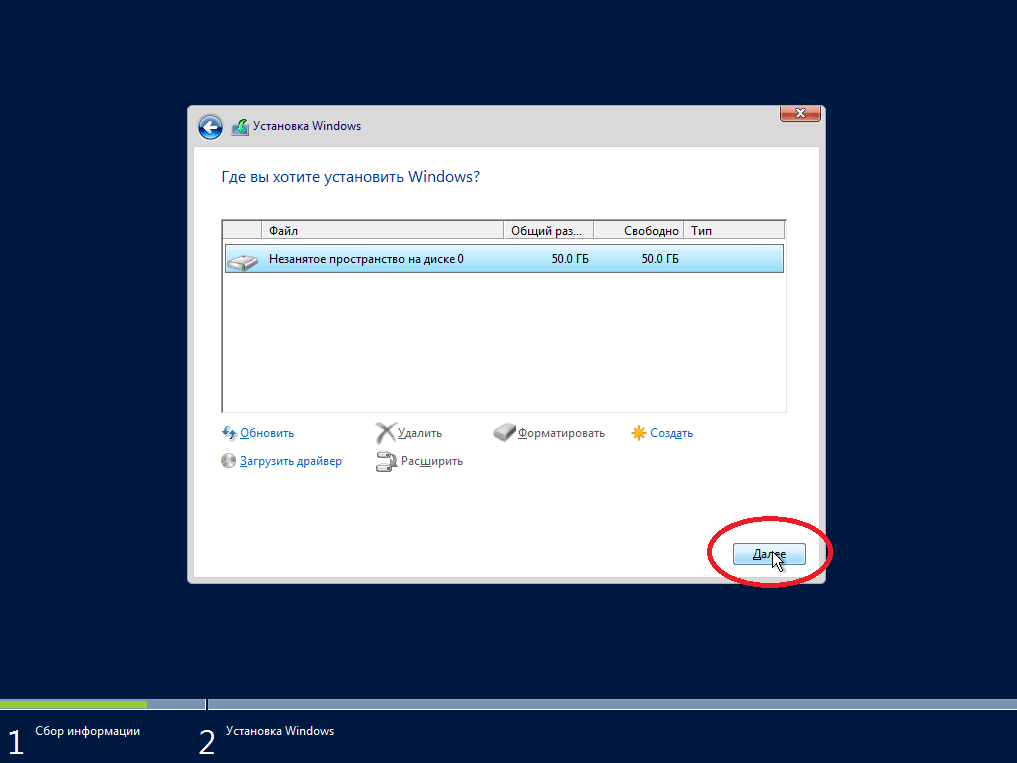
Далее Вам нужно будет выбрать диск, на который Вы хотите установить систему, у Вас их может быть несколько, к примеру SSD для системы, и HDD для хранения файлов, или что-то другое. В нашем случае на примере диск один.
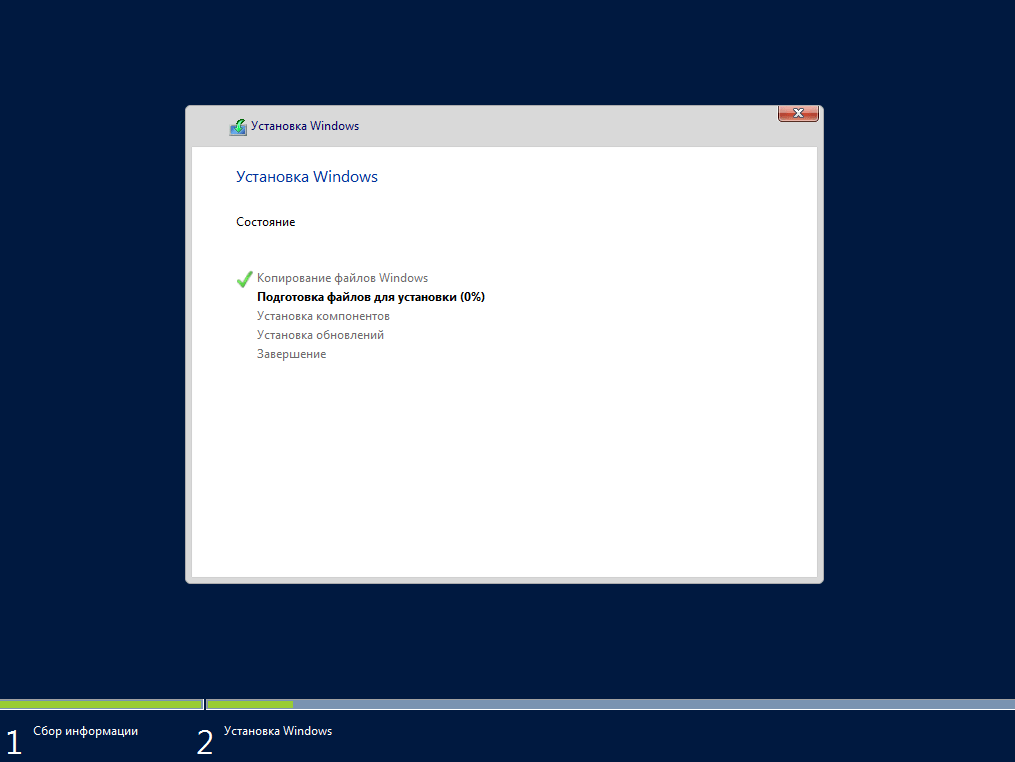
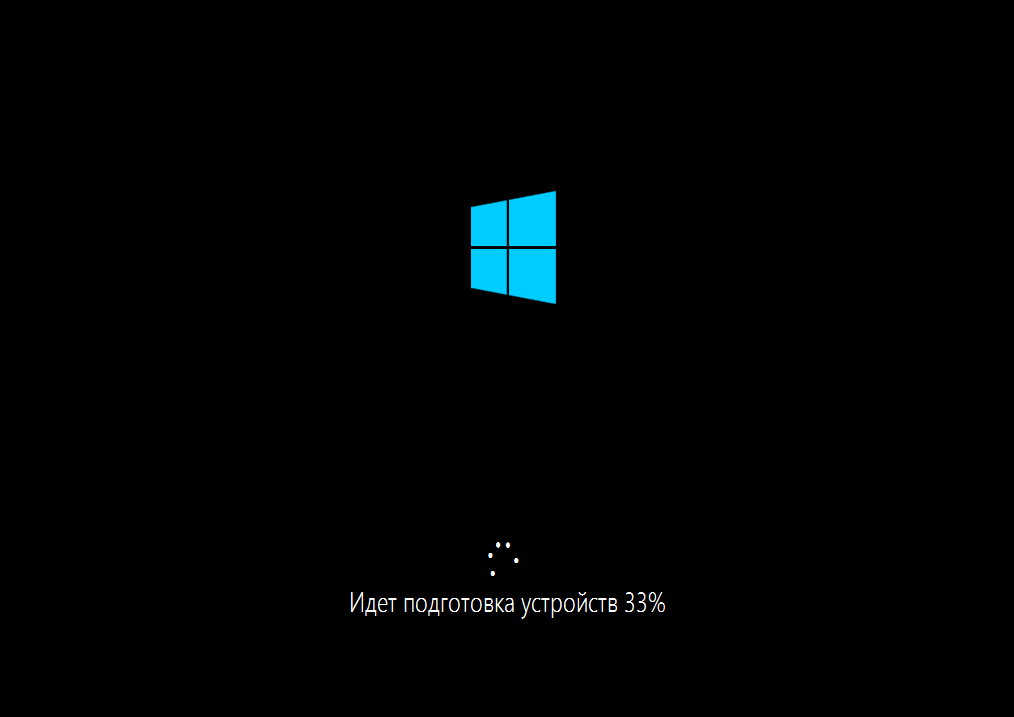
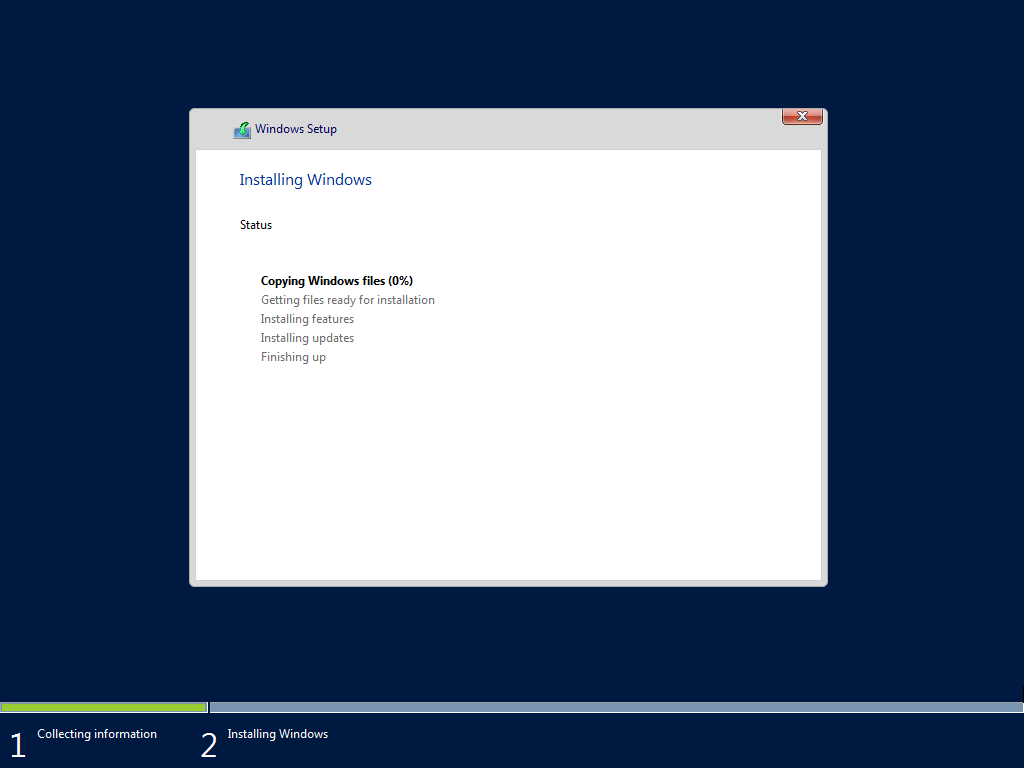
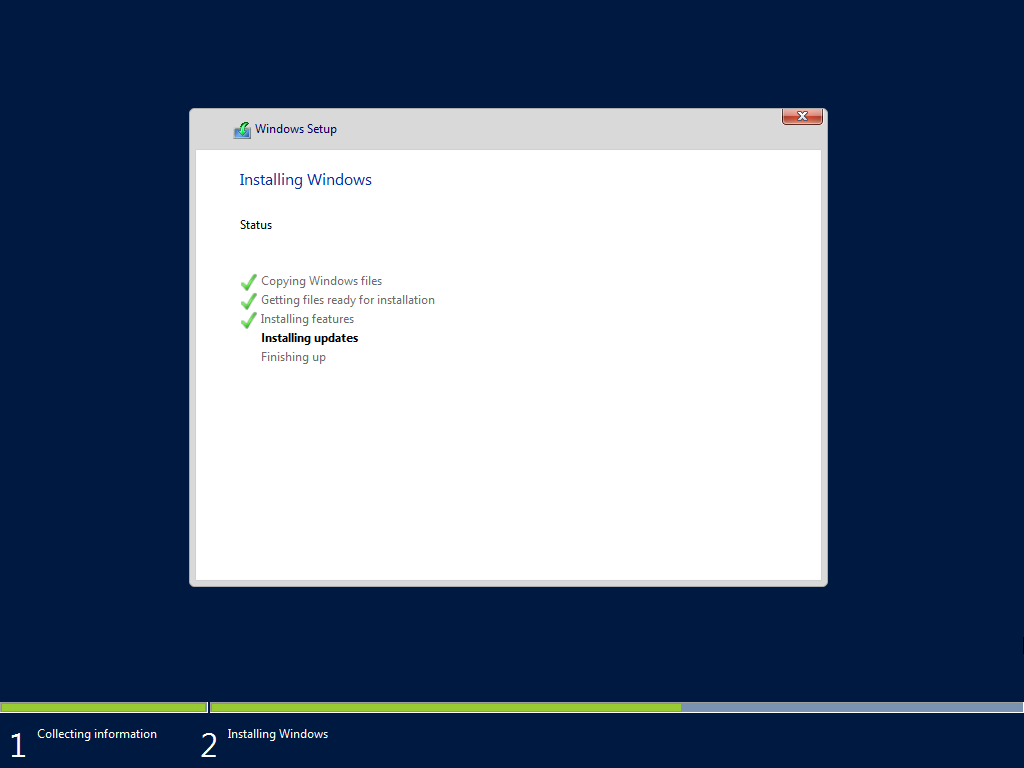
После начинается непосредственно сама установка Winodws Server 2016.
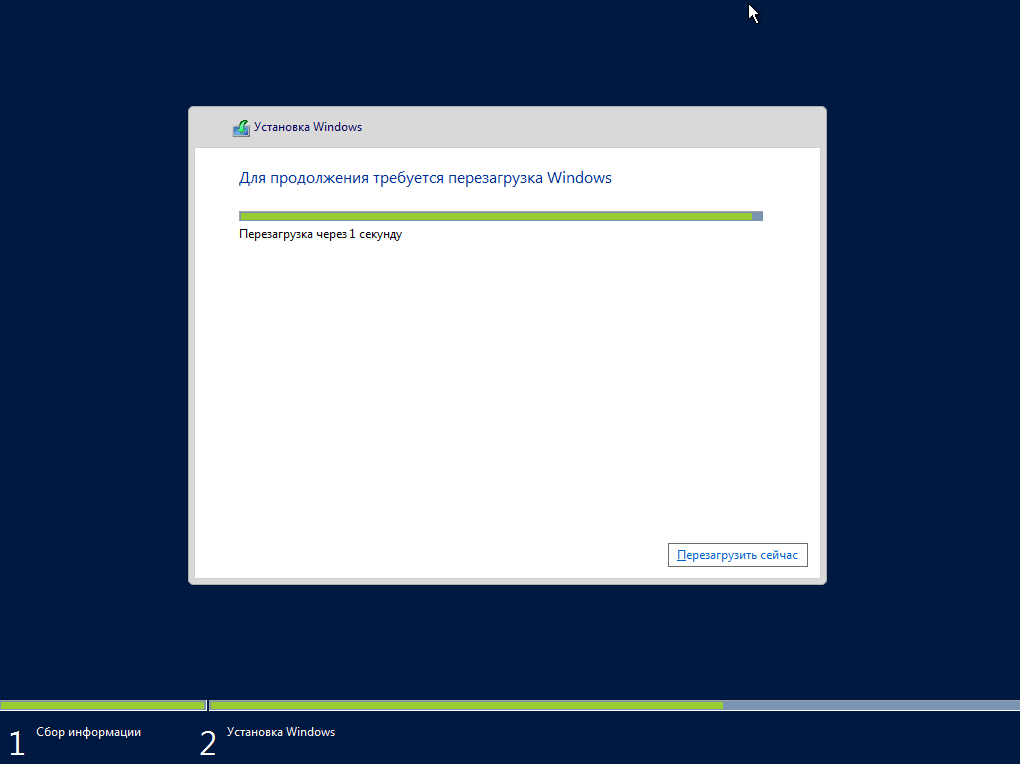
После завершения установки и обновлений компьютер пару раз может перезагрузиться.
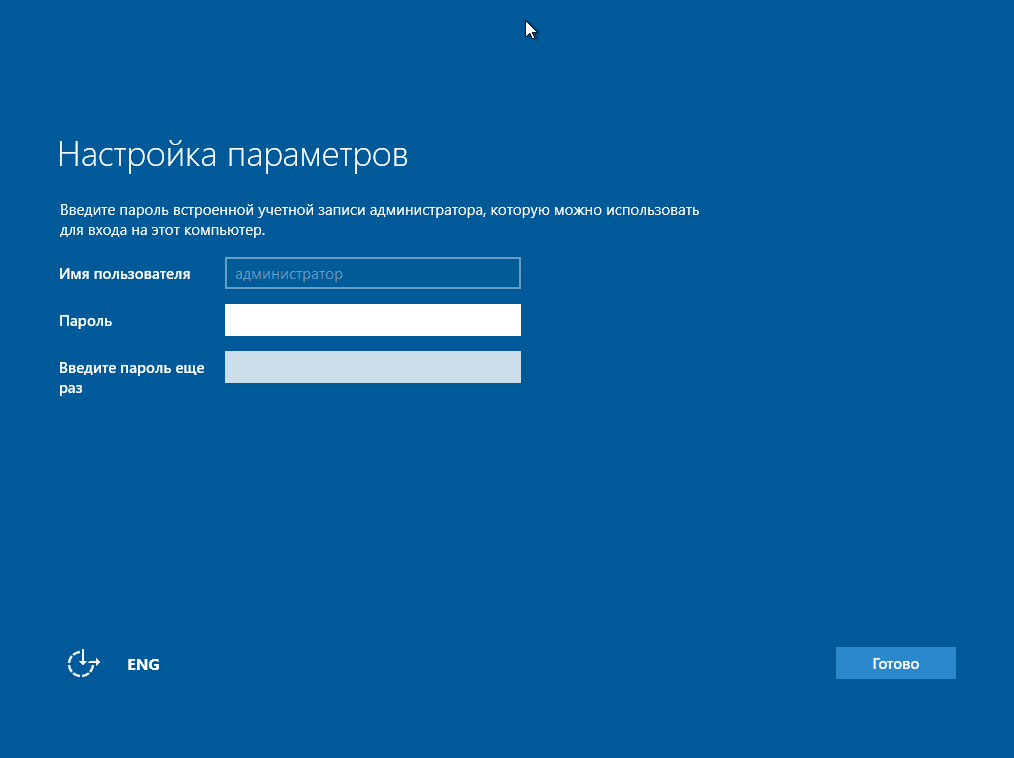
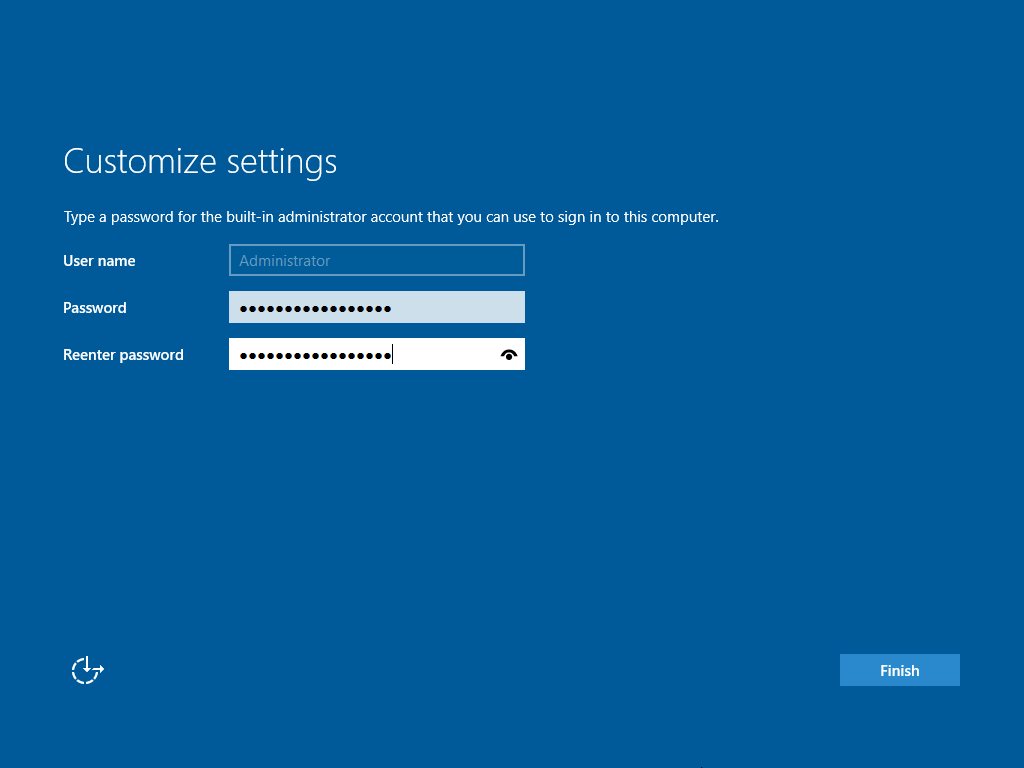
Далее Вам нужно придумать пароль администратора, он будет запрашиваться при входе в систему. Используйте латинские символы, пароль так же должен содержать как минимум одну большую букву и цифру.
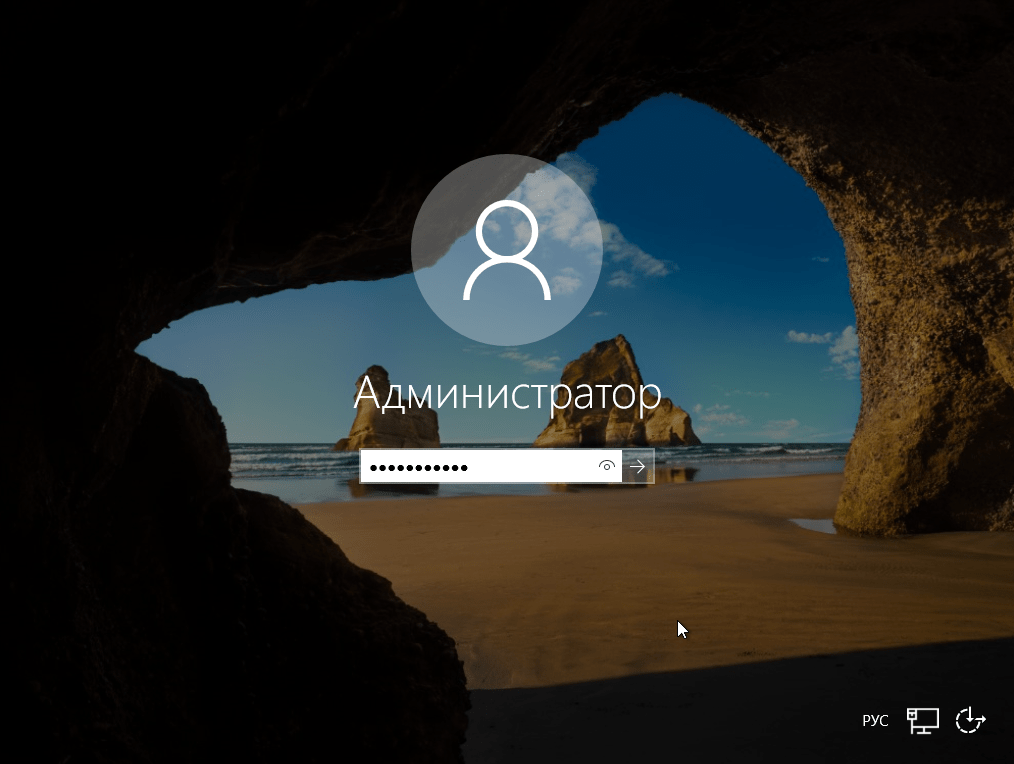
После установки пароля входим в систему.
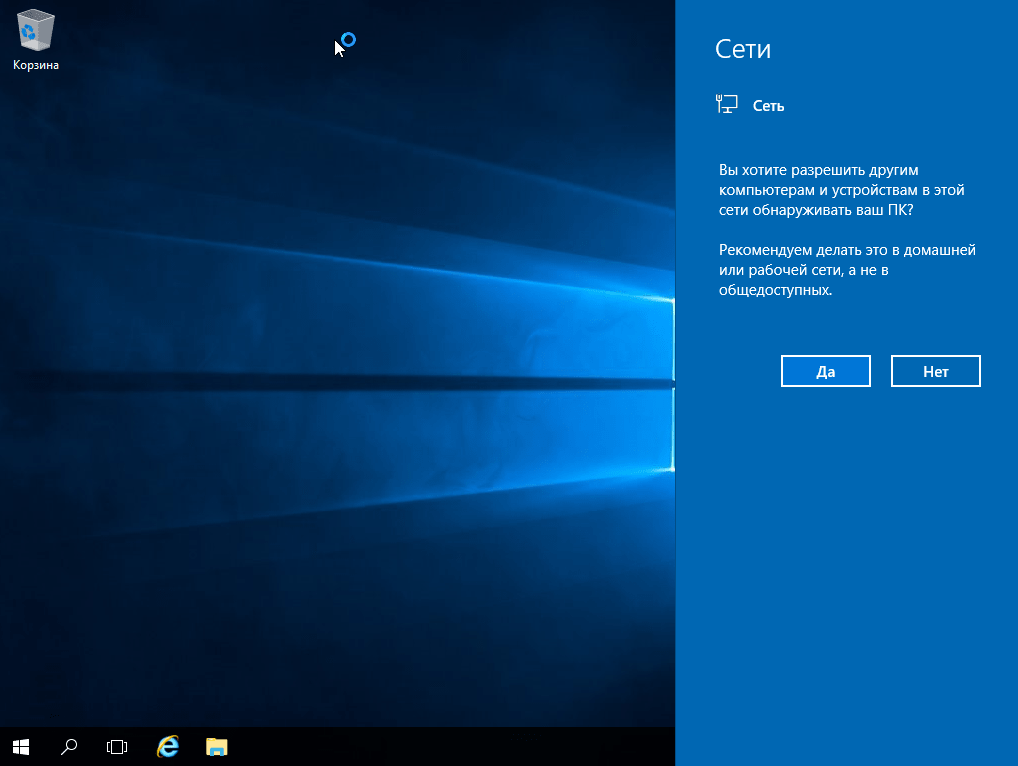
Вот мы и зашли на рабочий стол Windows Server 2016. Нажимаем «Да», если у Вас проводное соединение, для получения доступа в интернет.
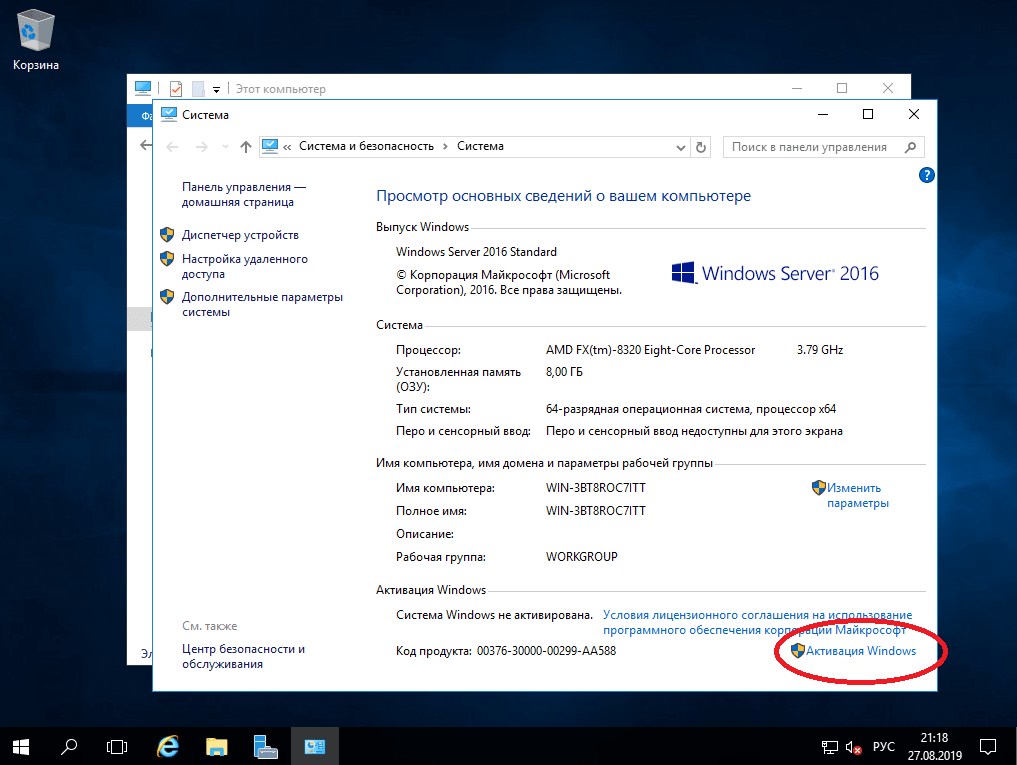
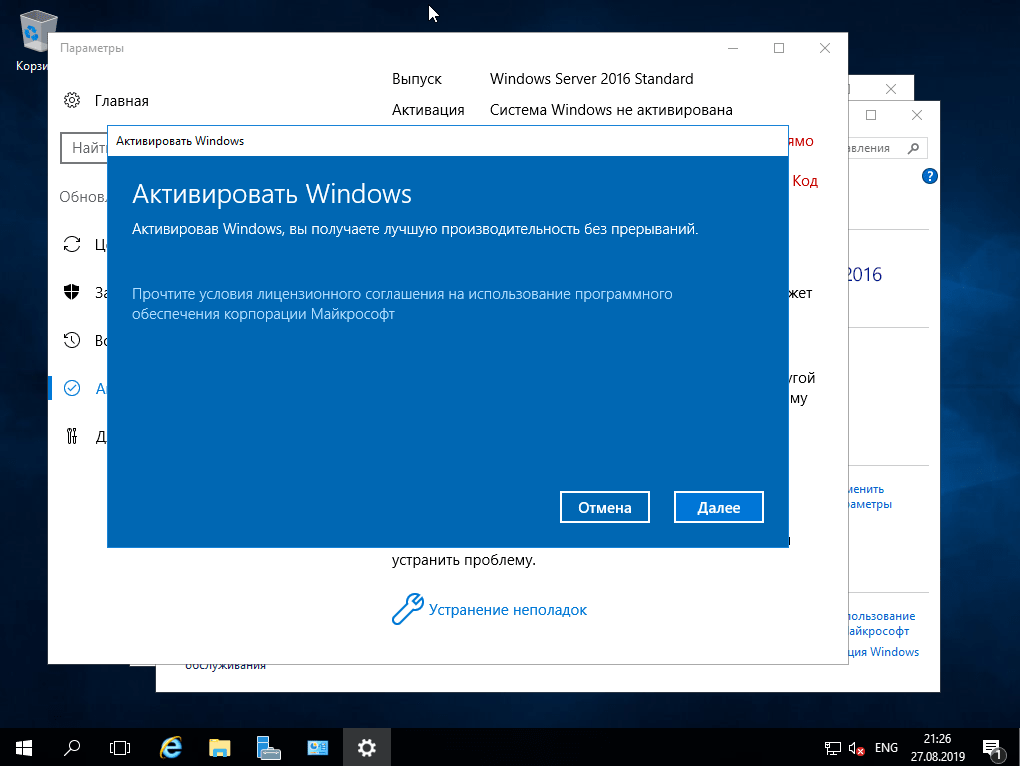
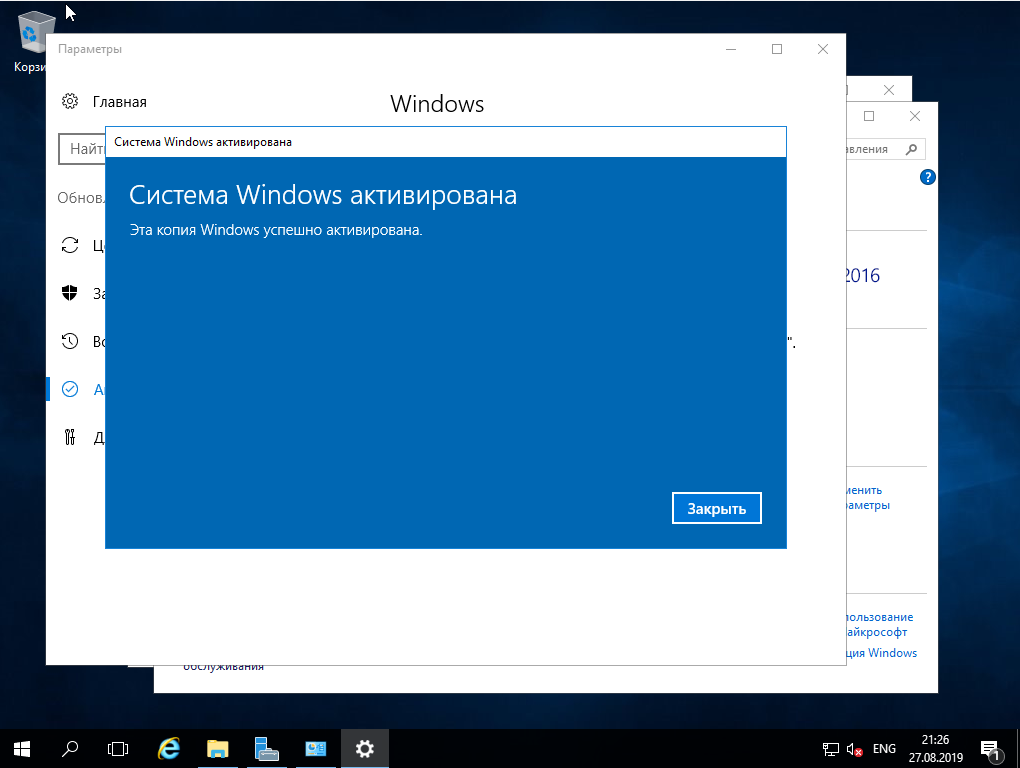
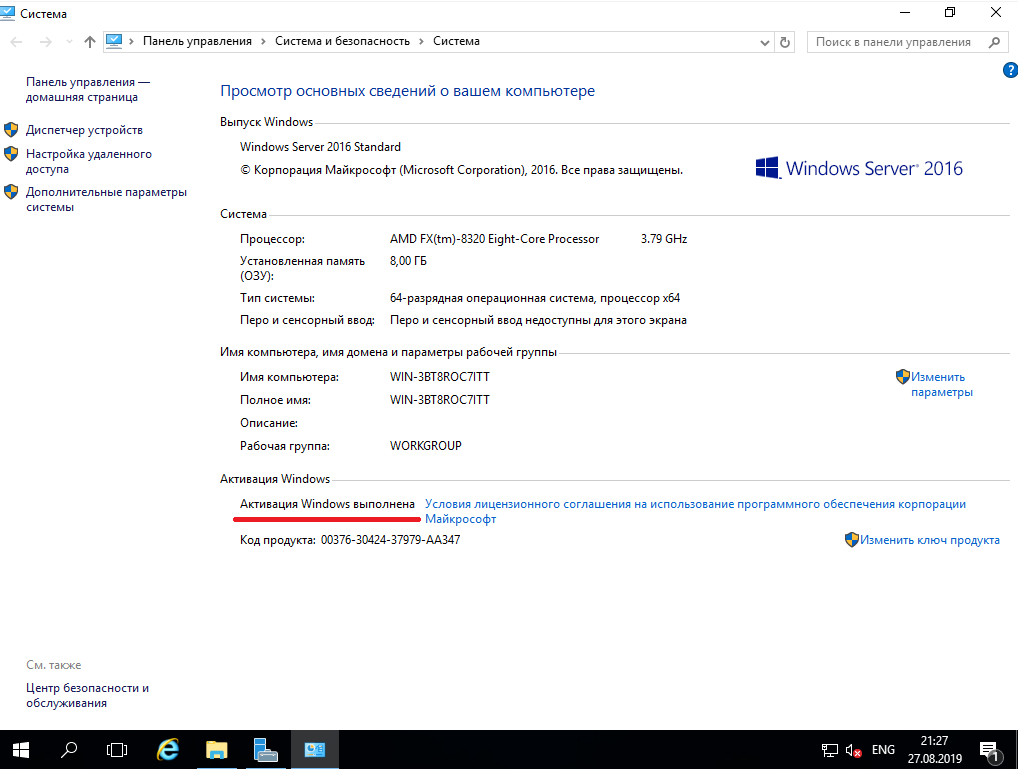
5) Приступим к первичной настройке, не углубляясь в сложности настройки серверной системы. Для начала активируем саму систему. Заходим в свойства компьютера => Активация Windows. Там Вам нужно будет ввести ключ активации.
Приобрести его можете в нашем интернет-магазине по низкой цене. Быстрая доставка ключа на Ваш Email в течении одного часа, так что настройка системы не заставит Вас долго ждать. Приобрести ключ активации на Windows Server 2016 можете в нашем каталоге на следующей странице.
6) Далее приступим к обновлению системы. Чтобы у нас изначально были все актуальные пакеты обновлений и безопасности, для Windows Server — это как никогда очень важно.
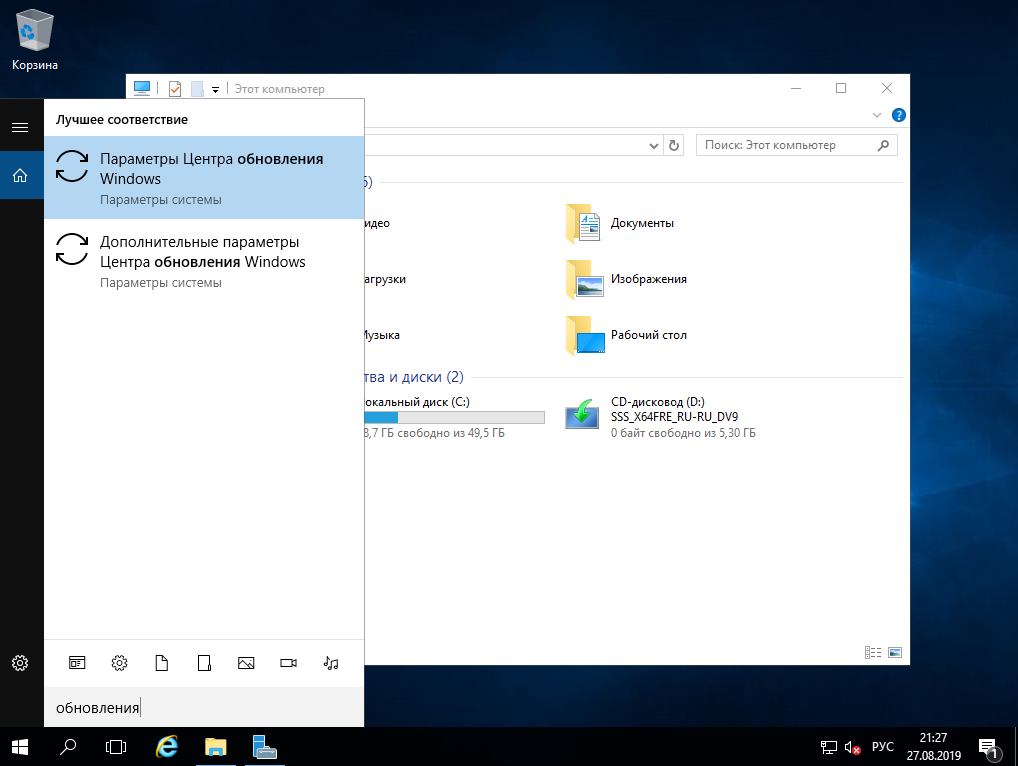
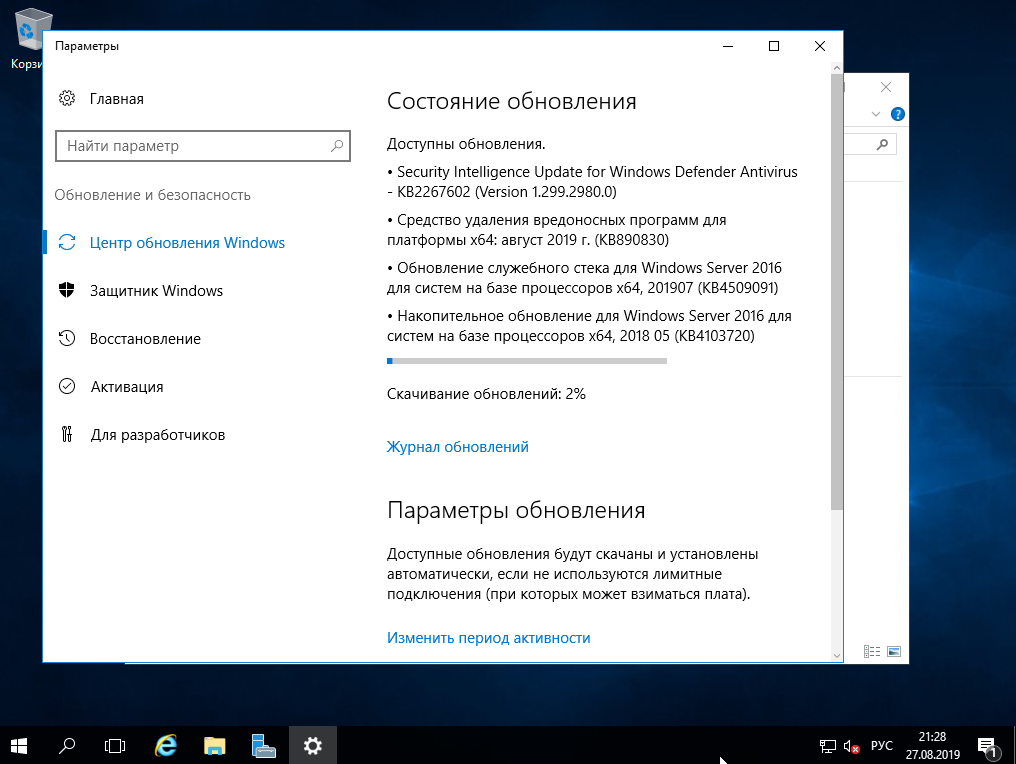
В поиске вводим слово «Обновления» и заходим в «Параметры центра обновлений Windows». Проверяете наличие обновлений, скачиваете и устанавливаете. После установки всех пакетов обновлений перезагрузите систему.
В следующей статье мы расскажем как настроить Windows Server.
Лицензионный ключ активации Windows Server 2016 от
If you’ve already purchased Windows Server 2016 Standard but can’t understand how to use it on your device or looking for the complete DIA (Download, install and Activate) guideline, you are in the right place. If you think the whole process is too complicated, get out of this idea. Because in this post, we will share the complete easy guidelines about Windows Server 2016 Standard download, installation and activated process.
Note: In this process, you must need a server 2016 activation key. If you don’t have a license key then before you continue, buy a server 2016 license key from our shop.
Essential System Requirements to Download Windows Server 2016 Standard
Before jumping into the download process l 2016 Standard download, your computer must fulfill the system requirements. Check these system requirements carefully:
| Requirement | Minimum Specification |
| Processor | 1.4 GHz; 64-bit processor |
| RAM | 512 MB or greater |
| Hard Disk Space | 32 GB or more |
| Display Resolution | 1024 x 768 or higher resolution |
| Network Connection | Ethernet adapter of 1 gigabit/sec |
Fundamental Information about Windows Server 2016 Standard
Windows Server 2016 Standard is a hybrid cloud environment support group of operating systems. It includes numerous tools and features to organize and integrate with Microsoft Azure and other cloud services. The software offers various features and tools for medium-sized businesses to help organizations manage their network infrastructure and data. Also, the Server 2016 standard provides a secure and reliable platform for running business-critical applications. Windows Server 2016 Standard also includes multiple security features to help protect organizations from cyber threats.
Windows Server 2016 Standard offers improved performance and scalability compared to previous versions that you can use. Get the features and advantages you need to download and install Windows Server 2016 on your device. Let’s dive into the principal process.
Download Process of Windows Server 2016 Standard ISO 64-bit Full Version
You can download the Windows Server 2016 Standard in many processes. Windows Server 2016 standard download is available from the official Microsoft Website. Let’s have a look at the download process:
- Go to the Microsoft Official website download page.
- Click on Download the ISO file and go to the next page.
- From the next page, fill up the form with your original information.
- Then Click on the Download Now button.
- Finally, click on the language based 64 bit ISO file.
- Within a few moments, It starts the download process.

Note: To complete the whole download process, it will take almost 1 hour. The download speed will vary with the browser and internet connections.
How to Install Windows Server 2016 Standard
- Once you have downloaded the software, you can install the Windows Server Standard 2016 version on your computer. Let’s take a look at the easy process:
- Locate the Downloaded software file on your device.
- Then extract the downloaded ISO file.
- Double-click on the folder to enter the folder.
- Look for the setup.exe file and double-click on it to run the installation process.

It will start the installation process; click on the Download and Install Updates and press the Next button.

- Select Windows Server 2016 Standard Evaluation on the next screen and click the Next button.
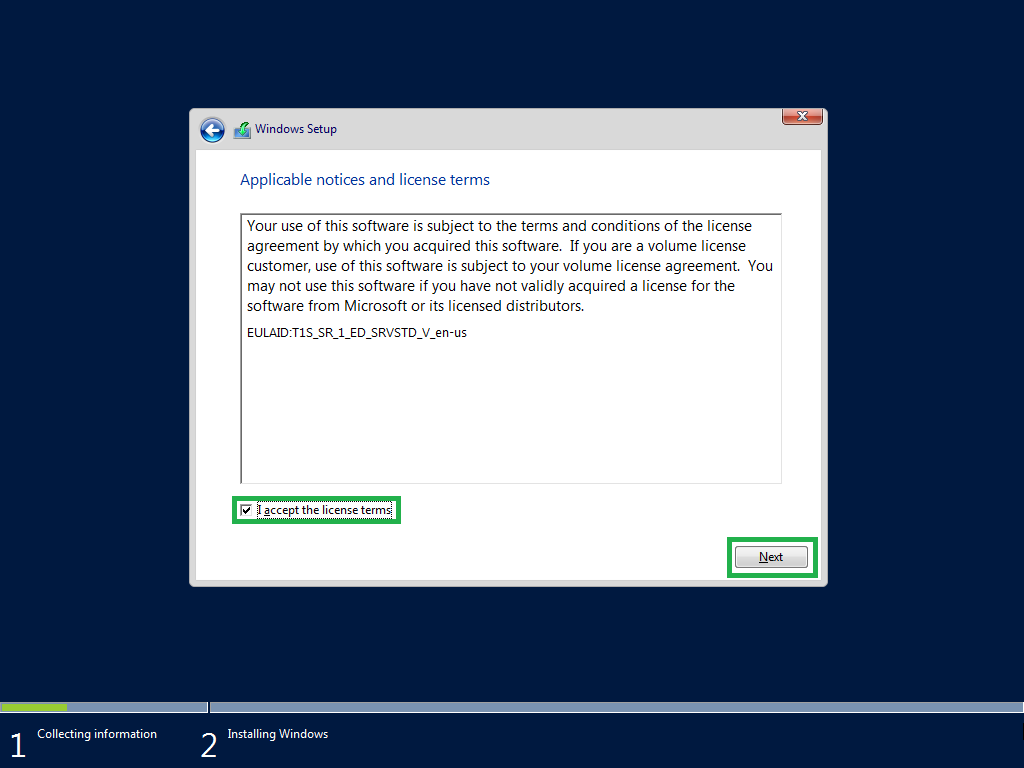
- Accept the Applicable Notices and License Terms option.
- Then choose Nothing and tap on the Next button.

- Windows Server Setup program automatically checks updates and you need to press the Next button when the update is completed.

- Then confirm all the information in the Window and click the Ok button.
Note: If you can see Turn Off BitLocker, then do it and follow the next process.

- Now you can see the configurations for installing Windows 2016 Server. Click on the Install option and follow further directions to complete Windows 2016 Server installation process.
How to Activation Windows Server 2016 Standard
Welcome to the activation process since you have completed the installation process. To activate the Windows server on your device, just follow the below procedure:
- First, press Win+R from the keyboard and type cmd in the box.
- Then click Ctrl+Shift+Enter to open the Command box to run the administrator.
- Carefully type: Dism /online /Set-Edition:ServerStandard /AcceptEula /ProductKey:XXXXX-XXXXX-XXXXX-XXXXX-XXXXX

- Note: Enter your 25-digit Windows Server 2016 Standard license key instead of XXXXX-XXXXX-XXXXX-XXXXX-XXXXX
- Now the Windows Server 2016 is activated on your device.
Summary
Consequently, here is the end of today’s blog post. If your device system fulfills the hardware and software requirements and you have the valid license key, then you can easily activate the server on your device by following our process. Hopefully, our download, install and activate Windows Server 2016 Standard guidelines will help you complete the whole process effortlessly.
Albert, a seasoned tech enthusiast at MSCDKEYS, brings a wealth of knowledge and insight to the team. With expertise spanning gaming, tech guides, product reviews to software development, he delivers in-depth analysis and engaging content. Known for his approachable demeanor, Albert connects with readers on a personal level, making tech accessible to all.
View all posts by Albert
,
This tutorial contains detailed instructions on how to install Windows Server 2016 Standard. Windows Server 2016 comes in 3 Editions: Essentials, Standard & Datacenter.
- Windows Server 2016 Essentials is ideal for small businesses with 25 users and up to 50 devices and does not support virtualization.
- Windows Server 2016 Standard is ideal for companies that require advanced features and virtualization (up to 2 virtual machines).
- Windows Server 2016 Datacenter is for companies that require advanced features and needs more that 2 virtual machines (unlimited).
Suggestion: Before buying (installing) the new server, choose the appropriate Windows Server 2016 edition according to your needs. View the detailed comparison of Windows Server 2016 Standard and Windows Server 2016 Datacenter.
Minimal System Requirements for Windows Server 2016.
| CPU: | 1.4 GHz 64-bit processor |
| RAM: | 512 MB ECC (Error Correcting Code) without Desktop Experience installation & 2GB with Desktop Experience installation. |
| Disk space: | 32 GB (Computers with more than 16 GB of RAM will require more disk space for paging, hibernation, and dump files). *
* Ideally use a disk with at least 80-100GB disk space. |
| Network adapter: | 1x Ethernet capable of at least gigabit throughput. |
| Other requirements: | UEFI 2.3.1c-based system & Firmware that supports secure boot. Trusted Platform Module if you want to use the BitLocker Drive Encryption. Internet access. |
How to Install Windows Server 2016 Step by Step.
1. Place the Windows Server 2016 DVD (or the USB) installation media and boot from it.
* Notes:
1. You can download an evaluation version of Windows Server 2016 in ISO format, from here.
2. To create a USB installation media, you can use Rufus USB creator utility.
2. At the first screen, choose your Language, Time & currency format and the Keyboard or input method and click Next.

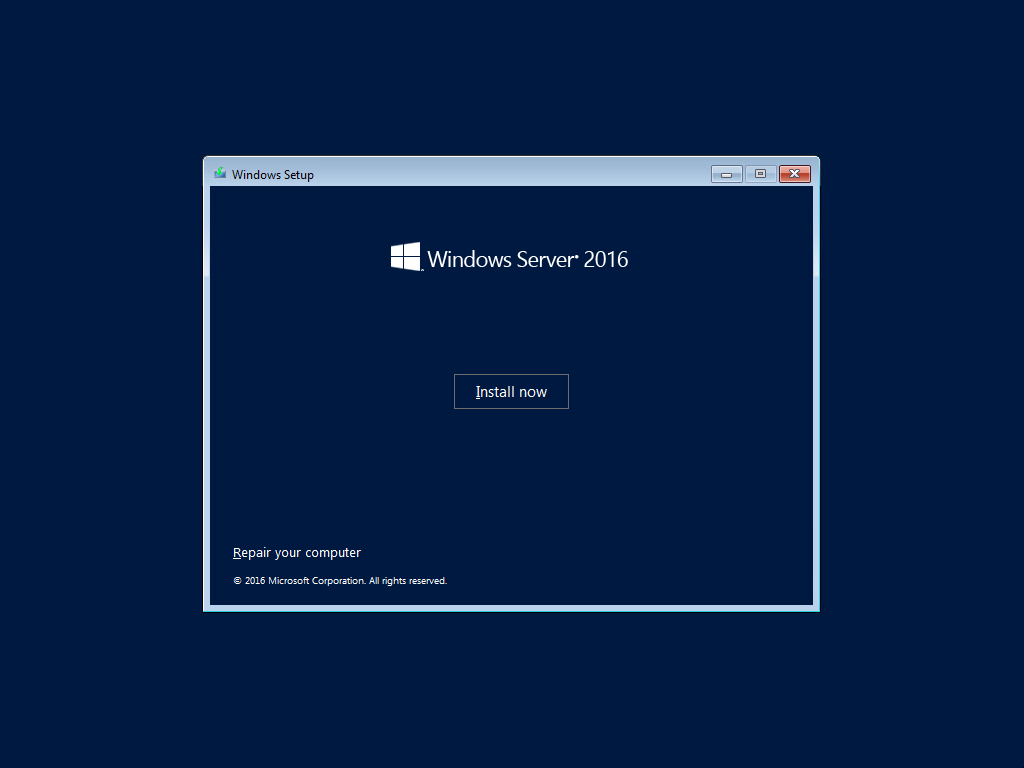
3. Then press Install now.

4. Choose the appropriate Server 2016 version,* according to your needs and click Next.
* Note:
The Windows Server 2016 (Desktop Experience) installation includes the Windows 10 GUI and the Server Manager.
The Windows Server 2016 without the Desktop Experience, is what we have known to be the Core installation and doesn’t include a GUI interface and the Server manager.
Important: Unlike some previous releases of Windows Server, you cannot convert between Server Core and Server with Desktop Experience after installation. For example, if you install Server Core and later decide to user Server with Desktop Experience, you should do a fresh installation (and vice versa).
In this tutorial, we choose to install the Windows Server 2016 Standard with the Desktop Experience. I prefer this option, because many companies have server based applications and needs the full GUI to operate well.

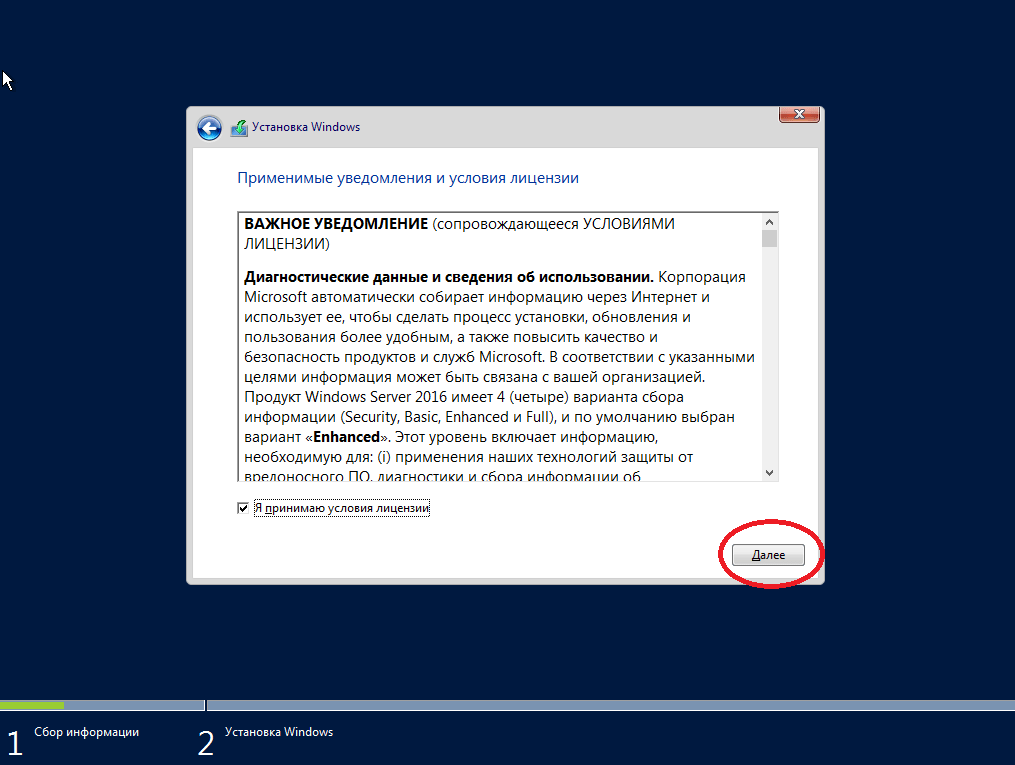
5. Accept the License terms and click Next.

7. Provided that it is a new installation, choose Custom: Install Windows.

8. Then select the disk to install the OS and click Next. *
* At this point you can press the New button, in order to give a specific disk space in GB for the OS.

9. Let Windows setup to copy the required files and to finish the installation.

10. After a few restarts you ‘ll be prompted to specify a password for the (standard) Administrator account. Type a complicated password (composed of uppercase, lowercase, symbol and numbers) and click Next.

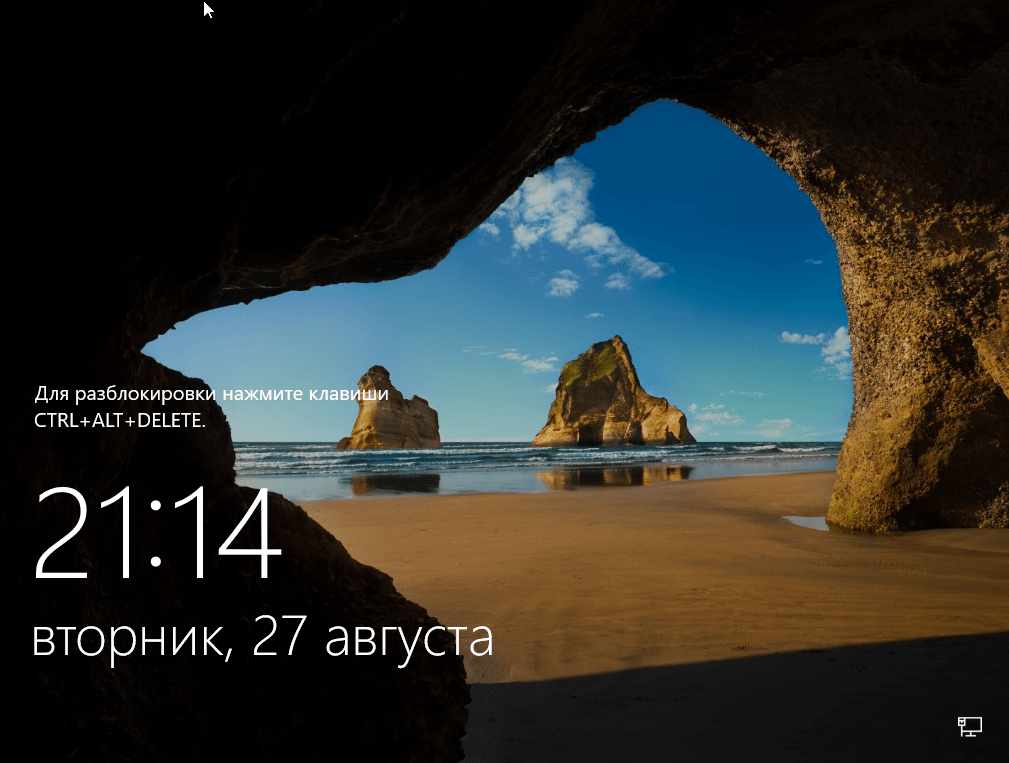
11. When prompted, press Ctrl + Alt + Delete, type the Administrator password and press Enter to login to your new server.

12. After login, Server Manager will start automatically. Proceed to configure your new server.

That’s it! Let me know if this guide has helped you by leaving your comment about your experience. Please like and share this guide to help others.
If this article was useful for you, please consider supporting us by making a donation. Even $1 can a make a huge difference for us in our effort to continue to help others while keeping this site free:
- Author
- Recent Posts
Konstantinos is the founder and administrator of Wintips.org. Since 1995 he works and provides IT support as a computer and network expert to individuals and large companies. He is specialized in solving problems related to Windows or other Microsoft products (Windows Server, Office, Microsoft 365, etc.).
how to install windows server 2016 from iso file In This Tutorial, We Learn About how to install windows server 2016 from iso file. Installation of Windows Windows Server 2016 is one of the major functions of the network. As an administrator, you should know how to install and configure Windows Server. To begin administering your network, of course you first need to install a Windows Server and configure it. Make a plan for installation before installing Windows Server. Of course, you can plug the installation media (DVD, USB flash, etc.) into the server.
Choose an appropriate version of Windows Server. One version of Windows Server supports specific roles / roles that others do not support. Think about your current needs and what your needs may be in the future. How many virtual machines may you need in the future? Does your network now require a web server? How many users work in your network? Those are all things you should pay attention to when making a good plan for a Windows Server installation.
download windows server 2016 ISO Image
First download windows Server 2016 ISO Image from Bellow Links.
download ISO Image from Microsoft official website
On windows server 2016, you can download the image by fill some required information from Microsoft’s Evaluation Center site. The downloaded ISO image has a trial validity of by default 180 days. Which can be registered and taken for a license for a lifetime.

Hardware Requirement to Install windows server 2016
- Processor: 1.4Ghz 64-bit processor
- 512 MB (2 GB for Server with Desktop Experience installation option)
- Disk Space: 32 GB
- Network: Gigabit (10/100/1000baseT) Ethernet adapter
- Optical Storage: DVD drive (if installing the OS from DVD media)
- Video: Super VGA (1024 x 768) or higher-resolution (optional)
- Input Devices: Keyboard and mouse (optional)
- DVD drive (if you intend to install the operating system from DVD media)
Feature of Windows Server 2016
- Shielded Virtual Machines
- Nano Server
- Containers Windows Server Container, Hyper-V Container.
- Linux Secure Boot
- The Resilient File System (ReFS) stable version
- Faster Hyper-V storage with ReFS.
- Hyper-V hot add NICs and memory
- Nested Virtualization
- Shielded VMs
installing windows server 2016
The downloaded ISO image (which was downloaded earlier) will have to be bootable before window server 2016 is put into the system. To make the image bootable, you have to use source USB or DVD. If you want to install Windows Server 2016 from DVD, you can burn iso image to DVD with DVD burning software (Nero, ASHAMPOO BURNING STUDIO, and a DVD burner, etc.).
Creating a bootable USB device for Windows server 2016
when you want to install windows server 2016 through USB Pen Drive use bellow software to make bootable Pendrive
dda command to write the ISO image directly to the USB device. (Linux)- Rufus (Windows)
- Windows USB/DVD Tool (Windows)
- UnDiskMaker X (Mac)
- diversal USB Installer (Windows)
- EaseUS (Windows/Mac)
windows server 2016 installation and configuration
To install Windows Server 2016, first go to the system’s BIOS (to go into the system’s bios can be a different key according to the system, such as changing the boot priority of the system by going to F2, F11 or F12.) Have to set the first priority through which you want to install the server.
Plug the Windows Server 2016 boot drive (DVD, USB) into the computer and boot your computer. When the Windows Setup page appears, select your language, time format, and keyboard then click on the Next button.

Click On Install Now Butten to start the installation process.

Select the appropriate version of Windows Server that meets the needs of your organization. In this installation, we have selected the windows server 2016 standard evaluation Desktop Experince and then click on Next. Make sure that you have chosen the appropriate version of Windows Server.
Accept the License Terms
Put a checkmark in the box next to the accepted license conditions (before applying the checkmark, carefully read the complete Microsoft’s terms and conditions) and click on the Next button. The term license is the way you want to purchase a license for your server from Microsoft.

On this, you will see two options upgrade and custom. Upgrades option is selected in the condition when a Windows operating system is already installed in our system such as windows 2012 or etc. And want to use all the files, settings, and applications in this new windows server 2016.
When we choose custom when we want to install the Fresh Operating System
In this article, we will proceed by clicking Custom: Install Windows only advance.

Create Drive In Windows server 2016
Select the hard drive that you want to install the windows server on, then click on the New button to do the partitions.
Here you can decide the size of the partition where you want to install windows server 2016. after gives the partition size click on Apply Butten

An alert appears in the Bellow Screen that allows the system to create a drive for the system file. Click on the OK button, if you want to add more drives then do this process again and Click On Next Button to Procced

here you can see the all created Drive size and Drive Name in the system if you want to edit the Drive Size double click on that partition and edit it , if drive size are ok click on next to procced

After clicking Next the System starts copying all the files from the external drive to the internal hard drive. Below Screen you can see the Windows Server 2016 Installation Process during the installation system restarted several times.

After the installation of Windows Server 2016 is completed, finalize your work by entering the required details. Type the complex password example SimiTECH@123 (made up of uppercase, lowercase, symbol, and number) twice in the box and click the finish button. The username will remain administrator by default.

Press Ctrl+Alt+Del buttons from Your Keyboard to start the screen to a login page and inside the box below the administrator user name, enter the password and press Enter button from the keyboard to sign in the Windows.

Change computer name in Windows Server 2016
To change the computer name, first open the server manager. After that click on local server, after that you will see the computer name by default was set during OS Installation , click on the computer name

Click On Manage option the one windows open here you put the your computer name according to your organization requirement click on Next button to procced .

system asking for restart he system to apply the change setting click n restart now button

now you successfully change the system computer name

Conclusion
In this Tutorials, we Learn how how to install windows server 2016 from iso file step by step with screenshots, and is ready to work. When Windows installed you can’t go back and for example, change the edition. If so, do the clean installation again. For any question leave a comment below.
Basic Monitoring Tools
How to Install MySQL Ubuntu 20.04
How to Install Windows 10 From a Bootable USB Drive.
This is a guide for installing Windows Server 2016. If you already have Server 2016 installed and you would like to configure it, please see one of the articles below.
Configure Server Using Sconfig
Configure Server Using Server Manager
How-To
Prerequisites
Before starting with this guide, you will need to boot into installation media. For a physical server, insert the disc or USB drive and choose it in your boot options if necessary. For a virtual server, configure it to mount the ISO or pass though the server’s optical drive or usb slot. Then change the boot order or one-time boot options.
1) Boot into the installation media
If you have booted off the installation media, you have see the screen below
Choose your Language, Time and currency format, and Keyboard or input method and hit Next
2) Click Install Now
3) Choose the version
Choose the version that fits your license and your needs then click Enter
Please Note:
Choosing Windows Server 2016 Standard or Windows Server 2016 Datacenter will install without a desktop experience. This was previously known as Server Core. If you would like the GUI, make sure to choose one of the options with (Desktop Experience).

4) Accept the license terms
Click the I accept the license terms checkbox and click Next
5) Choose your installation type
We are assuming Windows Server is not installed on this machine
Choose Custom: Install Windows only (advanced)
6) Choose the drive
Select the drive you would like to install to and click Next

7) Let the install complete
See examples of the progress below

 Enter the administrator password
 Enter the administrator password
Enter the password you would like to use for the administrator account then click Finish or hit Enter
9) Installation is now complete!
You are now at the login screen
You can now log in with the administrator credentials you created earlier
Feel free to use the links at the top of the page to configure the server