

Windows Server 2016
Checkdisk is a drive error checking tool used by the Windows OS standard. If a system error or bad sector (area where data cannot be recorded) is detected on the hard disk / SSD of a Windows PC and an error is found, it may be possible to repair it with a check disk. In this article, we will explain how to execute the check disk and how to check the result using the event log. * Check disk is not a function to repair physical disk errors. It is a function to check and correct the file system of software.
Windows Server 2016: Check disk execution procedure
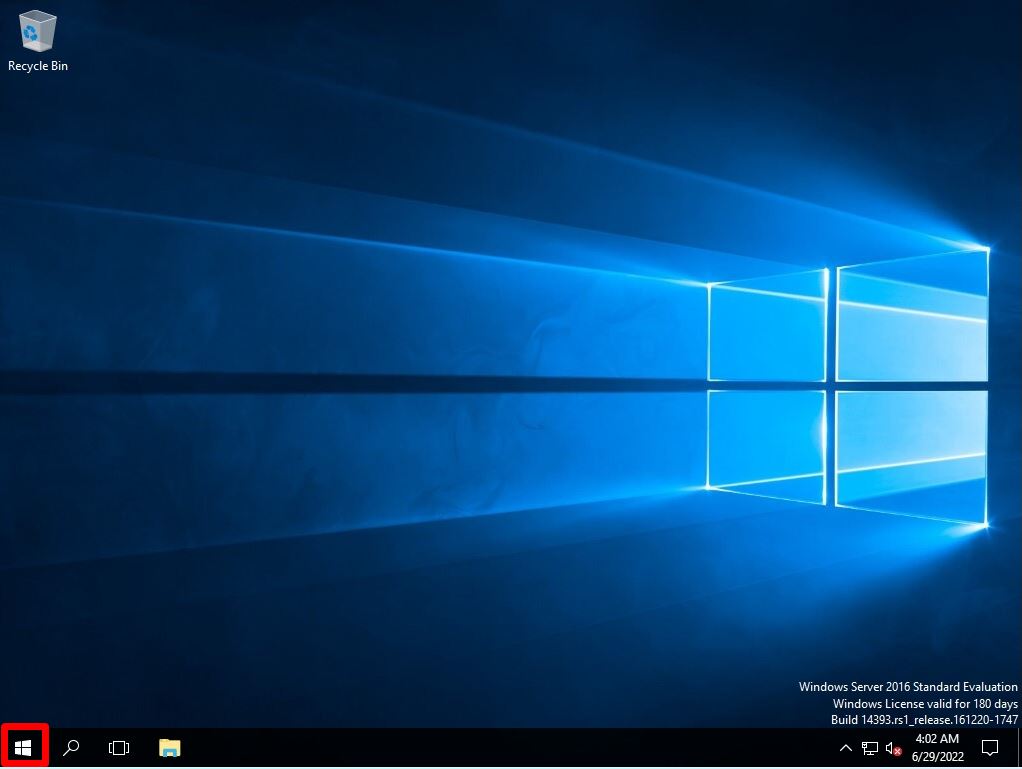
Step 1:
Select the Windows mark at the bottom left of the desktop screen.
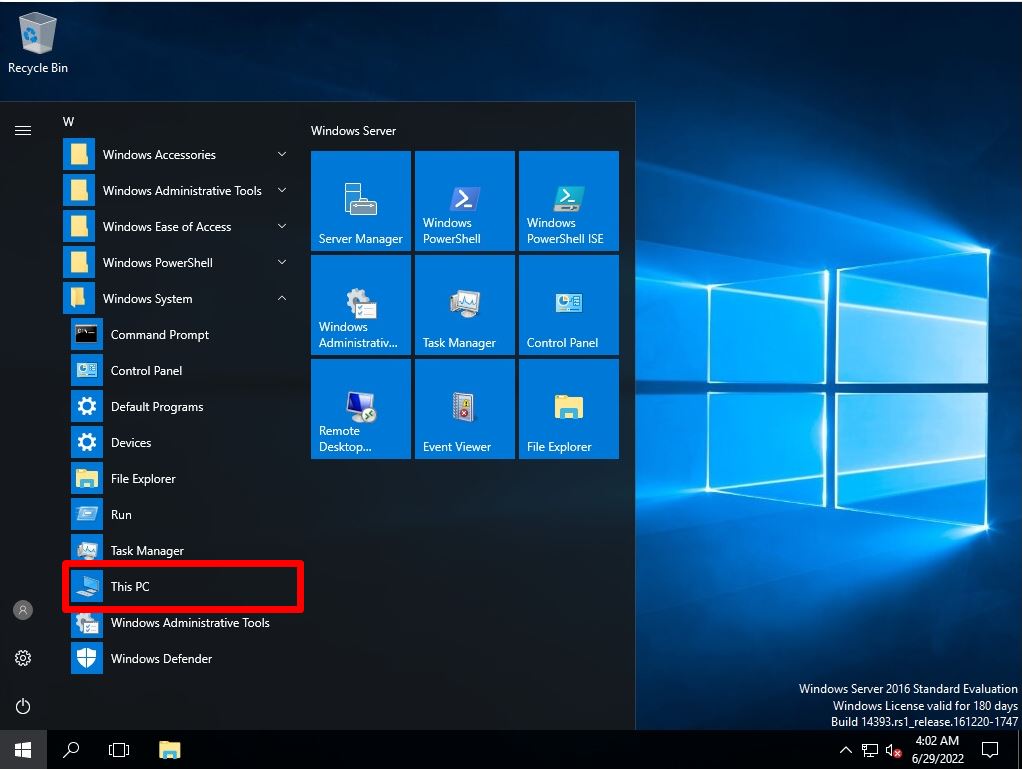
Step 2:
Select Windows System -> This PC.
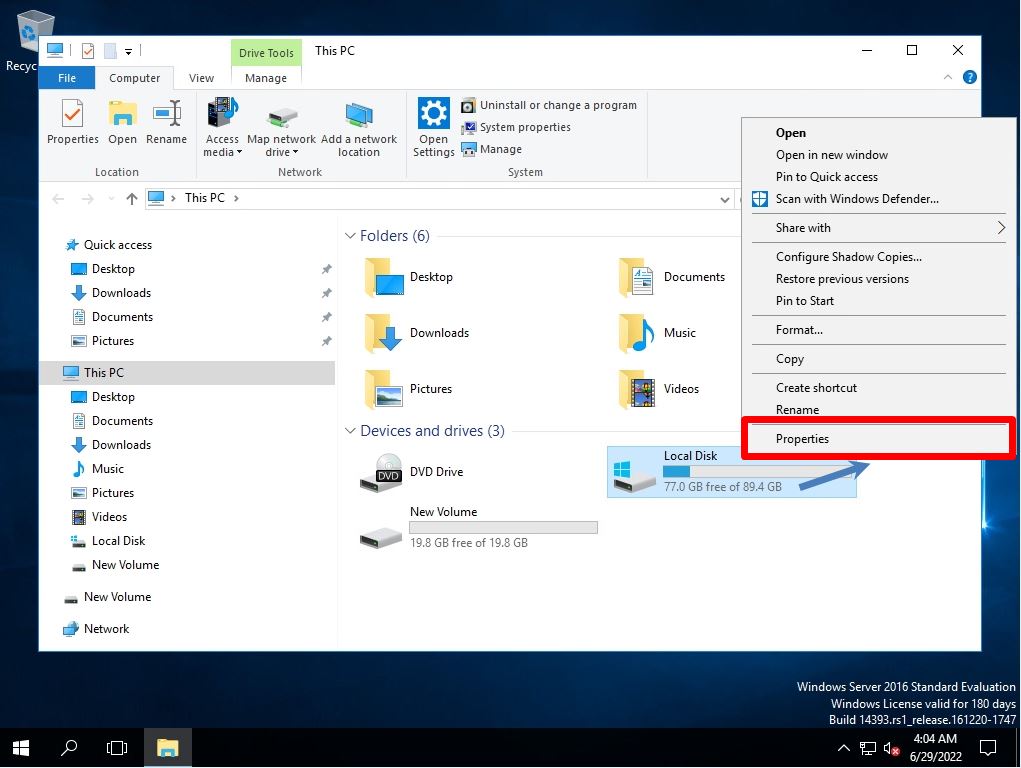
Step 3:
Right-click Local Disk-> Select Properties.
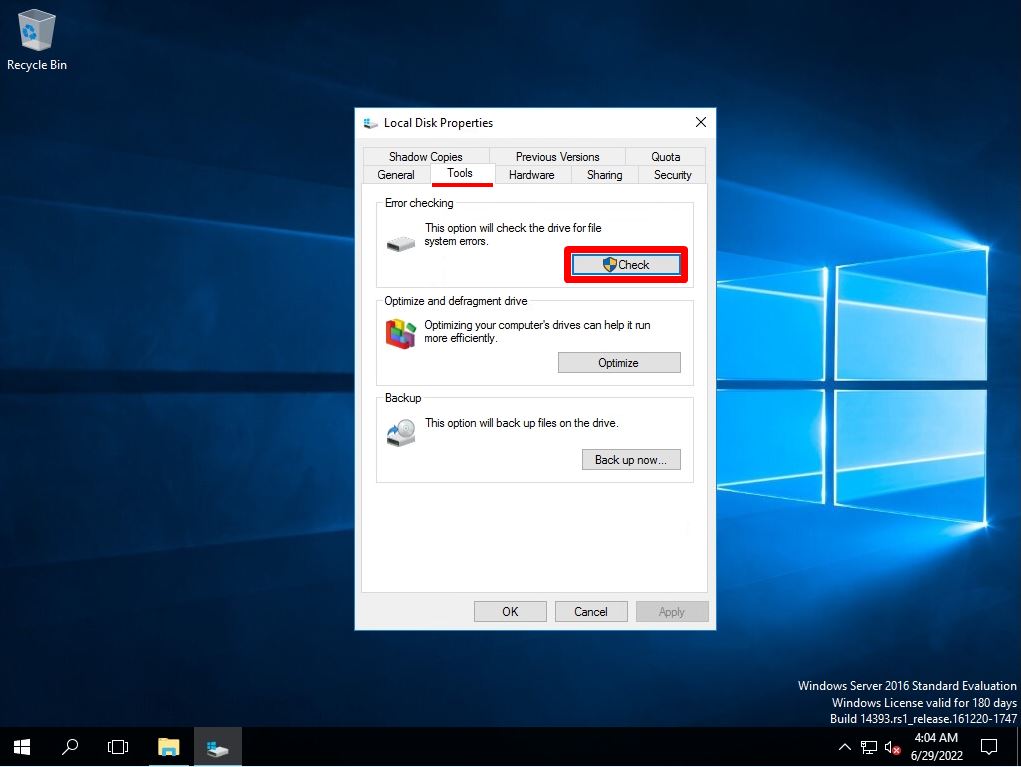
Step 4:
Select Tools-> Check.
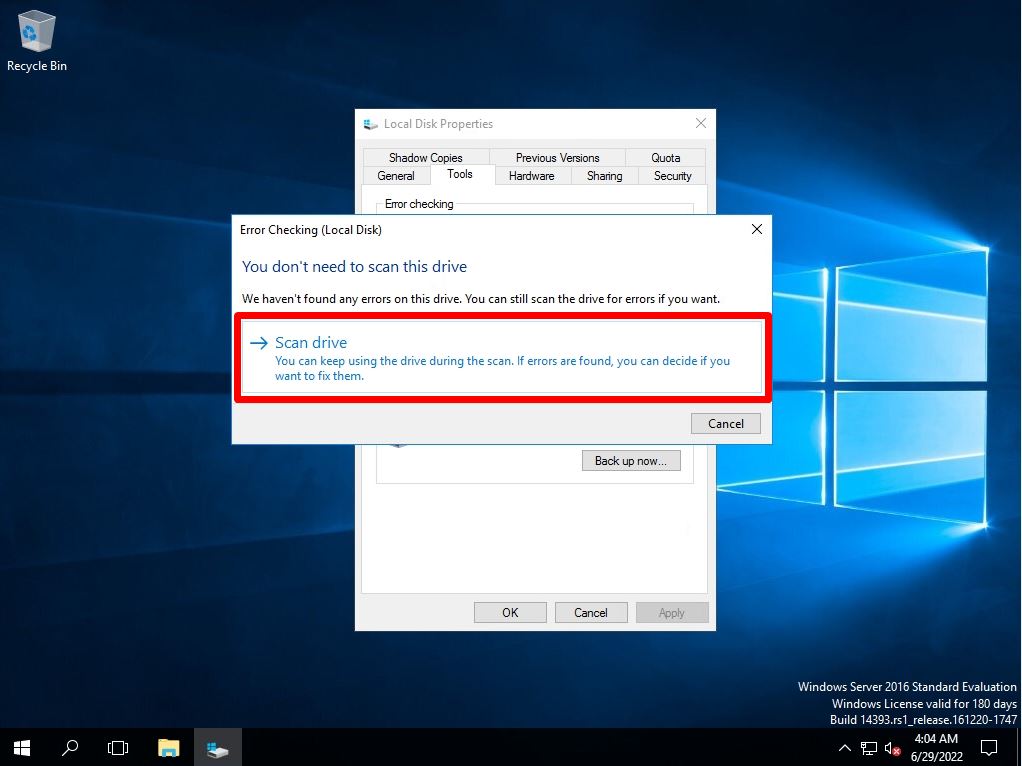
Step 5:
Select Scan Drive.
If an error is detected on the hard disk / SSD, “Repair this drive” will be displayed in addition to the screen below. Select the corrective action from the displayed items and repair or scan the drive.
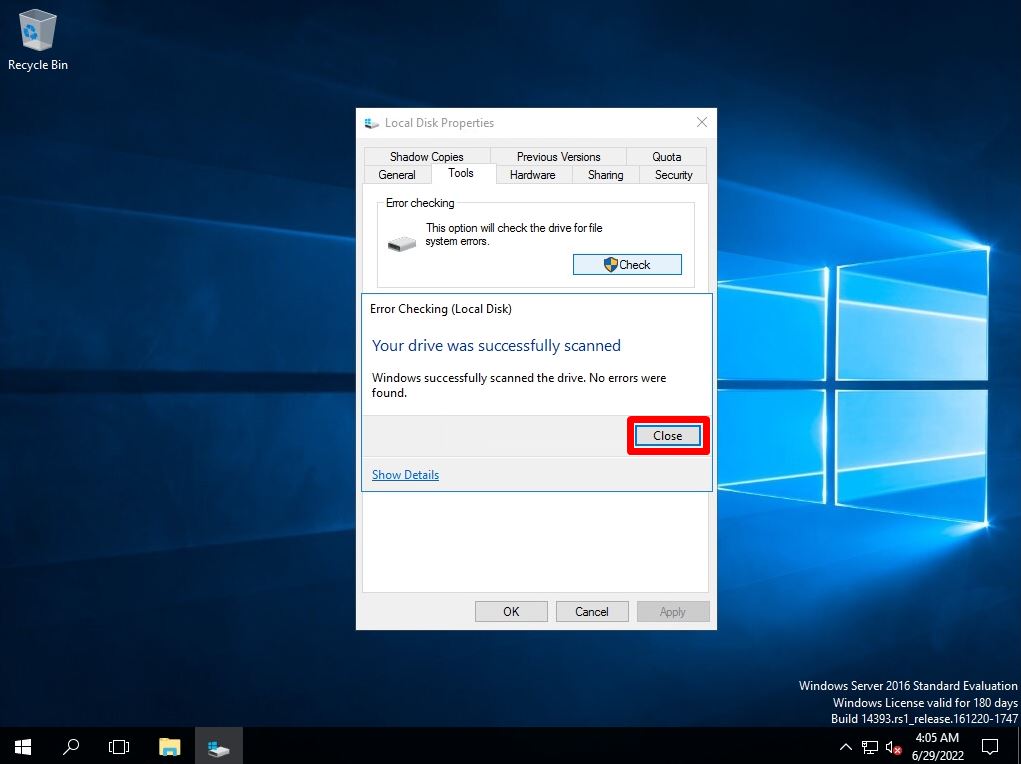
Step 6:
Select “Close”.
Check disk log check by Event Viewer
The result of executing the check disk is recorded in the application log of the event viewer.
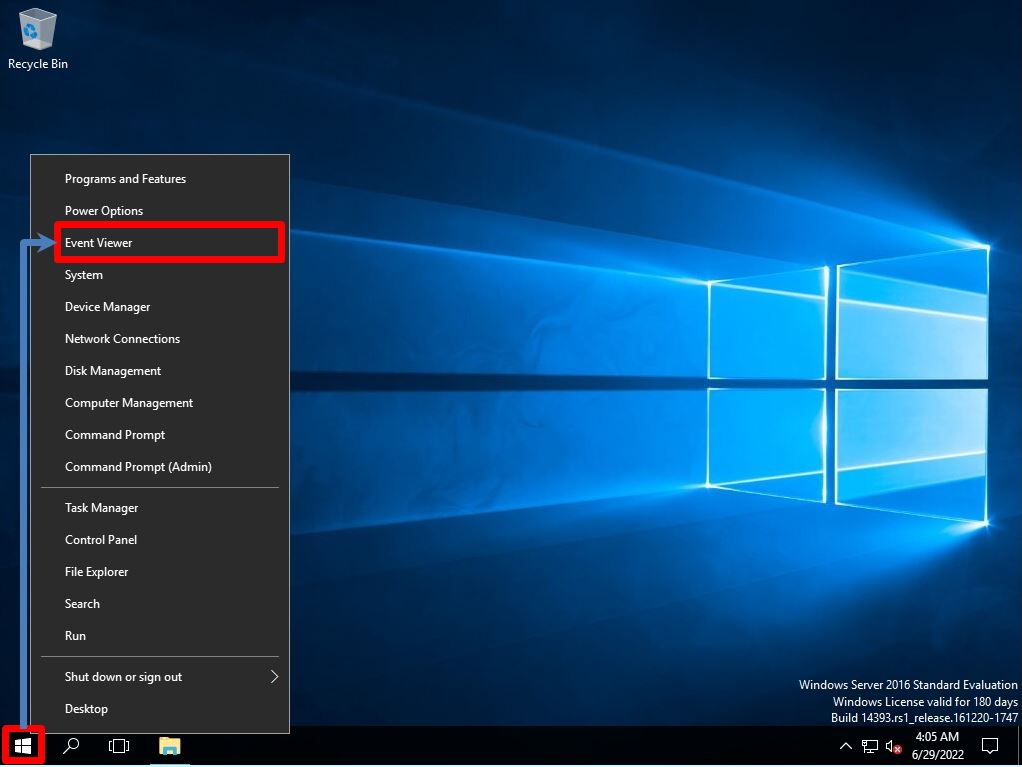
Step 1:
Right-click on the Windows mark at the bottom left of the desktop screen-> select Event Viewer.
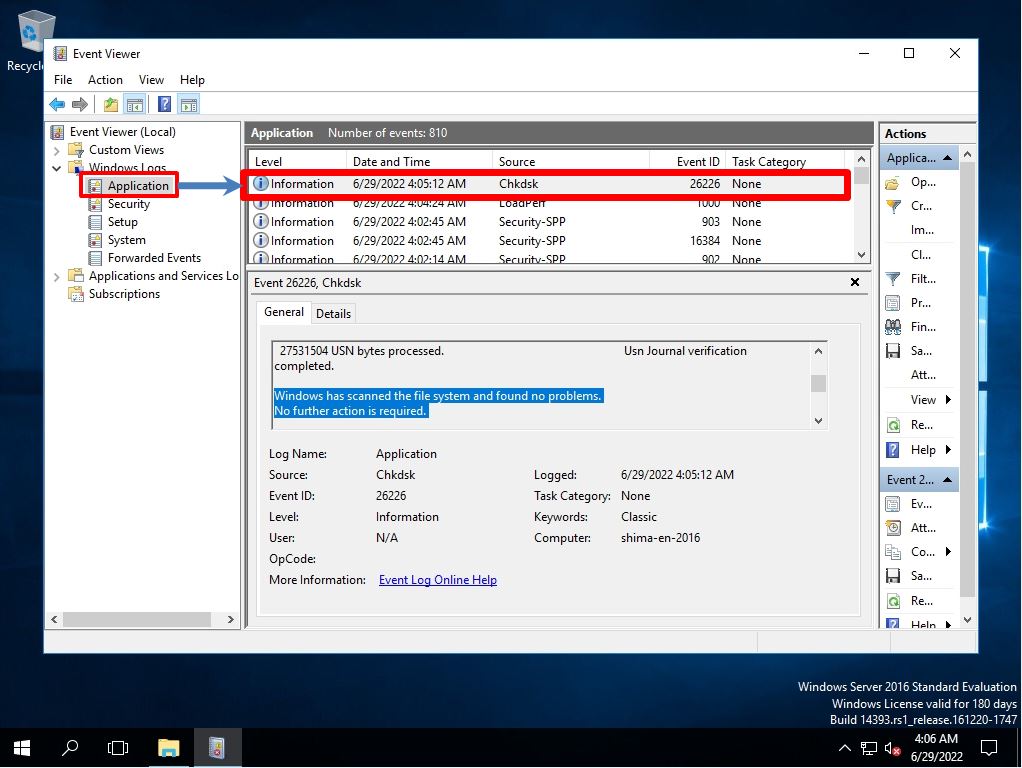
Step 2:
“Event Viewer” -> “Windows Logs” -> “Chkdsk” log is output to the source of “Application” and the result is displayed.
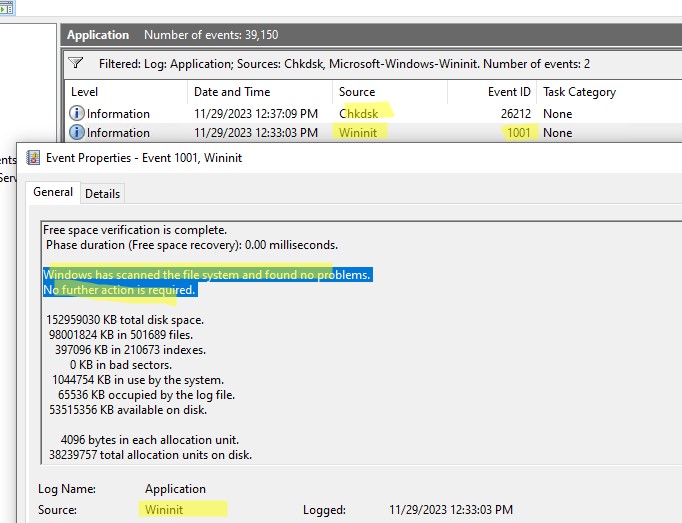
After executing the check disk, if there is no problem, “No further action is required” is output.
Встроенная утилита CHKDSK.exe (check disk) используется в Windows для проверки диска на ошибки. Сhkdsk проверяет файловую систему на физические и логические ошибки, находит поврежденные секторы (bad sectors) и исправляет найденные проблемы.
Содержание:
- Проверка и восстановление диска с помощью команды chkdsk
- Просмотр результатов проверки Chkdsk в Windows
Проверка и восстановление диска с помощью команды chkdsk
Чтобы проверить жесткий диск на ошибки, запустите командную строку с правами администратора и выполните:
chkdsk E: /F /R
Данная команда:
- Выполнит проверку диска E:\
- Исправит автоматически найденные ошиьки (/F)
- Попытаться восстановить данные при обнаружении поврежденных секторов, она попытается восстановить информации (/R).
Полная проверка диска может занять длительное время в зависимости от емкости носителя и количества файлов. После окончания проверки диска вы увидите подробную статистику диска, информацию о поврежденных секторах и файлах, предпринятых действиях по восстановлению.
Если утилита chkdsk не обнаружила проблем на диске, появится сообщение:
Windows has scanned the file system and found no problems.
No further action is required.

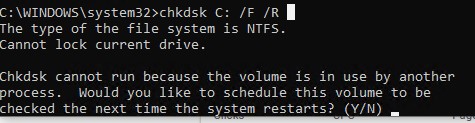
Утилита chkdsk не позволяет выполнить online проверку системного диска (C:\). При запуске команды chkdsk C: /F /R появится уведомление:
Cannot lock current drive. Chkdsk cannot run because the volume is in use by another process. Would you like to schedule this volume to be checked the next time the system restarts? (Y/N).
Невозможно выполнить команду Chkdsk, так как указанный том используется другим процессом. Следует ли выполнить проверку этого тома при следующей перезагрузке системы?
Чтобы запланировать проверку диска при следующей загрузке Windows, нажмите
Y
->
Enter
.
This volume will be checked the next time the system restarts
.
Чтобы отменить запланированную проверку диска, выполните:
chkntfs /x c:
Чтобы отключить топ перед проверкой, добавьте атрибут /X в команде chkdsk. В этом случае Windows принудительно закрое все открытые файловые дескрипторы, отмонтирует диск и выполнит проверку на ошибки.
Если вам нужно выполнить проверку большого NTFS тома, но вы не хотите блокировать диск, можно сначала просканировать диск на ошибки:
chkdsk E: /f /offlinescanandfix
Утилита найдет ошибки и сохранит их в файл $corrupt для дальнейшего исправления
Чтобы исправить найденные ошибки, не тратя время на полное сканирование тома, выполните:
chkdsk D: /spotfix
Это существенно сократит время недоступности тома для пользователя при исправлении ошибок.
В консоли PowerShell для проверки диска можно использовать командлет Repair-Volume как аналог команды chkdsk:
Repair-Volume -driveletter C -scan
Также рекомендуем перед проверкой проверить SMART состояние жестких дисков с помощью встроенных PowerShell командлетов из модуля управления дисками:
Get-PhysicalDisk | Sort Size | FT FriendlyName, Size, MediaType,SpindleSpeed, HealthStatus, OperationalStatus -AutoSize

Просмотр результатов проверки Chkdsk в Windows
Chkdsk при онлайн сканировании диска выводит результаты прямо в консоль. Если вы запланировали проверку диска при загрузке Windows, то результаты можно получить только из журнала событий Windows (Event Viewer).
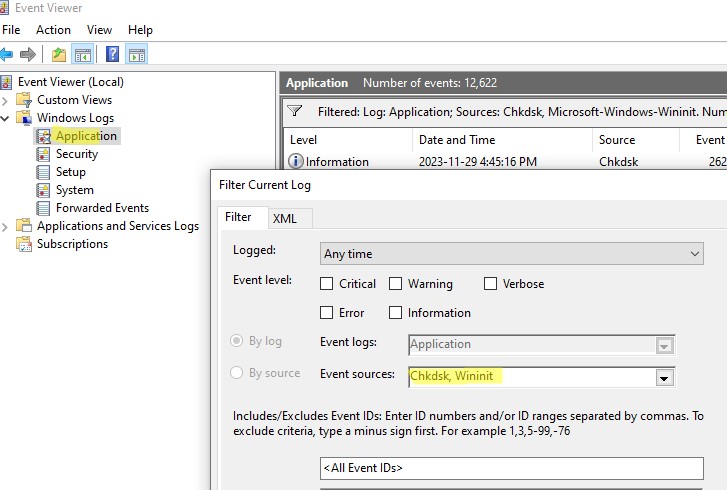
- Откройте консоль Event Viewer (
Eventvwr.msc
) и перейдите в раздел Windows Logs -> Application; - Щелкните правой клавишей по разделы Application и выберите Filter Current Log. В поле Event Source выберите Chkdsk и Wininit и нажмите ОК;

- Подробные результаты проверки диска содержатся в описании события. Обратите внимание, что у онлайн событий проверки диска будет указан источник Chkdsk. Если выполнялась офлайн проверка диска при загрузке Windows, у такого события будет источник Wininit и EventID 1001.

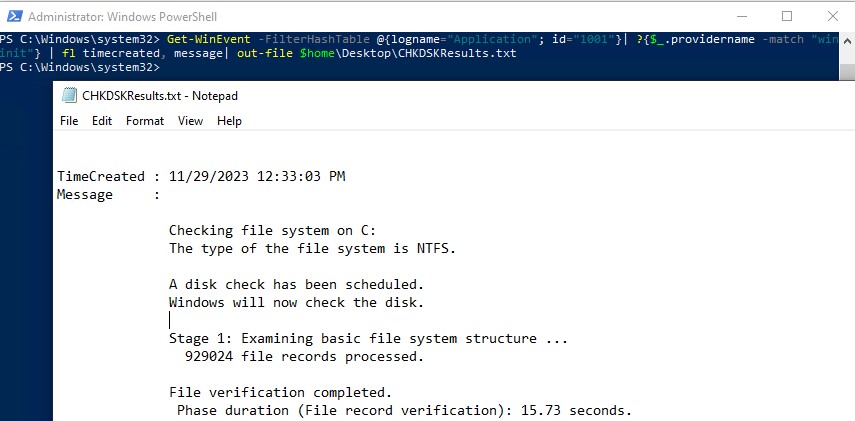
Можно получить лог проверки диска с помощью PowerShell командлета Get-WinEvent. Например, чтобы выгрузить результаты последних 5 проверок диска в текстовый файл CHKDSK_SCAN.txt на рабочем столе, выполните команду:
Get-WinEvent -FilterHashTable @{logname="Application"; id="1001"}| ?{$_.providername –match "wininit"} | fl timecreated, message| out-file $home\Desktop\CHKDSKResults.txt
Открыть полученный файл с логом chkdsk:
notepad.exe $home\Desktop\CHKDSKResults.txt
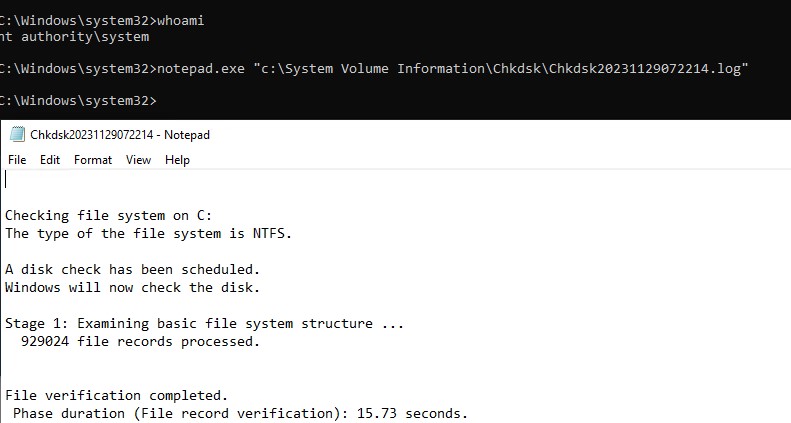
Если размер лога Chkdks очень большой, журнал событий может обрезать его. В этом случае можно открыть полный лог проверки диск в System Volume Information. Чтобы получить доступ к этой папке, нужно запустить командную строку от имени SYSTEM (проще всего с помощью утилиты psexec):
.\PsExec.exe -i -s cmd.exe
После этого можно открыть лог chkdsk:
notepad.exe "c:\System Volume Information\Chkdsk\Chkdsk20231129072214.log"
Исходные:
Windows Server 2016 Standard
диски для ОС собраны в RAID1, raid в свою очередь задействован встроенный на чипе материнки ASROCK X79 EXTREME6 сами диски SAMSUNG HD321KJ
Ко всему прочему диски шифрованы bitlocker
Тормозит работа ОС и приложений на нем. На нем исполняется в основном по загрузке RDP, СУБД(MSSQLSERVER, PosgtreSQL) 1С, libre.
Вопрос с остальными компонентами не стоит и близко Процессор, ОЗУ, сеть не загружены и запас огромен. Но диски тоже вроде как не загружены по следующим счетчикам: средняя длина очереди диска, среднее время чтения с диска, среднее время записи на диск, Обмен страниц/сек. Однако с учетом того что у конкретно этих моделей дисков по характеристикам «скорость внешней передачи данных» 300Мб\сек, то я склоняюсь что диски надо менять. Однако начальство не хочет их менять, нужен аргумент. Я не знаю как в числах именно выразить это. Есть только подозрения на основании опыта работы с данной ОС. Конкретного счетчика чтобы проверить именно эту характеристику диска «скорость внешней передачи данных» насколько я знаю нет.
Да я понимаю что вообще чип на материнке вообще не нужен нахрен включая своим врагам, а нужен нормальный аппаратный RAID. Да я понимаю что диски мягко говоря нищеброские даже по меркам домашнего пользователя для такого типа нагрузки как вышеперечисленное. К сожалению молекулярное администрирование не изучал и не копал в такие дебри, чтобы иметь какой-то численно выраженный показатель, который одназначно скажет что да надо менять диски. Долбанутый начальник возомнил себя админом, потому что десять лет назад 5 кнопок нажал и теперь помимо того что работаю админом так еще предварительно надо поработать разрушителем легенд. Как минимум уговорить не использовать RAID на материнке мне не удалось хотя в данном примере я понимаю что есть элементарно риск потерять данные или сбойный в работе RAID при отказе питания или сбой при записи, как минимум в пример.
Provide feedback
Saved searches
Use saved searches to filter your results more quickly
Sign up
Have a noisy hard drive or two in your Windows Server? Experiencing less performance on your drives than usual? If so, you’ll want to check your hard drive health. In this guide, we’ll show you how you can check hard drive health in Windows Server with various tools like Disk Management, PowerShell, etc.
How to check hard drive health with the Disk Management tool
An easy way to check the health of the hard drives connected to your Windows Server is with the Disk Management tool. Disk Management is usually used to manage partitions, however, it can also tell you how your disks are.
To start, open up the Start Menu, search for “Create and format hard disk partitions,” and open it. Once it is open, look for the “Status” column. In this column, Windows will tell you if your drive is healthy or not.
If looking in the “Status” column isn’t enough, find the drive in the layout, and right-click on it. Select “Properties,” and locate the “General” tab. In this tab, find the “Device status” section. If your disk is healthy and working properly, it will say “This device is working properly.”
How to check hard drive health with PowerShell
Another way you can check hard drive health in Windows Server is via PowerShell. To start, open up a Windows PowerShell terminal. You can launch it via the Start Menu on the Windows Server desktop. Once it is open, use the “Get-PhysicalDisk” command.
Get-PhysicalDisk
After running the command above, PowerShell will output a table. This table will number all connected drives, show their serial number, media type, if they can be added to a storage pool, operational status, health status, etc.
To determine if your drives are operational, check the “OperationalStatus” column. If it says “OK,” your hard drive(s) can be utilized in Windows Server. If it says something other than “OK,” you’ll need to do some troubleshooting.
To determine if your drives are healthy, find the “HealthStatus” column. If your hard drive is healthy, it will say “Healthy” in this column. If the drive has “Unhealthy,” you may need to take a look at the drive. Lastly, if the “HealthStatus” column states “Warning,” you may want to replace the drive with a new one.
How to check hard drive health with GSmartControl
If the Disk Management tool or PowerShell doesn’t work for you, you can install a third-party program like GSmartControl. This program is useful, as it simplifies the process of checking your hard drive health. You can also use it to collect offline drive data.
To start, you must download and install GSmartControl on Windows Server. Head over to the official GSmartControl website download page. Once there, download the 64-bit installer to Windows Server. Then, open up the Explorer app.
Inside the Explorer app, find the “Downloads” folder, and click on it. Then, select the GsmartControl EXE to launch the installer. Go through the installer, and set up the software on Windows Server.
Once the software is installed on Windows Server, open up the Windows Start Menu, and launch the GsmartControl app. When it is launched, it will scan your server for connected hard drives.
Once the GSmartControl app is done scanning your server for connected hard drives, select a drive that you wish to check the health of. After selecting it, the information will appear under the “Basic health check” section.
To view an even more detailed rundown of a drive in GSmartControl, right-click on a drive and select the “View details” option. When you select “View details,” GSmartControl will show a more detailed readout of the drive.
How to error check your hard drive on Windows Server
Checking hard drive health helps to find out if something is critically wrong. However, sometimes, your hard drive isn’t in critical condition. Sometimes, there are just small errors that need to be fixed.
To run an error check on your hard drive in Windows Server, do the following. First, open up the Windows Explorer app on the Windows Server desktop. Then, find “This PC,” and select it.
On the “This PC” menu, locate the hard drive giving you issues. Then, right-click on the drive, and select “Properties.” Finally, select the “Tools” tab, and select the “Check” option to run an error check.
Selecting the “Check” button will bring up the “Error Checking” window. Click on the “Scan drive” button to scan the drive for errors. This scan may take some time to complete. When it finishes, your drive should be error-free!
