
Need a more powerful search software for your Windows Server? Learn more here…
Windows Search Server vs. Search Service
The Windows Search Protocol allows communication with a server that hosts a Windows Search Service. The Windows Search Service can issue queries and it also allows an administrator to manage an indexing server. The indexing process runs within the LocalSystem account and constantly runs for all users. This allows Windows Search to:
- Maintain an index that can be shared among all of the users.
- Maintain security restrictions and access to content.
- Process remote queries from computers on the network.
Don’t confuse the Windows Search Service with Microsoft Search Server Express. Microsoft Search Server Express is a free enterprise-class search server, which enables high performance searches of corporate data across multiple systems. Search Server Express has a similar appearance to a Windows SharePoint Services site. The main difference between Windows Search and Search Server Express is that Windows Search can search on a desktop and a server, where Search Server Express can only search on the server.
Windows Search Service on Windows Server 2008
If you are already using a Windows Server based computer, and are currently using Windows Server 2008 then you should know that the Windows Search Service might not be installed by default. You can install and configure the Windows Search Service manually, but it takes some time, patience, and a bit of knowledge to get it done. Here are the steps that you will need to follow:
- Click Start > All Programs > Administrative Tools and then Server Manager
- You will see a console tree in Server Manager, right click on Roles and then choose Add Roles.
- When the Add Roles Wizard opens, click Next.
- Add the Windows Search Service.
- You will need to choose the Volumes with shared folders to be indexed.
- Now you can finish & close the wizard. This should have the search service up and running.
Enable Windows Search Service on Windows Server 2012
While the steps are similar to enabling the search service on previous server versions, there are enough differences to write up the steps you need to follow to enable the Windows search service on Windows Server 2012. Here’s what you need to do:
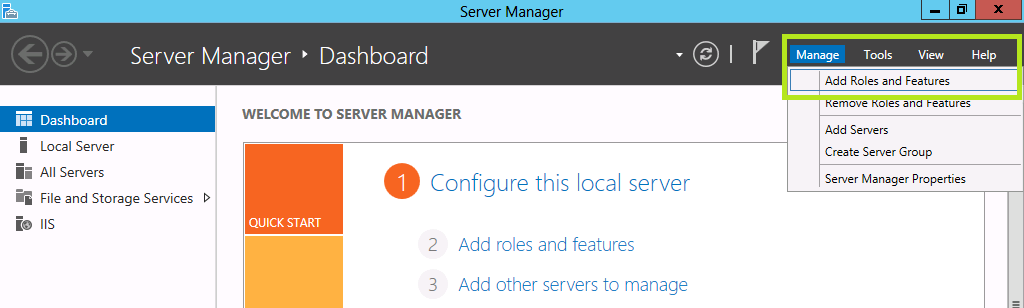
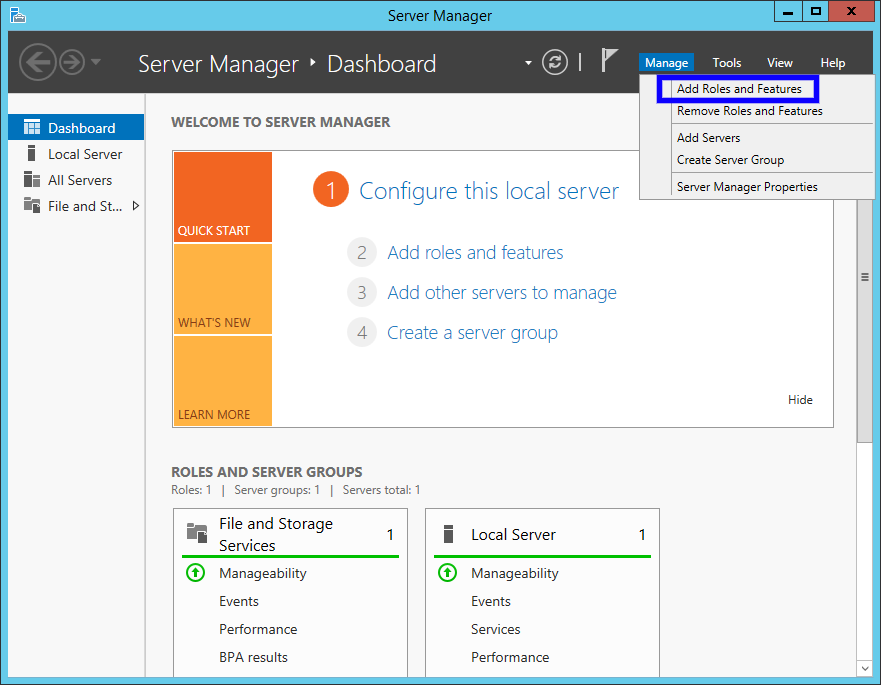
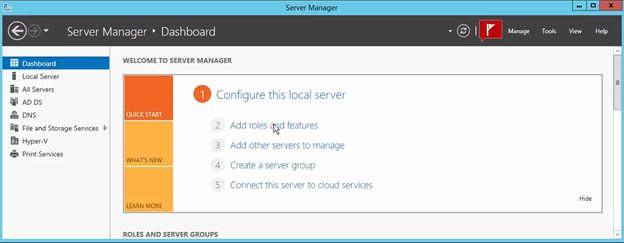
Open the Server Manager tool, then click Manage.
Go to Add Roles and Features to open the Add Roles and Features Wizard window.
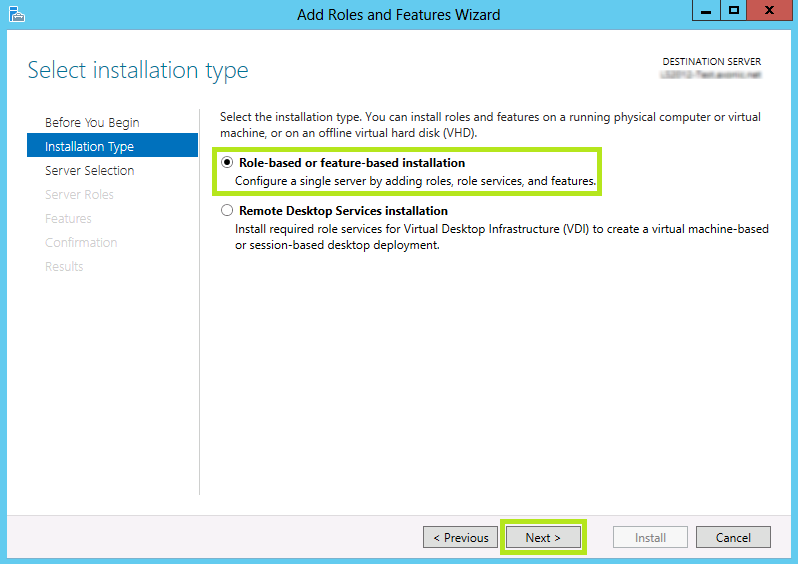
Click Next to open the wizard to the Installation type page.
Select Role based or feature based installation option, and click Next.
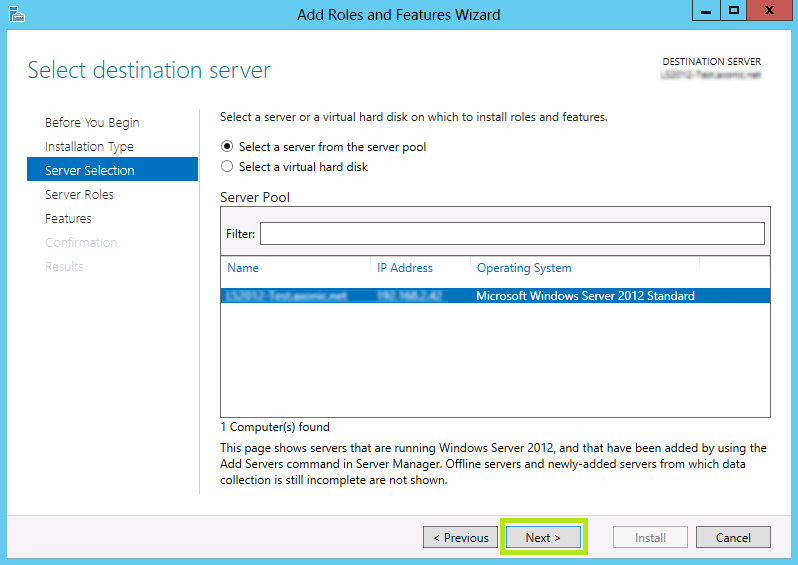
Now you are on the server selection page. Select the server you want the service installed on. If you only have one server, it will automatically select it. Click Next.
Now you are in the Server Roles page. Just click Next, because you are installing a feature, not a role.
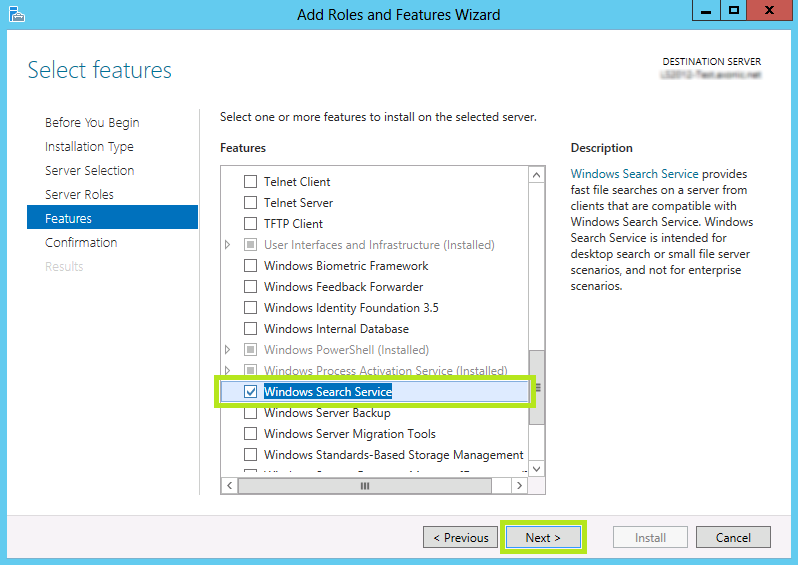
This will open the Features page, here is where you can choose Windows Search Service (make sure the check box is checked) click Next.
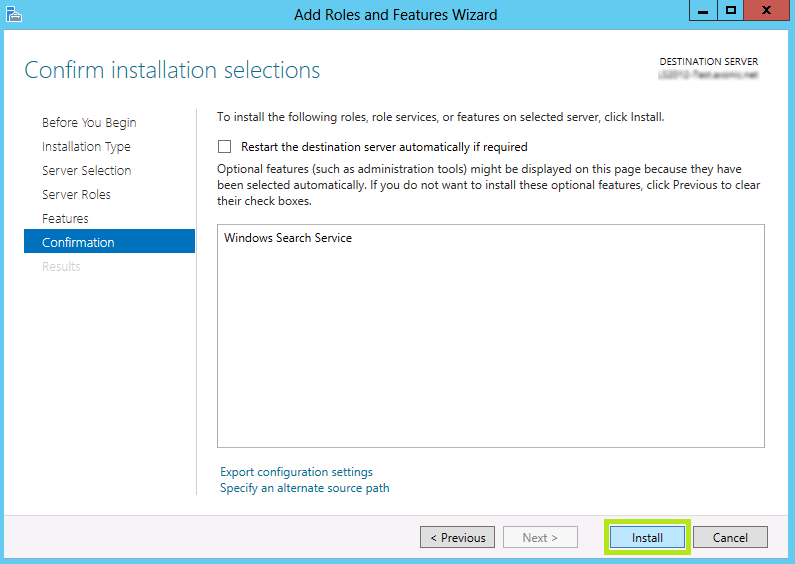
You are now in the confirmation page. To confirm the selection, just click Install. Please note that it will take some time to install the Windows Search Service.
The installation should now be complete.
Adding a New Location to be Indexed
A common problem that users on a network face is that when they try to add a network drive to their Library, an error message suddenly pops up that says “this network location can’t be included because it is not indexed”. There’s no need to worry though, this problem is easy to solve. The following steps require Windows Server 2008 or higher, and will work directly with Windows 7, 8, and 10 Libraries.
When the Windows Search Server is enabled, the server generates an index which is then stored on a Network Share. The clients that have this share mounted can use the search index to find the files they need.
The first step is to create a Shared Folder to host the search index. This can easily be done by going to the Server Manager > File and Storage Services > Shares and setting the appropriate User and File permissions.
Next you should enable Windows Search Service from your server. See the steps outlined above to do so on Windows Server 2008 and 2012.
With Windows Search Service installed and the shared folder created, you will then need to add that shared folder to the index. On the server, go to Control Panel > Indexing Options then click Modify to add the folder or even an entire drive to the index.
Now you will be able to add the network share to the library without the error message appearing.
Oct
01
By Default Help Server get installed to server machine if you install the complete server installation of Microsoft Dynamics NAV 2013 or Microsoft Dynamics NAV 2013 R2, However in some cases during the help server installation, setup find that “Microsoft Search Service” is not available in the server and this result a error in the Microsoft Dynamics NAV Help Server installation.
What is the reason for this problem?
Microsoft Dynamics NAV Help Server use Microsoft Windows Search Service and on Windows Server 2012 R2, Windows Search Service is not installed as a default feature. Therefore if you need to use this feature you need to install this manually.
Lets see how to install Windows Search Service and fix this problem.
How to install Windows Search Service on Windows Server 2012 R2
First open the Server Manager tool of Microsoft Windows Server 2012 R2 and then click on the Manage and go to “Add Roles and Features”. (Refer below image)
And it will open a “Add Roles and Features Wizard” window. (Refer following image)
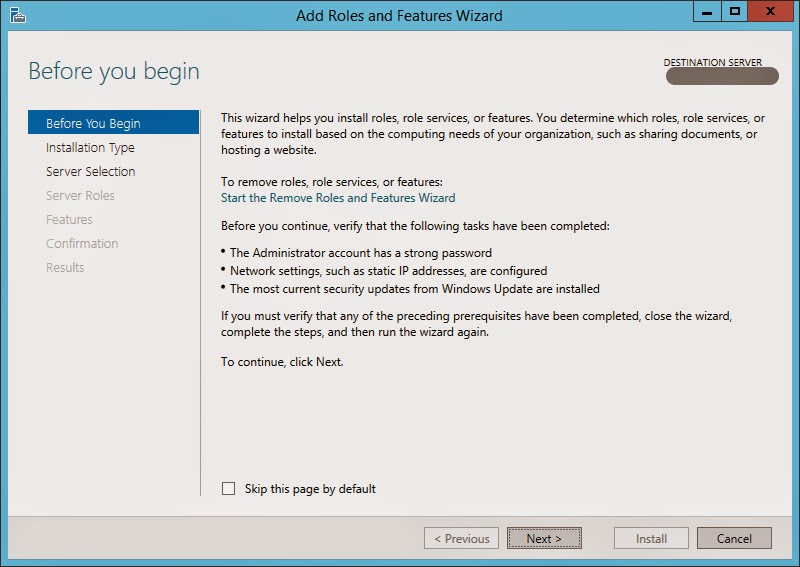
This is the default screen unless if you didn’t tick the “Skip this page by default“. However just go through this page content or simply click “Next” button.
Now we are in the “Installation Type” Page. (Refer the below image)
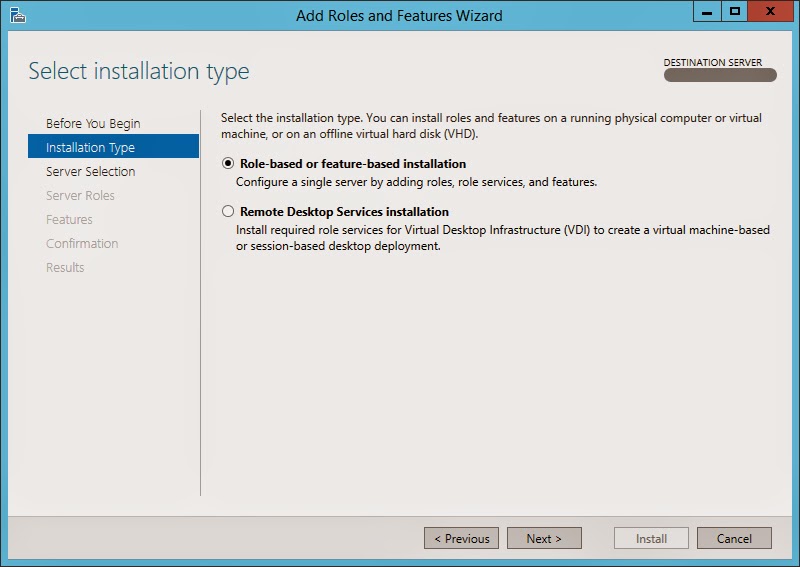
In this window select “Role-based or feature-based installation” option. As the name implies this will allow us to add the roles, role services and features.
After selecting the option press “Next” button and it will navigate to the “Server Selection” page in the wizard. (Refer the below image)

In this page select the server that you want to install “Windows Search Service” feature. In my case I only have one server in the server pool and by default it was automatically get selected.
After selecting the server from the server pool, click the “Next” button and it will navigate to “Server Roles” page. (Refer the below image)

We just have to skip this window because we are not going to install a server role and we want to install a server feature. Therefore press “Next” button in the bottom of the wizard and it will navigate the page to “Features” page. (Refer the below image) Finally we are there!!

In this window you can select the features that you want to install to the selected server. In this case we only want to install Windows Search Service. To install Windows Search Service, click on the related check box as shown in the above picture.
After selecting the check box click “Next” button in the wizard to go to Confirmation page.

In this page you need to confirm your selection to proceed with the installation.To confirm the Installation click “Install” button in the page and it will take few seconds to install the Windows Search Service.
After the installation is completed following window will appear and if it does not have any error messages then you have completed the installation properly. (Refer the below image)

Thank you and Regards,
Tharanga Chandrasekara.
Comments have been disabled.
By Ruby Nahal, Systems Engineer
If you’ve been in IT for a while like I have, you know that over the years, the amount of data organizations accrue has grown exponentially. Each business has a virtual library of information that they must dig through to find exactly what they are looking for – a task that can be both time consuming and frustrating.
Many organizations use Windows Search Service (known pre-Windows XP as Windows Indexing Service) as a search engine for local data as well as internal shared data, believe it or not. This indexing service allows you to search content quickly, which makes it a pretty slick feature for smaller organizations that only need basic content searching. (I am not talking about Windows Search Server here, which is a different beast altogether, and is implemented at a whole different level.)
However, if you have Windows Server 2012 file server in your environment that hosts data for mapped shares, Windows Search Service is not an “install the service on the file server and off-you-go” setup. With Windows Server 2012 file server, the deployment for searchable shares has changed quite a bit and now includes indexed libraries.
Deployment
Windows Search Service still needs to be installed on the file server and the data still needs to be configured for indexing – that part hasn’t changed, but it’s easy; We can use the Windows indexing options in Control Panel to set this up.
Now we need to set up libraries on the client workstation. But before we start with creating libraries, we need to make sure what libraries are needed within the organization. In other words, what shares will be made searchable for the users. You can also control what type of content is searchable by configuring advanced options under Indexing Options.
If you have followed the best practices, you will implement mapped drives using group policy preferences. The easiest way to do this is to use a client workstation as template. Create the libraries that are needed in Windows Explorer and add the mapped drive to the library locations.
After you have created all the libraries use the group policy preferences to copy these libraries to %UserProfile%\AppData\Roaming\Microsoft\Windows\Libraries for the users that require it. It will be best to create the preference in the same GPO as the one for mapped drives. You can also use item-level targeting if you want to get sophisticated with it.
Note: If DFS names are being used for mapping drives within your organization, search service for indexing mapped drives is not an option. It is currently not supported for Windows Search service 3.0. Hopefully, it will be included for support in the next version.
Once the libraries are deployed and the content has been fully indexed on the file server, users will be able to search these libraries for files AND content, greatly cutting down on your clients’ time and frustration level.
About Ruby //@RubyNahal // Ruby hails from India with a flair for cooking traditional cuisine and a deep love of learning (you may find her buried in a book, non-fiction of course) and a real passion for all things tech. For her, enhancing people’s lives via well-executed technology solutions has always been more than a job, and it also makes Ruby a perfect fit for our team; she gets our mission to the core. As far as technical chops, Ruby is bar none. She holds a Master’s Degree in IT, multiple certifications and awards in Network and Security Administration, led several R & D teams and worked for five years as an Infrastructure Architect in Canada. Need we say more?
NAV 2013 R2 — Howto enable Windows Search Service in Windows Server 2012.

Hi all,
While installing NAV 2013 R2 on Windows Server 2012 the Installer gives an error message of missing component of Windows Search.
ERROR — «The following external program are prerequisites to one of more of the selected product components. They must be present on your computer before the configuration can be installed. For more information, see the system requirement’s for Microsoft Dynamics NAV.
WINDOWS SEARCH
If your server is Windows Server 2012 then follow the steps below —
1. Start Server Manager.

2. Click on Add Roles and Feature From Center Navigation Pane.

3. Select Installation Type as Role based or feature based installation, click Next.

4. IF Using Hyper V select the appropriate Server, click Next.

5. Navigate to Features from Right Menu and Select the Windows Search service.

6. Click Next and select Install.

Finish the wizard and now you should have the Windows Search service up and running.

Hope this helps during installation of Middle Tier of Navision on Server.
Regards,
Saurav Dhyani
www.sauravdhyani.com
Popular posts from this blog
Hi all, As a Navision developers I have Multiple Versions of Navision running in single Machine. As discussed Earlier in the post how to run multiple Version of RTC in single machine. So my machine have following details for RTC Versions — NAV 2009 R2 — is installed. NAV 2009 SP1 — is copied at C:\Program Files (x86)\Microsoft Dynamics NAV\60\NAV 6.0 SP1 IN\ NAV 2009 — is copied at C:\Program Files (x86)\Microsoft Dynamics NAV\60\NAV 6.0 IN\ This approach has been working great for execution of Classic and RTC Clients. However, after installing Dynamics NAV 2009 R2, if i tried to view the Layout for an NAV 2009 SP1 Report i was getting the following error: ————————— Microsoft Dynamics NAV Classic ————————— It is not possible to instantiate the Visual Studio bridge. ————————— OK ————————— After searchi…
Hi Readers, This article is based on a request from a blog reader who wanted to understand about MenuSuite in Dynamics NAV. If you have started working with Business central with AL Code then it does not apply to those releases but if you are interested go ahead. Let’s start with Future — In Latest and greatest version of product MenuSuite are obsolete and no longer used. So this article applies if you want to learn about C/AL MenuSuite.
Hi all, we are facing a conman issue during restoring a SQL Database backup restored for NAV 2013. While Trying to run object from Object Designer we get below listed error (even the service is configured properly) — ————————— Microsoft Dynamics NAV Development Environment ————————— There are no NAV Server instances available for this database. You must ensure that a NAV Server instance is running and is configured to use the database before you perform this activity. ————————— OK —————————
Introduction
This will be a tutorial on how to improve our search for our windows
file servers, using the Windows Search Service. What we will be working
with is Windows Server 2012 R2, however, this will also work for both
2016, 2019, etc.
Getting Into the Server
The first thing we are going to do is go to our server dashboard and add
a role. To do this we are going to select the button that says, “Add
roles and features”. Click “Next”, leave it on the option that says
“Role-based or feature-based installation”, and click “Next” again.
Then, choose your server and select “Next”. While in Server Roles, we
are going to select “Next” at the bottom once again as what we are
searching for is a feature. Under “Features”, we are going to search for
a feature called “Windows Search Service”. Once found, click on the
checkbox next to it and select “Next”. We will then click “Install” to
get this installed.
Filter Pack
Our next item we are going to add is the filter pack. The filter pack
will allow us the ability to search inside of documents. To download
this, we are going to open a web browser, and navigate to this link:
- https://www.microsoft.com/en-us/download/details.aspx?id=17062
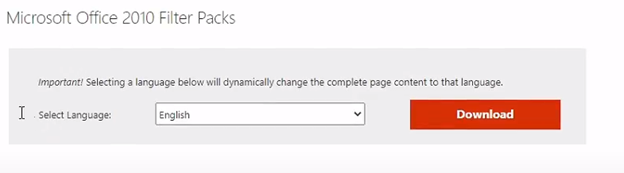
Once there, you will notice it says, “Microsoft Office 2010 Filter
Packs”. That is okay as this will provide us with what we need. Make
sure to get the 64-bit version when installing. We will then run the
download. Click “Next”, accept the checkbox and click “Next”, and click
“Ok” and it should be installed.
Turning on the Windows Search Services
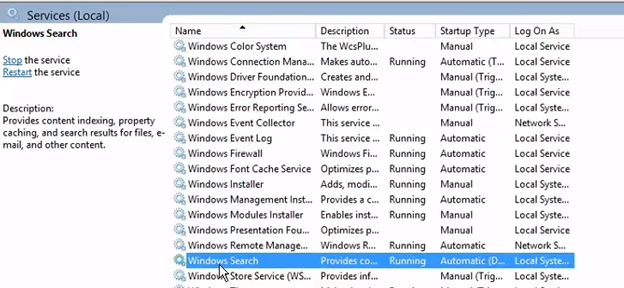
Our next step is to turn on the Windows Search Service. To get to that,
go to your Server Manager Dashboard and you should see “Tools” at the
top right. Click on that and select “Services”. We will then need to
find “Windows Search” which may be very far down as it is alphabetical.
If it is not already started, click on it and start it up as well as
make sure “Automatic (Delayed Start)” is selected for startup type.
Control Panel
To Launch the control panel, you can right click on the Windows Icon at
the bottom left of your screen and select “Control Panel”. Whilst in
there, you will search at the top for “Index” and select “Indexing
Options”. Now we are going to add the share drive location. We will
click on “Modify” and navigate to the drive we want and select “Ok”.
Index Location
While in the Indexing options from the previous part, we will select
“Advanced”. We can then change the location that we are storing the
indexing files. This is very important as this file could grow large
depending on how often this is used. Some good options are to create a
separate drive to put this in, or make sure your C: Drive has plenty of
space on it. You can also change the file types that are being indexed
by going to the tab “File Types” if you would like. We can then click
“Ok”.
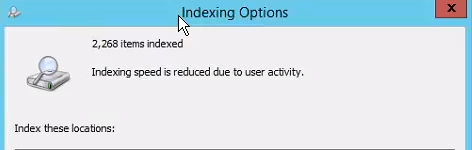
Indexing Speed
While back in the Indexing Options, you may see that “Indexing speed is
reduced due to user activity”. This is caused by a user being logged in
as it slows down to not use up the PC nearly as much. It is best
practice to leave this running overnight. When it finishes, the file
search will now be much faster and more efficient. All devices connected
will also have much quicker search speeds as well.
Full Video
SUPPORT MY WORK
Hire US
TECH I USE AND RECOMMEND
Tech Kits
Domain Registrar
Digital Ocean CloudServer
- Kevin Stevenson
- Thursday, Oct 14, 2021