
Hyper Text Transfer Protocol Secure (https) website is encrypted site. Encrypted site means that website is secured. HTTPS site is secured by using Secure Sockets Layer (SSL). SSL certificates are issued by the Certificate Authority (CA). We can check that particular website is HTTPS or not by checking a ‘green colour lock‘ and https: in the address bar before the website name. For example, all banking websites are working on https. Some of the examples of secure websites are “https://www.google.com“, “https://www.facebook.com” and many more. In this article, we’ll learn the steps to install and configure SSL certificate server and CA.
Install and configure SSL certificate would encrypt (secure) our website so that no one can easily decode the information or data transferred by web servers to the clients. Sharing confidential information over internet is not safe that is why https is used to encrypt our data for safe transfer.
Steps to install and configure SSL Certificate on Windows Server 2012 R2.
1. To install and configure SSL certificate server, we need to install the “Active Directory Certificate Services” role. Open “Server Manager” and click on “Add roles and features“.

2. Please ensure that password is set for local Administrator and valid static IP address is assigned to the Server. Click next to continue.

3. Select an option “Role-based or feature-based Installation” and click on next.

4. Select the server from the pool on which we need to install and configure SSL Certificate.

5. Select the role “Active Directory Certificate Services” and click on next to continue.

6. Certain features are required to install and configure SSL Certificate Services role, click on “Add Features” to install all the dependent features.

7. Click on next to continue.

8. From features window, you can select additional features if required, however in this practical it is not required, therefore click on next to continue.

9. The name and domain settings of the computer cannot be changed after a CA has been installed on the Server. Therefore make the changes before installing the role.

10. From the “Role Services”, select “Certificate Authority” and “Certificate Authority Web Enrollment”. Certificate authority web enrollment allows users to request new, renew, revoke certificates, etc using Web console.

11. Web Server (IIS) role is required for end users to request, renew, revoke certificates.

12. Click on next to continue.

13. Add roles and features wizard, would explain about the importance of “Web Server Role”.

14. All the components of “Web Server” role are selected by default. You can add additional features by selecting them.

15. Select an option “Restart the destination server automatically if required”, this would restart the server if role requires the same.

16. Once the installation is succeeded successfully, click on “Configure Active Directory Certificate Services on the destination server” to begin the configuration wizard.

17. You need to be “Enterprise Admin” to configure Certificate services. Type the credentials of “Enterprise Admin” and click next.

18. Select the roles that we need to configure. We installed two roles i.e. “CA” and “CAWE” and click next to continue.

19. For the organizations normally we select “Enterprise CA”, ensure that this computer must be the member of domain otherwise this role would not be enabled.

20. Select “Root CA” and click on next.

21. Select an option “Create a new private key”.

22. In “Specify the cryptographics options” window, we’ll go for the default options and click on next. Make sure that “Key length” is 2048.

23. Specify the name of CA, we’ll select default options.

24. Validity period defines the validity of certificates, by default duration is 5 years but we can change it as per your Organization’s policy.

25. Information of certificate database and database log location is “C:\Windows\system32\CertLog”. You can change it if required.

26. Click on “Configure” to begin the configuration process. Click on previous if you want any modification to be done.

27. Green check confirms that configuration is successful for all the roles that we installed. Click on close to close the window.

Hope, you are clear with the steps to install and configure SSL certificate. In the future article, we’ll learn the steps to create HTTPS website.
Get your FREE copy of «The Ultimate Guide of SSL»
Download Ebook
SSL Certificates
Secure Sockets Layer (SSL) secures communication that happens between a web server and the browser and keeps it private, thereby reducing the risk of sensitive information being stolen. SSL certificates are used by millions of websites across the globe. In short, an SSL certificate assures that the conversation between two parties is private.
What is a Self-Signed Certificate?
A self-signed certificate is a free SSL certificate that is signed by the individual to whom it is issued. When you go for a self-signed certificate, the private key will be signed by you and not by any Certificate Authority (CA). Self-signed certificates are free and this gives website owners an opportunity to secure their websites with free SSL certificates. However, these certificates are generally used for internal testing purposes.
Standard SSL certificates are issued by Certificate Authorities using a chain of trust. Each certificate is signed by more reliable certificates and this chain extends to the root certificates. Unlike other standard SSL certificates, self-signed certificates do not use the chain of trust. These certificates are mostly used when the company wants to internally test without standard SSL certificates for which they have to pay.
Steps to Create a Self-Signed SSL for Windows Server 2012 R2
You can use a self-signed certificate for Windows Server 2012 R2. Following are the steps involved in the process of creating a self-signed SSL certificate for Windows Server 2012 R2.
Self-Signed SSL Certificate Generation Steps
- Step:1 Open the Microsoft Management Console (MMC) and go to Run, Type MMC and then click the OK button.
- Step:2 Window (MMC Console) will open, click on Add/Remove Snap-in.
- Step:3 You will find the certificate on the left panel >> select Certificates and click on Add.
- Step:4 After you click on Add, the snap-in window will pop-up. Select Computer Account and then click on the Next button.
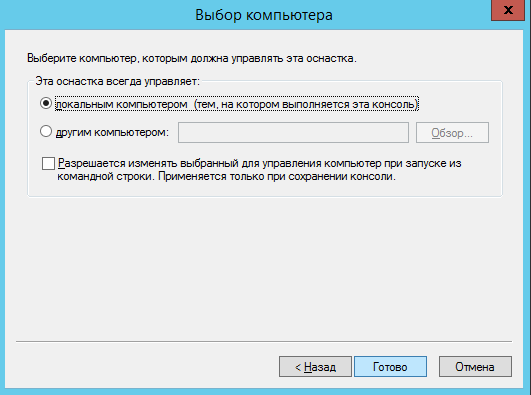
- Step:5 Select the Local Computer on which this console runs and click Finish.
- Step:6 The certificate will then be added to your Snap-in. Select the certificate and click on OK.
- Step:7 In the console root select Personal >> Certificate >> All Tasks >> Advanced Operations >> Create Custom Request.
- Step:8 The Certificate Enrollment window will pop up. Click on Next.
- Step:9 On the next window, click on “Proceed without enrollment policy” and click Next.
- Step:10 In the Custom Request Window, select, (No Template) CNG key and PKCS#10 format and click on Next.
- Step:11 In the Certificate Information page, click on Details to expand the box and click on Properties & then Next.
- Step:12 In the Certificate Properties window >> Select the General tab >> for Friendly Name and Description. Add the domain for which you need the SSL certificate in the Friendly Name and Description.
- Step:13 Select the Subject tab and under that select Common Name under Type >> Value is the name of your domain for which you are creating the SSL certificate >> Select DNS under Type >> Value is the name of your domain. Click Add. You will see the details added to the right panel. Finally, click Apply.
- Step:14 Click on the Extensions tab and select Extended Key Usage.
- Step:15 Further, scroll down the window and click on Basic Constraints and click the checkbox “Enable this extension.“
- Step:16 Select the Private Key tab and Select Key Options and change Key size to 2048 or the largest key size available also check “Make private key exportable.”
- Step:17 In the same page, on “Select Hash Algorithm” change to SHA-256
- Step:18 Click Apply >> click OK.
- Step:19 Click Next in the Certificate information pop up.
- Step:20 On the Certificate Enrollment wizard, under Where do you want to save the offline request? Select the destination and click Finish.
Self-Signed SSL Certificate Import Steps
- Step:1 Click Certificate Enrolment Requests from the menu on the left >> Right click on Certificates >> All Tasks >> Import.
- Step:2 Click on Next.
- Step:3 In the Certificate Import wizard, select the destination and click Next.
- Step:4 Click Finish in the Complete the Certificate Import Wizard.
- Step:5 You will then see a pop up saying The import was successful. Click OK.
- Step:6 Click Certificates under Certificate Enrollment Requests, to view your certificate.
- Step:7 Double click Certificate and go to Details.
- Step:8 Click Copy to file and click Next.
- Step:9 Select your preferred format and name the file.
- Step:10 Import to Desktop and click Finish.
- Step:11 Import certificate in Personal Store.
- Step:12 Go to the Details tab to check the Signature hash algorithm.Step:13 You will see SHA-256.
Remember, when you use a self-signed certificate, you will notice a certificate error in IE if you do not install the certificate on all machines you use. This is one reason why many prefer standard SSL certificates over self-signed certificates.
Disclosure: AboutSSL appreciates your continuous support. It helps us tremendously to keep moving in the competitive SSL industry. Here most of the links which direct you to buy any SSL/TLS related service or products earns us a certain percentage of referral commission. Learn More
Настройка веб-сервера Центра сертификации на MS Windows Server 2012 R2
Настройка веб-сервера Центра сертификации будет заключаться в следущем:
- корректировка шаблона сертификата веб-сервера;
- создание сертификата веб-сервера;
- настройка диспетчера IIS для работы веб-сайта центра сертификации по протоколу SSL.
Корректировка шаблона сертификата для веб-сервера
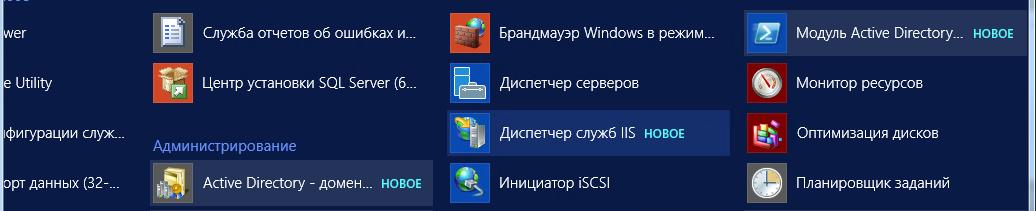
Запустить Центр сертификации. Для этого нажать кнопку Пуск,
в открывшемся окне на значок стрелки в кружке.Кликнуть дважды мышкой на
Центр сертификации.
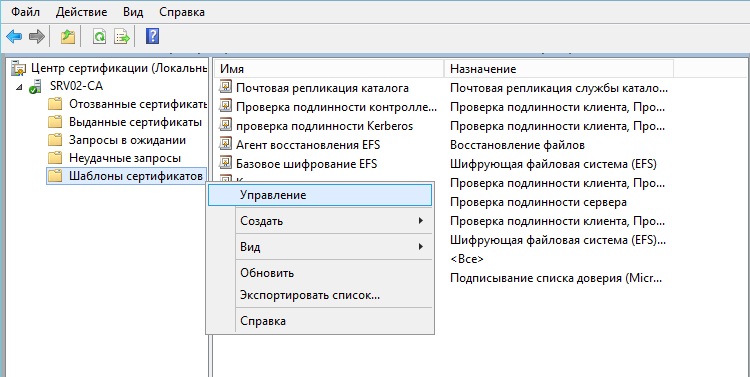
В центре сертификации переместиться на Шаблоны сертификатов,
вызвать контекстное меню, нажать на Управление:
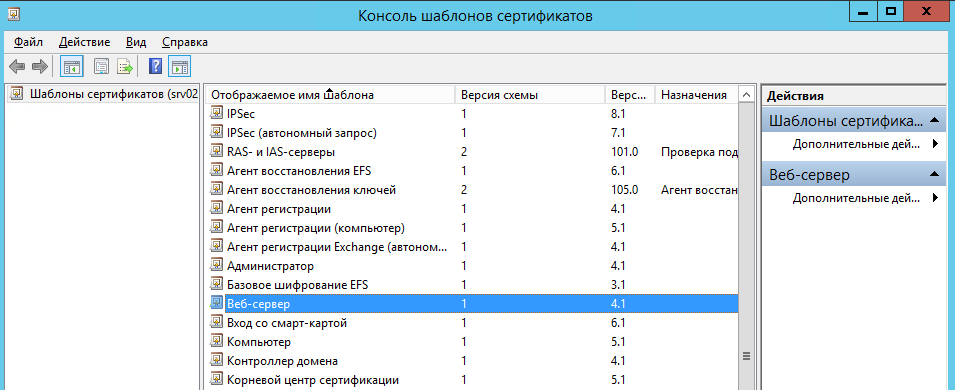
В открывшемся окне консоли шаблонов сертификатов выбрать Веб-сервер
и дважды кликнуть на нем мышкой:
В закладке Безопасность для группы пользователейПрошедшие проверку
поставить флажок Заявка и нажать кнопку Применить:
Закрыть окно центра сертификации.
Создание сертификата для веб-сервера
Запустить оснастку mmc. Для этого нажать правой кнопкой мыши на Пуск, в открывшемся окне выбрать Выполнить. В меню запуска
введите команду MMC:
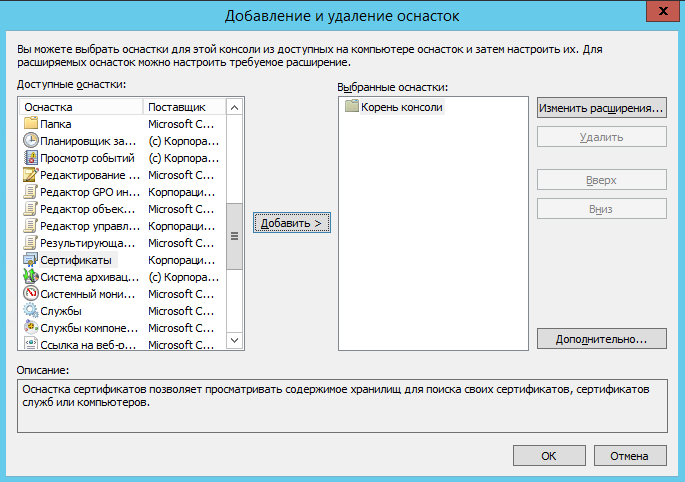
Добавить оснастку, для этого выбрать меню Файл/Добавить или удалить оснастку:
Выбрать Сертификаты и нажать кнопку Добавить:
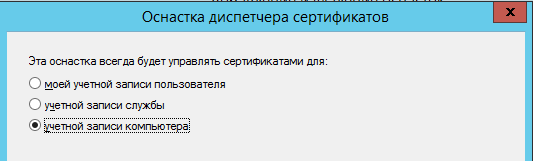
В окне Оснастка диспетчера сертификатов выбрать учетной записи компьютера:
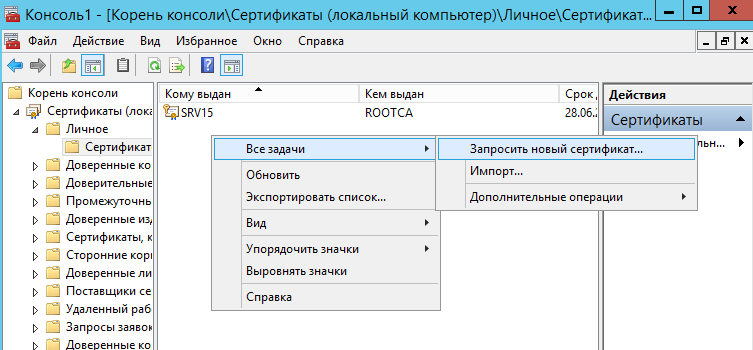
Создать настраиваемый запрос, для этого в окне консоли оснастки
сертификаты раскрыть меню Сертификаты (Локальный компьютер/Сертификаты
На строке Сертификаты вызвать контекстное меню Все задачи/Запросить новый сертификат:
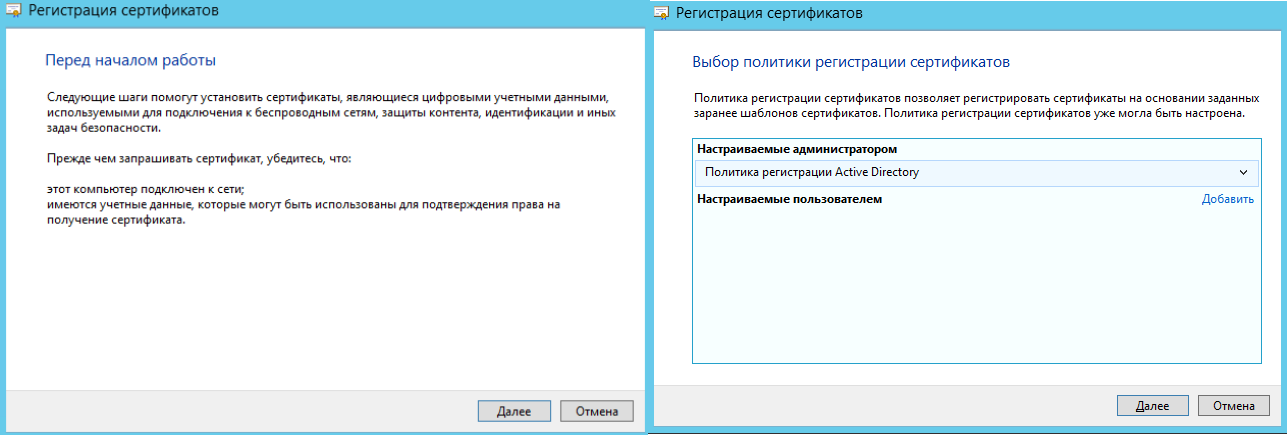
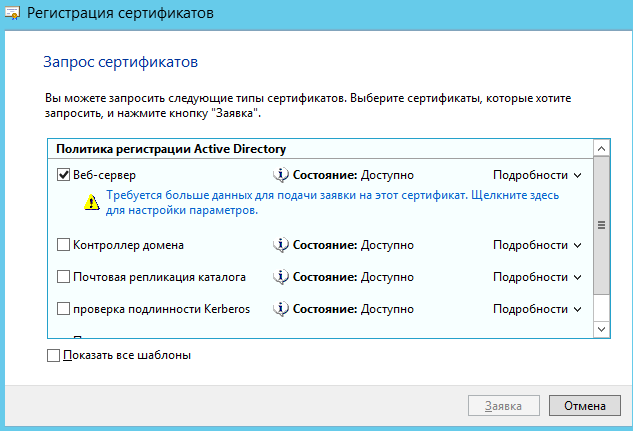
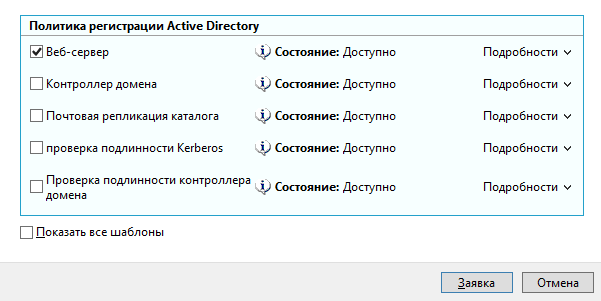
В окне запросов сертификатов ставим флажок возле шаблона Веб-сервер.
В связи с тем, что для создания запроса необходимо ввести дополнительные сведения о пользователе,
нажимаем на строку Требуется больше данных для подачи заявки на…:
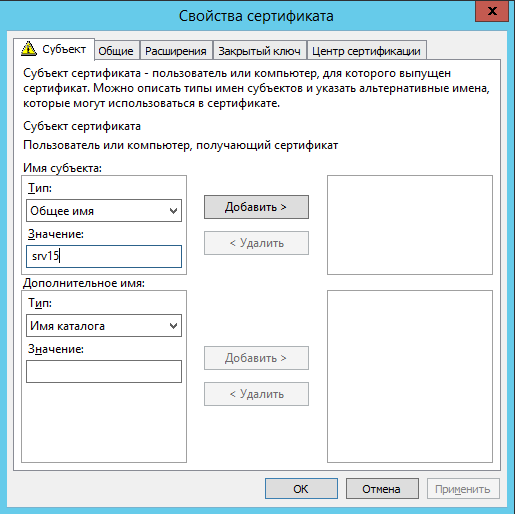
В закладке Субъект необходимо добавить значения Общее имя и Страна
. Общее имя должно соответствовать имени сервера (например,
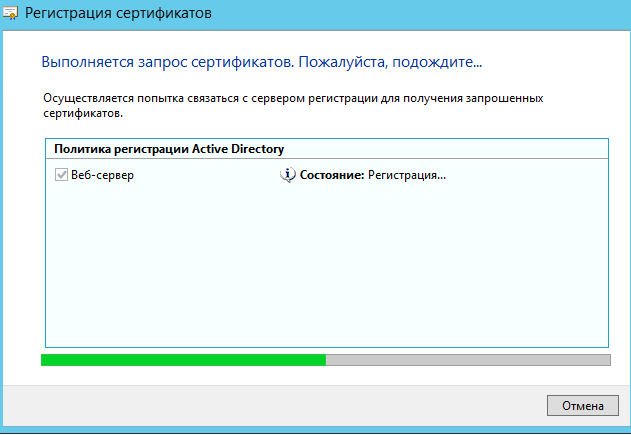
SRV15), страна – RU. Нажимаем ОК и Заявка:
Настройка работы веб-сервера Центра сертификации протоколу SSL
Запустить Диспетчер служб IIS:
В левой части окна диспетчера выбрать Default Web Site,
затем в правой части окна – Привязки:
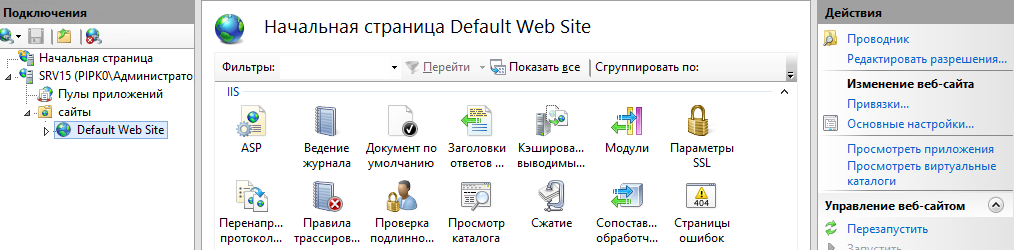
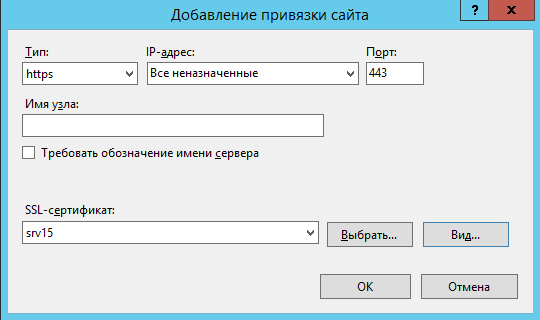
В появившемся окне нажать кнопку Добавить:

В окне Добавление привязки сайта выбрать тип HTTPS и
выбрать из списка созданный SSL сертификат. Назначение
сертификата должно быть Обеспечивает получение идентификации
от удаленного компьютера:
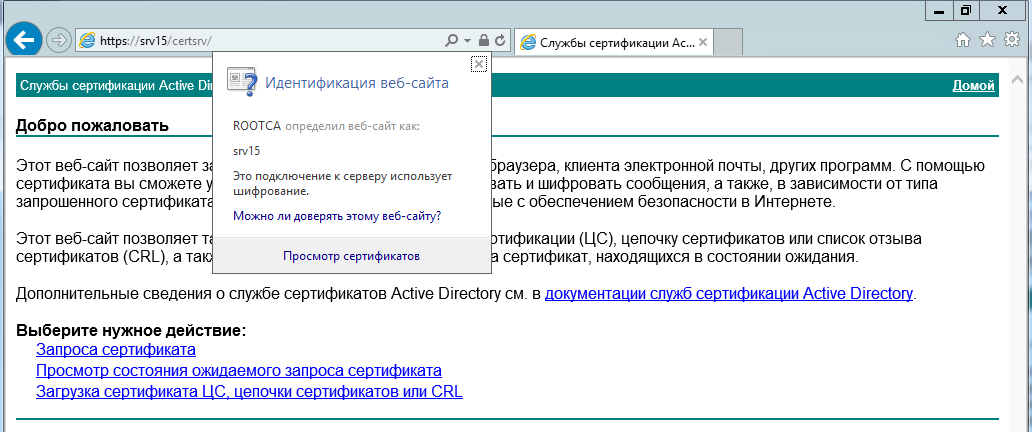
Закрыть окно. Сделать проверку работы SSL сертификата при доступе на сайт центра сертификации
через браузер. Ввести адрес – https://имя сервера/certsrv, где имя сервера вводим
самостоятельно.
При правильной настройке веб-сервера доступ к сайту будет выполнен без ошибок.
Installing a certificate on Windows Server 2012 is a crucial process for ensuring secure communication between the server and clients. It enables encryption of data transmitted over the network, providing protection against unauthorized access and potential data breaches. In this blog post, we will explore the challenge of installing a certificate on Windows Server 2012 and discuss various methods to accomplish this task. By following the steps outlined in this article, you will be able to successfully install a certificate on your server and enhance the security of your network.
The Challenge of Installing a Certificate on Windows Server 2012
When it comes to installing a certificate on Windows Server 2012, there are several challenges that you may encounter. These challenges include understanding the different methods available for installing a certificate, ensuring proper configuration of the certificate store, and managing any potential compatibility issues with the server software. To help you overcome these challenges, we will now explore four different methods for installing a certificate on Windows Server 2012.
Video Tutorial:
Method 1: How to Install a Certificate using Internet Information Services (IIS)
Installing a certificate using Internet Information Services (IIS) is a commonly used method that allows you to manage SSL/TLS certificates for your website. This method is suitable if you want to secure web traffic to your server. Here are the steps to install a certificate using IIS:
Pros:
– Easy to use and navigate for those familiar with IIS
– Provides a centralized location to manage certificates for multiple websites
– Integration with other IIS features and functionalities
Cons:
– Limited to web traffic only
– Requires administrative access to the server
– May not be suitable for servers running non-web services
1. Open Internet Information Services (IIS) Manager by searching for it in the Start menu.
2. In the Connections pane, select your server name.
3. Double-click the Server Certificates feature.
4. Click on «Import…» in the Actions pane on the right-hand side.
5. Browse and select the certificate file (.pfx or .p12) that you want to import.
6. Enter the password for the certificate if prompted.
7. Choose the «Certificate store» option. Select the appropriate certificate store based on your requirements.
8. Click «OK» to complete the installation of the certificate.
Method 2: How to Install a Certificate using Certificate Manager
Certificate Manager is a built-in Windows tool that allows you to manage certificates on your server. This method is suitable for installing certificates on both web and non-web services. Here are the steps to install a certificate using Certificate Manager:
Pros:
– Works for both web and non-web services
– Does not require administrative access to the server
– Can be used to manage certificates for multiple services on the same server
Cons:
– May not provide the same level of granularity and control as other methods
– Requires familiarity with Certificate Manager interface
1. Press «Windows Key + R» to open the Run dialog box.
2. Type «certmgr.msc» and click «OK» to open Certificate Manager.
3. In Certificate Manager, expand the «Personal» folder and select «Certificates«.
4. Right-click on the «Certificates» folder and select «All Tasks» > «Import«.
5. Follow the Import Wizard to browse and select the certificate file (.pfx or .p12) that you want to import.
6. Enter the password for the certificate if prompted.
7. Choose the «Automatically select the certificate store based on the type of certificate» option.
8. Click «Finish» to complete the installation of the certificate.
Method 3: How to Install a Certificate using PowerShell
PowerShell is a powerful scripting language and command-line shell that is built into Windows Server 2012. This method is suitable for automating the certificate installation process or performing bulk installations. Here are the steps to install a certificate using PowerShell:
Pros:
– Provides scripting capabilities for automation and bulk installations
– Allows for fine-grained control and customization
– Can be used in combination with other PowerShell cmdlets
Cons:
– Requires familiarity with PowerShell scripting
– May not be suitable for users without scripting knowledge
– PowerShell access and execution policy restrictions may apply
1. Open PowerShell with administrative privileges.
2. Run the following command to import the certificate:
«`powershell
Import-PfxCertificate -FilePath «C:\path\to\certificate.pfx» -CertStoreLocation Cert:\LocalMachine\My
«`
3. Replace «C:\path\to\certificate.pfx» with the actual file path of the certificate you want to import.
4. Enter the password for the certificate if prompted.
5. Check the «My» certificate store in Certificate Manager to verify the successful installation.
Method 4: How to Install a Certificate using Active Directory Certificate Services (AD CS)
Active Directory Certificate Services (AD CS) is a Windows Server feature that enables the issuance and management of digital certificates within a network. This method is suitable if you want to deploy a public key infrastructure (PKI) and have full control over certificate lifecycle management. Here are the steps to install a certificate using AD CS:
Pros:
– Provides full control over certificate lifecycle management
– Enables the deployment of a PKI within your network
– Supports advanced features and configurations
Cons:
– Requires additional configuration and setup of AD CS
– May not be suitable for smaller networks or environments without the need for a PKI
– Requires administrative access to the AD CS server
1. Install the AD CS role and its dependencies on your Windows Server 2012.
2. Follow the AD CS setup wizard to configure your PKI infrastructure.
3. Request or generate a certificate signing request (CSR) for the certificate you want to install.
4. Submit the CSR to your CA (Certificate Authority) for certificate issuance.
5. Import the issued certificate into the appropriate certificate store using Certificate Manager or PowerShell.
Alternatives: What to Do If You Can’t Install a Certificate
If you encounter difficulties or limitations preventing you from installing a certificate on Windows Server 2012, there are alternative solutions you can consider. These alternatives include:
1. Using a load balancer or reverse proxy: Offloading SSL/TLS termination to a load balancer or reverse proxy can eliminate the need to install certificates directly on the server. This approach provides scalability, flexibility, and centralized certificate management.
2. Implementing a third-party security software: Some third-party security software solutions offer certificate management features that can simplify the process of installing and managing certificates on Windows Server 2012. These solutions often come with additional security features and functionalities.
3. Seeking professional assistance: If you are facing difficulties that cannot be resolved through the available methods and alternatives, it may be beneficial to seek professional assistance from a network security specialist or systems administrator. They can provide tailored advice and guidance based on your specific requirements and environment.
Bonus Tips
1. Regularly renew and update your certificates to ensure continued security and compatibility with the latest industry standards.
2. Keep a backup of your certificate files and avoid losing the private key, as it is essential for the proper functioning of your certificates.
3. Stay informed about the latest security vulnerabilities and best practices related to certificate management on Windows Server 2012.
5 FAQs about Installing a Certificate on Windows Server 2012
Q1: Can I use the same certificate on multiple servers?
A: Yes, you can export a certificate with its associated private key and import it onto multiple servers. However, note that this may raise security concerns, as the private key will be identical on each server.
Q2: How often should I renew my certificates?
A: It is recommended to renew your certificates before they expire. The validity period of a certificate can vary, but typically they are issued for one to three years.
Q3: Can I install a wildcard certificate on Windows Server 2012?
A: Yes, Windows Server 2012 supports wildcard certificates. You can install and use wildcard certificates to secure multiple subdomains under a single domain.
Q4: Do I need to restart the server after installing a certificate?
A: In most cases, you do not need to restart the server after installing a certificate. However, certain applications or services may require a restart for the changes to take effect.
Q5: Can I install a self-signed certificate on Windows Server 2012?
A: Yes, you can install a self-signed certificate on Windows Server 2012. However, self-signed certificates are not trusted by default and are suitable for internal use or testing purposes.
In Conclusion
Installing a certificate on Windows Server 2012 is a critical step in establishing a secure and encrypted communication channel between your server and clients. By understanding the challenges and utilizing the methods outlined in this blog post, you can successfully install a certificate and enhance the security of your network. Whether you choose to use Internet Information Services (IIS), Certificate Manager, PowerShell, or Active Directory Certificate Services (AD CS), each method offers its own benefits and considerations. Additionally, if you cannot install a certificate, there are alternative solutions to explore, such as using a load balancer or reverse proxy or implementing third-party security software. Remember to follow best practices, stay informed about the latest industry standards, and seek professional assistance when needed to ensure optimum security and performance for your Windows Server 2012 environment.
Certificate Authorities (CAs) play a crucial role in ensuring the security of communications and transactions on the internet. They issue digital certificates that verify the authenticity of websites and other digital entities. If you have a Windows Server 2012, you can configure it to act as a Certificate Authority. In this tutorial, we will guide you through the steps required to set up a Certificate Authority on your Windows Server 2012.
Step 1: Open the Server Manager on your Windows Server 2012. You can do this by clicking on the Start button and selecting «Server Manager» from the menu.
Step 2: Once the Server Manager is open, click on «Add roles and features» from the main dashboard.
Step 3: The Add Roles and Features Wizard will open. Click «Next» to proceed.
Step 4: Select «Role-based or feature-based installation» and click «Next.«
Step 5: Choose your server from the server pool and click «Next.«
Step 6: Scroll down and locate the «Active Directory Certificate Services» option. Check the box next to it and click «Next.«
Step 7: On the Features page, just click «Next» to proceed.
Step 8: On the AD CS page, read the information and click «Next.«
Step 9: Select «Certification Authority» as the role service you want to install. You can also choose other options depending on your requirements. Click «Next» to continue.
Step 10: On the Confirmation page, review your selections and click «Install» to begin the installation process.
Congratulations! You have successfully configured a Certificate Authority on your Windows Server 2012. Now you can generate and issue digital certificates as needed.
| Pros | Cons |
|---|---|
| 1. Enables secure communication and transaction on the internet. | 1. Requires technical knowledge and understanding of certificate management. |
| 2. Provides a trusted means of verifying the authenticity of websites and digital entities. | 2. May involve additional costs for obtaining a certificate from a trusted CA. |
| 3. Gives you control over issuing and managing digital certificates within your organization. | 3. Requires regular maintenance and updates to ensure the security of the CA. |
Setting up a Certificate Authority on your Windows Server 2012 can enhance the security and trustworthiness of your digital communication. However, it is important to follow best practices and regularly update and maintain your CA to ensure its effectiveness and security.
Video Tutorial:How do I install and configure certificate authority?
How do I create a certificate authority for Windows Server?
Creating a certificate authority (CA) for Windows Server involves several steps. Here is a guide on how to do it:
1. Launch the Windows Server Manager and select the «Add Roles and Features» wizard.
2. Follow the wizard instructions and select the «Active Directory Certificate Services» option.
3. Choose «Certification Authority» as the role service. You can also add other role services depending on your requirements.
4. Configure the CA setup by selecting the appropriate options such as the type of CA and the cryptographic provider. It is recommended to use a Root CA for creating the main certificate authority.
5. Specify the common name and validity period for the CA certificate.
6. Choose a private key storage option based on your security needs.
7. Set the database and log file locations, or go with the default settings.
8. Configure additional CA extensions such as Certificate Revocation List (CRL) distribution points and Authority Information Access (AIA) settings to enhance certificate usability and security.
9. Define the security settings for the CA, including access control permissions and auditing options.
10. Complete the installation and wait for the CA setup to finish.
After creating the CA, you can issue and manage certificates for various purposes, including secure communication, authentication, and encryption. Also, it is essential to regularly update and renew the CA certificate to maintain security and trust within your network.
Note: The specific steps may vary slightly depending on the Windows Server version you are using, so it is always recommended to refer to the official documentation or relevant resources for your specific setup.
How to generate SSL certificate in Windows Server 2012 R2?
To generate an SSL certificate in Windows Server 2012 R2, you can follow these steps:
Step 1: Open the Internet Information Services (IIS) Manager.
– Go to «Start» and search for «Internet Information Services (IIS) Manager«.
– Click on the «Internet Information Services (IIS) Manager» shortcut to open it.
Step 2: Generate a Certificate Signing Request (CSR).
– In the IIS Manager, navigate to the server or site where you want to generate the SSL certificate.
– Open the «Server Certificates» feature.
– Click on «Create Certificate Request» in the Actions pane on the right.
Step 3: Complete the Certificate Request form.
– Enter the required information like Common Name (domain name) for which you want to generate the SSL certificate.
– Select the Bit length (2048-bit or higher is recommended).
– Choose a Cryptographic Service Provider (CSP) and a Hash Algorithm.
Step 4: Save the Certificate Request.
– Save the CSR file to a specific location on your Windows Server.
Step 5: Submit the Certificate Request to a Certificate Authority (CA).
– Send the generated CSR file to a trusted CA. You can use either a commercial CA or set up your own internal CA.
– Follow the CA’s instructions to process and issue the SSL certificate.
Step 6: Install the SSL certificate.
– Once you receive the issued SSL certificate from the CA, open the IIS Manager.
– Navigate to the server or site where you generated the CSR.
– Open the «Server Certificates» feature.
– Click on «Complete Certificate Request» in the Actions pane on the right.
– Browse and select the issued SSL certificate file.
– Provide a friendly name to identify the certificate.
– Click «OK» to complete the installation.
Step 7: Bind the SSL certificate to the desired website or service.
– In the IIS Manager, navigate to the site where you want to enable HTTPS.
– Open the «Bindings» feature.
– Click on «Add» to create a new binding.
– Select HTTPS as the type, choose the SSL certificate you installed, and enter the necessary information (IP address, port, hostname).
– Click «OK» to save the binding.
That’s it! You have successfully generated an SSL certificate and bound it to your website or service on Windows Server 2012 R2. The SSL certificate enables secure communication and encryption between the server and users’ devices. Remember to regularly update and renew your SSL certificates to maintain security and trust.
Configuring an SSL certificate on a server is an essential step for ensuring secure communications between the server and clients. Here are the steps to configure an SSL certificate on a server:
1. Choose the right SSL certificate: Before anything else, you need to choose the right SSL certificate for your server. Consider factors such as the level of security required, the type of server, and the number of domains/subdomains you need to secure. You can obtain SSL certificates from trusted certificate authorities or use Let’s Encrypt for free certificates.
2. Generate a CSR: A Certificate Signing Request (CSR) is a file that’s generated on the server where the SSL certificate will be installed. The CSR contains information about your organization and the domain or domains you want to secure. Generate a CSR using server software or a web-based control panel provided by your hosting provider.
3. Submit CSR to the certificate authority: Once you have the CSR, submit it to the certificate authority (CA) along with any additional information they require. The CA will then issue the SSL certificate after verifying your organization and domain ownership.
4. Install and configure the SSL certificate on the server: After receiving the SSL certificate from the CA, you need to install it on the server. The steps for installation vary depending on the server software you’re using (e.g., Apache, Nginx, IIS). Generally, it involves copying the SSL certificate files to the appropriate directory on the server and configuring the server to use them.
5. Update server configuration: Once the SSL certificate is installed, you need to update your server’s configuration to enable SSL/TLS communication. This typically involves modifying the server configuration file to specify the SSL certificate file paths, enable SSL/TLS protocols, and configure other SSL-related settings.
6. Test SSL certificate installation: It’s crucial to test the SSL certificate installation to ensure it’s functioning correctly. Use online SSL checker tools or commands specific to your server software to verify the SSL configuration and check for any potential issues or vulnerabilities.
7. Set up certificate renewal: SSL certificates have an expiration date, so it’s important to set up automatic certificate renewal to ensure uninterrupted service. Depending on the certificate authority and server software, there may be different methods for automating the renewal process.
By following these steps, you can configure an SSL certificate on your server and establish secure connections between your server and clients. Remember to always keep your SSL certificates up to date and follow best practices for maintaining a secure server environment.
How to check certificate in Windows Server 2012?
To check certificates in Windows Server 2012, you can follow these steps:
1. Open the Run dialog by pressing the Windows key + R on your keyboard.
2. Type «mmc» (without quotes) and press Enter. This will open the Microsoft Management Console.
3. In the console, go to File -> Add/Remove Snap-in.
4. In the Add or Remove Snap-ins window, select «Certificates» from the Available snap-ins list and click the «Add >» button.
5. In the Certificates snap-in window, select «Computer account» and click Next.
6. Leave the default option selected, which is «Local computer,» and click Finish.
7. Click OK in the Add or Remove Snap-ins window.
8. In the MMC console, expand the «Certificates (Local Computer)» node.
9. Under the expanded node, you will see various certificate stores, such as «Personal,» «Trusted Root Certification Authorities,» and «Intermediate Certification Authorities.«
10. Expand the appropriate certificate store, depending on the type of certificate you want to check.
11. You will now see a list of certificates in the selected store. You can double-click on any certificate to view its details, including its expiration date, subject, issuer, and various other properties.
By following these steps, you can easily check certificates in Windows Server 2012 and access the necessary details about each certificate.
How to install Active Directory Certificate Services 2012 r2?
Installing Active Directory Certificate Services 2012 R2 involves several steps. Here’s a professional point of view on the installation process without mentioning that I am an technical blogger:
1. Prepare the server: Begin by ensuring that you have a server running Windows Server 2012 R2 with appropriate hardware requirements. Update the server with the latest patches and make sure it meets the necessary prerequisites.
2. Install Active Directory Certificate Services (AD CS): Launch the Server Manager on your Windows Server 2012 R2 and select the Add Roles and Features option. Follow the wizard to add the AD CS role. Make sure to include the Certification Authority (CA) role service during the installation.
3. Configure AD CS: After the installation is complete, open the Certification Authority console from the Tools menu in Server Manager. Choose the type of CA you want to set up – standalone CA or enterprise CA. Follow the prompts and provide necessary information during the configuration process, including specifying the certificate database, key type, and validity duration.
4. Set up certificate templates: In the Certification Authority console, navigate to Certificate Templates and manage the existing templates or create new ones according to your requirements. Customize the templates based on the type of certificates you want to issue, such as user certificates, domain controller certificates, or web server certificates.
5. Issue certificates: With AD CS configured and certificate templates in place, you can start issuing certificates. Use the Certification Authority console to issue certificates manually or develop rules and policies for automatic certificate enrollment. Ensure that the certificates are issued to the intended recipients securely.
6. Monitor and manage AD CS: Regularly monitor the health and performance of the AD CS infrastructure. Utilize tools like Certification Authority MMC snap-in and Event Viewer to review logs, track certificate revocation, and manage certificate services responsibly. Periodically review and renew existing certificates as well.
Note: The above steps provide a general overview of the installation process. It’s important to refer to Microsoft’s official documentation for detailed guidance and variations specific to your environment.