
В этой статье посмотрим, как с помощью встроенных средств на базе сервера с Windows Server 2012 R2 организовать простой межсетевой маршрутизатор. И хотя на практике маршрутизаторы на базе компьютеров используются довольно редко (аппаратные маршрутизаторы, как правило, имеют более высокую производительность, надежность и несколько дешевле выделенного компьютера), в тестовых или виртуальных средах, когда нужно срочно настроить маршрутизацию между несколькими подсетями, маршрутизатор на базе Windows Server вполне себе приемлемое решение.
Итак, в роли маршрутизатора будет выступать сервер с ОС Windows Server 2012 R2. Сервер имеет 2 сетевых интерфейса: физических или виртуальных, если сервер запущен на гипервизоре. Каждому интерфейсу сервера назначен выделенный IP адрес из различных подсетей. Для удобства, мы переименовали названия сетевых интерфейсов в Панели управления сетями и общим доступом:
Сетевая карта 1 (сетевая карта подключена во внутреннюю LAN сеть):
Имя: LAN
IP: 10.0.1.1
Сетевая карта 2 (сетевая карта во внешней сети ):
Имя: Internet
IP: 192.168.1.20
Наша задача – организовать маршрутизацию пакетов из локальной подсети 10.0.1.0 во внешнюю подсеть 192.168.1.0 (как правило, такая сеть имеет выход в интернет) через NAT. Такую схему можно реализовать в случае необходимости организации доступа клиентов из внутренней сети в интернет.

Маршрутизация в Windows Server 2012 R2 реализуется на базе роли Remote Access (RRAS). Данная служба появилась еще в Windows Server 2003 и до текущей в версии Windows Server ее интерфейс и процесс настройки практически не изменился.
В первую очередь нужно установить роль Remote Access. Для этого откроем консоль Server Manager, выбираем Manage -> Add Roles and Features, находим и отмечаем роль Remote Access, в ее составе выбираем службу Routing, и, соглашаясь со всеми предложенными по умолчанию компонентами, запускаем ее установку (Install).

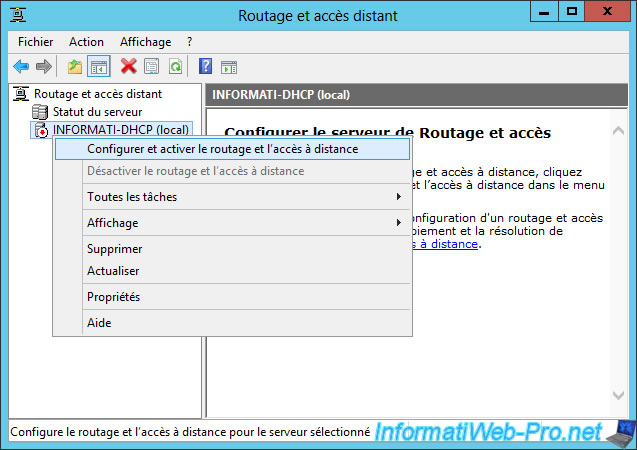
После окончания установки открываем консоль Routing and Remote Access (rrasmgmt.msc), щелкаем по имени сервера (с красной стрелкой) и выбираем Configure and Enable Routing and Remote Access.

В открывшемся окне выбираем пункт Network Address Translation (NAT).
")
На следующей шаге (NAT Internet Connection) нужно выбрать сетевой интерфейс, подключённый ко внешней сети / Интернету (в нашем примере это интерфейс Internet с ip 192.168.1.20). Этот интерфейс будет «публичным интерфейсом» нашего NAT роутера.

Далее будет предложено указать должен ли NAT роутер обеспечить клиентов внутренней сети сервисами DHCP и DNS. Как правило, этот функционал во внутренней сети уже имеется, поэтому в нем мы не нуждаемся.

На этом базовая настройка маршрутизации на Windows Server 2012 R2 завершена. Сервер уже должен выполнять маршрутизацию пакетов между двумя подключенными сетями и выполнять трансляцию сетевых адресов (NAT).
Чтобы в этом убедиться, в консоли RRAS откройте свойства сервера. На вкладке General показано, что IPv4 маршрутизация включена (т.е. пакеты IPv4 будут пересылаться с одной сетевой карты на другую).
Проверить работу маршрутизации можно, указав на клиентском компьютере во внутренней сети (к которой подключен интерфейс сервера LAN) в качестве шлюза IP-адрес сервера (10.0.1.1), и выполнить ping или трассировку маршрута к ресурсу, расположенному во внешней сети или интернете. Эти попытки должны быть успешными.

Примечание. Windows Server 2012 R2 поддерживает статическую маршрутизацию, протокол динамической маршрутизации RIPv2 и BGPv4. Поддержка OSPF была прекращена еще в Windows Server 2008.
В нашем случае на сервере осуществялется статическая маршрутизация. Если нужно добавить новый маршрут, щелкните ПКМ по Static Routes, выберите пункт меню New static route и создайте новое статическое правило маршрутизации.
Примечание. Статический маршрут также можно добавить из командной строки с помощью команд Route или netsh.
Настройка маршрутизатора на основе Windows Server 2012R2
В статье показано как настроить ОС Windows Server 2012 R2 в качестве маршрутизатора. Настраиваемый сервер имеет 2 физических сетевых интерфейса. Каждому сетевому интерфейсу будет назначен статический IP адрес из разных подсетей. Для удобства, сетевые интерфейсы можно переименовать.
Сетевая карта 1 (сетевая карта подключена во внутреннюю сеть):
Имя: in
IP: 10.0.100.1
Сетевая карта 2 (сетевая карта во внешней сети):
Имя: out
IP: 172.16.0.1
Цель: организовать маршрутизацию пакетов из локальной сети 10.0.100.1 во внешнюю сеть 172.16.0.1.
Для начала необходимо добавить новую роль «Удаленный доступ» (Remote Access) на сервере, для этого откроем консоль «Диспетчер серверов» (Server Manager):
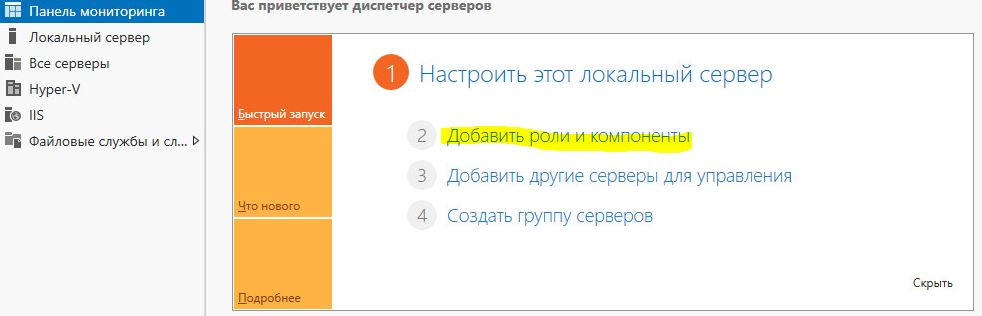
Выбираем Manage -> «Добавить роли и компоненты»(Add Roles and Features), выбираем галкой роль «Удаленный доступ» (Remote Access):
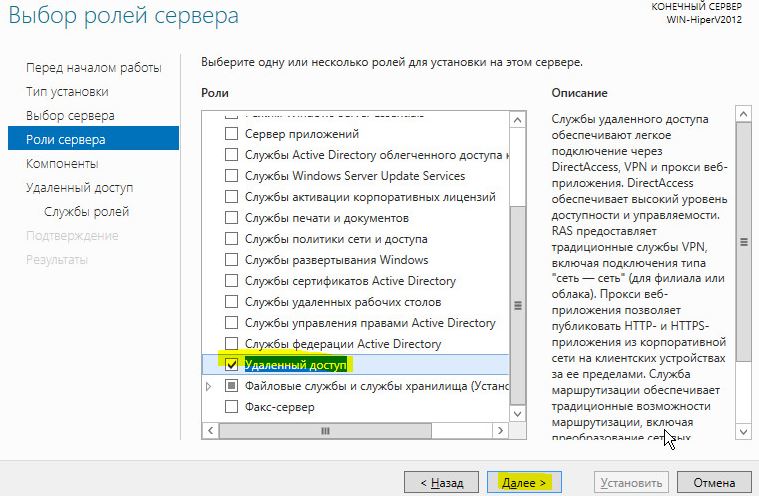
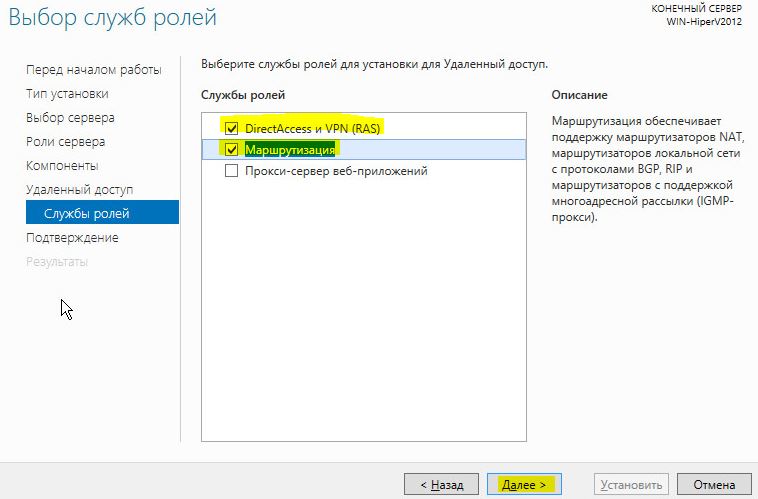
В составе роли выбираем службу «Маршрутизация» (Routing), по умолчанию должны установиться дополнительные компоненты, соглашаемся, и запускаем ее установку (Install):
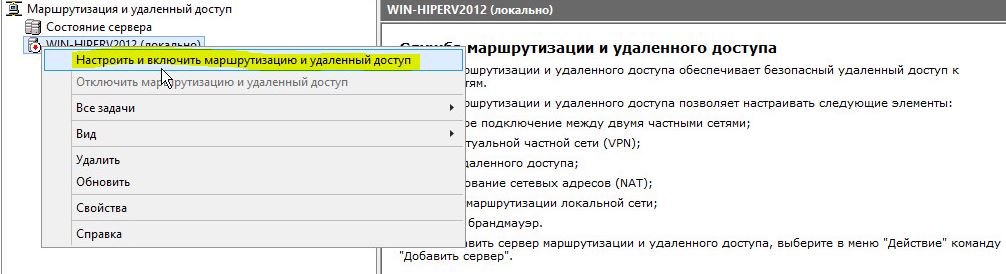
После окончания установки роли открываем консоль «Маршрутизация и удаленный доступ»(Routing and Remote Access) (Ctr + R, rrasmgmt.msc), щелкаем по имени сервера (с красной стрелкой) и выбираем «Настроить и включить маршрутизацию и удаленный доступ» (Configure and Enable Routing and Remote Access).
В окне мастера выбираем пункт «Подключение на основе NAT» (Network Address Translation, NAT)

Далее выбираем сетевой интерфейс, подключённый ко внешней сети (или Интернету) (в примере это сетевой интерфейс out с ip 172.16.0.1). Данный сетевой интерфейс будет «публичным интерфейсом» нашего NAT.
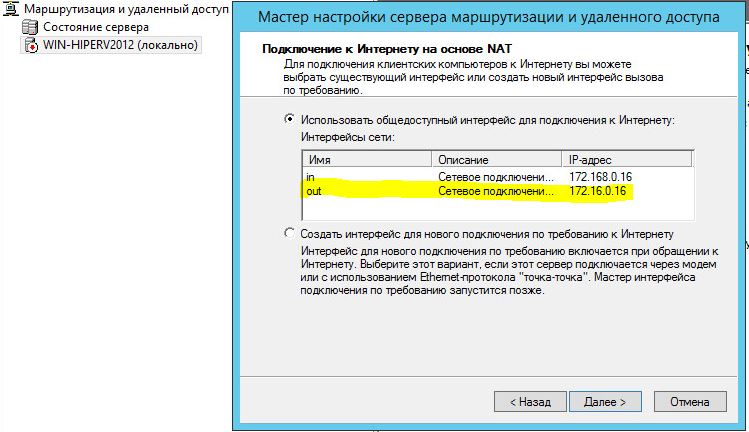
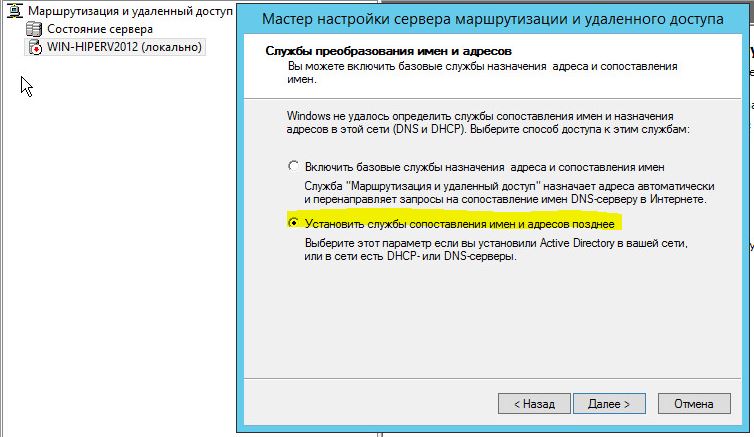
Далее будет предложено указать должен ли NAT, обеспечить клиентов внутренней сети службами DHCP\DNS. Обычно, данный функционал во внутренней сети уже присутствует, поэтому выбираем пункт «Установить службы сопоставления имен и адресов позднее».
Завершение мастера сервера маршрутизации и удаленного означает, что базовые настройки маршрутизации на Windows Server 2012 R2 завершены. В данной конфигурации сервер должен выполнять маршрутизацию пакетов между двух подсетей, при этом выполнять трансляцию сетевых адресов (NAT).
Чтобы убедиться что функционал работает:
- В консоли «RRAS» откройте свойства сервера, вкладку «Общие» (General) и убедитесь, что IPv4 маршрутизация включена и счетчики входящих и выходящих байтов увеличиваются.
- Проверить работу маршрутизации можно, указав на клиентском ПК во внутренней сети (к которой подключен сетевой интерфейс «in») в качестве шлюза IP-адрес сервера (10.0.100.1), и выполнить ping или трассировку маршрута к ресурсу, расположенному во внешней сети или в интернете. Команда ping должна быть успешна.
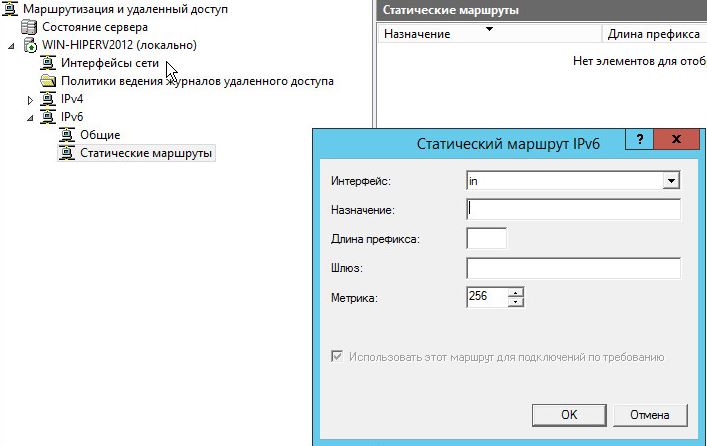
Примечание. Если нужно добавить новый маршрут, щелкните в меню «Статические маршруты», выберите пункт меню «новый статический маршрут» (New static route) и создайте новое статическое правило маршрутизации. Статический маршрут также можно добавить из командной строки с помощью команд Route или netsh.
To allow a Windows Server server to act as a router, you must install the NAT system (to translate private IP addresses (local) to Internet IP) and network routing system for ports forwarding.
- Prerequisite
- Install the «Routing» role service
- Configure routing and remote access
- Configure the DHCP server to use your new router on Windows Server 2012
1. Prerequisite
The prerequisites are:
- two network adapters : one connected to a switch (where clients computers are connected) and the other on a modem or a router connected to the Internet.
- a DHCP server to distribute private IP addresses to client computers
2. Install the «Routing» role service
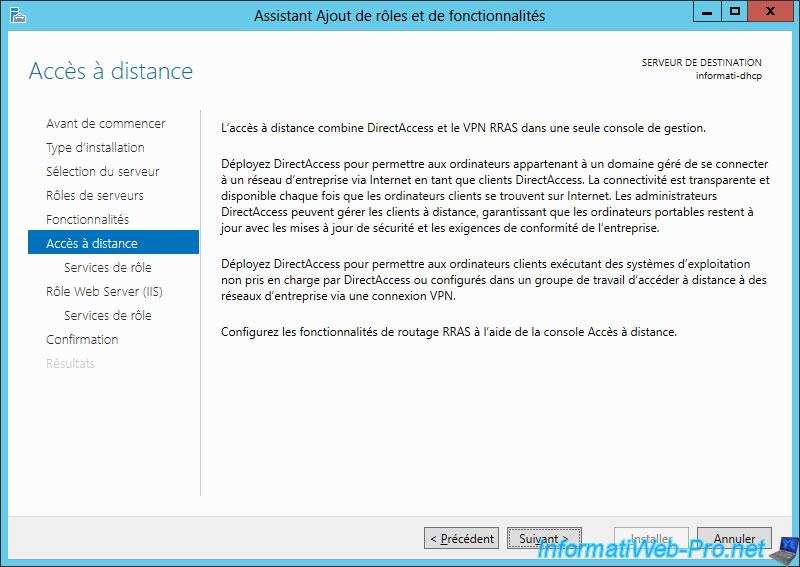
Unlike Windows Server 2008, on Windows Server 2012, these features can be found in the «Remote Access» role.
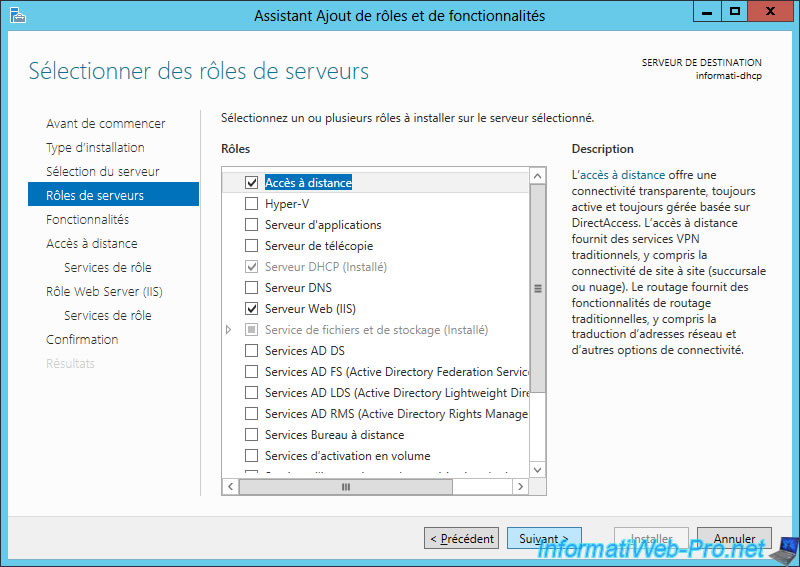
Select «Remote Access».
As indicated at the end of this description, you can configure the routing functionality by using the Remote Access console.
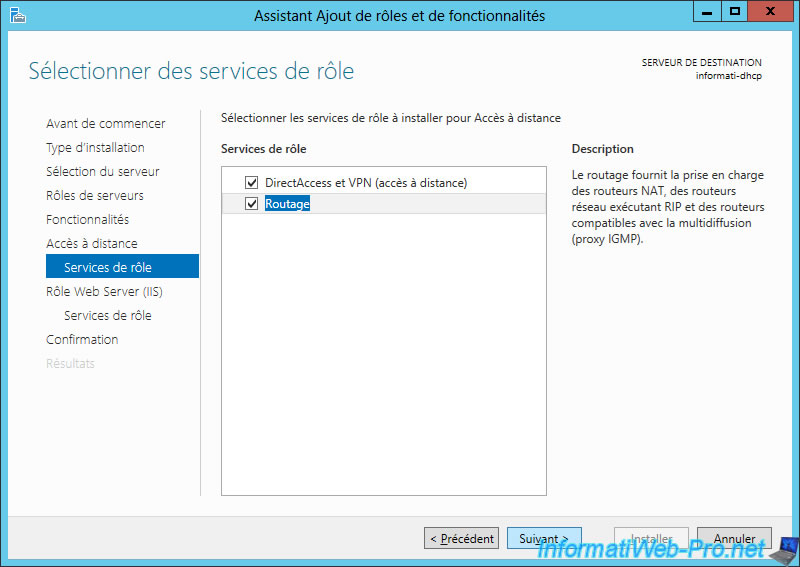
Select «Routing».
Note : The feature «DirectAccess and VPN (Remote Access)» is a dependency of the «Routing» functionality.
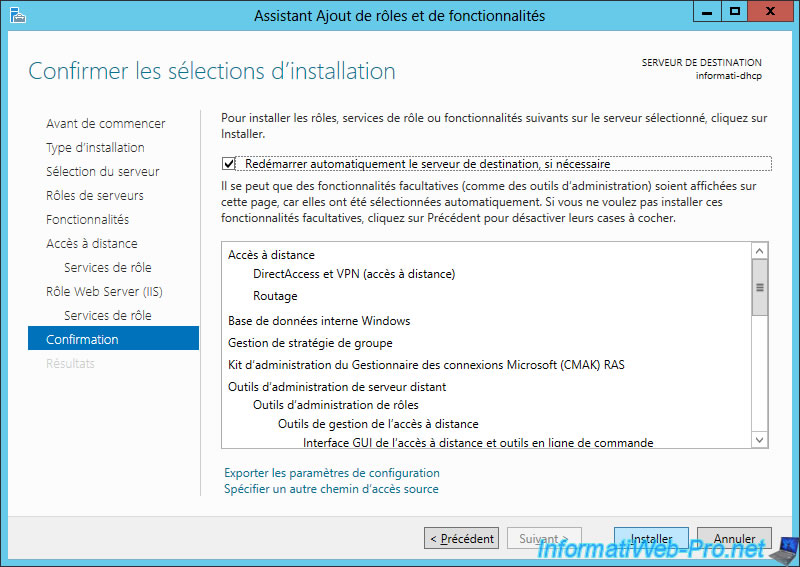
Click «Install».
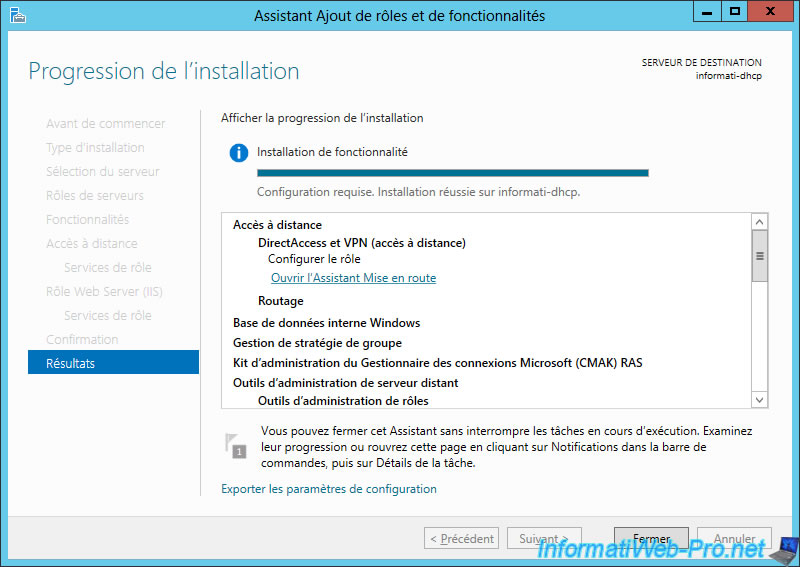
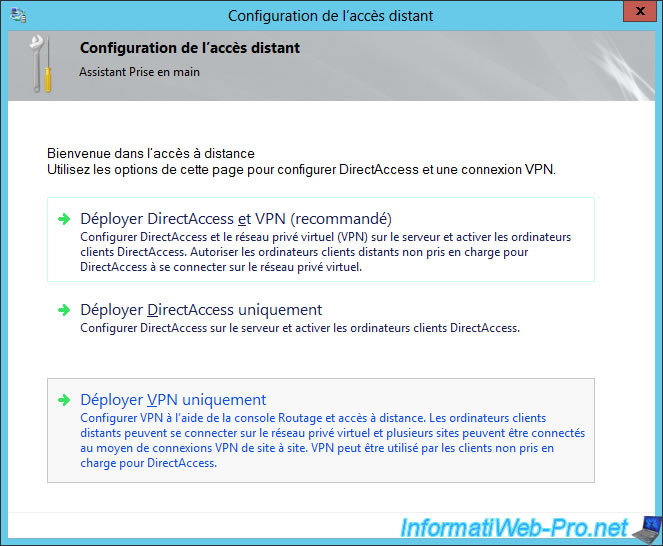
At the end of the installation, click on the «Open the Getting Started Wizard» link.
3. Configure routing and remote access
Then, click «Deploy VPN only» to open the «Routing and Remote Access» console that was also present in previous versions of Windows Server.
In the «Routing and Remote Access» window, right click on your server name and click «Configure and Enable Routing and Remote Access.»
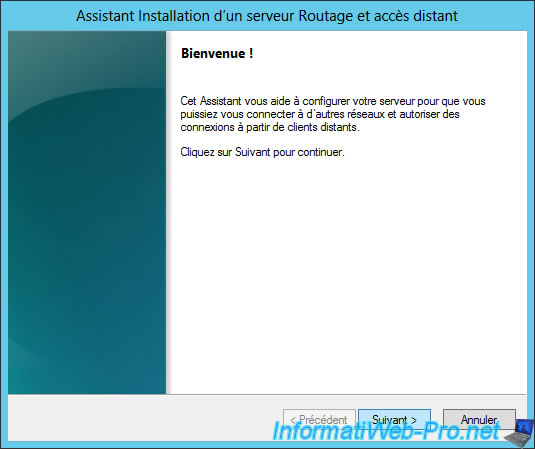
Click «Next».
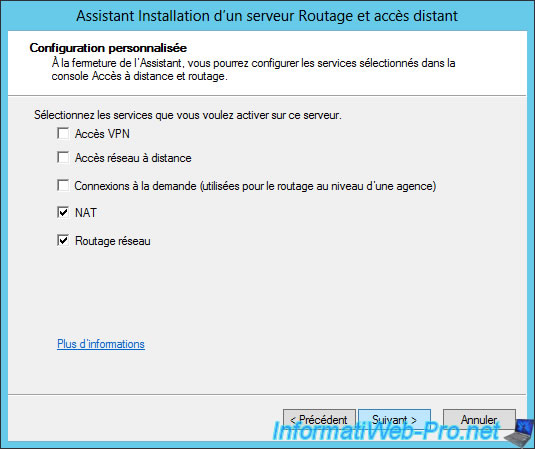
Select «Custom Setup».

Select «NAT» and «Network Routing».
The wizard displays a summary of the configuration.
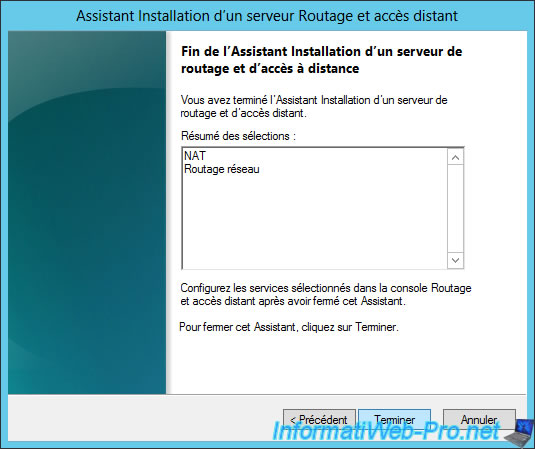
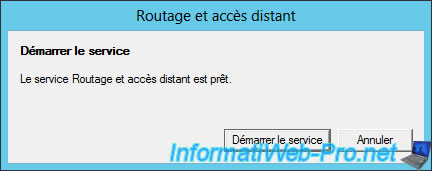
Click «Start Service».
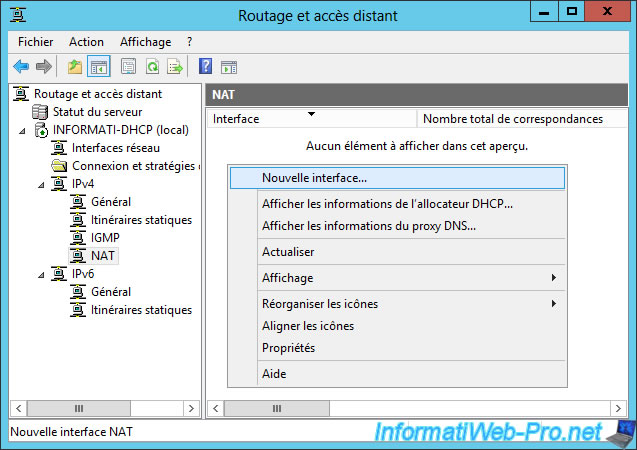
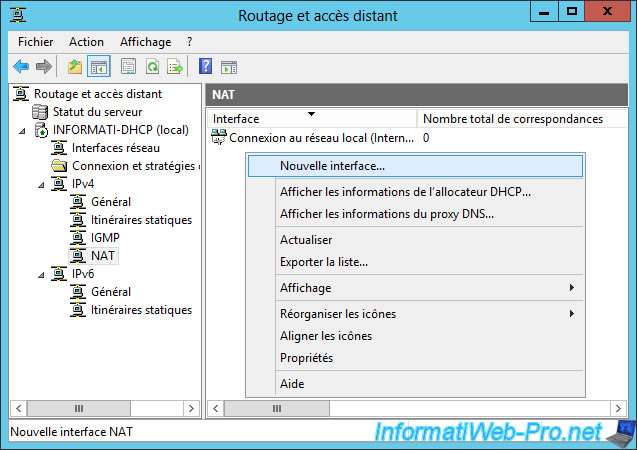
Once the service is started, go to «IPv4 -> NAT», right click on the right side and click on «New interface».
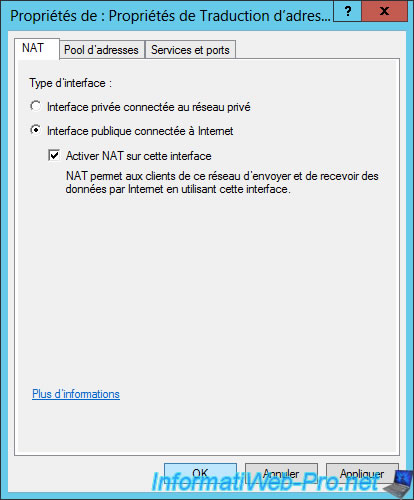
Select the network adapter connected to the Internet.
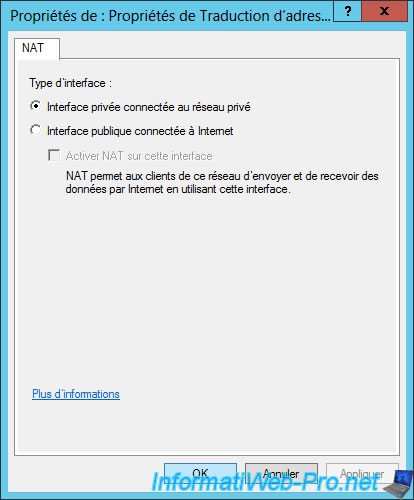
Select «Public interface connected to the Internet» and check «Enable NAT on this interface».
Now, add the interface connected to the private network.
Select the network adapter connected to the private network.
Note : Be careful, don’t confuse it with the «Internal» interface that doesn’t really exist.
Select «Private interface connected to the private network».
4. Configure the DHCP server to use your new router on Windows Server 2012
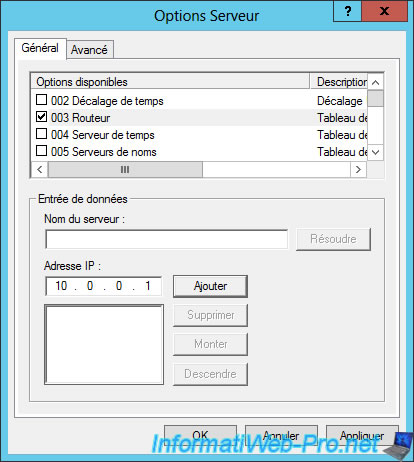
Now that your router is configured, we will configure the router option of our DHCP server.
Note : Set this option in the server options or scope options according to your case

Enter the IP address in the «003 router» option and click «Add».
Thus, clients will receive our IP address as the default gateway. The router that they must use to access the Internet.
On the client computer connected to the switch (private network), you see that it has received an IP address from our DHCP server and the IP address of the default gateway corresponds to the IP address of our server (which acts as a router).
Note : If your client computer doesn’t have Internet access, check that :
- the IP address of the gateway corresponds to the IP address of your server and the server is properly configured.
- the IP address of the DNS server corresponds to the IP address of your server if you installed a DNS server on your server. Otherwise, indicate those of Google (8.8.8.8 and 8.8.4.4) in the «006 DNS Servers» option of your DHCP server.
Windows also has many network services. Let’s see how to use Windows Server 2012 as a router by installing Remote Access for it!
Windows also has many network services and you probably already know that it can become a router or a VPN server. Let’s see how to use Windows Server 2012 as a router by installing Remote Access for it!
Note : The server should have 2 network cards. One card for LAN and another for Internet.
Add Remote Access
To add Remote Access, follow the steps below:
Step 1 — Go to Server Manager > Manage > Add Roles and Features > Next > Select Role-based installation or Feature-based installation > Select Select a server from the server pool > Next.
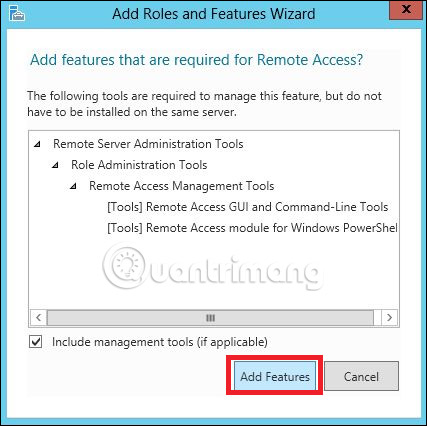
After all the steps above are done, at the Roles list , find Remote Access and select it. A window will open.

Step 2 — Click Add Features , and then click Next.
Step 3 — Click Next.

Step 4 — Choose DirectAccess and VPN (RAS) and Routing.

Step 5 — Click Install and wait until the installation is complete.

Set up for the router
After installation is complete, now let’s see the router’s settings. For this, you need to follow the steps below.
Step 1 — Go to Server Manager> Tools> Routing and Remote Access .

Step 2 — Right-click and then again click the Configure and Enable Routing and Remote Access as shown in the figure below.

Step 3 — Select Network address translation (NAT) option , and then click Next.

Step 4 — Now select the Ethernet card used for the website as shown in the image below and then click Next.

Step 5 — Select I will set up name and address services later after setting up DHCP and DNS, then click Next.

Step 6 — Click the Finish button .

Set up VPN for remote connection
Now let’s see how to set up VPN to allow employees to connect from their home. To do this, follow the steps below:
Step 1 — Go to Server Manager > Tools > Routing and Remote Access > Right-click and then click the Configure and Enable Routing and Remote Access > Custom Configuration , then select Next.

Step 2 — Select VPN Access and then click Next.

Step 3 — Click the Finish button .

See more:
- Configure Print Driver in Windows Server 2012
- Learn about Easy Printing in Windows Server 2012
- How to install the Print Server in Windows Server 2012
5 stars4 stars3 stars2 stars1 star3.8 ★ | 10 Vote
You should read it
- How to install IIS in Windows Server 2012
- Instructions for installing Windows Server 2012 step by step
- Learn about Windows Server 2012 (Part 3)
- Learn Windows Server 2012 (The last part)
- Trick to start and shut down Windows Server 2012 computer in a blink of an eye
- Learn about Windows Server 2012 (Part 2)
- 6 ways to access Control Panel on Windows Server 2012
- How to install software for clients from Windows Server 2012 R2 using Group Policy
- Learn about firewalls, Windows Firewall on Windows Server 2012
- Learn about Windows Server 2012 (Part 1)
- How to install the Print Server in Windows Server 2012
- How to install Hyper-V in Windows Server 2012
Every now and then you need to give a set of lab VMs access to Internet but still keep them on a separate, isolated network.
In this scenario, instead of relying on the physical host platform (Hyper-V / VMware), you use a virtual machine with multiple network adapters to do the routing. One benefit of doing that is that this works the same no matter what virtual platform you are using, and obviously that you don’t need to change the host network configuration (something that can be challenging/scary when remoting into a lab server in another city, like I do 🙂 ).
Back in 2012 I wrote a guide on how to set up either a Linux-based router (still the most stable one) as well as with a Windows Server 2012 router, manually. That post is available via the below, together with video.
Using a virtual router for your lab and test environment
https://deploymentresearch.com/Research/tabid/62/EntryId/81/Using-a-virtual-router-for-your-lab-and-test-environment.aspx
PowerShell cmdlets for Routing and Remote Access (RRAS) in Windows Server 2012 and Windows Server 2012 R2
Installing a router manually may be fun, but doing it using PowerShell is much more fun (and smarter too). Anyway, I though it was about time to write a post on how to setup a virtual router using PowerShell. The prerequisites for this guide is that you have a Windows Server 2012 R2 VM installed with at least two network cars. One connected to the External network (Internet), and one to the internal network where you have your VMs. On both networks there are DHCP servers, but you will obviously set a static IP address on the internal NIC. You don’t want that address to change 🙂
Note: In this guide I’m using Hyper-V is the virtual platform, but this works equally great on VMware as well. Again, I’m not using any gateway features on the host, only in the VM acting as a router.
The VM used for virtual router is named GW01, Windows Server 2012 R2 is installed and is configured in a workgroup, even though it’s perfectly fine to join it to a domain. The reason for using a workgroup machine is that I just wanted a generic router, without any dependencies.

The configuration
Setting up Routing and Remote Access is done in three steps:
- Configuring the internal NIC
- Install the Routing and Remote Access role
- Configure the Routing and Remote Access role
Step1 – Configure the internal network adapter
On my GW01 server I have named the network interfaces External and Internal, listed by running:
Get-NetAdapter | Select Name,MacAddress
To set a static IP address on the internal network adapter you run the following commands:
Get-NetAdapter -Name Internal | New-NetIPAddress -IPAddress 192.168.1.1 -AddressFamily IPv4 -PrefixLength 24Step 2 – Install the Routing and Remote Access role
Once the network adapter is configured it’s time to add the Install the Routing and Remote Access role, as well as its PowerShell cmdlets, by running the following command:
Install-WindowsFeature Routing -IncludeManagementToolsStep 3 – Install the Routing and Remote Access role
Once the Routing and Remote Access role and its PowerShell cmdlets are added, you can now configure it. In this scenario you set up a simple NAT gateway.
To configure the NAT gateway, run the following commands:
Install-RemoteAccess -VpnType Vpn

$ExternalInterface="External"
$InternalInterface="Internal"

cmd.exe /c "netsh routing ip nat install"
cmd.exe /c "netsh routing ip nat add interface $ExternalInterface"
cmd.exe /c "netsh routing ip nat set interface $ExternalInterface mode=full"
cmd.exe /c "netsh routing ip nat add interface $InternalInterface"
If you want to verify the setup you can open the Routing and Remote Access management tool.

Done!
Happy Deployment, Johan