
This is a step-by-step guide on how to configure an Open VPN server on Windows Server 2008/2012 operating systems and connect clients to the created virtual private network.
Open VPN is an open implementation of VPN technology — the Virtual Private Network, which is designed to create virtual private networks between groups of geographically distant nodes on top of an open data transmission channel (Internet). Open VPN is suitable for tasks such as secure remote network connection to a server without opening Internet access to it, as if you are connecting to a host on your local network. Connection security is achieved by Open SSL encryption.
How it works?
When the Open VPN configuration is completed, the server will be able to accept external SSL-protected network connections to the virtual network adapter created at the start of the VPN service (tun / tap) without affecting the traffic processing rules of other interfaces (external Internet adapter, etc.). You can configure client sharing Open VPN to a specific network adapter from those present on the server. In the second part of the instruction, this tunneling of users’ Internet traffic is considered. With this method of forwarding, the host that handles VPN connections will also perform the function of a proxy server (Proxy) — to unify the rules of network activity of users and to route client Internet traffic on its own behalf.
Installing Open VPN on the server
Download and install version of Open VPN that matches your operating system. Run the installer; make sure that all features are selected for installation in the third step of the installation wizard.
Please note that in this instruction further commands are based on the fact that Open VPN is installed in the default directory «C: \ Program Files \ OpenVPN».
We allow adding a virtual network adapter TAP in response to the corresponding request and wait until the installation is complete (it may take several minutes).
Key generation (PKI) of the certification center, server, client; Diffie-Hellman algorithm
To manage the key / certificate pairs of all nodes of the private network being created, use the easy-rsa utility, which works via the command line, by analogy with the Linux console. To work with it, open, run the command line (Keyboard shortcut Win + R, then type cmd and press Enter)
Configuration files.
Running init-config.bat script will generate a new vars.bat file in our easy-rsa directory, this file will contain our configuration:
cd "C:\Program Files\OpenVPN\easy-rsa"
init-config.bat
So now we need to open up the following directory using Windows Explorer: C:\Program Files\OpenVPN\easy-rsa
Now, using Notepad (or another text editor) edit the batch file named vars.bat, we need to configure some variables…
Change the following settings (nearer the bottom of the file) to meet your requirements:
set KEY_COUNTRY=US
set KEY_PROVINCE=CA
set KEY_CITY=SanFrancisco
set KEY_ORG=OpenVPN
set KEY_EMAIL=mail@host.domain
set KEY_CN=changeme
set KEY_NAME=changeme
Note: if the value of the variable contains a space, enclose it in quotes.
Next you should save the changes to the file and then using Command Prompt, run the following commands:
cd "C:\Program Files\OpenVPN\easy-rsa"
vars.bat
clean-all.bat
Certification Center and Server Key Generation
Let’s proceed to the creation of the key / certificate of the certification authority. Run the script:
build-ca.batIn response to the prompts that appear, you can simply press Enter. The only exception is the KEY_CN (Common Name) field — be sure to specify a unique name and insert the same name in the Name field:
Similarly, we generate a server certificate. Here the value of the Common Name and Name fields is SERVER:
.\build-key-server.bat serverNote: the server argument is the name of the future file.
All generated keys will now be asked whether to sign the generated certificate (Sign the certificate) on behalf of the certification authority. Answer y (yes).
Generating client keys and certificates
For each VPN client, you need to generate a separate SSL certificate.
There is an option in the Open VPN configuration, by enabling which you can use one certificate for several clients (see the server.ovpn file -> «dublicate-cn» file), but this is not recommended from a security point of view. Certificates can be generated in the future, as new customers connect. Therefore, now we will create only one for client1:
Run the following commands to generate client keys:
cd \
cd "C:\Program Files\OpenVPN\easy-rsa"
.\build-key.bat client1
Note: client1 argument is the name of the future file.
In the Common Name field, specify the name of the client (in our case client1).
Diffie Hellman Parameters
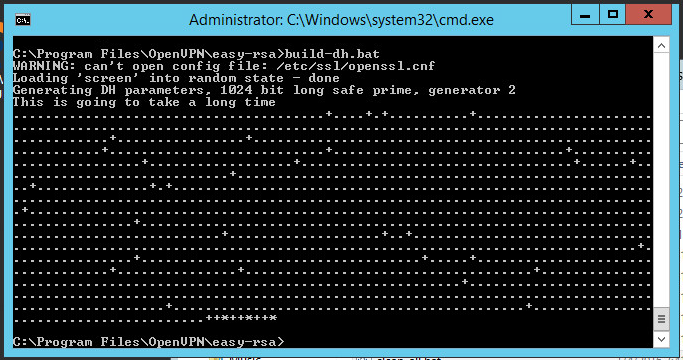
To complete the encryption setting, you need to run the Diffie-Hellman parameter generation script:
.\build-dh.batDisplaying information about creating parameters looks like this:
Transferring generated keys / certificates
The generated certificates are located in the C: \ Program Files \ OpenVPN \ easy-rsa \ keys directory. Copy the files listed below to the directory C:\Program Files\OpenVPN\config:
- ca.crt
- dh2048.pem/dh1048.pem
- server.crt
- server.key
Open VPN server configuration
Let’s proceed to the configuration of the VPN server directly, use our configuration file with the name server.ovpn and place it in the C: \ Program Files \ OpenVPN \ config directory.
copy "C:\Program Files\OpenVPN\sample-config\server.ovpn" "C:\Program Files\OpenVPN\config"
copy "C:\Program Files\OpenVPN\sample-config\client.ovpn" "C:\Program Files\OpenVPN\config"
Open the file; find the path to the keys (see below). Check the paths to the previously copied certificates ca.crt, dh1024.pem / dh2048.pem, server.key, server.crt and, if necessary, change:
port 1194
proto udp
dev tun
server 10.8.0.0 255.255.255.0
ca "C:\\Program Files\\OpenVPN\\config\\ca.crt"
cert "C:\\Program Files\\OpenVPN\\config\\server.crt"
key "C:\\Program Files\\OpenVPN\\config\\server.key"
dh "C:\\Program Files\\OpenVPN\\config\\dh2048.pem"
push "redirect-gateway def1"
push "dhcp-option DNS 8.8.8.8"
keepalive 10 120
comp-lzo
persist-key
persist-tun
verb 3
Save the file.
Now you need to allow traffic forwarding between adapters. Follow these steps: Control Panel -> Network and Internet -> Network and Sharing Center -> Change adapter settings. Choose an adapter that looks to the external Internet (TAP-adapter is responsible for the VPN connection). In our example, this is Ethernet 2.
Double-click the adapter Properties and go to the Access tab, tick all the checkboxes. Save the changes.
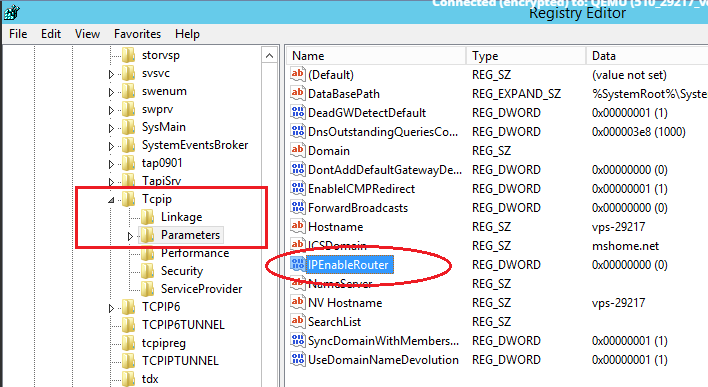
Next you need to enable IP addressing.
Using Windows Search, locate the REGEDIT.exe application.
In the tree, find the directory HKEY_LOCAL_MACHINE \ SYSTEM \ CurrentControlSet \ Services \ Tcpip \ Parameters. In the right part of the window, find the IPEnableRouter variable, double-click into the value editing window and change it to 1, thereby allowing addressing on the VPS.
Autorun Open VPN
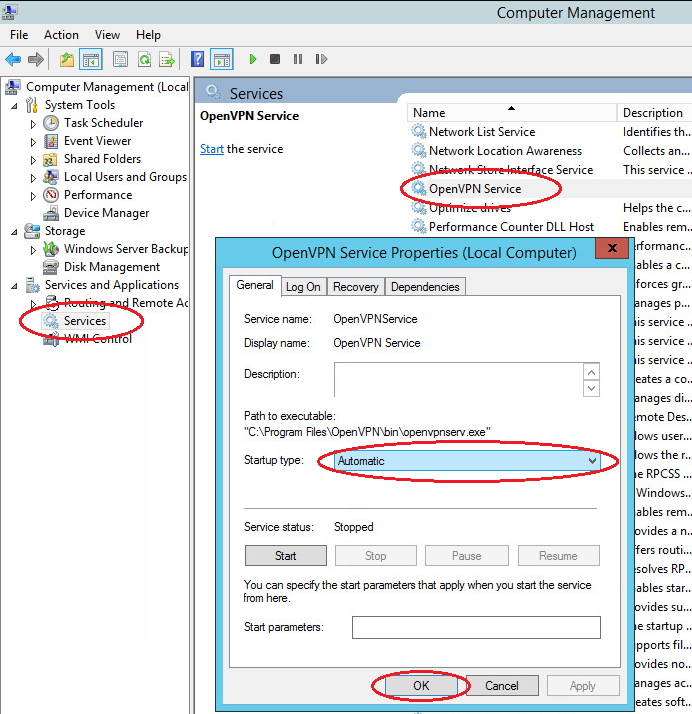
Immediately configure the Open VPN service to autorun at system startup.
Open the Windows Services. Find in the list Open VPN -> right-click -> Properties -> Start: Automatic
This completes the basic configuration of the virtual private network server. Find the file C: \ Program Files \ OpenVPN \ config \ server.ovpn -> right-click -> «Start OpenVPN on this config» to start the virtual private network server and the configuration file we prepared.
Open VPN Client Configuration
Open VPN client applications are available for all popular operating systems: Windows / Linux / iOS / Android. For MacOS, the Tunnelblick client is used. All of these applications work with the same configuration files. Only some differences of several options are possible. You can learn about them by examining the documentation for your Open VPN client. In this guide, we will look at connecting a Windows client using the same distribution package of the program that we installed on the server. When using applications for other operating systems, the setup logic is similar.
- Install the current version of Open VPN on the client computer.
- Copy to the directory C: \ Program Files \ OpenVPN \ config the client certificate files created earlier on the server (2 certificates with the .crt extension and the key with the .key extension) and use our client.ovpn client configuration file. After copying to the user’s device, the last file is deleted from the server or transferred from the config folder to avoid confusion in the future.
-
Open the client.ovpn file. Find the line remote my-server-1 1194 and specify the ip-address or domain name of the vpn-server in it:
remote <ip-address> 1194</ip-address>For example:
remote 83.166.241.155 1194 -
Find ways to certificates. Specify in it the paths to the ca.crt, client1.key, client1.crt certificates copied earlier as in the example below:
# See the server config file for more # description. It's best to use # a separate .crt/.key file pair # for each client. A single ca # file can be used for all clients. ca "C:\\Program Files\\OpenVPN\\config\\ca.crt" cert "C:\\Program Files\\OpenVPN\\config\\client1.crt" key "C:\\Program Files\\OpenVPN\\config\\client1.key" # This file should be kept secret - Save the file. Client setup complete.
Verify Windows Firewall Rules
Attention! For the correct operation of the OpenVPN service, it is required that the corresponding ports be opened on the server (by default UDP 1194). Check the relevant rule in your Firewall: Windows Firewall or third-party anti-virus software.
Check OpenVPN connections
Start the Open VPN server, to do this, go to the directory C: \ Program Files \ OpenVPN \ config and select the server configuration file (we have server.ovpn -> right-click -> «Start OpenVPN on this config file»).
Start the client, to do this, go to the directory C: \ Program Files \ OpenVPN \ config and select the client configuration file (we have client.ovpn -> right-click -> «Start Open VPN on this config file»).
The screen displays the connection status window. In a few seconds it will be minimized to tray. The green indicator of the Open VPN shortcut in the notification area indicates a successful connection.
Check the accessibility from the client device of the OpenVPN server using its internal private network address:
- Press the Win + R keys and type cmd in the window that appears to open the command line.
-
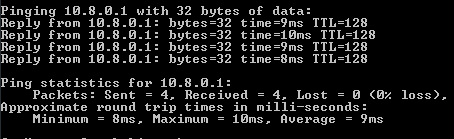
Execute the ping command to the address of our server in a virtual private network (10.8.0.1):
ping 10.8.0.1If the VPN is configured correctly, the packet exchange with the server will start.

- With the help of the tracert utility, we will check on which route the packets from the client go. In the console, enter the following command:
From the result of the utility, we see that the packets are first sent to the VPN server, and only then to the external network.
Now you have a ready-to-work virtual private network that allows you to make secure network connections between its clients and the server using open and geographically distant points of connection to the Internet.
OpenVPN is an open-source software suite that is one of the most popular and easiest solutions for implementing a secure VPN. OpenVPN allows you to combine a server and clients (even those behind a NAT or firewall) into a single network, or to connect networks of remote offices. You can deploy a server part of OpenVPN almost in all available operating systems, including Linux, Windows, MacOS, and *BSD. You can install an OpenVPN server on Windows Server 2022/20119/2016/2012R2 or even on a computer running desktop Windows edition (Windows 10 or 11).
In this article, we will show how to install and configure an OpenVPN server on a computer running Windows 10, set up an OpenVPN client on another Windows device, and establish a secure VPN connection.
Contents:
- How to Install OpenVPN Server Service on Windows
- Create OpenVPN Encryption Keys and Certificates
- OpenVPN Server Configuration File for Windows
- Configuring OpenVPN Client on Windows
OpenVPN is extremely popular in the SOHO segment to provide access to remote employees: you don’t need to buy any special hardware, licenses to build a VPN server based on Windows Server, expose RDP port to the Internet, and can easily protect against RDP brute force attacks.
How to Install OpenVPN Server Service on Windows
Download the OpenVPN MSI installer for your Windows version from the official website (https://openvpn.net/community-downloads/). In our case, this is OpenVPN-2.5.7-I602-amd64.msi (https://swupdate.openvpn.org/community/releases/OpenVPN-2.5.7-I602-amd64.msi).
Run the setup and select OpenVPN Service to install. If you want your OpenVPN server to start automatically, you may not install OpenVPN GUI.
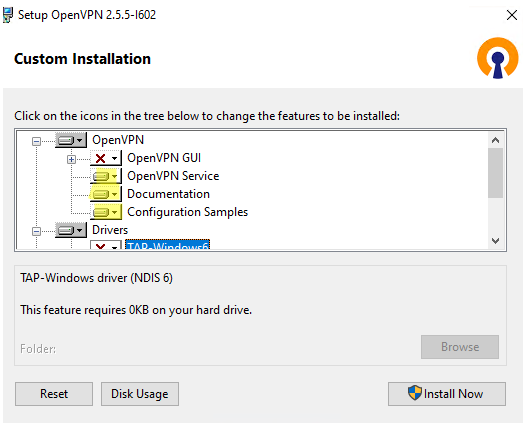
OpenVPN 2.5 (and newer) supports the WinTun driver from the WireGuard developers. This driver is faster that the default TAP OpenVPN driver. We recommend installing Wintun driver instead of TAP-Windows6.
Install the EasyRSA Certificate Management Scripts OpenSSL utility.
Complete the installation.
By default, OpenVPN is installed to C:\Program Files\OpenVPN.
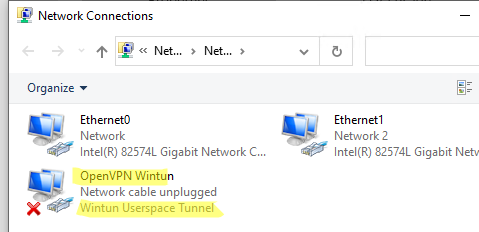
When the installation is complete, you will see a new network adapter Wintun Userspace Tunnel. This adapter is disabled if the OpenVPN service is not running.
Create OpenVPN Encryption Keys and Certificates
OpenVPN is based on OpenSSL encryption. This means that RSA3 keys and certificates must be used to establish a network connection between the client and the VPN server.
Open the command prompt and go to easy-rsa directory:
cd "C:\Program Files\OpenVPN\easy-rsa"
Create a copy of the file:
copy vars.example vars
Open the vars file in any text editor. Check the paths to the OpenVPN and EaseRSA working folders.
Be sure to edit the EASYRSA_TEMP_DIR variable as shown below:
set_var EASYRSA_TEMP_DIR "$EASYRSA_PKI/temp"

You may fill in the certificate fields (optional):
set_var EASYRSA_REQ_COUNTRY "DE"
set_var EASYRSA_REQ_PROVINCE "BY"
set_var EASYRSA_REQ_CITY "MUN"
set_var EASYRSA_REQ_ORG "WOSHUB-Com"
set_var EASYRSA_REQ_EMAIL "[email protected]"
set_var EASYRSA_REQ_OU "IT dept"
Set certificate expiration dates:
set_var EASYRSA_CA_EXPIRE 3650
set_var EASYRSA_CERT_EXPIRE 825
Save the file and run the command:
EasyRSA-Start.bat
All of the following commands must be run in the EasyRSA shell:
Initialize PKI:
./easyrsa init-pki
You should see this message:
init-pki complete; you may now create a CA or requests.
Your newly created PKI dir is: C:/Program Files/OpenVPN/easy-rsa/pki
Then generate the root CA:
./easyrsa build-ca
Enter a CA password twice:
CA creation is complete and you may now import and sign cert requests.
The command above has created:
- A root certificate of the Certification Authority:
C:\Program Files\OpenVPN\easy-rsa\pki\ca.crt - A Certification Authority key: C
:\Program Files\OpenVPN\easy-rsa\pki\private\ca.key
Then generate a certificate request and a key for your OpenVPN server:
./easyrsa gen-req server nopass
The tool will generate two files:
req: C:/Program Files/OpenVPN/easy-rsa/pki/reqs/server.req
key: C:/Program Files/OpenVPN/easy-rsa/pki/private/server.key
Sign the request to issue a server certificate using your CA:
./easyrsa sign-req server server
Confirm the data by typing yes.
Then enter the CA password for your root CA.
The server.crt file will appear in the issued folder (C:\Program Files\OpenVPN\easy-rsa\pki\issued\server.crt).

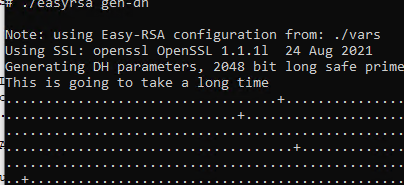
Then you can generate Diffie-Hellman keys (takes a long time):
./easyrsa gen-dh
To provide additional protection for your VPN server, it is recommended to enable tls-auth. This feature allows using HMAC signatures in SSL/TLS handshake, thus initiating an extra integrity check. Packets without such a signature will be dropped by the VPN server. This will protect you against VPN server port scanning, DoS attacks, SSL/TLS buffer overflows, etc.
Generate a tls-auth key:
cd C:\Program Files\OpenVPN\bin
 openvpn --genkey secret ta.key
The C:\Program Files\OpenVPN\bin\ta.key file will appear. Move it to C:\Program Files\OpenVPN\easy-rsa\pki folder.
Then you can generate keys for your OpenVPN clients. Each client connecting to your VPN server must have its own key pair.
There are several ways to generate OpenVPN keys and distribute them to clients.
In the example below, we will create a client key on the server and protect it with a password (PEM pass phrase):
./easyrsa gen-req testuser1
 ./easyrsa sign-req client testuser1
Copy the key file (C:\Program Files\OpenVPN\easy-rsa\pki\private\testuser1.key) to the client computer tell the user the password (voice, email, SMS). The client can disable the password protection for the key:
openssl rsa -in "C:\Program Files\OpenVPN\easy-rsa\pki\private\testuser1.key"-out "C:\Program Files\OpenVPN\easy-rsa\pki\private\testuser1_use.key"

If you want to generate a key that is not password protected, you need to run the command:
./easyrsa gen-req testuser2 nopass
You may create any number of keys and certificates for users on your VPN server. Generate keys and certificates for other clients in the same way.
You can revoke compromised client certificates:
cd C:\Program Files\OpenVPN\easy-rsa
 EasyRSA-Start.bat
 ./easyrsa revoke testuser2
Therefore, we have generated a set of keys and certificates for the OpenVPN server. Now you can configure and run your VPN service.
OpenVPN Server Configuration File for Windows
Copy the configuration file template for the OpenVPN server:
copy "C:\Program Files\OpenVPN\sample-config\server.ovpn" "C:\Program Files\OpenVPN\config-auto\server.ovpn"
Open server.ovpn in any text editor and make your settings. I am using the following OpenVPN configuration:
# Specify a port, a protocol and a device type
port 1194
proto udp
dev tun
# Specify paths to server certificates
ca "C:\\Program Files\\OpenVPN\\easy-rsa\\pki\\ca.crt"
cert "C:\\Program Files\\OpenVPN\\easy-rsa\\pki\\issued\\server.crt"
key "C:\\Program Files\\OpenVPN\\easy-rsa\\pki\\private\\server.key"
dh "C:\\Program Files\\OpenVPN\\easy-rsa\\pki\\dh.pem"
# Specify the settings of the IP network your VPN clients will get their IP addresses from
server 10.24.1.0 255.255.255.0
# If you want to allow your clients to connect using the same key, enable the duplicate-cn option (not recommended)
# duplicate-cn
# TLS protection
tls-auth "C:\\Program Files\\OpenVPN\\easy-rsa\\pki\\ta.key" 0
cipher AES-256-GCM
# Other options
keepalive 20 60
persist-key
persist-tun
status "C:\\Program Files\\OpenVPN\\log\\status.log"
log "C:\\Program Files\\OpenVPN\\log\\openvpn.log"
verb 3
mute 20
windows-driver wintun
Save the file.
OpenVPN allows you to use both TCP and UDP protocols. In this example, we have run OpenVPN on UDP port 1194. It is recommended to use UDP as it is optimal for both performance and security.
Remember to open ports in the firewall for the OpenVPN port number you have specified on the client and the server. You can open the port in Windows Defender using PowerShell.
Firewall rule for the OpenVPN server:
New-NetFirewallRule -DisplayName "AllowOpenVPN-In" -Direction Inbound -Protocol UDP –LocalPort 1194 -Action Allow
The rule for the client:
New-NetFirewallRule -DisplayName "AllowOpenVPN-Out" -Direction Outbound -Protocol UDP –LocalPort 1194 -Action Allow
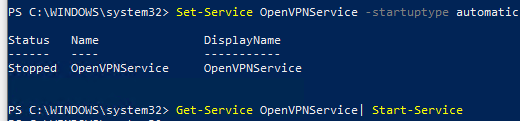
Then run the OpenVPN service and change its startup type to automatic. Use the PowerShell to enable the service:
Set-Service OpenVPNService –startuptype automatic –passthru
 Get-Service OpenVPNService| Start-Service

Open the network connections dialog (ncpa.cpl) and make sure that OpenVPN Wintun virtual adapter is now enabled. If it is not, check the log file C:\Program Files\OpenVPN\log\server.log.
If you see the following error in the log when starting OpenVPN:
Options error: In C:\Program Files\OpenVPN\config-auto\server.ovpn:1: Maximum option line length (256) exceeded, line starts with…
Change line break character to Windows CRLF (in Notepad++, select Edit -> EOL Conversion -> Windows CR LF) in server.ovpn. Save the file and restart the OpenVPNService.
This OpenVPN configuration allows remote clients to access the server resources only. Other computers and services in the server‘s local network are not available for remote clients. In order to allow OpenVPN clients to access the internal LAN, enable the IPEnableRouter option in the registry (enables IP routing in Windows including routing between Hyper-V networks, and allows you to use port-forwarding):
reg add "HKLM\SYSTEM\CurrentControlSet\Services\Tcpip\Parameters" /v IPEnableRouter /t REG_DWORD /d 1 /f
Add the routes to your local IP network to the server configuration file:
push "route 10.24.1.0 255.255.255.0"
push "route 192.168.31.0 255.255.255.0"
If needed, assign DNS server addresses to the client:
push "dhcp-option DNS 192.168.31.10"
push "dhcp-option DNS 192.168.31.11"
If you want to redirect all client requests (including the Internet traffic) to your OpenVPN server, add the option:
push "redirect-gateway def1"
Configuring OpenVPN Client on Windows
Create a template configuration file for a VPN client (based on client.ovpn template) on your server with the following settings (the file name is testuser1.ovpn):
client
dev tun
proto udp
remote your_vpn_server_address 1194
resolv-retry infinite
nobind
persist-key
persist-tun
ca ca.crt
cert testuser1.crt
key testuser1.key
remote-cert-tls server
tls-auth ta.key 1
cipher AES-256-GCM
connect-retry-max 25
verb 3
Specify a public IP address or a DNS name of your OpenVPN server in the remote directive.
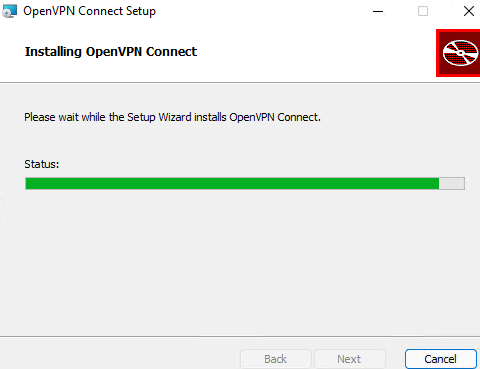
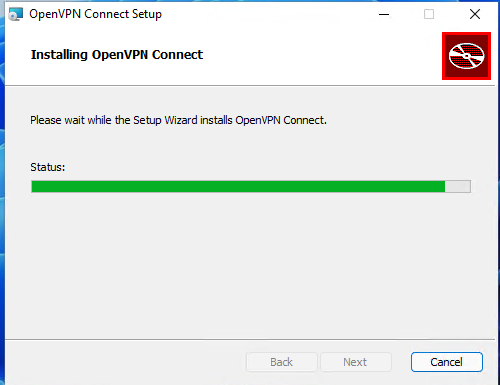
Download and install OpenVPN Connect for Windows (https://openvpn.net/downloads/openvpn-connect-v3-windows.msi).
Then copy the following files from your server to the computer with the installed OpenVPN client:
- ca.crt
- testuser1.crt
- testuser1.key
- dh.pem
- ta.key
- testuser1.ovpn
Import *.ovpn profile file and try to connect to your VPN server.
If you have set it correctly, you will see the image below:
Check the OpenVPN connection log on the client: C:\Program Files\OpenVPN Connect\agent.log
Mon Jul 17 08:09:30 2022 proxy_auto_config_url
Mon Jul 17 08:09:31 2022 TUN SETUP
TAP ADAPTERS:
guid='{25EE4A55-BE90-45A0-88A1-8FA8FEF24C42}' index=22 name='Local Area Connection'
Open TAP device "Local Area Connection" PATH="\\.\Global\{25EE4A55-BE90-45A0-88A1-8FA8FEF24C42}.tap" SUCCEEDED
TAP-Windows Driver Version 9.24
ActionDeleteAllRoutesOnInterface iface_index=22
netsh interface ip set interface 22 metric=1
Ok.
netsh interface ip set address 22 static 10.24.1.10 255.255.255.252 gateway=10.24.1.5 store=active
IPHelper: add route 10.24.1.1/32 22 10.24.1.5 metric=-1
The client has successfully connected to the VPN server and received the IP address 10.24.1.10.
Now check the OpenVpn log on the server-side (C:\Program Files\OpenVPN\log\openvpn.log). Here you can also see that the client with the testuser1 certificate has successfully connected to the server.
2022-07-17 08:09:35 192.168.13.20:55648 [tesuser1] Peer Connection Initiated with [AF_INET6]::ffff:192.168.13.20:55648
2022-07-17 08:09:35 tesuser1/192.168.13.20:55648 MULTI_sva: pool returned IPv4=10.24.1.10, IPv6=(Not enabled)
2022-07-17 08:09:35 tesuser1/192.168.13.20:55648 MULTI: Learn: 10.24.1.10 -> testuser1/192.168.13.20:55648
2022-07-17 08:09:35 tesuser1/192.168.13.20:55648 MULTI: primary virtual IP for tesuser1/192.168.13.20:55648: 10.24.1.10
OpenVPN – это набор open source программ, который заслуженно является одним из самых популярных и легких решений для реализации защищенной VPN сети. OpenVPN позволяет объединить в единую сеть сервер и клиентов (даже находящиеся за NAT или файерволами), или объединить сети удаленных офисов. Серверную часть OpenVPN можно развернуть практически на всех доступных операционных системах (пример настройки OpenVPN на Linux). Вы можете установить OpenVPN сервер даже на обычный компьютер с десктопной редакцией Windows 10.
В этой статье, мы покажем, как установить OpenVPN сервер на компьютер с Windows 10, настроить OpenVPN клиент на другом Windows хосте и установить защищенное VPN подключение.
Содержание:
- Установка службы OpenVPN сервера в Windows
- Создаем ключи шифрования и сертификаты для OpenVPN
- Конфигурационный файл OpenVPN сервера в Windows
- Настройка OpenVPN клиента в Windows
Установка службы OpenVPN сервера в Windows
Скачайте MSI установщик OpenVPN для вашей версии Windows с официального сайта (https://openvpn.net/community-downloads/). В нашем случае это OpenVPN-2.5.5-I602-amd64.msi (https://swupdate.openvpn.org/community/releases/OpenVPN-2.5.5-I602-amd64.msi).
Запустите установку.
Если вы планируете, OpenVPN сервер работал в автоматическом режиме, можно не устанавливать OpenVPN GUI. Обязательно установите OpenVPN Services.
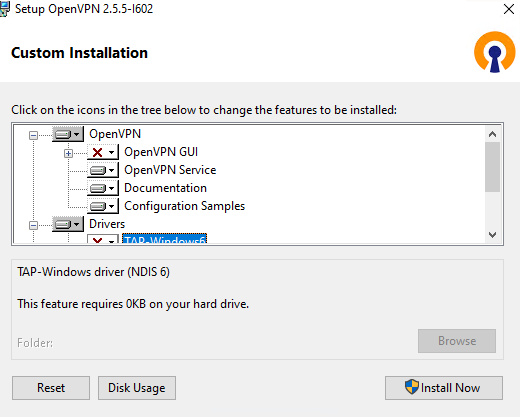
Начиная с версии OpenVPN 2.5, поддерживается драйвер WinTun от разработчиков WireGuard. Считается, что этот драйвер работает быстрее чем классический OpenVPN драйвер TAP. Установите драйвер Wintun, откажитесь от установки TAP-Windows6.
Установите OpenSSL утилиту EasyRSA Certificate Management Scripts.

Запустите установку.
По умолчанию OpenVPN устаналивается в каталог C:\Program Files\OpenVPN.
После окончания установки появится новый сетевой адаптер типа Wintun Userspace Tunnel. Этот адаптер отключен, если служба OpenVPN не запущена.
Создаем ключи шифрования и сертификаты для OpenVPN
OpenVPN основан на шифровании OpenSSL. Это означает, что для обмена трафиком между клиентом и серверов VPN нужно сгенерировать ключи и сертификаты с использованием RSA3.
Откройте командную строку и перейдите в каталог easy-rsa:
cd C:\Program Files\OpenVPN\easy-rsa
Создайте копию файла:
copy vars.example vars
Откройте файл vars с помощью любого текстового редактора. Проверьте пути к рабочим директориям.
Обязательно поправьте переменную EASYRSA_TEMP_DIR следующим образом:
set_var EASYRSA_TEMP_DIR "$EASYRSA_PKI/temp"

Можете заполнить поля для сертификатов (опционально)
set_var EASYRSA_REQ_COUNTRY "RU"
set_var EASYRSA_REQ_PROVINCE "MSK"
set_var EASYRSA_REQ_CITY "MSK"
set_var EASYRSA_REQ_ORG "IT-Company"
set_var EASYRSA_REQ_EMAIL " [email protected] "
set_var EASYRSA_REQ_OU " IT department "

Срок действия сертификатов задается с помощью:
#set_var EASYRSA_CA_EXPIRE 3650
#set_var EASYRSA_CERT_EXPIRE 825
Сохраните файл и выполните команду:
EasyRSA-Start.bat
Следующие команды выполняются в среде EasyRSA Shell:
Инициализация PKI:
./easyrsa init-pki
Должна появится надпись:
init-pki complete; you may now create a CA or requests.
Your newly created PKI dir is: C:/Program Files/OpenVPN/easy-rsa/pki
Теперь нужно сгенерировать корневой CA:
./easyrsa build-ca
Задайте дважды пароль для CA:
CA creation complete and you may now import and sign cert requests.
Данная команда сформировала:
- Корневой сертификат центра сертификации: «C:\Program Files\OpenVPN\easy-rsa\pki\ca.crt»
- Ключ центра сертификации «C:\Program Files\OpenVPN\easy-rsa\pki\private\ca.key»
Теперь нужно сгенерировать запрос сертификата и ключ для вашего сервера OpenVPN:
./easyrsa gen-req server nopass
Утилита сгенерирует два файла:
req: C:/Program Files/OpenVPN/easy-rsa/pki/reqs/server.req
key: C:/Program Files/OpenVPN/easy-rsa/pki/private/server.key
Подпишем запрос на выпуск сертификата сервера с помощью нашего CA:
./easyrsa sign-req server server
Подтвердите правильность данных, набрав yes.
Затем введите пароль CA от корневого CA.
В каталоге issued появится сертификат сервера («C:\Program Files\OpenVPN\easy-rsa\pki\issued\server.crt»)

Теперь можно создать ключи Диффи-Хеллмана (займет длительное время):
./easyrsa gen-dh
Для дополнительной защиты VPN сервера желательно включить tls-auth. Данная технология позволяет использовать подписи HMAC к handshake-пакетам SSL/TLS, инициируя дополнительную проверку целостности. Пакеты без такой подписи будут отбрасываться VPN сервером. Это защитит вас от сканирования порта VPN сервера, DoS атак, переполнения буфера SSL/TLS.
Сгенерируйте ключ tls-auth:
cd C:\Program Files\OpenVPN\bin
openvpn --genkey secret ta.key
Должен появиться файл «C:\Program Files\OpenVPN\bin\ta.key». Переместите его в каталог C:\Program Files\OpenVPN\easy-rsa\pki
Теперь можно сформировать ключи для клиентов OpenVPN. Для каждого клиента, который будет подключаться к вашему серверу нужно создать собственные ключи.
Есть несколько способов генерации ключей и передачи их клиентам. В следующем примере, мы создадим на сервере ключ клиента и защитим его паролем:
./easyrsa gen-req kbuldogov
./easyrsa sign-req client kbuldogov
Данный ключ («C:\Program Files\OpenVPN\easy-rsa\pki\private\kbuldogov.key») нужно передать клиенту и сообщить пароль. Клиент может снять защиту паролем для ключа:
openssl rsa -in "C:\Program Files\OpenVPN\easy-rsa\pki\private\kbuldogov.key"-out "C:\Program Files\OpenVPN\easy-rsa\pki\private\kbuldogov_use.key"

Если вы хотите сгенерировать ключ, не защищенный паролем, нужно выполнить команду:
./easyrsa gen-req имяклиента nopass
На сервере с OpenVPN вы можете создать неограниченное количество ключей и сертификатов для пользователей. Аналогичным образом сформируйте ключи и сертфикаты для других клиентов.
Вы можете отохвать скомпрометированные сертификаты клиентов:
cd C:\Program Files\OpenVPN\easy-rsa
EasyRSA-Start.bat
./easyrsa revoke kbuldogov
Итак, мы сгенерировали набор ключей и сертификатов для OpenVPN сервера. Теперь можно настроить и запустить службу OpenVPN.
Конфигурационный файл OpenVPN сервера в Windows
Скопируйте типовой конфигурационный файл OpenVPN сервера:
copy "C:\Program Files\OpenVPN\sample-config\server.ovpn" "C:\Program Files\OpenVPN\config-auto\server.ovpn"
Откройте файл server.ovpn в любом текстовом редакторе и внесите свои настройки. Я использую следующий конфиг для OpenVPN:
# Указываем порт, протокол и устройство
port 1194
proto udp
dev tun
# Указываем пути к сертификатам сервера
ca "C:\\Program Files\\OpenVPN\\easy-rsa\\pki\\ca.crt"
cert "C:\\Program Files\\OpenVPN\\easy-rsa\\pki\\issued\\server.crt"
key "C:\\Program Files\\OpenVPN\\easy-rsa\\pki\\private\\server.key"
dh "C:\\Program Files\\OpenVPN\\easy-rsa\\pki\\dh.pem"
# Указываем настройки IP сети, адреса из которой будет будут получать VPN клиенты
server 10.24.1.0 255.255.255.0
#если нужно разрешить клиентам подключаться под одним ключом, нужвно включить опцию duplicate-cn (не рекомендуется)
#duplicate-cn
# TLS защита
tls-auth "C:\\Program Files\\OpenVPN\\easy-rsa\\pki\\ta.key" 0
cipher AES-256-GCM
# Другая параметры
keepalive 20 60
persist-key
persist-tun
status "C:\\Program Files\\OpenVPN\\log\\status.log"
log "C:\\Program Files\\OpenVPN\\log\\openvpn.log"
verb 3
mute 20
windows-driver wintun
Сохраните файл.
OpenVPN позволяет использовать как TCP, так и UDP для подключения. В этом примере я запустил OpenVPN на 1194 UDP. Рекомендуется использовать протокол UDP, это оптимально как с точки зрения производительности, так и безопасности.
Не забудьте открыть на файерволе порты для указанного вами порта OpenVPN на клиенте и на сервере. Можно открыть порты в Windows Defender с помощью PowerShell.
Правило для сервера:
New-NetFirewallRule -DisplayName "AllowOpenVPN-In" -Direction Inbound -Protocol UDP –LocalPort 1194 -Action Allow
Правило для клиента:
New-NetFirewallRule -DisplayName "AllowOpenVPN-Out" -Direction Outbound -Protocol UDP –LocalPort 1194 -Action Allow
Теперь нужно запустить службу OpenVPN и изменить тип ее запуска на автоматический. Воспользуйтесь таким командами PowerShell, чтобы включить службу:
Set-Service OpenVPNService –startuptype automatic –passthru
Get-Service OpenVPNService| Start-Service
Откройте панель управления, и убедитесь, что виртуальный сетевой адаптер OpenVPN Wintun теперь активен. Если нет, смотрите лог «C:\Program Files\OpenVPN\log\server.log»
Если при запуске OpenVPN вы видите в логе ошибку:
Options error: In C:\Program Files\OpenVPN\config-auto\server.ovpn:1: Maximum option line length (256) exceeded, line starts with..
Смените в файле server.ovpn символы переноса строки на Windows CRLF (в notepad++ нужно выбрать Edit -> EOL Conversion -> Windows CR LF). Сохраните файл, перезапустите службу OpevVPNService.
Данный конфиг позволит удаленным клиентам получить доступ только к серверу, но другие компьютеры и сервисы в локальной сети сервера для них недоступны. Чтобы разрешить клиентам OpenVPN получить доступ к внутренней сети нужно:
Включить опцию IPEnableRouter в реестре (включает IP маршрутизацию в Windows, в том числе включает маршрутизацию меду сетями Hyper-V): reg add «HKLM\SYSTEM\CurrentControlSet\Services\Tcpip\Parameters» /v IPEnableRouter /t REG_DWORD /d 1 /f
Добавьте в конфгурационный файл сервера OpenVPN маршруты до внутренней IP сети:
push "route 10.24.1.0 255.255.255.0"
push "route 192.168.100.0 255.255.255.0"
Если нужно, назначьте клиенту адреса DNS серверов:
push "dhcp-option DNS 192.168.100.11"
push "dhcp-option DNS 192.168.100.12"
Если нужно завернуть все запросы клиента (в том числе Интернет трафик) на ваш OpenVPN сервер, добавьте опцию:
push "redirect-gateway def1"
Настройка OpenVPN клиента в Windows
Создайте на сервере шаблонный конфигурационный файла для клиента VPN (на базе iшаблона client.ovpn) со следующими параметрами (имя файла kbuldovov.ovpn)
client
dev tun
proto udp
remote your_vpn_server_address 1194
resolv-retry infinite
nobind
persist-key
persist-tun
ca ca.crt
cert kbuldogov.crt
key kbuldogov.key
remote-cert-tls server
tls-auth ta.key 1
cipher AES-256-GCM
connect-retry-max 25
verb 3
В директиве remote указывается публичный IP адрес или DNS имя вашего сервера OpenVPN.
Скачайте и установите клиент OpenVPN Connect для Windows (https://openvpn.net/downloads/openvpn-connect-v3-windows.msi).
Теперь на компьютер с клиентом OpenVPN нужно с сервера скопировать файлы:
- ca.crt
- kbuldogov.crt
- kbuldogov.key
- dh.pem
- ta.key
- kbuldogov.ovpn
Теперь импортируйте файл с профилем *.ovpn и попробуйте подключиться к вашему VPN серверу.
Если все настроено правильно, появится такая картинка.
Проверьте теперь лог OpenVPN на клиенте «C:\Program Files\OpenVPN Connect\agent.log»
Mon Dec 27 08:09:30 2021 proxy_auto_config_url
Mon Dec 27 08:09:31 2021 TUN SETUP
TAP ADAPTERS:
guid='{25EE4A55-BE90-45A0-88A1-8FA8FEF24C42}' index=22 name='Local Area Connection'
Open TAP device "Local Area Connection" PATH="\\.\Global\{25EE4A55-BE90-45A0-88A1-8FA8FEF24C42}.tap" SUCCEEDED
TAP-Windows Driver Version 9.24
ActionDeleteAllRoutesOnInterface iface_index=22
netsh interface ip set interface 22 metric=1
Ok.
netsh interface ip set address 22 static 10.24.1.6 255.255.255.252 gateway=10.24.1.5 store=active
IPHelper: add route 10.24.1.1/32 22 10.24.1.5 metric=-1
Клиент успешно подключится к OpenVPN серверу и получил IP адрес 10.24.1.6.
Проверьте теперь лог на сервере («C:\Program Files\OpenVPN\log\openvpn.log»). Здесь также видно, что клиент с сертификатом kbuldogov успешно подключится к вашему серверу.
2021-12-27 08:09:35 192.168.13.202:55648 [kbuldogov] Peer Connection Initiated with [AF_INET6]::ffff:192.168.13.202:55648
2021-12-27 08:09:35 kbuldogov/192.168.13.202:55648 MULTI_sva: pool returned IPv4=10.24.1.6, IPv6=(Not enabled)
2021-12-27 08:09:35 kbuldogov/192.168.13.202:55648 MULTI: Learn: 10.24.1.6 -> kbuldogov/192.168.13.202:55648
2021-12-27 08:09:35 kbuldogov/192.168.13.202:55648 MULTI: primary virtual IP for kbuldogov/192.168.13.202:55648: 10.24.1.6
Installing the openvpn server software. After some research, i find it's really an issue.
Incredible Setup Openvpn Windows Server 2012 R2 References, Just for two machines to talk to each other). Openvpn uses osi layer 2.
OpenVPN Server and Client Setup on Windows Linux From lisenet.com
Open the server manager and click on manage. I have experience with windows server from 2000 to. This means that rsa3 keys and certificates must be used to establish a network connection between the client and the vpn server. Open server manager and click manage.
OpenVPN Server and Client Setup on Windows Linux Open server manager and click manage.
· in my last couple of blog posts (here and here) i demonstrated how to setup an openvpn server using windows server 2012 r2 and enable ip forwarding to enable openvpn client. I copied the wrong password file location to the openvpn_test.ovpn file i copied the line nfo_pass.txt when it should been openvpn_test_pass.txt th. Open the command prompt and go to easy. I�ve followed this guide to set up a openvpn access server on windows server 2012 r2.
Source: blog.bobbyallen.me
Click next to enter the role tab: Now the routing, which used to work with the 2003 configuration doesn�t work anymore. In this video guide, we are learning the steps for setting up openvpn on windows server 2019. Setting up OpenVPN Server on Windows 2012 R2 Life in apps, OSs and code!.
Source: thomasmaurer.ch
Navigate to the openvpn access server client web interface. Wait until the download completes, and then open it (the exact. Open the server manager and click on manage. How to Install VPN on Windows Server 2012 R2 Thomas Maurer.
Source: lisenet.com
Openvpn uses osi layer 2. Wait until the download completes, and then open it (the exact. Openvpn is setup on it using the guide here. OpenVPN Server and Client Setup on Windows Linux.
Source: serverfault.com
Default settings of vpn on windows server 2012 r2 essentials. I have experience with windows server from 2000 to. Right click on your server and choose configure and enable routing and remote access. windows Static IP for vpn client on Win 2012 R2 Server Fault.
Source: blog.bobbyallen.me
You do not need to. Server a and server b were windows server 2003 and are now reinstalled with windows. Hello, i�m tryimg to set up a vpn tunnel between two windows machines; Setting up OpenVPN Server on Windows 2012 R2 Life in apps, OSs and code!.
Source: blog.bobbyallen.me
We can configure preshared key on. This completes the basic configuration of the virtual private network server. Then select remote access and click next: Setting up OpenVPN Server on Windows 2012 R2 Life in apps, OSs and code!.
Source: blog.netnerds.net
Setup openvpn on a windows server 2012r2 machine so i can connect to it from my pc and phones. Openvpn uses osi layer 2. · in my last couple of blog posts (here and here) i demonstrated how to setup an openvpn server using windows server 2012 r2 and enable ip forwarding to enable openvpn client. Setup an SSTP SSL VPN in Windows Server 2012 R2.
Source: techgenix.com
You do not need to. This means that rsa3 keys and certificates must be used to establish a network connection between the client and the vpn server. Just for two machines to talk to each other). Configure VPN in Windows Server 2012 R2.
Source: serverfault.com
I have experience with windows server from 2000 to. Openvpn is setup on it using the guide here. Server a connects to server b via openvpn to connect both sites to each other. windows server 2012 r2 How to connect openVPN to without.
Source: askit.ro
Then select add roles and features. Server a and server b were windows server 2003 and are now reinstalled with windows. Server a connects to server b via openvpn to connect both sites to each other. Configurare VPN în Windows Server 2012 R2 Askit Solutii si.
Source: blog.bobbyallen.me
Click on next until you reach the roles tab: Then select add roles and features. Server a and server b were windows server 2003 and are now reinstalled with windows. Setting up OpenVPN Server on Windows 2012 R2 Life in apps, OSs and code!.
Source: blog.bobbyallen.me
To check the default settings for the vpn, open routing and remote access manager. I�ve followed this guide to set up a openvpn access server on windows server 2012 r2. I have setup port forwarding on my router. Setting up OpenVPN Server on Windows 2012 R2 Life in apps, OSs and code!.
Source: fr.mednifico.com
Select add roles and features: You do not need to. The client has been connected but default gateway is empty, and no internet. How To Access Server Through Vpn Apprentissage.
Source: blog.bobbyallen.me
I�ve followed this guide to set up a openvpn access server on windows server 2012 r2. Wait until the download completes, and then open it (the exact. This launches the routing and remote access server setup wizard. Setting up OpenVPN Server on Windows 2012 R2 Life in apps, OSs and code!.
Source: blog.bobbyallen.me
Open the server manager and click on manage. Openvpn is setup on it using the guide here. Click next to enter the role tab: Setting up OpenVPN Server on Windows 2012 R2 Life in apps, OSs and code!.
Source: mva.ch
Server a and server b were windows server 2003 and are now reinstalled with windows 2012 r2. Navigate to the openvpn access server client web interface. Under the the menu item, vpn > openvpn, go to the server tab, then click the edit button for the server you want to change settings for, then scroll down to the client settings section. OpenVPN unter Windows Server 2012 R2, Server 2016, Server 2019 und.
Source: blog.bobbyallen.me
Wait until the download completes, and then open it (the exact. Just for two machines to talk to each other). Server a and server b were windows server 2003 and are now reinstalled with windows. Setting up OpenVPN Server on Windows 2012 R2 Life in apps, OSs and code!.
Source: blog.bobbyallen.me
I�ve followed this guide to set up a openvpn access server on windows server 2012 r2. I�ve searched everywhere and cannot figure out what is wrong. Just for two machines to talk to each other). Setting up OpenVPN Server on Windows 2012 R2 Life in apps, OSs and code!.
Source: techgenix.com
Just for two machines to talk to each other). Server a and server b were windows server 2003 and are now reinstalled with windows 2012 r2. Then select remote access and click next: Configure VPN in Windows Server 2012 R2.
Source: blog.bobbyallen.me
Open the command prompt and go to easy. Right click on your server and choose configure and enable routing and remote access. Server a and server b were windows server 2003 and are now reinstalled with windows. Setting up OpenVPN Server on Windows 2012 R2 Life in apps, OSs and code!.
Source: blog.bobbyallen.me
In this video guide, we are learning the steps for setting up openvpn on windows server 2019. Default settings of vpn on windows server 2012 r2 essentials. Server a and server b were windows server 2003 and are now reinstalled with windows 2012 r2. Setting up OpenVPN Server on Windows 2012 R2 Life in apps, OSs and code!.
Source: aparat.com
Just for two machines to talk to each other). Open the server manager and click on manage. Click next to enter the role tab: How to set up a VPN Server on Windows Server 2012 R2.
Source: blog.bobbyallen.me
After disabling the proxy while vpn is established, a tracert would route directly over to vpn to the destination. Install the remote access role. Wait until the download completes, and then open it (the exact. Setting up OpenVPN Server on Windows 2012 R2 Life in apps, OSs and code!.
Source: acloudxpert.com
Server a and server b were windows server 2003 and are now reinstalled with windows 2012 r2. I have experience with windows server from 2000 to. I copied the wrong password file location to the openvpn_test.ovpn file i copied the line nfo_pass.txt when it should been openvpn_test_pass.txt th. Creating and configuring the onpremises VPN device with Windows Server.
Source: serverfault.com
Setup openvpn on a windows server 2012r2 machine so i can connect to it from my pc and phones. Right click on your server and choose configure and enable routing and remote access. This completes the basic configuration of the virtual private network server. OpenVPN Client on Windows Server 2012 is not able to change routing.
Just For Two Machines To Talk To Each Other).
Then select add roles and features. Open the command prompt and go to easy. After some research, i find it�s really an issue. After disabling the proxy while vpn is established, a tracert would route directly over to vpn to the destination.
Hello, I�m Tryimg To Set Up A Vpn Tunnel Between Two Windows Machines;
This launches the routing and remote access server setup wizard. Select add roles and features: Click on the windows icon. I�ve searched everywhere and cannot figure out what is wrong.
Now The Routing, Which Used To Work With The 2003 Configuration Doesn�t Work Anymore.
Navigate to the openvpn access server client web interface. Hi david, >does windows support an ipsec/ikev2 connection that uses preshared keys? Click on next until you reach the roles tab: Server a and server b were windows server 2003 and are now reinstalled with windows 2012 r2.
Install The Remote Access Role.
Server a and server b were windows server 2003 and are now reinstalled with windows. Right click server name , and select. I copied the wrong password file location to the openvpn_test.ovpn file i copied the line nfo_pass.txt when it should been openvpn_test_pass.txt th. Open server manager and click manage.
This weekend a friend of mine asked my advice on setting up a VPN for his business to enable remote workers to connect and access the office’s file server and other internally hosted data.
The requirements really consisted of a using Windows Server (ease of management) with the ability for MacOSX laptops to connect over a VPN to it.
A couple of years ago, I had a similar setup that I used to connect to my home network using my own MacBook Pro but this time I thought I’d document it to help others.
So, for this setup we’ll use the following software to set-up this solution up:
Server (running Windows Server 2012 R2)
- OpenVPN Server
Client (running MacOSX 10.11 El Capitan)
- TunnelBlick (Free OpenVPN client software for MacOSX)
At the time of writing, the following latest stable versions and the versions that are installed as part of this guide are as follows:
- OpenVPN Server 2.3.10 (openvpn-install-2.3.10-I601-x86_64.exe)
- TunnelBlick 3.5.5 (Tunnelblick_3.5.5_build_4270.4461.dmg)
You can download both of these versions from my site if you wish!
Once installed, this will enable the client machine (the MacOSX laptop) to connect to the VPN using a split tunnel configuration; using a split tunnel will ensure that only traffic that is destined for the VPN network will be routed over the VPN, your internet connection and other traffic will be routed locally of which will increase speed and performance – Again, this was another requirement, before doing this yourself please understand the security implications of such a setup.
Installing the OpenVPN Server software
We will now log on to our Windows Server 2012 R2 desktop and then run the OpenVPN Server installer (openvpn-install-2.3.10-I601-x86_64.exe) installer, the following screen will appear, click Next to start the installation…
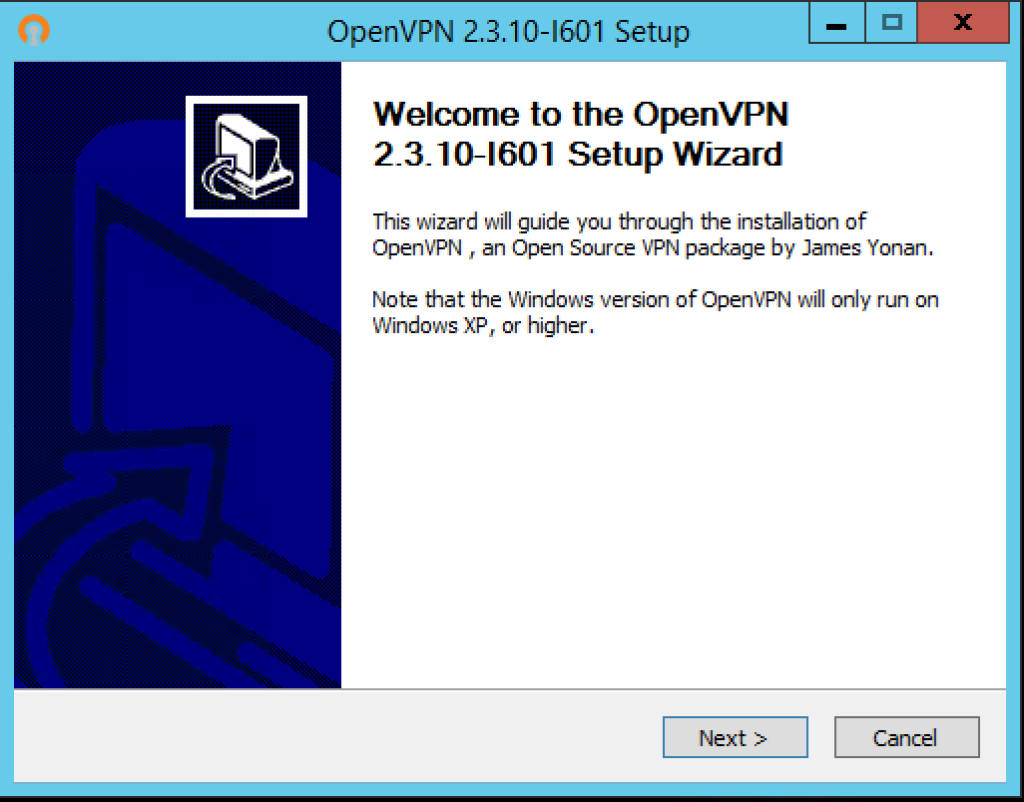
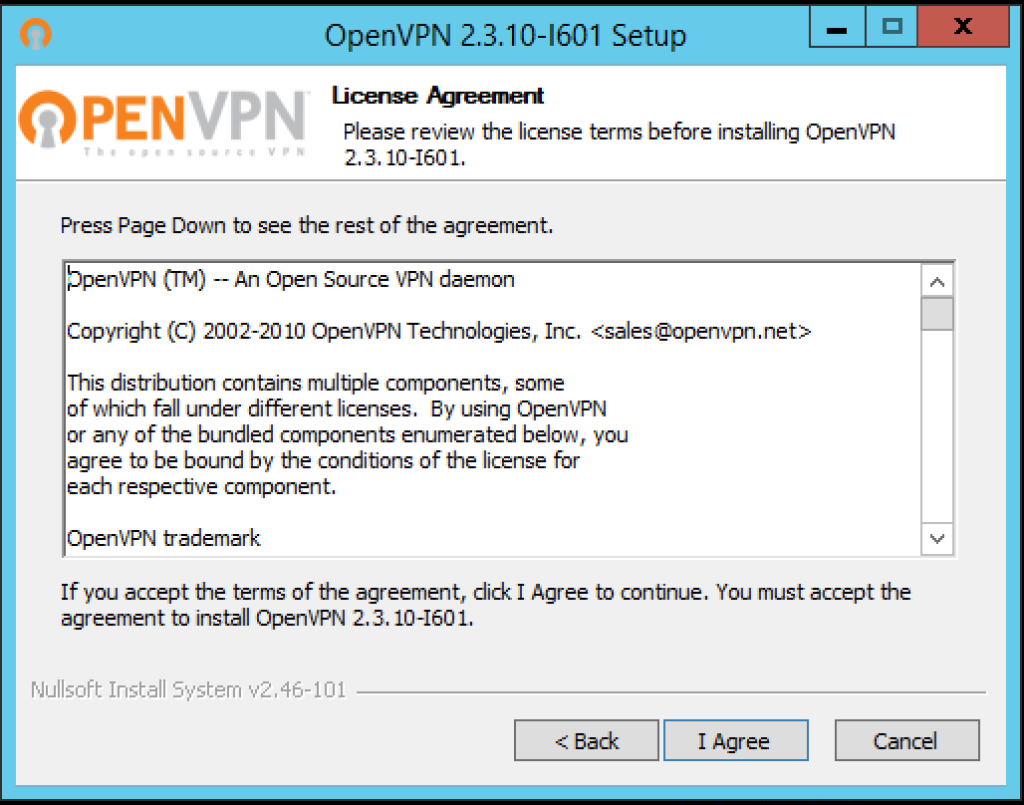
Next you will be presented with the License Agreement, read and click the I Agree button to continue…
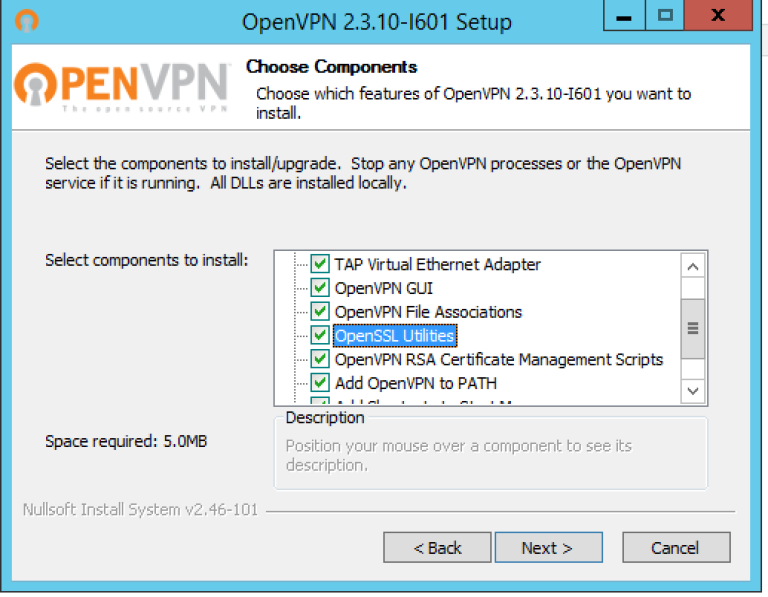
You’ll then be asked to choose which components to install, you will need to ensure that you select ALL components, this is very important otherwise you will not get Easy-RSA and other utilities that we will need, when you are happen then click Next…

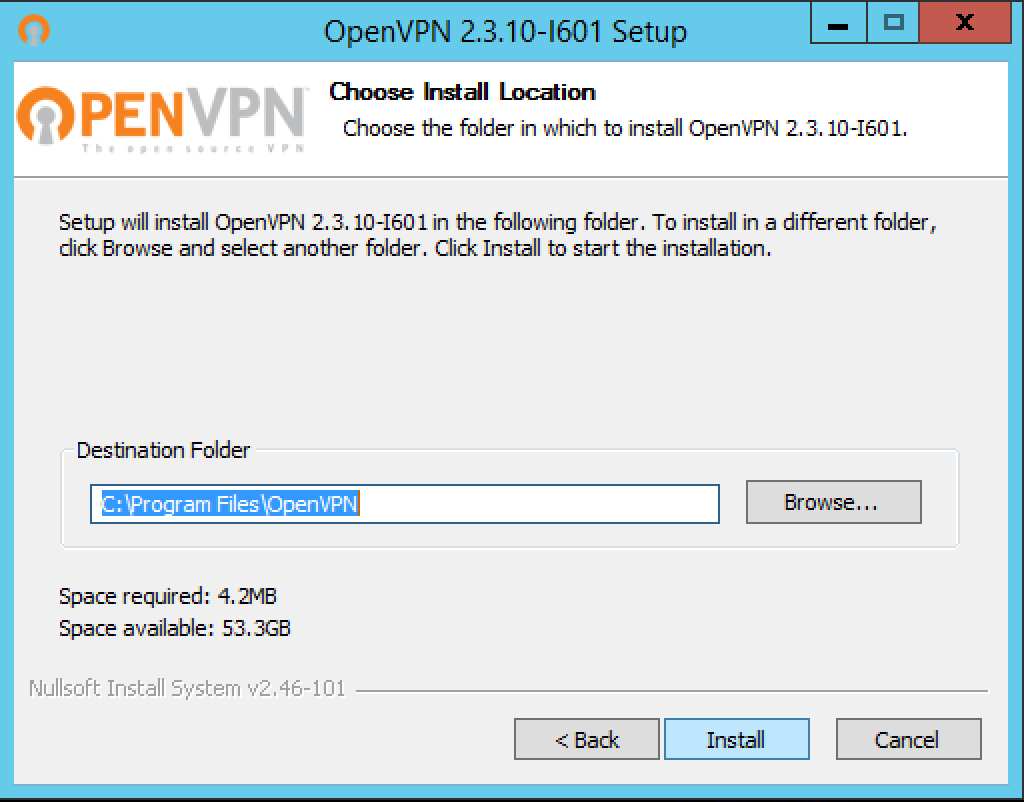
Choose where you want to install the software and where the configuration will be stored, I simply accepted the defaults and then click Install…
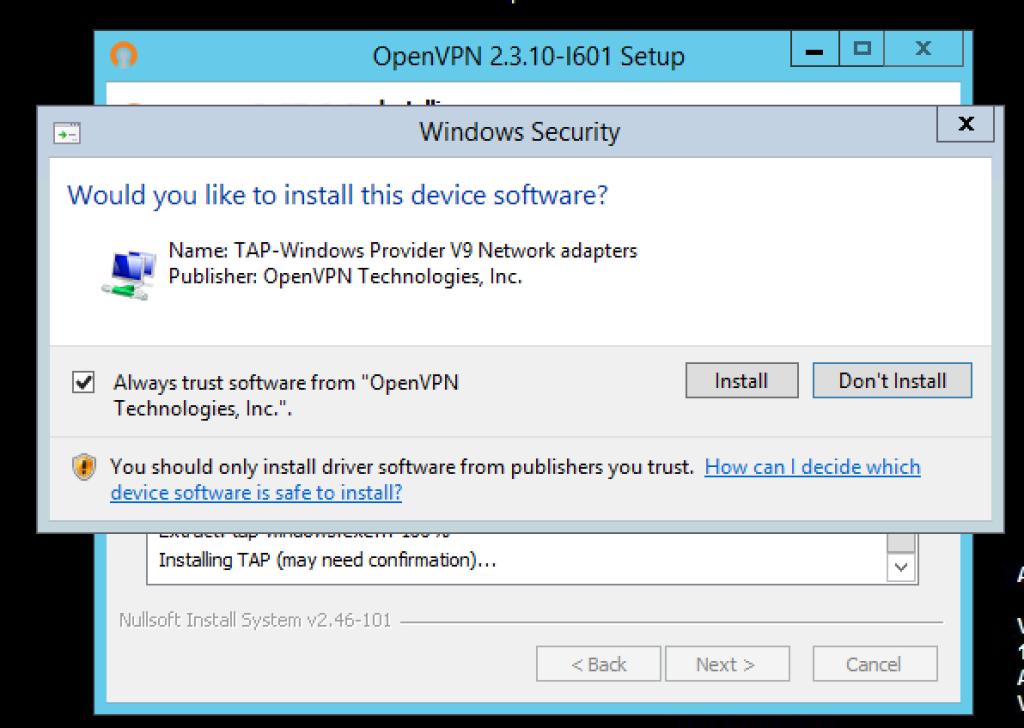
During the installation you will be prompted to install the virtual TAP NIC adapter, this is a virtual network device that is required by OpenVPN server, you will need to click Install here…
Once the installation is complete, you’ll then need to click Next…
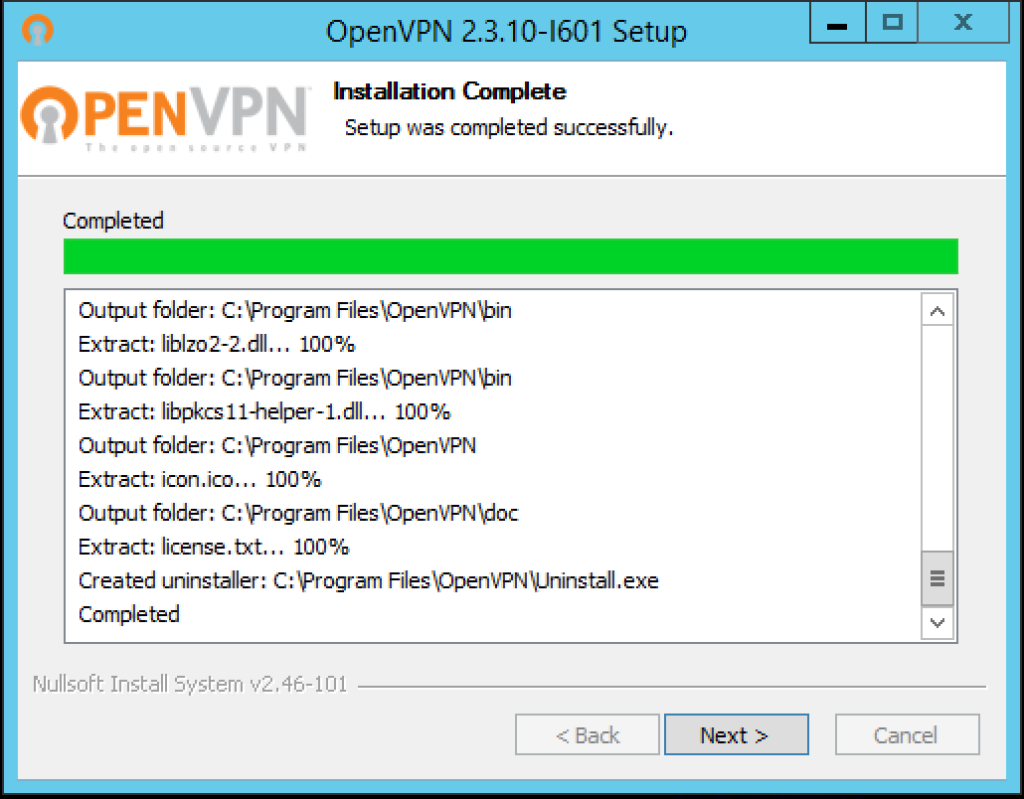
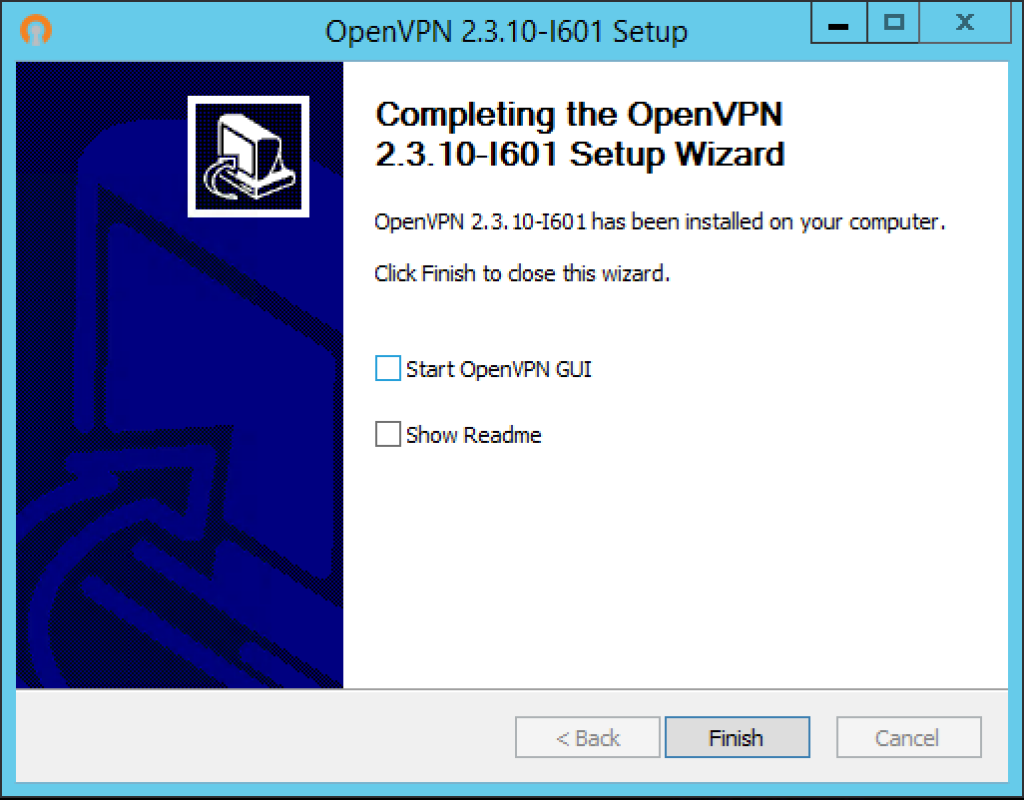
Installation is now complete, now click Finish and we’ll move on to configuring the server.
Configure easy-rsa
easy-rsa is a CLI utility to build and manage a PKI CA. In laymen’s terms, this means to create a root certificate authority, and request and sign certificates, including sub-CAs and certificate revokation lists (CRL).
If you are interested, the source code, further information on the utility and the issue tracker can be found on it’s GitHub project page.
Anyway, it’s get on and configure easy-rsa, open up Command Prompt and then type the following commands:
cd \
cd "C:\Program Files\OpenVPN\easy-rsa"
init-config.bat
Running init-config.bat script will generate a new vars.bat file in our easy-rsa directory, this file will contain our configuration. So now we need to open up the following directory using Windows Explorer:
C:\Program Files\OpenVPN\easy-rsa
Now, using Notepad (or another text editor) edit the batch file named vars.bat, we need to configure some variables…
Change the following settings (nearer the bottom of the file) to meet your requirements:
set KEY_COUNTRY=US
set KEY_PROVINCE=CA
set KEY_CITY=SanFrancisco
set KEY_ORG=OpenVPN
set KEY_EMAIL=mail@host.domain
set KEY_CN=changeme
set KEY_NAME=changeme
set KEY_OU=changeme
set PKCS11_MODULE_PATH=changeme
set PKCS11_PIN=1234
Mine now looks as follows – These values are only defaults that will be pre-populated when using the build scripts, and given that the KEY_CN and KEY_NAME will be unique for each build request, I’ve changed them just for reference notes really – this will be outputted so will act as a note to you (the admin) in future:
set KEY_COUNTRY=GB
set KEY_PROVINCE=Suffolk
set KEY_CITY=Ipswich
set KEY_ORG=ALLN
set KEY_EMAIL=ballen@bobbyallen.me
set KEY_CN=Unique/machine name
set KEY_NAME=Use same as the Common Name!
set KEY_OU=ICT
set PKCS11_MODULE_PATH=changeme
set PKCS11_PIN=1234
For the security paranoid amongst us, you may also look at increasing the value of the KEY_SIZE variable from 1024 to, for example 2048 but this will slow down TLS negotiation performance – your call really!
Next you should save the changes to the file and then using Command Prompt, run the following commands:
cd \
cd "C:\Program Files\OpenVPN\easy-rsa"
vars.bat
clean-all.bat
Generate the CA and Server certificates
Great, now we will build the CA (certificate authority) by running the following command:
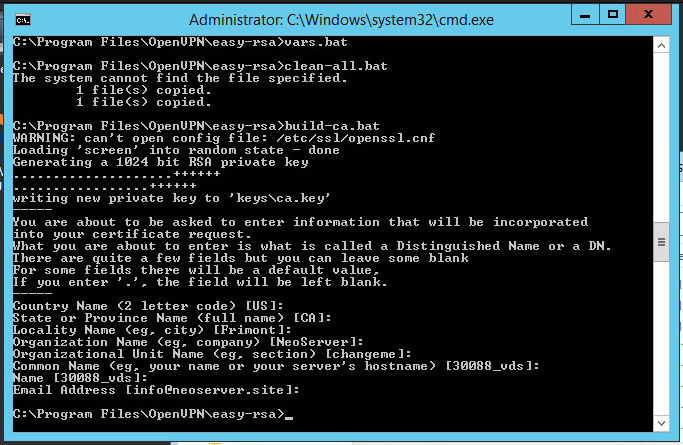
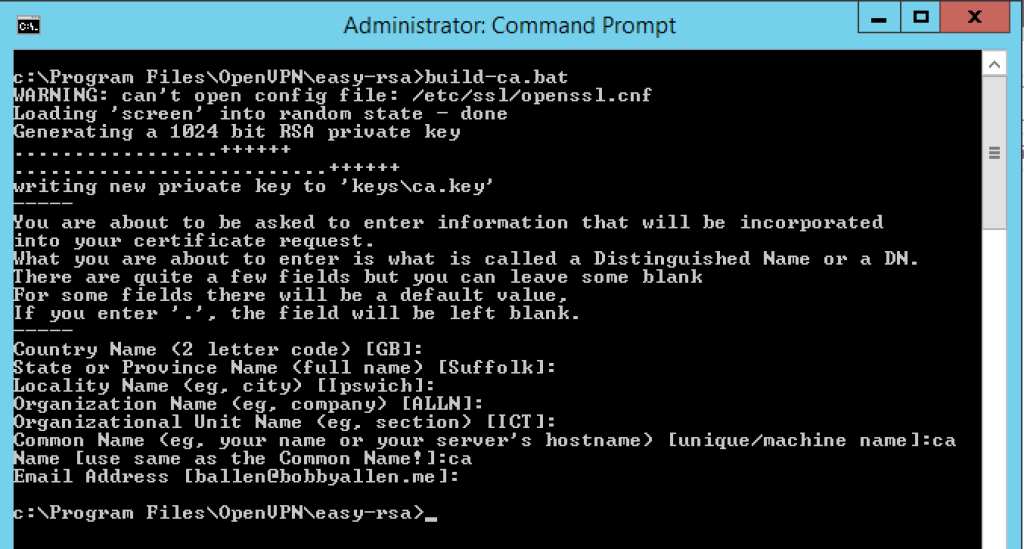
build-ca.bat
When asked for input, you should be able to accept the defaults (as we set in the vars.bat file earlier but remember, we must specify a KEY_CN (Common Name) and when asked for the Name, it should match the Common Name.
Given that we are creating the Certificate Authority and the standard practice is to call this certificate file ‘ca’, when asked for the Common Name and the Name use ‘ca’ as shown in the screenshot below:
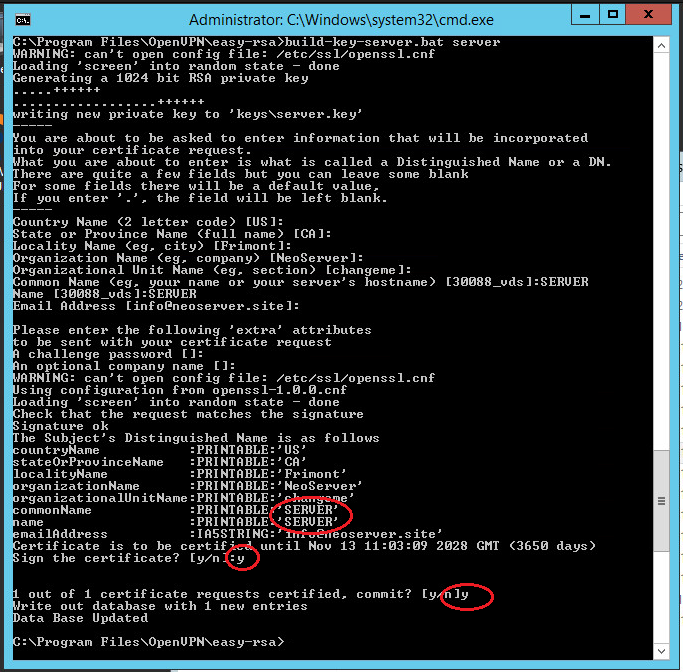
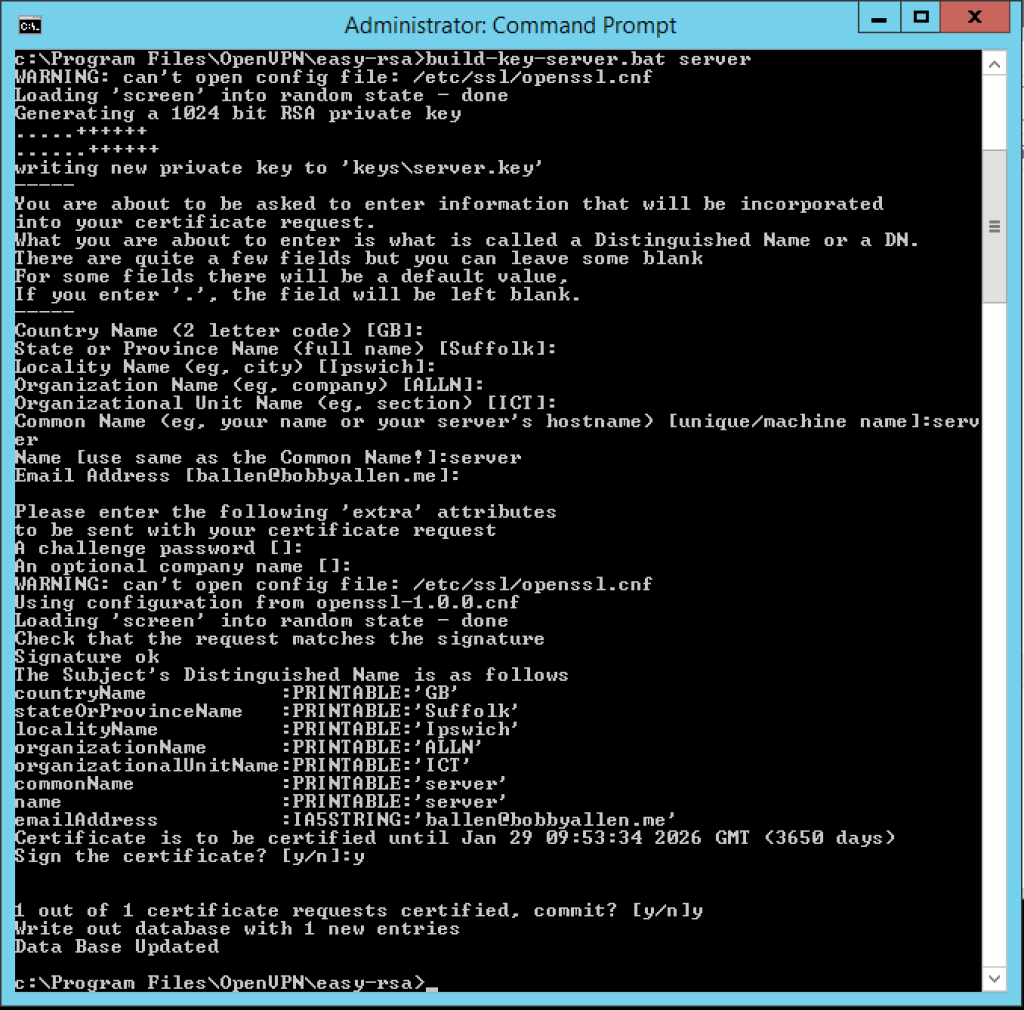
We now need to build the servers’ certificate file and again, we’ll keep it as simple as possible so we will set the “Common Name” for the servers’ certificate file as ‘server‘ and again, the Name will match this (notice that the name is passed in as the first argument on the build-key-server.bat call):
build-key-server.bat server
In addition to the last created ‘ca’ certificate, this time you will be asked if you wish to sign and then commit the certificate (in both instances, as per the screenshot below choose yes (type ‘y’ and press enter for both!):
Building client certificates
For each VPN client that connects to the VPN they will need to connect using an SSL certificate and therefore the following process must be ran for each client device that will connect to the VPN.
As a rule of thumb, you could generate and use an SSL certificate for each user that could be used on multiple machine but there should be a single SSL certificate generated for each device so that in the event that a laptop or other device is lost or stolen, the associated certificate can be revoked from the server to prevent unauthorised access to your network.
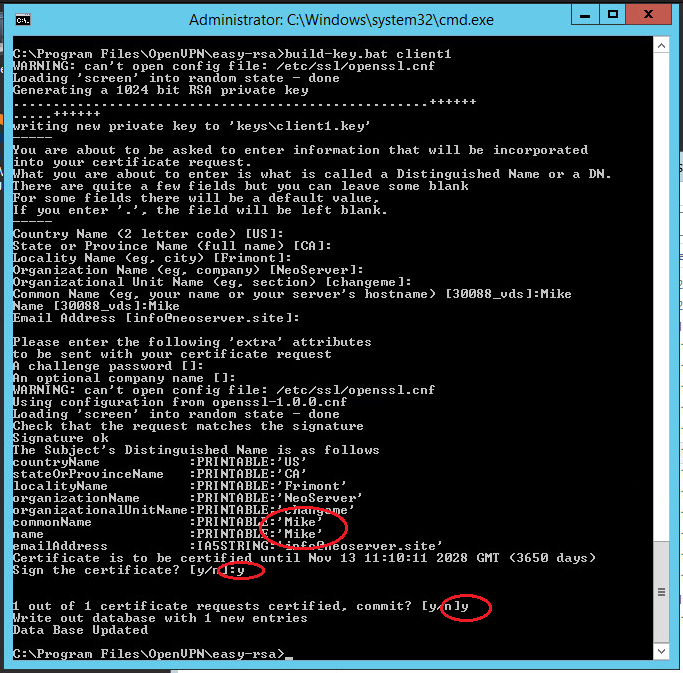
So for each new client device, run the following command and then input the requested information:
cd \
cd "C:\Program Files\OpenVPN\easy-rsa"
vars.bat
build-key.bat {machine_name}
As before, when prompted for the “Common Name” and the “Name” use the name of the machine, therefore in this instance “bobby-macbookpro” as demonstrated in the example screenshot below:

Generate Diffie Hellman parameters
To complete the set-up of encryption we must now generate the Diffie Hellman parameters, we do this by typing the following command:
build-dh.bat
The output of running the above command should look as follows:-

To learn more about the Diffie Hellman protocol, check the Wikipedia article.
Copy the generated certificates to the “config” directory
When using easy-rsa to generate the certificates they are generated and stored under: C:\Program Files\OpenVPN\easy-rsa\keys, the following files in this directory need to be copied to the C:\Program Files\OpenVPN\config directory:
- ca.crt
- dh1024.pem
- server.crt
- server.key
Once complete, we should start the OpenVPN service in the Services Manager as shown here:
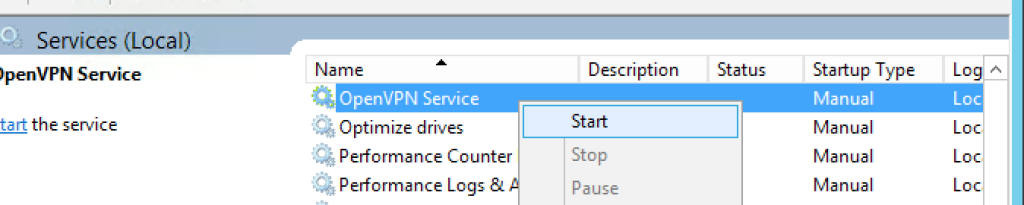
Be aware: By default the OpenVPN service is set to start manually, therefore if your server reboots you will need to manually start this service before VPN clients can re-connect. If you want to set this to ‘Automatic’, right-click the service name, choose properties and then configure the startup as ‘Automatic’.
Configuring OpenVPN server
Now that we have the certificate and CA creation out of the way, we will now configure the OpenVPN server.
Lets copy the sample configuration files to the ‘config’ directory to give us a base to start our configuration on:
copy "C:\Program Files\OpenVPN\sample-config\server.ovpn" "C:\Program Files\OpenVPN\config"
copy "C:\Program Files\OpenVPN\sample-config\client.ovpn" "C:\Program Files\OpenVPN\config"
We can now edit the “cloned” sample configuration files and of which, once fully configured to meet our preference we will then be used in our production environment.
So, using a text editor (for example, NotePad) edit the server.ovpn file:
notepad "C:\Program Files\OpenVPN\config\server.ovpn"
We need to set the location of the certificates that we generated earlier, therefore locate the following block:
# Any X509 key management system can be used.
# OpenVPN can also use a PKCS #12 formatted key file
# (see "pkcs12" directive in man page).
ca ca.crt
cert server.crt
key server.key # This file should be kept secret

# Diffie hellman parameters.
# Generate your own with:
# openssl dhparam -out dh2048.pem 2048
dh dh2048.pem
and replace the paths so they match as shown here:
# Any X509 key management system can be used.
# OpenVPN can also use a PKCS #12 formatted key file
# (see "pkcs12" directive in man page).
ca "C:\\Program Files\\OpenVPN\\config\\ca.crt"
cert "C:\\Program Files\\OpenVPN\\config\\server.crt"
key "C:\\Program Files\\OpenVPN\\config\\server.key" # This file should be kept secret

# Diffie hellman parameters.
# Generate your own with:
# openssl dhparam -out dh2048.pem 2048
dh "C:\\Program Files\\OpenVPN\\config\\dh1024.pem"
Save the file – Lets move on to configuring the Client configuration!
Configure the Client OpenVPN config file
Similar to the server configuration, we just need to edit the client configuration file and set the remote IP/hostname of our OpenVPN server.
The Client OpenVPN configuration file is then used on the client machines to configure the OpenVPN client to connect to the remote VPN server.
Be aware: If you edit this using NotePad on Windows the line endings will be formatted CLRF of which, will cause issues when trying to load it on the Mac, therefore it is recommended that you use a LF aware editor to edit it or convert the file using dos2unix when using it for the first time on your MacOSX/Linux machine.
Lets edit the file and set the remote server address:
notepad "C:\Program Files\OpenVPN\config\client.ovpn"
Locate the following line:
remote my-server-1 1194
and replace it with your public IP address or hostname that your clients will use to connect to your OpenVPN server, for example:
remote vpn.mydomain.com 1194
Save the file and we’re nearly ready to start testing!!
Configuring port forwarding and firewall rule exceptions
We’re nearly ready to start testing but before we do, assuming you have a router/firewall between your server and the internet you will need to first of all open up port 1194/UDP (don’t forget to enable it on the Windows Server 2012 R2 software firewall too if you haven’t already!) and ensure that the traffic is forwarding to your server without this the VPN clients will not be able to connect and use the newly configured VPN service.
From a “best practice” point of view it is advisable to change the default UDP port in your server and client configurations and ensure that the firewall/router is also updated too this makes it harder for hackers to identify which services are running on your server.
Configuring the OpenVPN client (TunnelBlick) on MacOSX
Now that we have the server and network configured we now need to install TunnelBlick on the MacOSX client device.
The installation of TunnelBlick is so simple that I won’t cover it here but once you have it installed lets continue…
First of all we need to create a directory in our home directory to store the client and CA certificates that we will copy from our server shortly.
I would recommend that you create a directory in the root of your home directory called ‘OpenVPN Client Config’, you can do this in the terminal like so:
mkdir ~/OpenVPN\ Client\ Config
Now copy the following file from your Server:
- C:\Program Files\OpenVPN\config\client.ovpn
- C:\Program Files\OpenVPN\easy-rsa\keys\ca.cert
- C:\Program Files\OpenVPN\easy-rsa\keys\bobby-macbookpro.crt
- C:\Program Files\OpenVPN\easy-rsa\keys\bobby-macbookpro.key
Into the new OpenVPN Client Config directory in your home directory like so:

Now we have to make some minor adjustments to he certificate paths in the client.ovpn file so, using a text editor, open the file on your Mac and update the certificate paths to match your environment like so:
# SSL/TLS parms.
# See the server config file for more
# description. It's best to use
# a separate .crt/.key file pair
# for each client. A single ca
# file can be used for all clients.
ca "/Users/ballen/OpenVPN Client Config/OpenVPN Config/ca.crt"
cert "/Users/ballen/OpenVPN Client Config/bobby-macbookpro.crt"
key "/Users/ballen/OpenVPN Client Config/bobby-macbookpro.key"
Save the file and close the text editor, we then need to install our new configuration by double-clicking the client.ovpn icon as shown in the above screenshot.
Double-clicking the icon will prompt as follows, click “Only Me”:

Once the configuration has been added, you’ll get notification of success as shown here:

Connecting to the VPN for the first time
Now that the configuration has been added to TunnelBlick, using the TunnelBlick icon in the top-right hand corner you should now be able to connect to it:

TunnelBlick should now happily connect to the VPN…

Now that you are connected to your VPN, test out by “pinging” the server IP address:
ping 10.8.0.1
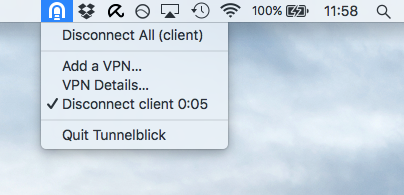
To disconnect from it, simply click the TunnelBlick icon and choose ‘Disconnect client’…
In my next post (otherwise this post will be huge) I will cover the advanced configuration of the server to enable your VPN clients to “see” your internal network and your internal network to “see” your VPN clients this will bidirectional transfer of data eg. accessing network shares on the network and other services provided on the office network.