
This post demonstrates how to install Windows Server 2012R2 evaluation version onto Oracle VirtualBox.
- First go to Windows Server 2012R2 evaluation downloading website “https://www.microsoft.com/en-in/evalcenter/evaluate-windows-server-2012-r2“
Choose ISO file type
Download ISO image of Windows Server 2012R2 evaluation

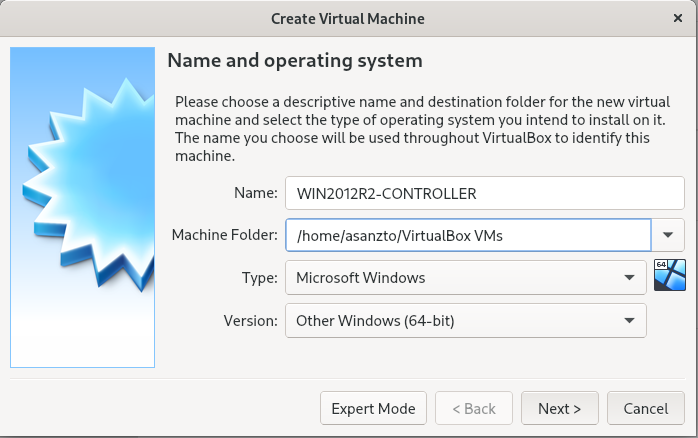
2. Start Oracle Virtual Manager, Select NEW.
Name: Windows Server 2012R2
Type: Microsoft Windows
Version: Windows 2012(64-bit)

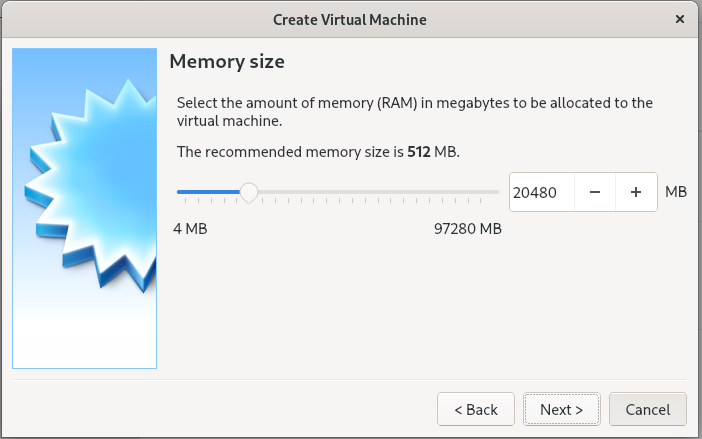
3. Give 5120M memory size depending on availability.

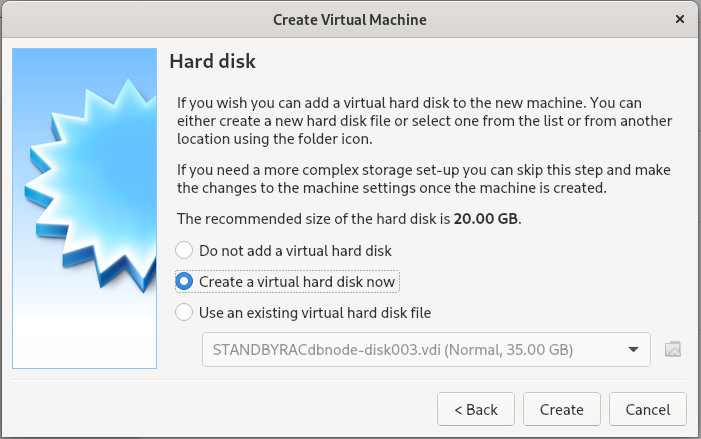
4. Create an virtual hard disk.

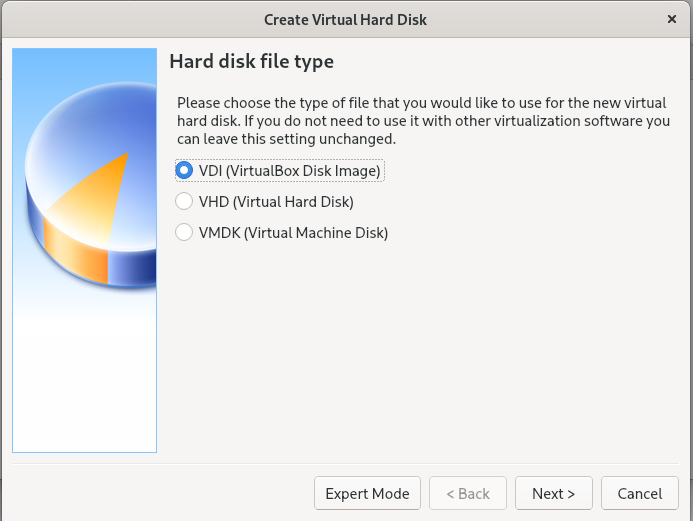
5. Choose “VDI( VirtualBox Disk Image)“.

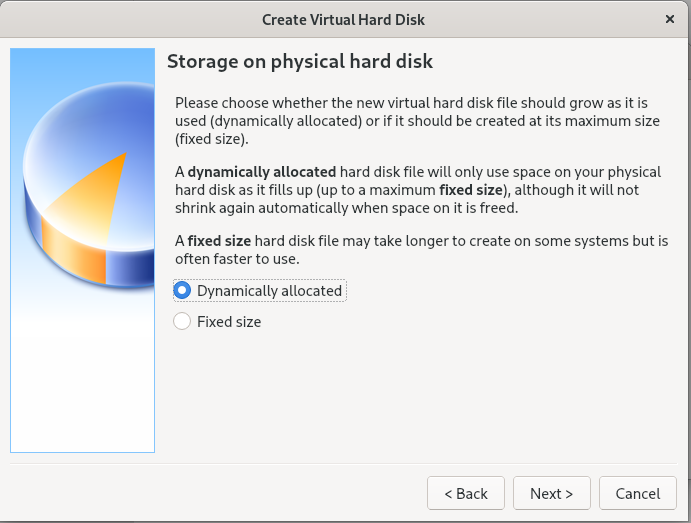
6. Choose “Dynamically allocated“.

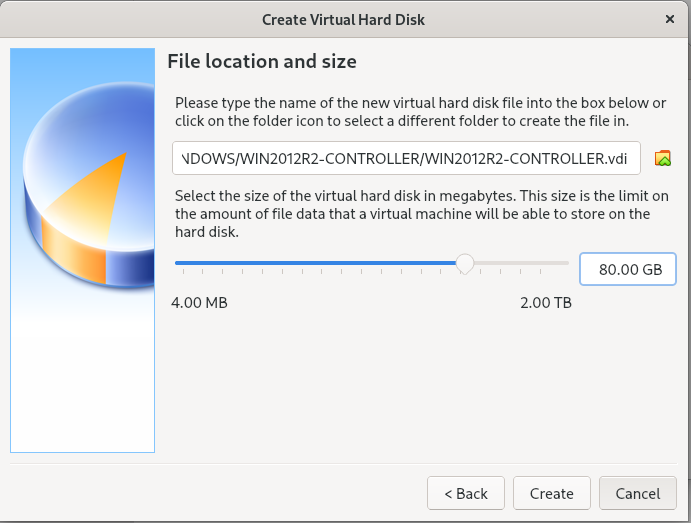
7. Give size 30GB.

8. Also you can choose where the VDI image file located.

9. Click “create” to create “Windows Server 2012R2” virtual machine.

10. Now attach the ISO image to the virtual CD/DVD drive by :
a)Ensure the Windows Server 2012R2 VM is selected and click Settings.
b)Select Storage. Click on Empty under IDE Controller.
c)In the Attributes section, click on “+”sign for adding optimal disk.
d)Select “Choose a disk file”.
e)Browse to the location where you saved the Windows DVD ISO file and select it.
f)Click Open.
g)It should look similar to the following graphic.


11) Now we can install Windows 2012R2 .
a)Select the Windows Server 2012R2 VM in VirtualBox and click Start.
When the Install screen appears, click Next.

b)Click Install Now.

c)Select 2012 evalution Datacenter (Server with a GUI) and click Next. The Server Core installation includes a command prompt but not a graphical user interface (GUI).
d)Review the license terms, select the checkbox to accept the license terms, and click Next.

e) Select Custom: Install Windows only (advanced).

f) The 30 GB drive you created with the VM will be selected as Drive 0 Unallocated Space. Click Next.

g)The installation will begin .

h)When prompted, enter a password for the Administrator account in the Password and Retype password text boxes. Click Finish.


To log on Windows Server 2012R2, press the host key plus the Delete key to simulate the CTRL + ALT + DELETE key combination. The host key is the right-CTRL key by default.
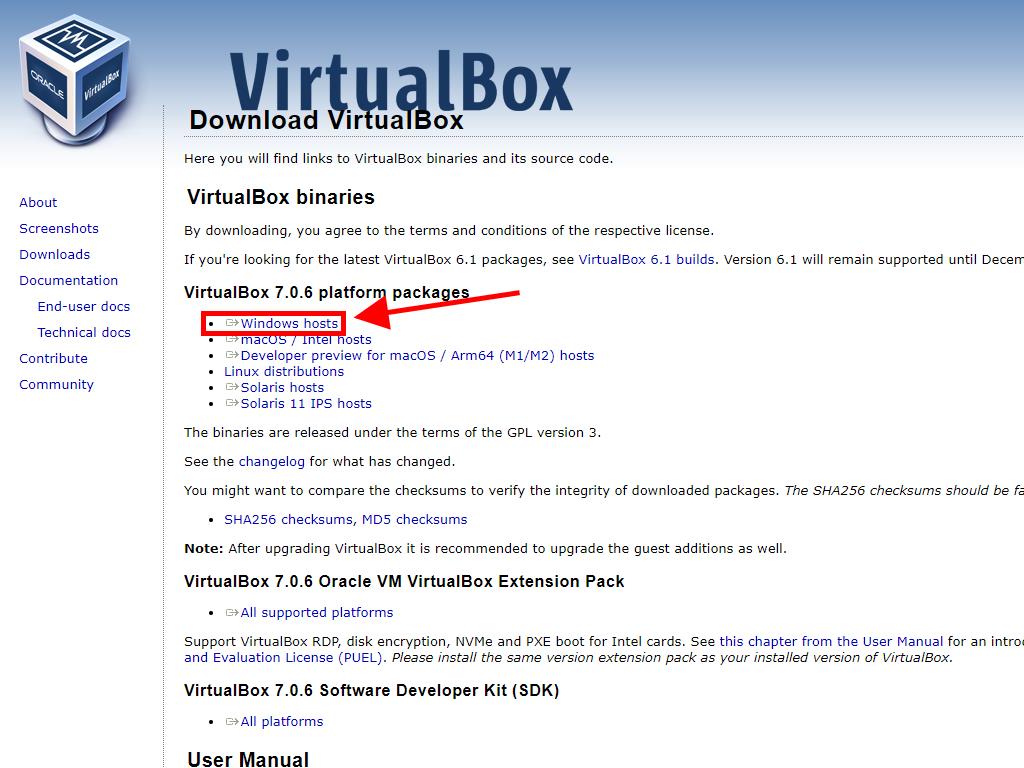
To install VirtualBox on your PC, follow these steps:
- Open this link and select the Windows Hosts option from the list.
- The VirtualBox file will begin to download on your PC.
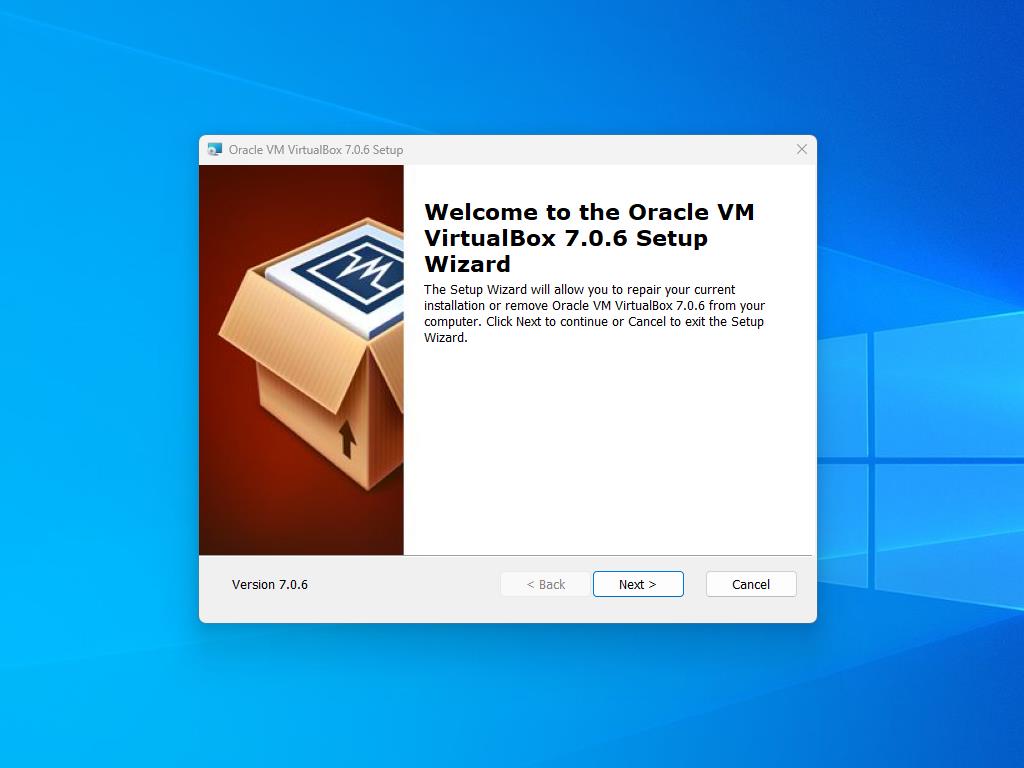
- Open the VirtualBox file and install it.
Note: If you have issues installing VirtualBox, deselect the USB features in the installation wizard.
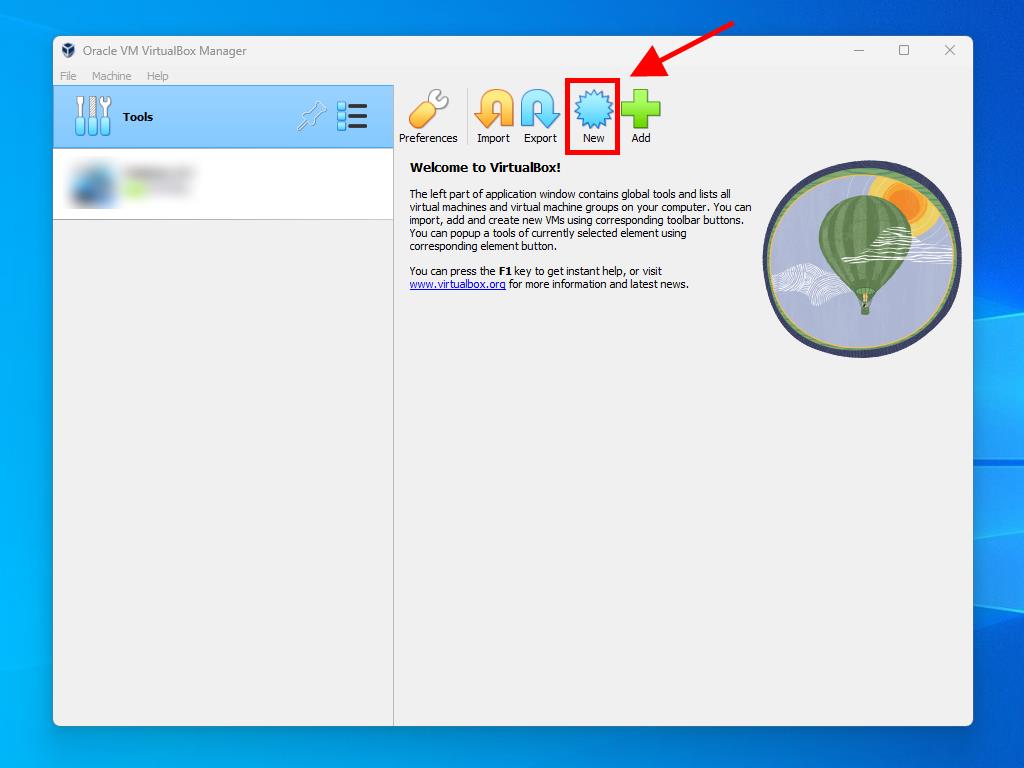
Here’s how you can create a new virtual machine (VirtualBox):
- In the Machine section, click the New button.
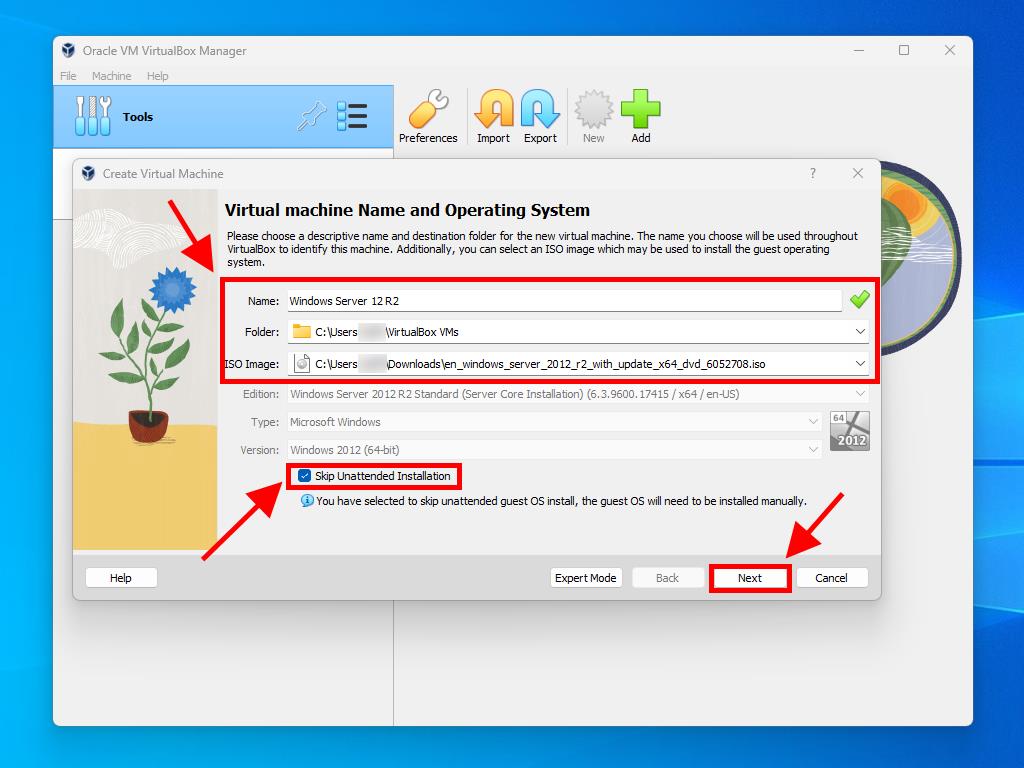
- Enter a name for the virtual machine, select the location of the Windows Server 2012 R2 .iso file, and then click Next.
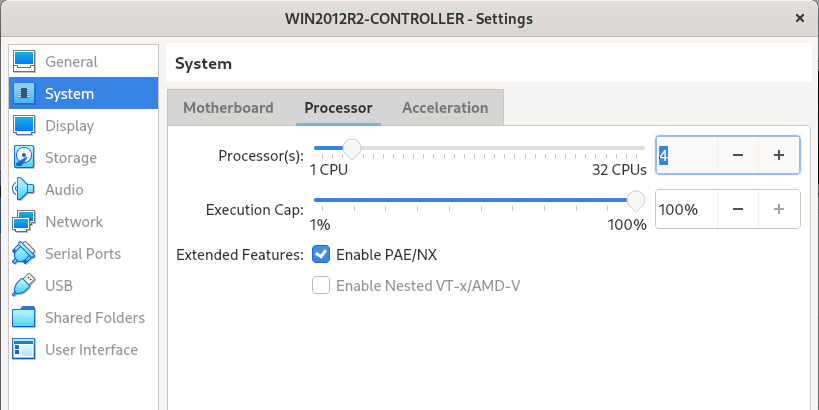
- Use at least 4 GB of RAM and click on Next.
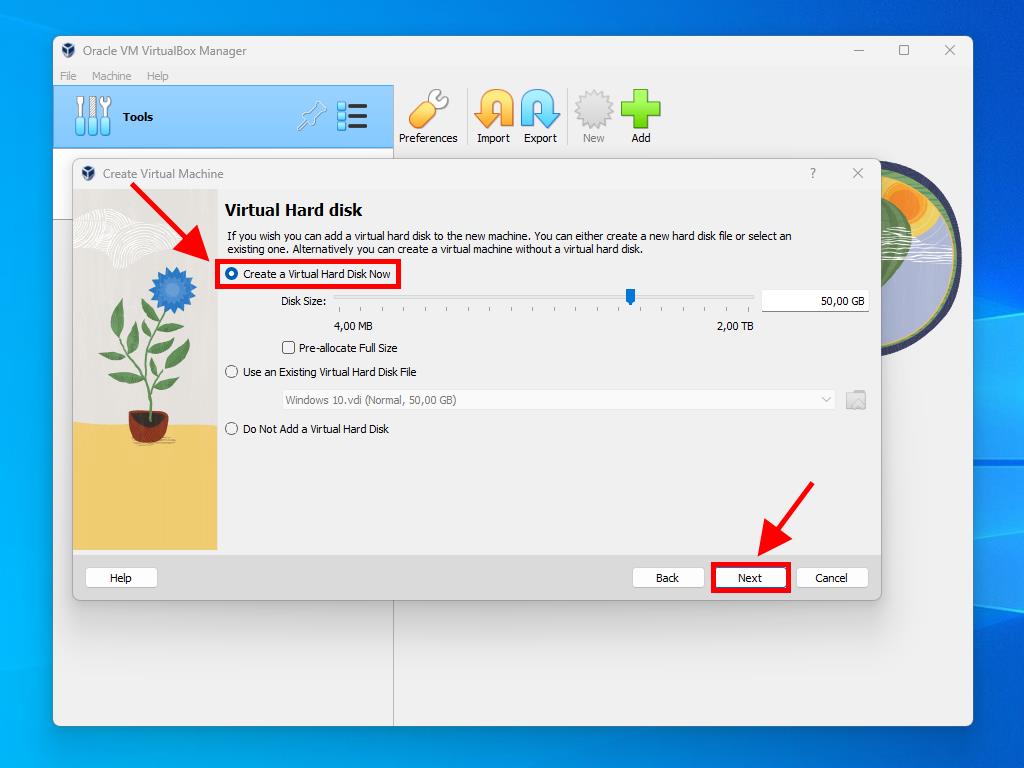
- Click the Create a Virtual Hard Disk Now option (you should use a minimum of 50 GB for proper operation). Then click Next.
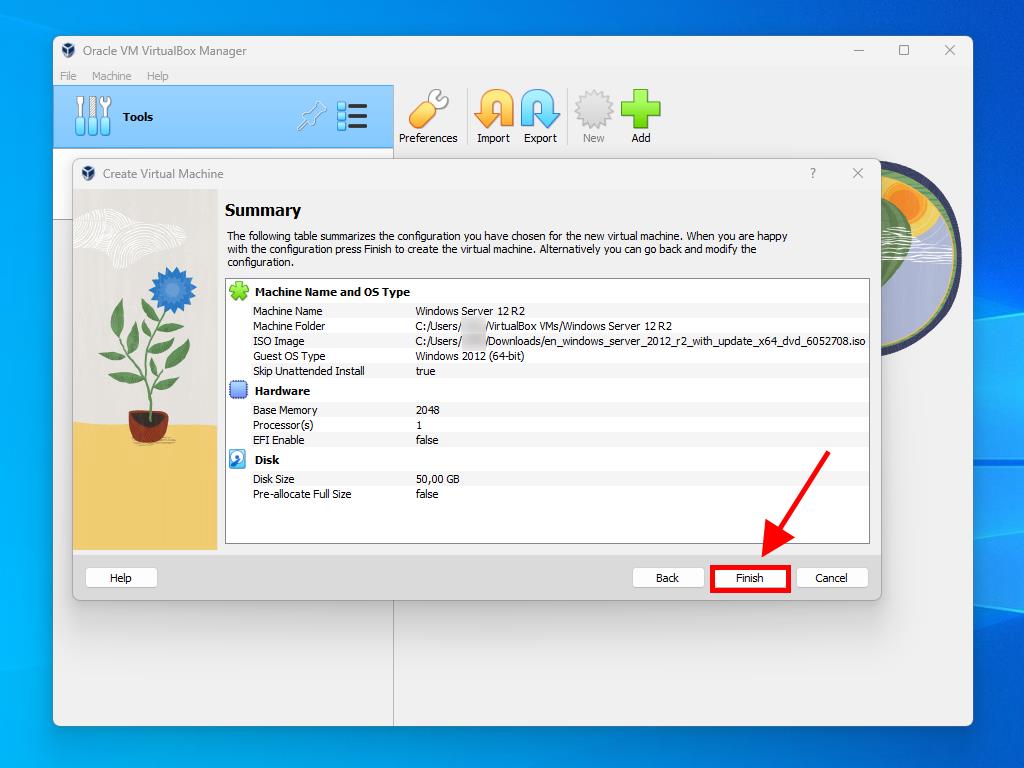
- In the following Summary window, click on Finish.
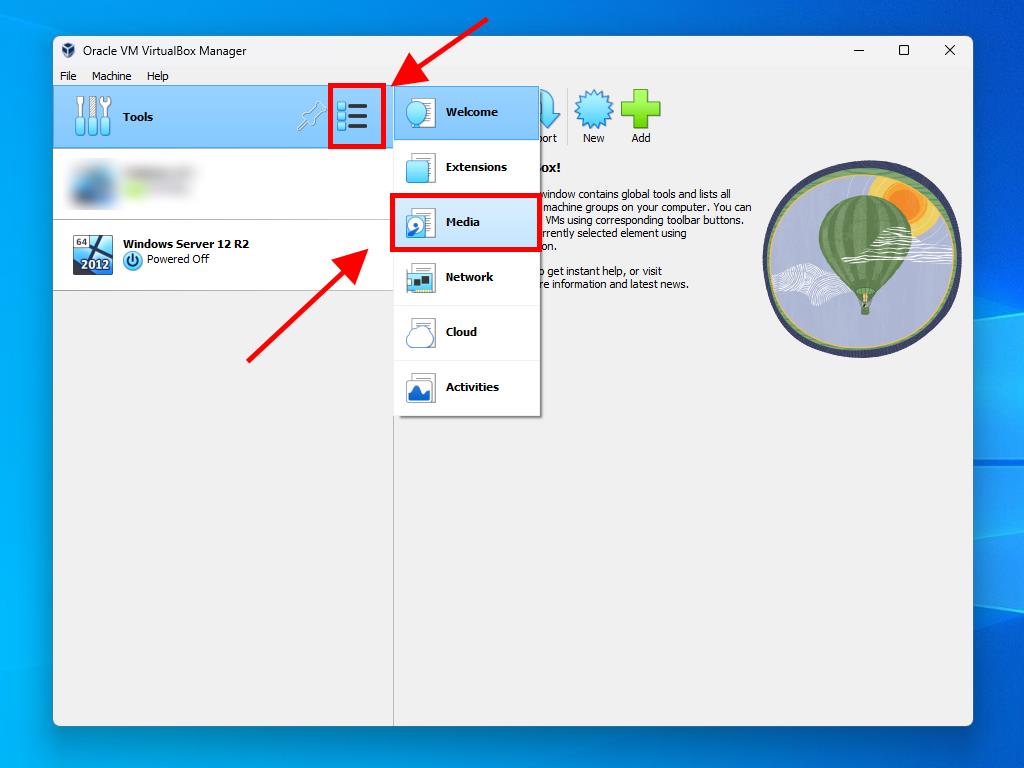
- In the Tools tab, select the Windows Server 2012 R2 .iso file by clicking the button with the three dots. A dropdown menu will open, and click on Media.
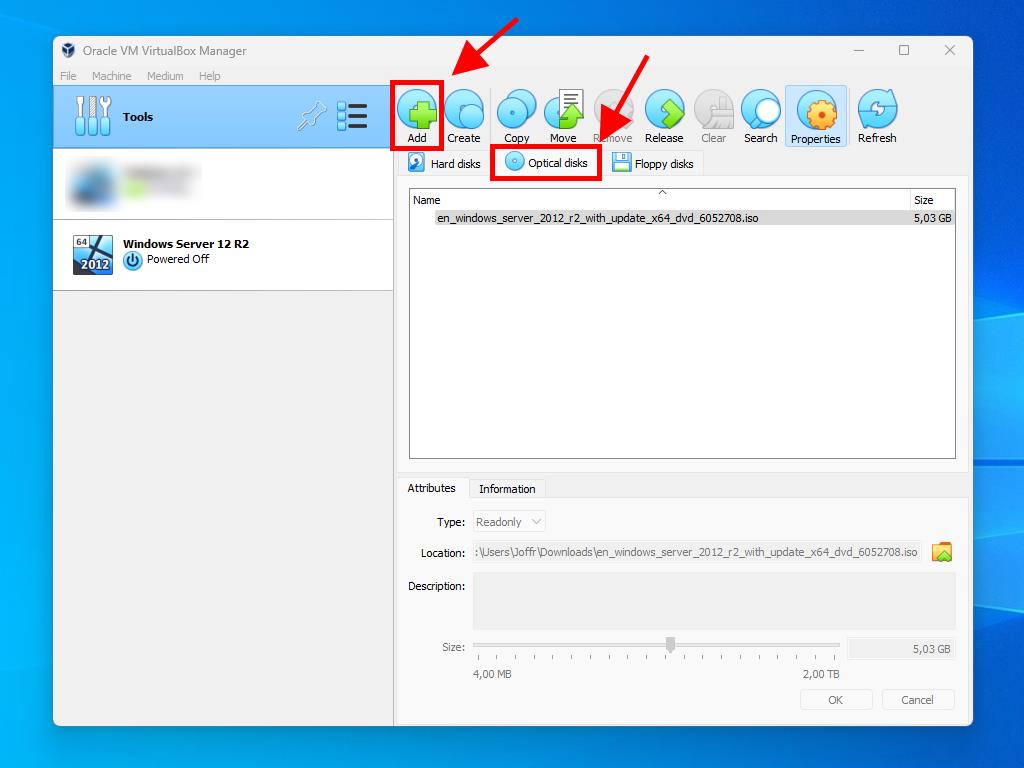
- Next, select the optical disks tab and click on Add.
- Power on the virtual machine by clicking on Start.
- The installation of Windows Server 2012 R2 will begin.
Note: Check the box called Skip Unattended Installations.
Note: You can choose any other value according to your preferences, as long as it matches the system requirements.


TrueConf Server поддерживает возможность запуска на виртуальной машине, хотя это сложная процедура и мы не рекомендуем её неопытным пользователям — настройка корректной работы виртуальной машины бывает порой довольно сложным делом.
В этой инструкции мы покажем пример настройки виртуализатора Hyper-V на сервере Windows Server 2012 R2.
Данная статья носит исключительно ознакомительный характер и не гарантирует непременную и полную работу сервера после выполнения инструкции.
Техническая поддержка TrueConf не консультирует пользователей по вопросам настройки виртуальных машин и запуска TrueConf Server на них. Виртуальная машина — это внешняя система, работа которой не зависит от приложения TrueConf, и её настройка и поддержка целиком лежат на плечах пользователя.
Шаг 1. Проверьте поддержку аппаратной виртуализации
Виртуализатор Hyper-V из нашего примера является средством аппаратной виртуализации, то есть использует для виртуализации специальную процессорную архитектуру. Соответственно, на процессорах, где нет поддержки этой архитектуры, его запуск невозможен.
Чтобы проверить, поддерживает ли ваше оборудование аппаратную виртуализацию, откройте консоль Windows PowerShell, введите systeminfo.exe и нажмите Enter.

Команда выведет на экран консоли список текущих настроек системы. Из этого списка нас интересует только последний абзац, где пункт Виртуализация включена во встроенном ПО должен быть отмечен как Да.

Если соответствующий пункт не отмечен пометкой Да, то установка Hyper-V на вашу систему невозможна.
Шаг 2. Добавьте сервер в список компонентов
Откройте диспетчер серверов. В меню сверху выберите Управление → Добавить роли и компоненты.

Выбор сервера
В открывшемся мастере добавления ролей и компонентов кликните на пункт Выбор сервера на панели слева и выберите нужный сервер. Если сервер в списке один, то он будет выбран автоматически. Нажмите Далее.

Роли сервера
В меню Роли сервера отметьте флажок рядом с надписью Hyper-V. После этого автоматически откроется окно в котором нужно активировать флажок Включить средства управления (если применимо). После этого нажмите кнопку Добавить компоненты и Далее.

Компоненты
В меню Компоненты отметьте необходимые для работы Hyper-V флажки:
- cредства удалённого администрирования сервера;
- cредства администрирования ролей;
- cредства упраления Hyper-V (2 пункта);

Виртуальные коммутаторы
Для того, чтобы виртуальная машина могла взаимодействовать с сетью, нужно наладить связь между ней и устройством, обеспечивающим выход в сеть. Перейдите в меню Виртуальные коммутаторы и отметьте сетевой адаптер, который вы хотите для этого использовать.

Хранилища по умолчанию
В пункте Хранилища по умолчанию нужно выбрать папки по умолчанию для расположения образов виртуальных жёстких дисков и файлов конфигурации виртуальной машины. Для этого нужно создать две отдельные папки. Рекомендуется предварительно отформатировать диск, на котором они находятся.

Подтверждения
В меню Подтверждения отметьте флажок Автоматический перезапуск конечного сервера, если требуется.
После этого нажмите кнопку Установить внизу и дождитесь окончания установки.

После нескольких перезагрузок и входа в систему мастер добавления ролей и компонентов сообщит об окончании установки. После этого нажмите кнопку Закрыть.

Шаг 3. Создайте виртуальную машину
Откройте диспетчер Hyper-V. На правой панели выберите пункт Создать → Виртуальная машина.

Имя виртуальной машины
Появится мастер создания виртуальной машины. Нажав один раз кнопку Далее, вы перейдёте к этапу установки Укажите имя и местонахождение (список этапов и текущий этап обозначаются в левой части окна). Здесь в соответствующем поле укажите имя виртуальной машины.

Выбор поколения
В следующем пункте выберите поколение виртуальной машины. В нашем примере мы использовали Windows 7, которой соответствует первое поколение.

Выделяемая память
Укажите количество выделяемой памяти. Мы рекомендуем выделять не менее 1 Гб, то есть 1024 Мб.

Настройка сети
В разделе Настройка сети выберите тот виртуальный коммутатор, который вы выбрали при добавлении компонента в меню Виртуальный коммутатор.

Виртуальный жёсткий диск
Далее потребуется создать или выбрать уже имеющийся виртуальный жёсткий диск. В нашем примере мы создаём новый жёсткий диск размером 40 Гб.

Источник установки операционной системы
Выберите способ установки операционной системы. В нашем примере мы устанавливаем её с DVD-диска.

В меню, Сводка, ничего заполнять не нужно. Нажмите Готово и ждите окончания настройки виртуальной машины.
Шаг 4. Включите виртуальную машину
После окончания настройки вы вернётесь в диспетчер Hyper-V. Там в правом меню в группе кнопок вашей виртуальной машины (в нашем примере, напомним, она называется vm1) нажмите Подключить.

В открывшемся после этого окне должна появится надпись Виртуальная машина выключена. Соответственно, вам нужно её включить. Для её включения нажмите Действие → Пуск.

Если вы точно следовали инструкции и указали корректный носитель или .iso образ с дистрибутивом системы, машина запустится и начнётся установка Windows.
Шаг 5. Установите TrueConf Server
После успешной настройки виртуальной машины остаётся установить на неё TrueConf Server. Воспользовавшись нашей инструкцией, вы сможете сделать это за 15 минут.
We are going to install Windows 2012R2 Standard Edition in VirtualBox as part of creating a Oracle Windows Cluster.
We want to have 3 server: 1 Controller + 2 Database servers:
| Server Name | Public IP: | Private IP: |
| win-rac1 | 192.168.56.151 | 192.168.10.151 |
| win-rac2 | 192.168.56.152 | 192.168.10.152 |
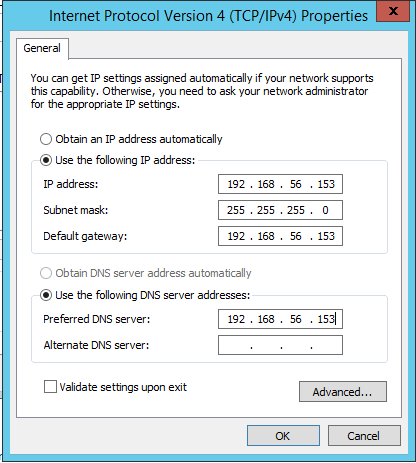
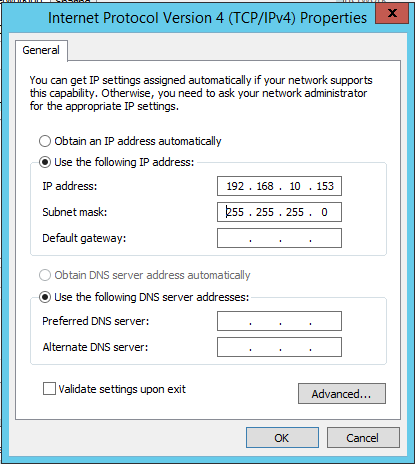
| win-rac-control | 192.168.56.153 | 192.168.10.153 |
Here the steps to create WIN-RAC-CONTROL (the controller) on VirtualBox. They are exactly the same for all 3 servers and you only need to change hostnames and IP’s.
You can clone the first VM and recreate the other 2, but you might have problems down the line at Network level saying same MAC is in different servers, so I decided to create all 3 individually.
**Disclaimer: You will need licence and Windows activated, if not, you are running the risk of VM’s crashing every 5-10min.
STEPS:
1:- New:
2:- Memory Size (20G for this test)
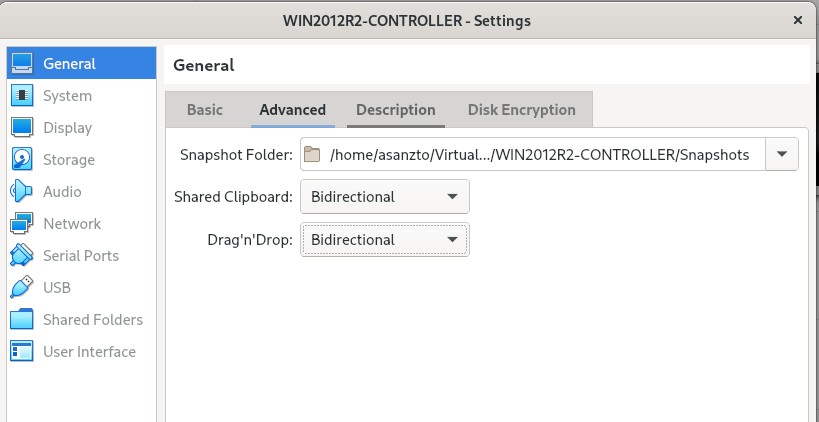
4:- Settings -> General:
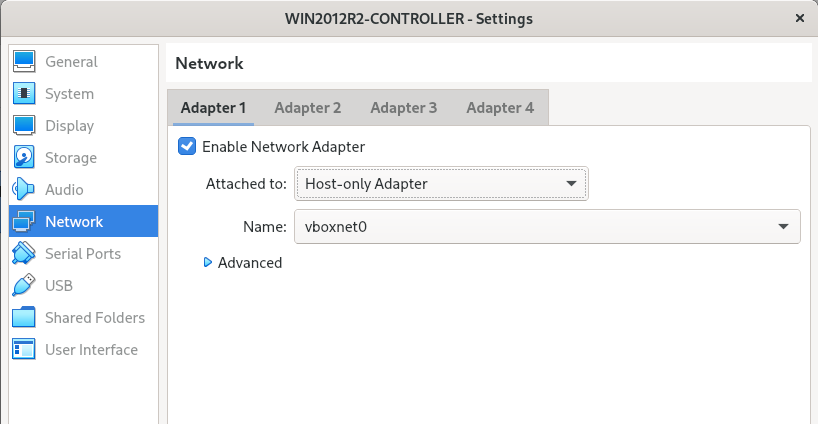
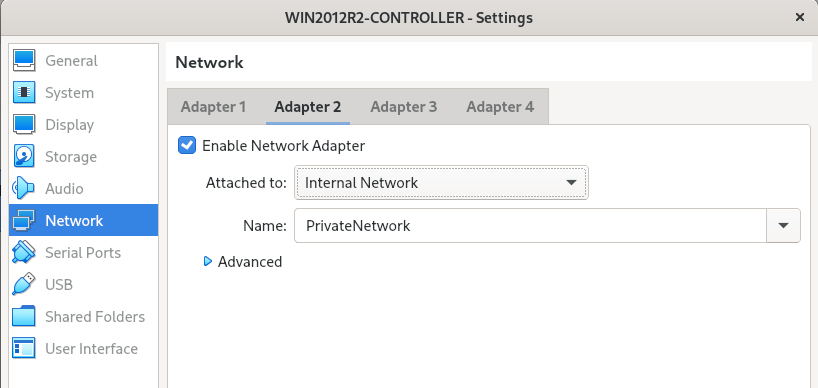
5:- Settings -> Network:
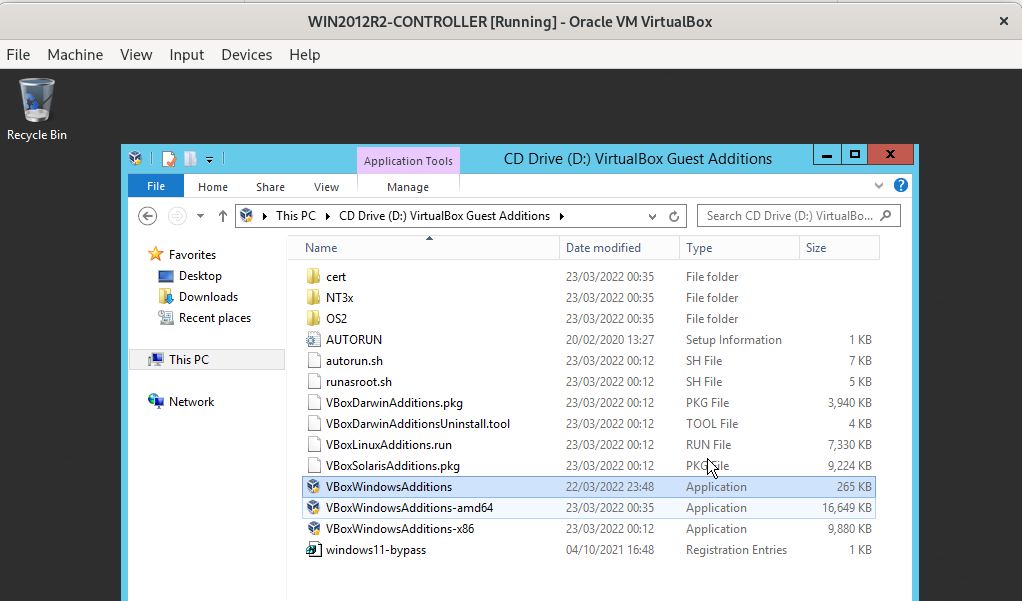
6:- Once Installed, Install Guest Additions:
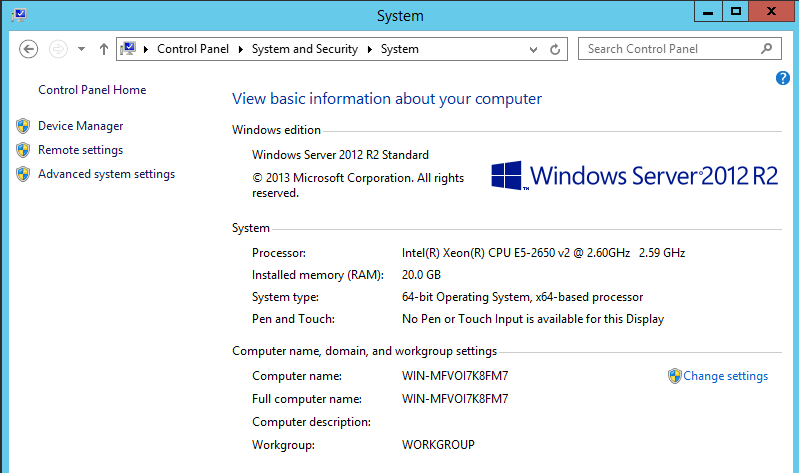
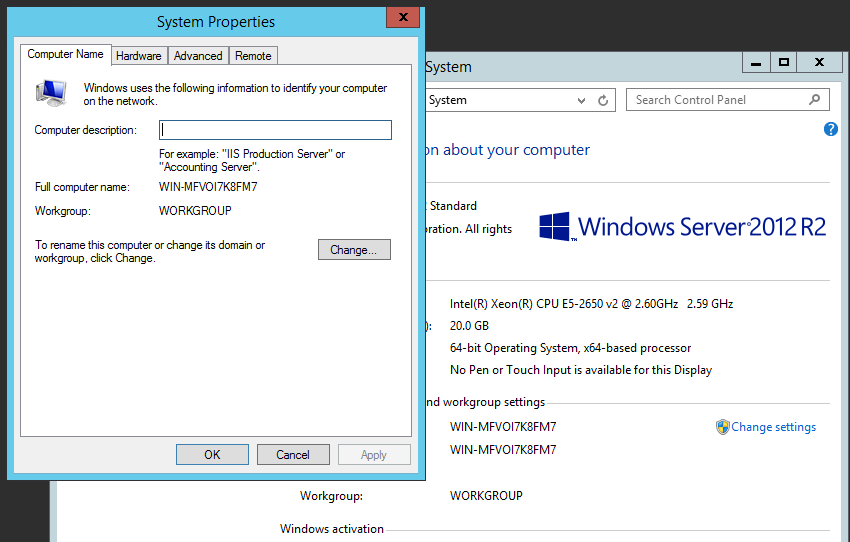
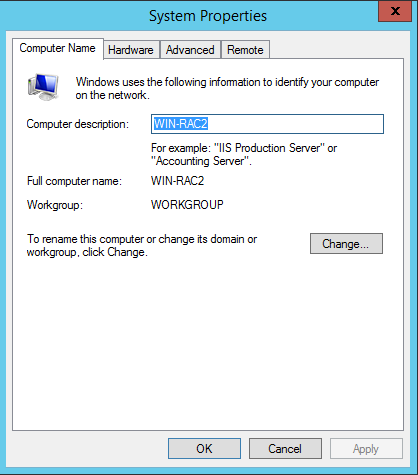
7:- Change Host Name: (Control Panel -> System and Security -> System -> Change Settings)
8:- Set PUBLIC IP ( Control Panel->Network and Internet->Network Connections -> First Interface)

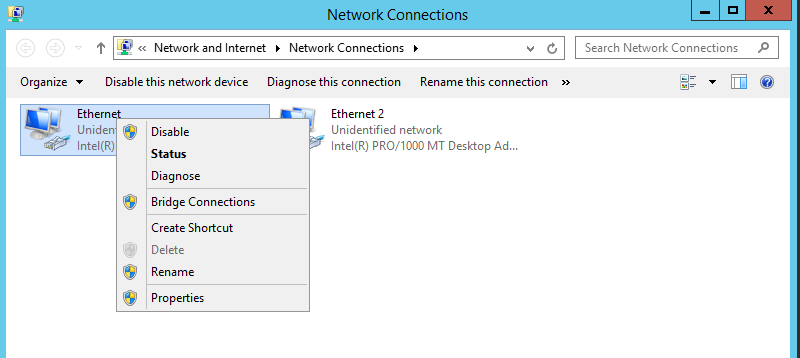
9:- Set PUBLIC IP ( Control Panel->Network and Internet->Network Connections -> Second Interface)
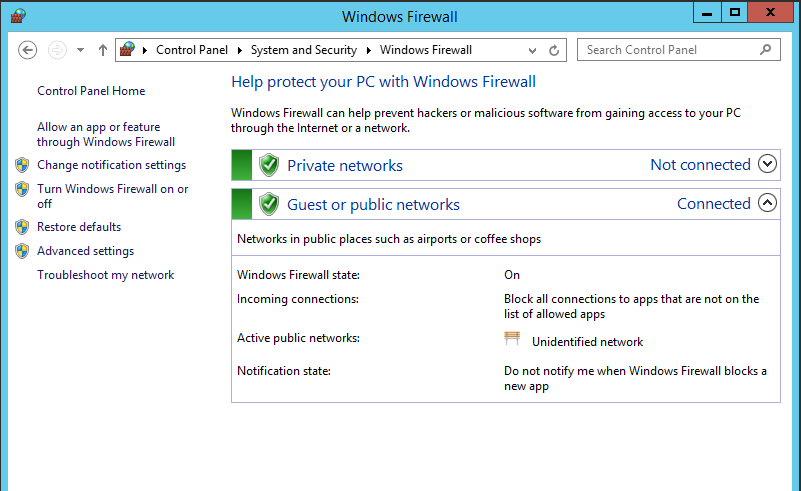
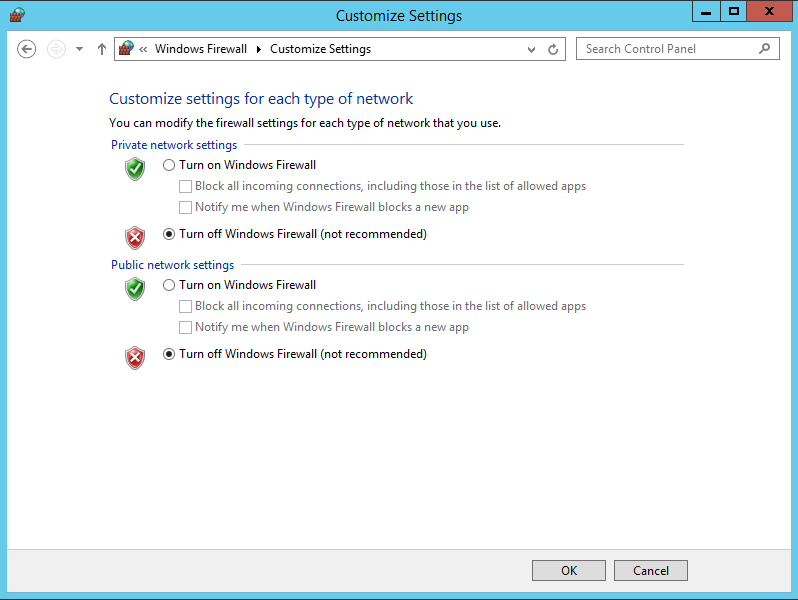
10:- Turn OFF Firewall:
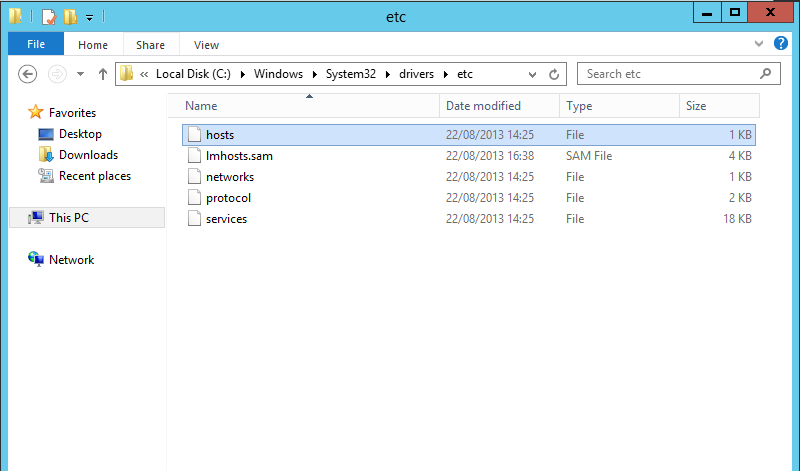
11:- Update host file with the following:
# Public
192.168.56.151   win-rac1.localdomain          			win-rac1
192.168.56.152   win-rac2.localdomain          			win-rac2
192.168.56.153   win-rac-control.localdomain   	    	win-rac-control
192.168.56.153   TESTLAB.localdomain   	    			TESTLAB  <<-- we will need it later
192.168.53.161   ACCESSPOINT                            <<---- We will need this later to create an ACTIVE/PASSICE
# Private
192.168.10.151   win-rac1-priv.localdomain     			win-rac1-priv
192.168.10.152   win-rac2-priv.localdomain     			win-rac2-priv
192.168.10.153   win-rac-control-priv.localdomain       win-rac-control-priv
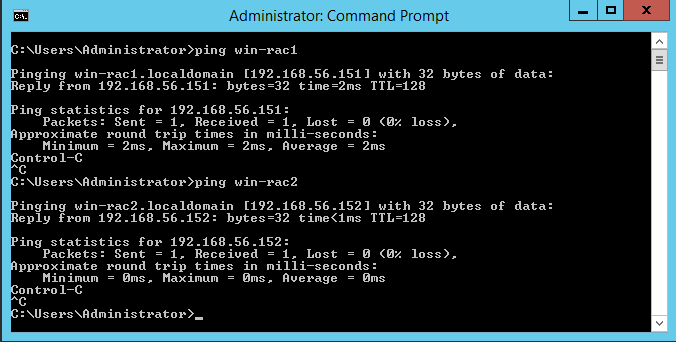
12:- PING all hosts, public and private interfaces (once created):
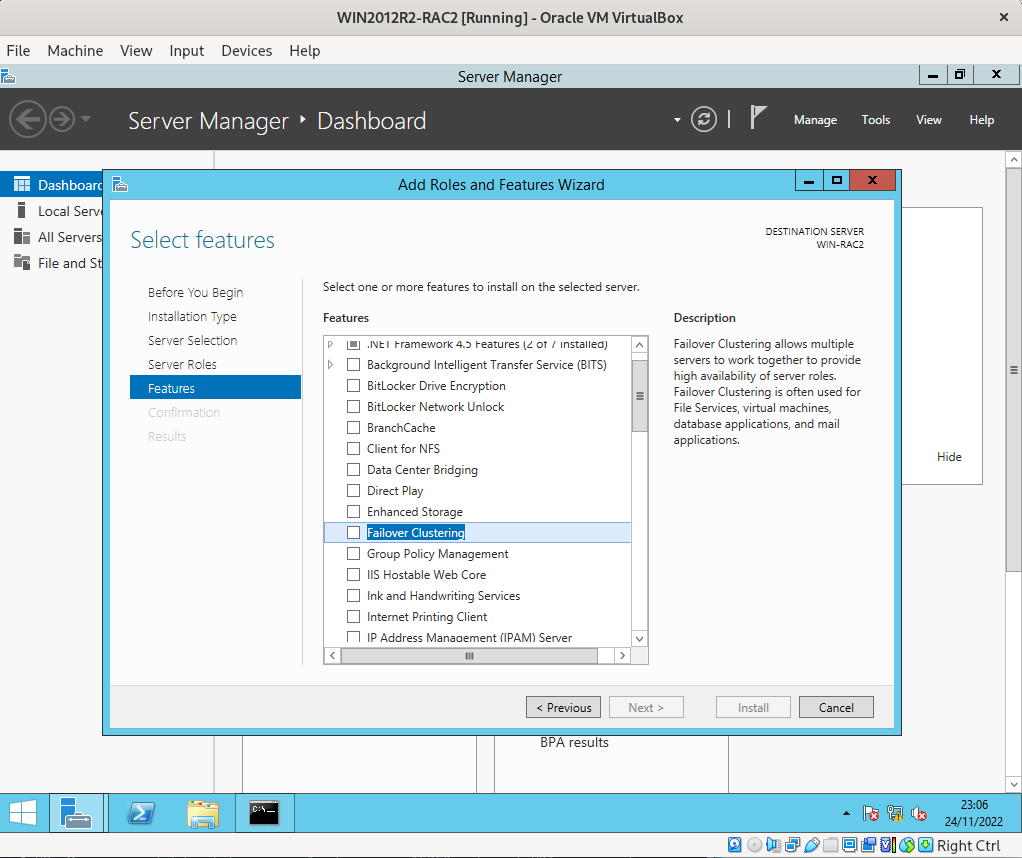
13:- Install Failover Clustering (Server Manager -> Manage -> Add Roles and Features)
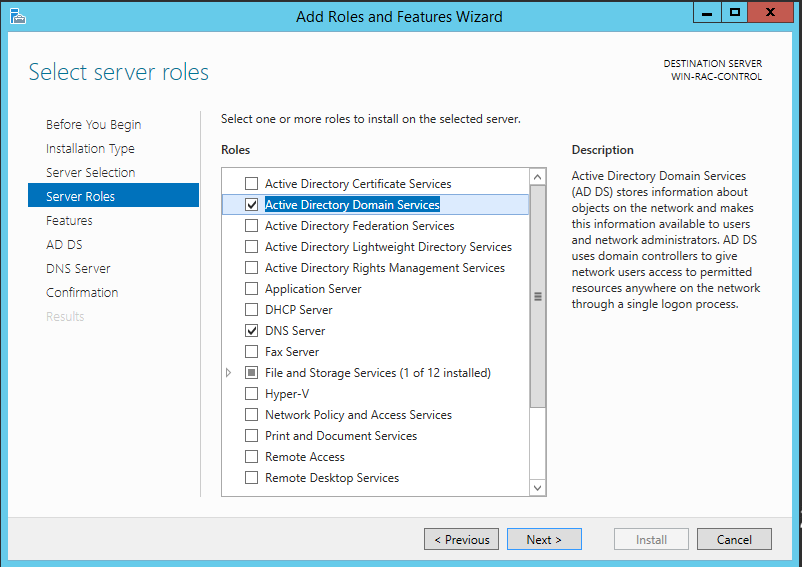
14:- ONLY on CONTROLLER Server: Install Active Directory (Server Manager -> Manage -> Add Roles and Features):
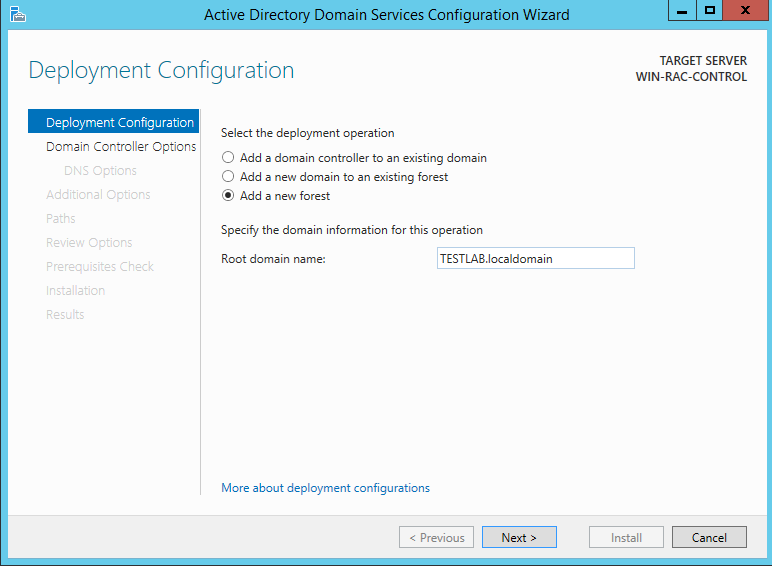
15:- Configure Active Directory:
Deployment Configuration -> Add a new forest -> enter domain name -> Next
Enter password for Directory Services Restore Mode(DSRM) in password field
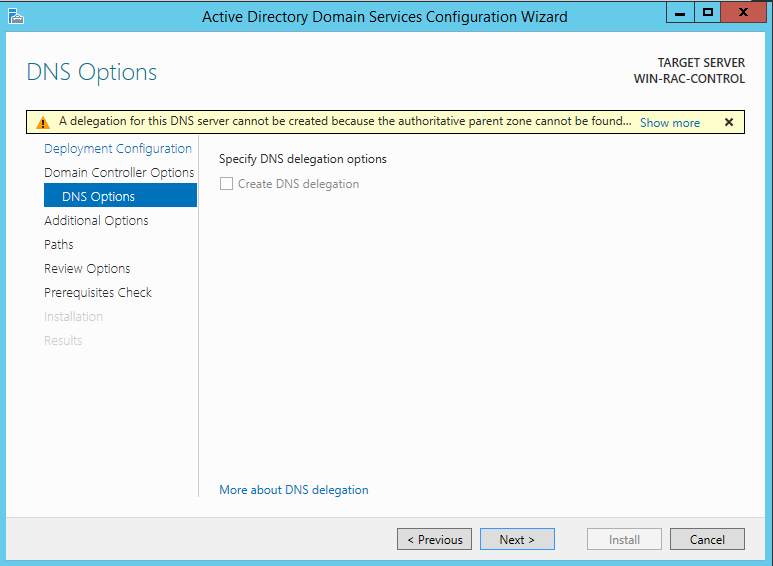
On DNS Options -> Next (ignroe warning)
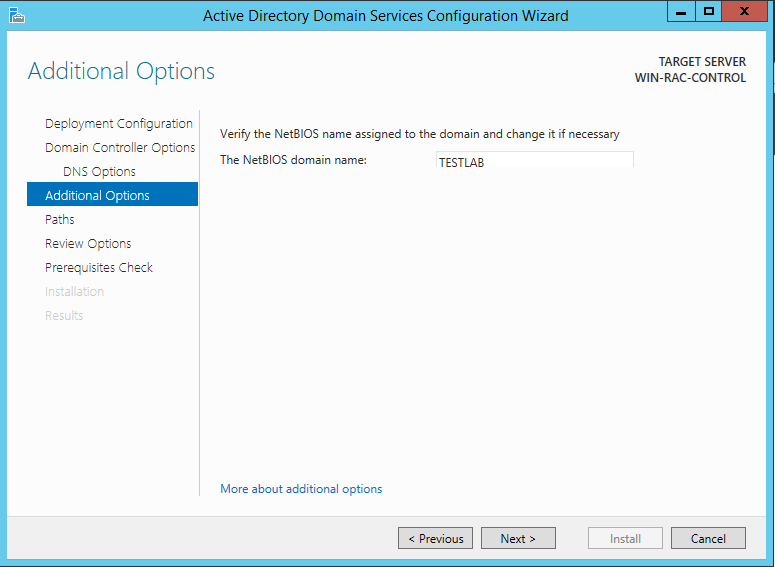
Additional Options
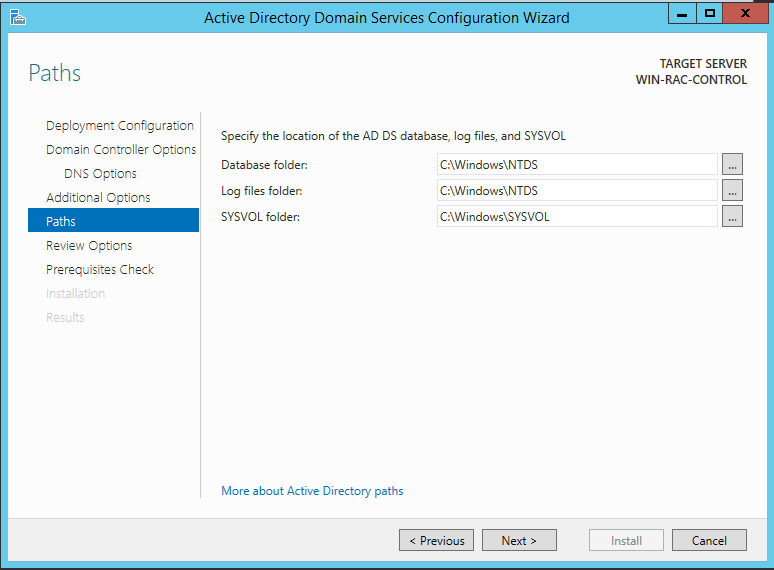
Paths -> Next
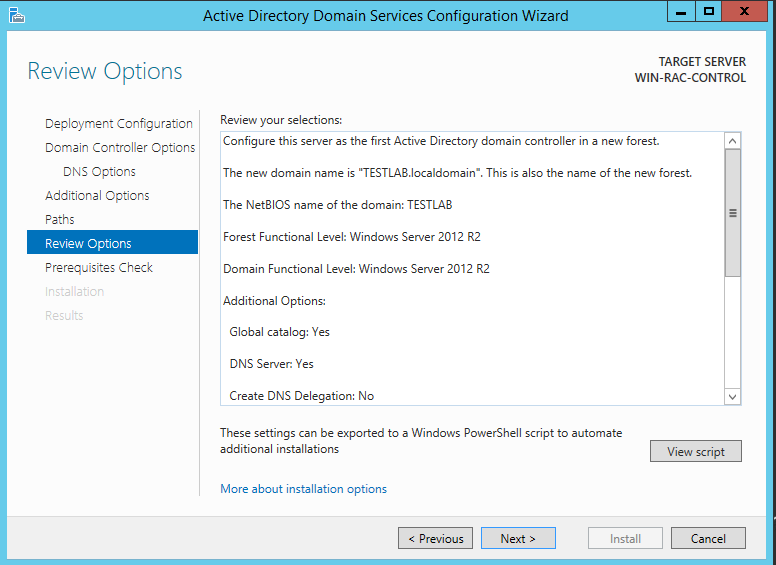
Review Options -> Next
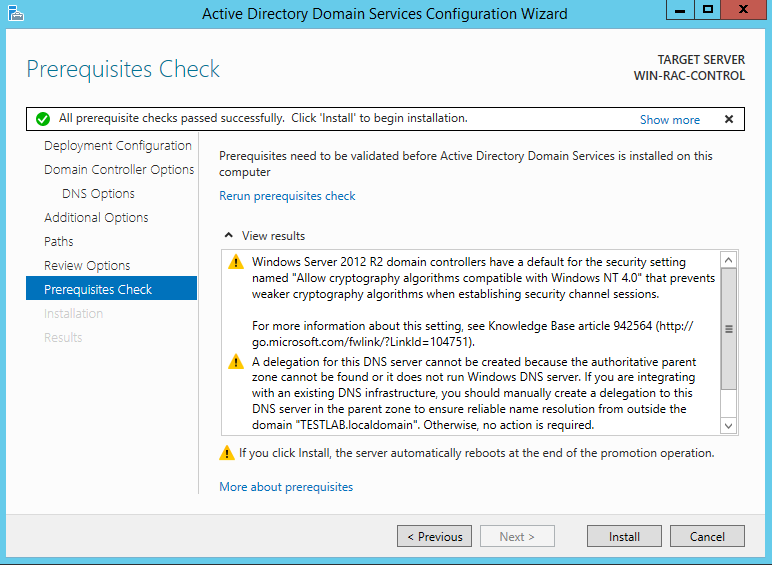
Prerequisites Checks -> Install
Once Install finishes, it will automatically reboot the server
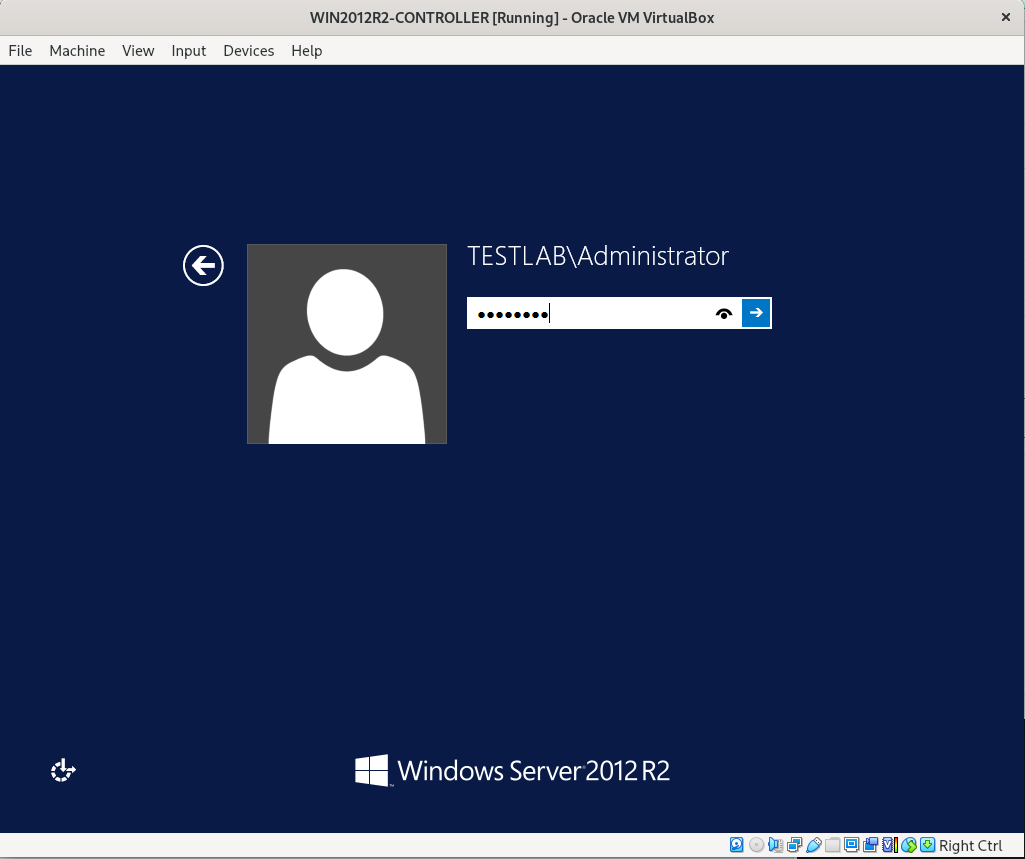
Log in to the server using domain admin credentials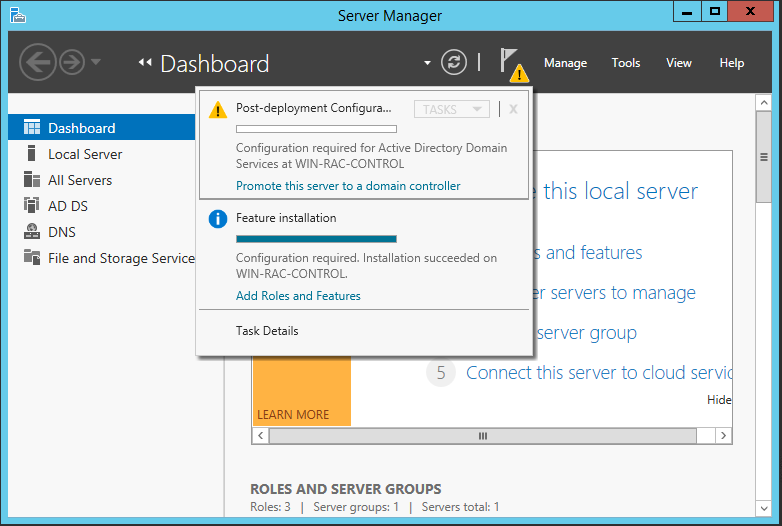
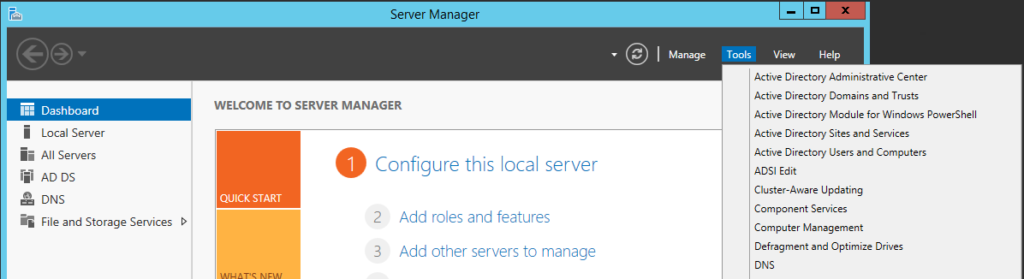
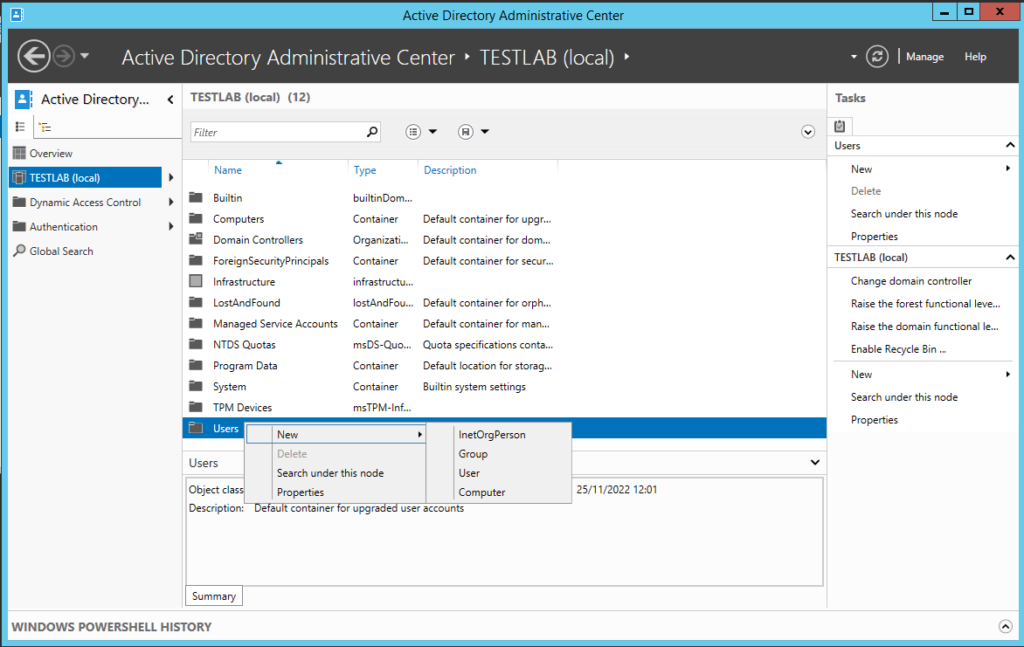
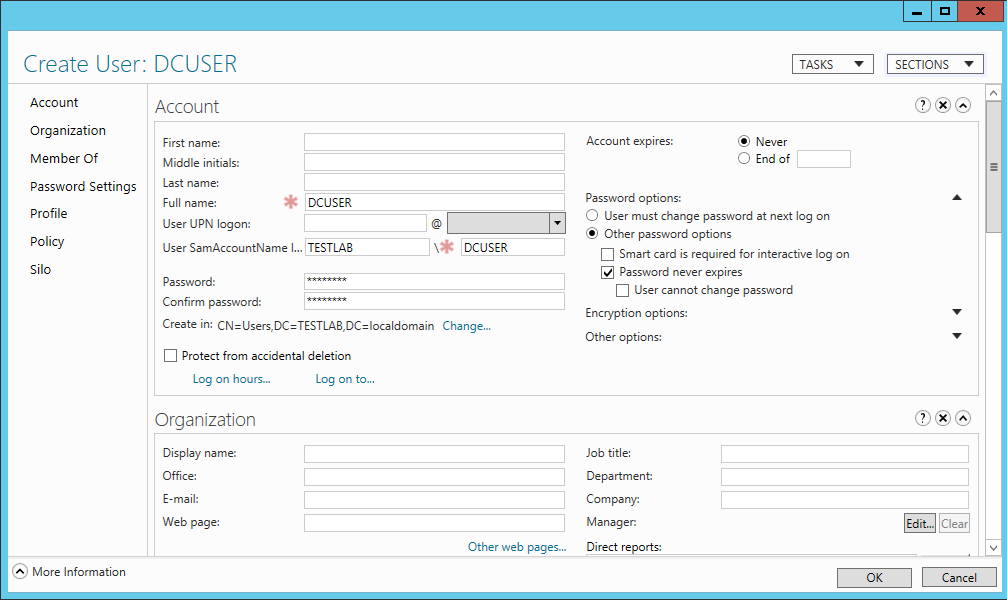
16:- Create a Domain Account (Server Manager -> Tools -> AD Administrative Center)
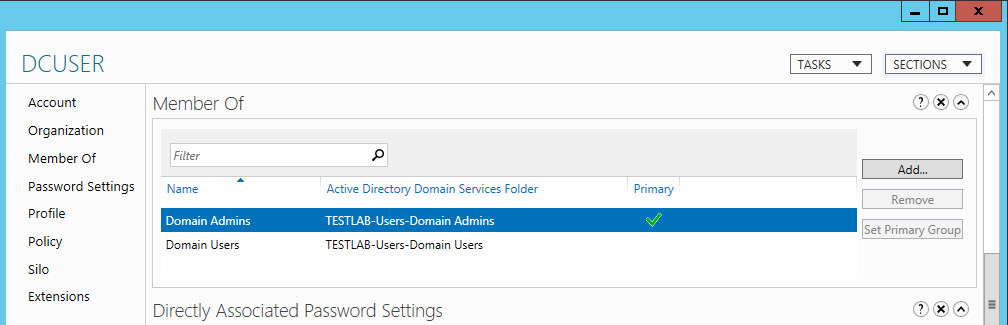
17:- Add DCUSER to the “Domain Admins”:
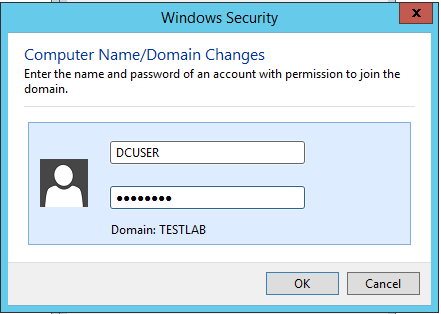
18:- Connect other servers to domain TESTLAB (in case WIN-RAC1 and WIN-RAC2)
That’s it! Example of installing Windows 2012R2 and connect to a domain done!
Post Views: 2,572
In This Topic Trainee Will Learn How to Install Windows Server 2012
This tutorial will disclose how to introduce Windows Server 2012 R2 in a virtual machine.
First, you need to have Windows Server 2012 R2 ISO file and VirtualBox installed.
Make a new virtual machine on VirtualBox by clicking on New. Select the type and form of the virtual machine. For this situation, Windows 2012 (64-bits).

Create a new virtual machine
Set the amount of memory (RAM). I selected the 4096 MB (4 GB).

Set the amount of memory
Create the virtual hard disk and set its size. I selected 40 GB.

Create a virtual hard disk

Set the virtual hard disk size
When starting the virtual machine, you will be asked to select the ISO file. Select the Windows Server 2012 R2 ISO file.

Select the virtual optical disk file
The installation wizard will have been started. Select your language, time and keyboard input. Then, start the installation.

Windows setup

Install Windows Server 2012 R2
Select the type of installation. In this case, Custom: Install Windows only (advanced). Hence, choose the partition to install windows and wait to finish the installation.

Type of installation

Partition for Windows Server

Installing Windows Server 2012 R2
When finishing the installation, the virtual machine will be restarted. Then, type the administrator password and Windows Server 2012 R2 will be ready.

Administrator password

Windows Server 2012 R2
Thanks for reading! We hope you found this tutorial helpful and we would love to hear your feedback in the Comments section below. And show us what you’ve learned by sharing your photos and creative projects with us.
Microsoft Windows Server 2019