
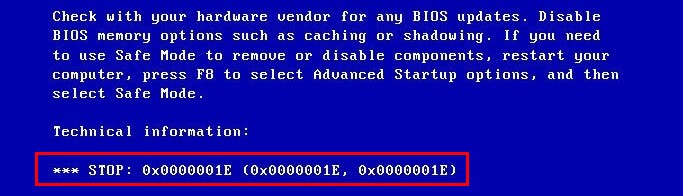
Is your screen shows you this blue screen when you installing software or updating the Windows system? Don’ worry, you’re not alone. Many Windows users have reported this 0x0000001E blue screen error. Fortunately, it’s usually not too hard to fix.
Back to normal system
The first thing to do when you meet 0x0000001E error is to restart your computer and make it back to the normal Windows system.
How: Hold your Power button for about 5 seconds to restart your computer.
If you can’t reboot your computer into normal mode in this way, you need to boot into safe mode. After that, restart the computer to see if the system has returned to normal.
Try these fixes:
There’re 7 fixes that have helped many users solve their problems. You don’t have to try them all; just work your way down the list until you find the one that works for you.
- Check your RAM
- Roll-back your driver
- Update your driver
- Uninstall the newly installed software
- Repair system files
- Clear any existed viruses
- Disable/Uninstall antivirus software
- Restore from a restore point
- Reset or reinstall Windows
Fix 1: Check your RAM
The reason for this 0x0000001E blue screen error is mostly caused by poor contact, defective or mismatched RAM (Random Access Memory).
You can physically or use the Windows Memory Diagnostics Tool to check your RAM.
1) Plug your RAM in and out to make sure it has been installed properly and steadily.
Clean your RAM if it’s dusty. And don’t forget the RAM slot.
2) Reboot your computer to check whether the problem exists.
If not, use the Windows Memory Diagnostics Tool to check for any memory problems.
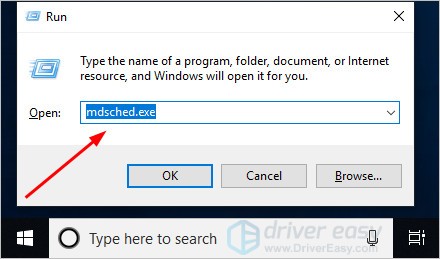
3) On your keyboard, press the Windows logo key + R together to open the Run box.
4) Type “mdsched.exe” and click OK.
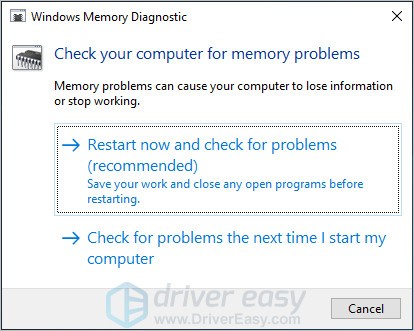
5) Click Restart now and check for problems.
The result can lead to two situations:
A: You RAM has no problem. Then move to the next method.
B: The test result indicated that the computer is suffering from a bad memory. You should replace your RAM with a new one.
Then restart your computer and check to see the blue screen will appear or not.
Fix 2: Roll-back your driver
Sometimes the latest version of the device driver doesn’t work properly on your system and starts interfering with the computer’s normal start-up process.
If this is the cause of the 0x0000001E error, simply roll back your driver to the previous version to resolve the issue.
In the steps below, we use the graphics driver as an example to demonstrate. You can follow the steps to roll back the driver you think needs to be rolled back.
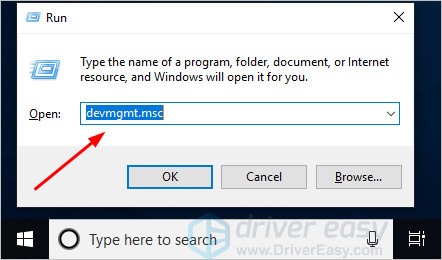
1) On your keyboard, press the Windows logo key and R together to invoke the Run box.
2) Type “devmgmt.msc” and click OK.
3) In the Device Manager, click the Display adapters, then right-click on your display device software and click Properties.

4) Under the Driver tab, click Roll Back Driver, then follow the on-screen instructions to finish the process.

Note: If the Roll Back Driver option grayed out, you can download a previous driver from the manufacturer’s website and install it on your PC, or try the Method 3.
5) Restart your computer, and see if the blue screen error is fixed or not.
Fix 3: Update your driver
If the roll-back driver does not resolve this issue, you may have used the wrong driver or an outdated driver.
There are two ways you can get the right drivers: manually or automatically.
Manual driver update – You can update your driver manually by going to the manufacturer’s website, and searching for the most recent correct driver. Be sure to choose only drivers that are compatible with your Windows version.
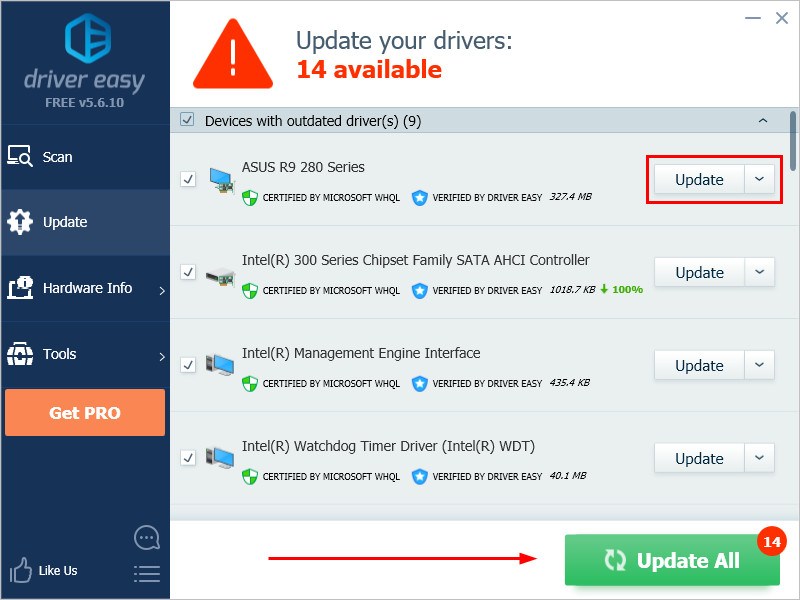
Automatic driver update – If you don’t have the time, patience or computer skills to update your video and monitor drivers manually, you can, instead, do it automatically with Driver Easy. Driver Easy will automatically recognize your system and find the correct drivers for your device, and your Windows version, and it will download and install them correctly:
1) Download and install Driver Easy.
2) Run Driver Easy and click the Scan Now button. Driver Easy will then scan your computer and detect any problem drivers.

3) Click the Update button or Update All to automatically download and install the correct version of all the drivers that are missing or out of date on your system. (This requires the Pro version which comes with full support and a 30-day money back guarantee. You’ll be prompted to upgrade when you click Update All.)
4) Restart your computer and check the blue screen problem is fixed or not.
Fix 4: Uninstall the newly installed software
Sometimes the third-party software that is not compatible with your system can cause the blue screen error. Uninstalling the newly installed software will resolve this issue.
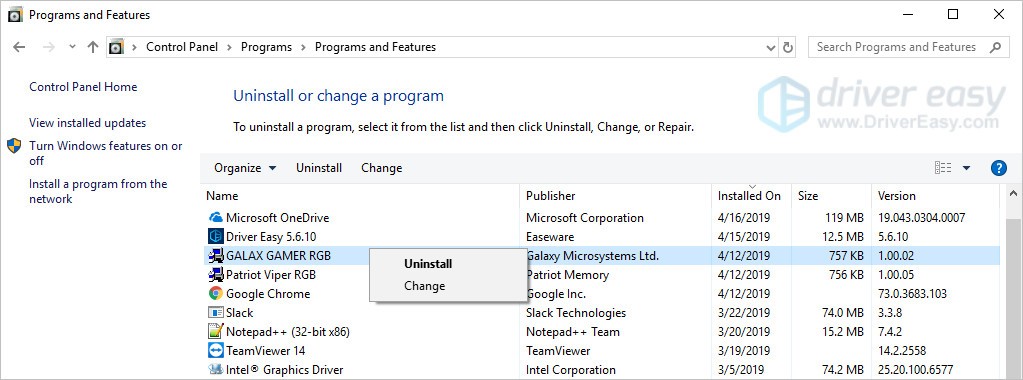
In the steps below, we use the GALAX GAMER RGB as an example to demonstrate. You can follow the steps to uninstall the newly installed software on your computer.
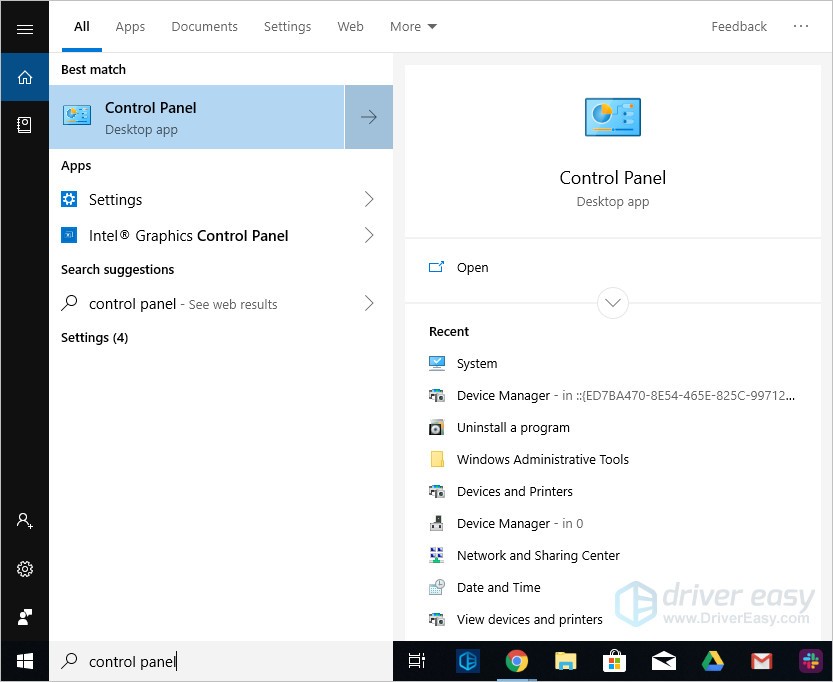
1) Click the Windows start button (if you hide the search field), type “control panel” in the search box, and click Control Panel.
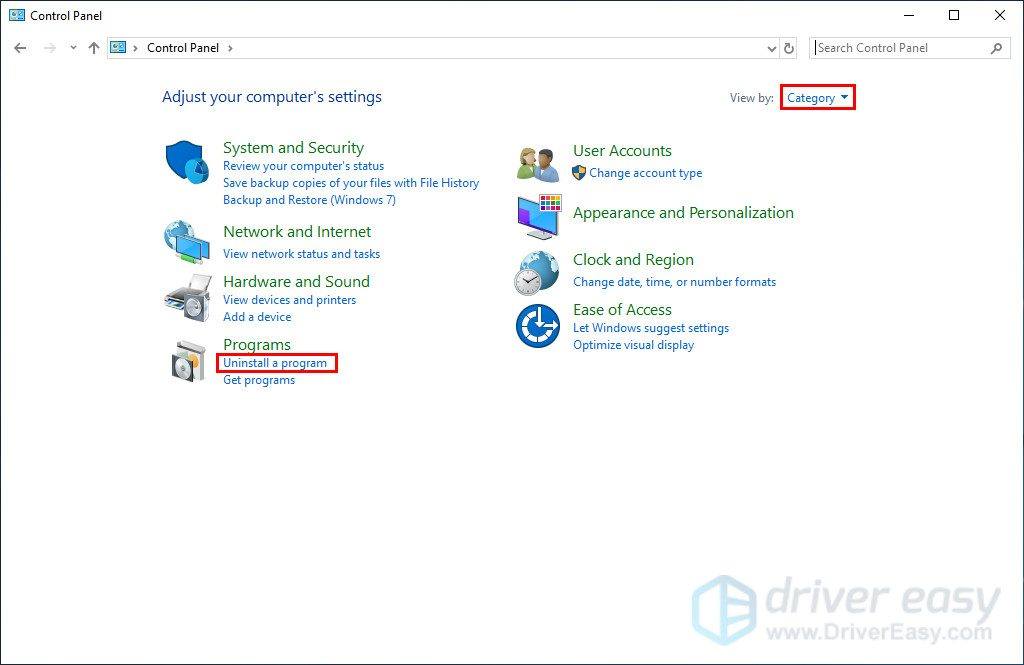
2) Choose to view by Category and then click Uninstall a program.
3) Find your newly installed program. Right-click on it and click Uninstall.
4) Follow the on-screen instructions and restart your computer to check the blue screen will appear or not.
Fix 5: Repair system files
When the system files are broken or corrupted, it may cause the Stop: 0x0000001E Blue Screen Error. Here’s how to scan and repair system files:
1) On your keyboard, press the Windows logo key and R key at the same time to invoke the Run box.
2) Type cmd and press Shift+Ctrl+Enter together on your keyboard to open Command Prompt in the administrator mode.
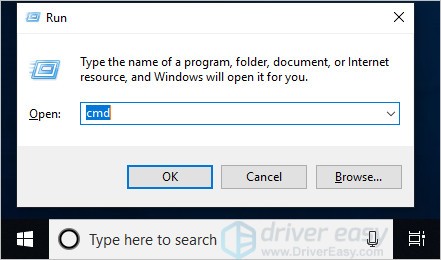
Note: Do NOT click OK or just press the Enter key as that won’t allow you to open Command Prompt in the administrator mode.
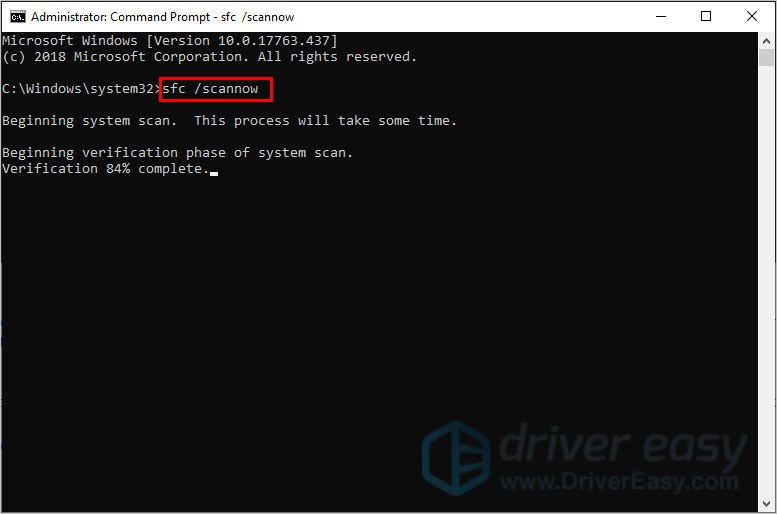
3) Type sfc /scannow (or copy-paste) and press Enter. Then wait for the verification is 100% complete.
4) Restart your computer to check the blue screen issue is fixed or not.
If the result indicates there are broken files but SFC can’t fix them, you can turn to Deployment Image Servicing and Management (DISM) Tool for deeper examination and repair.
Fix 6: Clear any existed viruses
The 0x0000001E Blue Screen Error could also be caused by a virus attack.
So run your antivirus software to do a security scan and clear existed viruses or malware. Be sure that your anti-virus software has been updated to the latest version.
Fix 7: Disable/Uninstall antivirus software
The 0x0000001E blue screen error may also be caused by the conflict between your antivirus software and the system. Therefore, disabling or uninstalling the antivirus software and then restarting your computer can help you solve the error.
If this method resolves the problem, you can install another antivirus software to protect your computer. But if you are fond of the old one, contact the vendor of your antivirus software and ask them for advice.
IMPORTANT: Be extra careful in using the Internet after uninstalling/disabling your antivirus software.
Fix 8: Restore from a restore point
If you can’t figure out which software or driver caused this blue screen error and your computer was fine a few days ago, you can restore your system back to a previous restore point.
This will roll back all the device drivers and software updates to the condition when you created the restore point.
Note: System restore will affect system files but won’t affect your personal files. Some of the files stored on your system may get overwritten by the previous files. So it is recommended to perform a backup before performing the system restore process.
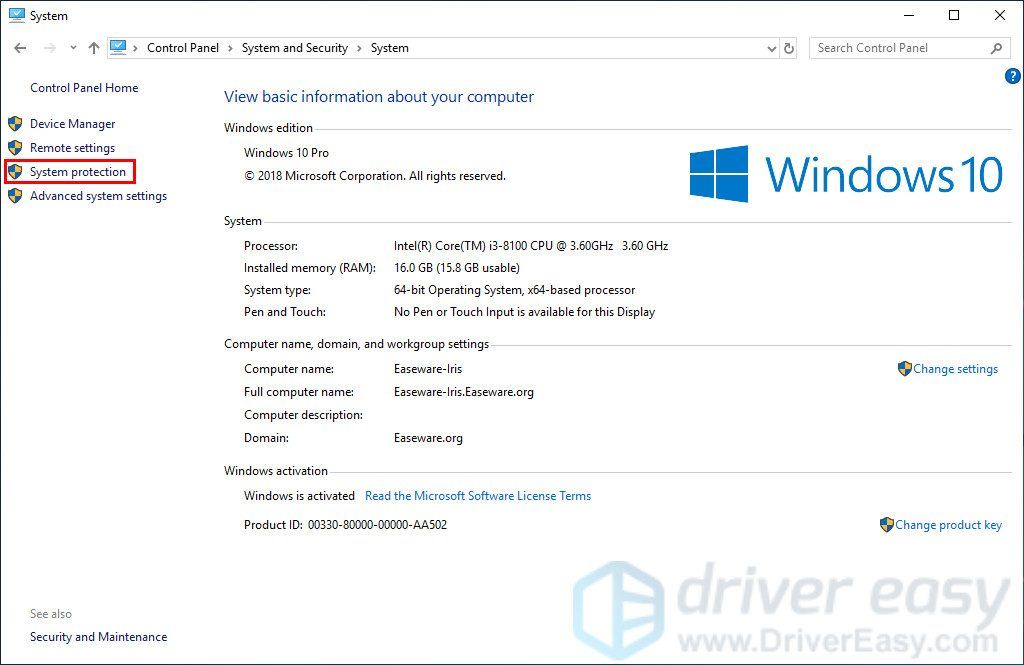
1) On your keyboard, press the Windows logo key + Pause together, then click System protection.
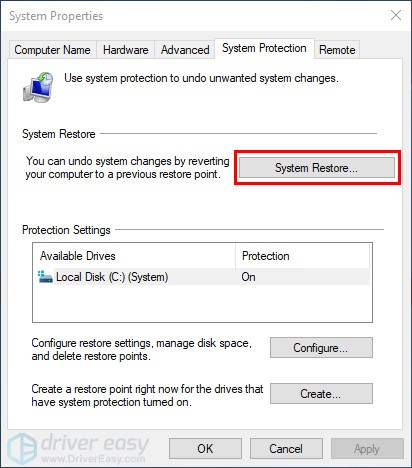
2) Click System Restore.
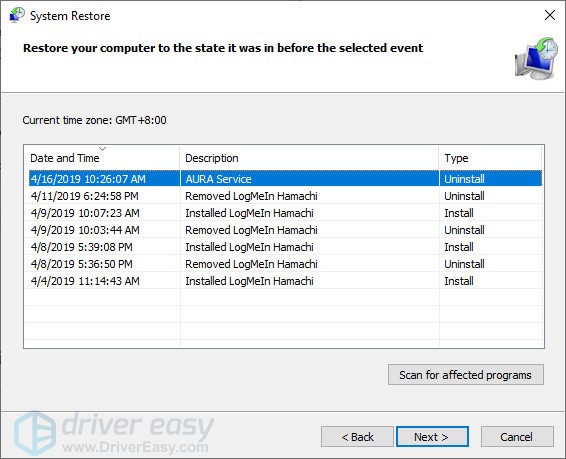
3) Click Next and it will open the below window.
Choose a restore point where the Windows didn’t show any errors. Then follow the on-screen instructions to finish the process.
4) Restart your computer to check the blue screen will appear or not.
Fix 9: Reset or reinstall Windows
If all else fails, you may have to reset Windows, or maybe even reinstall it together. We all know reinstalling will delete all the data on your hard drive, you have to back up all your important files before doing it.
But treat these options as a last resort, because they both take quite a long time.
We hope you find these techniques useful. You’re welcome to leave comments and questions below.
Windows · December 16, 2023
Windows Server is a powerful and reliable operating system used by many businesses for their hosting needs. However, like any other system, it can encounter errors that can disrupt its operation. One such error is the 0x0000001E – KMODE_EXCEPTION_NOT_HANDLED error. This error can be frustrating, but with the right steps, it can be fixed.
Understanding the Error
The 0x0000001E – KMODE_EXCEPTION_NOT_HANDLED error is a Blue Screen of Death (BSOD) error that occurs when a kernel-mode program generates an exception that the error handler cannot catch. This error is usually caused by a faulty driver or hardware issue.
Steps to Fix the Error
Step 1: Update Drivers
Outdated or corrupt drivers are often the cause of this error. To fix this, you should update all your drivers to the latest version. You can do this manually by going to the manufacturer’s website and downloading the latest drivers or using a driver update tool.
Step 2: Run a Memory Test
Bad memory can also cause this error. To check if this is the case, you can run a memory test using the Windows Memory Diagnostic tool. To do this, type “memory” in the search box and select “Windows Memory Diagnostic.” Follow the prompts to run the test.
Step 3: Check for Hardware Issues
If updating drivers and running a memory test does not fix the error, you may have a hardware issue. Check all your hardware components to ensure they are properly connected and functioning correctly.
Step 4: Perform a System Restore
If the error started occurring after a recent change to your system, you could perform a system restore to revert your system to a previous state. To do this, type “system restore” in the search box and follow the prompts.
Step 5: Reinstall Windows
If all else fails, you may need to reinstall Windows. This will erase all your data, so make sure to back up your files before doing this.
Conclusion
The 0x0000001E – KMODE_EXCEPTION_NOT_HANDLED error can be a headache for VPS users, but with the right steps, it can be fixed. By updating drivers, running a memory test, checking for hardware issues, performing a system restore, or reinstalling Windows, you can get your USA VPS Hosting back up and running smoothly. Remember to always keep your system updated and regularly check for hardware issues to prevent this error from occurring in the future.
В этой статье мы рассмотрим процедуры корректного удаления контроллера домена Active Directory на Windows Server 2022/2019/2016/2012R2. Обычно при удалении контроллера домена рассматривается один из сценариев:
Содержание:
- Понижение контроллера домена с удалением роли Active Directory Domain Services
- Удаление неисправного контроллера домена Active Directory
Понижение контроллера домена с удалением роли Active Directory Domain Services
Если вы выполняете плановое удаление (декомиссию) одного из существующих контроллеров домена AD (обычного DC или RODC), то прежде чем понизить контроллер домена до рядового Windows Server и удалить роль ADDS, нужно выполнить ряд подготовительных шагов.
- Проверьте состояние вашего контроллера домена, Active Directory и репликации. На сайте есть отдельная статья с описанием команд диагностики здоровья контроллера домена и репликации в AD с помощью
dcdiag
,
repadmin
и скриптов PowerShell. Исправьте найденные проблемы. Для вывода списка ошибок на конкретном контроллере домена выполните команду:
dcdiag.exe /s:dc01 /q - Убедитесь, что на контроллере домена не запущены FSMO роли AD:
netdom query fsmo
Если нужно, перенесите роли FSMO на другой DC; - Убедитесь, что на DC не запушена роль DHCP сервера. Если запущена, мигрируйте ее на другой сервер;
- Измените настройки DNS для DHCP областей, которые выдаются клиентам IP адреса. Перенастройте DHCP клиентов на другой DNS сервер (дождитесь окончания времени аренды IP адресов, чтобы все клиенты получили новые настройки DNS). Вы можете вывести список DNS серверов, заданных для всех зон (DNS Servers Option 006) на определенном сервере с помощью следующей команды PowerShell (подробнее об управлении DHCP в Windows Server с помощью PowerShell):
Get-DhcpServerv4Scope -ComputerName msk-dhcp01.winitpro.ru| Get-DhcpServerv4OptionValue | Where-Object {$_.OptionID -like 6} | FT Value - Некоторые клиенты могут быть настроены на использование DNS сервера на DC вручную (сетевые устройства, сервера, принтеры, сканеры и т.д.). Вам нужно найти такие устройства и перенастроить их на другой DNS сервер. Проще всего обнаружить устройства, обращающиеся к DNS серверу по его логам. Вот подробная статья: Аудит DNS запросов клиентов в Windows Server по DNS логам;
- Если на контроллере домена запущен центр сертификации (роль Certificate Authority), нужно мигрировать его на другой сервер;
- Если на контроллере домена запущены другие службы (например, KMS сервер, Raduis/NPS, WSUS и т.д.), решите нужно ли переносить их на другие сервера;
- Воспользуйтесь командлетом
Test-ADDSDomainControllerUninstallation
, чтобы проверить оставшиеся зависимости и проблемы, с которыми вы можете столкнуться при удалении DC. Если командлет вернет статус
Sucсess
, можете продолжить.

Теперь можно приступить к понижению роли контроллера домена до рядового сервера. До Windows Server 2012 для этого использовалась команда dcpromo. В современных версиях Windows Server этот инструмент считается устаревшим и не рекомендуется к использованию.
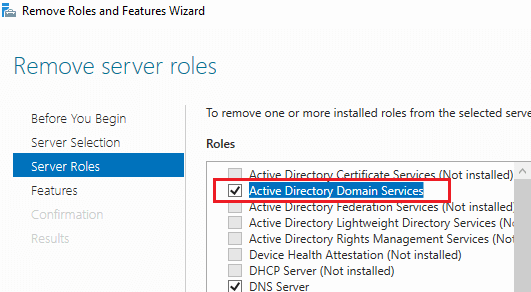
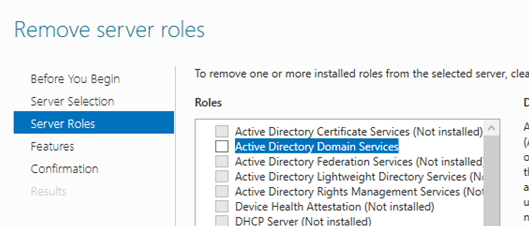
Вы можете понизить роль контроллера домена с помощью Server Manager. Запустите Server Manager -> Remote Roles and Features -> снимите чекбокс Active Directory Domain Services в секции Server Roles.
Нажмите на кнопку Demote this domain controller.
Должно открыться окно Active Directory Domain Services Configuration Wizard. Опцию Force the removal of this domain controller используется при удалении последнего контроллера домена. Включать ее не нужно. В дальнейшем мы удалим метаданные о DC вручную.
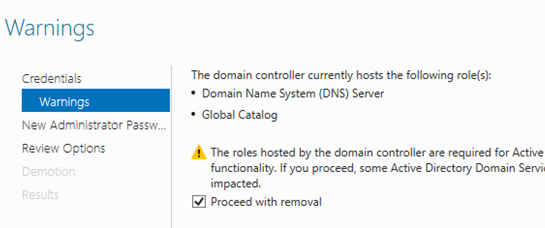
В следующем окне отметьте опцию Proceed with removal.
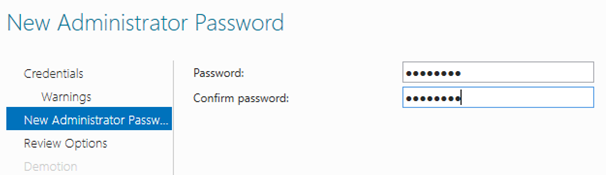
Затем задайте пароль учетной записи локального администратора сервера.
На последнем этапе останется нажать кнопку Demote.

Дождитесь окончания понижения контроллера домена. Должна появится надпись Successfully demoted the Active Directory Domain Controller.
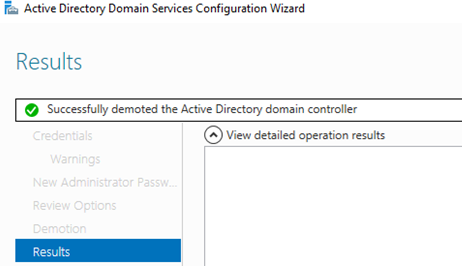
Перезагрузите сервер, еще раз запустите Server Manager для удаления роли Active Directory Domain Services.
При удалении роли ADDS по-умолчанию будут удалены следующие компоненты:
- Модуль Active Directory Module for Windows PowerShell
- AD DS and AD LDS Tools feature
- Active Directory Administrative Center
- AD DS Snap-ins and Command-line Tools
- DNS Server
- Консоль Group Policy Management Console (
gpmc.msc
)
Запустите консоль Active Directory Users and Computers (dsa.msc) и убедитесь, что учетная запись контроллера домена была удалена из OU Domain Controllers.
Также вы можете удалить контроллер домена с помощью PowerShell командлета
Uninstall-ADDSDomainController
. Команда попросит вас задать пароль локального администратора и подтвердить понижение DC.
После перезагрузки останется с помощью PowerShell удалить роль ADDS:
Uninstall-WindowsFeature AD-Domain-Services -IncludeManagementTools
Теперь запустите консоль Active Directory Sites and Services (
dssite.msс
), найдите сайт контроллера домена и его учетную запись в разделе Servers. Разверните DC, щелкните ПКМ по NTDS Settings и выберите Delete.
Подтвердите удаление DC, отметив опцию Delete This Domain controller anyway. It is permanently offline and ac no longer be removed using the removal wizard.
Затем удалите учетную запись сервера.
Дождитесь окончания репликации в AD и проверьте состояние домена с помощью
dcdiag
и
repadmin
(как описано выше).
Удаление неисправного контроллера домена Active Directory
Если ваш контроллер домена вышел из строя (физический сервер или файлы виртуального DC на хранилище) и вы не планируете восстанавливать DC его из созданной ранее резервной копии контроллера домена, можно удалить его принудительно.
Важно. Удаленный таким образом контроллер домена ни в коем случае нельзя включать в сеть.
До Windows Server 2008 R2 для удаления неисправного контроллера домена и очистки его метаданных в AD использовалась консольная утилита ntdsutil. В современных версиях Windows Server 2022/2019/2016/2012 вы можете удалить вышедший из строя DC и корректно очистить метаданные с помощью графических
mmc
оснасток управления AD.
Откройте консоль ADUC (
dsa.msc
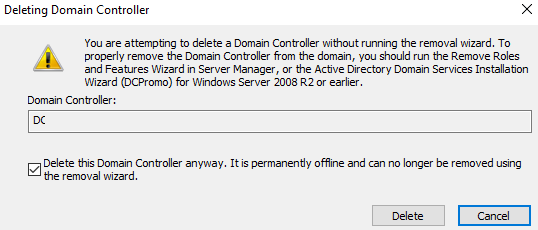
) и перейдите в контейнер Domain Controllers. Найдите учетную запись вашего DC и удалите ее.
Появится окно с подтверждением удаления DC. Включите опцию Delete this Domain Controller anyway. И нажмите кнопку Delete.

Active Directory автоматически очистит метаданные об удаленном DC из базы ntds.dit.
Теперь нужно удалить контроллер домена в консоли AD Sites and Services как описано выше.
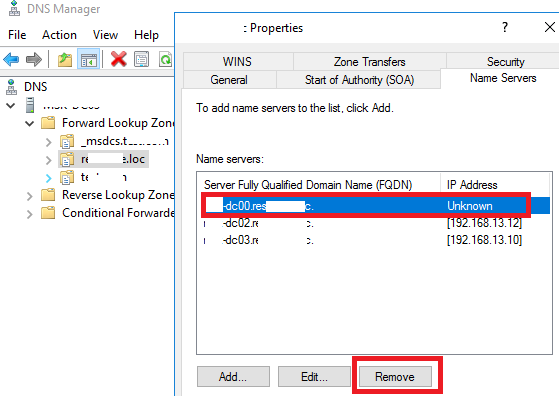
И последний шаг – удаление записей о контроллере домена в DNS. Откройте консоль DNS Manager (
dnsmgmt.msc
).
Удалите сервер из списка Name Servers в настройках зоны.
Удалите статические записи Name Servers (NS), оставшиеся от удаленного DC в вашей DNS зоне и разделах
_msdcs
,
_sites
,
_tcp
,
_udp
, и PTR записи в обратной зоне.

Или воспользуйтесь PowerShell для поиска и удаления записей в DNS.
Итак, в этой статье мы описали пошаговую процедуру, которая поможет вам понизить контроллер домена или удалить неисправный DC из Active Directory.
Summary: Errors are common scenarios when using a Windows computer system. As a Windows user, you might have encountered various errors like Grub loading error, and Blue Screen of Death. Although most of the said errors aren’t directly caused by the Windows itself, they are more or less triggered by some software and hardware. What matters is how to solve those thorny errors, one of which is the bluescreen error code 0x0000001e. Worse, the 0x0000001e error may well lead to a data loss issue. In this article, we will explain to you how to solve the error and, considering data loss issues, how to use our reliable and user-friendly data recovery tool, Bitwar Data Recovery to bring back your valuable files.
WIN VERSION MAC VERSION
Table of Contents
What Is Causing the BSOD Error Code 0x0000001e?
We looked into this particular issue by scouring the Internet for various user reports and the solutions that are wildly being used to fix this particular kind of Blue Screen of Death crash. And it turns out that there are several different culprits that might be accountable for this crash:
- System file corruption
- Bad RAM Memory
- Insufficient PSU power
- Windows 7 glitches
How to Fix the 0x0000001e Error
Method 1: Install the Hotfix for the 0x0000001e Error
If you’re running into occasional crashes with the 0x0000001E error code on a Windows 10, Windows 8.1, or Windows 7 computer, It’s very likely that the error is being triggered by a system memory leak problem.
If this is the problem facing you, the error will occur when a program opens a file that has an oplock attached to it for modification. Whenever this error occurs, NTFS will break the oplock, which will then leak nonpaged pool memory. and consequently, it causes superfluous memory usage and other memory allocation features that will lead to the 0x0000001E error.
Fortunately, in this case, you can resolve it easily by installing an appropriate hotfix for this issue.
The most efficient way of making sure that the appropriate hotfix gets installed is to install every pending Windows update until the operating system is thoroughly updated. refer to the following steps to learn how to do this:
Step 1: Press Win + R to open up a Run dialogue box.
Step 2: Type in wuapp and press Enter to open up Windows Update.
Note: If you are on Windows 10, use ms-settings: windows update instead.
Step 2: Once you’re in the Windows Update window, click on Check for Updates on the right pane to initiate an update scan. If any updates are available, you could follow the on-screen instructions to install every pending update.
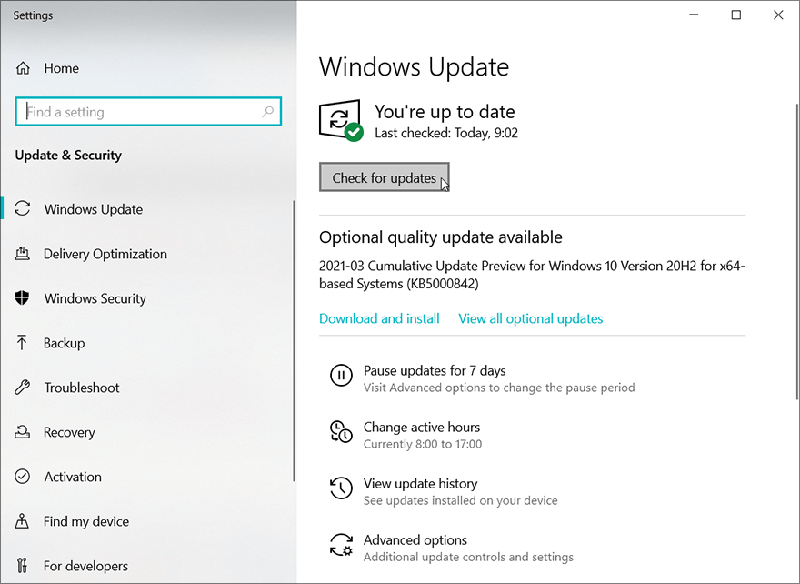
Note: If a message pops up asking you to restart your PC. Reboot your computer but bear in mind that you should return to the same window and continue the process until every pending update is installed.
Step 3: Once all pending updates are installed, Reboot your PC to check whether the BSOD problem with the 0x0000001e error code is still occurring.
Method 2: Run Anti-Virus Software
This is another simple but effective solution, which causes no harm to your computer if it fails. Users could try any working anti-virus tool such as Windows Security. You can use the scan function it features to search for and wipe out computer viruses. Refer to the following steps:
Step 1: Press Windows key + Q, type in Windows Security, and open it.
Step 2: Click on Virus & threat protection button on the right pane.
Step 3: Click Start action and then Quick scan.
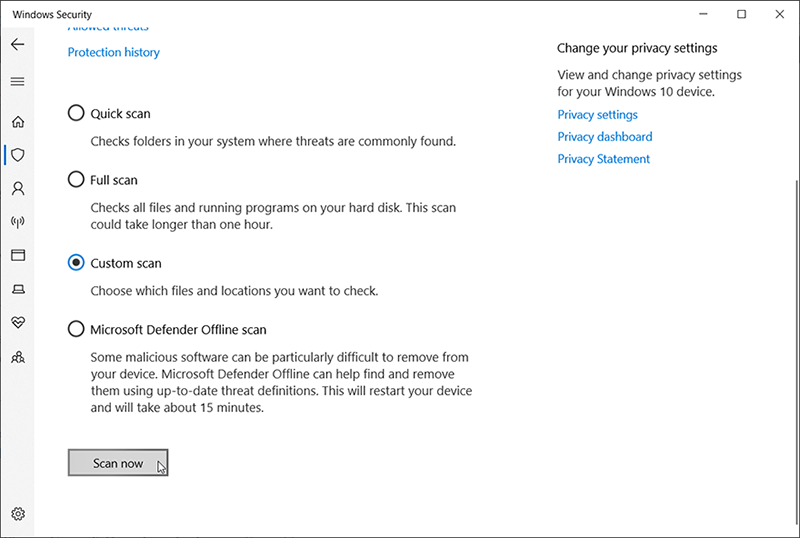
Step 4: If you want a more tailored scan, click the Scan options button.
Step 5: Choose the scan mode you want and click Scan now to start it.
Step 6: After removing those malicious viruses, restart your PC to check the efficacy of the solution.
Method 3: Disconnect Peripherals (if Applicable)
As things turn out, an overworked PSU (Power Source Unit) could also be the culprit of the BSOD 0x0000001e error. If the computer has a lot of peripherals connected to it, it’s a good idea to disconnect all non-essential ones to check whether the issue is still occurring.
After disconnecting all non-essential peripherals, if the crashes stop altogether, you will learn that the culprit is a power issue. In this case, you have two solutions to the problem:
- Upgrade your computer with a more powerful PSU that can provide enough power to all the connected devices.
- Purchase a USB Hub with a certain Power Supply that can take relieve your PSU of some burden.
Method 4: Run a Memory Test
If you’ve come this far without a result, you should take the appropriate tests to ensure that you’re not dealing with a memory problem. As it turns out, faulty RAM can also be responsible for BSODs associated with the 0x0000001e stop code.
Fortunately, Windows includes a tool that you can use to see if you’re dealing with faulty RAM memory. Follow the instructions below to test your RAM with the Windows Memory Diagnostic Tool:
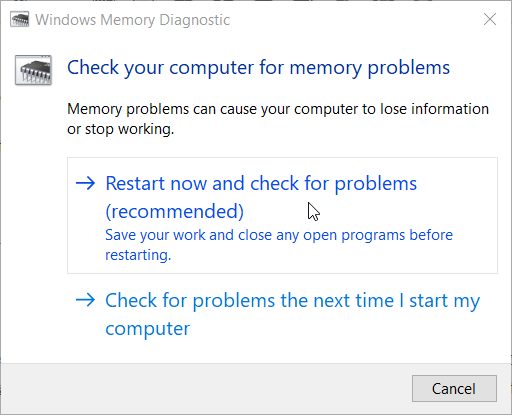
Step 1: Press Windows key + R to open up a Run dialogue box. Then, type “mdsched” inside the text box and press Ctrl + Shift + Enter to open up the Windows Memory Diagnostic tool with admin access. When prompted by the UAC (User Account Control), click Yes to grant administrative privileges.
Step 2: Once you get to the Windows Memory Diagnostic issue, click on the Restart now and check for problems.
Step 3: At the next startup, your computer will boot directly into the Windows Memory Diagnostics Tool. Wait until the process is complete – do not exit the setup until the scan is finished.
Step 4: If no problems are found, exit the setup and move directly to the next method below.
Note: If the scan reveals a problem with your RAM, the only way to stop the BSOD crashes associated with the 0x0000001e stop code is to invest in another memory altogether.
Method 5: Run SFC & DISM Scans
Users have reported that this issue can also be caused by some kind of system file corruption. In this case, if files used during the booting sequence are corrupted, you might experience relentless BSOD crashes accompanied by the 0x0000001e stop code.
Several users have also reported that they managed to resolve the issue by running a couple of built-in tools aimed at fixing system file corruption without resorting to some radical solution like uninstalling Windows.
SFC and DISM are two built-in tools capable of repairing system files, but they do the trick in different ways. SFC repairs corrupted files by replacing them with healthy copies, while DISM depends on Windows Update to download healthy copies to replace corrupted files.
The intriguing thing is that the two tools also complement each other, so we recommend you to use both tools if possible, to make sure that you don’t miss fixing every possible corruption instance. Refer to the following guide to how to SFC and DISM scans via an elevated Command Prompt:
Step 1: Press Win + R to open up a Run dialogue box, type in cmd in the box, and then press Ctrl + Shift + Enter to launch an elevated Command Prompt.
Note: When the PC pops up a message of UAC (User Account Control), click Yes to grant administrative privileges to Command Prompt.
Step 2: In the elevated Command Prompt Window, type in the following command and press Enter:
SFC /Scannow
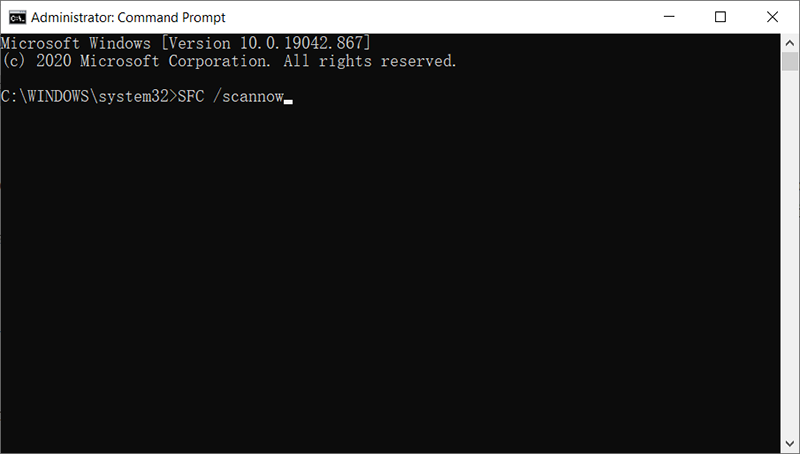
Note: Bear in mind that if this procedure is initiated, you should wait until the scan is fully completed without exiting the CMD window, otherwise you might risk causing more system corruption.
Step 3: After the process is complete, exit the elevated Command Prompt and reboot your PC to finish the process. After the computer has rebooted, follow step 1 again to open another elevated CMD.
Step 4: When you launch another elevated CMD, type in the following command and then press Enter:
DISM /Online /Cleanup-Image /restorehealth
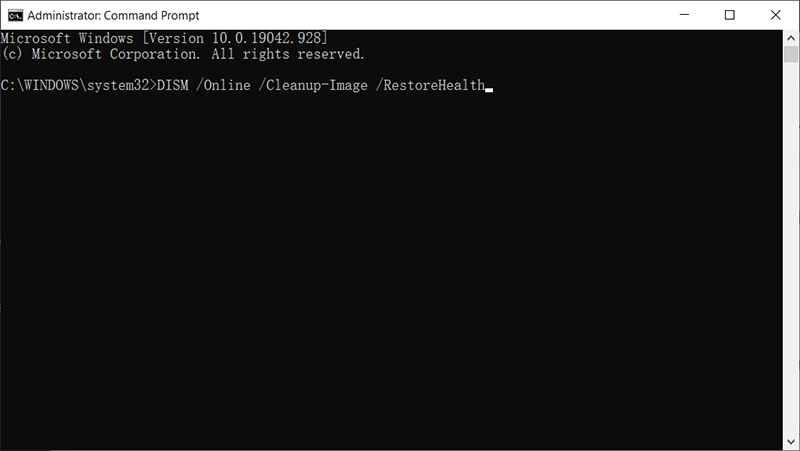
Note: This tool will require a stable internet connection to complete the process. DISM depends on WU (Windows Update) to download healthy files to be replaced with corrupted files.
Step 5: After the scan has finished, reboot your computer to see whether the 0x0000001e error code persists.
Recover Lost Files Using Bitwar Data Recovery
According to what some users faced with the 0x0000001e error have reported, this error, besides cutting short your work, might well trigger another unwelcome issue, data loss. So, to help users cope with this tricky problem, we would like to recommend our reliable and effective data recovery tool, Bitwar Data Recovery.
With the help of it, you will be capable of recovering files that have been deleted inadvertently. Refer to the following steps to check how the tool works.
Step 1: Download Bitwar Data Recovery from Bitwarsoft Download Center and install it.
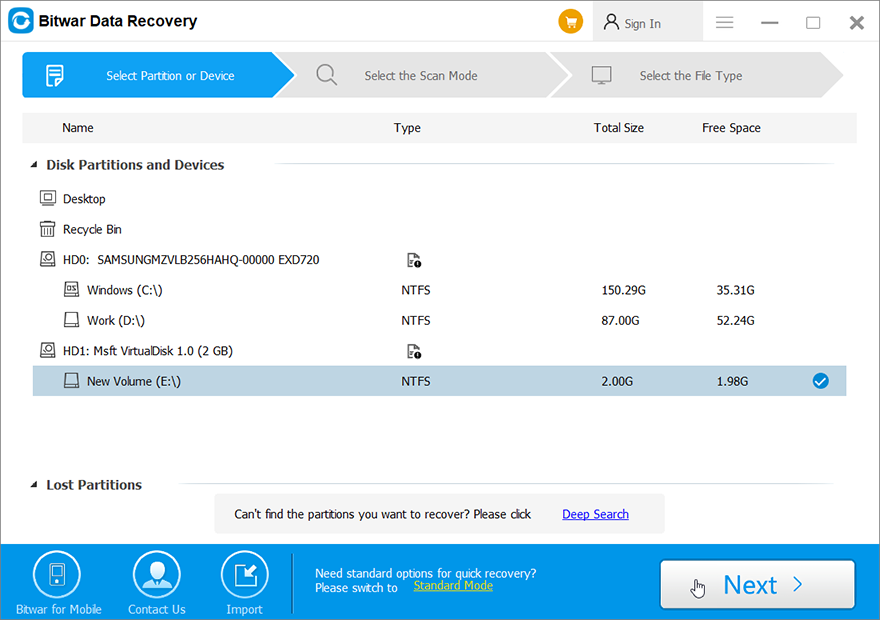
Step 2: Open the tool and select the disk drive where the missing files were stored and then click on Next.
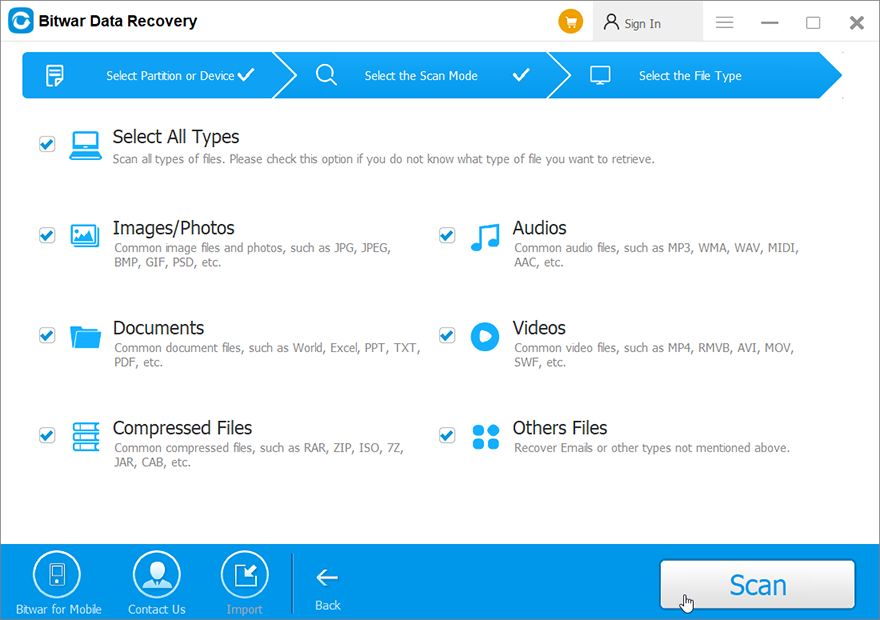
Step 3: You can choose a scan mode in this stage. We would like to recommend Quick Scan, which is able to recover a healthy number of lost files. If it fails to work, you can run the tool again and use Deep scan, which is more effective.

Step 4: Choose the types of files you want to recover and click on Next.
Step 5: Preview the desired files to check out their intactness. Choose those files and click on Recover.
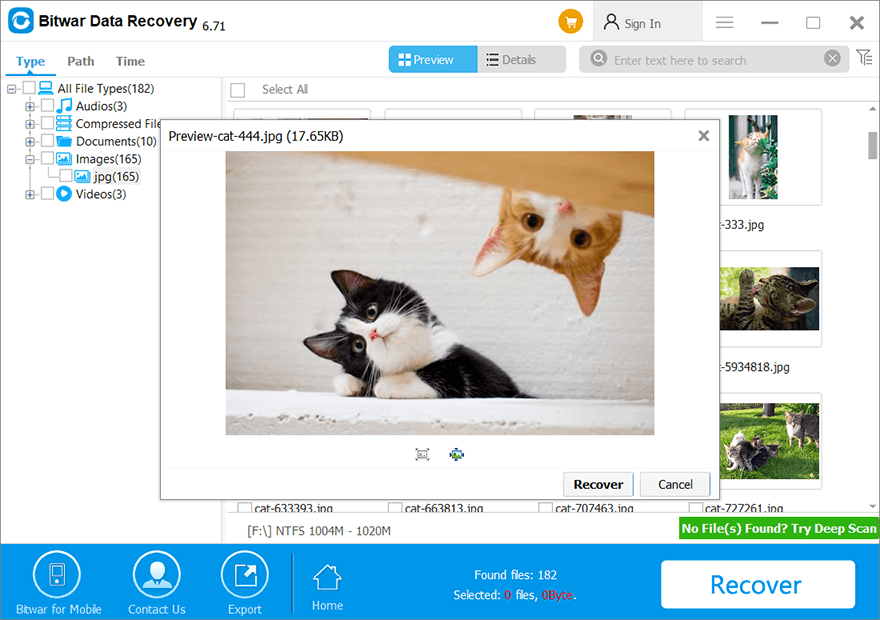
Important: To ensure that all the files you want will be recovered in an intact state. Save those recovered files to other disks except the one on which the lost files were stored.
Conclusion
It can be very frustrating to lose your precious files and folder in the wake of a system crash. If you are among users who lost files after a system crash like bluescreen 0x0000001e, in this article, besides effective solutions to the 0x0000001e error code, you will also learn how to recover your lost files by using Bitwar Data Recovery.
Read more:
- How to Solve System Service Exception BSOD Error
- 5 Effective Methods of Solving the APC Index Mismatch Error
- How to Solve the CRITICAL_STRUCTURE_CORRUPTION Error
Applies ToWindows Server 2012 R2 Datacenter Windows Server 2012 R2 Standard Windows Server 2012 R2 Essentials Windows Server 2012 R2 Foundation Windows 8.1 Enterprise Windows 8.1 Pro Windows 8.1
Symptoms
Assume that you have a VPN server that is running in Windows 8.1 or Windows Server 2012 R2. When there is a high volume of client connections to the VPN server and large amounts of traffic between clients, the VPN server may crash. Additionally, you receive a Stop error message that resembles the following:
STOP: 0x0000001E (parameter1, parameter2, parameter3, parameter4)
Notes
-
The Stop error 0x0000001E describes the KMODE_EXCEPTION_NOT_HANDLE issue.
-
The parameters in this Stop error message vary, depending on the configuration of the computer.
-
Not all 0x0000001E Stop errors are caused by this issue.
Cause
This issue occurs because the third-party VPN plugin support feature does not correctly handle the Secure Socket Tunneling Protocol (SSTP) miniport.
Resolution
Status
Microsoft has confirmed that this is a problem in the Microsoft products that are listed in the «Applies to» section.
References
See the terminology that Microsoft uses to describe software updates.
Need more help?
Want more options?
Explore subscription benefits, browse training courses, learn how to secure your device, and more.