
DNS (Domain Name System) – система доменных имен. В статье Настройка простой (одноранговой) локальной сети мы задавали IP адреса компьютеров и использовали их для удаленного подключения. Если простейшая сеть состоит (минимум) из двух компьютеров, то нет проблем, все ОК и хорошо.
Но, представим, что наша сеть разрослась до сотни, тысячи десятков тысяч и более компьютеров. Суть DNS в том, что DNS хранит данные о соответствии IP-адреса домену. То есть каждому IP-адресу, состоящему из цифр, соответствует буквенное имя, домен (Domain).
Благодаря DNS в компьютере хранится таблица соответствия вида «Имя домена» = «IP-адрес».
Так же система доменных имен удобнее визуально, согласитесь проще запомнить имя mycomp чем IP-адрес 192.168.1.1 , особенно если таких компьютеров много. Например, компьютер бухгалтера можно назвать compbuh и не запоминать его IP-адрес.
Соответствия IP-адресов именам, ресурсные записи доменов, а так же иную информацию хранит в себе DNS-сервер. По сути своей DNS-сервер это служба которая обеспечивает работоспособность DNS.
DHCP (англ. Dynamic Host Configuration Protocol — протокол динамической настройки узла) – это сетевой протокол, который позволяет получать устройствам, например компьютерам, IP-адреса автоматически.
Например, у вас дома стоит роутер, который раздает интернет. У вас есть компьютер и ноутбук. Именно DHCP раздает вашим устройствам (компьютеры, ноутбуку, смартфону) IP-адреса. Именно IP-адреса позволяют устройствам обмениваться информацией с роутером, благодаря чему на устройствах есть интернет.
Рассмотрим установку DNS на Windows Server 2012.
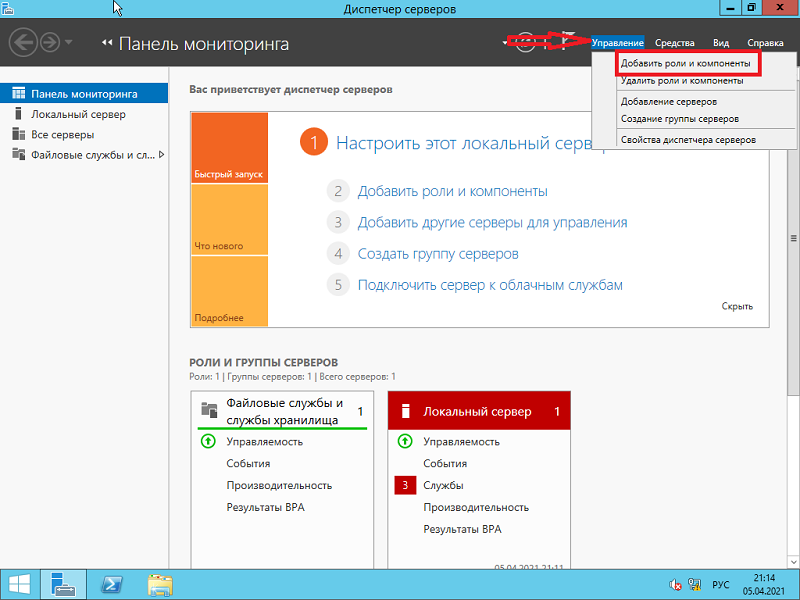
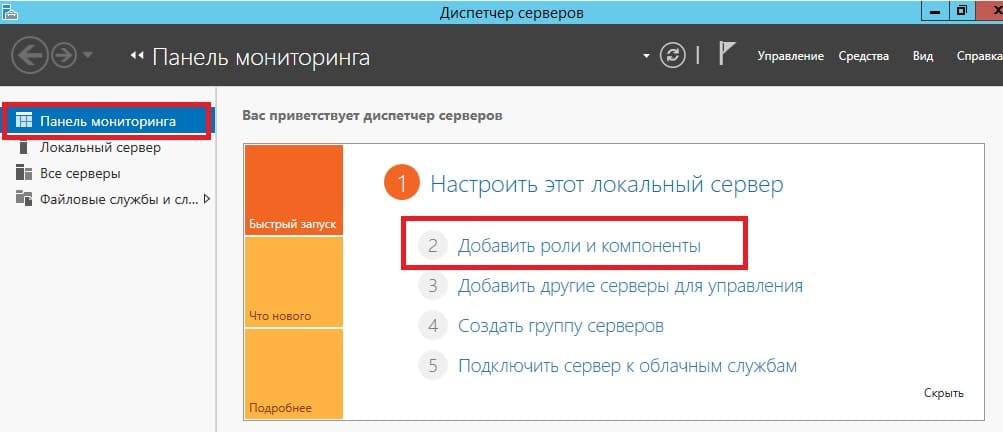
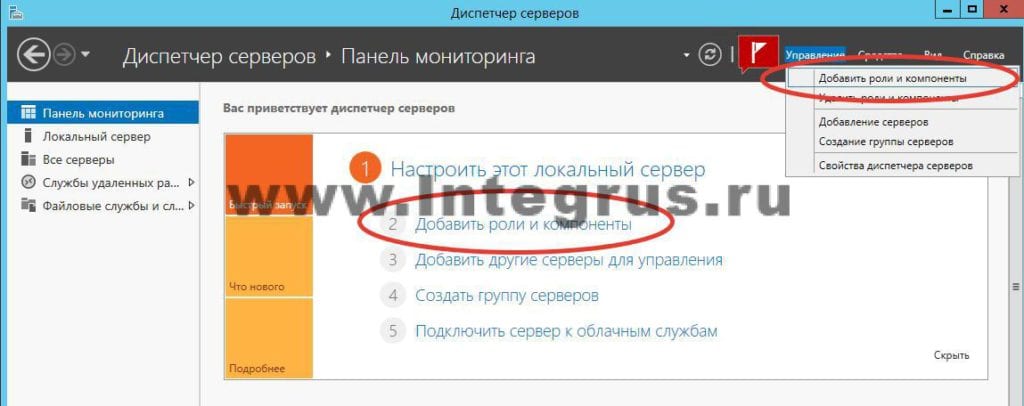
Откройте диспетчер серверов и выберите пункт «Добавить роли и компоненты».
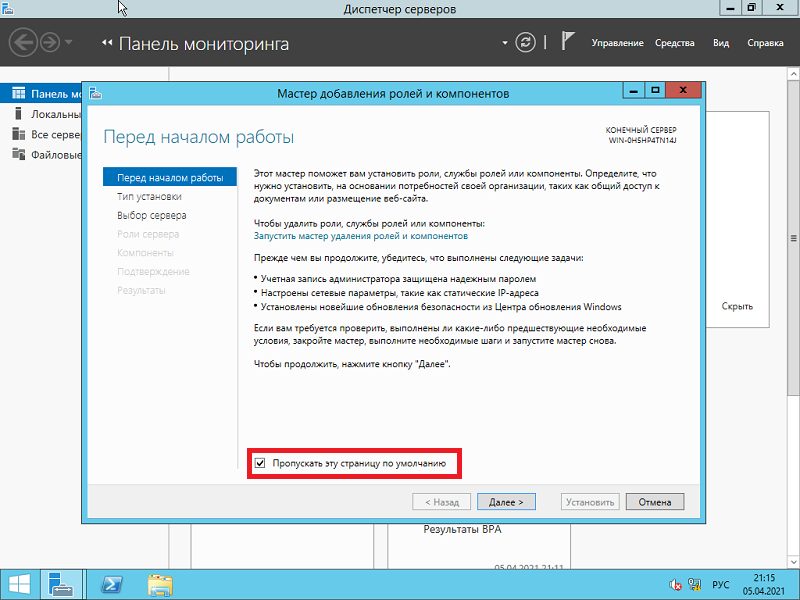
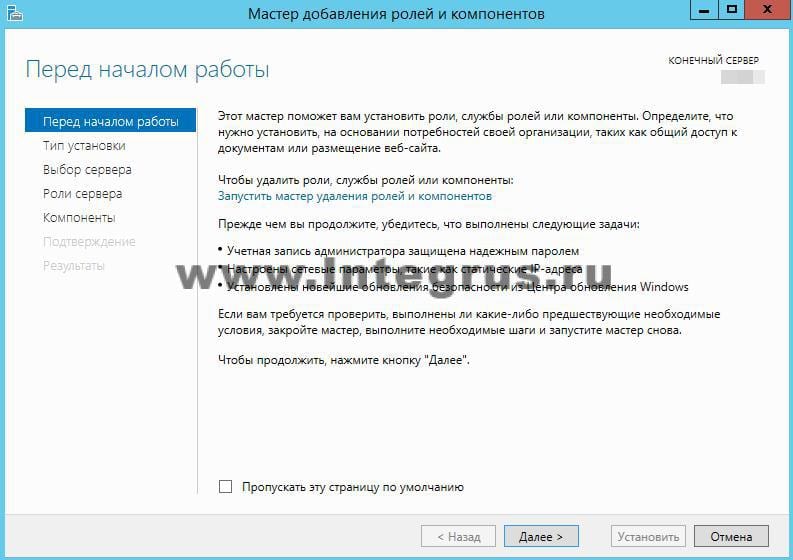
На следующей странице установите флажок «Пропускать эту страницу по умолчанию» и нажмите «Далее».
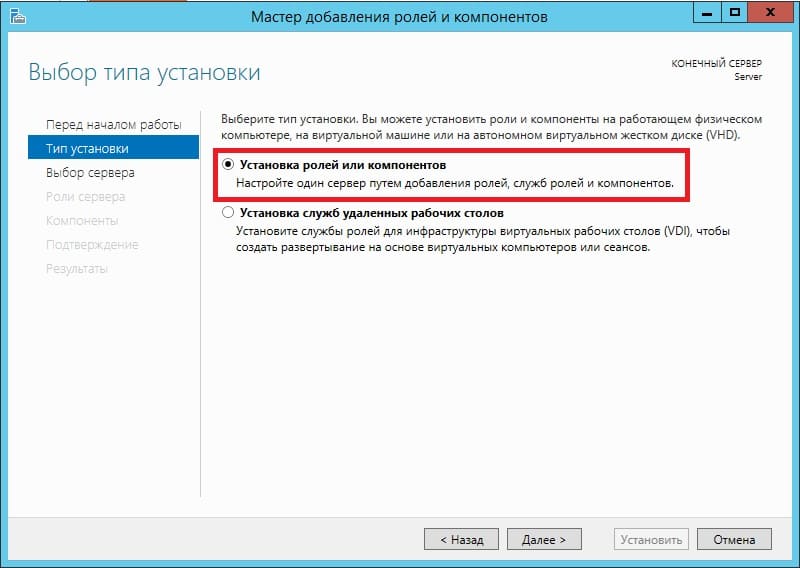
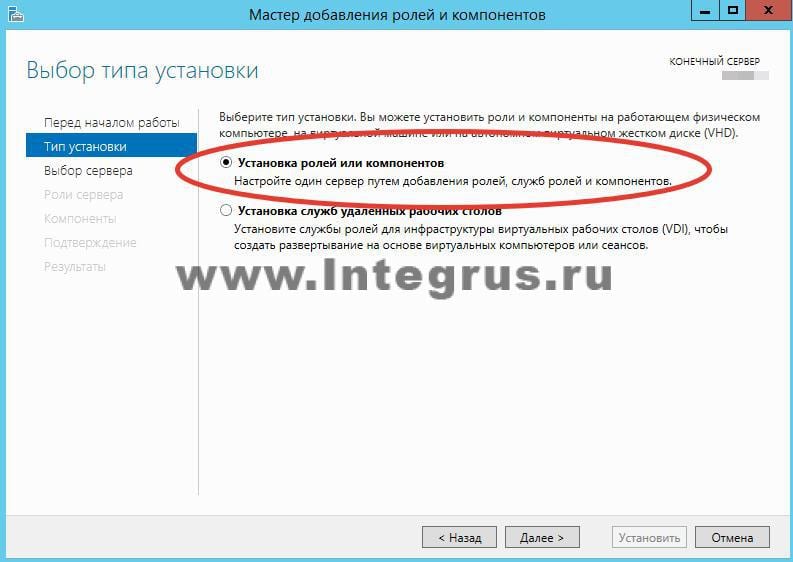
В окне «Выбор типа установки» нажмите «Далее».

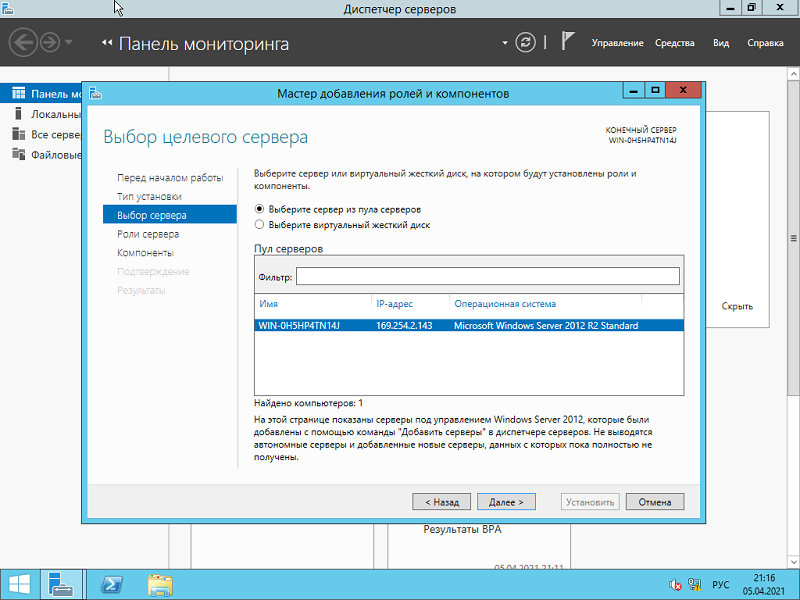
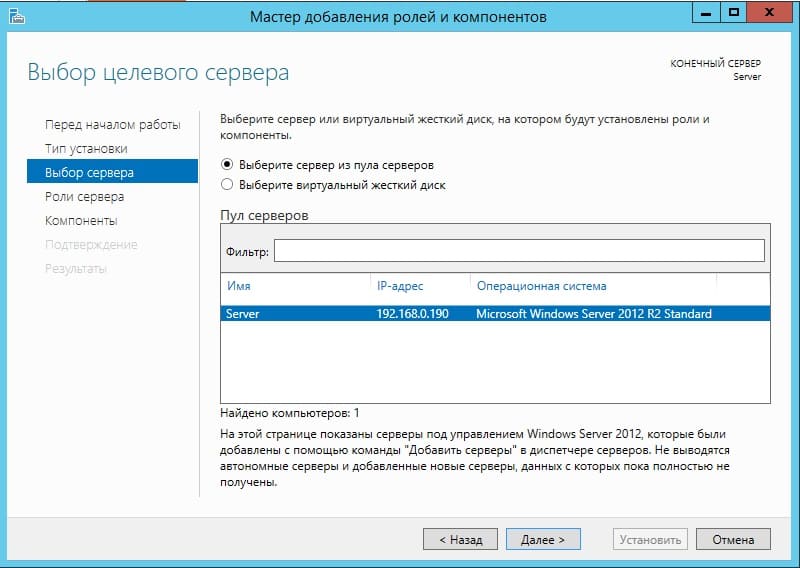
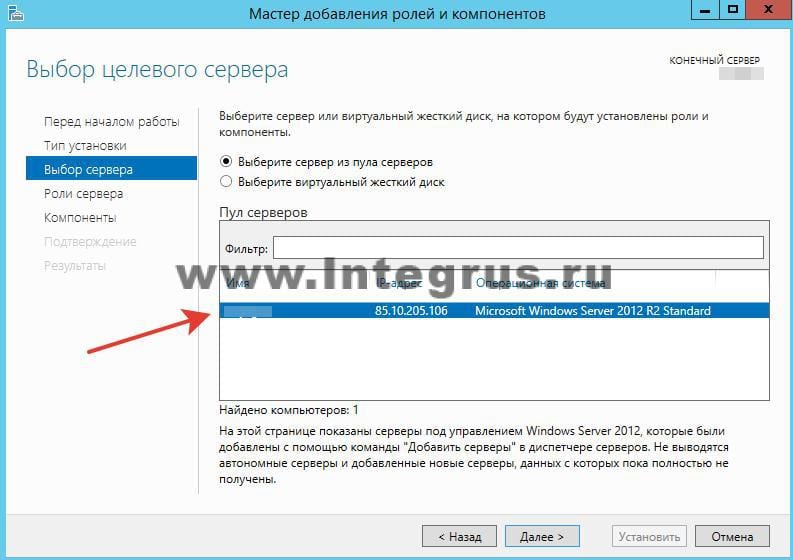
Выберите сервер, на который будет производиться установка роли DNS сервера. Если у вас один сервер, выбираете его. Если несколько — необходимый. В моем примере один сервер.
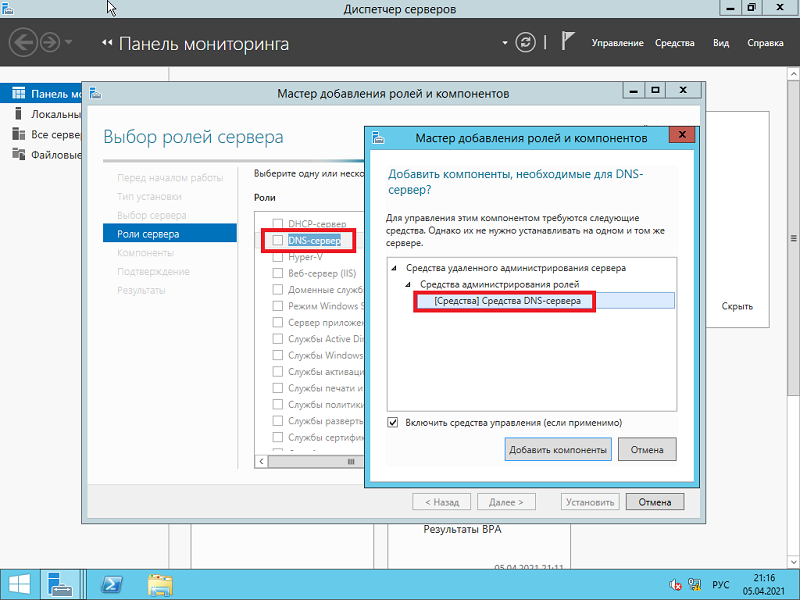
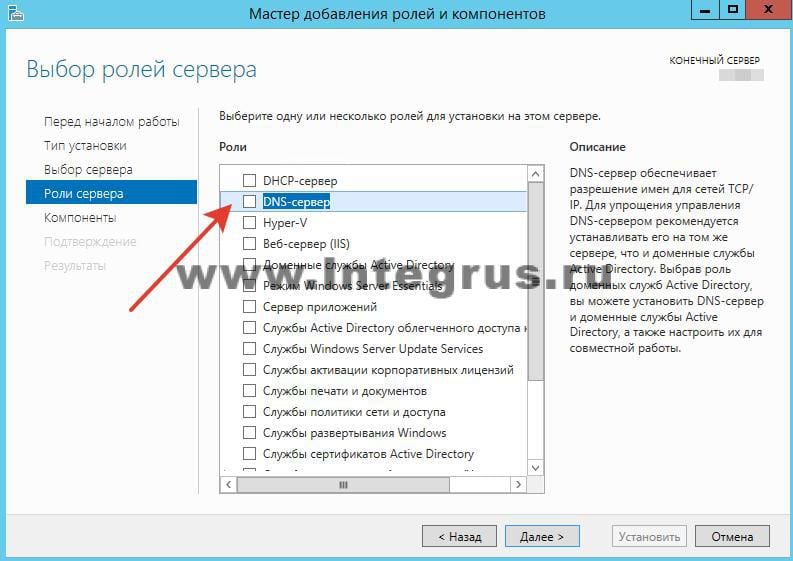
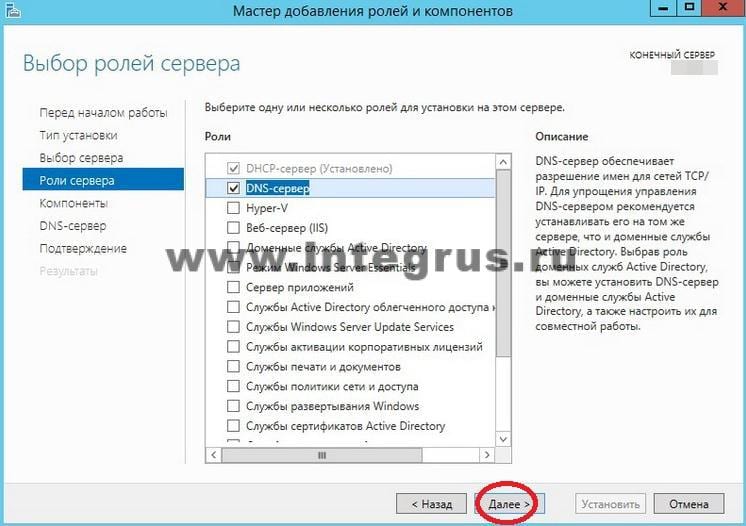
Далее нужно выбрать, какие роли необходимо устанавливать, соответственно нужно установить роль DNS сервера, поэтому выбирается он. Нажимаем «Далее».
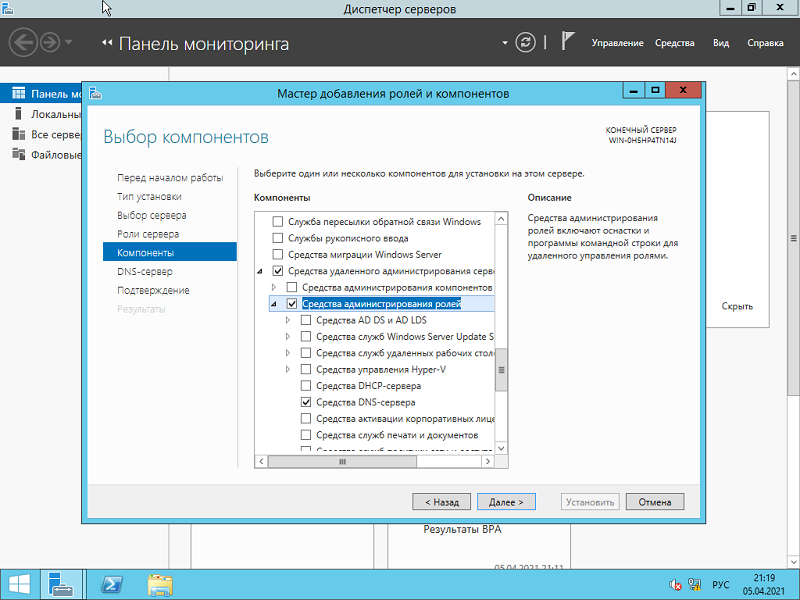
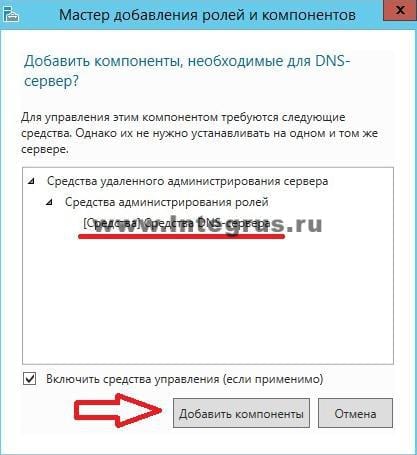
Выбор компонентов уже осуществлен, нажимаем «Далее».
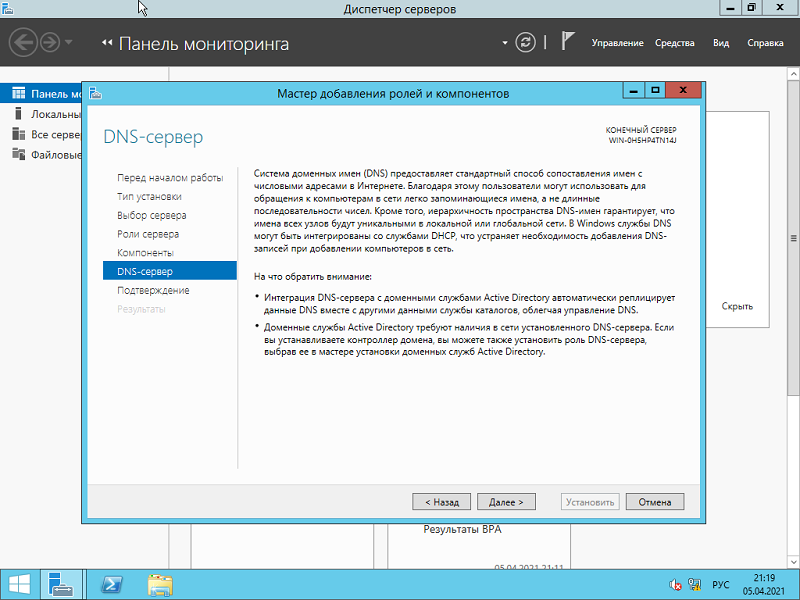
Далее появляется информация, на что обратить внимание при установке роли DNS сервера, нужно нажать «Далее».
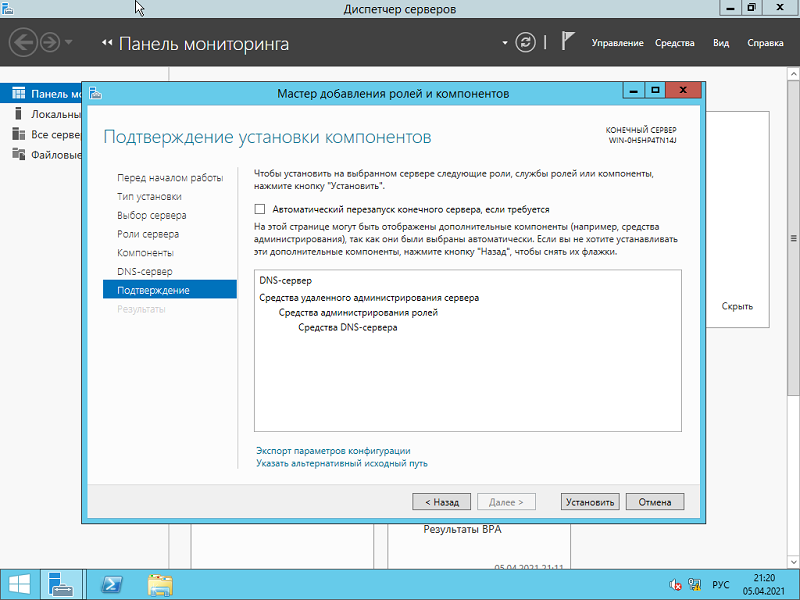
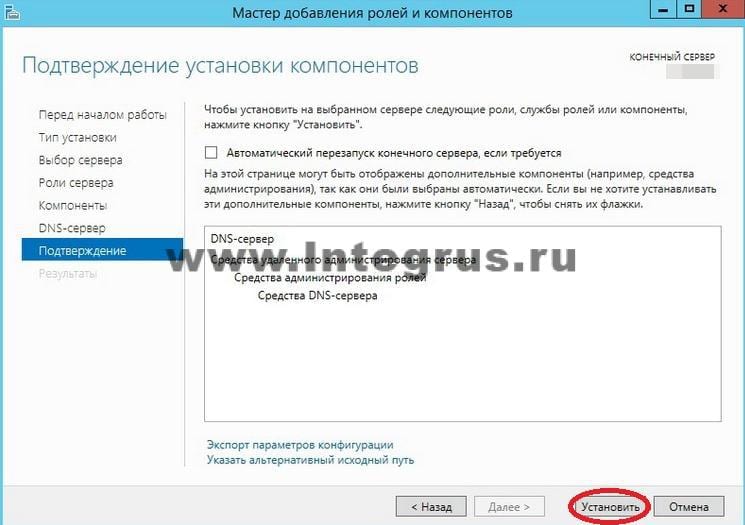
Далее необходимо подтвердить установку нажатием кнопки «Установить».
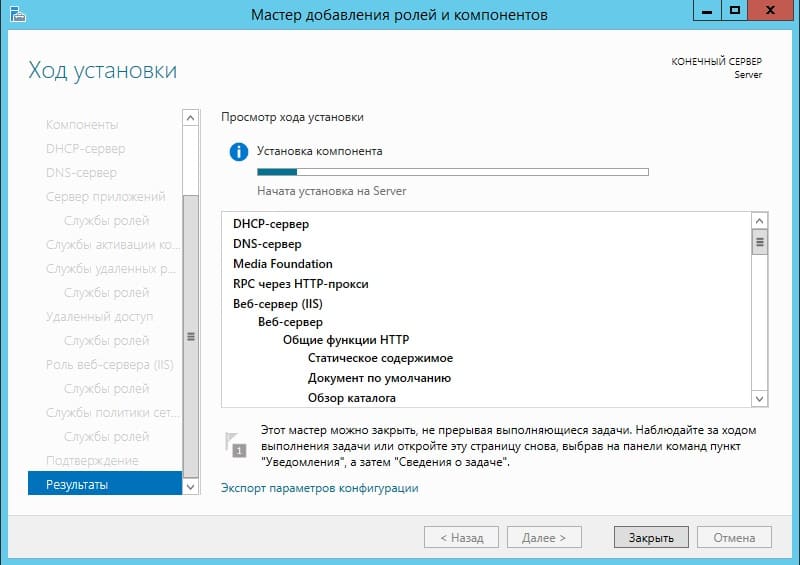
После чего запускается процесс установки, который длится около 3 минут.
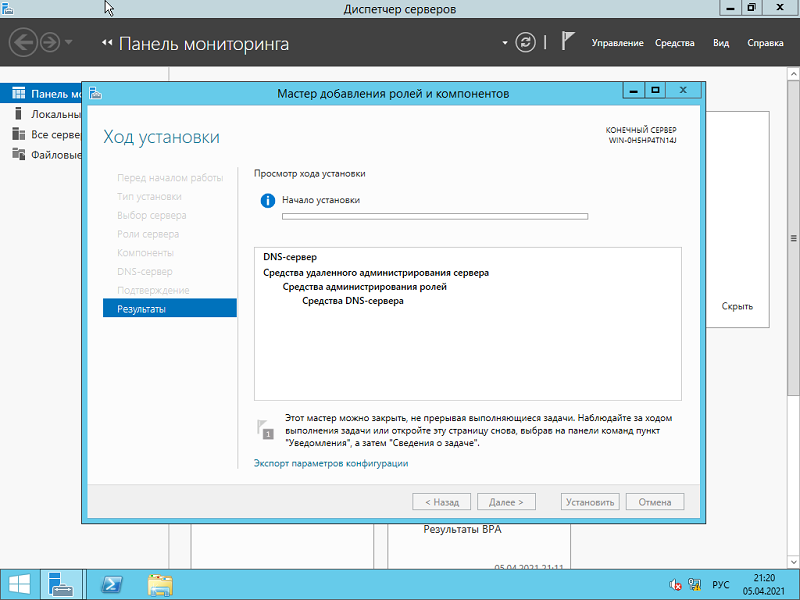
Дождитесь завершения установки и нажмите кнопку «Закрыть».
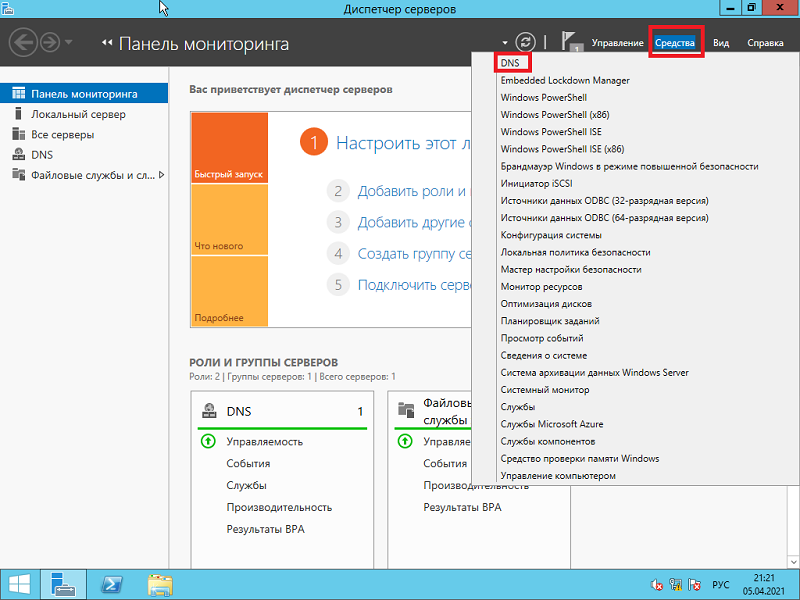
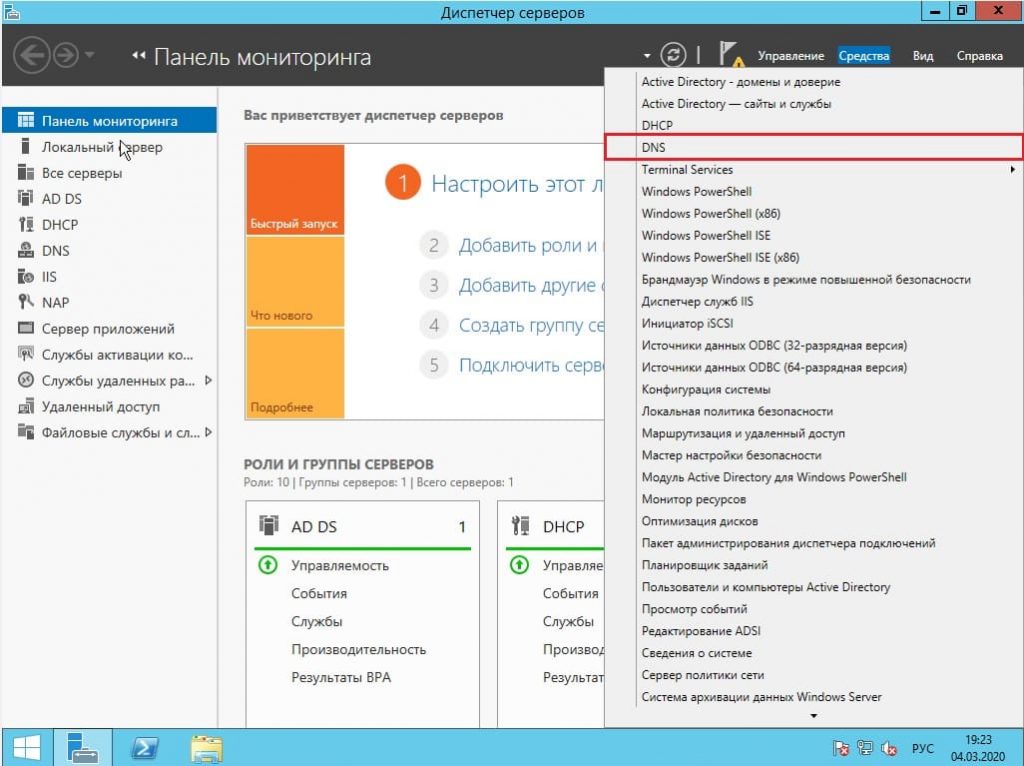
Роль сервера DNS-сервер установлена. Для запуска средств управления DNS сервером нужно использовать Диспетчер серверов -> Средства -> DNS.
Создание зоны прямого просмотра на DNS сервере
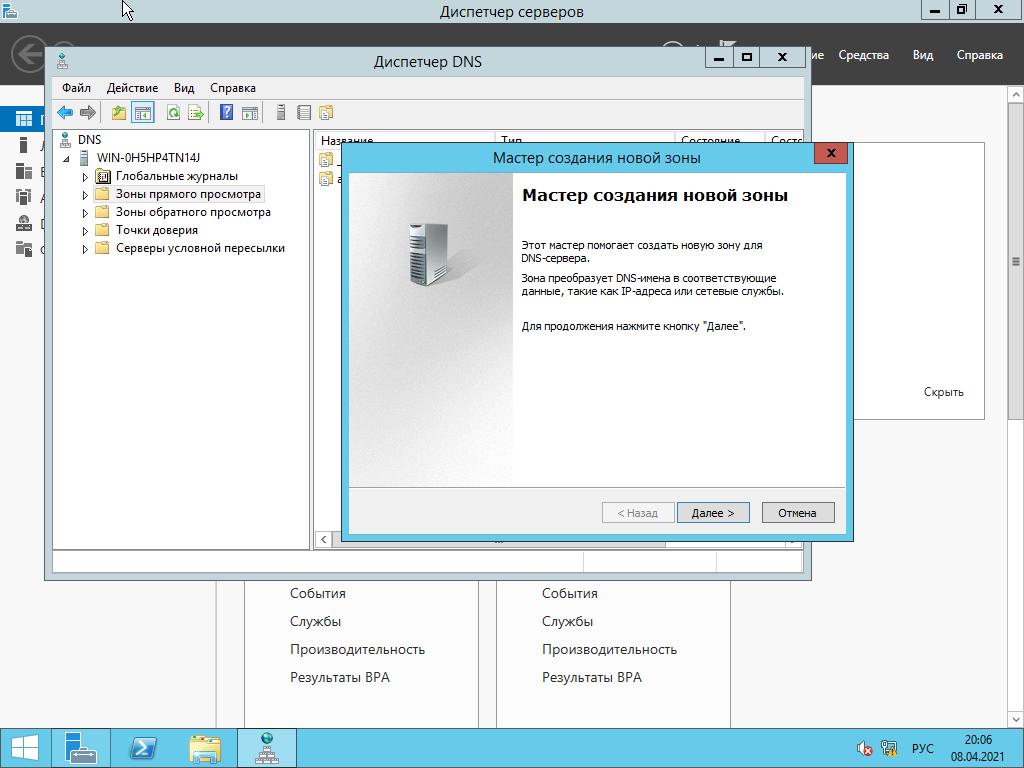
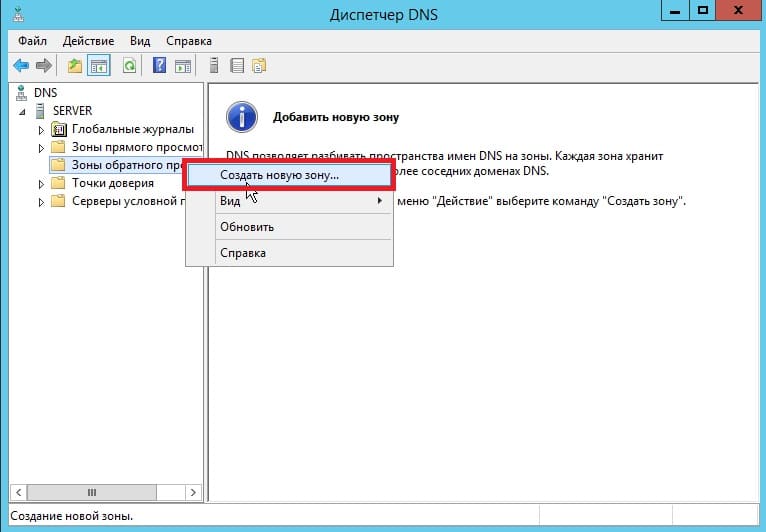
В диспетчере DNS на группе «Зоны прямого просмотра» необходимо щелкните правой кнопкой мыши и выберите «Создать новую зону». Запустится мастер создания новой зоны. Нажмите «Далее».
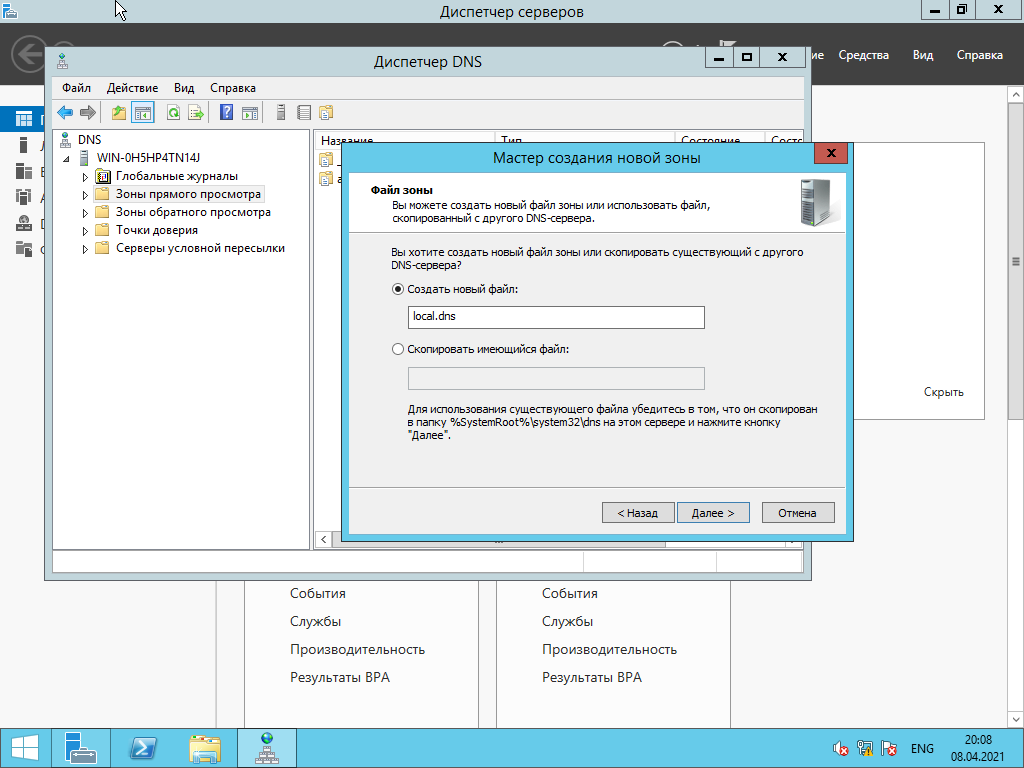
Выберите «Создать новый файл», так как другого DNS сервера нет, нажмите «Далее».
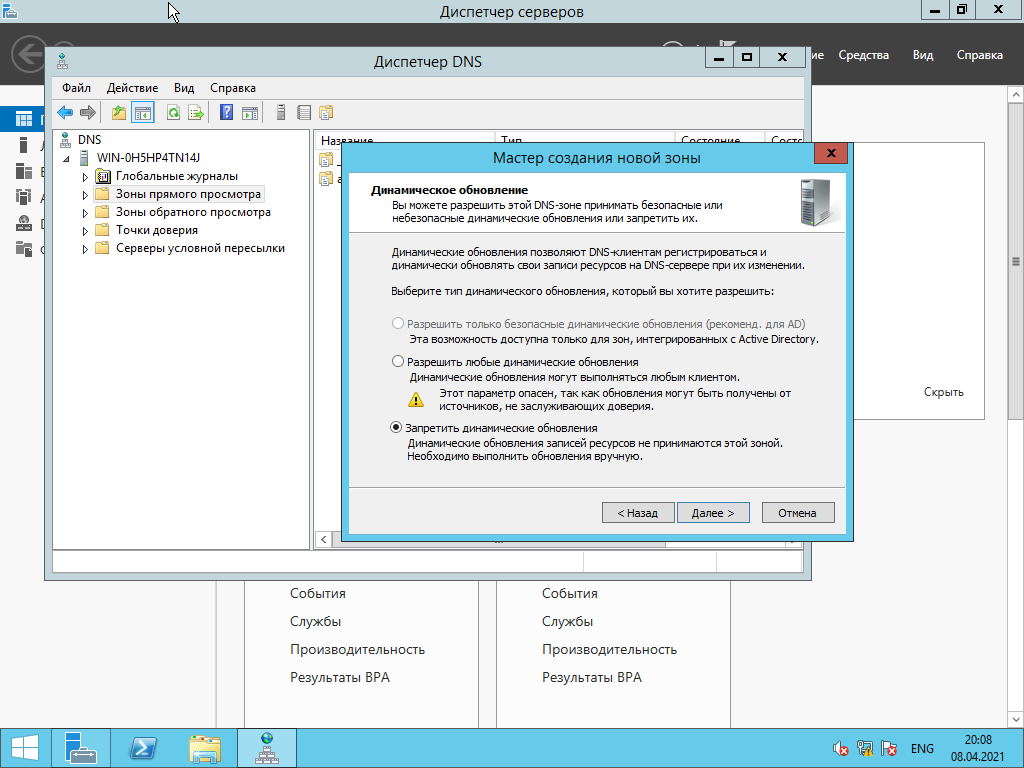
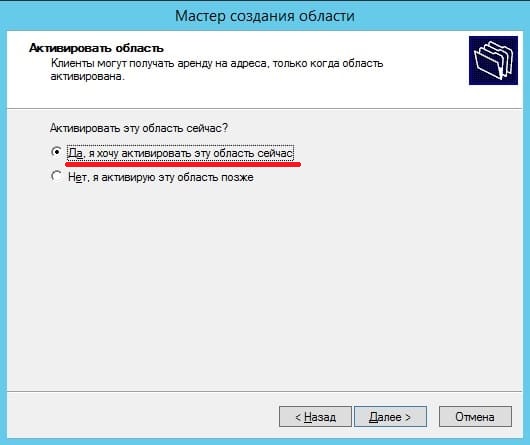
Затем нужно выбрать «Тип динамического обновления» на время такой функционал стоит запретить. Жмем «Далее» и «Готово».
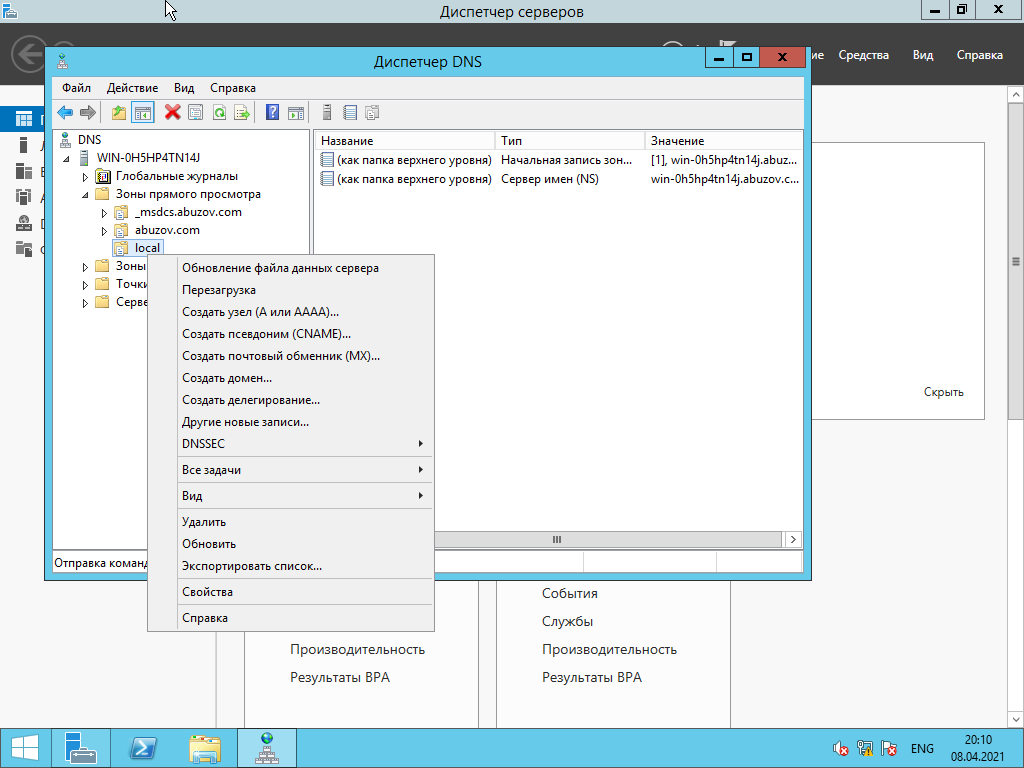
Зона создана, теперь можно сделать запись типа A, например, для этого же сервера. Для этого по зоне нужно щелкнуть правой кнопкой мыши и нажать «Создать узел A или AAAA».
Далее отключаем брандмауэр Windows Server: Центр управления сетями и общим доступом -> Брандмауэр Windows (слева внизу) -> Включение и отключение брандмауэра Windows — > отключаем для всех типов сетей.

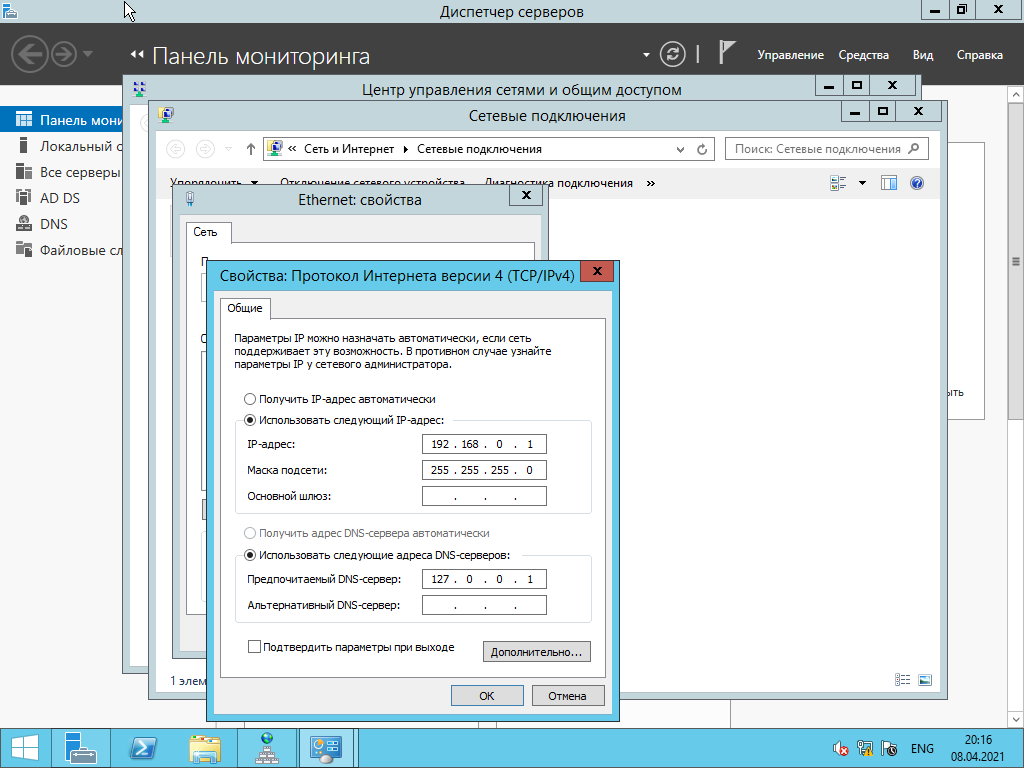
Далее задаем IP-адрес сервера. Проверяем созданную зону.
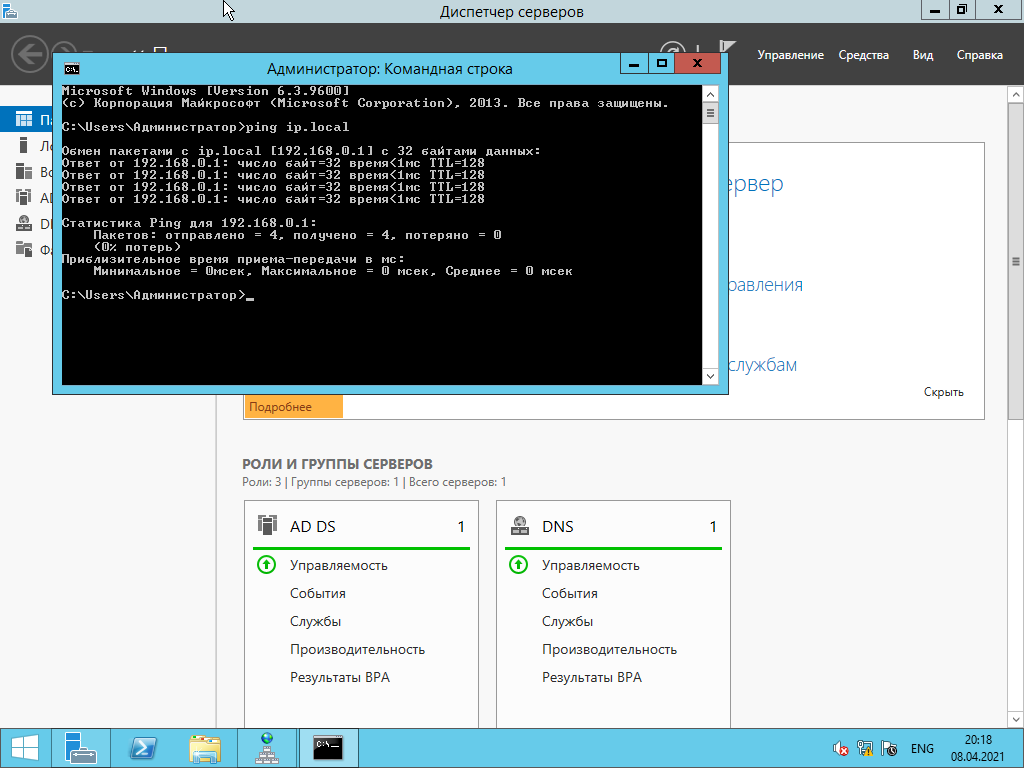
Проверить работу только что установленного DNS сервера, например, запустить командную строку и попробовать пропинговать узел который был создан чуть ранее.
В данной статье пошагово со скриншотами рассмотрим самые базовые настройки Windows Server 2012 R2 (любых версий: Standard, Datacenter, Essentials). В них входит настройка AD, DNS, DHCP, а так же лицензирование терминального сервера (настройка сервера RDP). Эти настройки как правило подходят для большинства задач и являются стандартными для использования их в Windows Server.
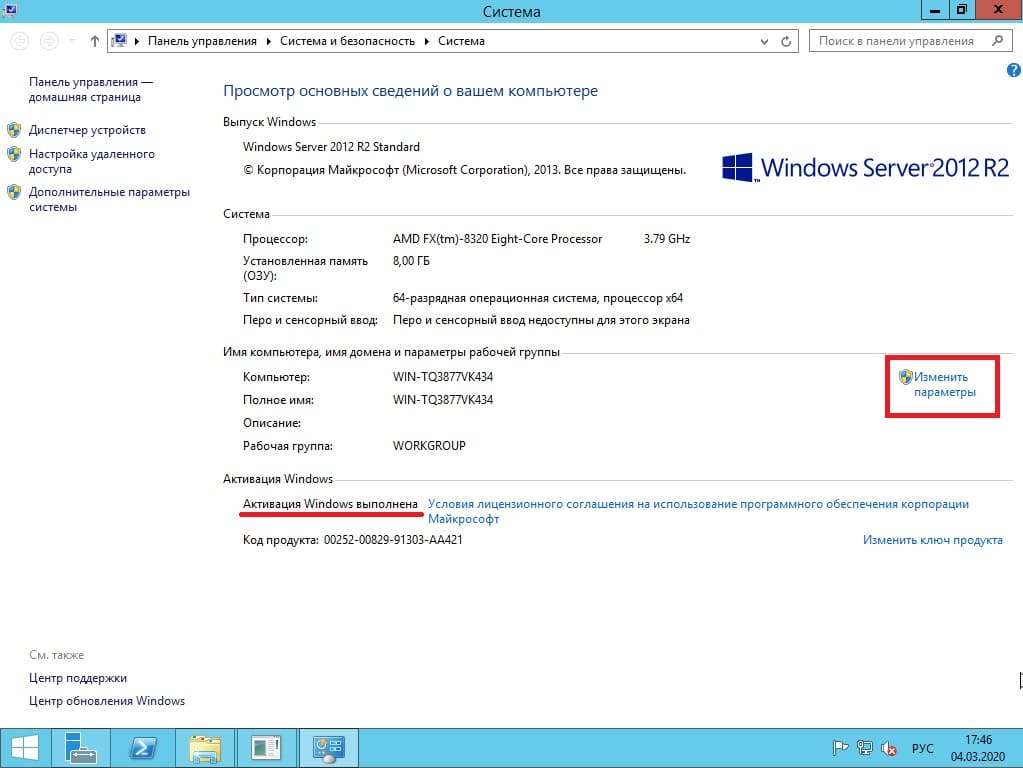
С процессом установки и самой начальной настройки как активация сервера, и получение обновлений Windows Server 2012 R2 можете ознакомиться в нашей прошлой статье.
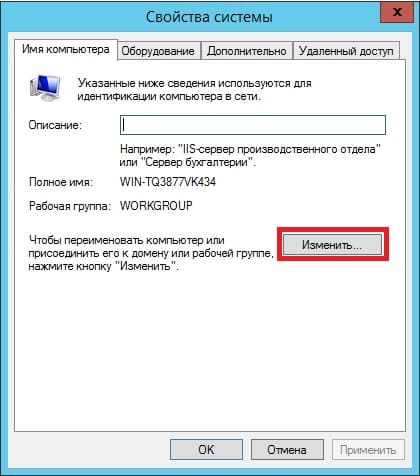
1) Итак, начнем. Для начала нам нужно задать имя сервера, чтобы оно было в последующем корректно указано в различных настройках для подключений. Зайдем в меню «Свойство системы» => Изменить параметры => Далее в окне «Имя компьютера» нажимаем кнопку «Изменить» => После в строке ввода «Имя сервера» задаем имя в произвольном порядке. У нас оно будет просто Server.
Чтобы настройки применились перезагрузите Ваш компьютер.
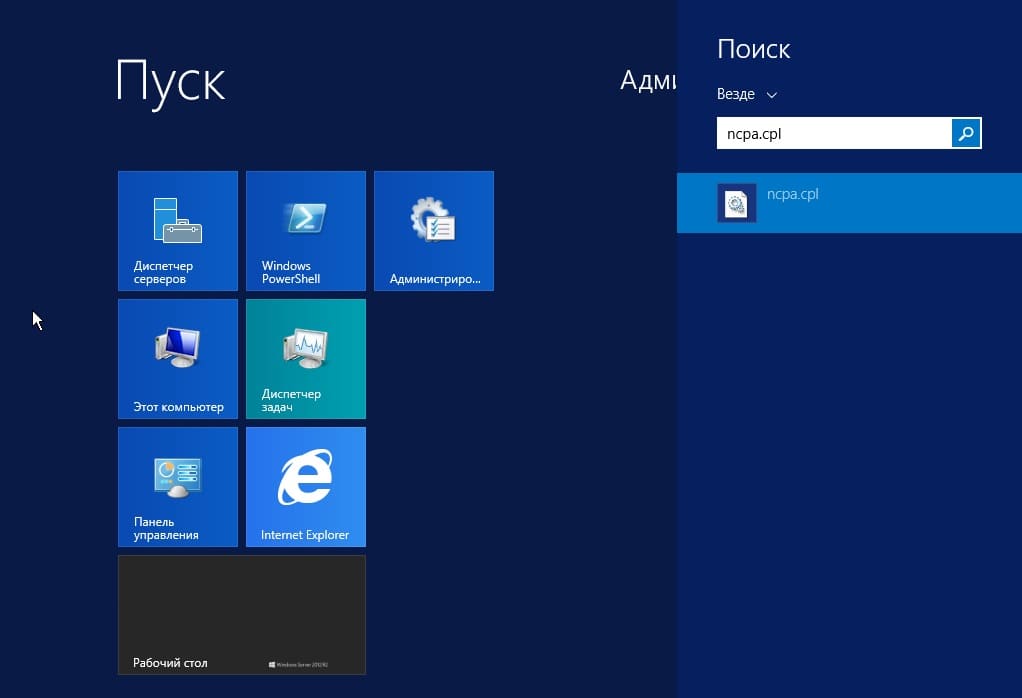
2) Следующая, тоже очень важная процедура — это задать локальный статический IP адрес серверу. Для быстроты переходим в меню «Пуск», далее в поиске вводим ncpa.cpl.
На Вашем основном сетевом адаптере щелкаем правой кнопкой мыши => Свойства
Выделяем протокол IPv4 и нажимаем «Свойства».
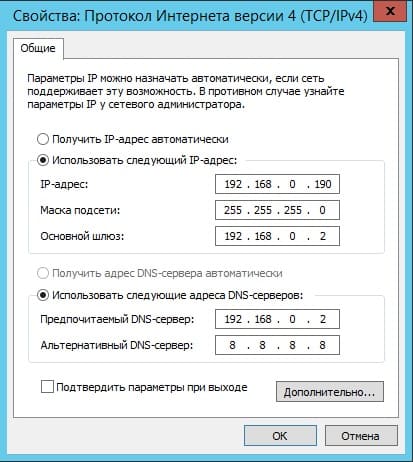
И задаете серверу статический IP адрес в зависимости от Вашей сети. (далее в статье рассмотрим настройку DHCP, чтобы Ваш сервер сам мог раздавать свой диапазон IP адресов). Чтобы посмотреть текущий локальный IP адрес и шлюз — Вам нужно открыть командную строку, в поиске введите «Cmd» => Далее введите команду «ipconfig». Как DNS сервера в предпочтительных можем оставить IP адрес Вашего шлюза (роутера, маршутизатора), а как альтернативный адрес Google — 8.8.8.8
После применяете настройки и проверяете Ваше соединение с интернетом, если все работает, значит Ваши настройки корректные.
3) С настройками IP адресов пока закончено, перейдем к добавлению ролей и компонентов. Заходим в диспетчер серверов. Меню «Панель мониторинга» => Добавить роли и компоненты
Переходим в пункт «Тип установки» и выбираем «Установка ролей или компонентов».
Выбираете Ваш сервер в меню выбора серверов.
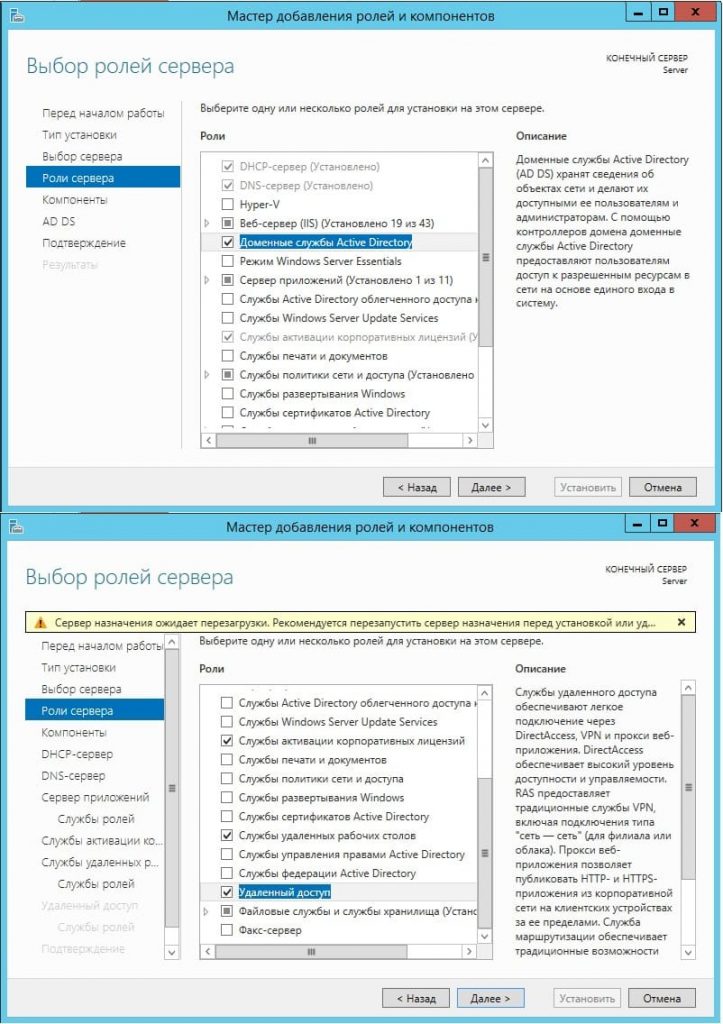
В ролях сервера мы в данном случае выбираем самые стандартные роли, которые используются как правило в большинстве задач. Можете сделать так же.
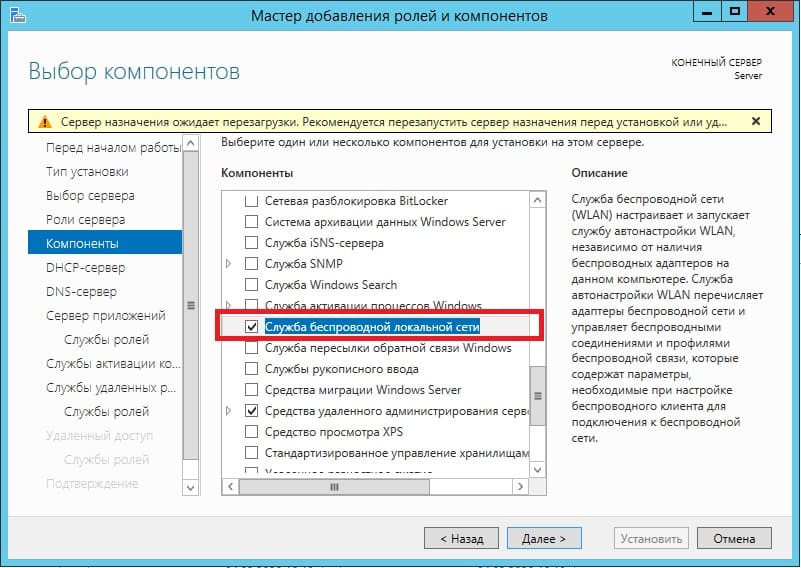
В компонентах оставляем все по стандарту. За исключением того, если у Вас сервер будет работать по Wi-FI, т.е в нем будет какой-либо Wi-Fi адаптер, то без компонента «Службы беспроводной локальной сети» — беспроводное соединение работать не будет. Отмечаете галкой его, если Вам требуется такой функционал.
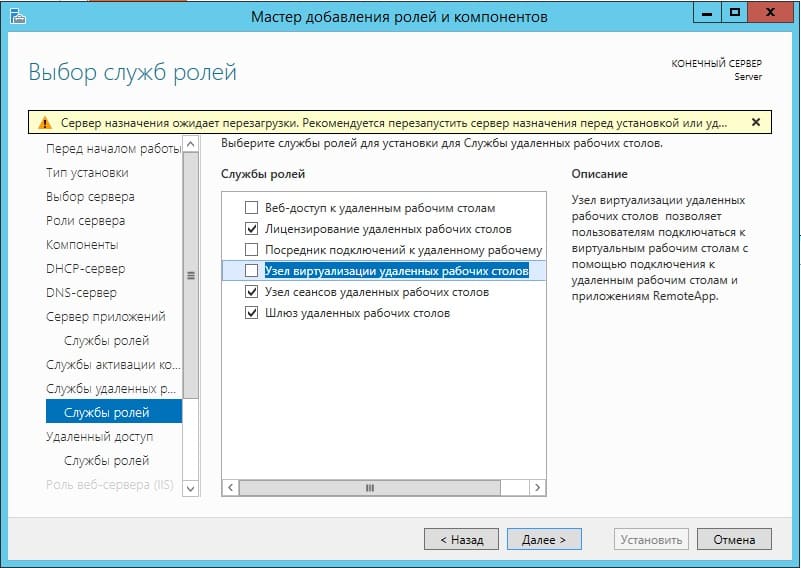
Далее доходим до меню «Службы ролей» для удаленных рабочих столов. Отмечаем галкой то, что нужно для работы с RDP.
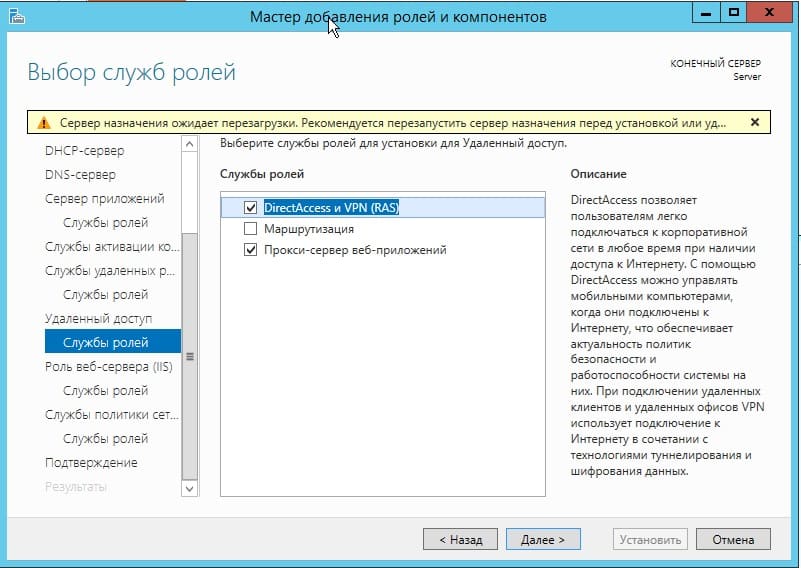
В службах «Удаленный доступ» по желанию можете выбрать работу с приложением для смены IP-адреса и прокси-сервером, это как правило многим не нужно. На Ваш выбор.
Доходим до пункта «Подтверждение», отмечаем галкой автоматический перезапуск после установки и жмем «Установить». Ожидаем пока все установится.

4) Теперь переходим к настройкам тому, что мы только что устанавливали. В конкретном случае к настройкам DNS. Заходим снова в меню «Диспетчер серверов» => Нажимаем на флажок => И выбираем пункт «Повысить роль этого сервера до контроллера домена».

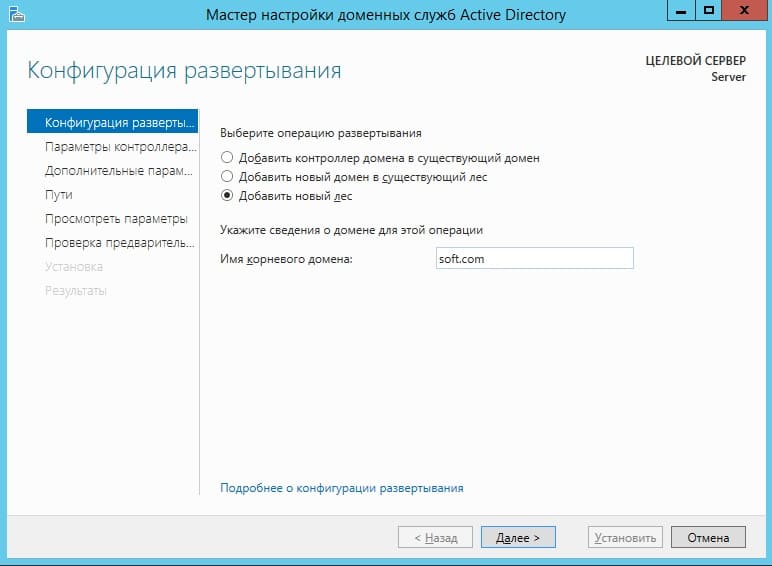
В конфигурации развертывания отмечаем пункт «Добавить новый лес» и придумываем имя корневого домена. В вашем случае это может быть абсолютно любое название, которое Вам понравится, мы назовем как пример «soft.com».
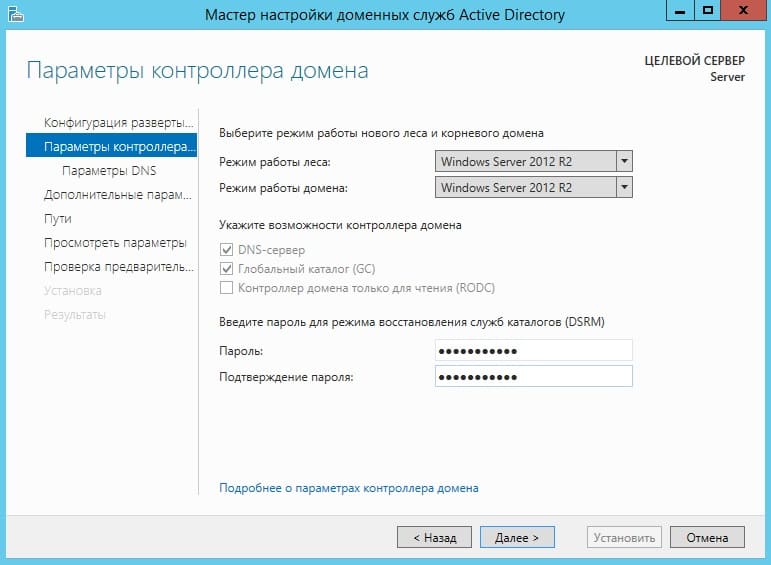
В параметрах контроллера придумываем Ваш пароль для Вашего домена и жмем «Далее».
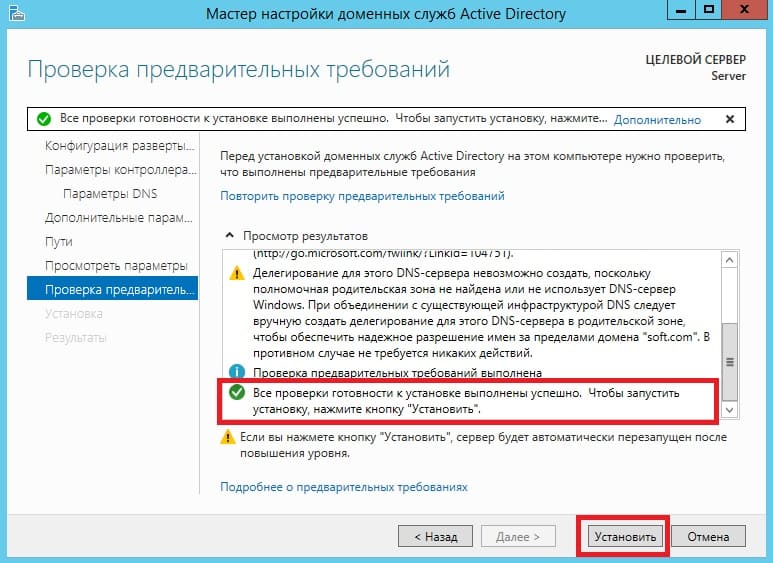
Теперь можем дойти сразу до предварительной проверки всех настроек. Все будет корректно если у Вас будет в окне указано, что «Все проверки готовности к установке выполнены успешно …«. Нажимаем установить. После установки перезагружаем сервер.
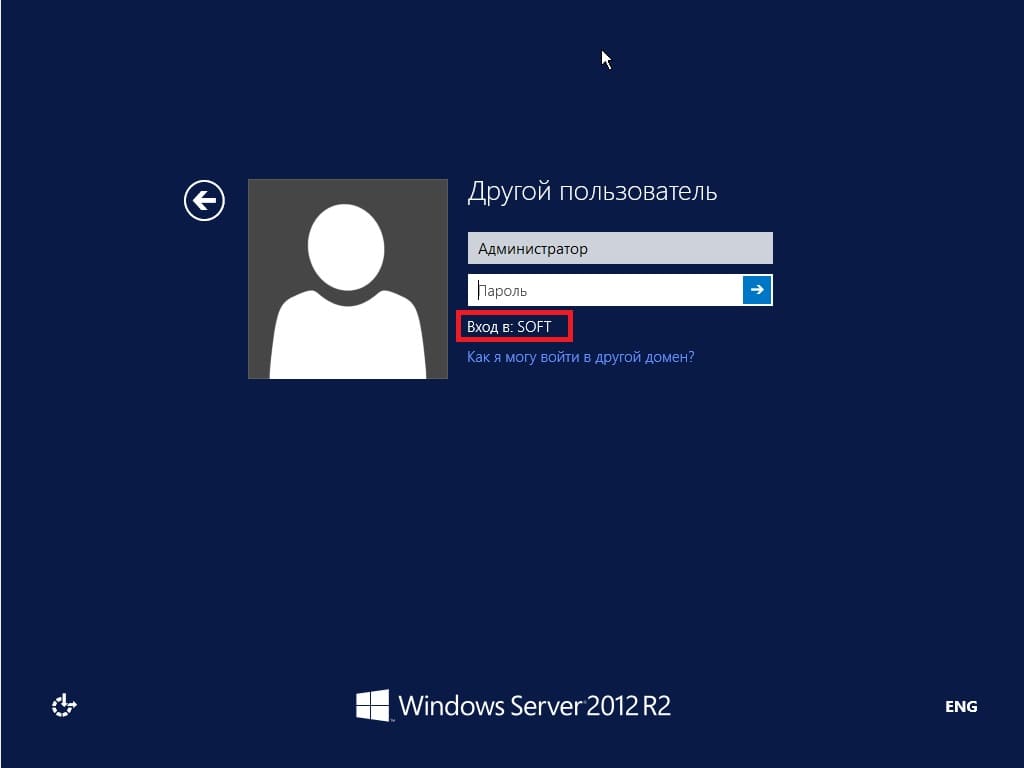
После перезагрузки как будете вводить пароль администратора, Вы можете заметить, что Ваш сервер уже добавлен в домен.
Но это еще не все, нам нужно его до конца настроить. Снова переходим в «Диспетчер серверов» => меню «Свойства» => DNS
Мы перешли в «Диспетчер DNS». Разворачиваем дерево DNS => SERVER (Имя Вашего сервера) => Зоны обратного просмотра => Щелкаем правой кнопкой мыши и нажимаем на пункт «Создать новую зону».
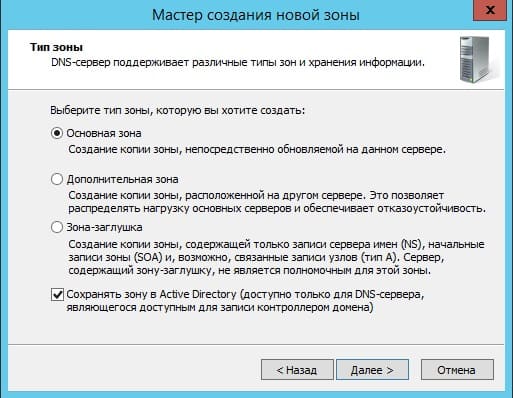
Выбираем «Основная зона» и отмечаем галкой «Сохранять зону в Active Directory …«.
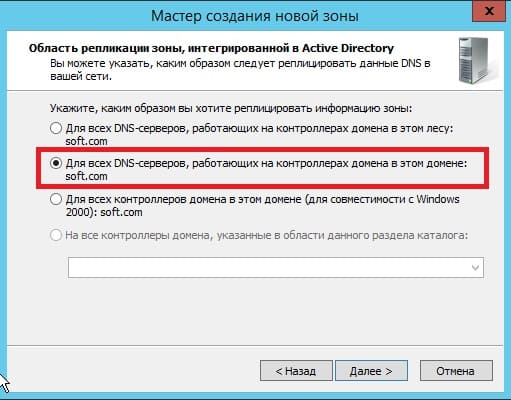
Следующим окном выбираем пункт «Для всех DNS-серверов, работающих на контроллерах домена в этом домене: «ваш домен»«.
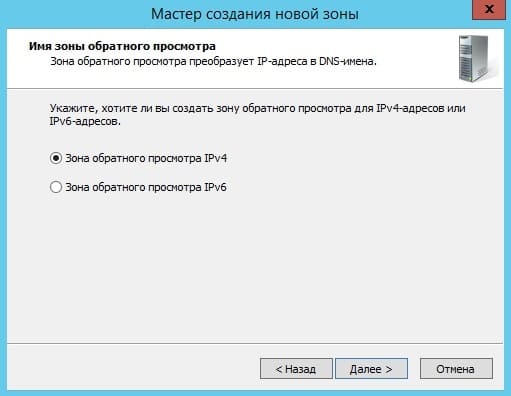
Далее выбираем пункт с IPv4 соответственно.
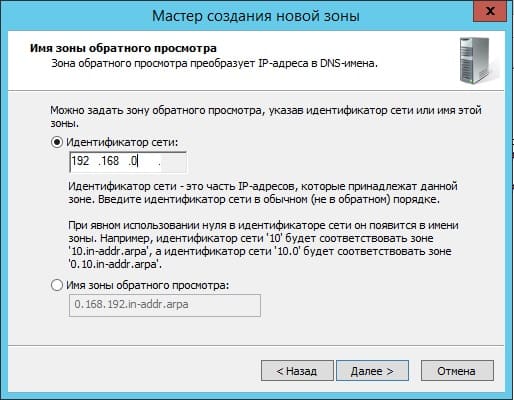
В индефикаторе сети для данного DNS выбираем Ваш IP диапазон или имя зоны. Мы на примере выберем DNS по IP диапазону.
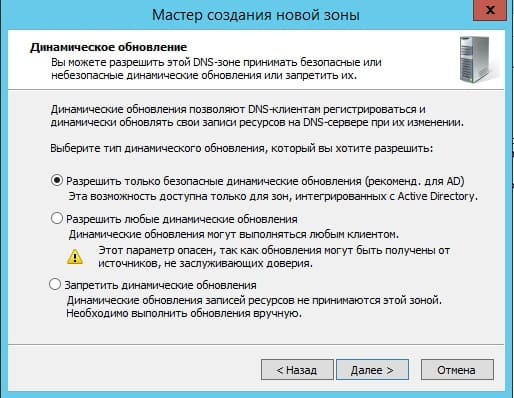
Разрешим динамические обновления, т.к это рекомендуемый параметр для настроек AD.
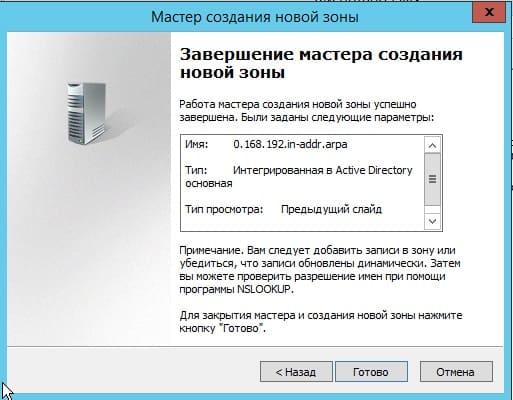
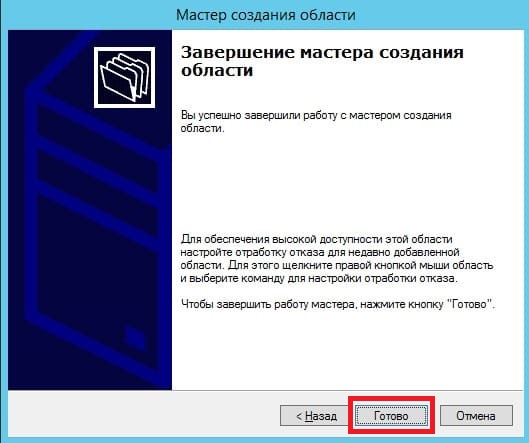
На этом все, нажимаем готово.
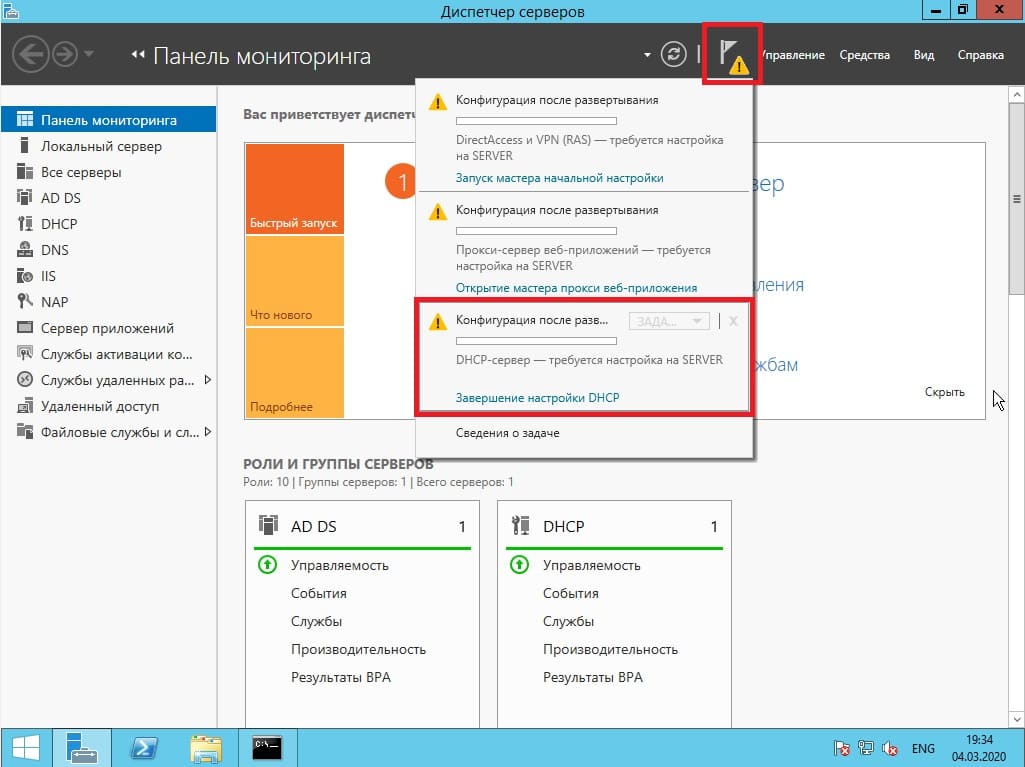
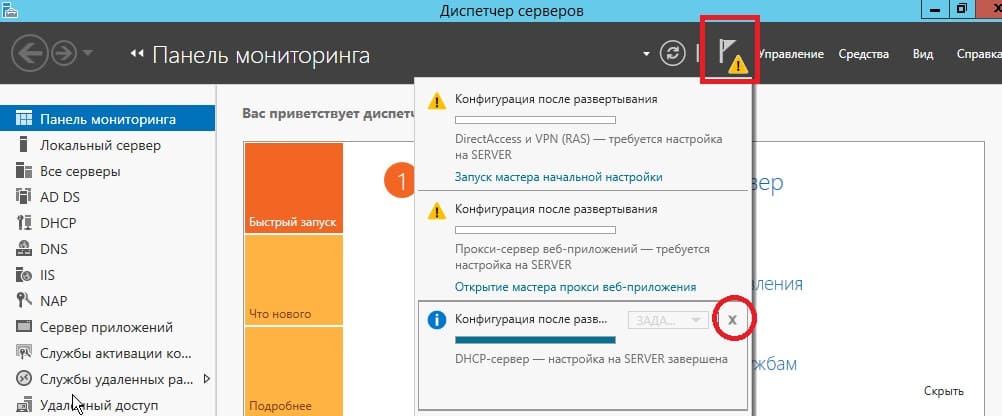
5) Теперь рассмотрим настройки DHCP (чтобы Ваш сервер мог раздавать свой диапазон IP адресов). Переходим в меню «Диспетчер серверов» и выбираем пункт «Завершение настройки DHCP».
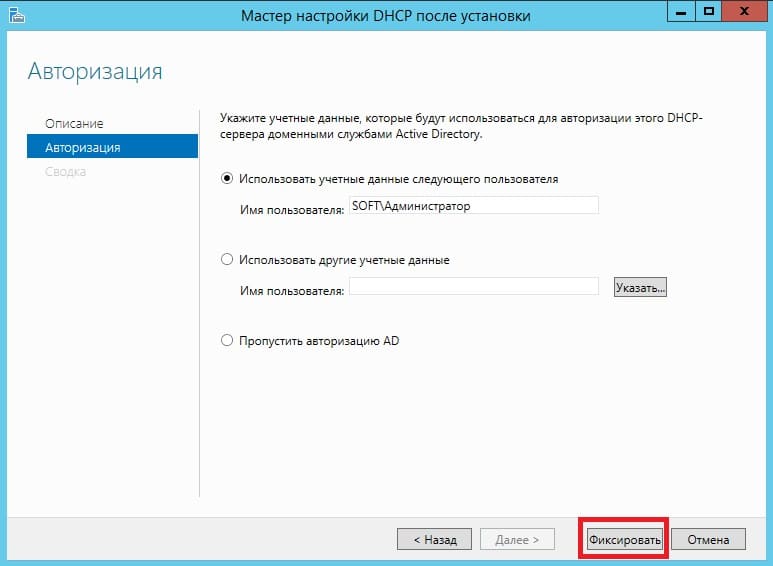
В меню «Авторизация» для удобства выбираем пункт «Использовать учетные данные текущего пользователя«. И нажимаем «Фиксировать».
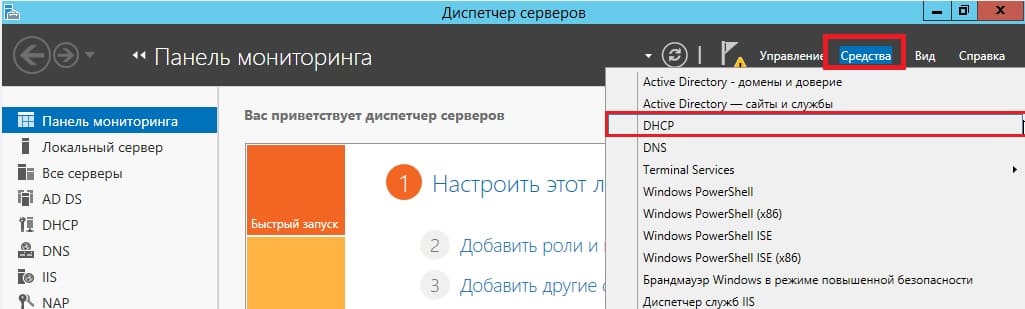
Теперь заходим в меню «Средства» => DHCP.
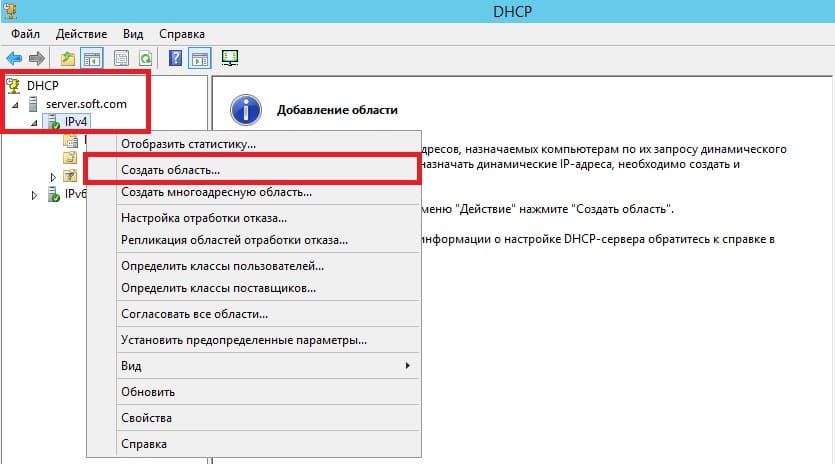
Разворачиваем дерево DHCP => «Имя вашего домена» => нажимаем на IPv4 правой кнопкой мыши => Создать область.
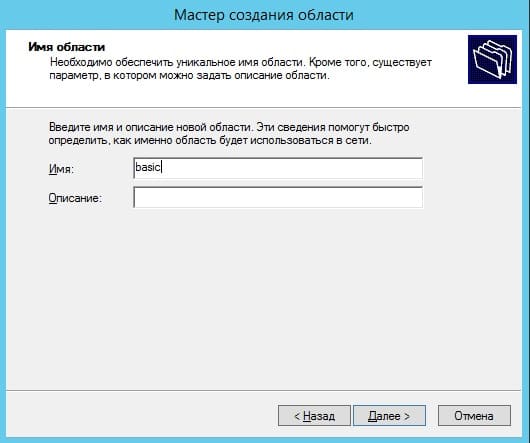
Задаем имя области, как пример «Basic», Вы можете задать любое название.
Теперь прописываем диапазон IP адресов, который будет раздавать Ваш сервер путем DHCP. Например 192.168.1.1/245. Диапазон задается по Вашему желанию.

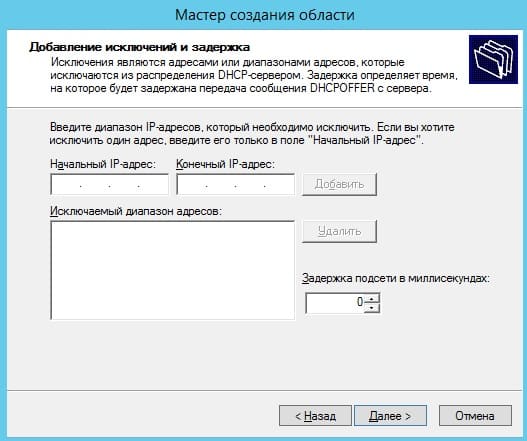
В следующем окне можете исключить какой-либо диапазон, например определенные IP адреса. На примере мы его пропустим.
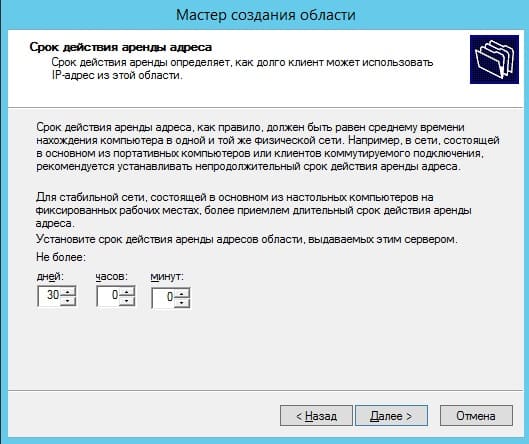
Задаем срок действия IP адреса для устройства, после которого динамически он сменится на другой. Можете задать любой срок в зависимости от Ваших задач, мы поставим 30 дней как пример.
Можете добавить Ваш маршутизатор в эту область, либо пропустить этот шаг.

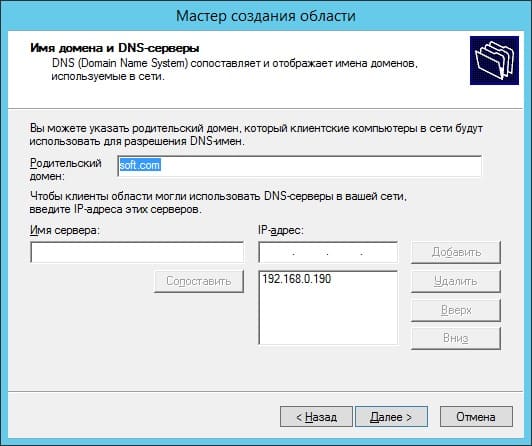
Укажите имя Вашего домена как родительский.
6) Теперь Вам можно уже настроить удаленные рабочие столы для пользователей. Для этого на Вашем сервере нужно лицензировать сервер удаленных рабочих столов. С инструкцией как происходит настройка RDP на сервере можете ознакомиться в нашей прошлой статье на следующей странице. Приобрести ключ активации для лицензирования Windows Server User/Device CAL можете в нашем каталоге. Быстрая доставка ключа в течении нескольких часов на Вашу электронную почту.
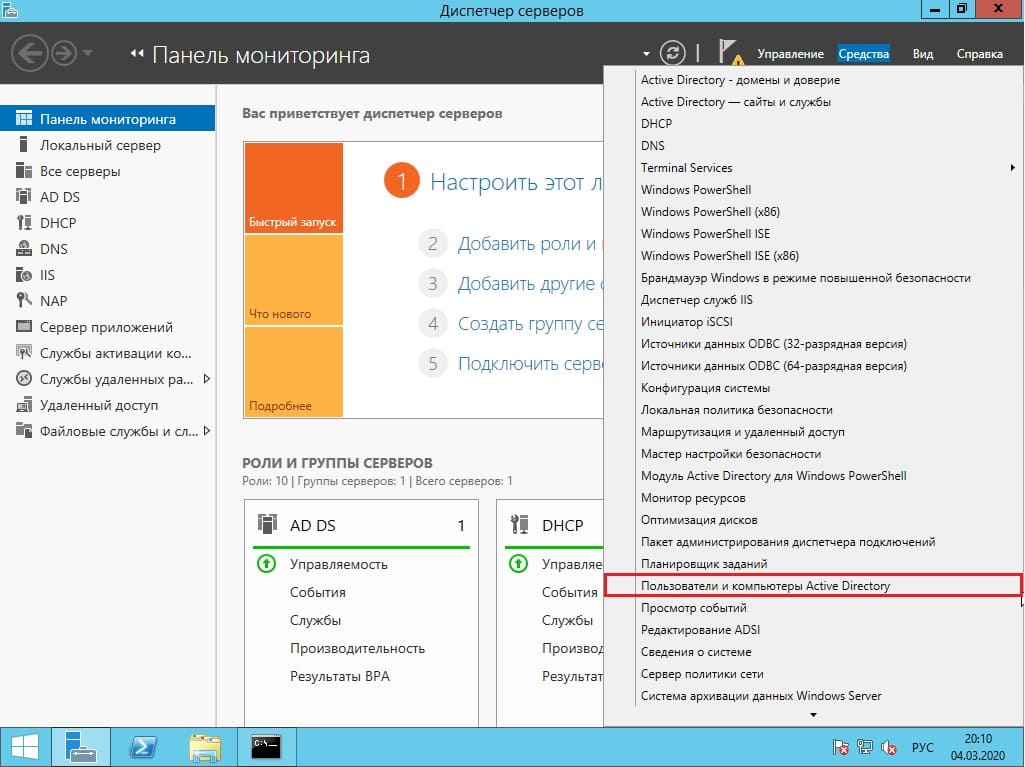
7) Теперь, после того как Вы успешно лицензировали сервер удаленных рабочих столов, можно добавить первого пользователя для подключения по RDP. Заходим в «Диспетчер серверов» => Средства => Пользователи и компьютеры Active Directory.
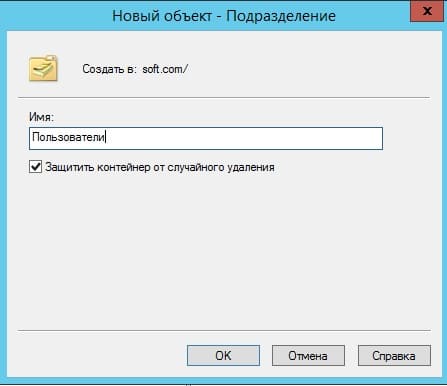
Разворачиваем дерево «Пользователи и компьютеры» => Правой кнопкой мыши на название Вашего домена или просто имя сервера => Создать => Подразделение.
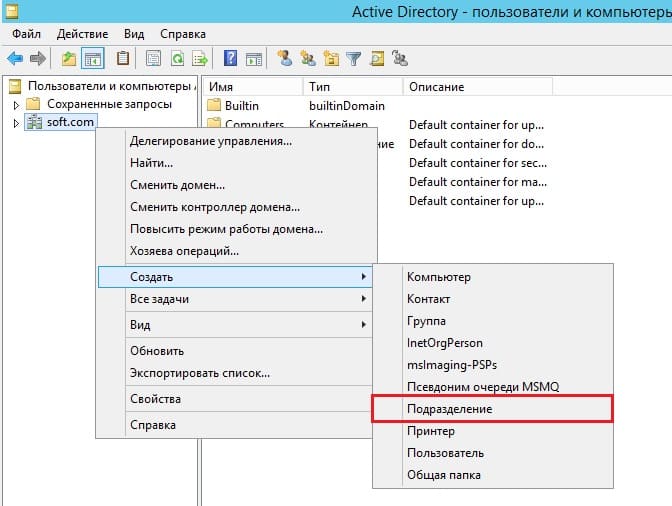
Чтобы было понятно, что за подразделение можете задать ему имя «Пользователи», или «Клиенты».
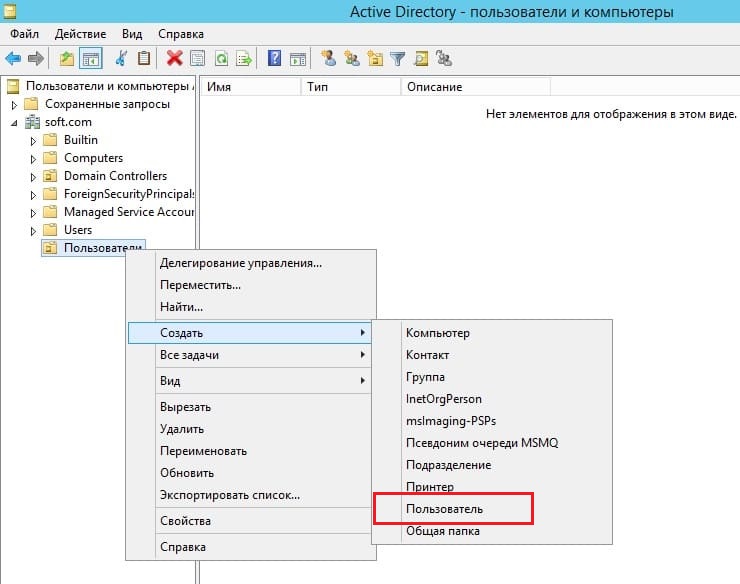
Далее в новом разделе «Пользователя» (в зависимости от того, как Вы назвали Ваше подразделение). Нажимаете на него правой кнопкой мыши => Создать => Пользователь.
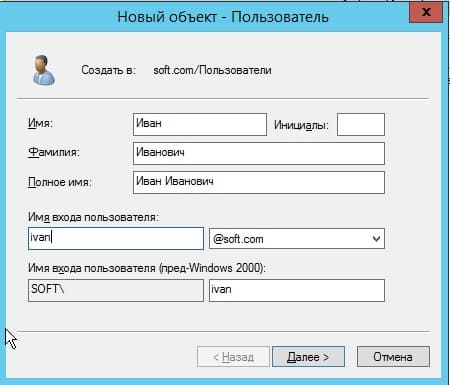
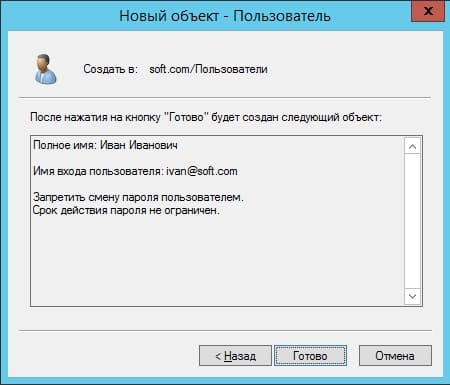
Теперь в карточке пользователя задаем параметры для пользователя, его имя, фамилию, имя для входа на латинице.
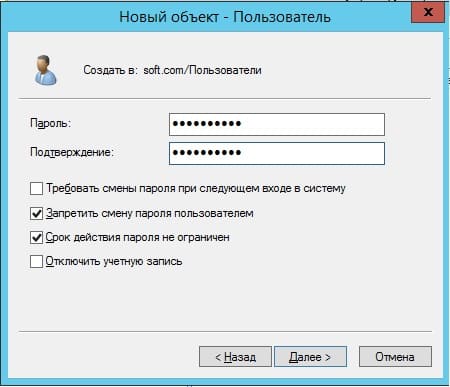
Задаем пароль для входа пользователю на сервер. Так же, по желанию, можете запретить смену пароля пользователям (желательно), поставить неограниченный срой действия пароля, чтобы в дальнейшем заново не задавать его.
Добавление пользователя закончено. Теперь по RDP пользователь может подключиться к серверу со своими данными.
На этом все, мы закончили самую базовую настройку.
Microsoft Windows Server 2012 is a powerful server operating system capable of many different roles and functions. However, to prevent overloading production servers with features and options that are never used, Windows Server provides a modular approach in which the administrator manually installs the services needed.
To set up and configure DNS, you’ll need to install the DNS Server Role on Windows Server 2012. This article will guide you through the DNS installation and configuration process in Windows Server 2012. Please note that you’ll need to be logged into your Windows server. When you’re ready to proceed, please refer to the following steps.
Installing the DNS Server Role in Server 2012
To add a new role to Windows Server 2012, you use the Server Manager.
- Start Server Manager
- Click the Manage menu
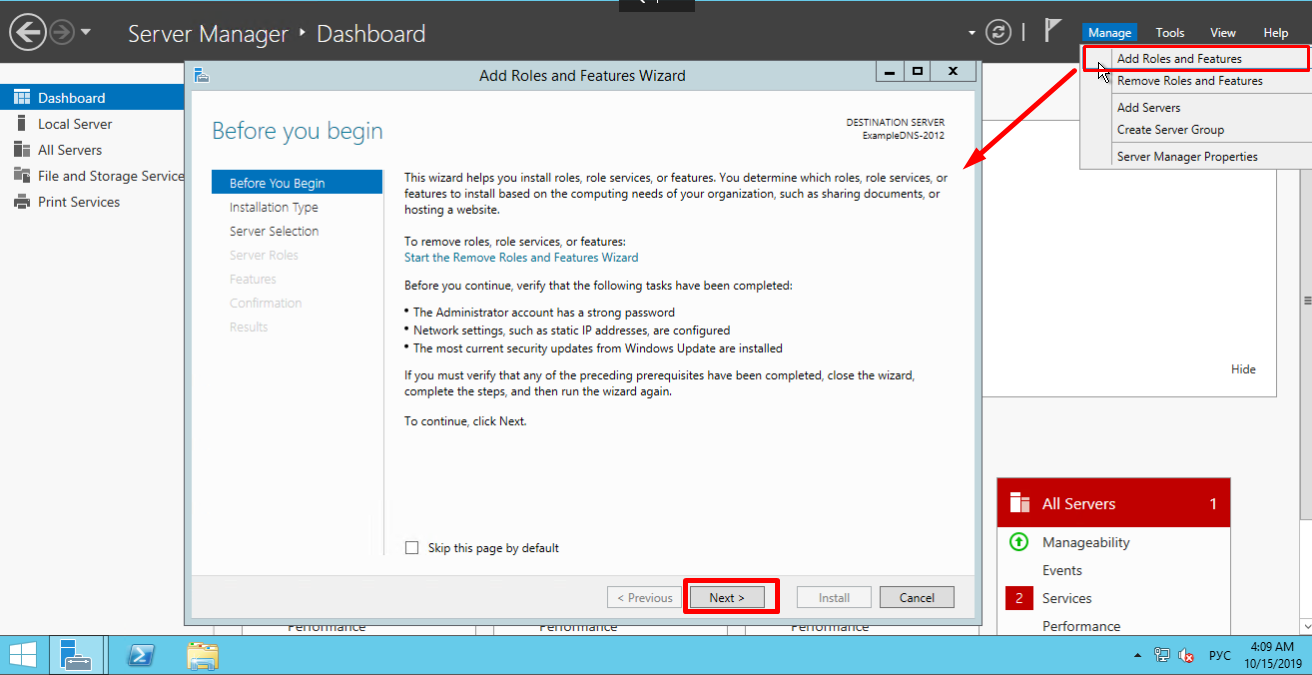
- Select Add Roles and Features
- Click Next on the Add Roles and Features Wizard Before you begin the window that pops up (If you checked to Skip this page by default at any point in the past, the page should not appear)
- Select Role-based or feature-based installation
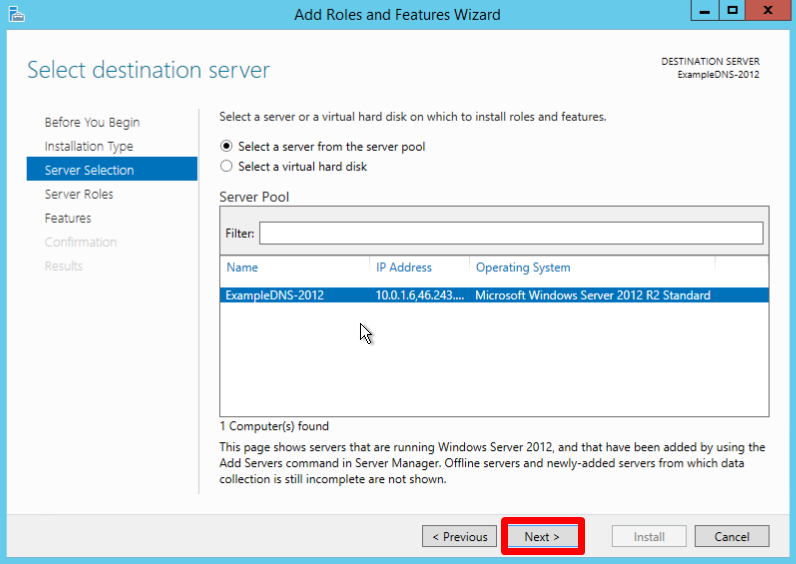
- Select the server that you’d like to install the DNS function to from the server pool and click next
- At this point, you’ll see a pop-up window informing you that some additional tools are required to manage the DNS Server.
- We recommend going ahead and install these tools unless your company policy explicitly forbids this practice.
- You shouldn’t need to make any changes in the Features window, and you can click Next.
- Click next on the information window that appears
- You should now be at the final confirmation screen before installation
- You can choose to restart the server once the installation is complete, although this is not necessary
Congratulations! The DNS Server role should now be installed and ready for use! You should now see a new DNS Role tile in your Server Manager.
Configuring the DNS Server Role in Server 2012
If you’re an old pro with DNS server files, Windows Server 2012 does let you edit the files directly. However, Microsoft recommends using the interface tools to avoid errors, especially if you’re integrating DNS with Active Directory. If you want to use the command line to configure your DNS, use the dnscmd command. For those who don’t memorize TechNet for fun, a few clicks are all it takes.
- Within the Server Manager, click the Tools menu and select DNS
- This brings up the DNS Manager window, which should look something like the following screenshot
- Select the DNS Server to manage
- Click the Action Menu
- Select Configure a DNS Server
- You should now see the Configure a DNS Server wizard
- There are three options
- Configure a forward lookup zone
- Create forward and reverse lookup zones
- Configure root hints only
- Select the option which best suits your needs. Generally, creating forward and reverse lookup zones is the best approach.
- Click Next
- Choose whether this server will maintain the zone or if this server will have a read-only copy of the DNS records from another server.
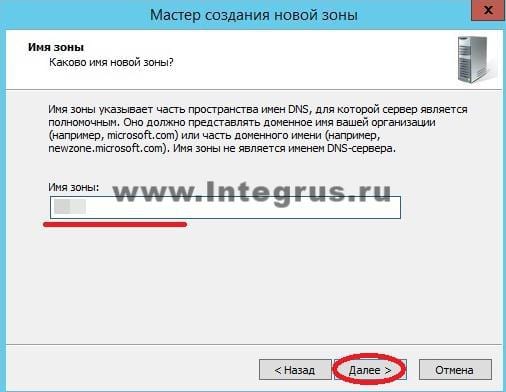
- Enter your zone name
- Click Next
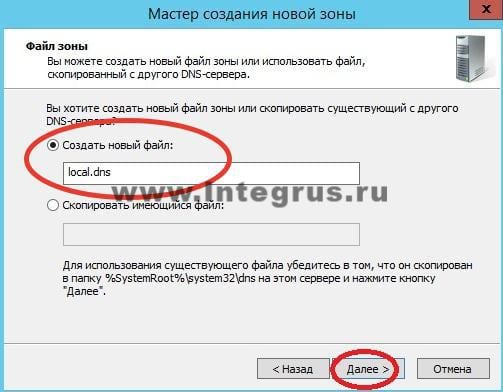
- Choose the file name where the DNS records will be stored
- Select how this server will respond to Dynamic Updates
- Select the first option to allow only secure dynamic updates if you’re integrating your DNS with Active Directory
- Select do not allow dynamic updates if your DNS is not integrated with Active Directory and you don’t want to allow dynamic updates
- Select if you’d like the DNS server to forward queries
- Click Next
Your DNS Server should now be configured and ready to use!
Что такое DNS?
DNS – это аббревиатура от Domain Name System. Переводится как система доменных имён, и является системой, которая сопоставляет между собой доменное имя и IP адрес хоста. Так, зная имя хоста, можно получить его адрес и наоборот. Для чего это нужно? Всемирная сеть Интернет устроена таким образом, что каждое устройство (компьютер, телефон, планшет, маршрутизатор) имеет свой уникальный адрес (на самом деле адреса могут повторяться, если речь идет о разных ЛОКАЛЬНЫХ сетях, но в данной статье мы говорим о глобальной сети и не будем вдаваться в подробности NAT, PAT и маршрутизации), и обратиться к этому устройству можно только зная его адрес в сети. Работая в Интернете, мы обращаемся к десяткам сайтов каждый день. Трудно было бы запомнить все их адреса, состоящие из последовательности номеров и точек, например, что проще запомнить 77.222.61.238 или integrus.compumur.ru? Конечно, второе. А адрес за вас вспомнит система доменных имен.
DNS есть на любом компьютере, в каждой сети и у каждого провайдера, кроме того имеет иерархический вид и в случае, когда система доменных имен не может определить адрес запрошенного ресурса по доменному имени, она передает запрос вышестоящему DNS-серверу. Запрос может передаваться вплоть до одного из 13 «самых главных в мире» корневых DNS серверов.
Как установить DNS-сервер?
Сервер может выполнять различные функции, он может исполнять роль глобального каталога, хранить файловую информацию, работать с базами данных, работать одновременно с несколькими пользователями. В зависимости от предназначения сервера на нем устанавливают роли – специальный набор программ, позволяющих серверу выполнять необходимые функции.
Как установить роль DNS сервера? Установку будем проводить на Windows Server 2012 R2.
Чаще всего роль DNS-сервера устанавливается вместе с контроллером домена. Но в случае если во время установки Active Directory вы сняли галочку «DNS-сервер», либо AD просто не нужен, то необходимо провести установку только DNS-сервера. Для этого нужно зайти в диспетчер сервера и нажать кнопку «Добавить роли и компоненты».
Откроется окно «Мастера добавления ролей и компонентов». Прочитайте вступительный текст мастера и нажмите «Далее».
Убедитесь, что выбран пункт «Установка ролей и компонентов» и нажмите «Далее».
Выберите сервер из пула серверов. В нашем случае сервер всего один, у вас может быть больше.
Выбираем Роль DNS-сервер.
Отметив необходимый пункт галочкой, увидим появившееся окно «Мастера добавления ролей и компонентов». Эти компоненты необходимы для управления устанавливаемой ролью. В случае, если вы собираетесь администрировать DNS-сервер с другого сервера, то можно пропустить добавление данных компонентов.
Вернувшись в окно, с отмеченной галочкой DNS-сервер, нажмите кнопку «Далее», затем «Далее и снова «Далее», пока не станет активна кнопка «Установить».
Нажмите кнопку «Установить».
Начнется установка.
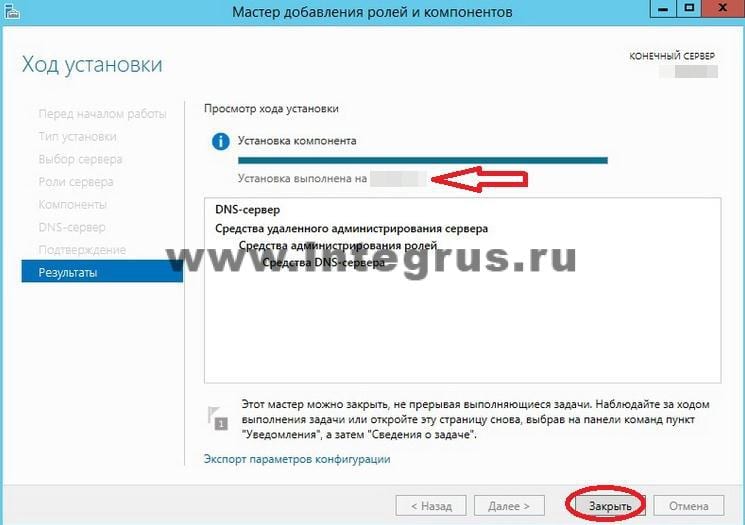
После завершения установки (установка будет длится менее 5 минут) появится надпись: «Установка выполнена на ИмяВашегоСервера». Можно нажать кнопку «Закрыть». Теперь в Панели мониторинга сервера, а также в Меню Пуск появится новая строчка «DNS». Если кликнуть по этой строчке, то запустится «Диспетчер DNS».
Он выглядит следующим образом.
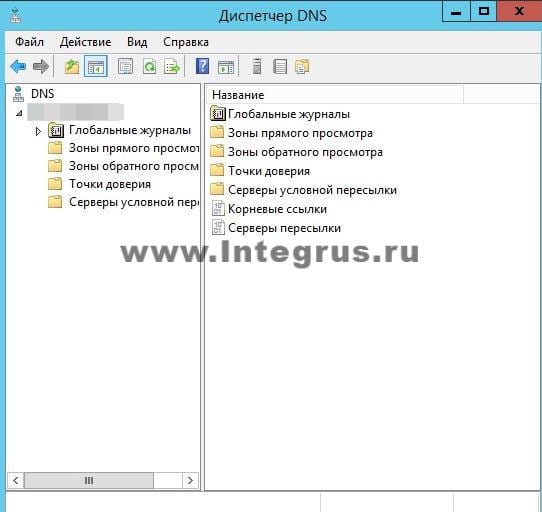
На данный момент на DNS-сервере не настроена ни одна зона. Такой сервер называется кэширующим. Зоны – это части пространства имен, за которые отвечает сервер. Зоны прямого просмотра предполагают преобразование имени в IP-адрес. Зона обратного просмотра наоборот, сопоставляет IP-адрес с именем.
Создадим зону прямого просмотра и сделаем её простую настройку.
Для этого кликнем правой кнопкой мыши на надписи «Зоны прямого просмотра» и затем «Создать новую зону».
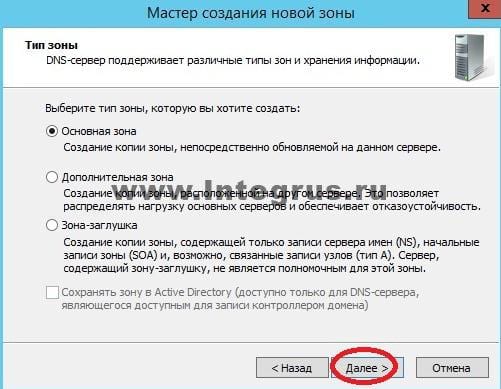
Откроется окно «Мастера создания новой зоны», жмем «Далее». Откроется окно выбора типа зоны. Если у Вас нет другого сервера DNS выбирайте «Основная зона» и «Далее».
В следующем окне нужно задать имя зоны. Рекомендуется использовать ваш домен. В нашем случае в качестве имени было бы указано: integrus.compumur.ru. Жмем «Далее».
Выбираем «Создать новый файл» и жмем «Далее».
В следующем окне выберите тип динамического обновления. Рекомендуется разрешить динамические обновления, но только если DNS будет использоваться исключительно в вашей локальной сети. В противном случае этот пункт может повлечь за собой риски безопасности, о чем «Мастер создания новой зоны» вас предупредит.

Жмем «Далее» и «Готово». Зона прямого просмотра успешно создана, проведем её простую настройку. Настройка зоны просмотра осуществляется путем добавления в зону DNS-записей. Существует несколько типов DNS-записей. Рассмотрим основные типы:
- А-запись. Соотносит Имя хоста и адрес протокола IPV
- АААА-запись. Соотносит Имя хоста и адрес протокола IPV
- CNAME-запись. Псевдоним, используется для переадресации на другое имя.
- MX-запись. Почтовая запись, указывает на почтовые сервера.
- NS-запись. Указывает на DNS-сервер домена.
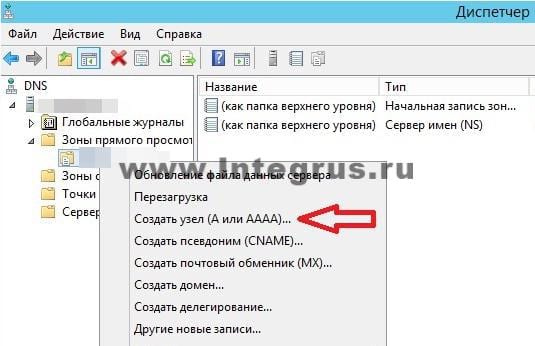
Создадим А-запись для нашей новой зоны прямого просмотра. Для этого кликнем правой кнопкой мыши на зоне и выберем соответствующий пункт контекстного меню, как показано на рисунке.
В открывшемся окне «Новый узел» вводим Имя узла, например GateWay и его IP-адрес, например 192.168.0.1. Нажмите кнопку «Добавить узел».
Готово! Запись успешно создана!
В данной статье мы постарались максимально понятным языком объяснить простому человеку без глубоких знаний IT что такое DNS, как установить роль DNS-сервера на Windows Server 2012, познакомились с основными типами записей и в картинках показали как эти записи делаются. А если все вышеописанное показалось Вам трудным, то наши специалисты настроят Вам сервер менее, чем за час.
DNS (Domain Name System) is a system that lets you translate domain names into IP addresses and vice versa.
A DNS server is a network service that provides and maintains the operation of DNS. The DNS server is an easy and light service that can run on most machines. If you don’t intend to configure other roles and services on the target machine, the minimum configuration is enough.
How to set up a DNS server:
- Configuring the network adapter for the DNS server
- Installing the DNS Server Role
- Create a forward lookup zone
- Creating a reverse lookup zone
- Create an A record
- Describes the Domain Name System (DNS) features that are new or changed in Windows Server 2016.
Configuring the network adapter on the DNS server
Installing a DNS server requires a domain zone. You need to create a private network in your personal account and connect virtual machines to it.
After the machine is connected to both of the networks, it is important to remember which connection needs to be configured. Usually, a network adapter is setup by default from the very beginning with an access to the Internet. At the same time other additional network adapters have no Internet access until the configuration is performed manually:
By hovering the cursor over the network icon in the system tray, you can find a tooltip with brief information about networks. Following the example above, you can see that the joined network is Network 3.
Perform a series of actions:
- Right-click Start and select Network Connections from the drop-down menu;
- Right-click on the required network adapter and select Properties from the menu;
- Select IPv4 In the Properties window, and click on the Properties button;
- Fill in the appropriate fields with the necessary data:

Here, the machine is assigned as the preferred DNS server, and the alternate is assigned as dns.google [8.8.8.8].
Installing the DNS server role
To add new roles to Windows Server, you use Add Roles and Features Wizard in Server Manager.
On the upper navigation bar of the Server Manager click the Manage menu, and then select Add Roles and Features:
Here, the Wizard recommends you to verify if the following tasks have been completed:
1. The Administrator account has a strong password.
2. Network settings, such as static IP addresses, are configured.
3. The most current security updates from Windows Update are installed.
If you are sure that all the conditions are met, click Next;
Select the Role-based or feature-based installation and click Next:

Select a server you want from the server pool and click Next:
Check off the DNS server role and click Next:

Check the list of features to install and confirm by clicking Add Features:

Keep the list of features as is and click Next:

Read the information and click Next:

Check the installation configuration once again and confirm your decision by clicking Install:

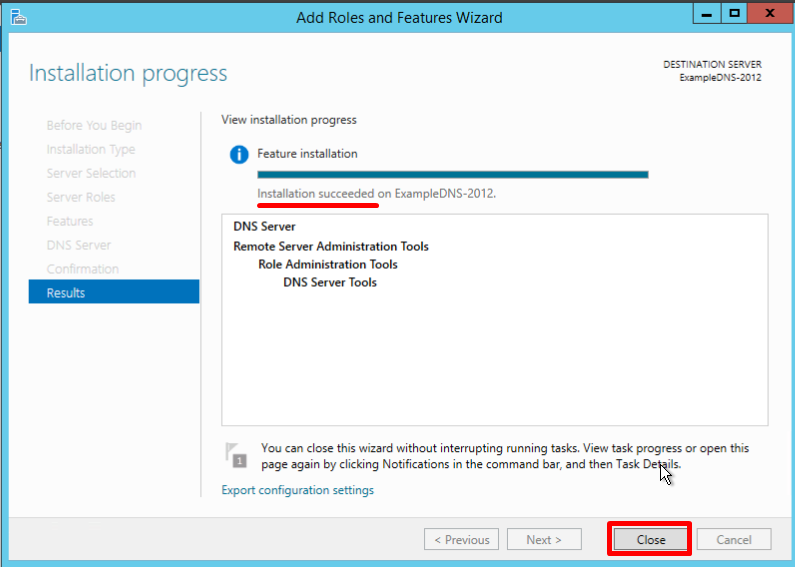
The final confirmation screen lets you know that the installation has been successfully completed, and you can close the installation Wizard:
Creating forward and reverse lookup zones
A domain zone — a set of domain names within a specific domain.
Forward lookup zones resolve names to IP addresses.
Reverse lookup zones resolve IP addresses to names.
You have to use the DNS Manager to create and manage the zones.
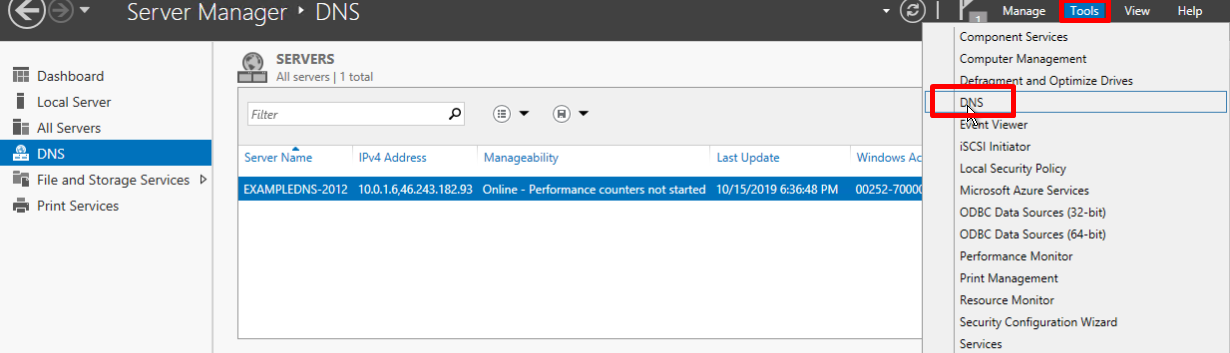
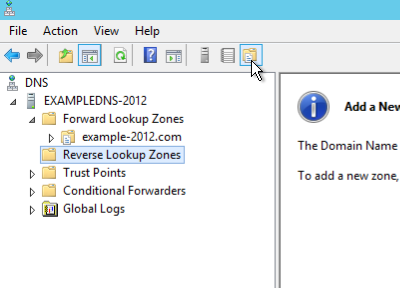
On the upper navigation bar of the Server Manager click the Tools menu and select DNS in the drop-down list:
Creating a forward lookup zone
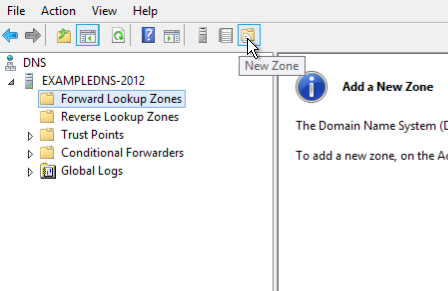
- Right-click on the Forward Lookup Zones folder, select New Zone. This will open the New Zone Wizard:
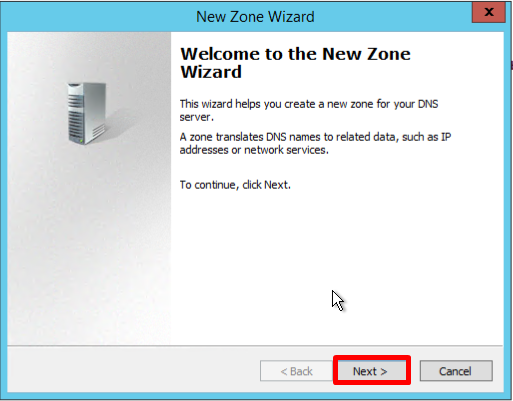
- On the Welcome screen of the Wizard, click Next:
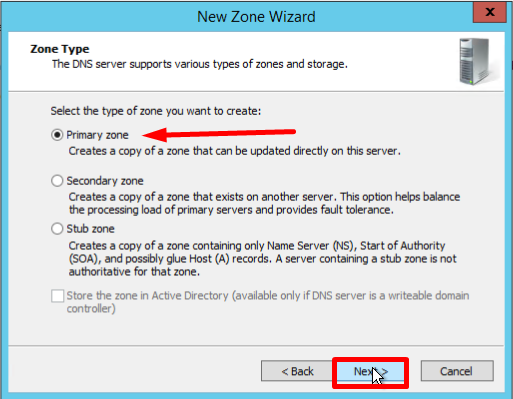
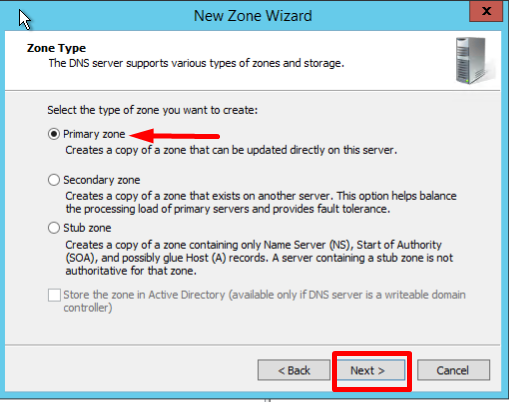
- On the Zone Type screen, Select Primary Zone, and click Next:
- Enter the name, and click Next:

- If necessary, change the name of the future zone file and click Next:

- You must choose whether you want to allow dynamic updates or not. It is not recommended to allow this because of a significant vulnerability. Click Next:

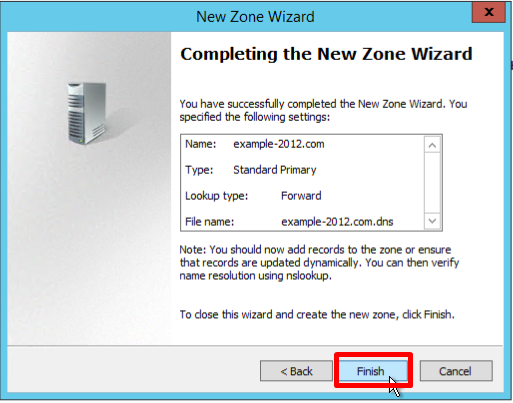
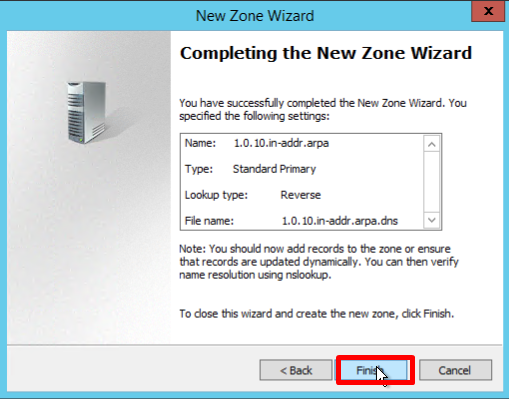
- Verify that the selected settings are correct, click Finish:
Creating a reverse lookup zone
- Open the DNS Manager and right-click on the Reverse Lookup Zones folder, select New Zone. This will open the New Zone Wizard:
- On the Zone Type screen, Select Primary Zone, and click Next:
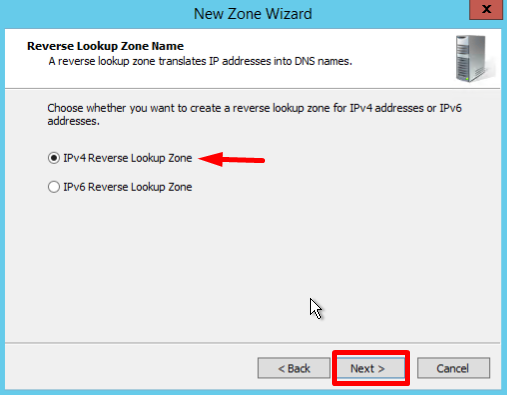
- In the first Reverse Lookup Zone Name page, select IPv4, click Next:
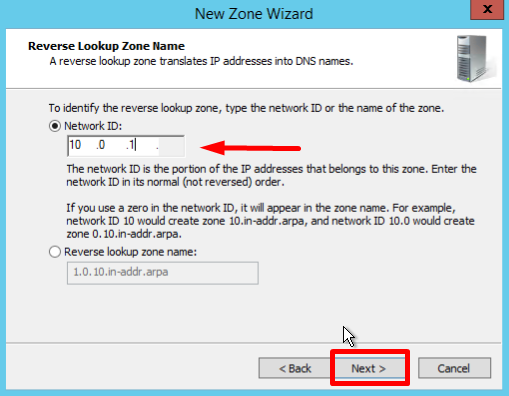
- Type the network ID (the first three octets of the IP address) and click Next:
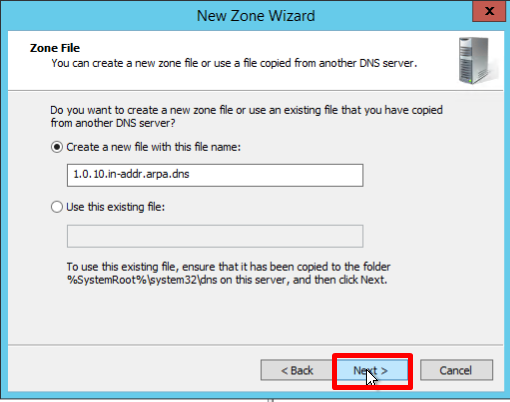
- If necessary, change the name of the future zone file and click Next:
- You must choose whether you want to allow dynamic updates or not. It is not recommended to allow this because of a significant vulnerability. Click Next:

- Verify that the selected settings are correct, click Finish:
Creating a host (A) record
This section of the guideline is here to mostly check all the steps you performed earlier.
A Resource Record is the unit of information storage and transmission in DNS. RRs are the basic building blocks of host-name and IP information and are used to resolve all DNS queries.
Record A — a record that lets you map hostnames to an IP address of the host.
Record PTR — is the reverse version of an A Record.
- Open the Forward Lookup Zones folder in the DNS Manager and find the zone folder. Right-click on the right part of the DNS Manager and select New Host (a or AAA):

- New Host page opens. In Name, type a name of the host (with no domain, it will use the name of the Zone as a domain) and your IP address. Check off the section «Create associated pointer (PTR) record», to verify if both Forward and Reverse Lookup Zones are operating properly:
If the Name field is blank it uses parent domain name.
- You can also add records for other servers:
- Once you are finished, click Done.
Making sure everything is correct
- Check the changes in the folders of the zones (in the example below you can see 2 records appeared in each of them):


- Open the command line (cmd) or PowerShell and run the nslookup command:
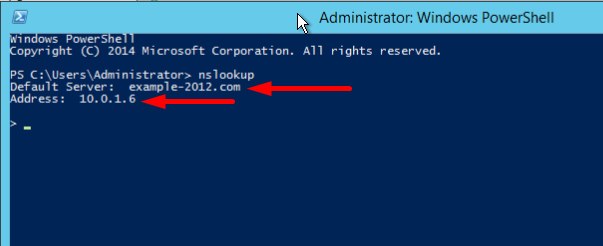
It shows that the default DNS server is example-2012.com with the address 10.0.1.6.
To make sure that the Forward and Reverse Zones are operating properly, you can send two queries:
- To query the domain;
- To query the IP address:
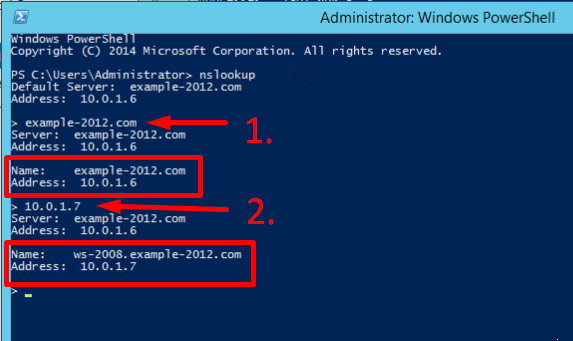
In the example, we have got appropriate responses for both queries.
- There is an option to send a query to an external resource:
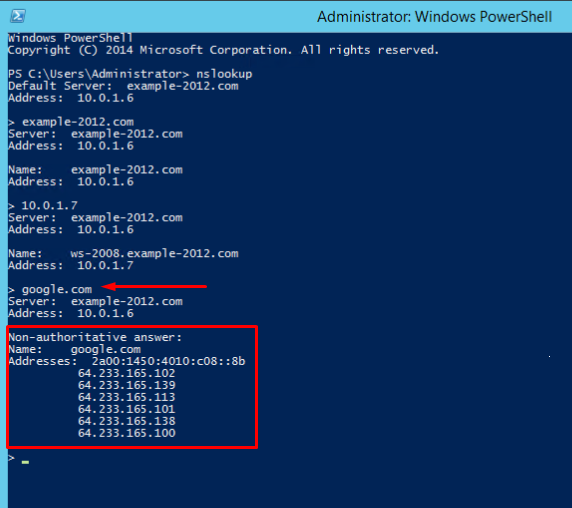
We see a new line here «Non-authoritative answer». This means that our DNS server does not contain domain’s original zone files. Although the information displayed below, received from an authoritative server, it is not itself authoritative in this case.
To compare, all the same queries were made on the server where the forward and reverse zones were not configured:

Here, the machine assigned itself as a default DNS server. The DNS server domain name is displayed as unknown because there are no resource records for the IP address (10.0.1.7). For the same reason, the 2nd query returns an error (Non-existent domain).
Describtion of the Domain Name System (DNS) features which are new or changed in Windows Server 2016.
In Windows Server 2016, DNS Server offers updates in the following areas:
- DNS Server Policies
- Response Rate Limit (RRL)
- DNS Based Named Entity Authentication (DANE)
- Unknown record support
- IPv6 root hints
- Windows PowerShell Support
DNS Server Policies
Now you can use these features:
- DNS Policy for Geo-Location based traffic management
- Intelligent DNS responses based on the time of day, to manage a single DNS server configured for split-brain deployment
- Apply filters on DNS queries, and more.
Specific description of these features:
Application Load Balancing
When you have deployed multiple instances of an application at different locations, you can use DNS policy to balance the traffic load between the different application instances, dynamically allocating the traffic load for the application.
Geo-Location Based Traffic Management.
You can use DNS Policy to allow primary and secondary DNS servers to respond to DNS client queries based on the geographical location of both the client and the resource to which the client is attempting to connect, providing the client with the IP address of the closest resource.
Split Brain DNS
With split-brain DNS, DNS records are split into different Zone Scopes on the same DNS server, and DNS clients receive a response based on whether the clients are internal or external clients. You can configure split-brain DNS for Active Directory integrated zones or for zones on standalone DNS servers.
Filtering
You can configure DNS policy to create query filters that are based on criteria that you supply. Query filters in DNS policy allow you to configure the DNS server to respond in a custom manner based on the DNS query and DNS client that sends the DNS query.
Forensics
You can use DNS policy to redirect malicious DNS clients to a non-existent IP address instead of directing them to the computer they are trying to reach.
Time of day based redirection
You can use DNS policy to distribute application traffic across different geographically distributed instances of an application by using DNS policies that are based on the time of day.
You can also use DNS policies for Active Directory integrated DNS zones.
Response Rate Limiting (RRL)
ТYou can configure RRL settings to control how to respond to requests to a DNS client when your server receives several requests targeting the same client.
By doing this, you can prevent someone from sending a Denial of Service (Dos) attack using your DNS servers.
For instance, a bot net can send requests to your DNS server using the IP address of a third computer as the requestor. Without RRL, your DNS servers might respond to all the requests, flooding the third computer.
When you use RRL, you can configure the following settings:
Responses per second This is the maximum number of times the same response is given to a client within one second.
Errors per second This is the maximum number of times an error response is sent to the same client within one second.
Window This is the number of seconds for which responses to a client are suspended if too many requests are made.
Leak rate This is how frequently the DNS server responds to a query during the time responses are suspended. For instance, if the server suspends responses to a client for 10 seconds, and the leak rate is 5, the server still responds to one query for every 5 queries sent. This allows the legitimate clients to get responses even when the DNS server is applying response rate limiting on their subnet or FQDN.
TC rate This is used to tell the client to try connecting with TCP when responses to the client are suspended. For instance, if the TC rate is 3, and the server suspends responses to a given client, the server issues a request for TCP connection for every 3 queries received. Make sure the value for TC rate is lower than the leak rate, to give the client the option to connect via TCP before leaking responses.
Maximum responses This is the maximum number of responses the server issues to a client while responses are suspended.
Allowlist domains This is a list of domains to be excluded from RRL settings.
Allowlist subnets This is a list of subnets to be excluded from RRL settings.
Allowlist server interfaces This is a list of DNS server interfaces to be excluded from RRL settings.
DNS Based Named Entity Authentication (DANE)
You can use DANE support (RFC 6394 and 6698) to specify to your DNS clients what CA they should expect certificates to be issued from for domains names hosted in your DNS server. This prevents a form of man-in-the-middle attack where someone is able to corrupt a DNS cache and point a DNS name to their own IP address.
Unknown record support
An «Unknown Record» is an RR whose RDATA format is not known to the DNS server. The newly added support for unknown record (RFC 3597) types means that you can add the unsupported record types into the Windows DNS server zones in the binary on-wire format. The Windows caching resolver already has the ability to process unknown record types. Windows DNS server does not do any record specific processing for the unknown records, but sends it back in responses if queries are received for it.
IPv6 root hints
The IPV6 root hints, as published by IANA, have been added to the Windows DNS server. The internet name queries can now use IPv6 root servers for performing name resolutions.
Windows PowerShell support
The following new Windows PowerShell cmdlets and parameters are introduced in Windows Server 2016.
Add-DnsServerRecursionScope — This cmdlet creates a new recursion scope on the DNS server. Recursion scopes are used by DNS policies to specify a list of forwarders to be used in a DNS query.
Remove-DnsServerRecursionScope — This cmdlet removes existing recursion scopes.
Set-DnsServerRecursionScope — This cmdlet changes the settings of an existing recursion scope.
Get-DnsServerRecursionScope — This cmdlet retrieves information about existing recursion scopes.
Add-DnsServerClientSubnet — This cmdlet creates a new DNS client subnet. Subnets are used by DNS policies to identify where a DNS client is located.
Remove-DnsServerClientSubnet — This cmdlet removes existing DNS client subnets.
Set-DnsServerClientSubnet — This cmdlet changes the settings of an existing DNS client subnet.
Get-DnsServerClientSubnet — This cmdlet retrieves information about existing DNS client subnets.
Add-DnsServerQueryResolutionPolicy — This cmdlet creates a new DNS query resolution policy. DNS query resolution policies are used to specify how, or if, a query is responded to, based on different criteria.
Remove-DnsServerQueryResolutionPolicy — This cmdlet removes existing DNS policies.
Set-DnsServerQueryResolutionPolicy — This cmdlet changes the settings of an existing DNS policy.
Get-DnsServerQueryResolutionPolicy — This cmdlet retrieves information about existing DNS policies.
Enable-DnsServerPolicy — This cmdlet enables existing DNS policies.
Disable-DnsServerPolicy — This cmdlet disables existing DNS policies.
Add-DnsServerZoneTransferPolicy — This cmdlet creates a new DNS server zone transfer policy. DNS zone transfer policies specify whether to deny or ignore a zone transfer based on different criteria.
Remove-DnsServerZoneTransferPolicy — This cmdlet removes existing DNS server zone transfer policies.
Set-DnsServerZoneTransferPolicy — This cmdlet changes settings of an existing DNS server zone transfer policy.
Get-DnsServerResponseRateLimiting< — This cmdlet retrieves RRL settings.
Set-DnsServerResponseRateLimiting — This cmdlet changes RRL settigns.
Add-DnsServerResponseRateLimitingExceptionlist — This cmdlet creates an RRL exception list on the DNS server.
Get-DnsServerResponseRateLimitingExceptionlist— This cmdlet retrieves RRL excception lists.
Remove-DnsServerResponseRateLimitingExceptionlist — This cmdlet removes an existing RRL exception list.
Set-DnsServerResponseRateLimitingExceptionlist — This cmdlet changes RRL exception lists.
Add-DnsServerResourceRecord — This cmdlet was updated to support unknown record type.
Get-DnsServerResourceRecord — This cmdlet was updated to support unknown record type.
Remove-DnsServerResourceRecord — This cmdlet was updated to support unknown record type.
Set-DnsServerResourceRecord— This cmdlet was updated to support unknown record type
For more information, see the following Windows Server 2016 Windows PowerShell command reference topics.
Powershell DNS Server
Powershell DNS Client