This topic explains how to install an additional Active Directory domain controller in an existing domain. The steps apply to domain controllers that run Windows Server 2008 or Windows Server 2008 R2. If the domain controller that you plan to install will be the first that runs Windows Server 2008 or Windows Server 2008 R2 in your domain or forest, you need to prepare the domain before you can install the domain controller. In this case our first domain controller runs Windows Server 2008 R2.
To perform this procedure, you must be a member of the Domain Admins group in the domain in which the domain controller is being installed.
To start procedure Log on to the server you want to promote to a domain controller and follow next steps:
- Specify the preferred DNS server
Set up static network parameters:
2.After that Open Server Manager and click on Roles and then Add Roles to start installation and click Next:

3. On the Select Server Roles page, select the Active Directory Domain Services check box, and click Add Required Features and then click Next:

4. Click Next (this page introduction about ADDS):

5. Click Install:

6. When the installation is finished you will be shown a success message, Click Close.

Enable remote management , Open the Server Manager window if it is not already open and enable remote management.
7. Open up Server Manager, expand Roles and click on Active Directory Domain Services. On the right hand side click on the Run the Active Directory Domain Services Installation Wizard (dcpromo.exe) :

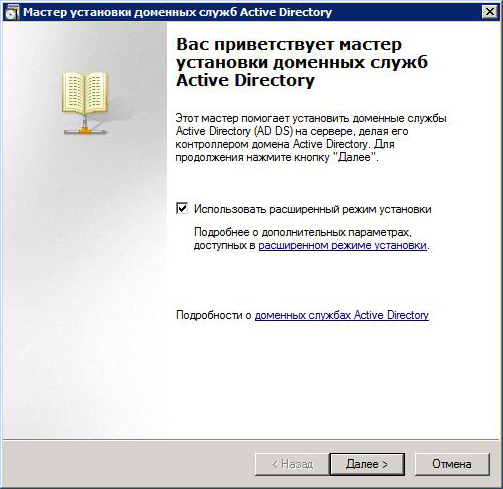
8. Select Use advanced mode installation and Click Next on the Welcome wizard:

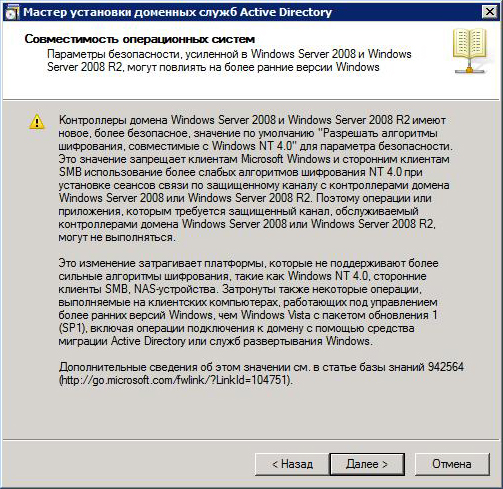
9. On the Operating System Compatibility page, click Next (The message that is shown now relates to older clients that do not support the new cryptographic algorithms supported by Server 2008 R2, these are used by default in Server 2008 R2)

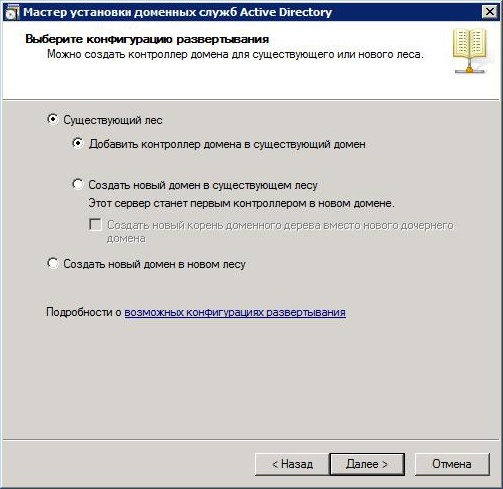
10. On the Choose A Deployment Configuration page, select Existing Forest, select Add A Domain Controller To An Existing Domain, and then click Next:

11. On the Network Credentials page, type your domain in the text field, select Alternate Credentials, and then click Set.
Enter user name and password for an account that must be a member of the Domain Admins group and Click Next:

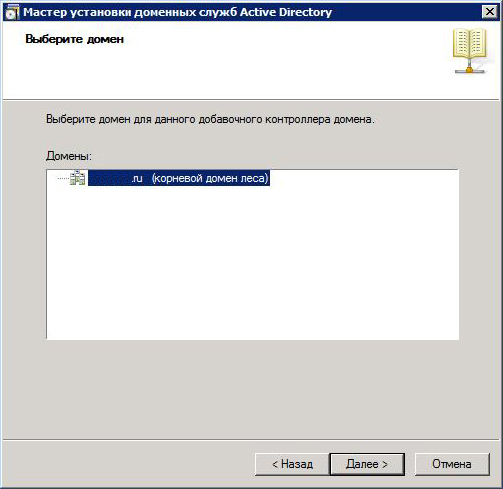
12. On the Select A Domain page, select domain and click Next:

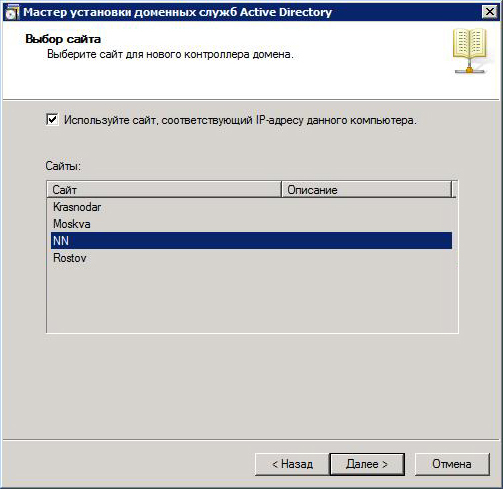
13. On the Select A Site page, select Default-First-Site-Name and click Next:

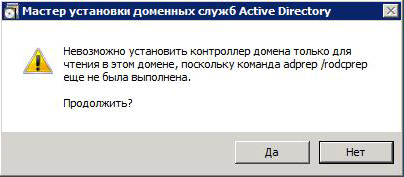
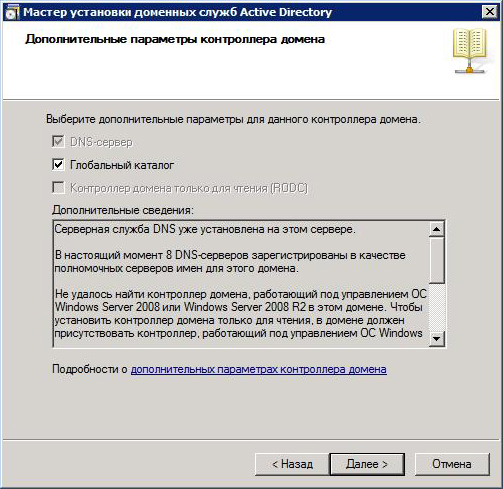
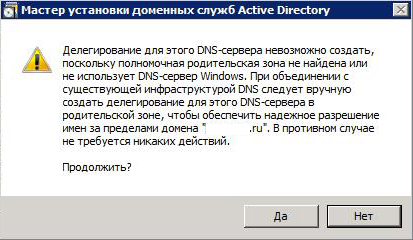
14. The Additional Domain Controller Options page appears. DNS Server and Global Catalog are selected by default. if you want to be an Additional DC – DNS server and a Global Catalog, so I will keep the check boxes selected and click Next and click Yes:

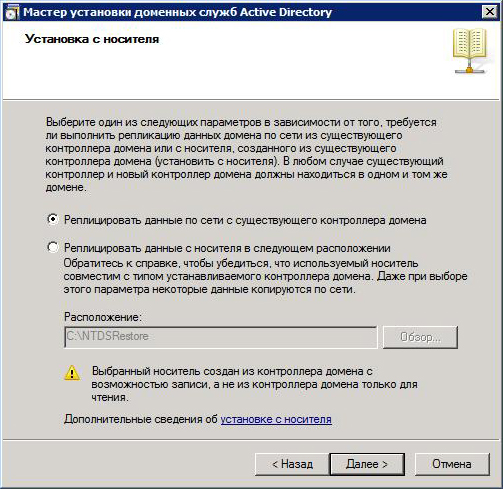
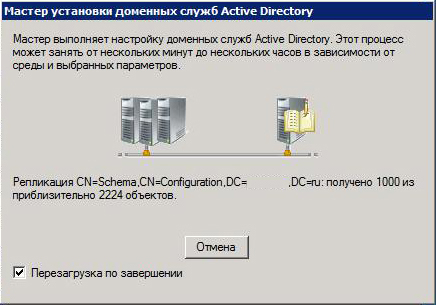
15. Choose default option to replicate data over the network from an existing domain controller(or You can choose replicate data from media at the following location to create the domain controller) and click Next:

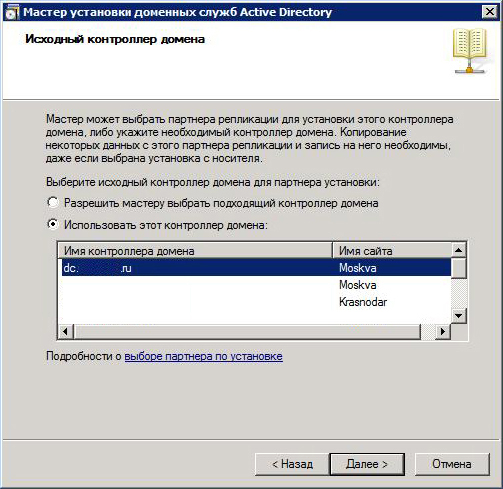
16. Choose default option to replicate data from other existing DC in a network, or click Use this specific domain controller to specify a domain controller that you want to provide as a source for replication for new domain controller and click Next:

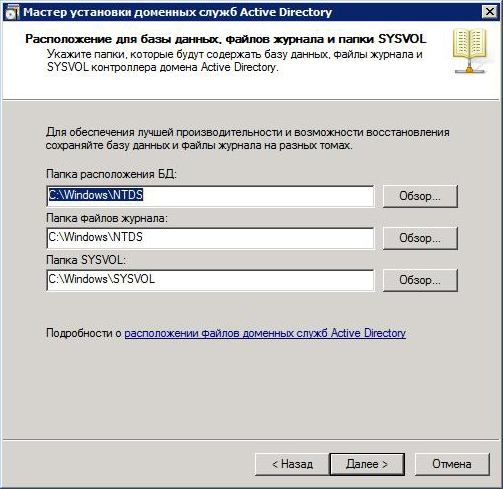
17. On the Location for Database, Log Files, and SYSVOL page, accept the default values and then click Next:

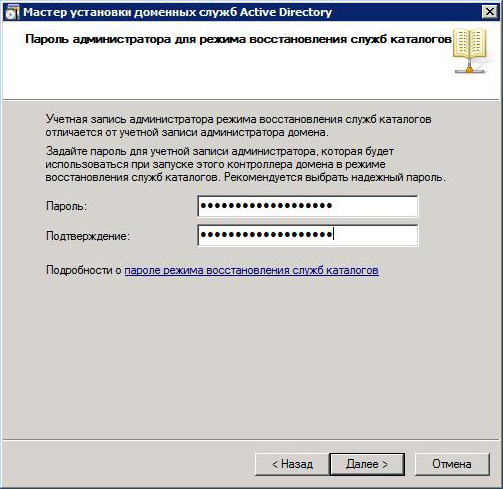
18. Choose Active Directory Restore Mode Password and click next:

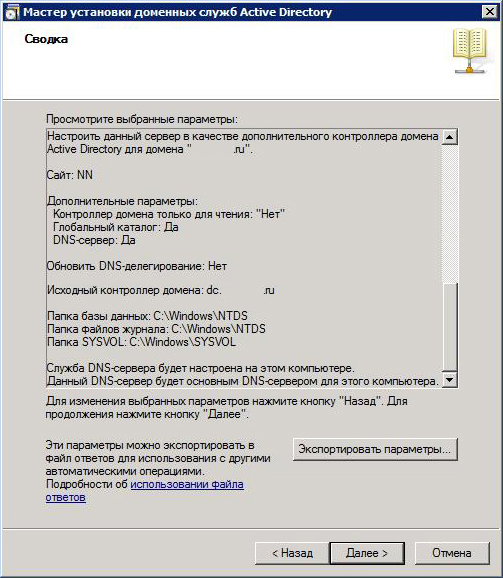
19. On the Summary page, review your selections(you can also export your settings) and then Click Next:

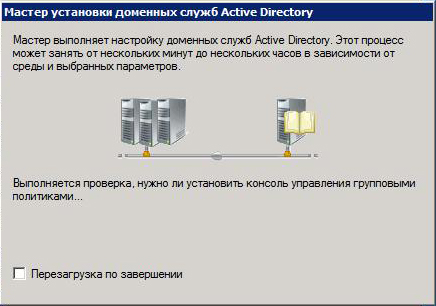
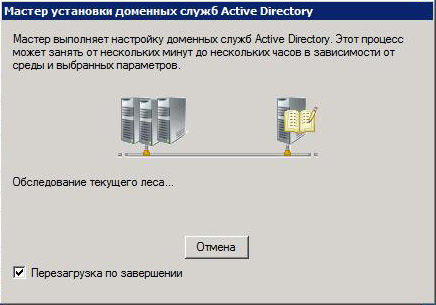
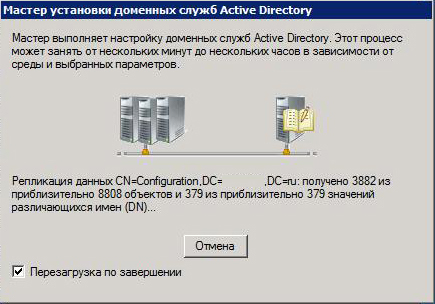
20. The installation begins and if you want server to restart automatically after the installation is completed, select the Reboot on completion check box:

21. Click Finish to complete installation:

22. Then click Restart Now to restart the server:
23. The following windows you can see AD Users and Computers And DNS manager screens DC1 and DC2:

Данное пошаговое руководство описывает как поднять второй domain controller на системе Windows Server Core, а также некоторые общие команды по его управлению.
Для установки пароля администратора выполните следующие действия:
net user administrator *
Все последующие настройки можно осуществляеть через sconfig
sconfig
Для настройки статического IP-адреса выполните следующие действия:
netsh interface ipv4 set address name="ID" source=static address=Статический_адрес mask=Маска_подсети gateway=Шлюз_по_умолчанию
netsh interface ipv4 add dnsserver name="ID" address=адрес_DNS index=1
Повторите шаг 4 для каждого сервера DNS, который Вы хотите указать, каждый раз увеличивая на единицу значение параметра index=.
Для смены имени сервера выполните следующие действия:
Выясните текущее имя сервера с помощью команды hostname или ipconfig.
netdom renamecomputer %computername% /NewName:Новое_имя_компьютера
Перезагрузите компьютер:
shutdown /r /t 0
Для присоединения компьютера к домену выполните следующие действия:
netdom join Имя_компьютера /domain:Имя_домена /userd:Имя_пользователя /passwordd:*
Если Вам необходимо добавить доменную учетную запись пользователя в группу локальных администраторов, наберите следующую команду:
net localgroup administrators /add Имя_домена\Имя_пользователя
Перезагрузите компьютер:
shutdown /r /t 0
Для управления сервером, работающим в режиме Server Core, с использованием сервера терминалов выполните следующие действия:
cscript C:\Windows\System32\Scregedit.wsf /ar 0
Эта команда разрешает использование режима удаленного администрирования Remote Desktop for Administration и позволяет принимать входящие подключения.
Для управления сервером, работающим в режиме Server Core, с использованием оснастки консоли управления MMC выполните следующие действия:
Если сервер, работающий в режиме Server Core, не является членом домена, установите сеанс связи с ним, набрав в командной строке клиентского компьютера следующую команду:
net use * \\Имя_сервера\c$ /u:Имя_пользователя
где: Имя_сервера – имя сервера, работающего в режиме Server Core, а Имя_пользователя – имя учетной записи администратора.
На сервере добавить в firewall исключение для удаленного управления
netsh advfirewall firewall add rule name=”RDS Admin” protocol=TCP dir=in localport=3389 action=allow
cscript C:\Windows\System32\Scregedit.wsf /IM 1
Или вырубим firewall полностью
netsh advfirewall set allprofiles state off
Запустите оснастку консоли управления MMC, например Computer Management.
В левой панели оснастки щелкните правой кнопкой мыши самый верхний узел дерева (если рассматривать пример работы с оснасткой Computer Management, то Вам нужно щелкнуть узел Computer Management (Local)) и в контекстном меню выберите команду Connect to another computer.
В поле Another computer введите имя сервера, работающего в режиме Server Core, и нажмите кнопку OK.
Активирование лицензионного ключа
Добавляем ключ
slmgr.vbs -ipk XXXXX-XXXXX-XXXXX-XXXXX-XXXXX
Активируем сервер
slmgr.vbs -ato
Для повышения серевера до уровня контроллера домена необходимо создать файл unattend.txt
notepad unattend.txt
Ввести следующее
[DCINSTALL]
ReplicaOrNewDomain=Replica
ReplicaDomainDNSName=domain.local
ReplicationSourceDC=dc01.domain.local
ConfirmGc=Yes
SafeModeAdminPassword=Пароль
RebootOnSuccess=Yes
Сохранить на C: и запустить
dcpromo /unattend:c:\unattend.txt
Для установки роли сервера DNS выполните следующие действия:
start /w ocsetup DNS-Server-Core-Role
Настройте зону DNS, набрав в командной строке команду dnscmd
Просмотр зон в DNS
dnscmd /enumzones
Добавление primary DNS-зоны с именем domain
dnscmd /zoneadd "domain.local" /Primary /file "domain.local.dns"
Для установки роли сервера DHCP выполните следующие действия:
start /w ocsetup DHCPServerCore
Настройте область DHCP, набрав в командной строке команду netsh
netsh
netsh> dhcp
netsh dhcp> add server dc02.domain.local 192.168.1.2
netsh dhcp> exit

sc config DHCPServer start=auto
net start DHCPServer

netsh
netsh> dhcp server
netsh dhcp server> initiate auth
netsh dhcp server> add scope 192.168.1.0 255.255.255.0 Название_области
netsh dhcp server> scope 192.168.1.0
netsh dhcp server scope> set optionvalue 003 IPAddress 192.168.1.1 //адрес шлюза
netsh dhcp server scope> set optionvalue 006 IPAddress 192.168.1.1 //адрес DNS
netsh dhcp server scope> set optionvalue 015 String domain.local //имя домена DNS
netsh dhcp server scope> set state 1
netsh dhcp server scope> exit
Просмотр пользователей в AD
dsquery user
Диагностика контроллера домена
dcdiag /q
Просмотр последних 10 логов
wevtutil qe system /c:10 /rd /f:text | more
Проверка расшаренных папок (должны быть открыты SYSVOL и NETLOGON)
net share
Просмотр MAC-адреса другой машины
getmac /s имя_машины
Также существуют графические утилиты для настройки Windows Server 2008 Core: Core Configurator, Smart-X Core Configurator.
HomeMicrosoft, Windows ServerHow to add a Windows Server 2008 R2 Core as Secondary Domain Controller (replica)
This is a small How to which shows you how you can add a Windows Server 2008 R2 Core as a Secondary Domain Controller or Replica.
- First configure the Core Server, Name, Domain, IP Adresse and more. You can use the command sconfig to run the Server Configuration Utility.
- Now you can go back to the Command Promt.
- Now you have to possibilities to install a Domain Controller. First you run dcpromo with a unattend file you have created and copied on the server, or you run dcpromo with some parameters. I decided to run dcpromo with the necessary parameters because I just need a simple replica.
- Now you can run the command on the Command Promt
Dcpromo /unattend /replicaOrnewDomain:replica /replicaDomainDNSName:corp.pepsi.local /ConfirmGC:yes /username:corp’administrator /Password:* /safeModeAdminPassword:PepsiPassword - After that the Server will run the installer and reboot.
- A replication connection was created
If you need more Information about Active Directory Creation on a Windows Server 2008 Core Server you can checkout the Microsoft KB947034.
Tags: Active Directory, Active Directory on Core Server, Ad, Core, Dcpromo, Domain, Domain Controller, Microsoft, Replica, Server, Windows, Windows Server, windows server 2008, Windows Server 2008 Core, Windows Server 2008 R2, Windows Server 2008 R2 Core, Windows Server Core Last modified: November 2, 2010
About the Author / Thomas Maurer
Thomas works as a Principal Program Manager & Chief Evangelist Azure Hybrid at Microsoft (Cloud + AI). He engages with the community and customers around the world to share his knowledge and collect feedback to improve the Azure hybrid cloud and edge platform. Prior to joining the Azure engineering team (Cloud + AI), Thomas was a Lead Architect and Microsoft MVP, to help architect, implement and promote Microsoft cloud technology.
If you want to know more about Thomas, check out his blog: www.thomasmaurer.ch and Twitter: www.twitter.com/thomasmaurer
Important documentation:
Unattended mode to install and remove Active Directory Domain Services
Active Directory Technet Links
Our tasks include:
– install Server 2008 R2 SP1 Core (i hope, you have already done it)
– change server name
– set NIC settings
– activate server
– turn on Windows Update Services and download/install the latest applicable updates
– turn on Remote Desktop connection to our server
– promote server to additional DC in existing domain
– check result
Installation steps
1. After successful installation Server 2008 R2 change your administrator password, log on to server and change server name using sconfig.cmd. Then restart your server.

2. Set static IP (recommended) or enable DHCP (don’t forget to reserve your ip on DHCP server) on your NIC using option 8 of sconfig.cmd


3. Use cscript c:\windows\system32\slmgr.vbs to your server activation

4. Turn on Windows Update Services and download/install latest updates using sconfig.cmd again


5. Enable RDP for remote management using sconfig.cmd option 7
6. I hope, you read about unattanded installation domain controller (Unattended mode to install and remove Active Directory Domain Services) . So, we have to create additional file with configuration of promotion (dcpromo). Type notepad yourfilename.txt. By default, your file saves in %USERPROFILE%.

Paste to this file following strings (don’t forget to edit them 🙂 ) and save txt:
[DCINSTALL]
UserName=rlevchenko
UserDomain=test.com
Password=Pass123
InstallDNS=Yes
ConfirmGC=Yes
ReplicaOrNewDomain=replica
ReplicaDomainDNSName=test.com
SafeModeAdminPassword=Pass123
RebootOnCompletion=Yes
Then execute dcpromo /unattend:<path of the answer file>. Notice, after dcpromo implementation server will automatically reboot because of RebootOnCompletion=Yes.
7. Check dcpromo log for any warnings or error

8. On your primary controller check that new server for replica has been added

9. Check DNS-records

10. Check Domain Controller container in Active Directory Users and Computers
12. Our installation is complete. Thanks for your comments!