
Windows Server 2008 R2 RDS User CAL
Windows Server 2008 R2 RDS User CAL
Licensed product
Manufacturer:Microsoft Corporation
License Type:ESD (Digital Key)
Lifespan:Perpetual
Supported OS: Windows Server 2008 R2
Number of connected users:20
Activation region:Global
Instant delivery to your Email
Product key
The User CAL license is intended only for servers with a domain. If you do not have a domain, then the RDS Device CAL license is suitable for you.
CAL (Client Access License) RDS (Remote Desktop Services) Terminal Server Licensing is a feature that grants a user the right to access server services.
Windows Server 2008 R2 RDS User CAL is required to expand the number of users connected to the server. The user gains the ability to remotely access server software from any device. This type of license is advantageous because one user can work with the server without being tied to specific hardware.
More About Windows Server 2008 R2 RDS User CAL
- Terminal server licensing “Per User”.
- Support for working with Windows Server 2008 R2.
- Ability to support up to 20 simultaneous client connections to the server.
- Requires the Windows Server 2008 R2 product itself, the activation key for which is purchased separately.
- Not sure which license you need? Learn about the differences between User CAL and Device CAL on this page.
- Remote Desktop Licensing Guide.
Buy Windows Server 2008 R2 RDS User CAL product key
— Instant delivery to your Email immediately after payment.
— Orders are processed automatically 24/7.
— 24/7 technical support from our store.
— Genuine license at a low price.
— All current updates available.
29
Store Reviews
Product Reviews.
Dear visitors, to contact the store administration, you can use the contact form in the lower right corner of the window.
And also, if you have purchased your product and activated the key, please leave a comment, it helps the development of the store. Thank you for using our services!
If you leave a review through your personal account, which will have created automatically after purchasing the product, then on the site in the reviews it is displayed on behalf of «User». When writing a review directly from the product page in the field below — the items «Name» and «E-mail» are mandatory, your Email is not publicly published , we need it only for feedback.
In this blog post we will look at how to install and activate a RDS License Server. We will also review the two different types of CALs, and how to install CALs on the RDS License Server. And finally we will look at how to designate specific License Servers to RDS Session Host Servers, through Group Policy.
If you don’t have Remote Desktop Services Client Access Licenses (RDS CALs), your users will not be able to connect to a remote desktop session host server, after the initial grace period of 120-days expires. To install Remote Desktop CALs, you first need to install a Remote Desktop License Server. This is a role service of the Remote Desktop Services role on Server 2008 R2.
Also Citrix XenApp relies on a RDS license server. Because what XenApp essentially does, is to extend the capabilities of the Microsoft Remote Desktop session host server. Each time a user connects to a XenApp session, he is also connecting to a Remote Desktop Session. So you will need licenses for both XenApp and RDS.
1. Installing the Role Service
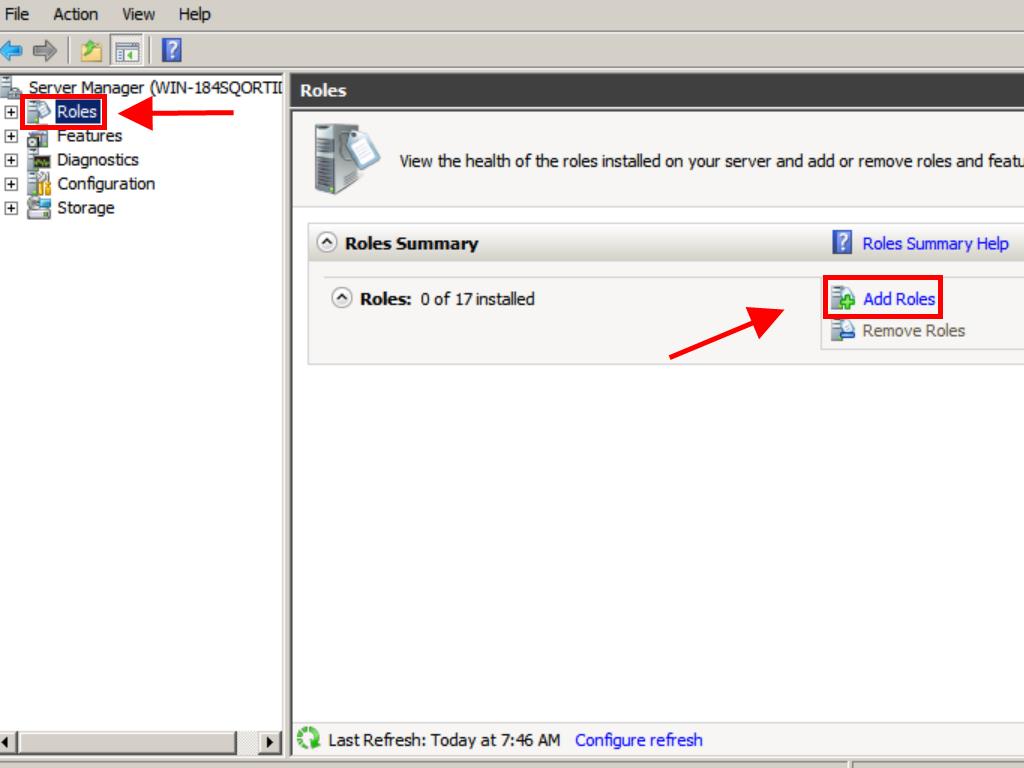
1.1 Start Server Manager, Click on Add Roles, and choose the Remote Desktop Services role

1.2 Click Next

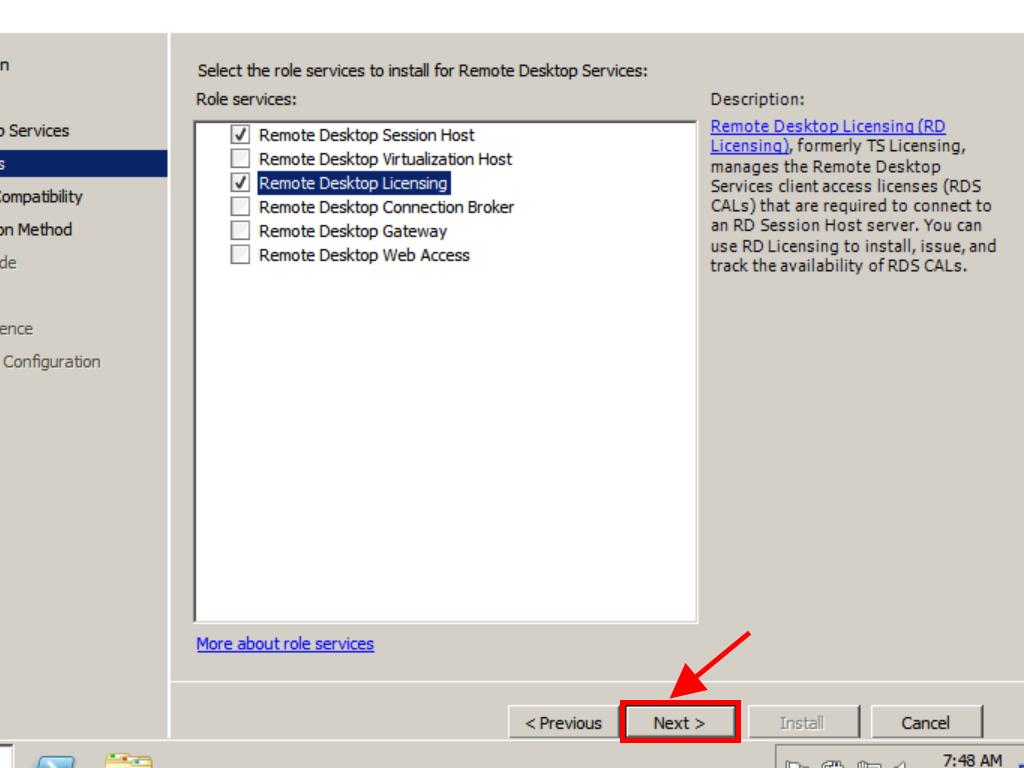
1.3 Choose Remote Desktop Licensing

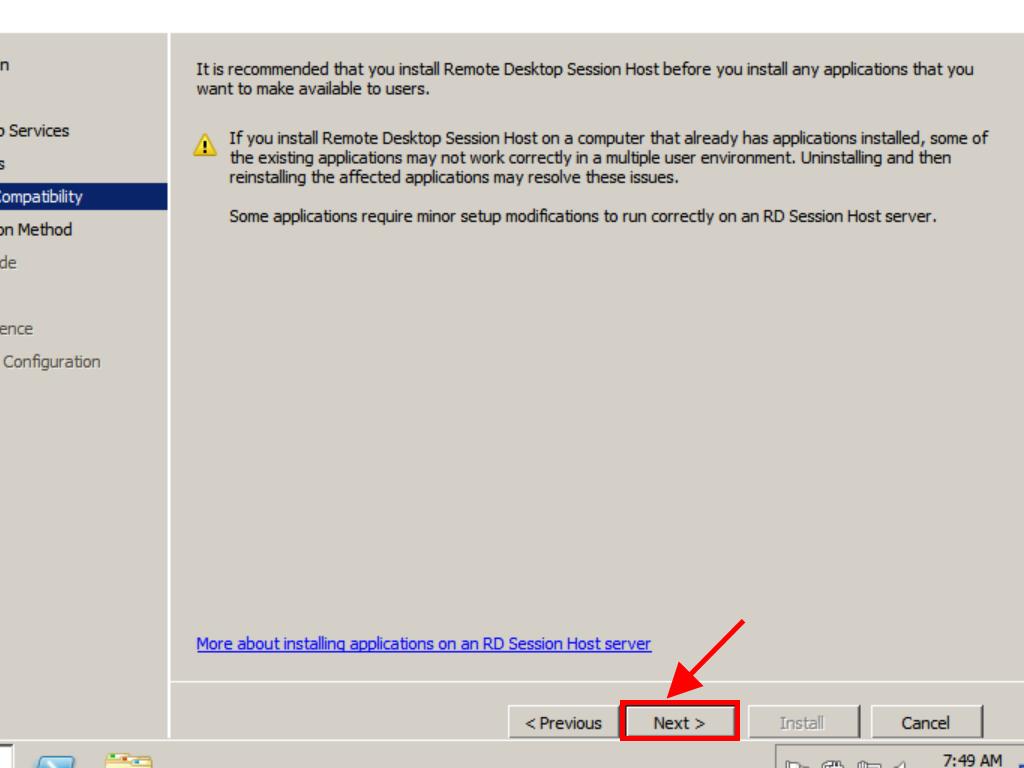
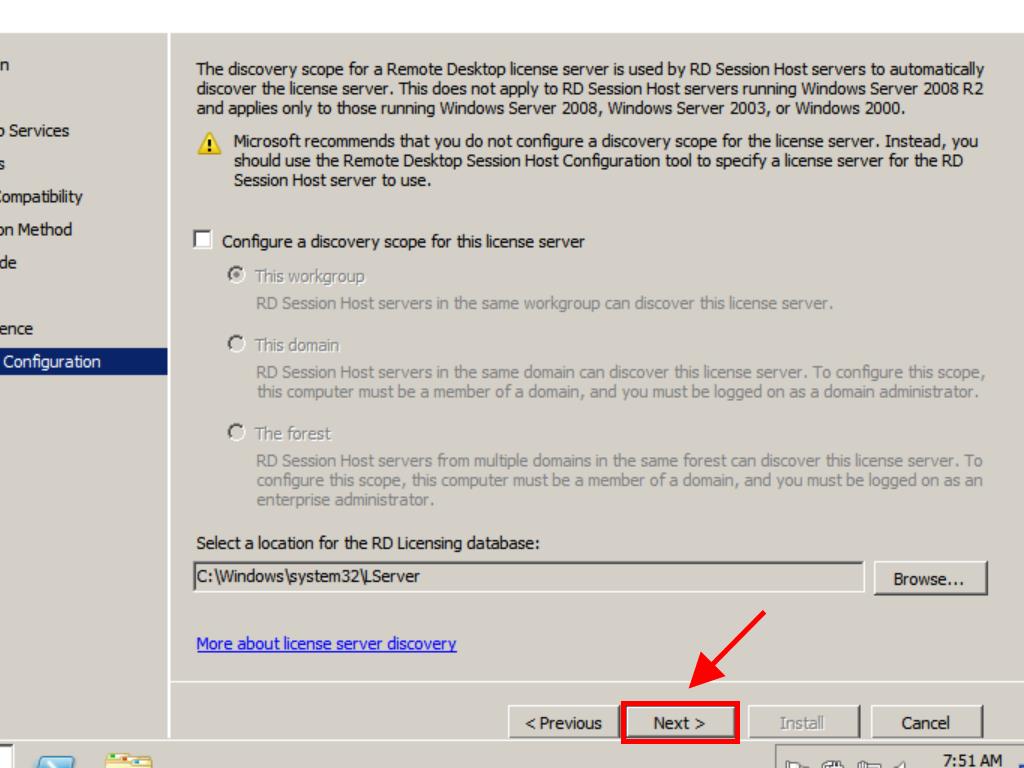
1.4 Review the text, but don’t make any choices, Click Next

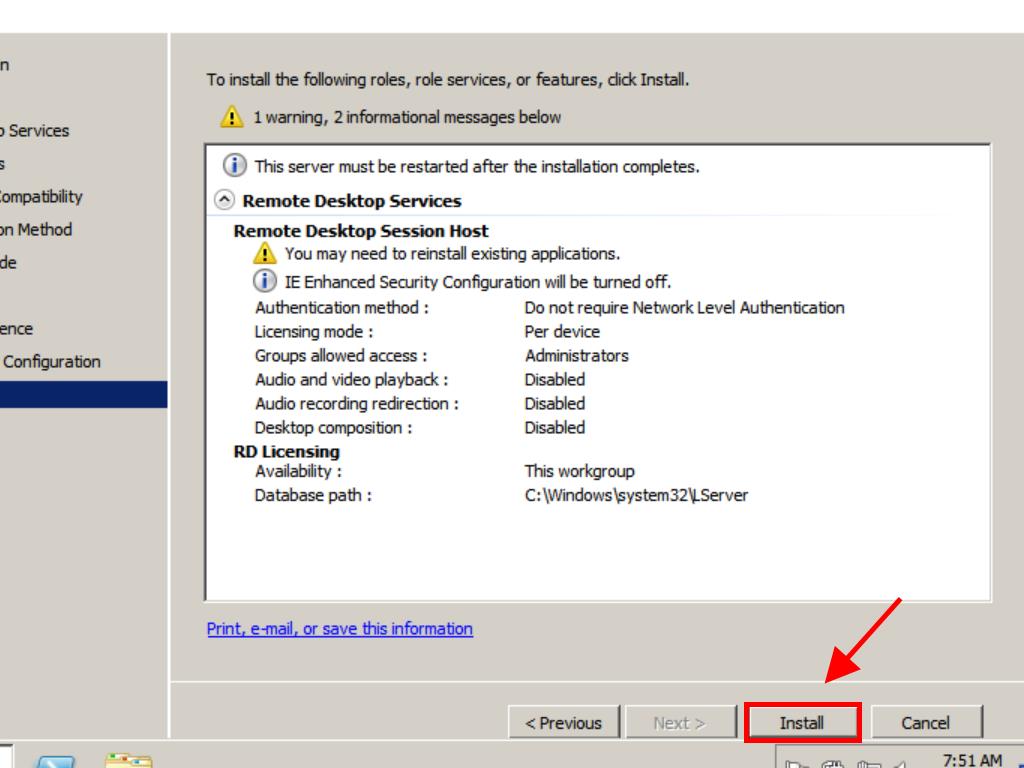
1.5 Click Install.

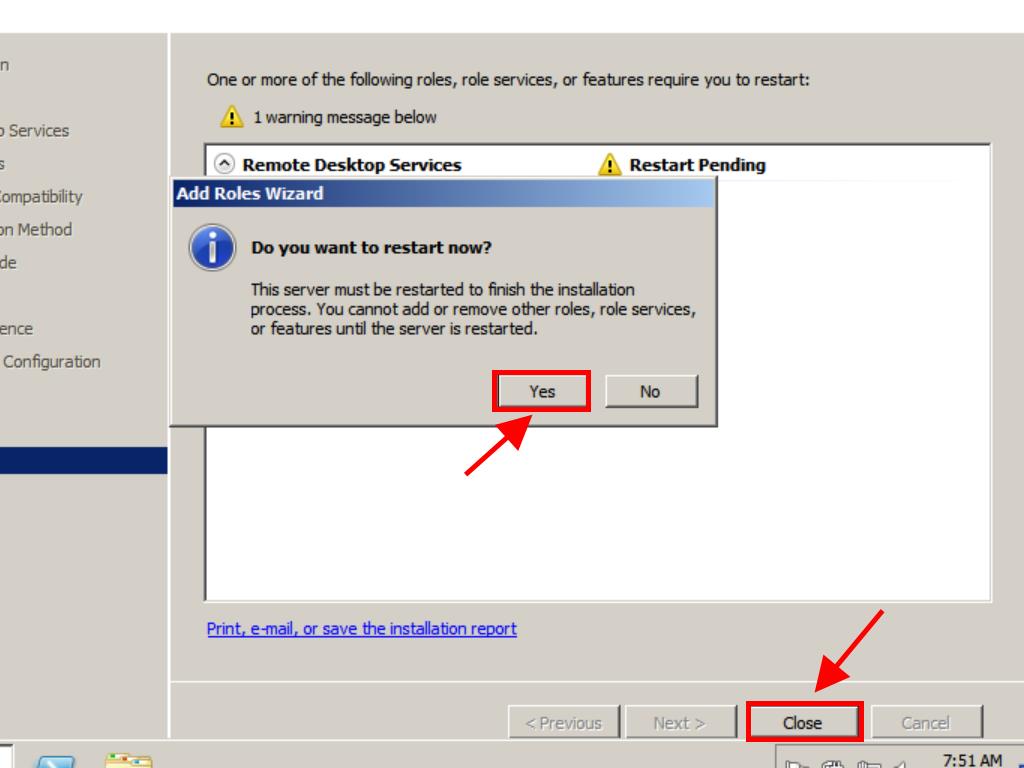
1.6 Click Close, and that is pretty much it for the installation of the role service.
2. Activating the server
The license server must be activated to issue RD CALs.
2.1 Click Start → Administrative Tools → Remote Desktop Services → Remote Desktop Licensing Manager

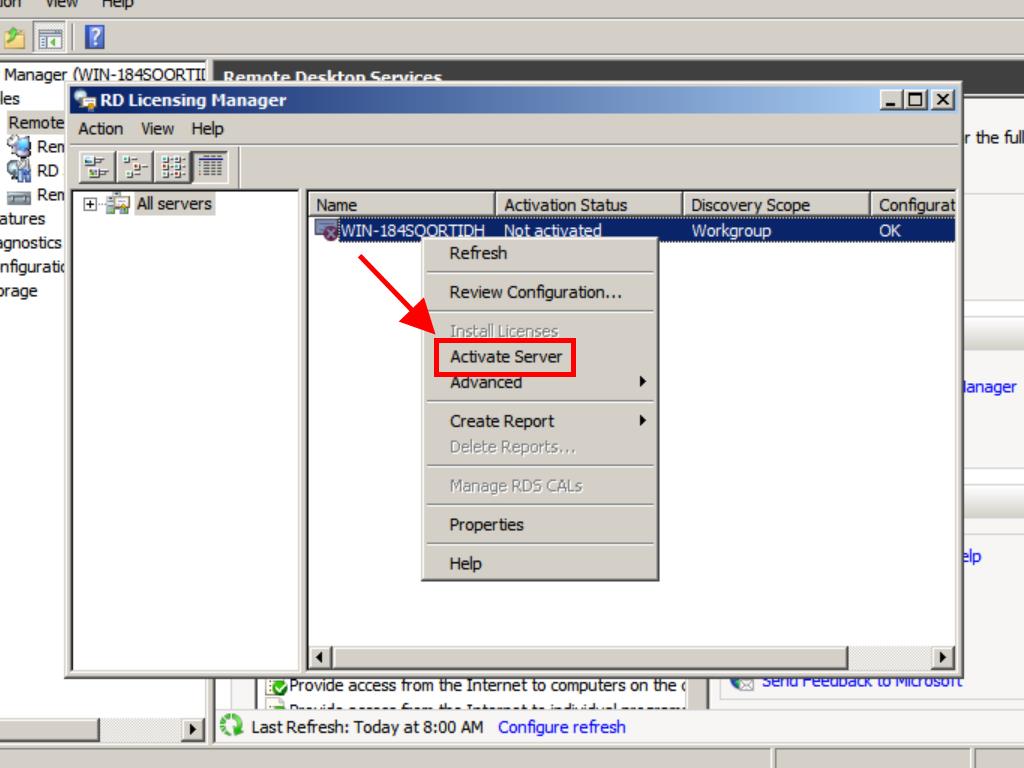
2.2 Right click the server name, and choose Activate Server

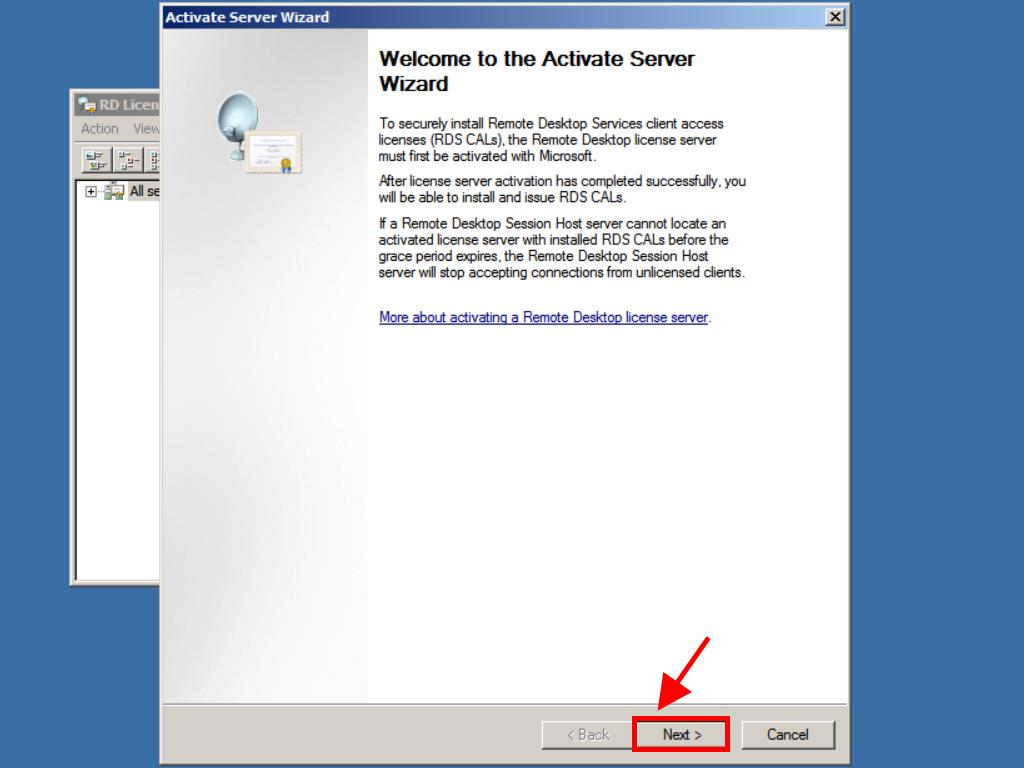
2.3 Click Next

2.4 Choose desired connection method. I’m choosing Automatic connection, which connects to the Microsoft clearinghouse over the internet, by using https (port 443 obviously). If your license server does not have access to the internet, you can also choose to activate it through the web browser (of another computer, which is connected to the internet) or over telephone. Click Next

2.5 The license server will start locating a Microsoft Clearinghouse server

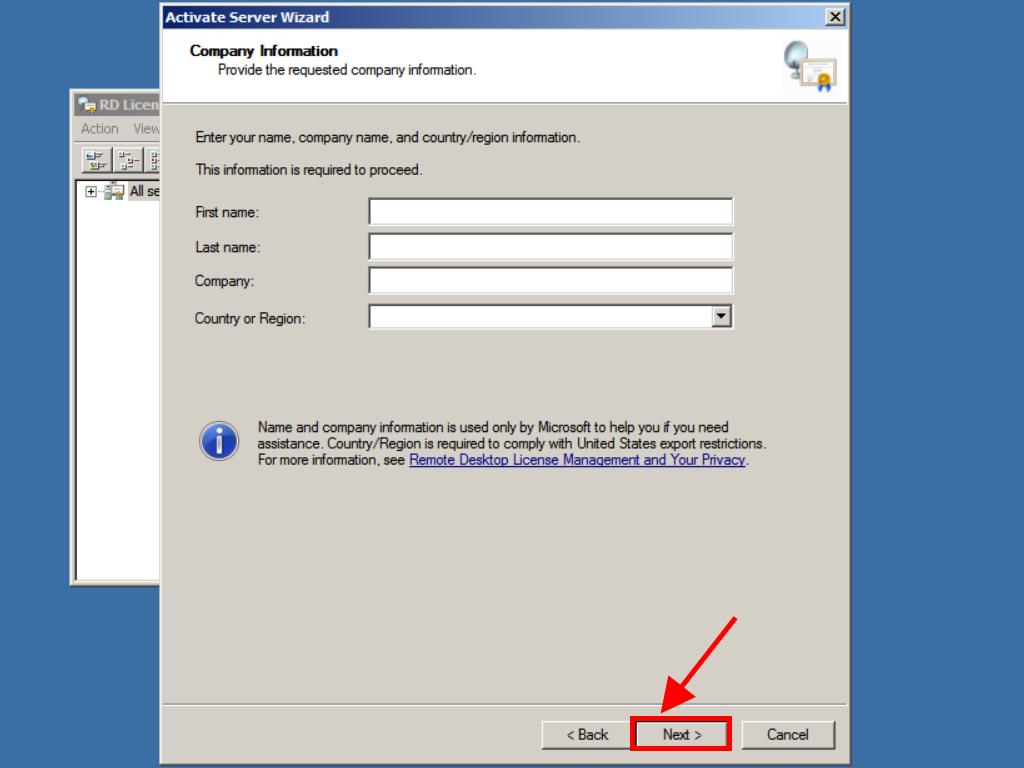
2.6 Then you are requested to provide some information about yourself. These four fields are required, so enter information for each field

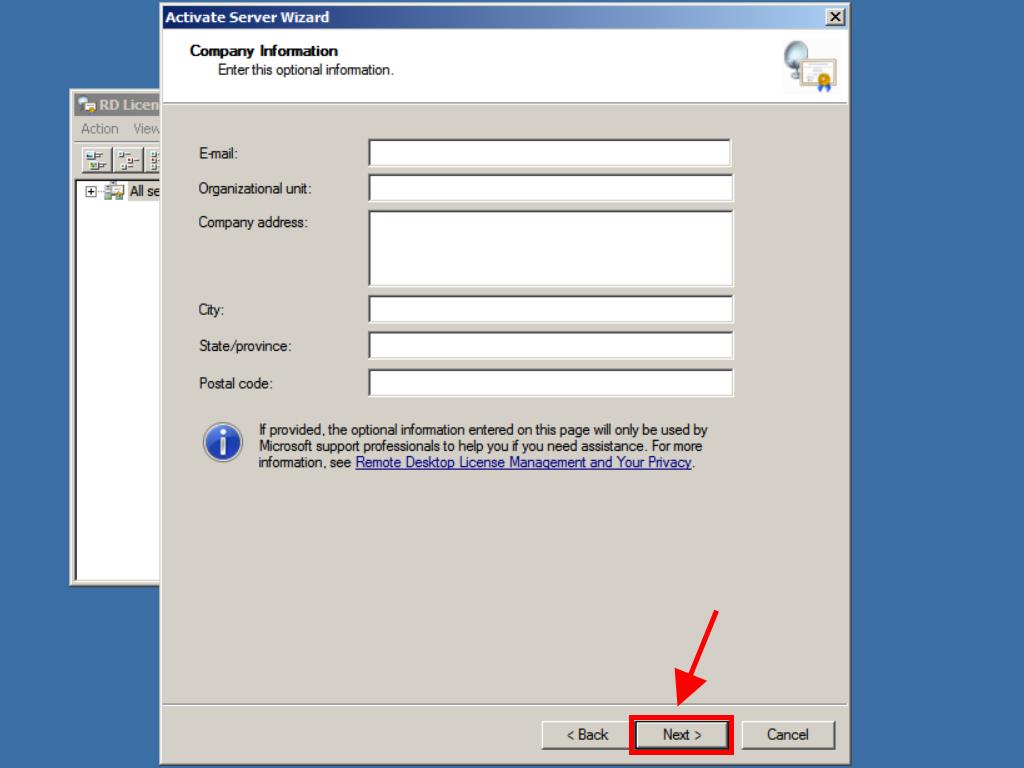
2.7 These fields are optional. Click next when you are ready

2.8 The server will be activated
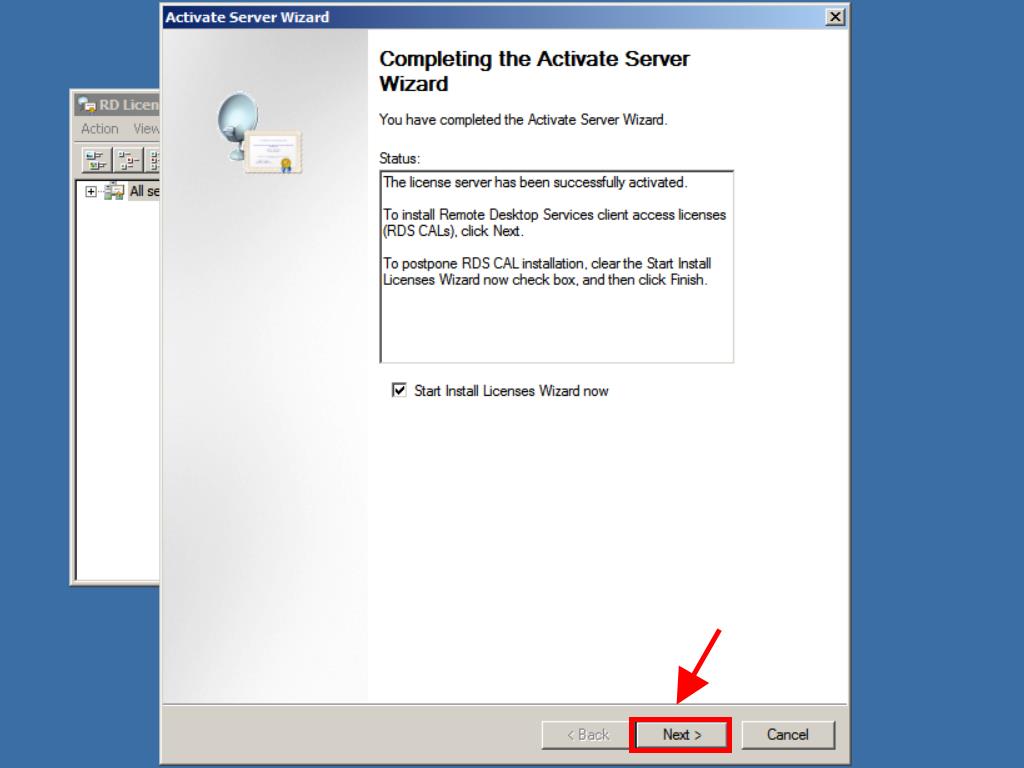
2.9 You can start the Install Licenses Wizard if you like from this page, but I chose not to

3. Types of CALs
There are two types of Client Access Licenses available for Remote Desktop Services.
Per Device CALs
These are permanent CALs assigned to any computer or device that connects to an RD Session Host Server more than once. The first time a computer or device connects to an RD Session Host, its by default issued a temporary license. The second time a computer or device connects to an RD Session Host, the license server issues it a permanent RD Per Device CAL, if the license server is activated and enough RD Per Device CALs are available.
Per User CALs
Per User CALs give users right to access Remote Desktop Services from any number of devices. They are not assigned to specific users permanently like Device CALs are to devices.
4. Install CALs
4.1 Right-click server, and choose Install Licenses

4.2 The same three connection methods that were available during activation of the server, are available now. The connection method you used during activation, is retained. Click Next

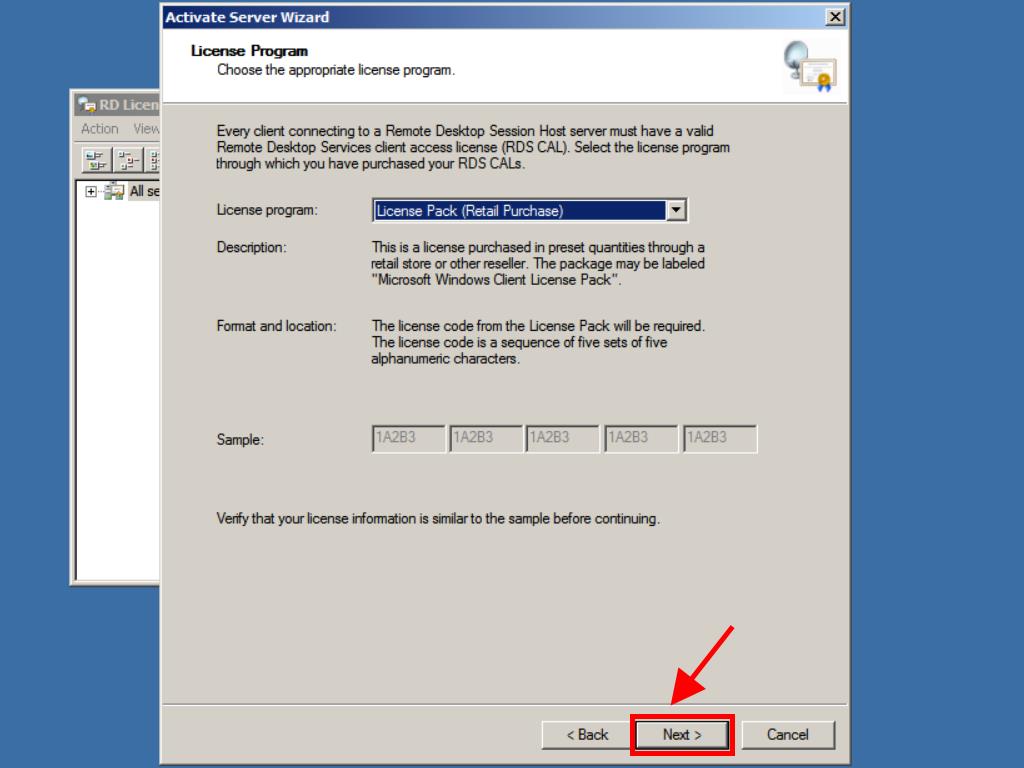
4.3 Choose appropriate License Program, and then click next. I chose Enterprise Agreement

4.4 The next few steps will depend on the license program you chose in the previous step. These are the steps for Enterprise Agreement
4.5 Enter Agreement number, and then click Next

4.6 Select Product Version, license type and quantity of licenses to install onto the license server. Then click Next to complete the license installation process.

The license server can now issue RD CALs to clients.
5. Specify Licensing Mode and License server
for RDS session Host Servers
5.1 Through RD Session Host Configuration Tool
5.1.1 Click Start → Administrative Tools → Remote Desktop Services → Remote Desktop Session Host Configuration

5.1.2 Right-click beneath Licensing, and choose Properties

5.1.3 Choose appropriate licensing mode, and then click Add to specify License Server

5.1.4 Add one of the known license servers, or type in the name or IP address of a license server, and then click Add. When you are done specifying license servers, click OK.

5.1.5 Then on the Licensing tab of the properties page, click Apply and OK.

5.2 Through Group Policy
Specifying licensing mode and license server for many RDS session host servers manually, can be time consuming. Therefore its better to specify these settings in a GPO, and link it to your RDS servers.
The settings can be found in the following location, and they are self-explanatory
Computer Configuration → Policies → Admin Templates → Windows Components → Remote Desktop Services → Remote
Desktop Session Host→ Licensing

Another interesting setting can be found at the following location
Computer Configuration → Policies → Admin Templates → Windows Components → Remote Desktop Services → RD
Licensing

With this setting you can control which RD Session Host servers are issued RDS CALs by the license server. It must be configured in a GPO that is applied to the license server.
Additional resources:
Technet: Deploying Remote Desktop Licensing Step-by-Step Guide
Install the Remote Desktop Licensing role service and Remote Desktop Session Host by following these steps:
Installation of Remote Desktop Licensing role.
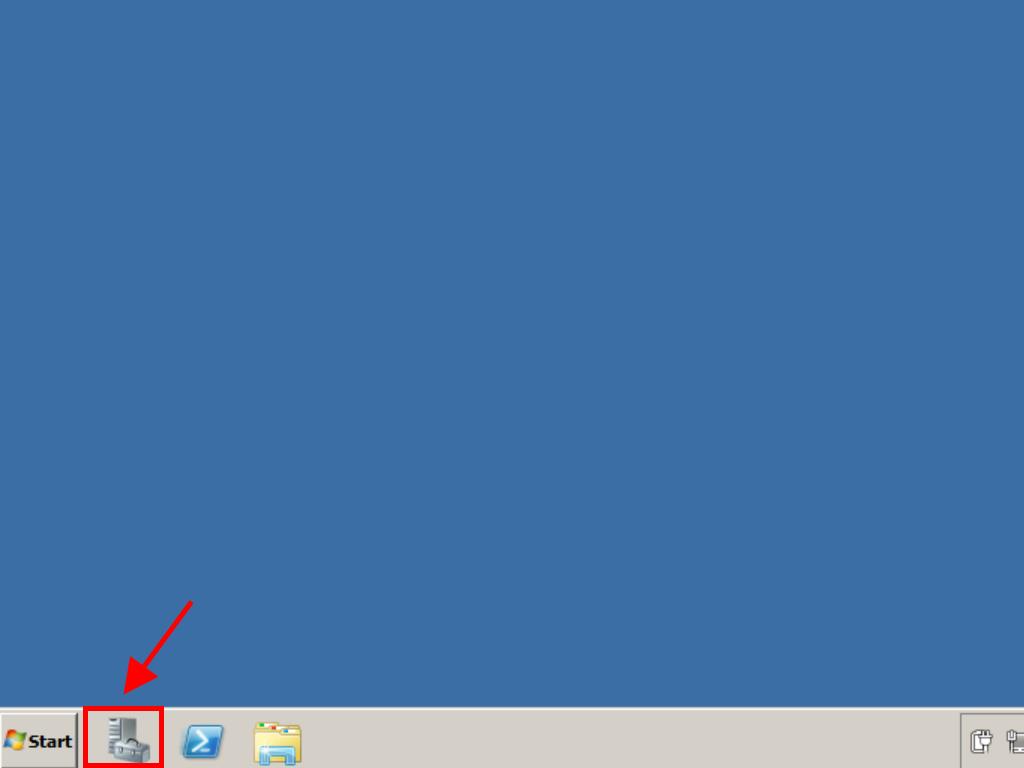
- Open the Server Manager. To do this, click on the icon in the taskbar.
- Select Roles in the top left corner and then click on Add roles.
- Now, in the Add Roles Wizard, click Next.
- On the Select Server Roles page, tick the box for Remote Desktop Services and click Next.
- Next, click Next.
- In the following box, tick the boxes for Remote Desktop Licensing and Remote Desktop Session Host and click Next.
- In the next step, click Next to install the Remote Desktop Session Host.
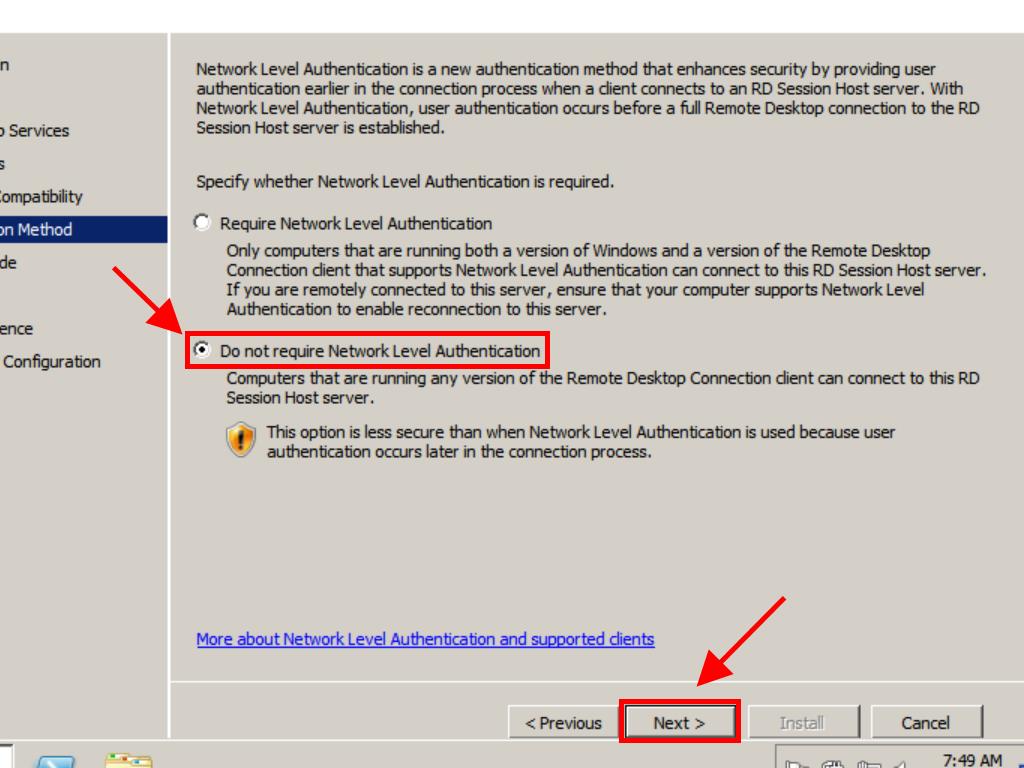
- Select Do not require Network Level Authentication and click Next.
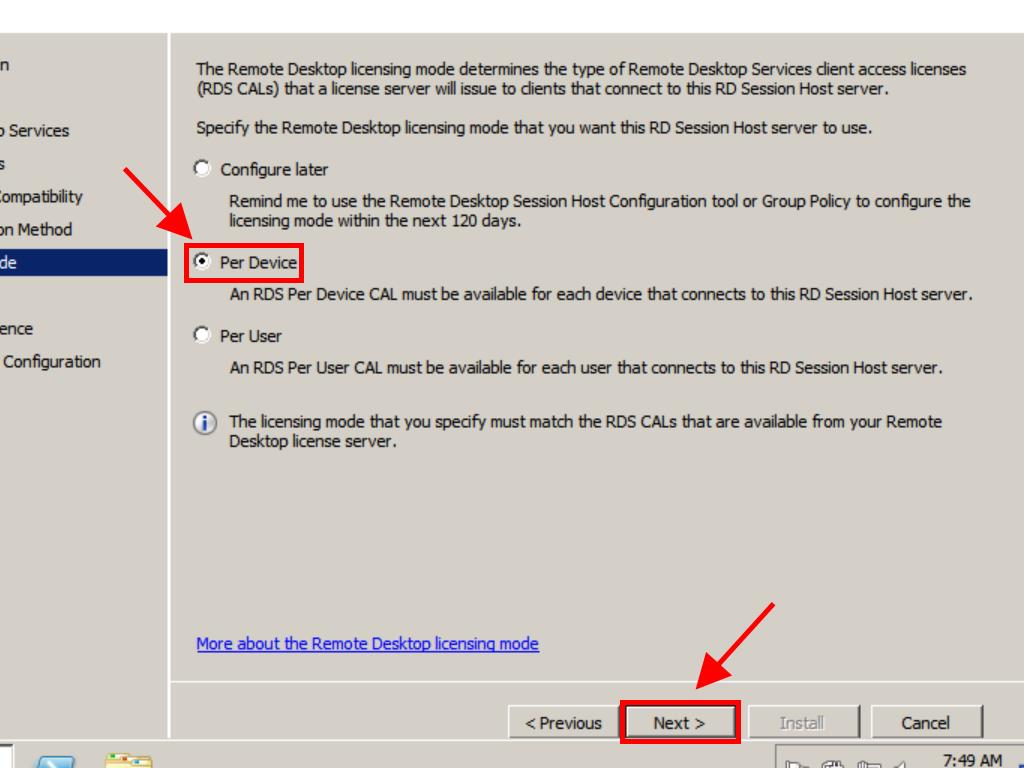
- In the following image, choose the type of RDS CALs license you will configure, either per user or per device, and then click Next.
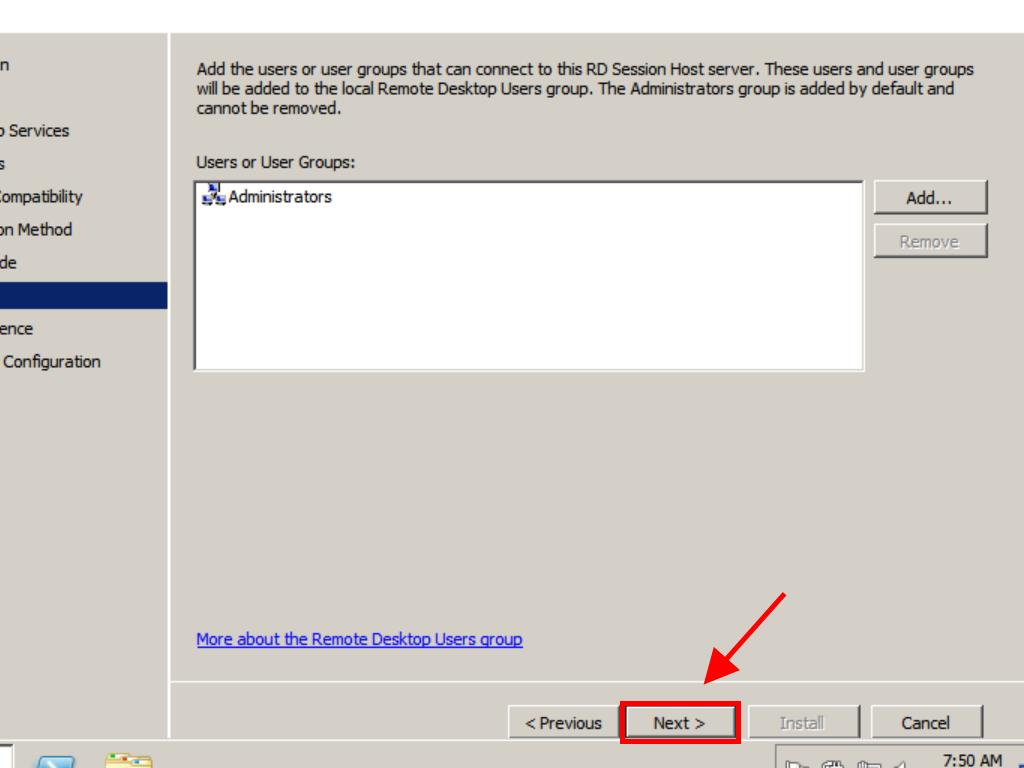
- Enter the users who will connect to the server and click Next.
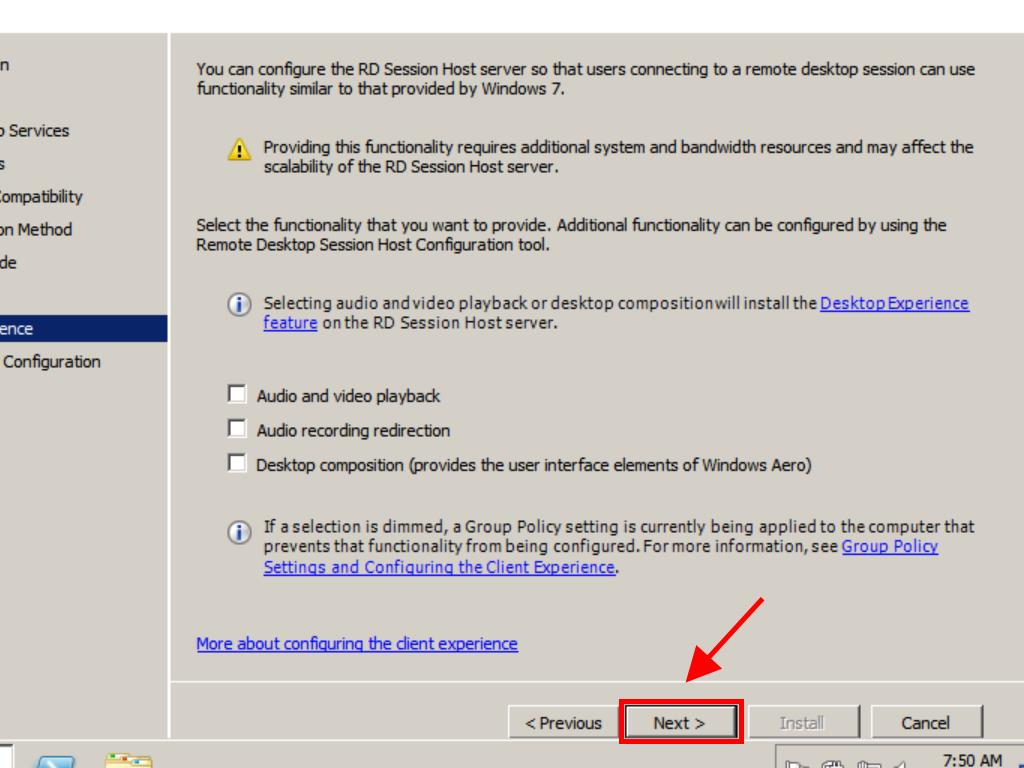
- In the next step, select the options you want to enable for users and then click Next.
- Next, click Next.
- Lastly, click on Install.
- Wait for the role to be configured. Once the process is complete, select Close and click on Yes to restart the Server and complete the installation.
- After installing the roles, activate the Remote Desktop Licensing server. To do this, click on the Server Manager pinned to the taskbar.
- Next, click on the + sign to the left of Roles (located in the top left corner) and click on Remote Desktop Services.
- Now, scroll to the bottom of the page and click on Remote Desktop Licensing Manager, found under the Advanced Tools tab.
- Next, right-click on the server and click on Activate Server.
- The server activation wizard will open. Click on Next.
- Next, click on Next.
- Enter the company name and region and click on Next.
- Next, enter the company information and then click on Next.
- The server activation wizard is complete. Click on Next.
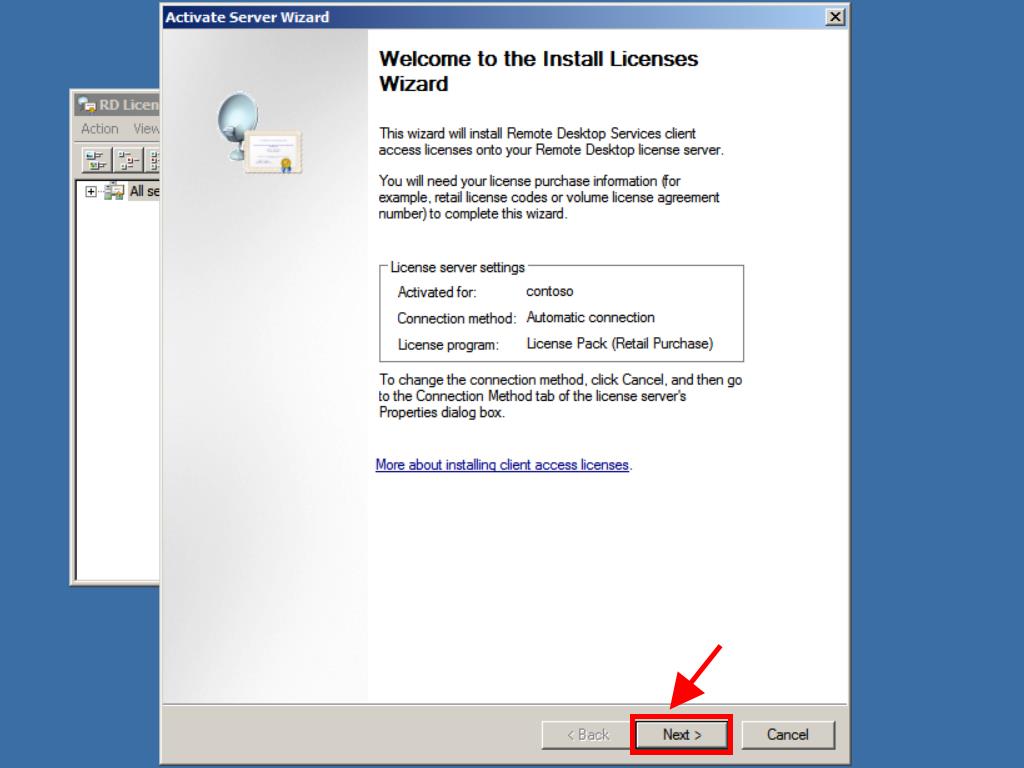
- You will receive a reminder of how your server is configured. Click on Next.
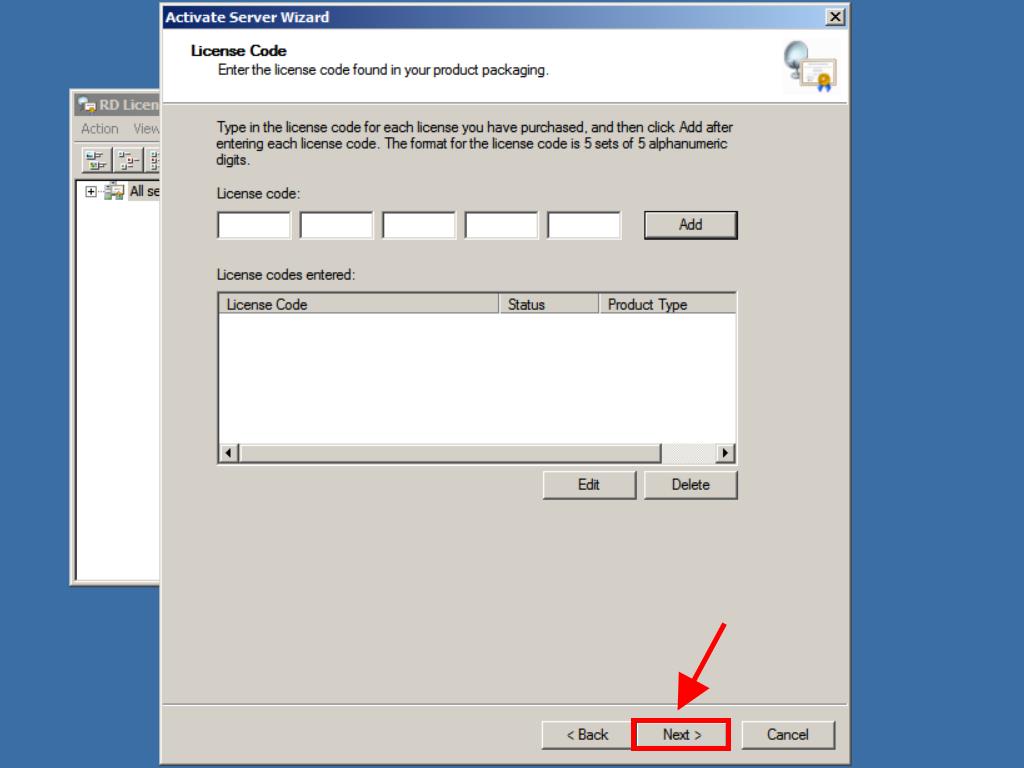
- Then, in the License Program, select Pack. lic. (Box or prod. pack). Click on Next.
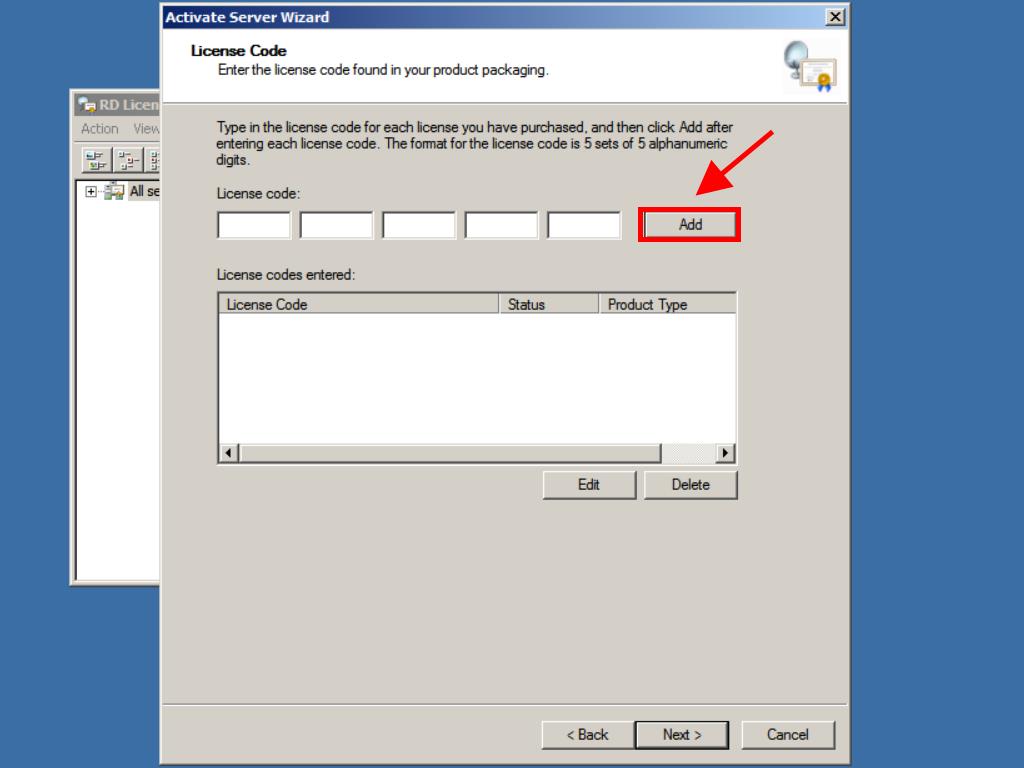
- Next, enter your RDS CALs product key and click on Add.
- After the license is recognised, click on Next.
- At this point, the License Installation Wizard will confirm that it was installed correctly. Click on Finish.
- Now your licensing server is ready to start issuing and managing licenses. You can check this by selecting the name of your server where you will see the available licenses and those that have been issued. In this case, it should be zero.


Note: In this guide, we will choose the Per device option.


Main Features
RDS CALs for Windows Server 2008 R2 offer the following key features:
- RemoteApp Programs: Allows users to run Windows-based programs that are installed on a remote computer.
- Remote Desktop Gateway: Provides secure access to remote desktops located on a corporate network or the Internet.
- Remote Desktop Web Access: Allows users to access RemoteApp programs or full desktops through a web browser.
- Remote Desktop Connection Broker: Enables users to reconnect to their existing virtual desktops, RemoteApp programs, and session-based desktops.
- RemoteFX: Provides a rich desktop experience for virtual and session-based desktops by delivering a 3D graphics experience and support for USB devices.
Benefits
- Increased productivity: Users can access their desktops and applications from anywhere, at any time, and on any device.
- Cost savings: RDS CALs allow multiple users to access a single server, reducing hardware and software costs.
- Enhanced security: RDS CALs provide secure access to corporate resources and data, reducing the risk of data breaches.
- Centralized management: Administrators can manage and maintain remote desktops and applications from a single location.
- Scalability: RDS CALs can be easily scaled to meet the needs of growing organizations.
The Difference Between RDS CALs for Devices and Users in Windows Server 2008 R2
In Windows Server 2008 R2, Remote Desktop Services (RDS) Client Access Licenses (CALs) are available for both devices and users. The main difference between the two is how they are assigned and used.
RDS CALs for Devices
RDS CALs for devices are assigned to a specific device, such as a desktop computer or a tablet. This means that any user who logs in to that device can access the RDS services without needing their own CAL. This is useful in situations where multiple users share a single device, such as in a classroom or a hospital.
RDS CALs for Users
RDS CALs for users are assigned to a specific user, regardless of the device they are using. This means that a user can access RDS services from any device they choose, as long as they are logged in with their assigned user account. This is useful in situations where a user needs to access RDS services from multiple devices, such as a remote worker who uses a laptop, a desktop computer, and a tablet.
It is important to note that RDS CALs are required for each user or device that accesses RDS services on a Windows Server 2008 R2 system. Choosing the right type of CALs for your organization depends on your specific needs and usage patterns.
| Previous | Table of Contents | Next |
| Deploying a Windows Server 2008 R2 Remote Desktop Server Farm using RD Connection Broker | Managing Windows Server 2008 R2 Disk Quotas |
<google>BUY_WINSERV_2008R2</google>
Unless licensing is configured during the initial installation of the Remote Desktop Services role on Windows Server 2008 R2, a 120 day grace period is provided before a license server needs to be installed and activated. The purpose of this chapter, therefore, is to provide details on installing and activating a Windows Server 2008 R2 Remote Desktop Services License Server and subsequently installing Client Access Licenses (CALs).
Contents
Contents
|
||
Installing the Remote Desktop Services License Server
The first step is to install the Remote Desktop Services License Services server role. The license server does not necessarily have to be installed on a system which is acting as a Remote Desktop Server. The installation can be performed using by selecting Roles from the tree in the left hand panel of the Server Manager tool.
If the server is already configured with the Remote Desktop Services role, scroll down the Roles summary page to the Remote Desktop Services section click on the Add Role Services link. In the resulting dialog titled Select Role Services select the check box next to Remote Desktop Licensing and then click Next to proceed to the Configure discovery scope for RD licensing screen as illustrated in the following figure:
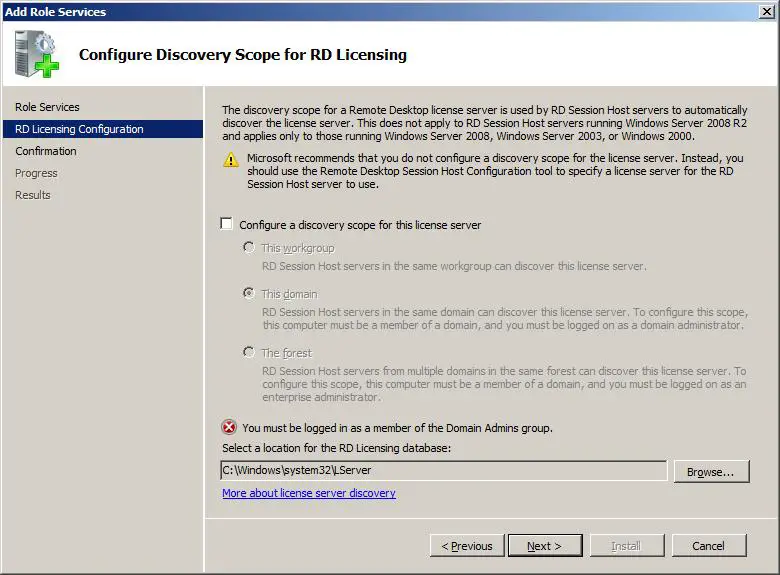
In the first version of Windows Server 2008, it was necessary to specify a method by which RD Session Host servers (or Terminal Servers as they were known then) would auto-detect the server running the licensing server. With Windows Server 2008 R2, this approach is discouraged, and Microsoft now recommends that each RD Session Host be manually configured with information about the license server. In keeping with this recommendation, leave the Configure a discovery scope for this license server option unselected. Note, however, that this setting may be changed at a later time if required via the RD Licensing Manager tool. Click Next to proceed to the confirmation screen.
On a server which is does not have the Remote Desktop Services role installed, open the Server Manager, select Roles from the tree in the left hand panel and select Add Roles. Click Next on the initial screen if it appears so that the Select Server Roles screen is displayed. From the list of roles select the check box next to Remote Desktop Services and click on the Next button.
Read the information screen and then proceed to the Select Service Roles screen. Check the box next to Remote Desktop Licensing, click Next and follow the steps outlined above.
On the confirmation screen, verify that the information matches your expectations and click Install to initiate the installation process.
Activating the RD License Server
Once the RD License Server has been installed the next task is to activate it. This task is performed using the RD Licensing Manager which may be launched via Start -> All Programs -> Administrative Tools -> Remote Desktop Services -> Remote Desktop Licensing Manager. Once started, the Remote Desktop Licensing Manager dialog will appear containing a list of detected license servers on the network. The only license server listed in the following figure is the one on the local server. Because this has yet to be activated it is listed with a red circle containing an X mark next to it:

To activate a license server, right click on the server in the list and select Activate Server. After reading the welcome screen click Next to proceed to the Connection Method screen. The activation process requires communication with Microsoft in one form or another. If the server has an internet connection then the activation can be performed over this connection. The default, recommended method, is to have the RD Licensing Manager automatically connect to gather the information. Failing that, another option is go to the https://activate.microsoft.com web site using a browser and enter the product ID. Alternatively, if an internet connection is not available or a firewall prevents such access the activation may be performed over the telephone. If Automatic connection is selected, the following dialog will appear as the wizard attempts to contact Microsoft:

Once the Microsoft activation server has been located a new dialog will appear prompting for user, company and geographic location information. Complete these details and click Next to proceed. The second screen requests more detailed, but optional information. Either complete this information or click Next to skip to the activation process. Once again the wizard will contact Microsoft and complete the activation. Once completed, the following completion screen will appear:

Note that the Start Install Licenses Wizard now check box is selected by default. If you are ready to begin installing Client Access Licenses (CALs) now click on Next.
Installing Client Access Licenses (CAL)
<google>WIN28BOX</google>
A Client Access License (CAL) is required for each client requiring access to Windows Server 2008 R2 Remote Desktop Services. Once an RD License Server has been installed and activated the next step is to install the CALs. This can be performed as a continuation of the RD License Server activation process as outlined above, or at any other time by opening the RD Licensing Manager, right clicking on the appropriate license server in the list and choosing Install Licenses from the popup menu.
Once the Install Licenses wizard has started, click Next on the welcome screen to select the type of license program being used. Select the appropriate license type from the drop down list depending on how the licenses were acquired and then click Next to enter the license codes. On the License Program screen enter each code and press the Add button:
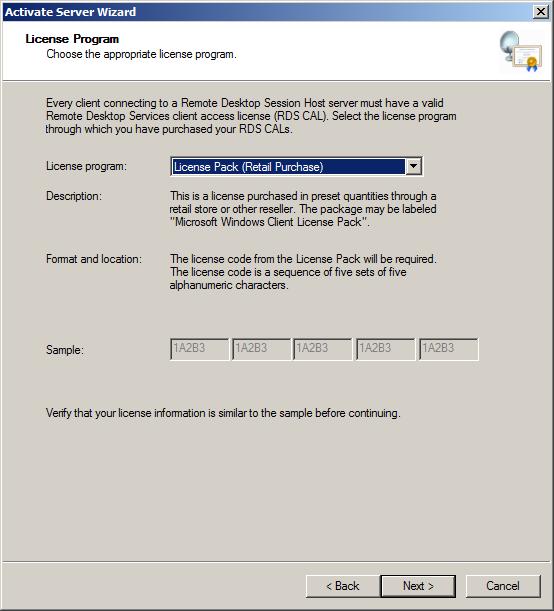
Select the license program corresponding to your license and click next to proceed to the License Code screen:
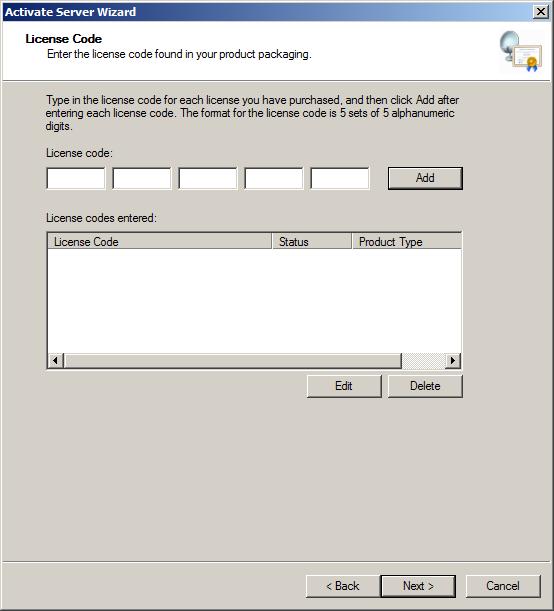
Enter each license key into this screen followed by the Add button. Once all the license codes have been added click on the Next button to complete the license installation process.
Configuring Licensing Settings on RD Session Hosts
Assuming that you followed Microsoft’s recommendation to manually configure the license server information for each RD Session Host it will now be necessary to perform this task. On each RD Session Host invoke the Remote Desktop Session Host Configuration tool by selecting the Start -> All Programs -> Remote Desktop Services -> Remote Desktop Session Host Configuration menu option. Within this tool, double click on the Remote Desktop licensing mode entry located in the Edit settings box listed under Licensing. In the resulting Licensing tab of the properties dialog select the appropriate licensing mode (per device or per user). Having defined the licensing mode, the next task is to specify the licensing server. Beneath the mode selection area, click on the Add… button to display the Add License Server dialog as illustrated in the following figure:
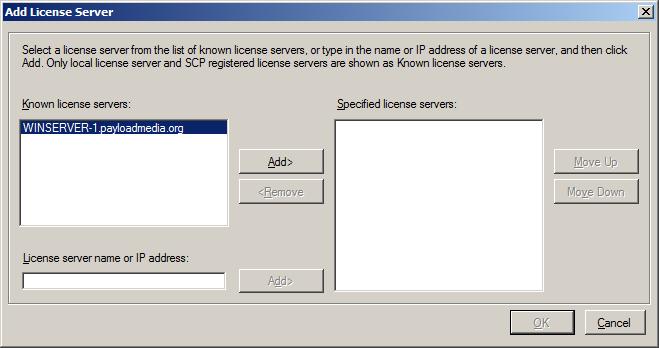
All known license servers will be listed in the left hand box. If the required servers are listed, select them and add them to the list of specified servers by clicking on the Add> button. If a server is not listed, manually type the name or IP address of the server in the text box provided and click the corresponding Add> button. Once all the required servers have been specified, click the OK button to commit the changes and dismiss the dialog.
<google>BUY_WINSERV_2008R2_BOTTOM</google>