
В этой статье будет описан порядок создания резервной копии (backup) сервера работающего под ОС Windows Server 2008 R2 штатными средствами и восстановление (restore) из полученного образа.
Все админы делятся на две категории: на тех, кто еще не делает бэкапы и тех, кто УЖЕ делает бэкапы
Backup
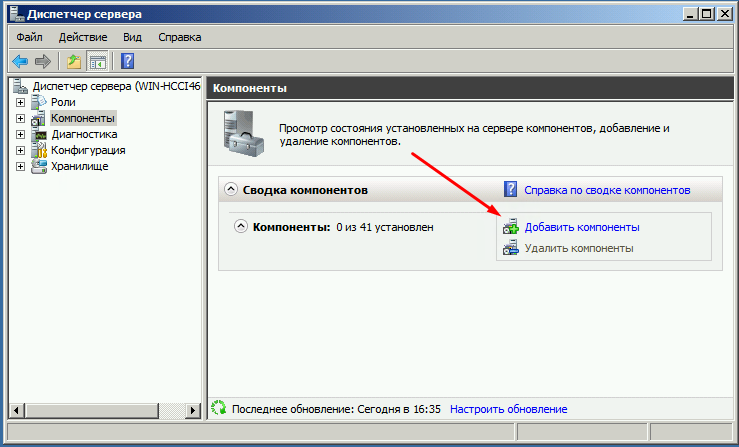
Для того что бы можно было создать образ нашего сервера сначала нужно установить компонент системы Система архивации данных Windows Server, для этого запускаем Диспетчер сервера, выбираем Компоненты, жмём Добавить компоненты
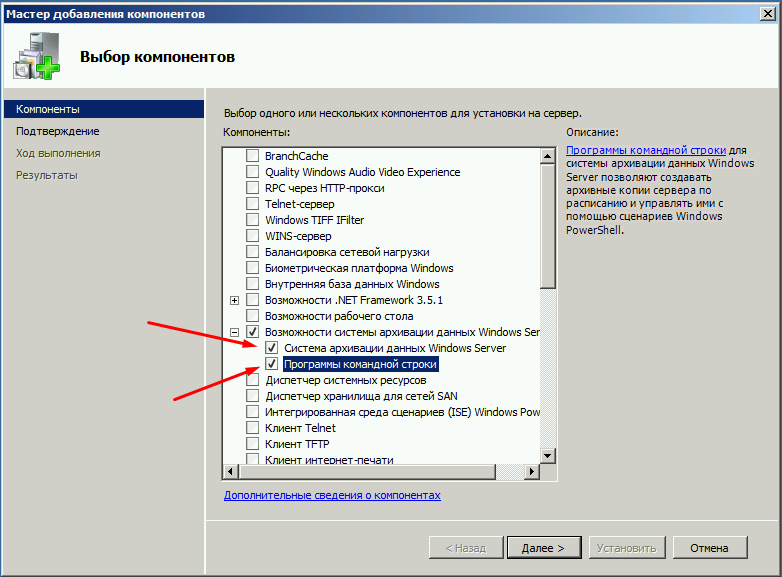
в появившемся окне ставим галочки напротив Система архивации данных Windows Server и Программы командной строки. Жмём далее, установить и дожидаемся окончания процесса установки.
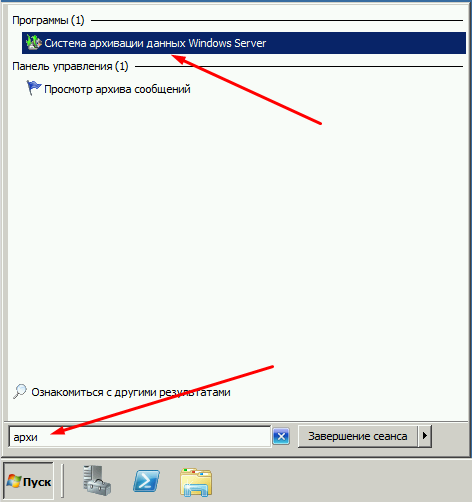
Теперь мы можем приступать к резервному копированию, для этого переходим в меню пуск и набираем в строке поиска «архив», затем выбираем Система архивации данных Windows Server.
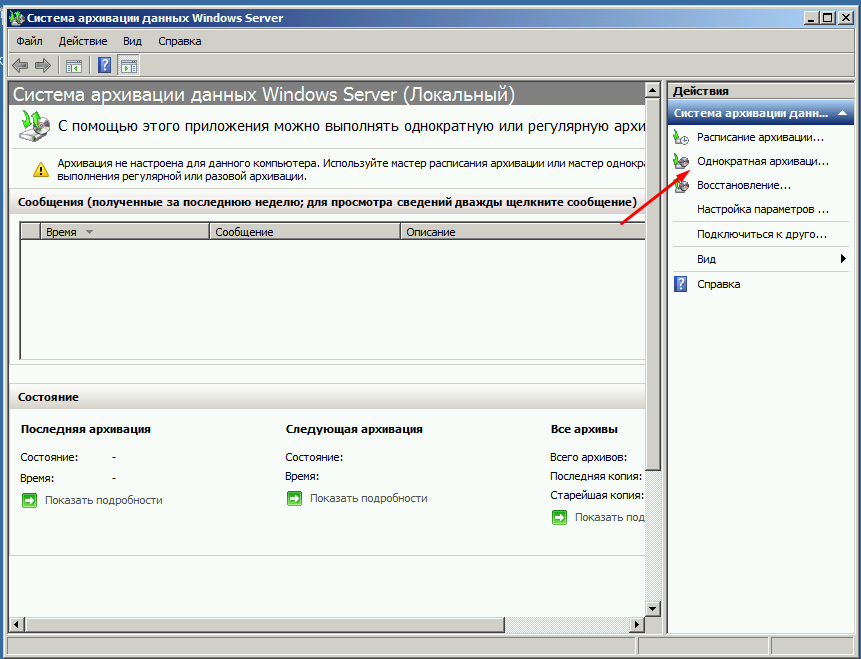
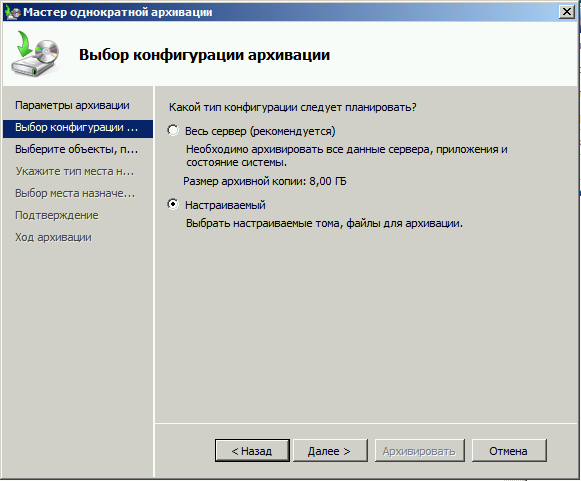
В этом окне собраны основные элементы управления системой архивации, в данном обзоре мы воспользуемся Однократной архивацией. В дальнейшем если у Вас есть например отдельный жёсткий диск для хранения образов, Вы можете создать расписание архивации.
Выбираем Настраиваемый, жмём далее
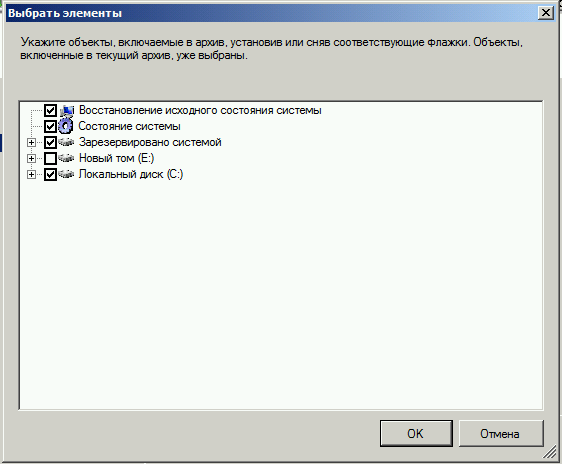
Жмём добавление элементов и ставим галочку Восстановление исходного состояния системы, возможно у Вас будут другие диски, которые не выберутся автоматически, но Вы хотите их включить в архив, можете смело ставить галку. Есть только одно но, нельзя ставить галку на том диске куда вы хотите сохранить архив.
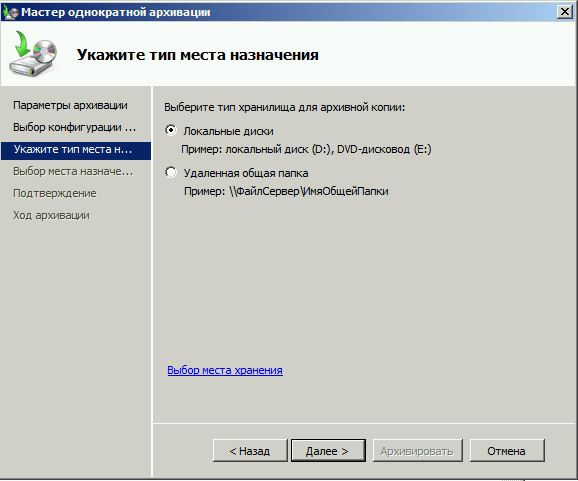
На следующем этапе необходимо выбрать куда мы будем сохранять данные, я буду сохранять на внешний USB диск, который у меня находится под буквой E: поэтому выбираю Локальные диски. Хотя система архивации позволяет сохранять образы системы так же по сети, в общую папку например.
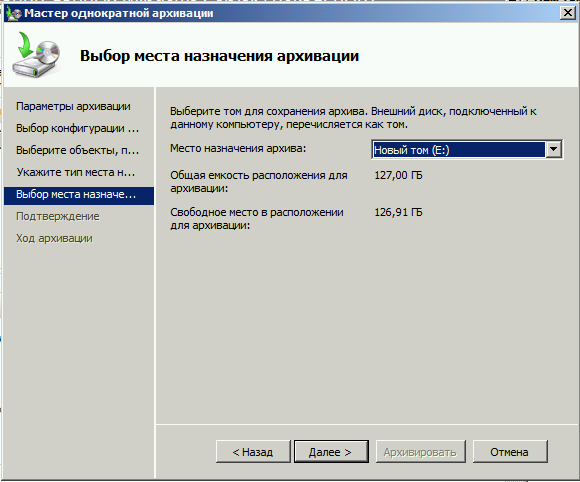
На следующем шаге система предлагает выбрать диск куда мы будем сохранять архив, в моём случае это E:
Жмём далее, затем Архивировать и ждём пока процесс архивации закончится.
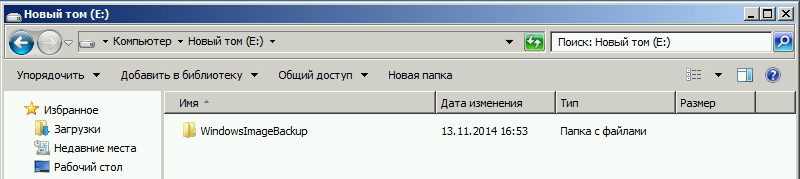
По завершению процесса архивации можем зайти на жёсткий диск и посмотреть, должна появится папка WindowsImageBackup.
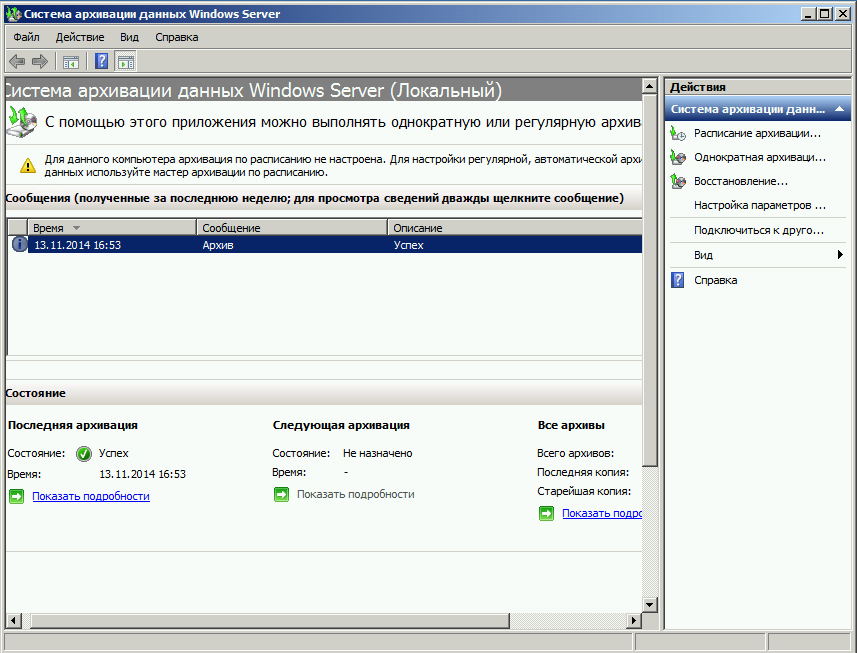
В окне Системы архивации в случае успешного завершения создания образа системы должна стоять отметка Успех. Дважды щёлкнув по строке мы можем увидеть подробности.
Restore
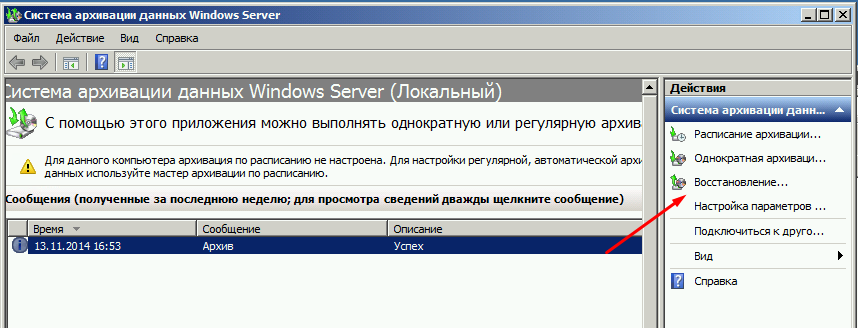
Для того что бы восстановится из этого образа есть два способа, первый из окна Системы архивации, подходит в том случае если наша система загружается. Для того что бы восстановится жмём кнопку Восстановление
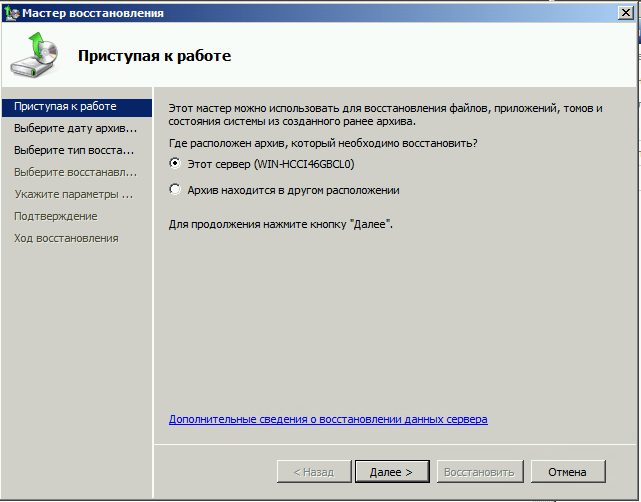
Выбираем Этот сервер
И выбираем дату, архива.
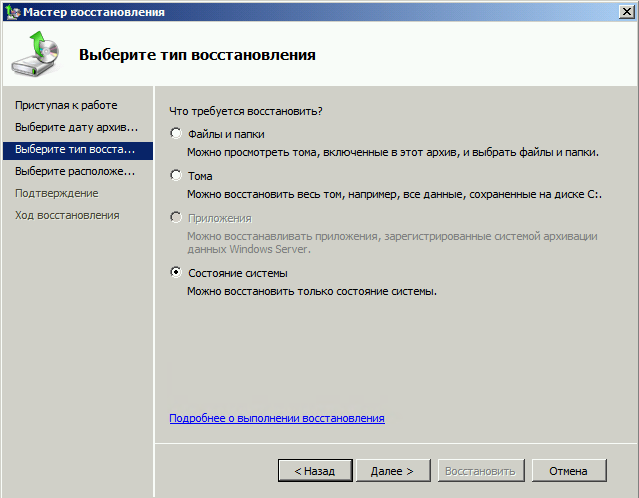
На следующем шаге мы можем выбрать нужные нам файлы и папки, или же выбрать восстановление состояния системы если хотим восстановить весь сервер.
И затем выбираем исходное размещение. И жмём кнопку восстановить.
Bare metal recovery
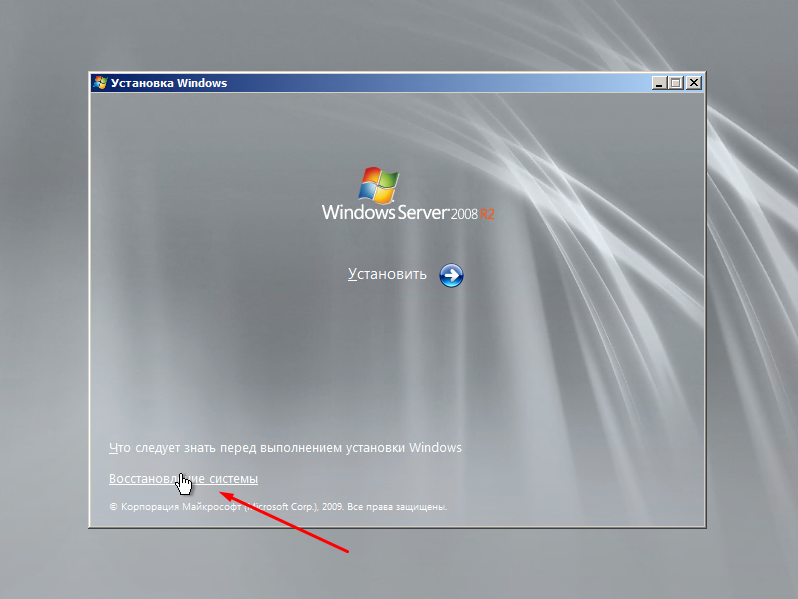
Так же, если наш сервер по какой-либо причине не загружается, или мы заменили его на новый мы можем воспользоваться установочным диском Windows Server для того чтобы восстановить состояние системы, для этого загружаемся с установочного диска и на втором экране установки выбираем восстановить
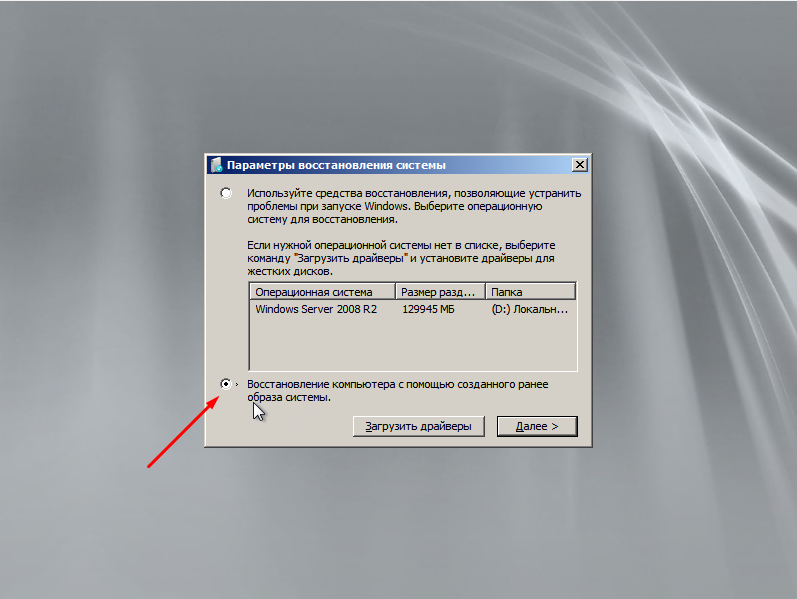
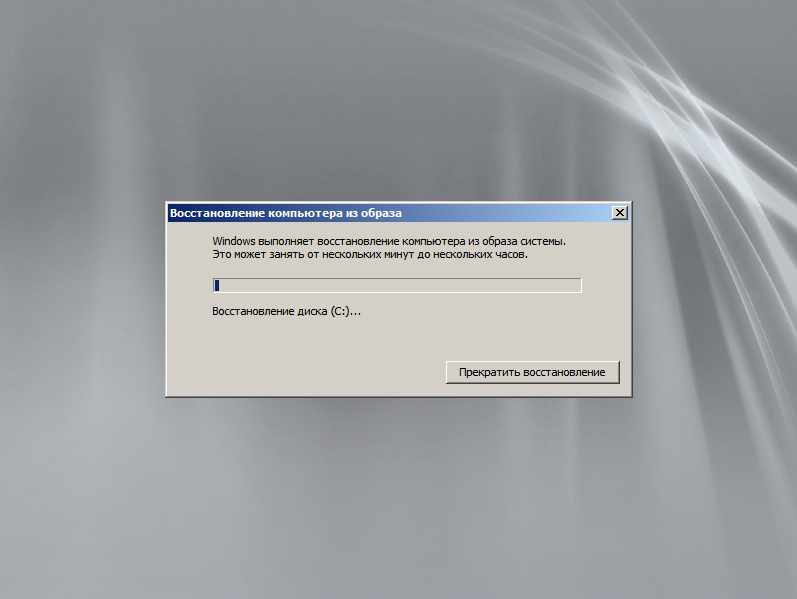
На следующем шаге выбираем Восстановление компьютера с помощью созданного ранее образа системы.
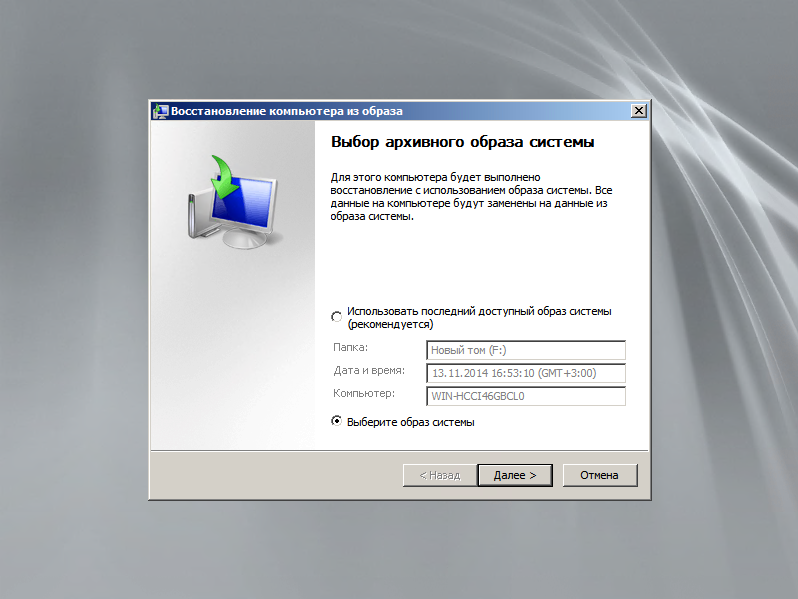
Далее нам предлагают либо использовать последний удачный, либо выбрать образ, попробуем выбрать.
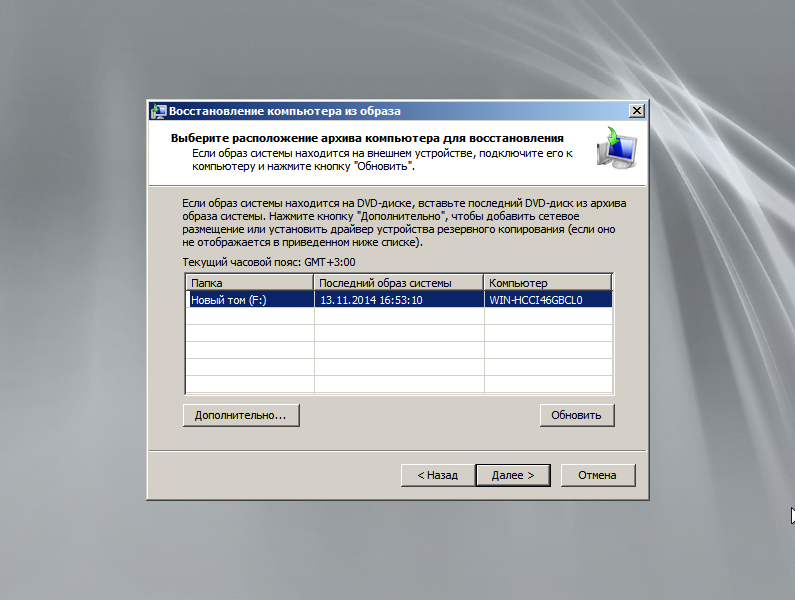
Система сама сканирует диски на наличие образа, есть возможность через кнопку дополнительно установить драйвер или выбрать сетевое расположение образа. Выбираем образ и жмём далее.
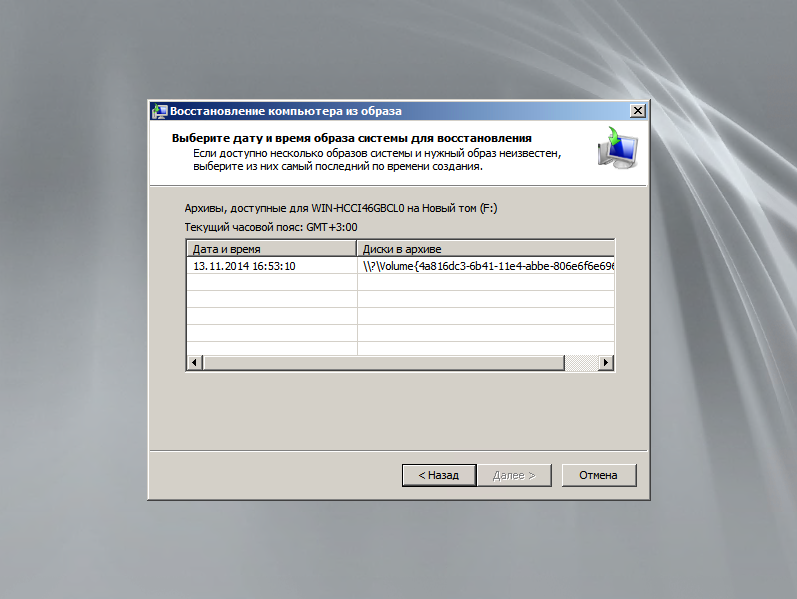
Выбираем нужный нам архив доступный в образе и так же, далее.
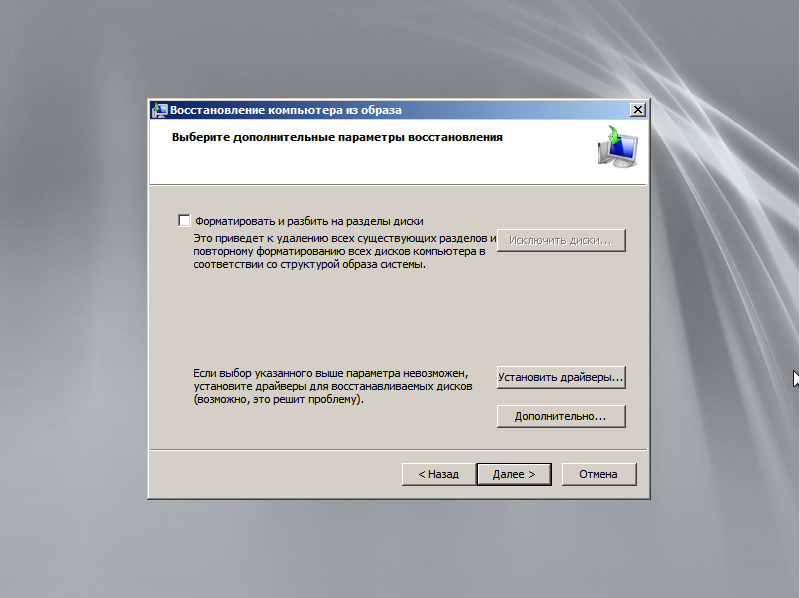
Если случилась такая неприятность и мы заменили диск, то стоит поставить галочку Форматировать и разбить на разделы диски. Если же установлен диск который разбит как надо то эту галочку можно не ставить. Затем жмём готово и ждём пока система восстановится.
Пожалуй на этом всё.
Как и прежде любые вопросы или пожелания можно оставлять в комментариях ниже, буду стараться по возможности ответить.
В Windows Server 2008 R2 Microsoft значительно доработала и улучшила систему резервного копирования (как блочного, так и файлового). Появились следующие функции:
- Улучшена поддержка резервного копирования на уровне файлов: теперь можно выбрать конкретные папки и файлы, которые нужно включить/исключить из бекапа.
- Улучшена поддержка резервного копирования по сети: теперь появилась возможность выполнять резервное копирование на устройства NAS с запущенной службой доступа к файлам Samba (бекап на уровне файлов полностью не поддерживается). Также поддерживается инкрементальное копирование, но только в том случае, если на получателе работает служба VVS.
Однако в связи с наличием ряда ограничений во встроенной процедуре выполнения бэкапа в Windows Server 2008 R2 Microsoft, можно воспользоваться сторонними утилитами, специальными программами для резервного копирования, или утилитой robocopy.
Резервное копирование с помощью robocopy
Robocopy расшифровывается как “Robust File Copy”, это утилита командной строки для осуществления репликации каталогов, данная утилита во многом похожа на команду Unix – xcopy. Основное преимущество команды заключается в том, что она позволят выполнять копирование/перемещение только тех файлов, которые были изменены, что позволяет реализовать функцию инкрементального резервного копирования.
Синтаксис команды robocopy можно посмотреть, открыв командную строку и набрав:
robocopy
/?
Например, мы хотим выполнить копирование всех новых фотографий на сетевой накопитель NAS. В нашем примере мы должны указать папку-источник, папку назначения и опции команды:
robocopy "E:\Documents" "\\NAS\BACKUP\Documents" /MIR
Параметры “/MIR” означают, что нужно выполнить зеркальную копию, т.е. если я удалю фото в исходном каталоге, оно удалится и в моем бекапе.
Еще одной удобной функцией robocopy является возможность отложенного копирования, т.е. если папка источника или назначения не доступна, то копирование будет выполнено позднее. По-умолчанию, время ожидания 30 секунд, после которого будет еще 1000000 попуток скопировать файлы, в том случае, если мы хотим, например, выполнить повторное копирование через 15 секунд и повторить его только 5 раз, можно воспользоваться такой командой:
robocopy "E:\Documents" "\\NAS\BACKUP\Documents" /MIR /R:5 /W:15 Еще больше опция:
robocopy "E:\Documents" "\\NAS\BACKUP\Documents" /Z /MIR /R:5 /W:15 /V /TS /FP /NP /LOG+:"C:\NASSync.log"
Приведенные параметры robocopy говорят о том, что необходимо делать подробный вывод результатов исполнения (/V), выводить метку времен (/TS), полный путь (/FP), не показывать шкалу прогресса (/NP), и выводить результаты в файл лога (/LOG+). Для NAS, которые не поддерживают файловую систему NTFS, необходимо указывать параметр /FFT.
Планирование резервного копирования
Для того, чтобы выполнять регулярное резервное копирование, можно воспользоваться планировщиком Windows — Task Scheduler. Запускаем планировщик, создаем новое задание Create Basic Task, в мастере указываем имя задания (например, backup) и нажимаем Next. На экране Trigger, указываем как часто нужно выполнять резервное копирование. На вкладке Action указываем, что мы хотим запустить программу, нажимаем Next. Далее указываем имя программы, можно просто набрать robocopy, или указать полный путь к программе C:\Windows\System32\robocopy.exe. В окне с параметрами (Add arguments (optional)) мы должны указать аргументы команды robocopy.

Нажимаем Next и Finish.
Для того, чтобы проверить правильность работы задания, перейдем в планировщик, найдем в нем наше задание, правой кнопкой щелкнем по нему и выберем Run. После того, как задание будет выполнено, его статус можно найти в Last Run Result.
Примеры использования robocopy
Рассмотрим различные сценарии и параметры использования robocopy.
1. Скопировать файлы, измененные за последние 5 дней (исключая сегодня).
robocopy "E:\Documents" "\\NAS\BACKUP\Documents" /maxage:5 /minage:1
2. Переместить все файлы:
robocopy "E:\Documents" "\\NAS\BACKUP\Documents" /move /e3. Скопировать файлы за исключением скрытых (/xa:h):
robocopy "E:\Documents" "\\NAS\BACKUP\Documents" /e /xa:h
или за исключением read-only (/ia:rs):
robocopy "E:\Documents" "\\NAS\BACKUP\Documents" /ia:rs
При копировании также можно менять атрибуты файлов, при помощи опции A+ (добавить атрибут) or A- (удалить атрибут). Скопировать все файлы и задать им атрибут read-only:
robocopy "E:\Documents" "\\NAS\BACKUP\Documents" /e /A+:r
4. Скопировать все файлы по шаблону (расширению), пустые папки не копировать:
robocopy "E:\Documents" "\\NAS\BACKUP\Documents" *.doc *.ppt /s
5. Скопировать все файлы размером от 1000 до 60000 байт:
robocopy "E:\Documents" "\\NAS\BACKUP\Documents" /e /max:60000 /min:1000
6. Исключить из копирования папку AppData (/XD AppData):
Robocopy "C:\Users\Administrator" "\\NAS\BACKUP\Administrator" /MIR /XA:SH /XD AppData /XJD
7. Создать 32 потока (/MT:32) копирования файлов:
Robocopy "C:\Users\Administrator" \\NAS\BACKUP\Administrator /MIR /XA:SH /XD AppData /XJD /R:5 /W:15 /MT:32
В примере мы используем опцию /MT[:n], где n – это число от 1 до 128, которое определяет количество потоков. По умолчанию, если параметр /MT не указан, используется 8 потоков.
Solutions provider takeaway: This chapter excerpt provides information on Windows server backup in Windows Server 2008 R2. You will learn how to configure backup settings, back up specific files and perform system state and bare-metal backups.
Manage Backup and Recovery
Now that you have seen some of the tools for backups and recovery, it is time to put them to use. When you perform backups traditionally, you want to have the backups on a schedule so you are sure they are happening at regular intervals. This will make finding the right media for recovery easy. Even though Backup and Recovery are performed separately, they are joined together in form and function. The type of backup you perform will always dictate the recovery options available to you. In reality, the backup strategy is determined by your recovery requirements and what your service-level agreement is with your users and business. Is it OK if a user has to wait 24 hours to recover a file? What if the user is the CEO? Is it OK to turn off a server during work hours? What if the server is mission critical to your organization? These are all key questions, among many others, that you need to address when defining your policies and procedures and determining the best way to handle the needs of your organization.
Whether you choose to perform backup and recovery tasks with the GUI, command-line tool, or the PowerShell cmdlets, you are essentially performing the same task. In this section, you will learn how to use the backup and recovery tools to perform your daily tasks. Not that to perform either backup or recovery, you do need to be a member of the Backup Operators or Administrators groups.
Back Up Your Server
After you have determined your backup strategy, it is time to back up the server. When you back up your server, you want to make sure you schedule your backup times to not impact your network or your users. Try to schedule the backups after-hours, when the system is being used the least. You also want to make sure your backups complete in a timely manner; this is where knowing the difference between full and incremental backups can offer value to you and your organization.
Configure Backup Settings
Before you perform your backup, you may need to define your backup settings. You have only a few selections to make to configure your backup. Specifically, you need to determine whether you want to perform a full/normal backup, an incremental backup, or a custom combination of both of these methods. To configure your server, perform the following steps:
- Start Windows Server Backup by selecting Start ⇒ Administrative Tools ⇒ Windows Server Backup.
- In the right Actions task pane, click Configure Performance Settings; you will see a screen similar to Figure 8.7.
-
Figure 8.7: Backup performance settings
The three options listed determine how the backup will be performed. It is important for you to know the choices you make here will not be applied if you are backing up only system state.
- Normal Backup Performance is the default method for Windows Server Backup, and this method will perform a normal backup.
- Faster Backup Performance will perform an incremental backup for your system.
- Custom will allow you to choose a combination of the previous two options for your drives. For example, you could perform a full backup on your data volume but only an incremental backup on your system drive.
- Select the setting for your system, and click OK.
Back Up Your Server
After you have installed the backup tools, it is now just a matter of setting up the tasks to begin protecting your system. When you are ready to perform the backup and you know what files and folders you want to protect, you are ready to set up the backup test and schedule.
The first time you load the tool, you will see a message telling you no backup has been configured and you need to either set up a backup schedule or set up a backup once to begin protecting your system. Whether you choose to create a backup schedule or perform a backup once, the choices in the wizard are the same, with the exception of configuring the schedule:
- Start Windows Server Backup by selecting Start ⇒ Administrative Tools ⇒ Windows Server Backup.
- To launch the backup wizard, in the Actions pane on the right, select Backup Schedule to create a regular backup task, or select Backup Once if you just want to perform an immediate backup. For this set of tasks, you will see the Backup Schedule choice.
- Review the Getting Started screen, and click Next to see a screen similar to Figure 8.8.
-
Figure 8.8: Configuring the backup
- Select Full Server (Recommended), and click Next.
- Set your schedule; the default is once a day at 9 p.m. You can also configure multiple times a day to perform the backup. After you set your schedule, click Next.
- On the Specify Destination Type screen, as shown in Figure 8.9, you’ll see two new choices in Windows Server 2008 R2; these allow you to store your backup to another volume and to a network share. These methods provide flexibility for your backup process that did not exist in prior versions of Windows servers. However, make sure you make note of the performance costs to your additional volume or network. You will have to decide what the right balance is for you and your organization. After you make your selection, click Next.
-
Note: The first time you run the backup wizard, you may be asked to format the destination drive. When you select the default choice of Backup To Hard Disk That Is Dedicated For Backups, it will reformat the selected disk before the backup process begins. Make sure you have saved any necessary data off the drive. The format of the drive has to be NTFS; also, make sure you have at least 1½ times the free drive space compared to what you are backing up.
Figure 8.9 : Backup destinations
- On the Select Destination Disk page, select where you want to store your backups. For a scheduled backup, this can be another hard drive or a network share. It cannot be an optical drive or removable media. However, you can use optical drives or removable media for backup-once backups, and these media choices provide a great choice for bare-metal backups. After you make your selection, click Next.
- If you are presented with a warning to format the disk and you are positive you want to use the selected disk, click Yes. Otherwise, click No, and select another drive to store your backup.
- Review the Confirmation screen, and click Finish to create the scheduled task for backup and format the volume (if this is your first time using Windows Server Backup). If you chose Backup Once, you will click Backup to immediately perform the backup.
- Review your Summary screen, and click Close.
Note: After you have run the backup wizard the first time, the next time you run it you will see a screen similar to Figure 8.10. This allows you to modify the existing backup or stop the backup process. You can still configure the backup once if you need to create new backups for different files or needs, like bare-metal recovery.
Figure 8.10: Modifying the existing backup schedule
Back Up Specific Files
In Windows Server Backup in Windows Server 2008, you had to back up the entire volume. In Windows Server 2008 R2, you now can include or exclude folders or individual files. You can also exclude files based on the file types with filters. For this purpose, you will see how to modify an existing backup schedule.
- Start Windows Server Backup by selecting Start ⇒ Administrative Tools ⇒ Windows Server Backup.
- To launch the backup wizard, in the Actions pane on the right, select Backup Schedule.
- On the Modify Backup Schedules screen, verify that Modify Backup is selected, and click Next.
- Select Custom, and click Next.
- On the Select Items For Backup screen, you will see what you are currently backing up. If want to add or remove from the backup, click Add Items, and you will see a screen similar to Figure 8.11.
-
Figure 8.11: Backup item selection
- Select the items you want to add to or remove from the backup by selecting or deselecting the check boxes next to the items. If you want to select specific folders, click the + sign next to your listed hard drives to expand the directory tree and then make your folder selections. When you are done selecting items to back up, click OK.
- If you want to exclude certain files from your backup, such as temporary files (*.tmp) or music files (.wmv, .mp3, and so on), click the Advanced Settings button.
- Click Add Exclusion to select the drive or folders you want to apply your exclusions.
- Select the drive you want to use. Typically you will want your full volumes to have the exclusion applied. However, you can select individual folders or files to exclude directly. When you’re done selecting your locations, click OK.
- To exclude certain files, click in the File Type column, and type in your exclusion. You can also specify whether you want apply the filter to the subfolders. For example, if you wanted to exclude .tmp files from your backup, type *.tmp. Your screen would look similar to Figure 8.12.
-
Figure 8.12: Backup exclusions
If you want to add more exclusions, click Add Exclusion, and repeat the process. Likewise, if you want to remove the exclusion, you can select it and click Remove Exclusion.
- When you are finished creating exclusions, click OK to proceed through the rest of the wizard.
- Set or modify your schedule, and click Next.
- Select your destination type, and click Next.
- Select the destination disk, and click Next.
- If you are presented with a warning to format the disk and you are positive you want to use the selected disk, click Yes. Otherwise, click No, and select another drive to store your backup.
- Review the Confirmation screen, and click Finish to create the scheduled task for backup and format the volume (if this is your first time using Windows Server Backup). If you chose Backup Once, you will click Backup to immediately perform the backup.
- Review your Summary screen, and click Close.
Perform a System State Backup
When you back up the system state, you are backing up a majority of the system configuration information. In Windows Server 2008 R2, you can perform the system state backup inside the Windows Server Backup Tool, and you do not have to solely use wbadmin.exe. Also, if you have installed additional roles on the Windows Server 2008 R2 server, your system state will contain more data. By default, on a server with no additional roles, the system state backup always contains the following components:
- Registry
- COM+ class registration database
- Boot files, including system files
- System files under Windows File Protection
If the system is a domain controller in addition to the default system state data, system state will contain the following:
- Active Directory service
- SYSVOL directory
|
|||
If you have installed clustering on the server, the system state data will contain the clustering services information.
If you have installed a certificate services server, the system state data will contain the certificate services database.
If you have installed IIS, the system state data will contain the IIS metadirectory.
- Start Windows Server Backup by selecting Start ⇒ Administrative Tools ⇒ Windows Server Backup.
- To launch the backup wizard, in the Actions pane on the right, select Backup Schedule to create a regular backup task, or select Backup Once if you just want to perform an immediate backup. For this set of tasks, you will see the Backup Schedule choice.
- Review the Getting Started screen, and click Next.
- Select Custom, and click Next.
- On the Select Items For Backup screen, click Add Items.
- Click System State, click OK, and then click Next.
- If presented with a scheduling window, set or modify your schedule, and click Next.
- Select your destination type, and click Next.
- Select the destination disk, and click Next.
- If you are presented with a warning to format the disk and you are positive you want to use the selected disk, click Yes. Otherwise, click No, and select another drive to store your backup.
- Review the Confirmation screen, and click Finish to create the scheduled task for backup and format the volume (if this is your first time using Windows Server Backup). If you chose Backup Once, you will click Backup to immediately perform the backup.
- Review your Summary screen, and click Close.
Perform a Bare-Metal Backup
Another backup option that will provide you with a great option in case of a catastrophic failure is a bare-metal backup. The bare-metal backup will back up your system state, your system volume, and the system reserved data. This backup set is also unique in that you will need the Windows Server 2008 R2 installation media available during recovery.
This is a good time to use a USB drive or another portable media to store this backup. The main reason is because to perform the restore, you need to boot the system into the Windows Recovery Environment using a Windows Server 2008 R2 installation DVD.
- Start Windows Server Backup by selecting Start ⇒ Administrative Tools ⇒ Windows Server Backup.
- To launch the backup wizard, in the Actions pane on the right, select Backup Schedule to create a regular backup task, or select Backup Once if you just want to perform an immediate backup. For this set of tasks, you will see the Backup Schedule choice.
- Review the Getting Started screen, and click Next.
- Select Custom, and click Next.
- On the Select Items For Backup step, click Add Items.
- Click Bare Metal Recovery, and click OK; then click Next.
- If presented with a scheduling window, set or modify your schedule, and click Next.
- Select your destination type, and click Next.
- Select the destination disk, and click Next.
- If you are presented with a warning to format the disk and you are positive you want to use the selected disk, click Yes. Otherwise, click No, and select another drive to store your backup.
- Review the Confirmation screen, and click Finish to create the scheduled task for backup and format the volume (if this is your first time using Windows Server Backup). If you chose Backup Once, you will click Backup to immediately perform the backup.
- Review your Summary screen, and click Close.
Look at the Scheduled Tasks
Whenever you create a backup schedule, you may be wondering where the task is stored. The task is stored in the Task Scheduler tool, and you can view your backup tasks there. You can also run the task directly from the Task Scheduler. The tasks in the Task Scheduler have several properties you can modify, as shown in Table 8.2.
Table 8.2: Task Property Tabs
|
Property Tab |
Definition |
| General | Contains the description, author, and what account will be used to run the command. |
| Triggers | Determines when the task will be performed. In the case of a backup, the trigger is date and time. |
| Actions | Determines what programs or commands will be run. |
| Conditions | Specifies additional options, combined with the triggers, that determine whether the task should run. |
| Settings | Controls additional behaviors of the task. An important setting here is Allow Task To Be Run On Demand. If you want to be able to run your tasks directly from the Task Scheduler, you have to select this setting to turn it on. |
| History | Shows the past history of the task when it was run. |
Property Tab Definition
- Click Start ⇒ Administrative Tools ⇒ Task Scheduler.
- Expand the tree to view the backup tasks. Click the + to expand Task Scheduler Library ⇒ Microsoft ⇒ Windows, and then click Backup.
- Double-click the task to view the properties of the backup task, and you will see a screen similar to Figure 8.13.
Figure 8.13: Backup task
You can also view the status of your backups and get more details on the main console page of the Windows Server Backup window, as shown in Figure 8.14.
Figure 8.14: Windows Server Backup
From the main console window, you can view the details, status, and next schedule for your backups and recovery processes. The Windows Server Backup Tool will show all the events with your backups and restores in this main console window.
Backing Up and Recovering Your Server
Windows server backup in Windows Server 2008 R2
Bare-metal, system state recovery in Windows Server 2008 R2
Printed with permission from Wiley Publishing Inc. Copyright 2010. Microsoft Windows Server 2008 R2 Administration Instant Reference by Matthew Hester and Chris Henley. For more information about this title and other similar books, please visit Wiley Publishing Inc.
Dig Deeper on MSP business strategy
-

Troubleshooting the most common issues with Windows 11
By: Brien Posey
-
Windows Server backup to the cloud: A step-by-step guide
By: Brien Posey
-
How to use the Windows Server Backup tool
By: Damon Garn
-
How to create a local admin account with Microsoft Intune
By: Brien Posey


There’s some good news for IT managers deploying Windows Server 2008: Backup and Restore has been reworked in this edition to leverage the Volume Shadow Copy Service (VSS) and block-level transfers for faster backups, and it also integrates with recovery tools for simplified restoration of files and the operating system.
Windows Server 2008 disposes of the aging NTBACKUP utility and introduces Windows Server Backup, an optional feature that can be installed through Server Manager. As in Vista’s Complete PC Backup, Microsoft’s virtual hard drive (VHD) format is used to create file-based images of disk volumes. Before I address how to work with the new software, it’s important to note that several important features of NTBACKUP have been dropped from Windows Server Backup.
Windows Server Backup — Need to Know
The software is primarily designed for disk-to-disk use; tape drives are not supported. While disk-to-disk backup promises a simple, reliable and affordable solution, the lack of portability for offsite backups could be an inconvenience with some hardware. Even though bays for removable drives are becoming more common in low-end servers, removable hard drives are expensive compared with tape. Limited support for writable DVD is provided (no recovery operations for individual files, folders or application data are allowed), along with external USB drives.
Much like Complete PC Backup in Vista, you can’t back up individual files and folders, only complete volumes. Another NTBACKUP feature, the verify option, is available only when the backup destination is removable media, so you can’t always run consistency checks. While it’s possible to set the backup destination to a mapped drive or NTFS mount point, it’s no longer possible to back up a network drive, or local drives that are not formatted with NTFS. Backups of the system volume contain everything necessary to restore a working server, but if you want to back up just the system state, you’ll need to use the command line.
The situation looks a little better in the recovery area, with the added ability to select individual files and folders using the GUI or the command line. The Windows Recovery Environment can be used in combination with backups to restore files and folders or entire volumes and perform bare-metal restores.
Application Support and VSS
Software that supports the Volume Shadow Copy Service can be registered with Windows Server Backup via a VSS writer, but the ability to make an online backup of Exchange is no longer available. The lack of support for Exchange seems a little off the mark, considering it’s unlikely anyone wants to make offline database backups regularly. Microsoft’s Exchange team promises a VSS plug-in for Windows Server Backup sometime in the future. They also say that Windows Small Business Server 2008 will include support for backing up Exchange.
Windows Server Backup offers two types of backup: VSS copy and VSS full. VSS copy, which is the default and recommended option, preserves application logs (if they exist) on selected volumes without updating files’ archive bits. Archive bits are file attributes used to mark files as backed up. This lets Windows Server Backup work in parallel with third-party software that’s used to back up applications such as Exchange, without interfering with incremental or differential backup schedules that such applications support.
In contrast, VSS full backups truncate application transaction logs and update the archive bit of all backed-up files. While there’s no option to select an incremental backup in the GUI, if you use a volume that contains a previous backup, only changes made since the last backup will be saved, giving ultra-fast performance.
Creating a Scheduled Backup
Regardless of the limited functionality, it’s worth knowing how to perform basic tasks with the built-in software. Log on to Server 2008 using an account with local administrator privileges:
- From the command prompt run servermanagercmd.exe -install Backup-Features.
- When the backup features have finished installing, open Windows Server Backup from Administrative Tools on the Start menu.
- In the Actions pane on the right, click Backup Schedule.
- Click Next on the Getting Started dialog. Choose Full Server on the Select backup configuration screen. Click Next to continue.
- On the Specify backup time screen, leave the default option of once a day at 21:00 selected and click Next.
- On the Select destination disk screen, I’ve selected my external drive (E:\) (Figure 1). To select an internal disk, click Show All Available Disks. Click Next to continue.
- At this point you’ll be warned that the destination disk will be dedicated to backup (to facilitate moving the disk offsite) and formatted and hidden from Windows Explorer (to ensure integrity). Click Yes to continue.
- You should note the disk’s label from the Label destination disk dialog, and write it on the disk enclosure, if it’s external or removable, so it can be easily identified in the future. Click Next and then Finish on the confirmation screen. The Backup Schedule Wizard will then format the disk and you will be presented with a summary screen, telling you when the first backup is scheduled to run. Click Close to continue.
- You should now see information about the backup you’ve just created in the Windows Server Backup console under Status (Next Backup) and Scheduled Backup. To run the scheduled job ahead of time, click Backup Once in the Actions pane, in Backup options leave the default settings, click Next and then Backup on the confirmation screen.

Figure 1
If you have multiple disks available for use with Windows Server Backup, the Backup Schedule Wizard lets you specify more than one backup destination. When a scheduled backup runs, a disk will be chosen randomly, if more than one configured destination disk is connected. Therefore, you should make sure that only the required disk is connected before the scheduled start time.
System State Backups
The system state is included in our full backup, but what if we want to run a quick system state backup without the overhead of the entire system volume? The Windows Server Backup console doesn’t provide for this, but we can perform this task from the command line:
- Since our destination disk has been dedicated to backup tasks by Windows Server Backup and hidden from Windows Explorer, we’ll have to determine the volume’s name using the following command:
wbadmin get versions
Backup time: 04/07/2008 06:25
Backup target: Fixed Disk labeled WIN-XRG 2008_07_03 14:38 DISK_01(\\?\Volume{e01f7065-48ff-11dd-83fb-000c29d73f77})
Version identifier: 07/04/2008-05:25
Can Recover: Volume(s), File(s), Application(s), Bare Metal Recovery, System State - The disk’s label should match what you wrote down when preparing the disk for scheduled backup. The volume name then needs to be specified, to back up the system state as shown below:
wbadmin start systemstatebackup -backupTarget:\\?\Volume{e01f7065-48ff-11dd-83fb-000c29d73f77}
Restoring Files
Restoring files can be done from the command line using wbadmin or from the Windows Server Backup console. Let’s use the console to restore a file:
- Open the Windows Server Backup console from Administrative Tools on the Start menu.
- Click Recover in the Actions pane on the right.
- Leave This server selected and click Next on the Getting started screen.
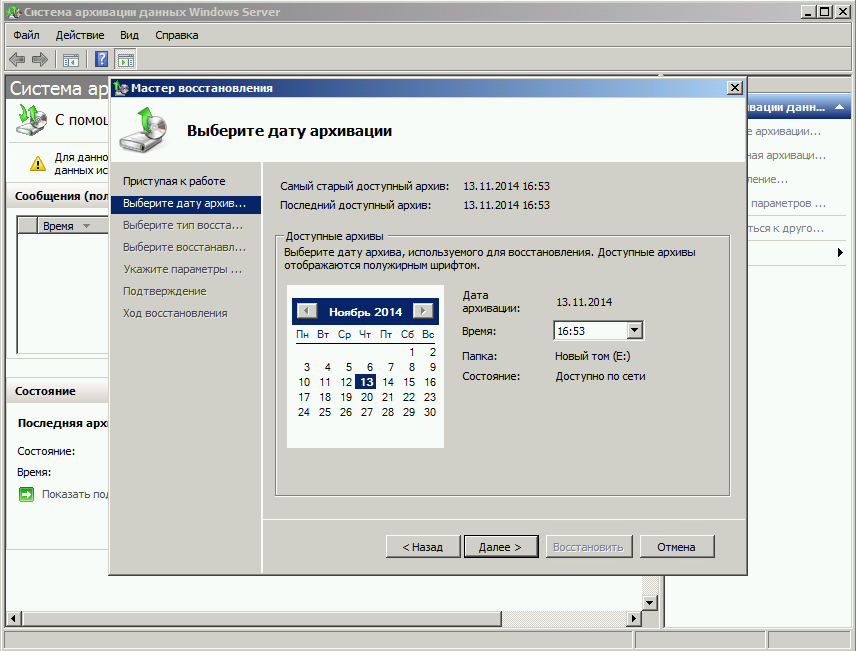
- On the Select backup date dialog, select the date and time of the backup you want to use for the restore operation and click Next (Figure 2).
- Leave the default option of Files and folders selected on the Select recovery type dialog and click Next.
- Expand the disk’s label under Available items, highlight the files you want to restore in the right pane and click Next (Figure 3).
- On the Select recover options dialog, leave the default options selected to restore the files to the original location. Click Next to continue.
- Review the confirmation screen and click Recover. Once the restore is completed, click Close on the Recover progress dialog.

Figure 2

Figure 3
Using WinRE to Restore a Server
In the event of a disaster, backups made by Windows Server can be used in conjunction with the Windows Recovery Environment (WinRE) to get your server back up and running with a minimum of fuss. Boot your server into WinRE from the Windows Server 2008 media or from the hard disk if WinRE’s preinstalled:
- Select your language, regional preferences and click Next.
- Click Repair your computer on the Install Windows dialog.
- On the System Recovery Options dialog, select the operating system to repair and click Next.
- Click Windows Complete PC Restore on the System Recovery Options screen. This will erase files and restore the system volume.
- Click Next to use the most recent backup on the Restore your entire computer from a backup dialog (Figure 4).
- Check Format and repartition disks on the Choose how to restore backup screen. The disk that contains the backup will be automatically excluded from this operation. If you have any additional volumes in the backup, an option to Only restore system disks is given to exclude the extra volumes from the restore process (Figure 5). Click Next to continue.
- Review the final dialog and click Finish.

Figure 4

Figure 5
From the System Recovery Options window, it’s also possible to launch a command prompt and use wbadmin. In WinRE, wbadmin offers more flexible recovery options than the Windows Complete PC Restore wizard. wbadmin start recovery is for restoring individual volumes, applications or files/folders. wbadmin start sysrecovery is for running a complete PC restore. To run a complete PC restore from the command prompt:
- Issue the following command lines:
wbadmin get disks
wbadmin get versions -backupTarget:d:In this case I can use the drive letter as indicated by the wbadmin get disks command, as it’s not hidden in WinRE.
- Run wbadmin get versions –backupTarget:d: to list the backups stored on the target volume. There are two backups to choose from (Figure 6).
- Run a restore from the latest backup, using the version identifier from the output of the wbadmin get versions command:
wbadmin start sysrecovery -version:07/04/2008-06:14 -backupTarget:d:
- Follow the prompts to complete the restore operation.

Figure 6
IT Takeaway: Backup and Restore in Windows Server 2008
The restore features in Windows Server Backup are appealing, but let down by inflexible backup options and lack of support for Exchange Server and tape drives. Windows Server Backup might be useful in scenarios where disk-to-disk is used as the primary backup method. However, all but the most basic removable and disk-to-disk backup systems feature their own management and backup software, or are compatible with popular applications such as Symantec’s Backup Exec. Whatever your backup strategy, it’s likely that Windows Server Backup won’t provide for all your needs. That might change in the future when support for Exchange is added.
Russell Smith is an independent consultant based in the United Kingdom who specializes in Microsoft systems management.
I was very excited when I started to play around with the first beta versions of Windows Server 2008 and experiment with the latest security improvements. At first, I wanted to start with one of the more basics and important things on this new server: Active Directory.
Several improvements were made on security matters that we can find it related to Active Directory: Read-Only DCs, more group policies, auditing enhancements, etc. After installing a small lab to check all these features, I finally arrive to another important Active Directory matter: Backing up and Restoring Data from a Domain Controller.
I was pretty disappointed at first when I realized that there was no easy way to backup a system state from a Domain Controller. Even more disappointed when I couldn’t find out the way to schedule a system state backup! Well on this post I want to review the way to simply schedule a system state backup on a Domain Controller and maintain those backups by removing the old ones from the backup catalog.
Requirements
a. A secondary hard drive on the domain controller. It cannot be a network drive.
The only storage point possible for backing up your server is using a secondary hard drive that can only be attached locally.
b. Having the Windows Server Backup feature installed.
The first thing that you must know to start backing up data from Windows Server 2008 is that the backup tool is not installed by default, like it was on Windows Server 2003 with ntbackup. To install it:
a. Open Windows Server Manager snap-in
b. Access Features section and click on Add a New Feature
c. Select Windows Server Backup including the sub-item “Command Line Tools”
i. This will also need Powershell
d. Click on Install.

Scheduling System State Backup
If you check the GUI of the Windows Server Backup you’ll see that there’s no way to backup the system state from there:
The only way to backup the system state using this tool is using the command line. So, to use this backup feature as a scheduled task, we are going to create a .bat file and schedule this batch file to run on our desired time (actually you can skip creating the .bat file, and just use task scheduler with the right parameters).
1. Open notepad and insert:
@echo off
WBADMIN START SYSTEMSTATEBACKUP –backuptarget:e: -quiet
“e:” is your local hard drive where the backup catalog will be stored.
“-quiet”: is the parameter used to not ask for confirmation

2. Save it as a batch file. Like: systemstatebackup.bat
3. Open Task Scheduler and create a “New Task”. The task properties window will open.
4. On the “General” tab select:
a. “Run whether the user is logged or not”
b. “Run with the highest privileges”

5. On the “Triggers” tab, click on “New”:
Here is where you select how often the backup task will run. This is an example of a task running weekly:

6. On “Actions” click on “New” and select to “Start a Program” and browse the batch file you just created.

7. Click on “OK” and the schedule task is ready.

You can manually run this task on demand by right-clicking it and selecting “Run”.
This task to complete takes between 40 minutes to 1 hour (or even more), depending on the system state data (Active Directory, DNS, registry, certificates, etc).
This is the process running

I have the backup… but what a hell is this??
Probably your first impression on the backup won’t be the best:
You don’t have permissions to see the backup files at first

You don’t see a simple .bkf file as it was when you used ntbackup

The size of every backup (that means every time you run the task) is as much as the size of the system drive
After all that, maintaining those backups sounds a little bit hard to do, the backup hard drive will significantly increase in a few weeks and for sure, you won’t be feeling much comfortable if you just try to delete.
Keeping It Simple… and smaller
But not of these annoying things are here to just making our work a little bit hard and awkward. Besides from adding a new layer of security to our backups, it also the maintenance of the old backups will actually get simpler.
You can create a new scheduled task that will keep every week (if that’s your case) only the newer backups on your catalog:
WBADMIN DELETE SYSTEMSTATEBACKUP –backuptarget:e: -deleteOldest –quiet
This way you will prevent from the backup hard drive to easily increase enormously. A good thing to keep in mind if you are working with virtual machines, you’ll probably know that it’s REALLY annoying having a big size virtual disk, and not being able to decrease their size (not an easy way anyhow).

This is the cmd running and deleting an old backup from system state (without the -quiet parameter).
To restore an Active Directory using these backups is not very much different from backing it up, we can see that procedure on a next post.
Hope it helps!
Cheers!