
Download Article
An in-depth guide to making a custom mouse cursor in Windows 10 or 11
Download Article
- Editing Your Cursor
- Converting Your Image
- Changing Your Cursor
- Video
- Q&A
|
|
|
|
Do you want to make and use your own unique cursor on your computer? While the default cursor on Windows does the job, it’s fairly plain. By customizing your cursor, you can choose something a lot more fun and personalized. You can use any photo or image you’d like to create this new cursor; you’ll just need to edit and convert it to a .CUR file first. This wikiHow will show you how to make and apply a custom cursor for your Windows 10 or 11 computer.
Things You Should Know
- Find a .PNG image with a transparent background. Paste it onto a transparent 45 W by 50 H canvas and save.
- Convert the .PNG file to .CUR with an online converter.
- Type «Mouse settings» into the Start menu. Click «Additional mouse options» → «Pointers» → «Browse» → select your image → «Apply».
-

This image must be in .PNG format, as this provides a transparent background. If you don’t have a transparent background, you’ll need to edit the image to make it transparent.
- Search Google for images or upload your own to your computer.
-

Go to https://ipiccy.com/ in a web browser. This is a free photo editor that works in your browser.
Advertisement
-

This will be at the top of the page.
- The photo editor will open.
-

You can find this at the very top center of the screen, next to Photo Library.
-

Enter 45 in the Width box and 50 in the Height box.
- Your canvas size should be 45 W x 50 H.
- Be sure to check the box next to Transparent.
-
This looks like three rectangles layered on top of each other. You can find this on the left panel.
-
This looks like a blue star in front of a mountain and sun picture.
-
Click Upload image in the left panel, and then select your photo from your computer. Once added, it will appear in the left panel.
-

Use the scroll wheel to zoom into your canvas if needed.
- If the image doesn’t take up most of the canvas space, click and drag a corner of the image to enlarge it. Make sure the image sits in the center of your canvas and all parts of it are visible.
-
You can find this at the top of the window. This will save your changes.
-
Your cursor image is all finished; you’ll just need to save it to your computer.
- Click Save at the top.
- Click My computer.
- Enter a name for your cursor and then set the file as .png.
- Click Save to my computer.
- Select a save location.


Advertisement
-
Go to https://convertio.co/png-cur/ in a web browser. This is a free image converter. You’ll need to convert your .png image into cursor format (.cur).
-
This is the large button at the center of the screen. Make sure to avoid clicking any surrounding ads.
-
Use the pop-up window to locate the image you created in the previous section. Select it, and click Open.
-
This will convert your image to .cur format. It should only take a few moments to convert.
-

This is the blue button to the left of your image file.
- The .cur file will be downloaded to your computer.
- In most cases, this will be found in your Downloads folder. If desired, move the file to another folder by clicking and dragging.


Advertisement
-
On Windows 10 and earlier, this will be at the bottom left corner of the screen. On Windows 11, this will be at the bottom center of the screen.
-
Results will load as you type.
-
A new window will open.
-
This will be underneath the Related settings header.
- A new window will open.
-
This is the top tab, to the right of Buttons.
-
This is below the Customize box. Make sure the Normal Select mouse option is highlighted.[1]
- Alternatively, double-click Normal Select to open the Browse window.
-
Find your saved .cur image from the previous section. Click it, and then click Open.
-
This is the button at the bottom-right corner. Your cursor will change into your new image.
- Click OK to close the window.
- If you want to change the cursor back to its default, return to the Pointers menu and click Use Default.


Advertisement
Add New Question
-
Question
Can I use Microsoft Photos or Paint instead of Gimp?
Of course, you can! Right-click on a photo in your computer. Click «Properties» in the drop-down menu. In the «General» tab, click the «Change» button. Then choose any program you want the photos to open with.
-
Question
How do I know if the files I download in this process are safe?
Paul Schofield
Community Answer
On most computers these days it will warn you beforehand if the download can cause problems with your computer. If this doesn’t show up, then you will be safe to initiate the download process.
-
Question
It doesn’t say download in the digitalcoding part. How do I do that?
You need to scroll down after converting the image on digitalcoding.com.
See more answers
Ask a Question
200 characters left
Include your email address to get a message when this question is answered.
Submit
Advertisement
Video
Thanks for submitting a tip for review!
About This Article
Thanks to all authors for creating a page that has been read 230,560 times.
Is this article up to date?
Your mouse cursor plays a vital role when using your computer, and you should be completely comfortable with its appearance. Maybe you want a larger cursor, easy to find in a text without straining your eyes, or perhaps you are bored with the same old pointer that you have been using for what feels like forever. Whatever the case, this tutorial shows you how to customize mouse cursors on your Windows 11 or Windows 10 computer or device:
NOTE: We wrote this tutorial using the initial release of Windows 11 (version 21H2 build 22000), as well as Windows 10 (version 21H2 build 19044). If you’re using an older version of Windows 10, you might have to install the latest updates to get access to all the features presented.
What’s a mouse cursor in Windows?
A mouse cursor is an indicator used to depict on your display either the current position for user interaction or the movements of your pointing device. In Windows 11 and Windows 10, you can replace the currently used icons with entirely different ones, and you can also change the cursor’s thickness, adjust the size and color of its pointers, etc.
Windows uses the “.ani” (animated cursor) and “.cur” (cursor) extensions for the files that store mouse cursors. Built-in Windows 10 cursor files are usually around 9 to 10KB in size each, while animated mouse cursors can be as large as 500 to 600KB.
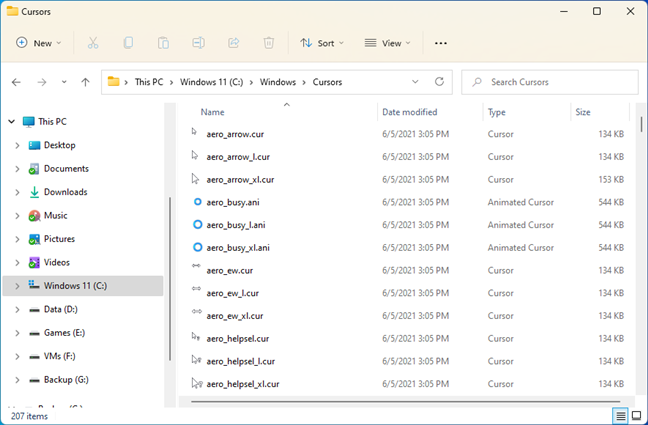
Built-in Windows 11 cursors
The default folder for these files is “C:\Windows\Cursors.” If none of the available options are to your liking, you might decide to download a new mouse cursor scheme. In that case, you should extract the new cursor scheme in its own subfolder under this default folder: “C:\Windows\Cursors.”
TIP: You’ll find some useful help on installing mouse cursor schemes, here: How to install custom mouse cursors in Windows.
New mouse cursor schemes are often way more entertaining than what Windows 11 or Windows 10 offers. Still, keep in mind that, should you choose to install animated cursors, they can take up to four times more storage space (approximately 2MB). By the way, here are the best free custom cursors for Windows we’ve found on the internet, if that’s what you’re looking for.
You’ve probably landed on this webpage while looking for answers to one of these two questions: “How do I enable custom cursors?” or “How do I customize my cursor?”. Although the steps to do that are not exactly intuitive, they’re simple enough for anyone to follow. Here’s what you need to do to change your mouse cursors scheme and how to enable custom cursors in Windows 11 or Windows 10:
How to change the mouse pointer scheme used by Windows 11 or Windows 10
In order to change the mouse pointer scheme and replace the current ones, you’ll first have to get to the mouse settings from Windows. If you’re using Windows 11, click or tap the Search button next to the Start Menu and type “mouse settings.” If you’re using Windows 10, simply start typing the same expression — “mouse settings” — in the search box to the right of the Start button. Then, once the search results show up, in either operating system, click or tap on Mouse settings.
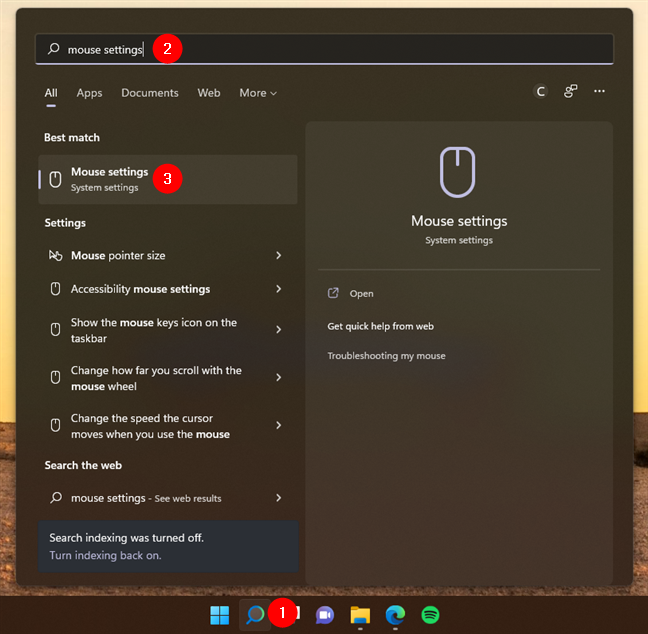
Access the Mouse settings in Windows 11
This opens the Settings app and automatically takes you to the Mouse page. In Windows 11, it’s found in the Bluetooth & devices category of settings, while in Windows 10, it’s located in the Devices category. Next, if you’re using Windows 11, click or tap the “Additional mouse settings” link from the Related settings section at the bottom of the window. If you’re using Windows 10, press the similarly named “Additional mouse options” link also found at the bottom of the window.
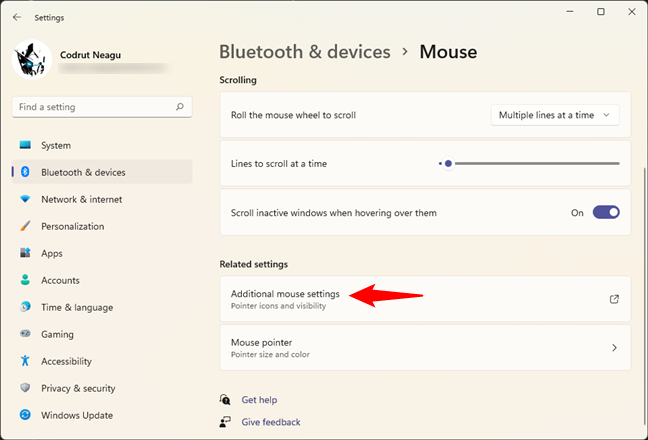
Press on Additional mouse settings or options
An old-looking (Windows 7-style) window called Mouse Properties will open up. In it, select the Pointers tab. Then, you should see some familiar shapes in the Windows Default list of mouse cursors.
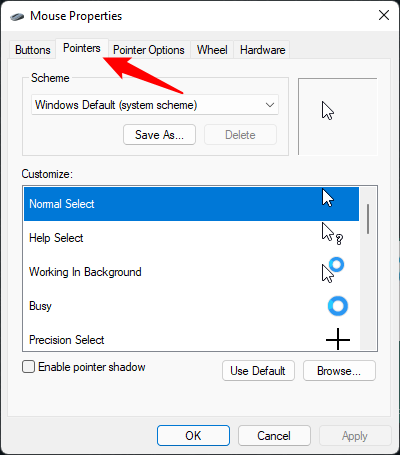
The Mouse Properties window
In the Scheme section, press the arrow to reveal a drop-down menu with all the pre-installed pointer schemes. There are twelve system schemes in total. For a preview of a scheme, select it from the menu, and you can see all its mouse cursors by scrolling in the Customize section.
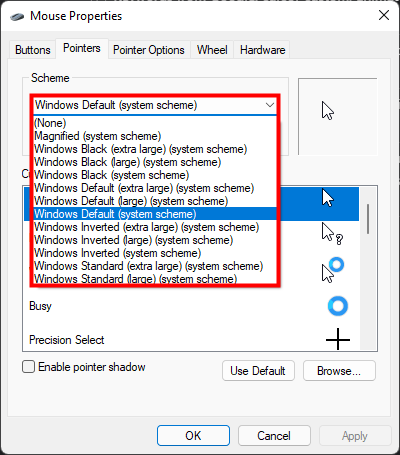
Open the drop-down menu by pressing the arrow
You can also choose to “Enable pointer shadow” by checking the corresponding box under the Customize section.
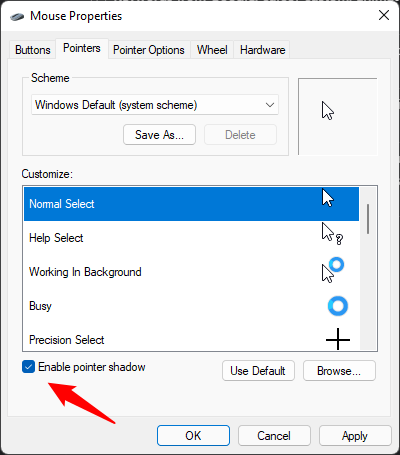
Enable a shadow under your cursor
Once you have found the mouse cursors scheme you like, press on either Apply or OK.
How to customize your cursor in Windows
If you can’t find a scheme to your liking, you can mix and match the existing cursors, including any custom cursors or animated cursors you installed, to create your own scheme. First, go to the Pointers tab of the Mouse Properties window by following the instructions in the previous section of this tutorial. Then, in the Customize list, click or tap the entry you want to replace and press Browse.
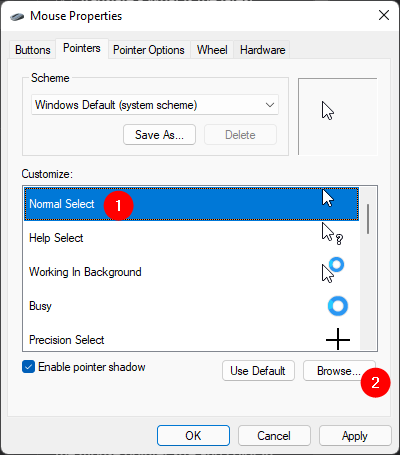
Select a mouse cursor and press Browse to replace it
This opens the “C:\Windows\Cursors” folder, which stores all the available cursors. Scroll through the thumbnails until you find what you’re looking for. Note that, if you’ve also installed some custom cursors or animated mouse cursors downloaded from the internet, you should find them in their own subfolders.
Also, while some cursor thumbnails might look similar, clicking or tapping on them displays them in the Preview section from the lower-left corner, allowing you to take a better look. When you are happy with your choice, click or tap Open.
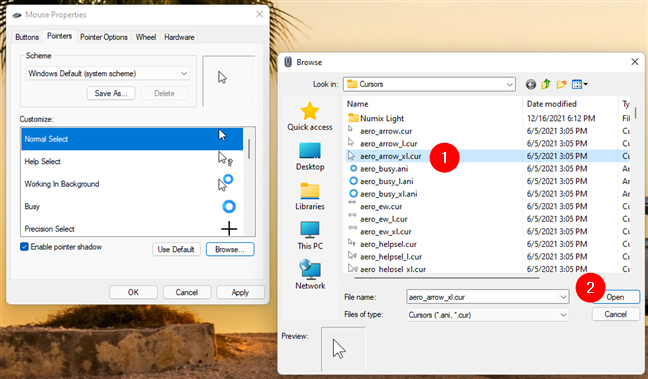
Find the custom cursor you want to use and press Open
You can start from a scheme close to what you want to use and just replace whatever cursors you don’t like. If you change your mind, click or tap the Use Default button, followed by either OK or Apply, and the scheme resets to its original set of cursors, discarding all the custom cursors you’ve selected.
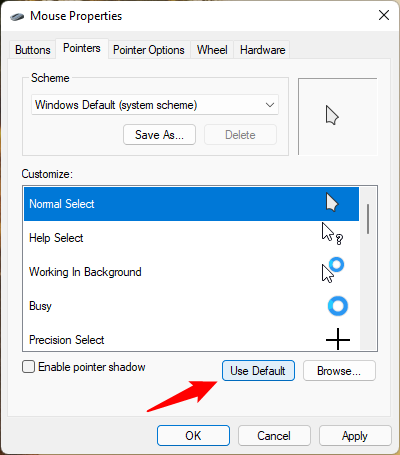
Press Use Default to reset the scheme
Choosing even one custom mouse cursor to replace the default one from a scheme causes Windows to treat your changes as an entirely new scheme. To save this scheme for future use, click or tap the Save As button in the Scheme section, give your scheme a name, and then press OK.
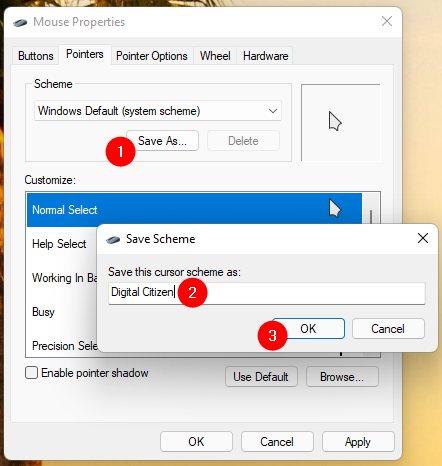
Name your custom cursors scheme
TIP: Any custom cursor scheme you create can be deleted by selecting it and pressing the Delete button from the Scheme section. On the other hand, system schemes can not be deleted.
Bonus: How to change the pointer size and color in Windows
Although using custom cursors is nice, there are situations in which you might prefer just to adjust the pointer size and color instead. It’s what you want if you’re having trouble seeing the mouse cursor. Both Windows 11 and Windows 10 offer a vast array of colors and plenty of increased sizes to choose from. If that sounds interesting, we’ve got you covered in this separate tutorial: How to change the mouse pointer size and color.
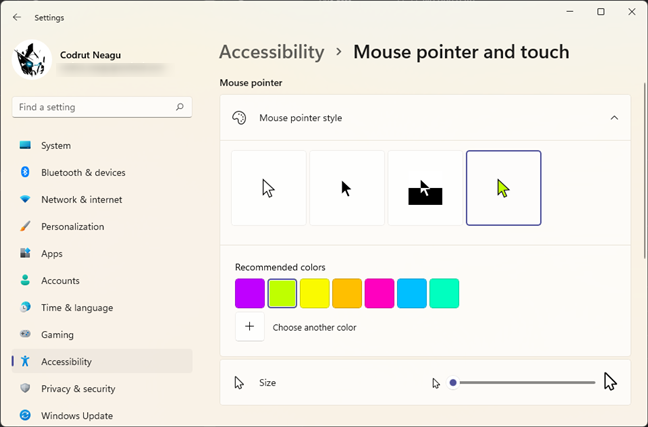
Adjust the mouse pointer style, size, and color
But, because these settings are part of the Accessibility (or Ease of access) settings, designed to help people with various impairments, they aren’t applied to custom cursors downloaded from the internet. If you enable any of these settings, your mouse pointer automatically switches to the default one in Windows, albeit with the style, color, and size you specified.
What does your mouse pointer look like?
The mouse pointer is one of the things you always see when you’re using your Windows computer or device, so you shouldn’t neglect it. Customizing it according to your preferences can make you more productive while offering you an enjoyable user experience. Before closing this tutorial, tell us: Which mouse pointers did you choose to use, and why did you decide to change the default ones?
Содержание статьи:
- Настройка курсора
- Замена стандартной стрелки-курсора на что-то иное
- Как создать свой курсор
- Как сбросить все настройки по изменению курсора
- Вопросы и ответы: 3
Здравствуйте!
Вообще, сам я немного скептически смотрю на замену курсора (кроме отдельных случаев: когда он сливается с фоном или слишком мелкий, например), но вопросов таких получаю массу… 😉
Сегодня решил набросать небольшую заметку с парочкой простых способов сделать это (покажу, как обычную стрелку «превратить» во что-то более оригинальное).
Кстати, для тех кто хочет немного позаниматься «творчеством» — есть вариант создать свой курсор (благо, это доступно большинству, причем, даже если вы совсем не умеете рисовать).
Итак, к делу…
*
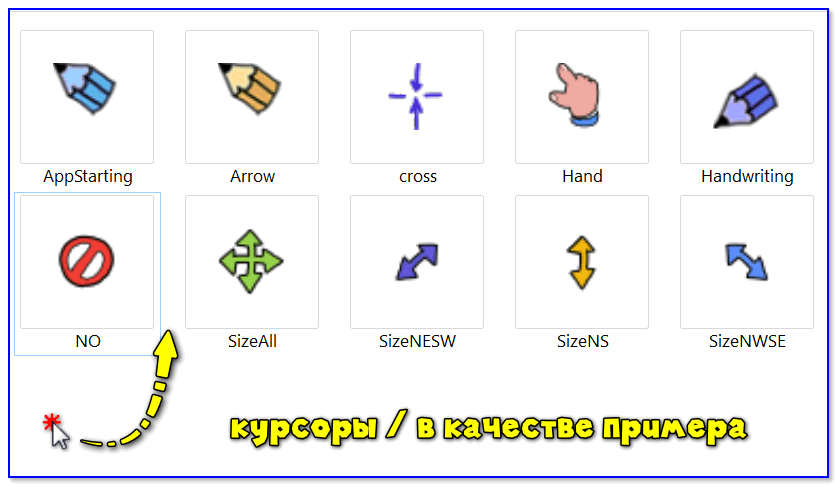
Пример — на что можно поменять стрелку…
*
📌 В помощь!
Как поменять обои на рабочем столе, как их сделать живыми. Что делать, если обои не меняются?
*
Настройка курсора
Замена стандартной стрелки-курсора на что-то иное
Вариант 1 (штатный)
Если у вас установлена современная обновленная версия Windows 10/11 — то в арсенале ее функций есть возможность поменять курсор. Выбор, конечно, не самый большой — но есть!
Как это делается:
- зайти в параметры ОС (сочетание Win+i / либо через меню ПУСК);
- перейти в раздел «Специальные возможности / указатель мыши»;
- задать размер указателя, и выбрать его цвет (кое-какие варианты есть 👌).
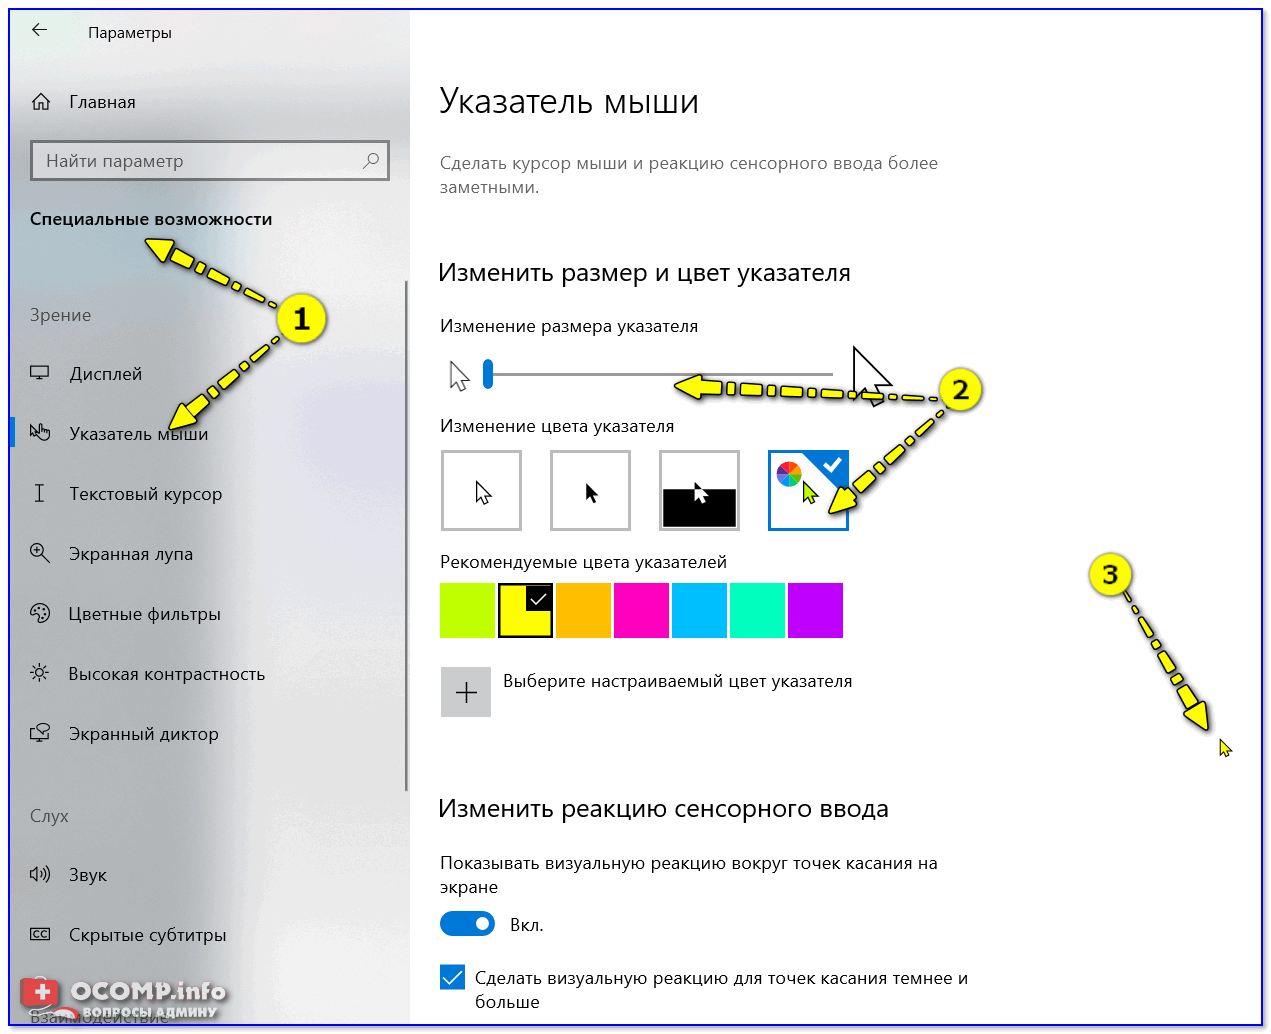
Windows 10 — указатель мышки
*
Вариант 2 (универсальный)
Сейчас в сети можно найти сотни и тысячи самых разных курсоров — что называется на любой вкус. В рамках этой заметке я предложу свой «старый» архив (ссылка ниже 👇. В нем собраны сотни разных курсоров, думаю, что для первого знакомства это должно хватить 😉).
*
👉 Ссылка на большой пакет курсоров: «Скачать Курсоры.rar» (запаковано WinRAR).
Также курсоры можно найти на сайтах:
rw-designer.com / deviantart.com / 7-themes.su
*
Как пользоваться:
- загружаем архив с курсорами;
- копируем его в папку «C:\Windows\Cursors» и извлекаем всё, что в нем есть (архиваторы в помощь);
- нажимаем Win+R и используем команду control mouse;
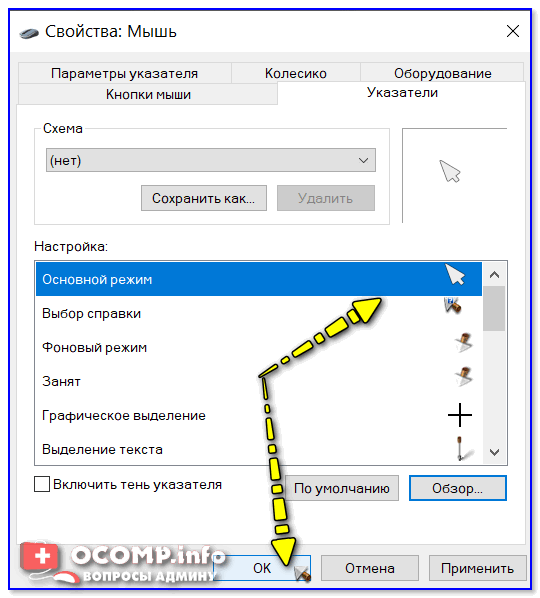
- должны открыться настройки мышки. В разделе «Указатели» выбираем основной режим и нажимаем «Обзор»;

Свойства мышки — выбор указателя
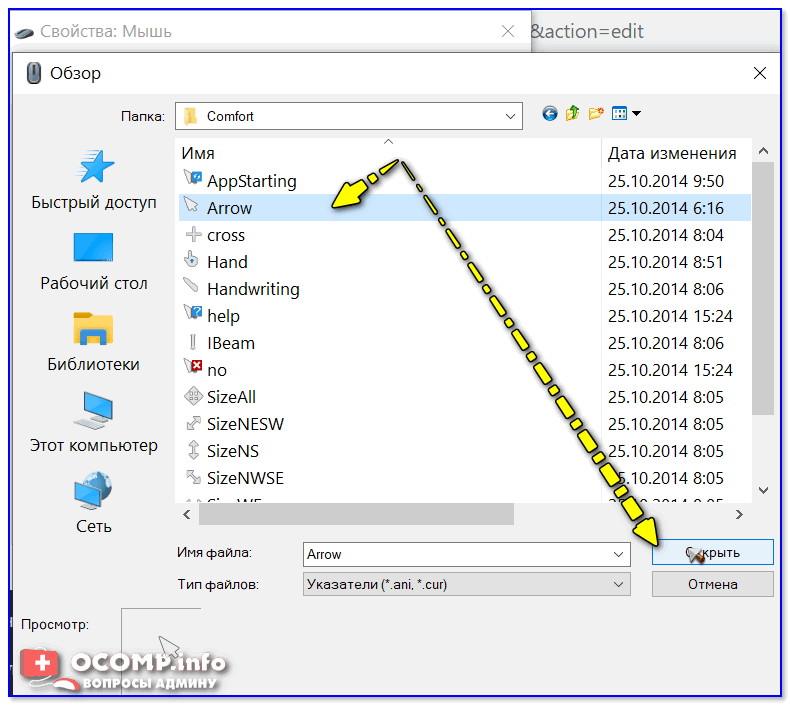
- выбираем один из курсоров, которые мы загрузили в шаге 1;

Открыть!
- Для того, чтобы изменения вступили в силу — осталось только нажать на кнопку «Применить». На этом всё, курсор должен быть изменен!

Выбор указателя для справки
- Для других режимов («Выбор справки», «Фоновый режим» и т.д.) курсор настраивается аналогичным образом.

*
Как создать свой курсор
Для этого лучше и легче всего использовать спец. программу — ArtCursors. По своему внешнему виду — она очень напоминает стандартный Paint.
Единственное отличие: поле, на котором вы будете рисовать курсор (указатель), представляет из себя прямоугольник, разделенный на небольшие квадратики (пиксели). Слева (справа) представлены инструменты, которыми и можно «творить» свой шедевр… 👌 👇
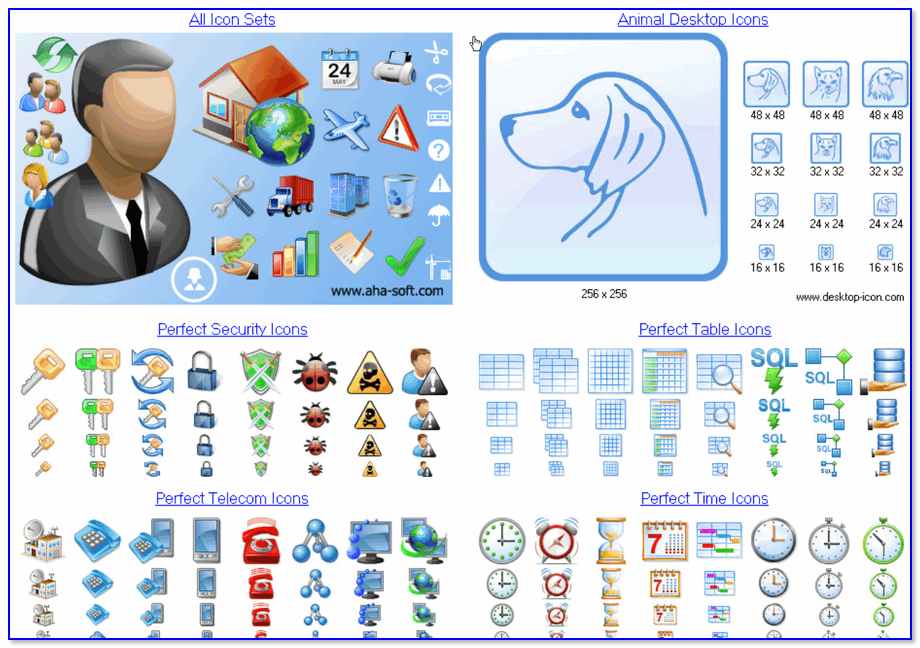
ArtCursors
Сайт: http://www.aha-soft.com/
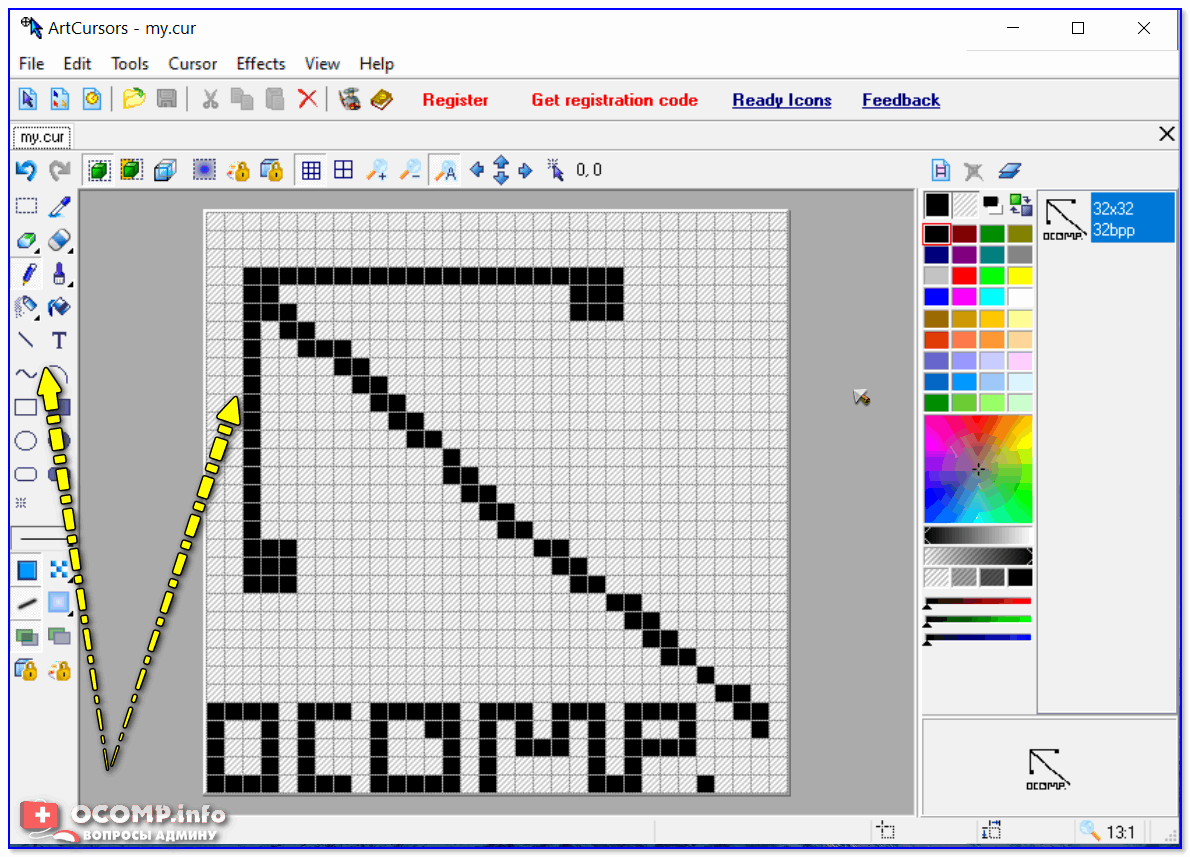
Создаем свой курсор в ArtCursors
ArtCursors позволяет нарисованную картинку сразу же сохранить в формат «.CUR». А ее потом достаточно разместить в папку «C:\Windows\Cursors» и выбрать в настройках курсора (как мы это делали чуть выше…).
И будет «бегать» по экрану свой рисунок (вместо стандартной стрелки).

Что у меня получилось!
Кстати, эта программа позволяет «побаловаться» не только с курсорами, но и другими иконками Windows. Но в рамках этой статьи на этом не останавливаюсь…
Что дает проф. версия программы
*
Как сбросить все настройки по изменению курсора
👉 Способ 1
Необходимо открыть настройки мышки: нажать Win+R и в окне «Выполнить» использовать команду control mouse.
Далее в открывшемся окне перейти во вкладку «Указатели», выбрать «Основной режим» и нажать кнопку «По умолчанию». См. скриншот ниже. 👇

Задать курсор по умолчанию
*
👉 Способ 2
Еще один хороший способ изменить курсор (да и вообще оформление ОС) — установить новую тему (которая включает в себя всё сразу: обои, цвет, звуки, указатель и пр.).
Сделать это можно в параметрах ОС (сочетание Win+i) в разделе «Персонализация / темы».
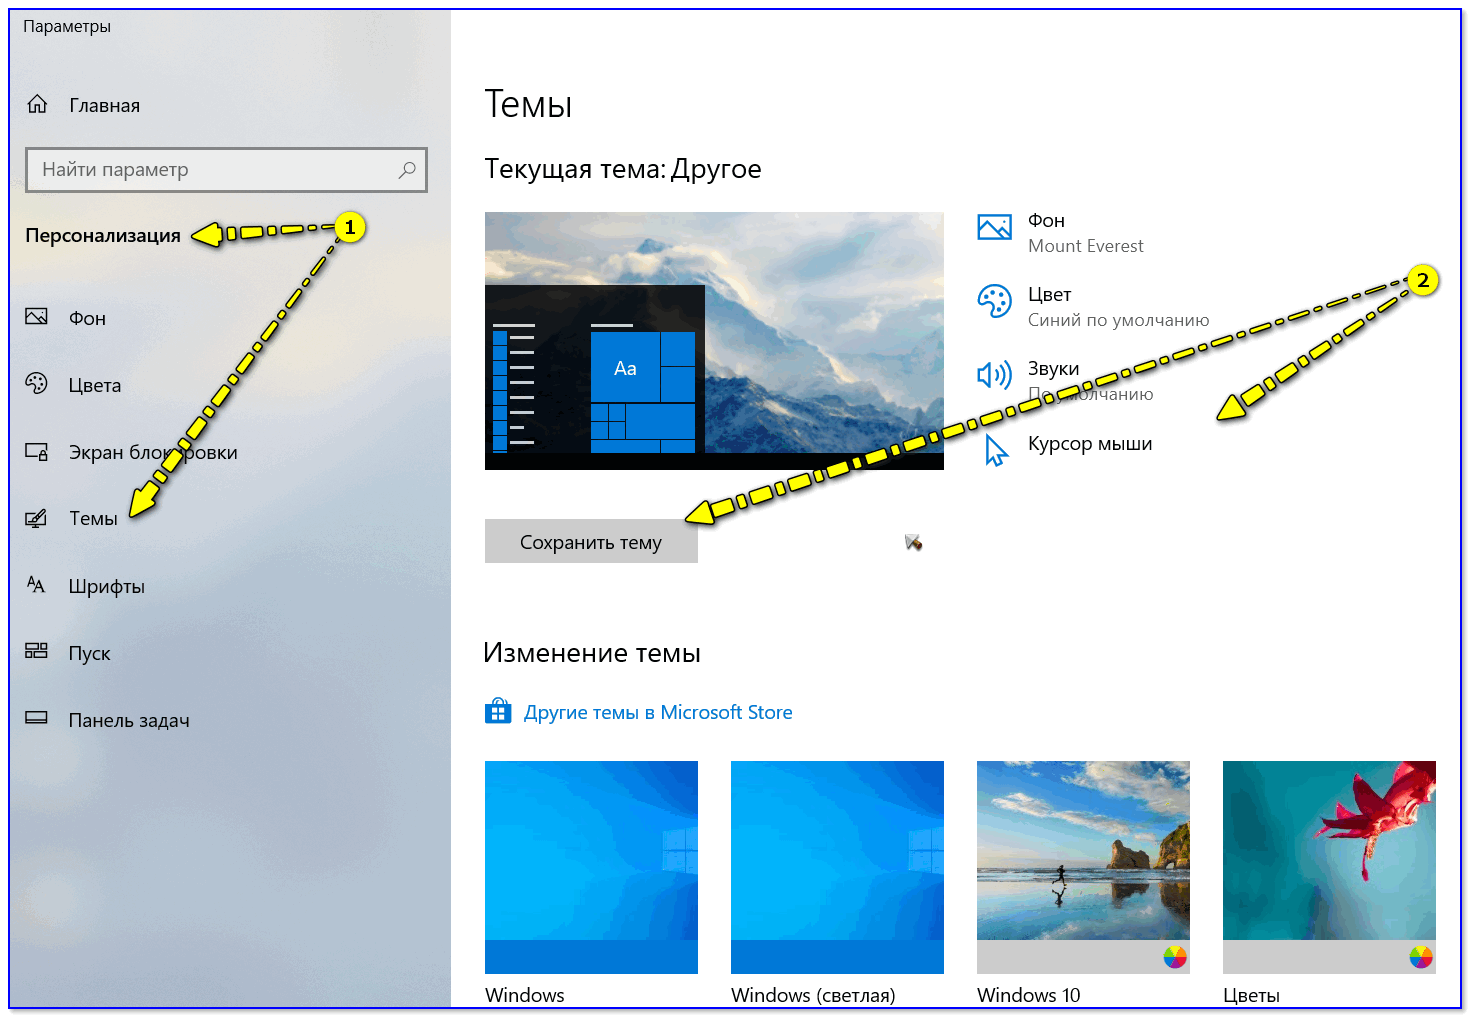
Меняем тему / Windows 10
*
👉 Способ 3
В некоторых случаях (например, когда вы использовали какие-то спец. утилиты) способ 1/2 может не сработать…
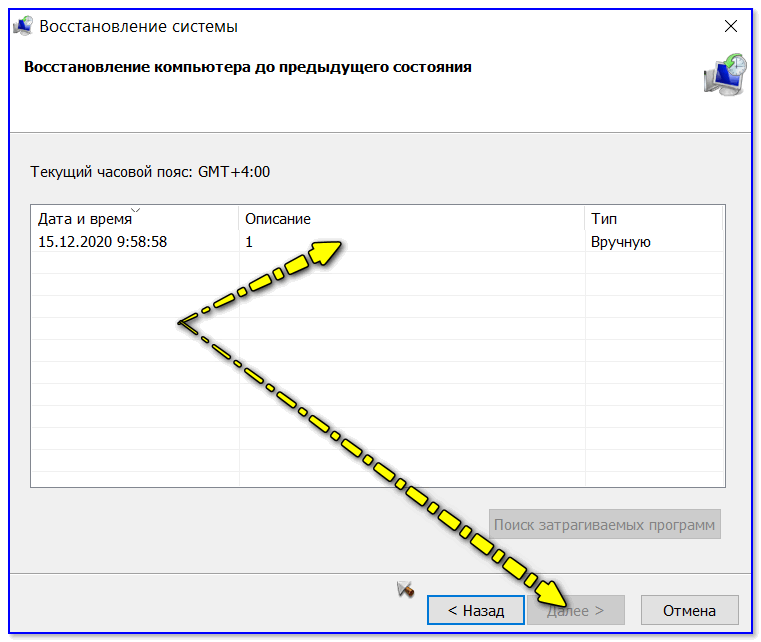
Тогда можно попробовать откатить систему (если, конечно, у вас сохранилась хотя бы одна точка восстановления).
Для просмотра точек восстановления:
- нажмите Win+R (чтобы появилось окно «Выполнить»),
- используйте команду rstrui.
Как видите из примера ниже — в моей ОС есть только одна точка (впрочем, этого достаточно для восстановления системы).
📌 В помощь!
Как работать с точками восстановления в Windows — подробная инструкция
Есть только одна точка…
Если точек для отката ОС нет — то восстановить норм. работу Windows можно через сброс параметров и настроек (в дефолтные). Сейчас Windows 10/11 предлагает это сделать через меню «Обновление и безопасность / Восстановление».
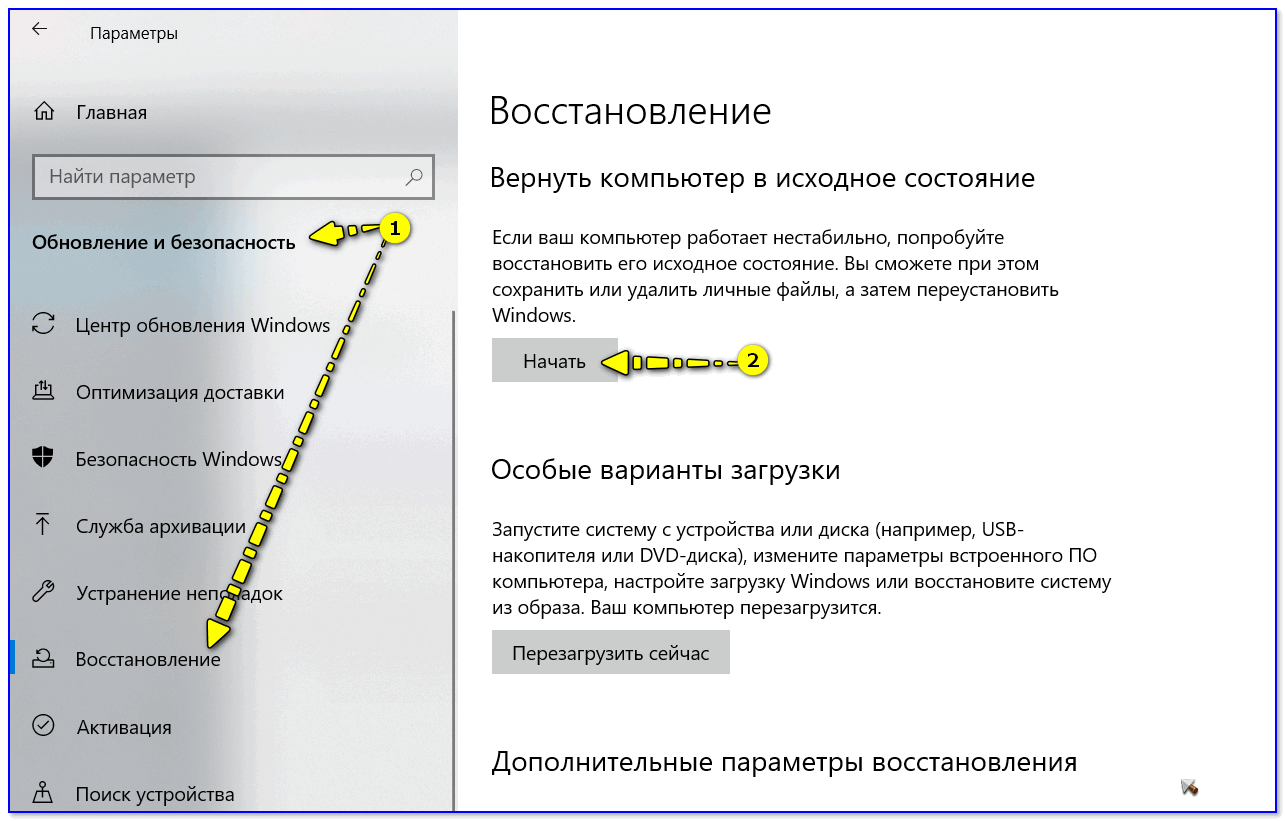
Вернуть ПК в исходное состояние
*
На сим пока всё… Дополнения были бы кстати!
Успехов!
😉
Первая публикация: 16.12.2020
Корректировка: 24.04.2022
| October 13 2010 |
This article serves as an introduction to Windows mouse cursors. You’ll learn what it is, how to switch your active mouse cursors and how to create new ones. Knowing how computers store images is an advantage.
What is a mouse cursor?
A mouse cursor or a mouse pointer is a small image that represents your hand on the computer screen. The typical cursor is an arrow pointing up-left. As you move your mouse, the cursor is moving on the screen. When a mouse button is pressed, the object below the tip of the arrow is activated.
The hot spot
The point (image pixel) on the tip of the arrow is called the «hot spot». This point determines what gets clicked when you press the mouse button.
The cursor does not always look like an arrow — for example it may look like a hand with the index finger stretched. In case of a hand cursor, the hot spot is at the tip of the index finger. For other cursor shapes, the hot spot may be in various positions, but it is usually easy to guess where it is.
Cursors in the cursor library on this site are drawn over a cross-hair to easily see where the hot spot lays.
Cursor roles
Windows does not always use the arrow cursor. It uses different cursors in different situations. There is a hand cursor for internet links, a circle or hourglass cursor when your computer is busy and other. There is a total of 15 different cursor roles.
The displayed cursor indicates what is going on and what happens when you click. There are these situations (cursor roles): normal, help, working, busy, 6x resizing, move, precision, hand drawing, text, link, and alternate selection.
Cursor sets / cursor schemes
A complete cursor set contains cursor for each of the 15 roles and the all of the cursors share the same style. You can download original cursors in the cursor section of the gallery.
Changing active cursors
There are multiple ways how to change cursors. RealWorld Cursor Editor and the Change Cursor utility offer comfortable way to change your cursors. Even without any special software, you can change cursor from the control panel.
A control panel where you can change cursors for individual roles.
Creating cursors
This site offers a freeware cursor editor. Download it, watch a tutorials and start creating your own cursors.
Animated cursors
Instead of using a static image, cursors can be animated. The animation is created by putting multiple images into a single cursor file and displaying them in a repeating sequence.
If you have a modern web browser (Firefox or Opera), you will see this cursor in motion.
About the cursor file formats
Windows uses .cur file format for static cursors and .ani file format for animated cursors.
The .cur file format may include multiple images in different sizes or color depths, but Windows always resizes them to 32×32 pixels. Due to this reason, .cur files usually only contain a single image.
The .ani file format is in short a container for multiple .cur files. In addition to the images, it also stores the speed of the animation and the order in which to display the individual frames.
Windows 7 is capable of using larger cursors, but only if it is running in very high DPI mode — in 144 DPI. In this case, it uses 48×48 pixels images. More info about Win 7 cursors.
Recent comments
Show older posts

Anonymous
on January 8th
0
how do I do this
It is possible to change the canvas size with open animated cursors?
Anonymous
on January 23rd
0
htkffkut
Anonymous
on February 7th
0
😎
Anonymous
on February 19th
0
no
Anonymous
on March 14th
0
Anonymous
on March 25th
0
its no working for me
Anonymous
on April 9th
0
it works
😎
Anonymous
on April 9th
0
daddy
Anonymous
on April 26th
0
FUNCIONA 😎
В какой-то момент мне надоело смотреть на стандартную стрелку курсора и захотелось заменить его на что-нибудь другое. Полазив по сайтам, у меня получилось найти несколько классных и интересных наборов указателей. А еще оказалось, что поставить другой курсор довольно просто.
Как происходит замена курсора
Есть несколько способов изменить указатель. Обычно, если вы скачиваете архив с набором курсоров, там лежит файл install.inf, который после двойного щелчка поменяет курсор и добавит соответствующую схему в свойства мыши. Чтобы вернуться к стандартному указателю или выбрать другой набор, можно нажать «Win+R», ввести «control Main.cpl» и в открывшемся окне выбрать вкладку «Указатели», где и будет выбор схем.
К сожалению, в некоторых наборах нет установочного файла. В таком случае придется менять картинки вручную, что делается через настройки в той же вкладке. Изображения должны быть формата .cur или .ani. Если же вы хотите использовать картинку другого типа, например .png, то сначала нужно конвертировать ее в подходящий формат, с чем хорошо справляются онлайн-конверторы: например, Convertio, Convertertools или Anyconv.
Еще одним вариантом являются программы, которые позволяют менять указатели на уже готовые наборы, а также дают возможность создать и установить собственный дизайн курсора. Подробнее о них вы можете узнать в конце статьи.
15 альтернативных курсоров, которые я выбрала
В Windows указатель имеет несколько состояний, которые зависят от объекта и режима взаимодействия с ним, и каждый из них выглядит по-своему. Например, обычное состояние курсора — это стрелка, при переходе по гиперссылкам он становится рукой, а при редактировании текста выглядит как палочка.
В интернете полно разных пакетов курсоров, а если постараться, можно самостоятельно нарисовать свой набор. Но чтобы не тратить время ни на одно, ни на другое, предлагаю взглянуть на найденные мной тематические наборы, которые можно легко найти в интернете по названию. А если они не понравятся, еще ниже вы сможете узнать о специальных приложениях со своими вариантами курсоров.
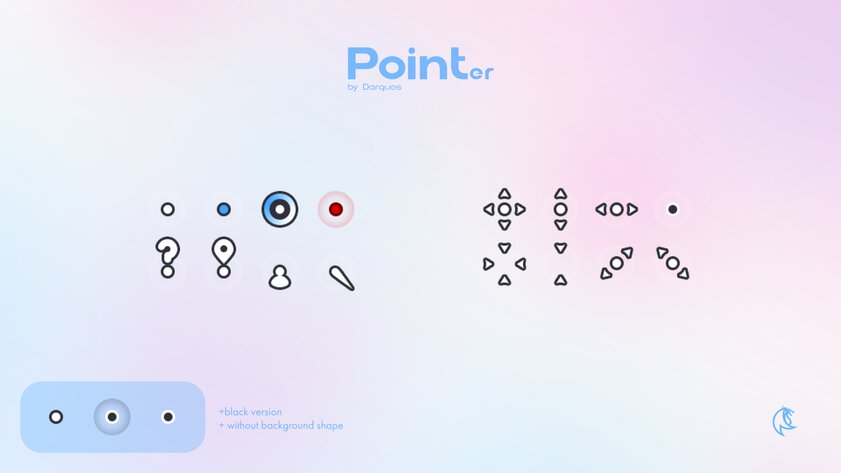
Point.er
MinimalisticLnD
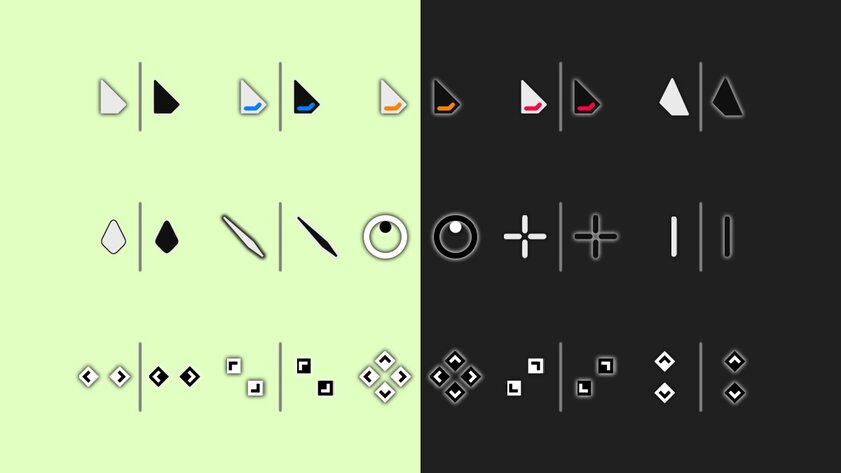
DeCody

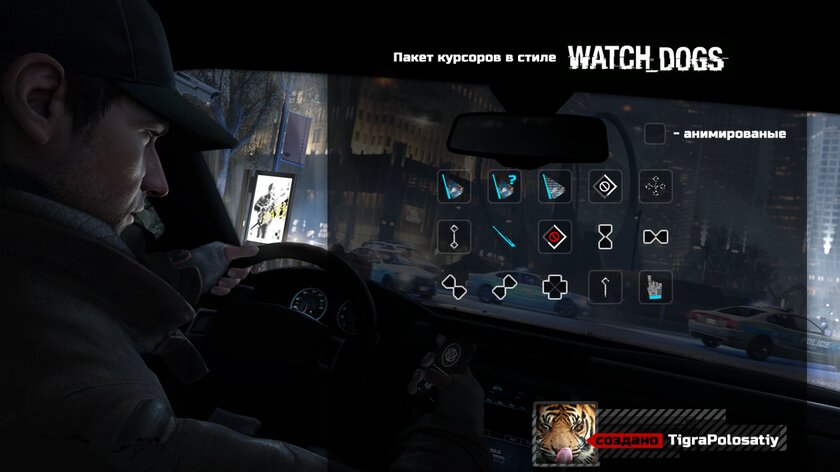
Watch_Dogs
Nord Cursor

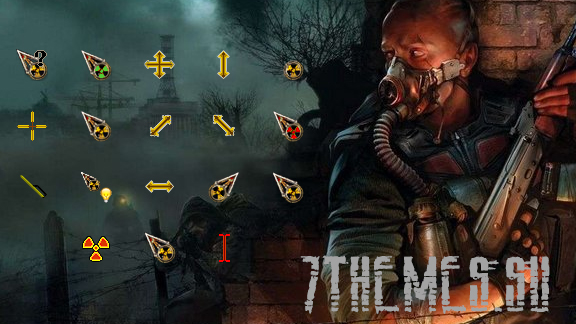
Stalker
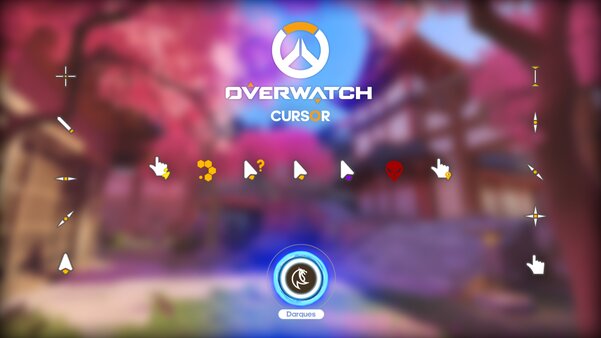
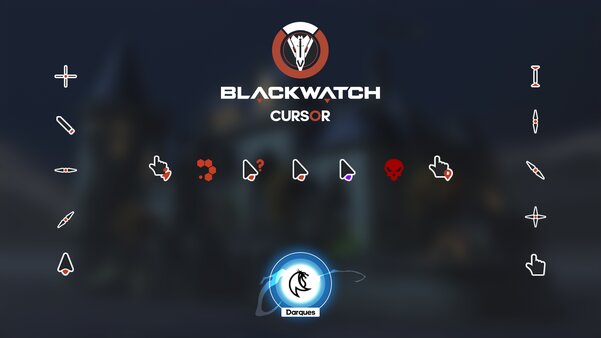
Overwatch Pointer и Blackwatch Pointer
Anoop

BLUE ALIEN

Assassin’s creed-black

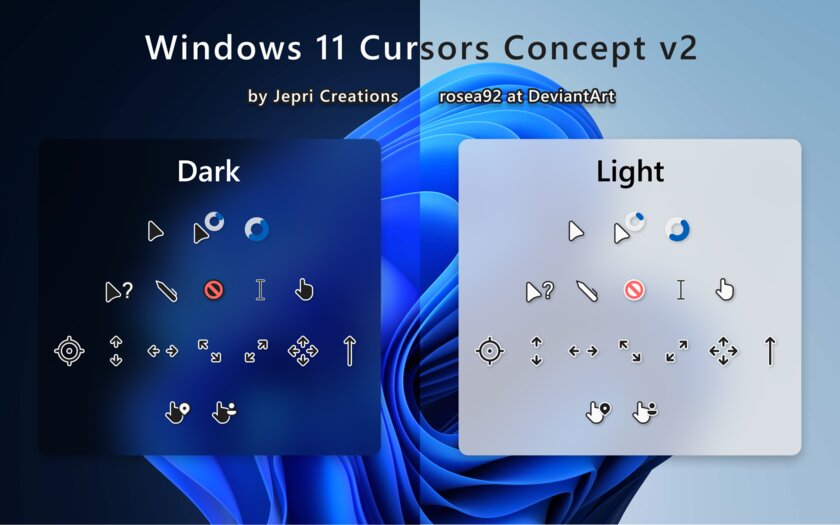
Windows 11 Cursors Concept v2
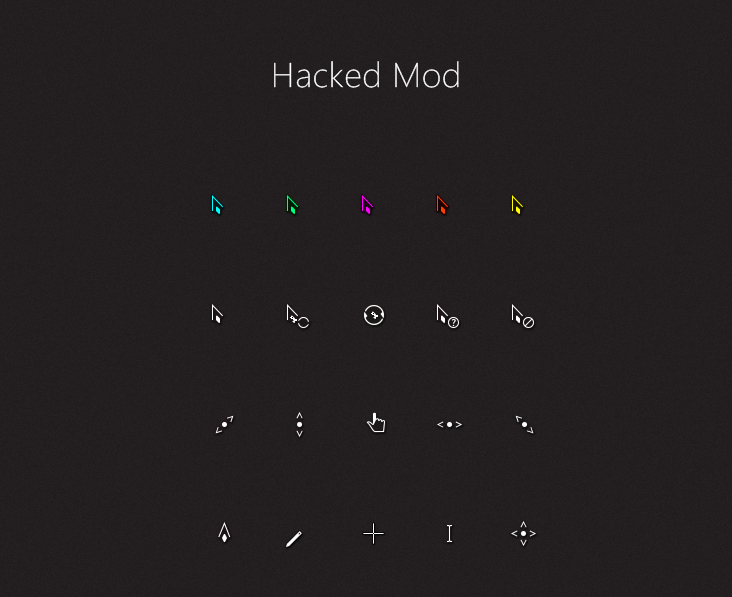
Hacked Mod Cursors
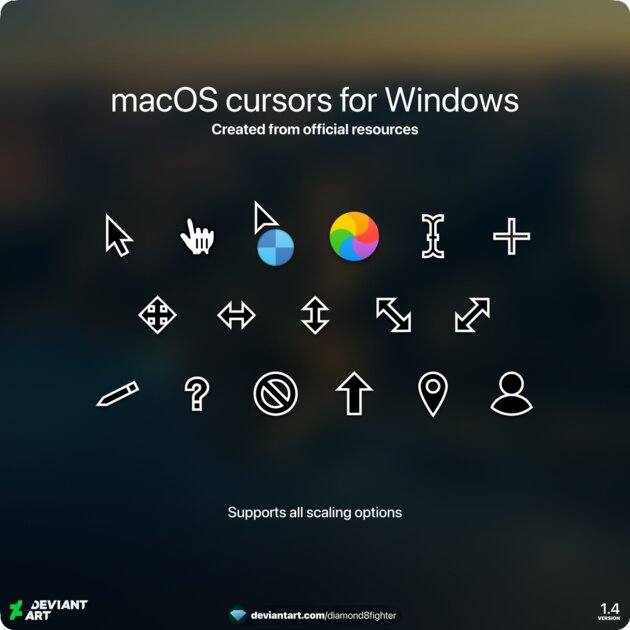
macOS cursors for Windows
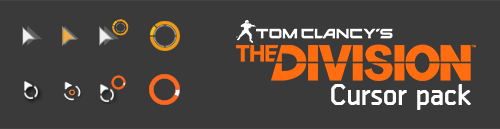
The Division Cursor pack
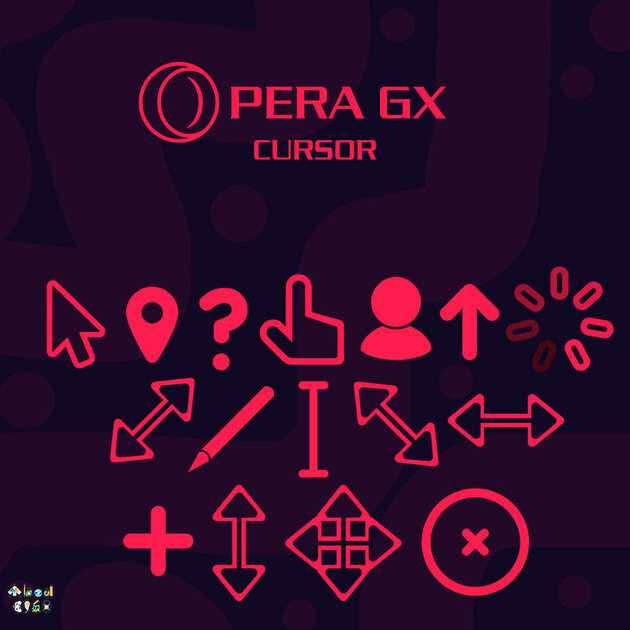
Opera Gx Cursor
Программы для замены курсора
Если вариант смены курсора выше не понравился или просто нет подходящего набора, то следует попробовать специальные приложения. У них есть большой плюс перед поиском и скачиванием архивов с курсорами — это каталоги с большим количеством дизайнов указателей и еще более легкой установкой. Также приложения дают возможность создавать свои наборы курсоров и применять их в несколько кликов.
Custom Cursor (бесплатная)
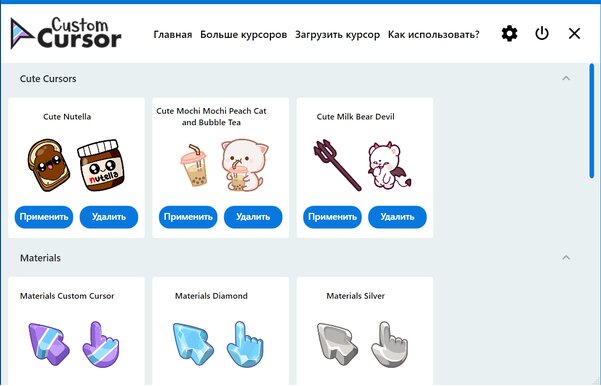
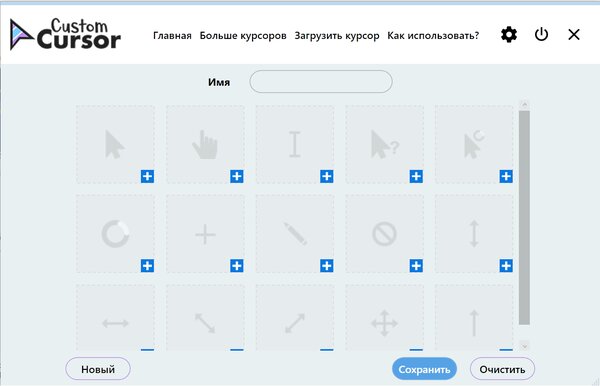
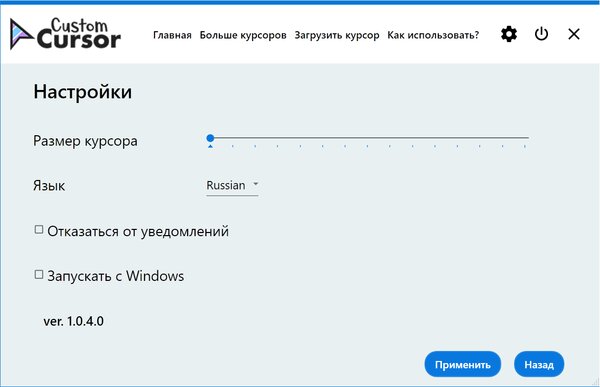
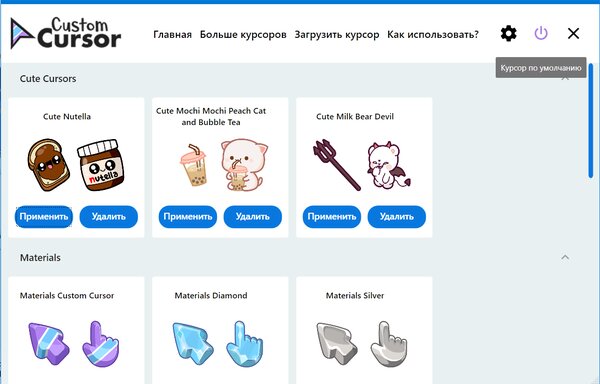

Это и приложение, и расширение для браузера. Во втором случае после установки можно выбрать любой набор из предложенных или найти желаемый на сайте, но работать они будут только в браузере. В приложение также заранее загружено несколько наборов, а остальные добавляются с сайта. Если хочется, есть вкладка «Загрузить курсор», где можно из своих картинок создать собственную схему указателей. Изменение курсора отключается с помощью кнопки «Курсор по умолчанию». В настройках приложения можно поставить размер курсора, изменить язык приложения, отказаться от уведомлений и включить или отключить автозапуск. У Custom Cursor есть только один минус — все наборы изменяют только два режима указателя: основной и выбор.
Чтобы изменить курсор с помощью данного приложения, нужно:
- Найти на сайте понравившийся курсор.
- Нажать кнопку «Добавить».
- В приложении найти выбранный указатель.
- Нажать кнопку «Применить».
CursorFX (4,99 доллара)
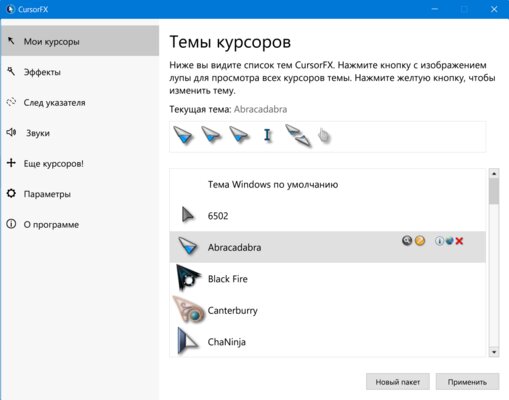

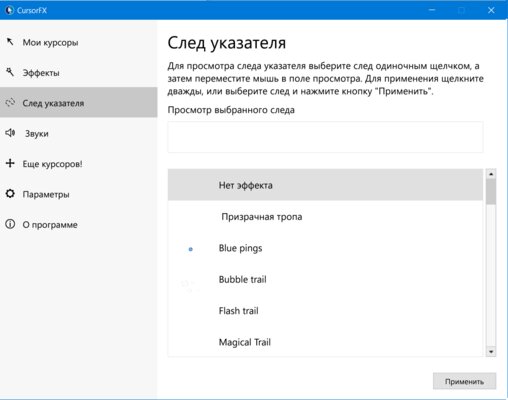
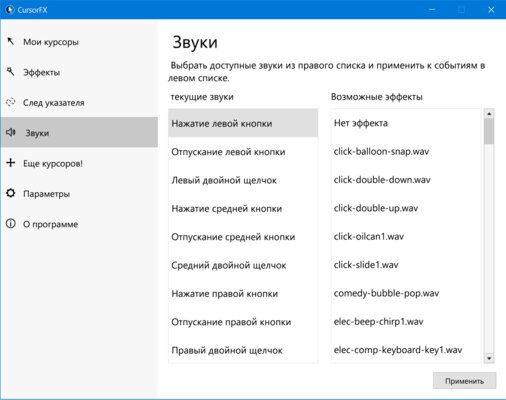
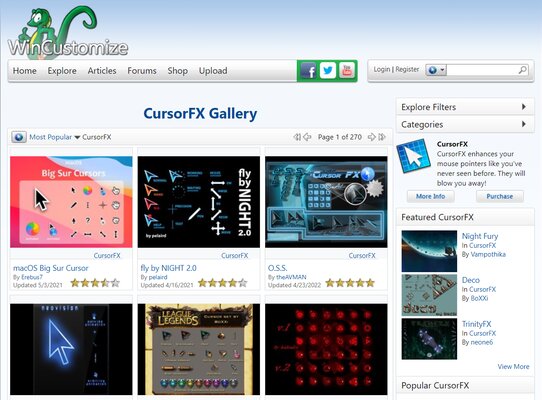
CursorFX является платной программой, но есть 30-дневная пробная версия. Приложение имеет 24 заранее загруженных наборов курсоров. Если они не понравились, во вкладке «Мои курсоры» находится ссылка на сайт, где люди предлагают свои варианты указателей. Большинство из них бесплатны, но остальные платные. Кроме курсора, с помощью приложения можно поменять эффект после нажатия, след и звук кликов, но только если вы изменили указатель с помощью CursorFX. А если существующие варианты не нравятся, приложение позволяет создать свой набор курсоров, эффекты, звуки и след.
Изменить указатель проще простого:
- Во вкладке «Мои курсоры» выбрать тему.
- Нажать кнопку «Применить».
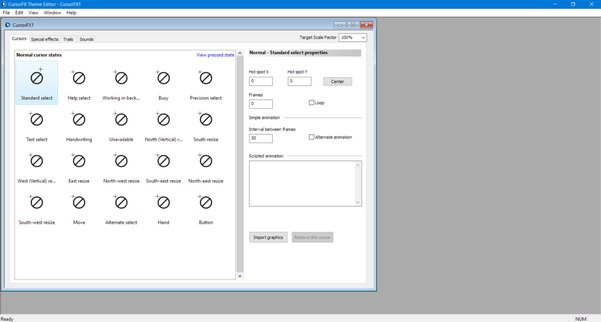
RealWorld Cursor Editor (бесплатная)
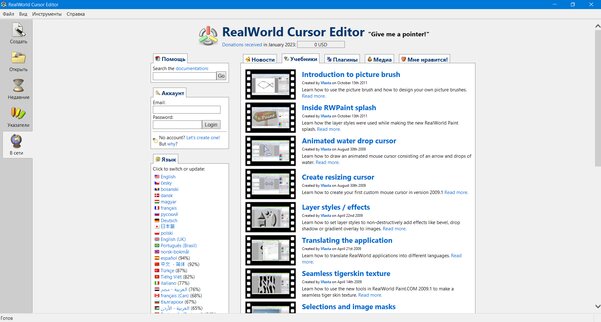

Приложение предназначено для создания собственных курсоров, но некоторые люди загружают свои труды на сайт, откуда их можно скачать, а после вручную применить на каждый вид указателя, поскольку в архивах нет установочных файлов. Для создания своих курсоров есть вкладка «Создать», где можно выбрать создание курсора с нуля или из картинки. А во вкладке «Указатели» находятся все настройки курсоров, так что можно с легкость заменить все или несколько на уже имеющееся изображение. Во вкладке «В сети» можно найти новости, туториалы и ссылки на другие материалы.
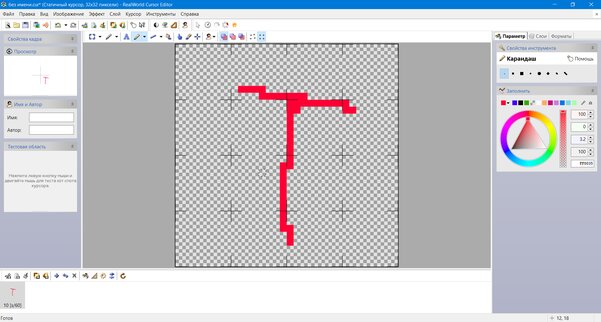
Для применения своего дизайна указателя существует два варианта. Первый довольно простой:
- Нарисовать курсор с нуля или из картинки.
- Во вкладке «Курсор» навести на «Использовать текущий для».
- Применить рисунок на желаемое состояние курсора.
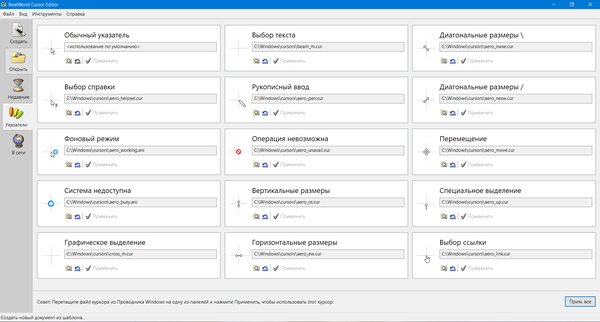
И второй, с помощью которого также можно изменить указатель на набор, скачанный с сайта:
- Скачать курсор или нарисовать свой, сохранив дизайн на компьютере.
- Открыть вкладку «Указатели» и выбрать состояние курсора.
- Нажать «Открыть файл курсора» и найти скачанный или созданный указатель.
- Нажать кнопку «Применить».