
SIDENOTE: if your searching by cifs, you should instead search by smb or samba. Cifs is an older version of SMB. Samba is the linux version of smb that talks with smb (and cifs, the older version of smb)
Introduction
By default when we go to \\ip\ in explorer (ip is the address of our samba server / NAS) windows will use our current windows login to access the NAS. What if you wanted to login as someone else? Well when you click on a share or go \\ip\ windows might popup a credential window asking for username (where you can also enter domain + username combo) and password. However if you already logged in, or windows remembered / cached your credentials – it might not ask again. So its useful to know how to change your session. Windows stores your connection to the samba server as whole in an IPC$ connection. So if we reconnect to the IPC$ with a different user, we will be able to see that users shares. I will use samba server / NAS interchangeably.
SIDENOTE: the admin user in the ReadyNAS can see every share and also every volume (thats the same admin user that you used to login to the GUI). So make sure your admin user has a very secure password. The ReadyNAS admin user for the GUI has the same password as the root user (used for SSH sessions, if you enabled SSH) and also the admin samba user. admin should not be confused with Administrator user (Windows domains and PCs have an “Administrator” user, not an “admin” user).
How to change user
Open up CMD in Windows. Windows+R, type cmd, ENTER key (DO NOT open up cmd as Admin user, because we need to have net use show us the current samba connections for the current user we are connected to in windows)
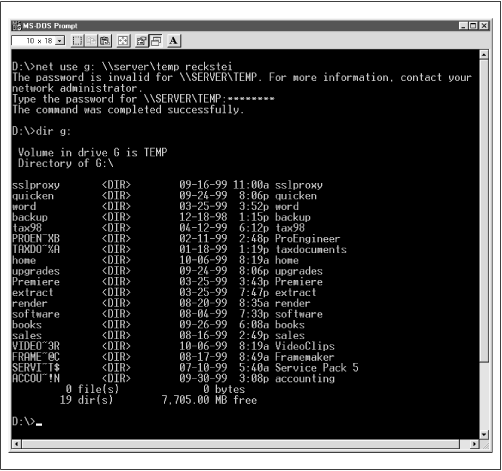
List your current samba connections that are mapped and also regular explorer connections that one connected with \\ip (those are usually listed as IPC$): net use
C:\Users\infotinks> net use
New connections will be remembered.

Status       Local     Remote                    Network

-----------------------------------------------------------
OK                     \\10.10.10.10\IPC$        Microsoft Windows Network
Optionally close any explorer windows that you have to your NAS or Samba server. It doesnt matter though, as a refresh after changing use should be good
Make sure there are no connections to our NAS or Samba Severs IP with an IPC$. Here we see our NAS (10.10.10.10) with an IPC$ connection. So lets delete it (now we are no longer going to be connected)
Now delete that with: net use \\10.10.10.10\IPC$ /delete
Next connect up with a different user:
net use \\10.10.10.10\IPC$ /user:user1
that should prompt for password, if you want to enter it directly use this method:
net use \\10.10.10.10\IPC$ /user:user1 user1spassword
Check out the shares that user1 has access to with: net view <ip>
C:\Users\infotinks>net view 10.10.10.10
Shared resources at 10.10.10.10

mynas

Share name  Type  Used as  Comment

------------------------------------------------------
share1       Disk
share2       Disk
The command completed successfully.
Also you can see these stats with:
net use \\ip\share
or
net use \\ip\IPC$
C:\Users\infotinks>net use \\10.10.10.10\IPC$
Local name
Remote name \\10.10.10.10\IPC$
Resource type IPC
Status OK
# Opens 0
# Connections 1
The command completed successfully.
How to expose your data volumes on a ReadyNAS?
If you use “admin” user on a ReadyNAS you will see a whole lot more than just your shares (including your data volume, which will contain your shares as well). on a ReadyNAS you can use a secret “admin” login to access and see the entire data volume (not just the shares. Make sure to use your admin password
net use \\10.10.10.10\IPC$ /user:admin
or
net use \\10.10.10.10\IPC$ /user:admin adminpassword
Open up explorer to \\10.10.10.10 and you will see all of your shares, and your home share (which contains all of the home folders), and you will see a share for each volume. So I see share1, home, data (data is my volume name). If I go into data (\\10.10.10.10\data) I will again see share1, home, and all of the folders and files that are on the root of the data volume.
The NAS makes shares like this:
share1 – /data/share1
user1 home share – /data/home/user1
data – /data
So if you go into data of course you will see “share1” again and you will see “home”
C:\Users\infotinks>net view \\10.10.10.10\
Shared resources at \\10.10.10.10\

mynas

Share name  Type  Used as  Comment

------------------------------------------
data        Disk           Volume 'data'
home        Disk           Private user folders
share1      Disk
The command completed successfully.
NOTEs:
- On a ReadyNAS the “admin” user & if joined to a domain the “Administrator” & “Domain Admins” users have full privileged view on the ReadyNAS, meaning they can see all of the shares, the home shares, and the data volumes. While guest (anonymous access, login not required / you can put in any username & password and get guest access), and everyone (everyone refers to all of the regular referenced samba users, so that can be your readynas local user database, or your active directory user database) only have access to view the shares they are allowed to see.
- If your logged in as a Domain Admin on your domain joined PC, you should be able to access the admin user view on ReadyNAS thats joined to the domain (not tested)
- If you have a username on your windows PC called admin with the same password as the ReadyNAS admin user then when you enter your NAS ip it should connect as admin adn you will see /data and /home and all of your shares.
- Windows only allows 1 connection by the same user. You have to disconnect all previous connections to the server or shared resource and try again (disconnect with net use \\ip\ /delete, or net use k: \\ip\share /delete)
You might see this error:
## connect to the NAS with admin credentials

C:\Users\infotinks>net use \\10.10.10.10\IPC$ /user:admin myadminpassword
some success message

## checking our connections to IPC

C:\Users\infotinks>net use
New connections will be remembered.

Status       Local     Remote                    Network

------------------------------------------------------------
OK                     \\10.10.10.10\IPC$  Microsoft Windows Network
The command completed successfully.

## Lets try to mount share1 to drive letter k:

C:\Users\kostia>net use k: \\10.10.10.10\share1 /user:user1
System error 1219 has occurred.

Multiple connections to a server or shared resource by the same user, using more than one user name, are not allowed. Disconnect all previous connections to the server or shared resource and try again.
- you can’t map an IPC$ to a drive letter like this. think of IPC$ as the main user credential windows will use when you connect to your nas via \\ip\ or \\ip\share1
- you can disconnect/delete all connections to samba (including all mapped drives) with net use * /delete
Other options:
- Map a drive with a different user with net use (more info: http://www.howtogeek.com/118452/how-to-map-network-drives-from-the-command-prompt-in-windows/). If you use /P:yes it makes it persistent
net use k: \\ip\share1 /user:user1 /P:yes - Map a drive with a different user with GUI (right click and hit Map a Network drive, or google “how to map network drive in windows” – here is how you do it in windows 7, should be similar in all latest windows: https://help.lafayette.edu/samba/win7nondomain and https://oit-nb.rutgers.edu/documentation/remote-drive-mapping-samba/samba-remote-drive-mapping-windows-7)
- Use credential manager and it lets you change that IPC$ via a GUI. Basically you select a resource address which will be 10.10.10.10 or \\10.10.10.10\ and then a username and password. Then when you try to access anything in that address it will use your selected username and password. More on IPC$ https://en.wikipedia.org/wiki/Net_use and http://www.governmentsecurity.org/_/articles/hack-exploit-ipc-share.html and http://smallvoid.com/article/winnt-ipc-share.html
Connecting to a Samba server from a Windows computer can provide a seamless file-sharing experience between different operating systems. Samba is an open-source implementation of the Server Message Block (SMB) protocol, which allows for file and printer sharing across different platforms. By connecting to a Samba server, Windows users can access files and folders shared on Linux or Unix-based systems.
In this blog post, we will explore how to connect to a Samba server from a Windows computer. We will discuss the necessary steps, options, pros, and cons to help you make an informed decision on establishing a connection. Whether you are a beginner or an experienced user, this guide will provide you with the information you need to connect and share files easily.
What’s Needed
Before we dive into connecting to a Samba server, there are a few things you need to ensure you have in place:
- A Windows computer with administrator privileges
- Access to the Samba server’s IP address or hostname
- The appropriate username and password to access the shared resources on the Samba server
- A stable network connection between your Windows computer and the Samba server
Video Tutorial:
What Requires Your Focus?
When connecting to a Samba server from Windows, you need to pay attention to the following aspects:
- Network connectivity: Ensure that your Windows computer has a stable network connection to the Samba server. Any network issues may cause problems with connecting or accessing shared resources.
- Firewall settings: Configure the firewall on both your Windows computer and the Samba server to allow the necessary network traffic. Firewall restrictions may prevent successful communication with the Samba server.
- Authentication: Provide the correct username and password to access the shared resources on the Samba server. Incorrect credentials may lead to authentication failures.
- Permissions: Ensure that the shared resources on the Samba server have the appropriate permissions set. Improper permissions may restrict or deny access to certain files or folders.
Option 1. How to Connect to Samba Server via Windows Explorer
The easiest way to connect to a Samba server from Windows is by using Windows Explorer. Follow these steps to establish a connection:
1. Open Windows Explorer by pressing the Windows key + E on your keyboard.
2. In the address bar at the top of the Windows Explorer window, enter the following:
“`
\\samba-server-ip-address
“`
Replace “samba-server-ip-address” with the actual IP address or hostname of the Samba server.
3. Press Enter or click the arrow next to the address bar. Windows Explorer will attempt to establish a connection to the Samba server.
4. If prompted, enter the username and password for the Samba server. Make sure to provide the correct credentials to access the shared resources.
5. Once connected, you will see a list of shared resources on the Samba server. You can now browse and access files and folders as if they were on your own computer.
Pros:
– Quick and easy method to connect to a Samba server from Windows.
– Familiar Windows Explorer interface for browsing shared resources.
– Allows for drag-and-drop file transfers between the Samba server and your local Windows computer.
Cons:
– Limited configurability and advanced options compared to other methods.
– May encounter issues if there are multiple Samba servers on the network with the same IP address or hostname.
– Requires correct username and password for authentication.
Option 2. How to Connect to Samba Server via Map Network Drive
Another way to connect to a Samba server from Windows is by mapping a network drive. This allows you to assign a drive letter to the shared resources, making them easily accessible. Follow these steps to map a network drive:
1. Open Windows Explorer by pressing the Windows key + E on your keyboard.
2. Click on “This PC” or “Computer” in the left sidebar of the Windows Explorer window.
3. In the toolbar at the top, click on the “Map network drive” button.
4. In the “Drive” dropdown, select an available drive letter for the network drive.
5. In the “Folder” field, enter the following:
“`
\\samba-server-ip-address\shared-folder
“`
Replace “samba-server-ip-address” with the IP address or hostname of the Samba server, and “shared-folder” with the name of the folder you want to access.
6. Check the box next to “Connect using different credentials” if you need to provide a specific username and password to access the shared resources.
7. Click “Finish” to establish the connection. Windows will attempt to connect to the Samba server and map the network drive with the assigned drive letter.
Pros:
– Allows you to assign a drive letter to the shared resources for easy access.
– Enables quick access to the mapped network drive from various applications and file managers.
– Provides an option to connect using different credentials for authentication.
Cons:
– Requires additional steps compared to using Windows Explorer directly.
– May encounter issues if there are multiple Samba servers on the network with the same IP address or hostname.
– Drive mapping may fail if the Samba server or network connectivity is unstable.
Option 3. How to Connect to Samba Server via Command Prompt
If you prefer using the command line, you can connect to a Samba server from Windows using the Command Prompt. Here’s how:
1. Open Command Prompt by pressing the Windows key + R on your keyboard, typing “cmd” (without quotes), and pressing Enter.
2. In the Command Prompt window, type the following command:
“`
net use : \\samba-server-ip-address\shared-folder /user:
“`
Replace “” with the letter you want to assign to the network drive, “samba-server-ip-address” with the IP address or hostname of the Samba server, “” with your username, and “” with your password for accessing the shared resources.
3. Press Enter to execute the command. Windows will attempt to connect to the Samba server and map the network drive with the assigned drive letter.
Pros:
– Provides a command-line interface for connecting to a Samba server.
– Can be easily automated or scripted for repetitive tasks.
– Allows for specifying credentials directly in the command for quick access to shared resources.
Cons:
– Requires familiarity with the command prompt and command syntax.
– Limited visual feedback compared to the graphical user interface methods.
– Command execution may fail if the Samba server or network connectivity is unstable.
Option 4. How to Connect to Samba Server via Credential Manager
Windows Credential Manager provides a way to securely store and manage credentials for different services, including Samba servers. By saving the login credentials, you can establish a connection to a Samba server without manually entering the username and password each time. Follow these steps to connect using Credential Manager:
1. Press the Windows key + R on your keyboard to open the Run dialog box.
2. Type “control /name Microsoft.CredentialManager” (without quotes) and press Enter. The Credential Manager window will open.
3. Click on “Windows Credentials” or “Generic Credentials” depending on your Windows version.
4. In the “Add a Windows credential” or “Add a generic credential” section, enter the “Internet or network address” as the IP address or hostname of the Samba server, the “User name”, and the “Password”.
5. Click “OK” to save the credentials.
6. Open Windows Explorer by pressing the Windows key + E on your keyboard.
7. In the address bar at the top of the Windows Explorer window, enter the following:
“`
\\samba-server-ip-address
“`
Replace “samba-server-ip-address” with the actual IP address or hostname of the Samba server.
8. Press Enter or click the arrow next to the address bar. Windows Explorer will use the saved credentials to connect to the Samba server.
Pros:
– Saves login credentials for easy and automatic access to the Samba server.
– Secure storage of credentials using Windows Credential Manager.
– Eliminates the need to remember and manually enter the username and password for each connection.
Cons:
– Requires setting up and managing credentials in the Credential Manager.
– Credential storage may pose a security risk if your Windows account is compromised.
– Limited configurability and advanced options compared to other methods.
Why Can’t I Connect to the Samba Server?
If you are unable to connect to the Samba server using the methods mentioned above, there could be several reasons. Here are three alternative solutions to consider:
1. Check network connectivity: Ensure that your Windows computer and the Samba server are on the same network and can communicate with each other. Check network settings, IP configurations, and any network-related firewalls or security software that may be blocking the connection.
2. Verify Samba server configuration: Verify that the Samba server is properly configured with shared resources and the appropriate permissions. Check the Samba server logs for any error messages or misconfigurations that could be preventing access.
3. Try alternative Samba client: If you are still unable to connect using the methods mentioned above, you can try using a different Samba client software. There are various third-party applications available that provide additional features and compatibility with Samba servers.
Implications and Recommendations
Here are three implications and recommendations to consider when connecting to a Samba server from Windows:
1. Security: Ensure that the Samba server is adequately secured with strong passwords, user access control, and encryption. Implementing VPNs or other secure connections can add an extra layer of protection when accessing shared resources over the internet.
2. Regular backups: It is important to regularly backup any critical files or folders stored on the Samba server. Local backups on the Windows computer or cloud-based backup solutions can help prevent data loss in case of hardware failures, accidental deletions, or other unforeseen events.
3. Stay up to date: Keep both your Windows computer and the Samba server updated with the latest security patches and software updates. Regularly checking for updates and installing them can help protect against known vulnerabilities and improve compatibility with newer features.
The Bottom Line
Connecting to a Samba server from a Windows computer allows for efficient file sharing between different operating systems. By following the steps outlined in this blog post, you can easily establish a connection and access shared resources on the Samba server. Whether you choose to use Windows Explorer, map a network drive, utilize the command prompt, or save credentials in Credential Manager, there are multiple options available to suit your preferences and requirements.
Remember to ensure network connectivity, configure necessary firewall settings, provide correct authentication credentials, and set appropriate permissions on the shared resources to establish a successful connection. If you encounter any issues, consider alternative solutions and check for any misconfigurations or network-related problems.
5 FAQs about Connecting to Samba Server from Windows
Q1: Can I connect to a Samba server using a hostname instead of an IP address?
A: Yes, you can connect to a Samba server using either the IP address or the hostname. However, make sure that the hostname is resolvable on your network. This can be achieved by either adding an entry in the hosts file on your Windows computer or configuring a DNS server with proper hostname resolution.
Q2: Are there any limitations on the file size or file types when accessing shared resources on a Samba server?
A: Generally, there are no specific limitations on file size or file types when accessing shared resources on a Samba server. However, the limitations may depend on the underlying file system used on the Samba server and any restrictions set by the administrator.
Q3: Can I connect to multiple Samba servers simultaneously from Windows?
A: Yes, you can connect to multiple Samba servers simultaneously from a Windows computer. Each connection will be treated as a separate network drive with a unique drive letter or a separate folder in Windows Explorer.
Q4: Can I access a Samba server over the internet?
A: Yes, you can access a Samba server over the internet by configuring appropriate port forwarding on your router and setting up secure connections like VPNs. However, accessing a Samba server over the internet may pose security risks, and it is recommended to implement security measures like firewall rules, encryption, and strong authentication.
Q5: Can I connect to a password-protected Samba server without providing a username and password each time?
A: Yes, you can save the login credentials in Windows Credential Manager to connect to a password-protected Samba server without manually entering the username and password each time. By saving the credentials, Windows will use them automatically for authentication when establishing a connection to the Samba server.
To connect to a Samba share from Windows 10:
1. Open File Explorer and click on This PC.
2. Click on the Computer tab and then click on Map network drive.
3. In the Folder field, type the path to the Samba share. For example: \\\\192.168.1.100\\share.
4. Click the Connect using different credentials checkbox.
5. Enter the username and password for the Samba share.
6. Click the Finish button.
7. The Samba share will now be accessible from Windows 10.
How do I access a Samba share from Windows?
How do I connect to smb share in Windows 10?
To connect to an SMB share in Windows 10:
1. Open File Explorer and select This PC.
2. In the left pane, select the Network option.
3. In the right pane, select the SMB share you want to connect to.
4. Enter the username and password for the SMB share, if prompted.
5. Once connected, you can access the files and folders on the SMB share.
To connect to a Samba share, you will need to install the Samba client software on your computer. Once the software is installed, you can use the «net use» command to connect to the Samba share.
Does Samba work with Windows?
Yes, Samba works with Windows. Samba is a free and open-source software suite that provides file and print services to Windows clients. Samba is typically used to share files between Linux and Windows systems.
Where can I find SMB in Windows 10?
To access SMB in Windows 10, you’ll need to open the File Explorer and select the «Network» option from the left-hand sidebar. Once you’re in the Network window, you should see any available SMB shares from other devices on your network.
Does SMB work on Windows 10?
Yes, SMB works on Windows 10. To set up SMB, you’ll need to open the File Explorer and click on «Network» in the left sidebar. Then, click on the «Network and Sharing Center» and click on «Change advanced sharing settings.» From there, you can enable SMB and choose the security and sharing options that you want.
Is Samba and SMB the same?
Samba and SMB are not the same. Samba is an open source implementation of the SMB/CIFS networking protocol, which allows for file and print sharing between devices on a network. SMB is the native networking protocol used by Microsoft Windows devices for file and print sharing.
How do I find my SMB IP address?
To find your SMB IP address, you can use the ipconfig command. To do this, open the Command Prompt and type «ipconfig» into the console. This will display all of your network information, including your SMB IP address.
How do I find my Samba IP address?
To find your Samba IP address, you can use the «ifconfig» command. This will show you all of the network interfaces on your system, including your Samba IP address.
How do I access Linux share from Windows?
To access a Linux share from Windows, you will need to install a Samba client on your Windows machine. Once the Samba client is installed, you can mount the Linux share to your Windows machine. To do this, you will need to know the IP address or hostname of the Linux machine, as well as the share name. Once you have this information, you can open the Samba client and enter the IP address or hostname of the Linux machine. Then, you will need to enter the share name. Once you have entered this information, you can click the «Connect» button and the Linux share will be mounted to your Windows machine.
How to configure Samba for file sharing with Windows?
The Samba software suite is a collection of programs that enables Unix-like systems to participate in a Windows Workgroup or Domain. The suite includes the SMB/CIFS server and client, the NetBIOS over TCP/IP (NetBT) server and client, the NetBIOS over IPX/SPX (NBT) server and client, and the Windows Internet Name Service (WINS) server.
The first step is to install the Samba software suite. On most distributions, this can be done using the package manager. For example, on Debian-based systems, the command would be:
$ sudo apt-get install samba
Once the software is installed, the next step is to configure the Samba server. The configuration file is typically located at /etc/samba/smb.conf. The file is divided into sections, with each section representing a different share. A share can be a printer or a directory.
The most important setting in each section is the path = setting. This setting tells Samba where the files for the share are located. For example, if we wanted to share the directory /home/samba/share, we would set the path = to /
Is Samba the same as SMB?
Samba is a free and open-source software suite that provides file and print services to SMB/CIFS clients. SMB (Server Message Block) is a network protocol used for file and printer sharing.
What is the tool to connect to SMB?
The tool to connect to SMB is the Server Message Block protocol. This protocol is used to provide shared access to files, printers, and other resources on a network. To connect to an SMB resource, you will need to install a client that supports the SMB protocol.
Is SMB and Samba the same?
SMB and Samba are not the same. SMB is a protocol for file sharing, while Samba is a software suite that allows for file sharing between Windows and Linux systems.
|
|
|||||||||||||||||||||||||||||||||||||||||||||||||||||||||||
|
|
||||||||||||||||||||||||||||||||||||||||||||||||||||||||||
Пожалуй нет ни одного офиса, в котором не применялись бы общие ресурсы локальной сети, будь то папки или принтеры. Крупные и средние компании используют возможности Active Directory, компании поменьше — используют штатные средства ОС Windows или Samba, но на серверах под управлением ОС Linux. Рассмотрим все случаи.
Как настроить Samba?
- Что такое Samba?
- Как настроить общую папку
- Как настроить общую папку в Linux
- Как настроить общую папку в Windows
- Как подключиться к общей папке
- Как подключиться к общей папке Linux
- Как подключиться к общей папке Windows
- Как создать общий сетевой ресурс в Samba
Что такое Samba?
Samba — серверное приложение, реализующее доступ клиентских терминалов к папкам, принтерам и дискам про протоколу SMB/CIFS.

Настройка общих папок
Linux
Установка и настройка Samba-сервер для Ubuntu выполняется следующими этапами.
Обновляем информацию о репозиториях и устанавливаем обновления для существующих пакетов в системе:
apt-get update && apt-get upgrade
Устанавливаем пакет Samba:
apt-get install -y samba samba-client
Создадим резервную копию файла конфигурации:
cp /etc/samba/smb.conf /etc/samba/smb.conf_sample
Создадим директории для файлов, например в каталоге /media:
mkdir /media/samba
Важно! По умолчанию, директория /media располагается в корне системы /, для нее редко создается свой раздел. По этой причине возможно переполнение корневого раздела. Во избежание этой неприятной ситуации, рекомендуем монтировать отдельный жесткий диск в /media/samba.
Создаем каталог для всех пользователей:
mkdir /media/samba/public
Изменим права доступа к каталогу:
chmod -R 0755 /media/samba/public
Также следует воспользоваться командой chown для смены владельца и/или группы.
Создаем директорию для ограниченного круга лиц:
mkdir /media/samba/private
С помощью системных инструментов создадим группу пользователей:
groupadd smbgrp
Добавляем пользователей Samba:
useradd user1
Созданных пользователей добавляем в группу:
usermod -aG smbgrp user1
Изменим группу, которой принадлежит приватная директория:
chgrp smbgrp /media/samba/private
С помощью инструментов Samba создадим пароль для добавленного пользователя:
smbpasswd -a user1
С помощью текстового редактора, например, nano, редактируем конфигурационный файл samba:
nano /etc/samba/smb.conf
Удаляем все строки из файла. Вставляем следующие:
[global]

workgroup = WORKGROUP

security = user

map to guest = bad user

wins support = no

dns proxy = no

[public]

path = /media/samba/public

guest ok = yes

force user = nobody

browsable = yes

writable = yes

[private]

path = /media/samba/private

valid users = @smbgrp

guest ok = no

browsable = yes

writable = yes
Сохраняем используя сочетание Ctrl + X, затем нажимаем Y и Enter.
Объясним значения строк. конфигурационный файл состоит из трех секций:
global — данная секция отвечает за общие настройки Samba-сервера;
public и private — секции описания настроек директорий общего доступа.
В секции global присутствуют пять параметров:
- workgroup — рабочая группа. Для упрощения работы пользователей WORKGROUP указывается, как группа по умолчанию. Если в вашей сети имя рабочей группы изменено, то следует изменить это значение и для Samba;
- security — уровень безопасности сервера. Значение user означает авторизацию по паре логин/пароль;
- map to guest — параметр определяет способ обработки запросов. Значение bad user означает, что запросы с неправильным паролем будут отклонены, даже если такое имя пользователя существует;
- wins support — включить или выключить поддержку WINS;
- dns proxy — возможность проксирования запросов к DNS.
Настройки директорий выполняются в соответствующих секциях:
path — полный путь до директории на жестком диске;
guest ok — возможность доступа к каталогу без пароля (гостевой);
browsable — показывать ли каталог (“шару”) на сервере среди прочих. Если параметр установлен как “no”, то доступ будет возможен по полному пути, например ip-addresshidden_directory;
force user — пользователь от которого ведется работа с каталогом. Для повышения безопасности сервера, обычно используют nobody. Главное, не использовать пользователя root — это небезопасно.
writable — установка значения как “yes” позволяет пользователю выполнять действия над файлами внутри каталога — переименование, добавление, удаление, перемещение в подкаталог и копирование;
valid users — список пользователей у которых есть доступ к каталогу. Если пользователей несколько, их имена указываются через запятую. Если необходим доступ для пользователей принадлежащих группе, перед именем группы устанавливается символ ”at” @ (“собака”).
Важно! Имя директории общего доступа, отображаемое пользователям, равно имени секции в которой оно описано.
Проверяем настройки с помощью команды:
testparm -s
Перезапускаем сервер:
service smbd restart
service nmbd restart
Настроим межсетевой экран. Для этого в правилах откроем TCP-порты 139 и 445, а также UDP-порты 137 и 138, но только для тех подсетей, которым доверяете. Для указания собственного диапазона адресов, замените значение после ключа “-s”:
iptables -A INPUT -p tcp -m tcp --dport 445 -s 10.0.0.0/24 -j ACCEPT

iptables -A INPUT -p tcp -m tcp --dport 139 -s 10.0.0.0/24 -j ACCEPT
iptables -A INPUT -p udp -m udp --dport 137 -s 10.0.0.0/24 -j ACCEPT
iptables -A INPUT -p udp -m udp --dport 138 -s 10.0.0.0/24 -j ACCEPT
Для сохранения правил и применения их после перезагрузки сервера следует воспользоваться пакетом iptables-persistent. Установим его:
apt-get install iptables-persistent
Входе установки пакета, программа предложит запомнить существующие правила iptables. Подтверждаем это действие.
Для проверки существующих правил используем:
iptables -L
Windows
По аналогии с Linux, настроим общий доступ к папкам public и private, но в ОС Windows.
Для создания общего доступа к каталогу без парольной защиты, необходимо настроить ограничения защиты в панели управления. Для этого открываем:
Панель управления → Сеть → Центр управления сетями и общим доступом → Расширенные настройки общего доступа.
В обновленном окне открываем раздел “Все сети” и ищем секцию “Общий доступ с парольной защитой”. Устанавливаем параметр в положение “Отключить общий доступ с парольной защитой”. Для сохранения значений параметра кликаем по кнопке “Сохранить изменения”.

Теперь откроем доступ к самому каталогу. Кликаем по папке правой кнопкой мыши, в контекстном меню выбираем “Свойства”. Открываем вкладку “Доступ” и кликаем по “Расширенная настройка”.

В открывшемся окне расширенных настроек общего доступа отмечаем галочкой “Открыть общий доступ к этой папке”, в поле “Имя общего ресурса” указываем название, которое будет отображено пользователям. Кликаем по кнопке “Разрешения”.
В открывшемся окне, в группах пользователей выбираем “Все”, а в разрешениях для группы, устанавливаем галку “Полный доступ”. Нажимаем “OK” в этом и остальных окнах.

В окне свойств папки public кликаем по кнопке “Общий доступ”.

В открывшемся окне добавляем пользователя “Все”, а также делегируем права на “Чтение и запись”. Кликаем по кнопке “Поделиться”.

В обновленном окне нажимаем “Готово”.

Настроим папку общего доступа, но для ограниченного круга лиц.
Кликаем правой кнопкой мыши по папке, выбираем “Свойства”.
В открывшемся окне переходим на вкладку “Доступ”. Кликаем по кнопке “Расширенные настройки”.
В новом открывшемся окне, устанавливаем галку “Открыть общий доступ к этой папке”. Затем кликаем по кнопке “Разрешения”.

В открывшемся окне, в поле “Группы или пользователи” выбираем “Все” и нажимаем кнопку “Удалить”.

Таким образом установлен запрет на анонимный доступ к папке.
Окно обновится. Кликаем по кнопке “Добавить”.
В открывшемся окне кликаем по кнопке “Дополнительно”.

Окно изменится в размере. Кликаем по кнопке “Поиск”. Двойным кликом выбираем пользователя, которому необходим доступ к этому каталогу, например, buhgalter.

В открывшемся окне, при желании, можем добавить еще одного пользователя через “Дополнительно” — “Поиск”. Аналогичным образом можно добавить группу пользователей, например, “Администраторы”, при этом следует понимать, что доступ будет предоставлен всем пользователям из этой группы.

Установим права доступа для пользователя “buhgalter”. Если требуется полный доступ к директории, устанавливаем галку в соответствующем месте.

Нажимая кнопки “OK” возвращаемся к окну свойств папки, в котором кликаем по кнопке “Общий доступ”.

В данном окне необходимо найти и добавить пользователя “бухгалтер”.

В окне выбора пользователей и групп кликаем по кнопке “Дополнительно”.

Окно снова изменит свои размеры. Кликаем по кнопке “Поиск”. В найденном ниже списке пользователей и групп выбираем искомого пользователя. Выбираем его двойным кликом.

В оставшемся окне проверяем правильно ли указан пользователи и нажимаем кнопку “OK”.

Устанавливаем требуемый уровень разрешений для пользователя и кликаем по кнопке “Поделиться”.

Кликаем по кнопке “Готово”.

Подключение к общим папкам
Из Linux
Для подключения к общим папкам из среды Linux требуется установка отдельного программного обеспечения — smbclient. Установим:
sudo apt-get install smbclient
Для подключения к серверу используется следующий формат комангды:
smbclient -U <Имя_пользователя> <IP-адрес><Имя_каталога_на_сервере>
Пример:
smbclient -U buhgalter 10.0.0.1public
Для того, Чтобы не вводить эту команду каждый раз, можно настроить монтирование общей директории как сетевого диска. Для этого установим пакет cifs-utils:
sudo apt-get install cifs-utils
Монтирование выполняется по следующему шаблону:
mount -t cifs -o username=<Имя_пользователя>,password= //<IP-адрес>/<Общий каталог> <Точка монтирования>
Пример:
mount -t cifs -o username=Everyone,password= //10.0.0.1/public /media
Важно! Если требуется подключение к общим папкам расположенным на Windows-сервере, то в для не защищенных паролем директорий, в качестве имени пользователя, следует использовать “Everyone”. Для подключения к Linux-серверу рекомендуем использовать в качестве имени пользователя “nobody”. В случае доступа к защищенным директориям следует использовать те учетные данные, которые вы указали.
Из Windows
Подключение к удаленным папкам из среды Windows выполняется немного иначе. Для этого в проводнике или окне запуска программ (Windows + R), следует использовать следующий шаблон:
<IP-адрес><имя_папки>
Указав просто IP-адрес сервера вы получите список общих папок.

При подключении к Windows-сервер, система безопасности может потребовать ввод учетных данных. Для подключения к общей открытой папке используем Everyone, а поле пароля оставляем пустым.

При подключении к Linux-серверу из ОС Windows, следует использовать указанный ранее шаблон:
<IP-адрес><имя_папки>
или просто адрес сервера:
<IP-адрес>
Как создать общий сетевой ресурс в Samba
Создайте директорию, которую в хотите сделать общей:
mkdir /home/<user_name>/<folder_name></folder_name></user_name>
Создайте бэкап, если что-то пойдет не так:
sudo cp /etc/samba/smb.conf ~
Отредактируйте файл «/etc/samba/smb.conf»:
sudo nano /etc/samba/smb.conf
Добавьте следующее содержимое в файл:
[<folder_name>]

path = /home/<user_name>/<folder_name>

valid users = <user_name>

read only = no</user_name></folder_name></user_name></folder_name>
Заполните файл своими данными, сохраните его и затем закройте
Перезапустим Samba:
sudo service smbd restart
Использую данную команду проверьте вашу директорию smb.conf на ошибки:
testparm
Чтобы получить доступ к вашему общему сетевому ресурсу:
sudo apt-get install smbclient

# Просмотр всех общих ресурсов:

smbclient -L //<host_ip_or_name>/<folder_name> -U <user>

# Подключение:

smbclient //<host_ip_or_name>/<folder_name> -U <user></user></folder_name></host_ip_or_name></user></folder_name></host_ip_or_name>
Note 1: Чтобы подключиться к вашему общему сетевому ресурсу используйте имя вашего пользователя () и пароль, который находится «smb:////»
Учтите, что «» значение передается в «[]»,
другими словами, имя общего ресурса, которое вы ввели в «/etc/samba/smb.conf».
Note 2: Группа пользователей samba по умолчанию это — «WORKGROUP».