
- To disable, enable, and restart a network adapter on Windows 11, go to Settings > Network & internet > Advanced network settings.
- You can also disable, enable, or restart a network adapter from the Command Prompt, PowerShell, Device Manager, and the Control Panel on Windows 10 and 11.
All modern computers come with network adapters today so you can connect to the internet and communicate with other devices. However, even the most sophisticated network adapters, whether wired (ethernet) or wireless (wi-fi), can run into issues and not perform as they are supposed to. At this point, a simple restart of the network adapter usually fixes the issues.
By restarting the network adapter, you avoid rebooting the complete computer, and the basic connectivity issues are also resolved.
You may want to restart your network adapter if your computer hasn’t had downtime in quite some time and the internet speed isn’t optimized when you are having trouble connecting to the wireless SSID, or if you are experiencing any sort of issues with network connectivity. Restarting the network adapter should be the first of many steps for troubleshooting.
On Windows 11, restarting the ethernet, wi-fi, or virtual network adapter involves turning it off and then on again. Therefore, the methods discussed in this post to restart any network adapter first let you disable the adapter, and then re-enable it. In case you want to simply disable or enable a network adapter on your Windows PC, you can use the same methods discussed below.
Note: Restarting and resetting the network adapter are two different things. When you reset the network settings, all configurations are lost and need to be redone.
Table of Contents
Restart the network adapter from Settings in Windows 11
Microsoft has introduced the ability to disable and enable any network adapter on your computer directly from the Settings app. You no longer have to open the Control Panel to do it.
Unfortunately, this option is not available in Windows 10.
Use the following steps to restart the ethernet or the Wi-Fi network adapter from the Windows 11 Settings app:
-
Press the Windows Key + i to open the Settings app.
-
Switch to the “Network & internet” tab from the left.
-
Scroll down and click “Advanced network settings.”
 1")
Open advanced network settings -
Click Disable in front of the network adapter that you want to disable or restart.
Disable the network adapter from Settings -
In case you want to restart the adapter, click Enable in front of it.
Enable the network adapter from Settings
 1")
 2")
 3")
If you re-enable the network adapter, you have successfully restarted it. If you were encountering issues with the adapter, check to see if they have been resolved.
Restart the network adapter from Control Panel
Traditionally, you can also restart the network adapter from the Control Panel. This method (and the methods below) also works for Windows 10.
-
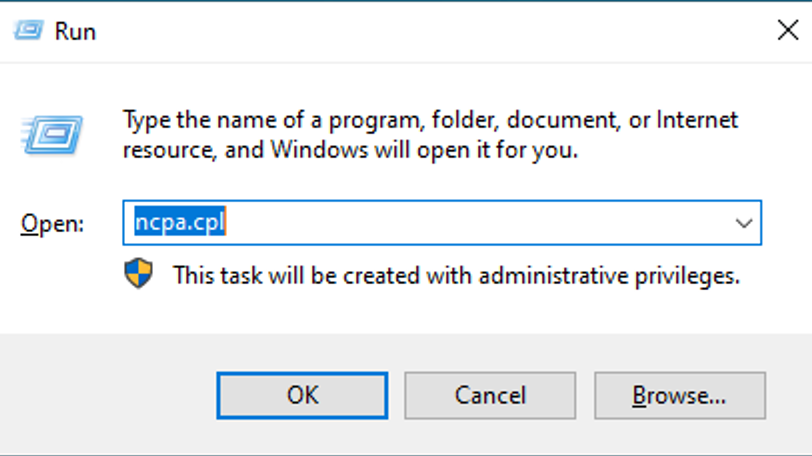
Press the Windows Key + R to open the Run Command box.
-
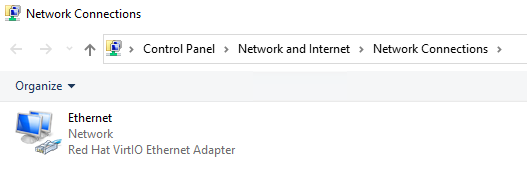
Type in “ncpa.cpl” and press Enter to open the Network Connections applet.
-
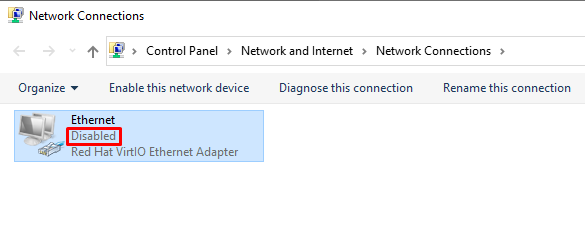
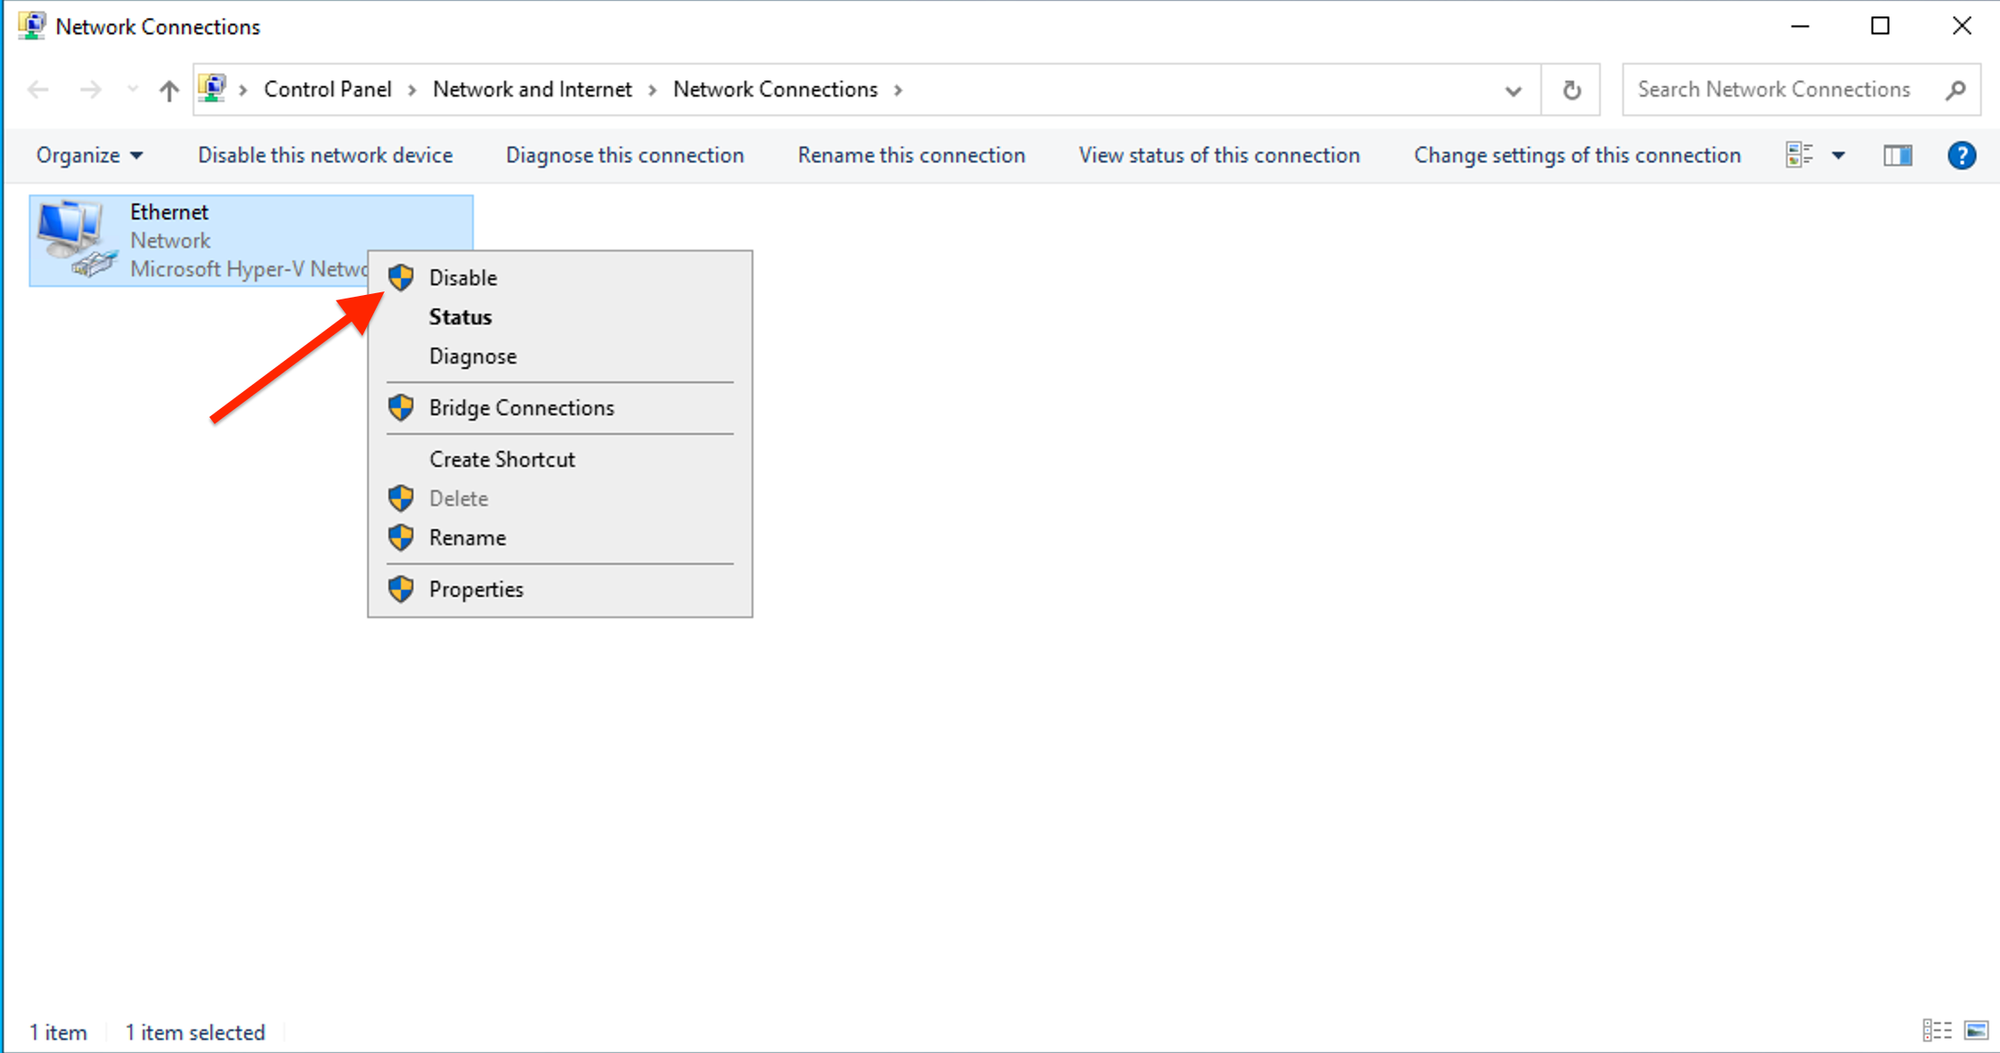
Right-click on the adapter that you want to disable/restart and click Disable.
 4")
Disable network adapter from the Control Panel -
To re-enable the adapter, right-click the adapter again and click Enable.
Re-enable the network adapter from the Control Panel
 4")
 5")
Restart the network adapter from Device Manager
To enable, disable, or restart any network adapter of your computer from the Device Manager, use these steps:
-
Press the Windows Key + R to open the Run Command box.
-
Type in “devmgmt.msc” and press Enter to open the Device Manager.
-
Click on “Network adapters” to expand it.
 6")
Expand Network Adapters in the Device Manager -
Right-click on the adapter that you want to disable/restart and click “Disable device.”
Disable network adapter from the Device Manager -
If asked for a confirmation, click Yes.
Confirm action -
To re-enable the adapter, right-click the adapter again and click “Enable device.”
Enable the network adapter from the Device Manager
 6")
 7")
 8")
 9")
After performing the steps above, the selected network adapter will be restarted and should perform optimally now.
Restart the network adapter from PowerShell
If you prefer using the Windows command line instead, then you can use the steps below to disable, enable, or restart the ethernet or the wireless network adapter using Windows PowerShell:
-
Open an elevated PowerShell instance.
-
Run the following command to list all the network adapters:
Get-NetAdapter | format-table 10")
List all network adapter details in PowerShell -
Note down the name of the network adapter that you want to restart/disable.
-
Now use this command while entering your adapter’s name in place of [NetworkAdapterName] to disable it:
Disable-NetAdapter -Name “[NetworkAdapterName]” -Confirm:$false
Disable network adapter from PowerShell -
To re-enable the adapter, use this command:
Enable-NetAdapter -Name “[NetworkAdapterName]” -Confirm:$false
Enable/restart network adapter from PowerShell
 10")
 11")
 12")
Restart the network adapter from Command Prompt
You can also use the Command Prompt to restart any connected network adapter. Here is how:
-
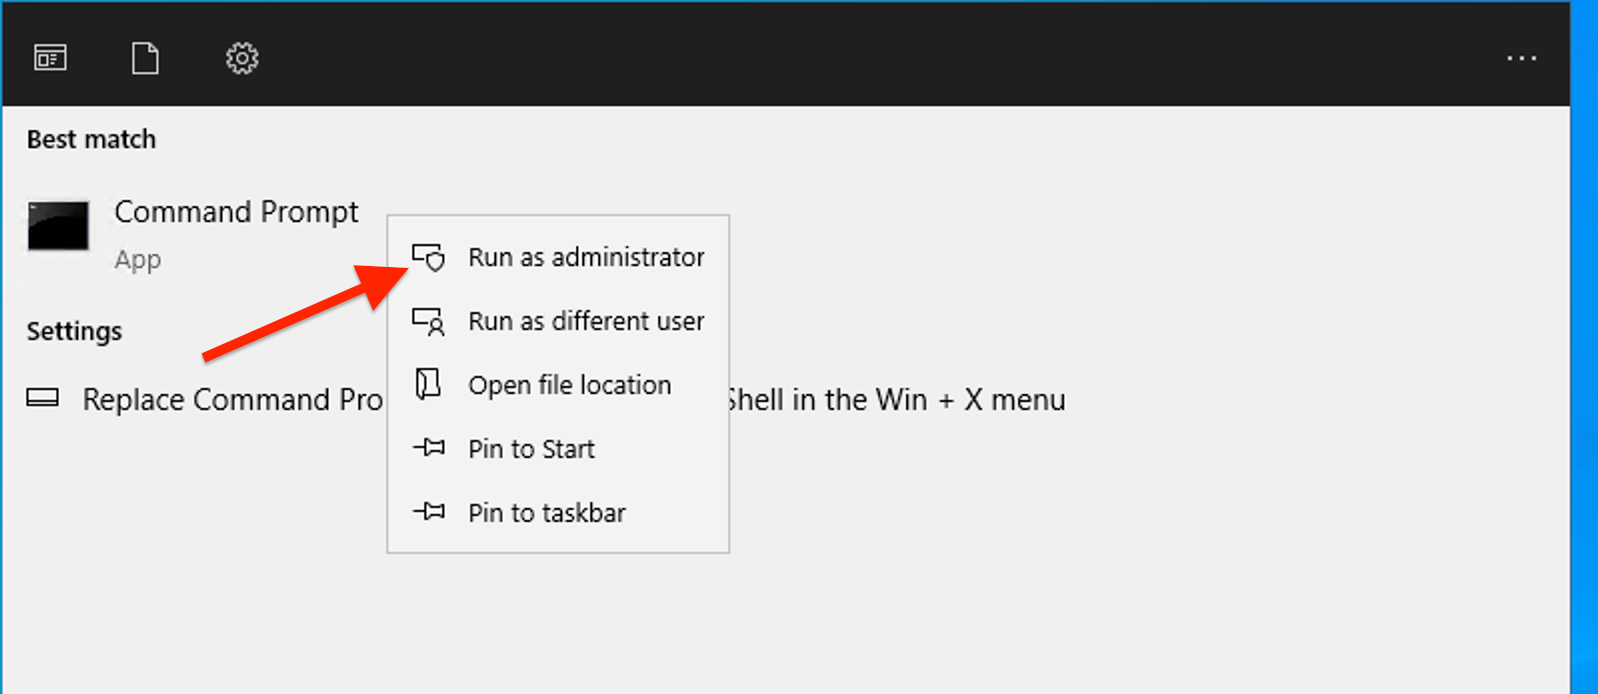
Run the Command Prompt with administrative privileges.
-
List all the network adapter details with this command:
netsh interface show interface
List all network adapter details in Command Prompt -
Note down the name of the network adapter that you want to restart/disable.
-
Now use this command while entering your adapter’s name in place of [NetworkAdapterName] to disable it:
netsh interface set interface “[NetworkAdapterName]” disable
Disable network adapter from Command Prompt -
To re-enable the adapter, use this command:
netsh interface set interface “[NetworkAdapterName]” enable
Enable/restart network adapter from Command Prompt
 13")
 14")
 15")
Ending words
Restarting the network adapters on Windows was already an easy task. However, Windows 11 has made it even more convenient.
Although the Settings app was supposed to replace the Control Panel, Microsoft still hasn’t entirely accomplished the task. They are gradually shifting the controls from the Control Panel over to the Settings app, and the addition of the ability to disable and enable the network adapters from the Settings app is part of that ongoing agenda.
Once you make changes in the server network configuration file, then require to restart the server networking service in order to reflect the changes.
This guide will describe the steps to restart the network interface or network adapter in the Linux and Windows servers.
Restarting Network interface/adapter in Linux OS
Ubuntu / Debian
-
Use the following command to restart the server networking service.
# sudo /etc/init.d/networking restart
or
# sudo /etc/init.d/networking stop
# sudo /etc/init.d/networking start
else
# sudo systemctl restart networking
-
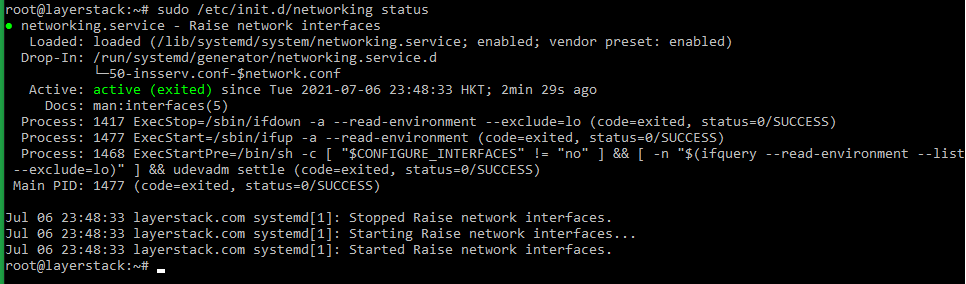
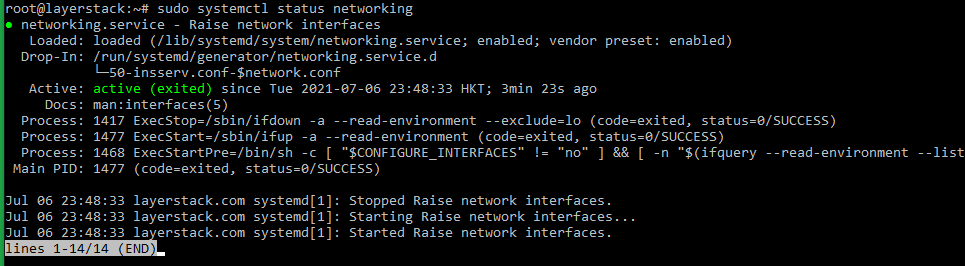
Once this is done, use the following command to check the server network status.
# sudo /etc/init.d/networking status
or
# sudo systemctl status networking


Ubuntu 17.10 and higher versions use NetPlan as the default network management tool and its configuration files are written in YAML syntax with a .yaml file extension.
Run the below command to update networking and then any changes that have been made to the network will take effect:
# netplan apply

AlmaLinux
-
Use the following command to restart the server networking service.
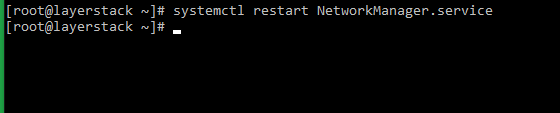
# nmcli networking off
# nmcli networking on
or
# systemctl restart NetworkManager
-
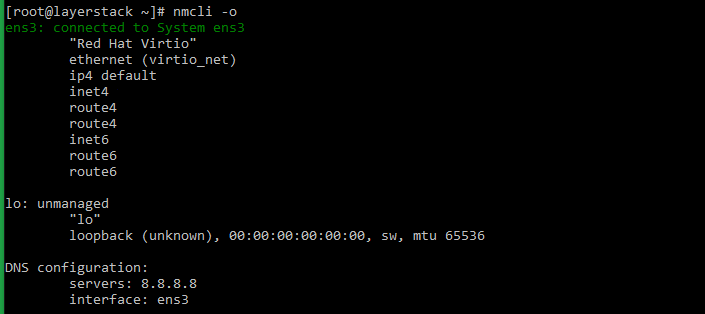
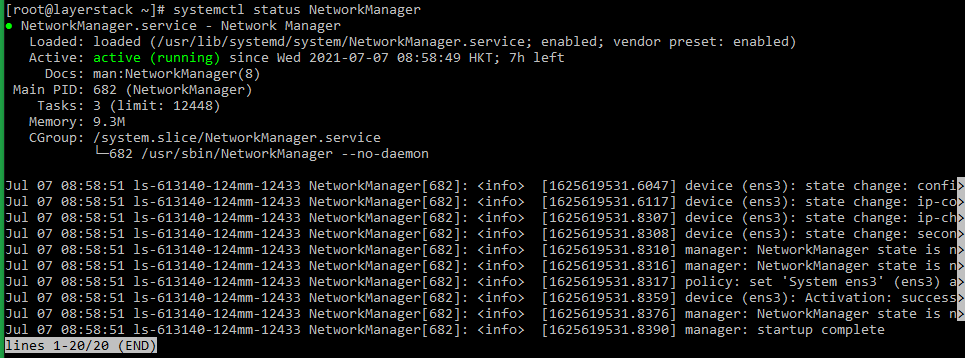
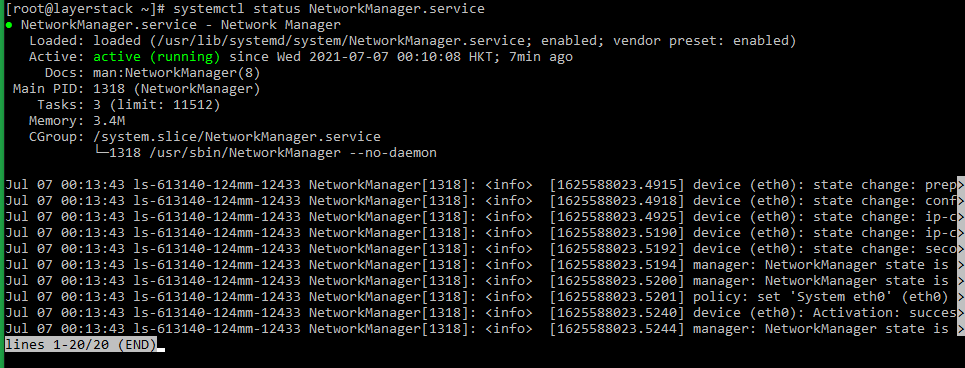
Once this is done, use the following command to check the server network status.
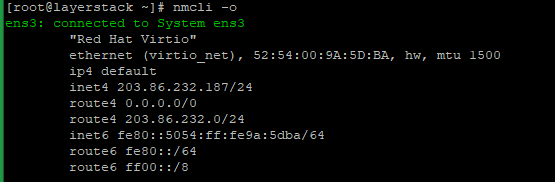
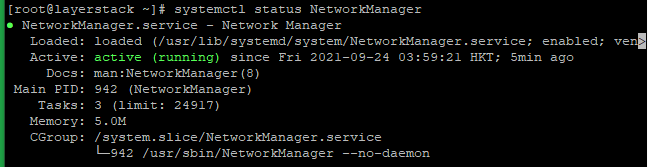
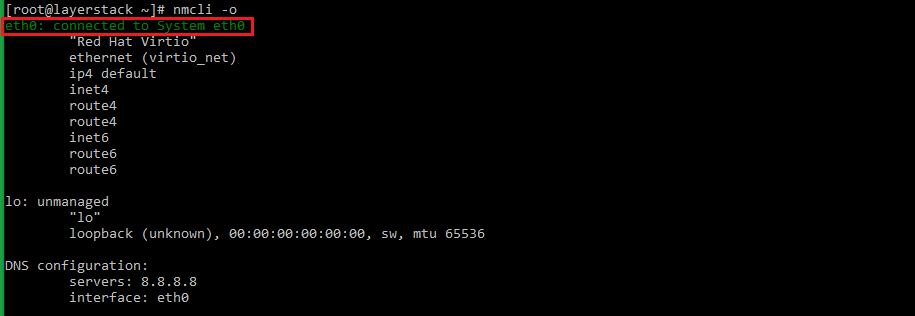
# nmcli -o
or
# systemctl status NetworkManager


Rocky Linux
-
Use the following command to restart the server networking service.
# nmcli networking off
# nmcli networking on
or
# systemctl restart NetworkManager
-
Either of the below commands can be executed to check the status of the networking service.
# nmcli -o
or
# systemctl status NetworkManager


CentOS 8
-
Use the following command to restart the server networking service.
# nmcli networking off
# nmcli networking on
or
# systemctl restart NetworkManager.service
-
Either of the below commands can be executed to check the status of the networking service.
# systemctl status NetworkManager.service
or
# nmcli -o

CentOS 7
-
Use the following command to restart the server networking service.
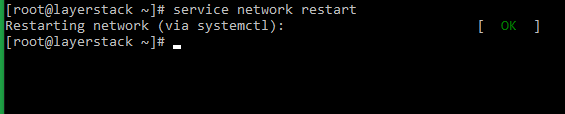
# systemctl restart network.service
or
# service network restart
or
# /etc/init.d/network restart
-
The status of the networking service can be checked by making use of any of the below commands.
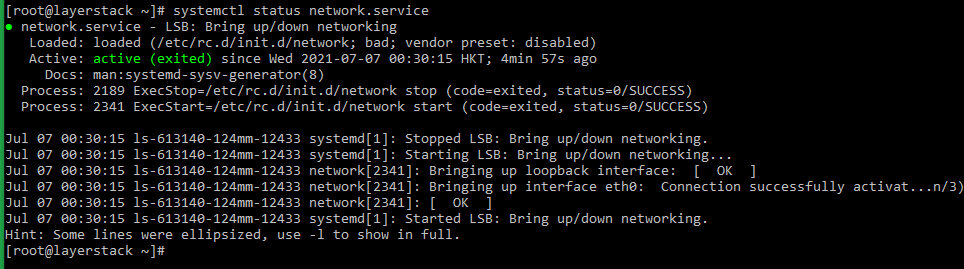
# systemctl status network.service
or
# service network status
or
# /etc/init.d/network status


CentOS 6
-
Use the following command to restart the server networking service.
# service network restart
or
# /etc/init.d/network restart
-
Once this is done, use the following command to check the server network status.
# service network status
or
# /etc/init.d/network status


Windows OS
Using the Enable/Disable mode of network adapter
-
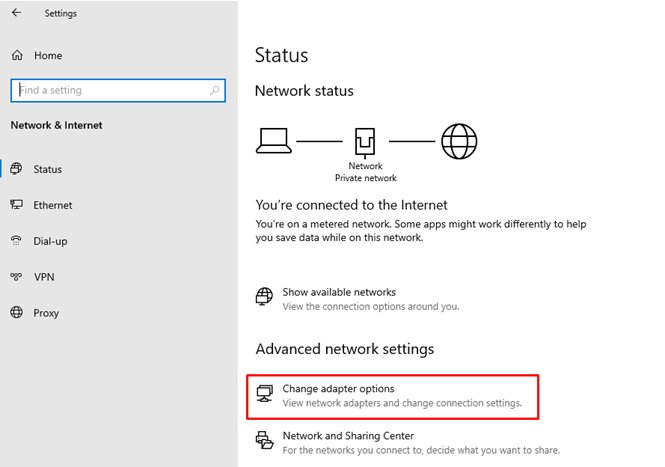
Click on the Windows key to open start and search
Settingsand go to theNetwork and Internetthen click onChange adapter optionwhich is shown in the below image.
Then will get the below page:
-
Right-click the
Ethernet deviceand click onDisableoption.
-
Again, Right-click the
Ethernet deviceand click onenableoption. -
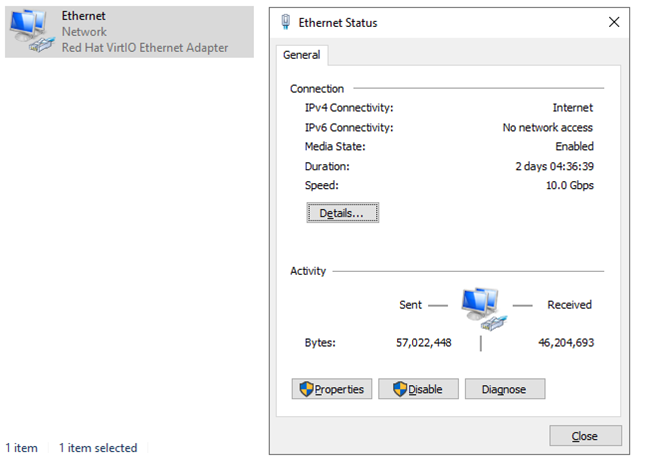
Once this is done, Right-click the
Ethernet deviceand click onstatus.


Using the netsh command
In Windows OS, the command line method involves using the netsh command for resetting the network and TCP/IP stack.
-
Go to
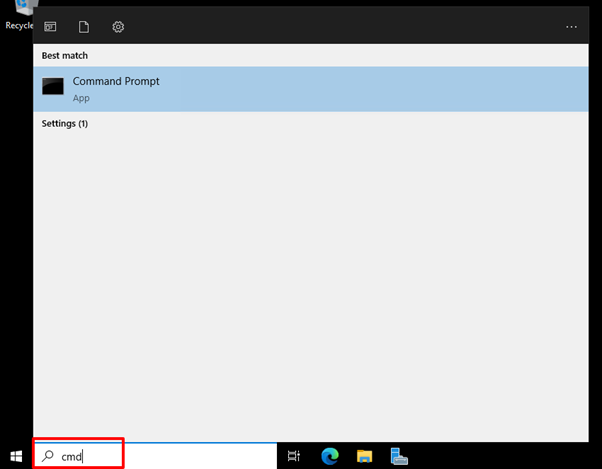
Startand typeCMDin the search window.
-
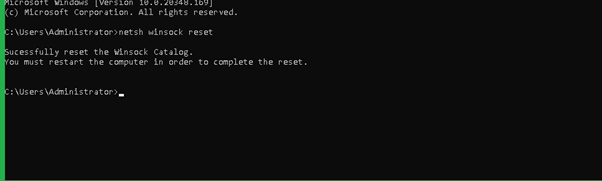
Once opened the
Command Prompt, the command for restarting the network interface, as provided below, can be executed.> netsh winsock reset
-
Regularize the networking process as indicated in the message after restarting the server.
-
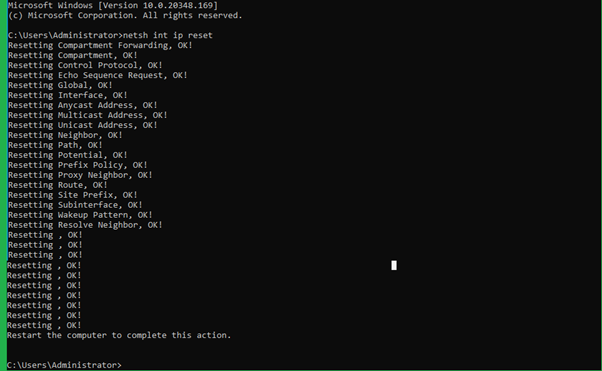
In addition to the above command, may also use the command which resets the TCP/IP stack. The command is as follows.
> netsh int ip resetThe output will be as follows:
Using the Network Reset option (Windows 10/11)
The reset button method can be used in Windows 10 & 11 versions by which the user can restart the Network interface. The steps for this are given below.
-
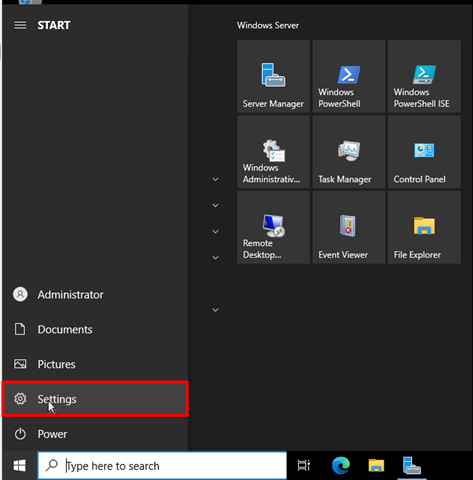
Click on Windows
Start Menubutton and then selectSettings.
-
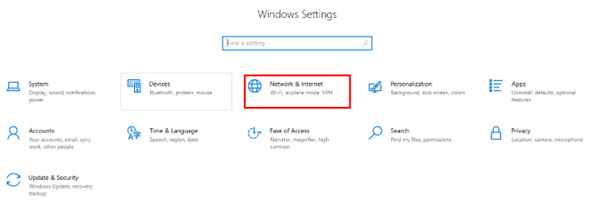
From the
Settingsoption, selectNetwork & Internetoption.
-
Here you would be able to see the adapter options i.e
Advanced Network Settings, from which you can click onNetwork Resetoption. -
Click on the
Reset Nowbutton on the right side ofNetwork resetoption and you will be prompted for the confirmation. ChooseYesfor proceeding with resetting the network settings.Once clicked on
Yes, the network adapter will start to reset and you will be able to restart the network interface.
Related Tutorials
-
How to check if TCP / UDP port is open on Linux & Windows Cloud Servers
-
Installing telnet client on Linux and Windows Cloud Servers
-
How to check TCP/IP configuration with ipconfig on Windows Cloud Servers
-
How to check TCP/IP configuration with ifconfig on Linux Cloud Servers
-
How to configure the Static IP Address & Network Card for Linux & Windows Cloud Servers
In the modern age of technology and connectivity, having a stable internet connection is crucial for both personal and professional tasks. When encountering issues with your network connection on Windows 11, one of the first troubleshooting steps is to restart your network adapter. This process is relatively simple but can resolve various connectivity issues, from slow internet speeds to complete disconnections. In this extensive guide, we’ll delve into the various methods to restart your network adapter, the reasons you might need to do so, and some tips to ensure a smooth experience.
Understanding Network Adapters
Before we dive into the practical steps, it’s important to understand what a network adapter is. A network adapter, also known as a network interface card (NIC), is a hardware component that allows your computer to connect to a network, be it wired or wireless. It can be built into your computer or added as an external device. When you encounter networking issues, the problem often lies with your network adapter.
Why You Might Need to Restart Your Network Adapter
There are several reasons why you may need to restart your network adapter:
-
Connection Issues: If you’re experiencing intermittent connectivity or cannot connect to the internet at all, cycling the network adapter can often resolve these glitches.
-
Slow Internet: Sometimes, internet speeds may drop without explanation. Restarting the adapter can refresh the connection and restore speed.
-
New Network Settings: If you’ve changed your network settings or configuration (like switching networks or IP addresses), restarting the adapter may be necessary for the changes to take effect.
-
Driver Problems: Outdated or corrupt drivers can cause issues with your network adapter’s performance. Restarting it along with updating drivers may solve the problem.
-
Overloaded Resources: Sometimes, network resources may become overwhelmed; restarting the adapter clears these resources.
-
Network Configuration Issues: Any improper configuration can lead to issues. Restarting the adapter can reset these configurations.
Methods to Restart Your Network Adapter in Windows 11
Windows 11 provides several methods for restarting your network adapter. Below, we’ll outline each method in detail, so you can choose the one best suited to your situation.
Method 1: Using Windows Settings
-
Click on the Start button or press the Windows key on your keyboard.
-
Navigate to Settings. This can also be done by clicking on the gear icon in the Start menu.
-
In the Settings window, select Network & internet from the left sidebar.
-
Under the Advanced network settings section, click on More network adapter options.
-
You’ll be directed to the Network Connections window. Here, you will see a list of your network adapters (Ethernet, Wi-Fi, etc.).
-
Right-click on the adapter you want to restart (for example, «Wi-Fi» or «Ethernet») and select Disable.
-
Wait for a few seconds, then right-click on the same adapter again and select Enable. This process will restart the network adapter.
Method 2: Using Device Manager
-
Right-click the Start button or press Windows + X to open the Quick Access menu.
-
Select Device Manager from the list.
-
In the Device Manager window, expand the Network adapters section. Here, you’ll find all installed network adapters.
-
Right-click the adapter you wish to restart and choose Disable device.
-
Confirm the action if prompted, and wait a few moments before right-clicking it again to select Enable device.
-
Your network adapter will now restart.
Method 3: Using Command Prompt
For advanced users, using the Command Prompt can be a quick and efficient way to restart your network adapter.
-
Press Windows + R to open the Run dialog.
-
Type
cmdand press Enter to launch the Command Prompt. -
Depending on your PC settings, you may need to run it as an administrator. Right-click on the Command Prompt icon and select Run as administrator.
-
To restart your network adapter, you can use the following commands:
-
First, type the command below to disable the adapter:
netsh interface set interface "YOUR_ADAPTER_NAME" admin=disabled -
Replace
"YOUR_ADAPTER_NAME"with the name of your network adapter (you can find it in the Network Connections window). -
Then, to enable the adapter, type:
netsh interface set interface "YOUR_ADAPTER_NAME" admin=enabled
-
-
Press Enter after typing each command. This sequence effectively restarts your network adapter.
Method 4: Using PowerShell
PowerShell is another powerful tool in Windows that can be used to manage network adapters.
-
Press Windows + X and select Windows Terminal (Admin) or open PowerShell as an administrator.
-
To view all network adapters, type the following command and press Enter:
Get-NetAdapter -
Find the name of the adapter you wish to restart.
-
To disable it, use the following command:
Disable-NetAdapter -Name "YOUR_ADAPTER_NAME" -Confirm:$false -
To enable it again, use:
Enable-NetAdapter -Name "YOUR_ADAPTER_NAME" -Confirm:$false -
This effectively restarts your network adapter.
Additional Troubleshooting Tips
If restarting your network adapter doesn’t solve your connectivity issues, there are further steps you can explore:
-
Update Network Drivers: Outdated drivers can cause issues. In Device Manager, right-click your network adapter, select Update driver, and follow the prompts.
-
Run the Network Troubleshooter: Windows has built-in troubleshooters that can help diagnose and fix common networking problems. Go to Settings > System > Troubleshoot > Other troubleshooters, and find Network Adapter.
-
Reset the Network Settings: If problems persist, you may need to reset your network settings. This will clear all configurations, so proceed with caution. Navigate to Settings > Network & internet > Advanced network settings > Network reset.
-
Check Hardware: If you’re still having issues, ensure that all physical connections are secure. This includes checking cables and ensuring that your router is functioning correctly.
-
Check for Windows Updates: Sometimes, Microsoft releases updates that improve network stability. Regularly check for system updates to ensure you’re on the latest version.
-
Check Firewall and Antivirus Settings: Occasionally, firewall settings or antivirus programs can interfere with network connectivity. Try temporarily disabling these to see if your connection improves.
Conclusion
Restarting your network adapter in Windows 11 is a straightforward yet often effective way to resolve various networking issues. Whether you opt for the settings menu, Device Manager, Command Prompt, or PowerShell, these methods empower you to take control of your network connection.
In today’s technology-driven society, a reliable internet connection is non-negotiable. Understanding how to troubleshoot and resolve network issues proactively will save you time and frustration in the long run. So the next time you face connectivity hiccups, leverage the methods outlined in this guide to get back online swiftly and efficiently.
As technology continues to advance, staying informed about your system’s networking controls and capabilities will enhance your overall experience with Windows 11. Regularly exploring updates, following best practices for connectivity, and maintaining hardware will ensure that you enjoy seamless browsing and uninterrupted work or play on your computer.
In summary, whether through a simple restart or deeper troubleshooting, you now have the tools and knowledge necessary to address and resolve network adapter issues effectively on your Windows 11 system.
Last updated on
If you need to restart your network adapter on Windows, whether for troubleshooting or to refresh your network settings, this guide will walk you through the process. Whether you’re dealing with a network adapter card for PC or managing the network adapter driver for Windows 10, restarting the adapter can often resolve connectivity issues or apply new configurations. Follow these simple steps to restart your ethernet controller driver on Windows 10 or any other internet adapter driver for Windows 10, and get your network back up and running smoothly.
Method 1: Using GUI
Press Win + R to open the Run dialog box, Type ncpa.cpl and press Enter. This opens the Network Connections window.
Locate the network adapter you want to restart. It’s usually labelled as «Ethernet» or something similar. Right-click on the network adapter and select Disable. This will turn off the network adapter.
After a few moments, right-click on the same network adapter again and select Enable. This will restart the network adapter.
Method 2: Using Command-Line
Type «cmd» in the Windows search box and Right-click «Command Prompt» and select «Run as administrator«.
Run the following command to list all network interfaces:
netsh interface show interface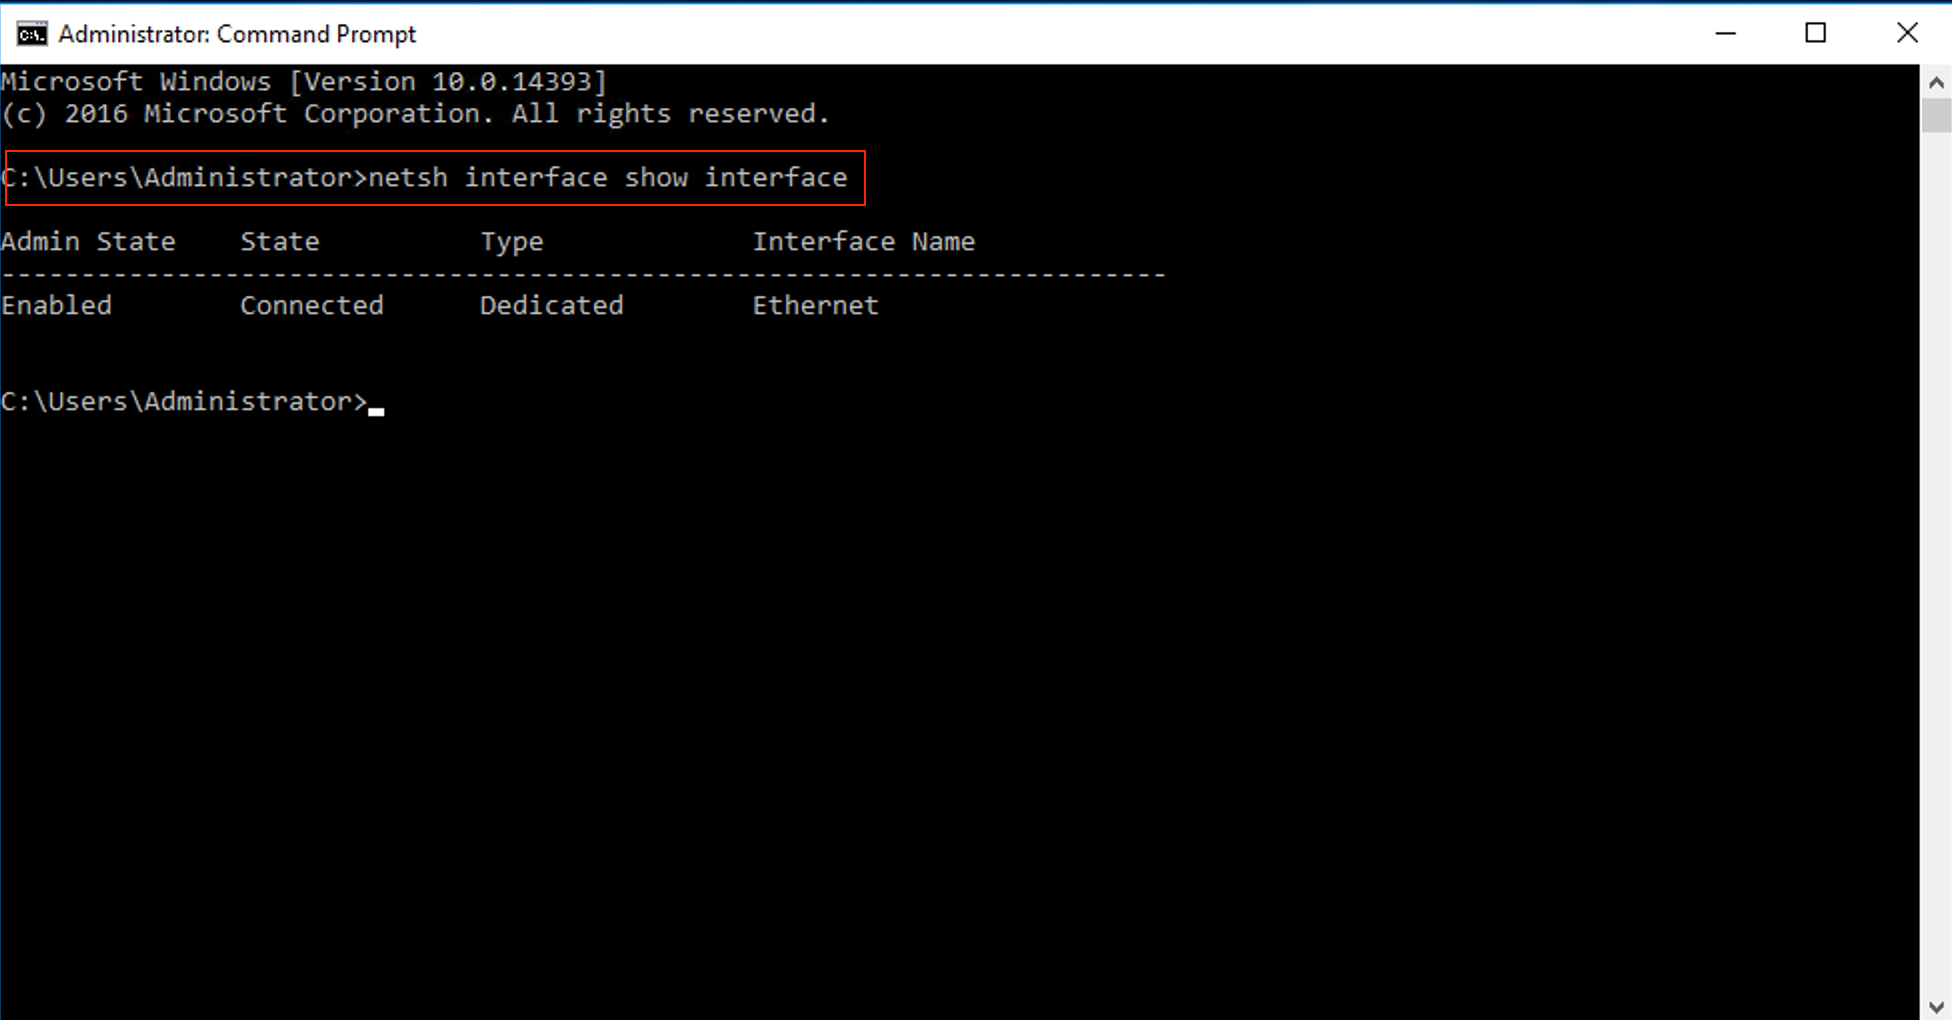
Use the following command to disable the network adapter:
netsh interface set interface "Interface Name" admin=disable
Replace "Interface Name" with the name of your network adapter (e.g., «Ethernet»).
Now, use this command to enable the network adapter:
netsh interface set interface "Interface Name" admin=enable

Sometimes, the domain based Windows server started but its network adapter switched into the public mode. Yup, the real nightmare, especially if you configured a very restrictive firewall rules. And you’re using the rigid firewall rules in the public mode, right?
The easiest way to switch such NIC back to the domain mode is to restart (disable and enable) it. Indeed! It’s so easy to perform named operations when you’re on the console of such server. What to do if you only have the remote connection?
It’s time for the mighty Jedi tricks and the command line Kung-Fu!
The power shell contains more than 2,500 different commands and you can perform virtually any task with a few commands. And all those commands are well documented on this Web page.
Server booted with NIC in the public mode
One of the servers worked, but its NIC was in the public mode. You can find that if you open the Network & Internet settings GUI.

We can see that the network adapter named Team1 is marked as the Public network. Now we knew the right adapter name.
Checking existing network adapters
I opened the administrative power shell window and typed already familiar command Get-NetAdapter.
PS C:\WINDOWS\system32> Get-NetAdapter

Name                      InterfaceDescription                    ifIndex Status       MacAddress             LinkSpeed
----                      --------------------                    ------- ------       ----------             ---------
Team1                     Microsoft Network Adapter Multiplexo...      18 Up           E0-CB-4E-0C-4A-06         2 Gbps
Ethernet 4                Intel(R) PRO/1000 PT Dual Port Ser...#2      17 Disconnected 00-15-2A-6E-40-61          0 bps
Ethernet                  Broadcom NetXtreme Gigabit Ethernet          11 Up           E0-CB-4E-0C-49-34         1 Gbps
Ethernet 2                Broadcom NetXtreme Gigabit Ethernet #2        6 Up           E0-CB-4E-0C-4A-06         1 Gbps
Ethernet 3                Intel(R) PRO/1000 PT Dual Port Serve...       3 Disconnected 00-15-2A-6E-40-60          0 bps


PS C:\WINDOWS\system32>
We can see the list of all adapters. This is the same step I already used in this post.
We can see that we have the virtual adapter named Team1 and 4 Ethernet adapters. As only adapters Ethernet and Ethernet 2 are up, we can easily conclude that they are part of this team. You can always check that with the power shell commands explained in this post.
Restarting any specific network adapter
Now, we need to restart the adapter named Team1. We can perform this operation with the command Restart-NetAdapter. This command will disable and enable any specific network adapter.
Why we cannot use here commands Disable-NetAdapter and Enable-NetAdapter? We’re working through the Remote Desktop session and if we disable the network adapter used for our remote communication, we will effectively cut ourselves from that server.
I executed the command:
PS C:\WINDOWS\system32> Restart-NetAdapter -Name "Team1"
PS C:\WINDOWS\system32>
The only needed parameter is the name of the specific network adapter.
After a few seconds, the remote desktop connection was intermittent.

After a while, the remote desktop connection was established again.
Checking the network connection
I switched back to the Network and Internet settings GUI and checked the status of this network adapter. As I expected, it was switched into the correct domain mode.

As you can see, the network adapter named Team1 changed its state to domain network (the domain name contoso.com is displayed here).
When I changed this network profile, the host firewall changed to the new profile and more services became available. The Dude server successfully checked all monitored services on this server and its icon turn to green.
That was the simple trick for the great solution. Case successfully closed.
Stay tuned.