
- Setting proxy with GPO
- Windows 10 proxy settings
- Computer proxy settings
- Proxy settings for WinHTTP API
- Setting proxy using system environment variables
- Prevent user from changing browser settings
- Powershell and proxy settings
As of June 2022 Internet Explorer browser reached end of support in Windows OS, and users are advised to use Microsoft Edge in IE compatibility mode. Especially if they have legacy apps running only on IE. Many of the settings we will explain here, related to proxy, are based on usage of Internet Explorer. Despite it, we will address all aspects of configuring proxy settings even it will become “deprecated”.
I took a big byte with this one because I wanted to cover all aspects of working with proxy settings, but it wared me out to check all details. I didn’t want to copywrite things but i wanted really to check what is going on with ceratin settings and how they work. In short, I didn’t wont to give false or deprecated info, but exact and tested information. I don’t know if I succeeded. Please comment and correct me if I am wrong somewhere.
If you read part I , you realize there are two dll-s you can use for Internet access and proxying , with different capabilities. As explained WinINET is user interactive based proxy engine and it has certain capabilities that modern browsers doesn’t have. For example ftp protocol. If you type ftp address in IE you will open ftp site but if you use Microsoft Edge, you will get prompt to open another app for browsing ftp site. In next video you can see that behavior with IE as ftp app.
There is lot of ways how to configure proxy settings on your PC or server. In this article we will explain how to set proxy with GPO, registry or netsh command. Also we will explain some specific situations and bypassing it.
Setting proxy with GPO
We will start with configuring proxy settings with GPO. We will create GPO and link it to OU.
Note
In previous versions of Internet Explorer (6, 7, and 9) to configure Internet Explorer settings you needed to use the following section in the Group Policy Editor console: User configuration > Policies > Windows Settings > Internet Explorer Maintenance. In Internet Explorer 10 (firstly appeared on Windows Server 2012 and Windows
the Internet Explorer Maintenance (IEM) section was removed from GPO Editor.
 the Internet Explorer Maintenance (IEM) section was removed from GPO Editor.
After that we edit created GPO. Navigate to User Configuration > Preferences > Control Panel Settings > Internet Settings and create new Internet Explorer 10 policy (it works for IE 11 also). Navigate to Connections and go to LAN settings

Enter setting for your proxy server in picture. Check box Use a proxy server for your LAN, and then enter IP address and port. Check also Bypass proxy server for local addresses.

There is one thing that you probably noticed on picture. There are green and red lines under different settings presented. Green means that setting is on and will be applied, and red means it is disabled. To toggle this settings use function keys
- F6 – enable selected option
- F7 – disable selected option
- F5 – enable all options on selected tab
- F8 – disable all options on selected tab
Bypass proxy settings for local addresses
This is very misunderstood setting. It means if you type http://intranet in your browser it will not use proxy to access web site. Local addresses are all URLs that doesn’t have domain suffix.
Regarding bypass, if you type http://intranet.contoso.com or http://192.168.0.34 it is not local address, and browser will try to use proxy to access it. That’s why it is usual to list your local domain and local addresses in exceptions on advanced tab. Use wildcards presented on picture example.

After GPO is applied, settings are presented in IE. If you have different proxy for different branch office-s aka LAN subnets you can use Item level targeting to use different proxy settings for different subnets. (I will not go into that area, but sometimes it is necessary. For example when using wpad or pac scripts for configuring proxy you will see it is common part of script configuration. We will talk about that in separate posts)

Windows 10 introduced new modern settings Control Panel where you can set up different computer settings. But still, it is just presentation pane. If you enter manually proxy settings here, you will have new entries in registry user path we talk about in next chapter. If you use GPO, proxy settings will be presented here because it will be read from the same location in registry. You can see words in red “some settings are managed by your organization“, if GPO is applied. Just to explain Microsoft Edge is using these settings, despite it is using WinHTTP API for accessing Internet. It is that setting in browser “Use system proxy settings” you can see in Chrome, Mozilla and similar browsers.

Setting proxy -registry settings
What happens when GPO is applied? It change registry settings. If you browse to registry key on picture, you will see all the same settings you configured on GPO

It means that you can also set user proxy settings by editing/adding registry keys. For example you can run this PowerShell script and set proxy settings for user. If keys doesn’t exist, please use New-ItemProperty instead of Set-ItemProperty.
$reg = "HKCU:\Software\Microsoft\Windows\CurrentVersion\Internet Settings"
Set-ItemProperty -Path $reg -Name ProxyEnable -Value 1
Set-ItemProperty -Path $reg -Name ProxyServer -Value "10.0.40.50:9090"
Set-ItemProperty -Path $reg -Name ProxyOverride -Value '*.contoso.com;<local>'
Set-ItemProperty -Path $reg -Name AutoDetect -Value 0
It is possible to create same registry settings with GPO also. Navigate to GPP section in GPO and create same registry keys from script. Location of settings is User Configuration > Preferences > Registry. Add next values to HKCU:\Software\Microsoft\Windows\CurrentVersion\Internet Settings registry path
- ProxyEnable (REG_DWORD) = 00000001;
- ProxyServer (REG_SZ) = 10.0.40.50:9090;
- ProxyOverride (REG_SZ) = *.contoso.com;<localhost>
Computer proxy settings
All settings we talked about are user proxy settings. If you need to setup proxy to computer object and all users logging into that computer, you need to configure two additional GPO settings. First one is Make proxy settings per-machine (rather than per user). It is located at Computer Configuration > Administrative Templates > Windows Components > Internet Explorer. When you enable this policy all users using that computer will have same proxy settings. Second setting need to override any user GPO policies it has in place. You need to enable Configure user Group Policy loopback processing mode located at Computer Configuration > Policies > Administrative Templates > System > Group Policy.
Make proxy settings per machine policy can be turned on also by registry setting . You will need to add next key on location in script.
$reg = "HKLM\Software\Policies\Microsoft\Windows\CurrentVersion\Internet Settings"
New-ItemProperty -Path $reg -Name ProxySettingsPerUser  -Value 0
For non domain-joined computers you can also use Make proxy settings per-machine GP locally. What is interesting is that you need to setup proxy settings in that way that you run IE but Run as Administrator. After that go to internet options in IE and configure all settings needed. What happens is that from that moment on, any user of that PC can change proxy settings, but if she/he open that window again proxy settings you entered as administrator will remain.
I checked what is happening in registry settings and what I discovered that somehow all Internet settings for proxy are changed in registry with entered values, but I didn’t catch a process that is changing all the values in registry. In any case result of this setting is also that if you try to change proxy setting as normal user setting is not changed. Wathc the video
Proxy settings for WinHTTP API
As we already mentioned in part I there are two different API-s used for accessing Internet over proxy. One of them WinHTTP API need its own separate proxy settings . Settings we talked about in chapters before This service also has add-on WinHTTP WPAD service that is used for configuring proxy settings using wpad script.
For system-wide proxy settings that is using this API you can use netsh command. This setting will affect all applications including Windows services which use WinHTTP API with default proxy. For example Windows Update service will not work if you are behind proxy and didn’t set this up. Syntax of this command, that you run in command shell is:
netsh winhttp set proxy 10.90.112.50:9090 "*.contoso.com;<local>"
netsh winhttp show proxy
After you run this command you will see proxy settings with show proxy command and it will look like this.

<local>
this entry correspond to Bypass proxy server for local addresses setting
These settings will be saved in the WinHttpSettings parameter under the registry key HKEY_LOCAL_MACHINE\SOFTWARE\Microsoft\Windows\CurrentVersion\Internet Settings\Connections.

You can set this proxy setting with GPO using registry wizard. Open new GPO nad navigate to Computer Configuration > Preferences > Windows Settings > Registry > New > Registry Wizard.
Select Local computer and specify the path to the WinHttpSettings parameter. Select setting and click finish. It will copy registry binary setting from your local PC to group policy entry.

Just to clarify that there is also two same settings under Connections Key with differnet names DefaultConnectionSettings and SavedLegacySettings among different registry keys. On this link you can find more about using this keys, and some help in quickly changing binary for turning on or off some common proxy setting values . For example If “Manual proxy” is checked – 9th byte value is “03“

Setting proxy using system environment variables
With new .NET Core cross platform language and general Windows love Linux attitude, you can now use environment variables for setting proxy. I first discovered this possibility when i tried to debug why certain web application is using proxy when it shouldn’t. For all apps that are using Linux like http_proxy, https_proxy entries you can now set it up. This change came with .NETcore 3.0. You can check when it all started on this link . If I am wrong please correct me. I didn’t had to much time to investigate
The environment variables used for DefaultProxy initialization on Windows and Unix-based platforms are:
- HTTP_PROXY: the proxy server used on HTTP requests.
- HTTPS_PROXY: the proxy server used on HTTPS requests.
- ALL_PROXY: the proxy server used on HTTP and/or HTTPS requests in case HTTP_PROXY and/or HTTPS_PROXY are not defined.
- NO_PROXY: a comma-separated list of hostnames that should be excluded from proxying.
New apps are using these environment variables first, and if they don’t exist user proxy settings are used. Please check this link for more details. What is interesting that PowerShell 7 is also using this feature.
If you see entries on the picture in your Windows installation check with you development team 🙂

Prevent user from changing browser settings
Even if GPO is applied to IE, netsh or any other proxy settings, users can change any of the proxy settings. Whatever change is, GPO will still overwrite user changed settings, because GPO’s are applied on regular bases in every domain.
You can prevent users from changing user proxy settings utilizing GPO “Prevent changing proxy settings”. This parameter is present in both the user and computer GPO sections under next locations
- Computer Configuration > Policies > Administrative Templates > Windows Components – Internet Explorer
- User Configuration > Policies > Administrative Templates > Windows Components Internet Explorer
Settings in the Computer Configuration section take precedence over user settings.


Powershell and proxy settings
When using PowerShell there is some recommendation what proxy settings should be used/configure. This is table about recommended proxy settings taken form this Microsoft link
| Platform | Recommended Proxy Settings | Comment |
|---|---|---|
| Windows PowerShell 5.1 | System proxy settings | Do not suggest setting HTTP_PROXY/HTTPS_PROXY environment variables. |
| PowerShell 7 on Windows | System proxy settings | Proxy could be configured by setting both HTTP_PROXY and HTTPS_PROXY environment variables. |
| PowerShell 7 on macOS | System proxy settings | Proxy could be configured by setting both HTTP_PROXY and HTTPS_PROXY environment variables. |
| PowerShell 7 on Linux | Set both HTTP_PROXY and HTTPS_PROXY environment variables, plus optional NO_PROXY | The environment variables should be set before starting PowerShell, otherwise they may not be respected. |
To find out what proxy settings is using PowerShell you can use this command
[System.Net.WebProxy]::GetDefaultProxy()

For some more info please check this link
I next part I will cover configuring proxy settings using WPAD/PAC scripts. i hope it will not be long and daunting task like this one. See you
A Proxy server acts as a mediator between the server and the client. It receives the requests from the client and forwards these on the client’s behalf to the server.
Windows, by default, enables automatic proxy detection. However, users can also set up their preferred proxy server manually if the proxy address and port are known.
You would prefer to use proxy servers on Windows to enhance the privacy and security of the network. It also compresses incoming requests over the network and saves bandwidth.
Using Automatically Detect Settings
The automatic detection works on the standard known as the Web Proxy Auto-discovery (WPAD). This protocol locates the Proxy Autoconfiguration file (PAC).
If the configuration file is located, it can be used to automatically set the proxy settings. To use this feature on Windows, you must enable automatic proxy detection.
- Press Windows Key + I to open Settings.
- Go to Network & internet > Proxy.

- Turn on the slider to Automatically detect settings.


Using Setup Script
If you are well aware of the proxy script, you can use it to set the proxy server on your Windows device. This script guides the request through the proxy server or connects it directly to the destination. Setting up a proxy script can be helpful if the automatic proxy detection does not work.
- Go to Settings.
- Navigate to Network & internet > Proxy.
- Under the Automatic proxy setup, find the Use setup script and select Set up.
- Enter the Script address and turn on the Use setup script option.
- Click on Save.


Manually Setting Up Proxy Server
You can even set up the proxy server manually on Windows with the proxy server’s IP address and port.
- Open Settings.
- Go to Network & internet > Proxy.
- Under the Manual proxy setup section, find Use a proxy server and click on Set up.
- Turn on Use the Proxy server option.
- Enter the proxy address and Port.
- Click on Save.


This can also be done using the command prompt
- Press Windows Key + X, and open Terminal.
- Now, use this command line,
netsh winhttp set proxy proxy_server_ip:portnumber

For instance, if the proxy server is 202.62.10.210 and the port is 8080, netsh winhttp set proxy 202.62.10.210:8080
To reset the Proxy settings, you can also use this command line.netsh winhttp reset proxy

By Configuring Proxy Settings from the Registry
The manual proxy server configurations can also be done through the Registry. This will work if the network settings are not accessible or you have to force set up the proxy server on the device.
- Press Windows Key + R, type
regedit, and hit enter. - Go to this registry location.
HKEY_CURRENT_USER\Software\Microsoft\Windows\CurrentVersion\Internet Settings

- Find the DWORD with the name Proxy Enable. Double-click to open it.

- Set the Value to 1 to enable the proxy server. You disable it by setting it to 0.
- Click on OK.
- Click on the Empty white space in the registry editor window.
- Select New > String value .

- Rename the new string as ProxyServer.
- Open the string and assign the Proxy server address and port in the Value data field. For instance,
202.62.10.210:8080
- Click on OK to save the changes.


By Configuring Proxy Settings for LAN
On the devices where the proxy settings cannot be configured from the Windows settings, it can also be accessed through Internet Properties.
- Press Windows Key + R, type
inetcpl.cpl, and hit enter to open the Internet Properties.
- Go to the Connection tab.
- Click on LAN settings.
- Check the Use a proxy server for your LAN option.
- Enter the Address and Port. Click on OK to save the changes.


You may also configure the proxy server by clicking the advanced button under the Proxy server section.

You can set up up to four different proxy servers from this section.
- HTTP: This is suitable for web browsing as it can only work well with HTTP and HTTPS websites.
- Secure: This proxy is suitable for public networks.
- FTP: This is a conventional and unsecure proxy mainly used for transferring files over the network.
- Socks: This proxy type is a better alternative to the VPN when it comes to speed. However, it does not use any encryption while transferring the data.

Enter the proxy addresses, then ports in the respective field. If you don’t want to use a specific proxy, you can set exceptions too from the Exceptions section.
By Configuring Proxy Settings On Browsers
Most browsers do not have their native built-in proxy settings that users can configure. Rather they make use of the proxy set by Windows. Google Chrome, Microsoft Edge, and Opera all fall into this category.
One exception to this is Mozilla Firefox, which has its own proxy settings. Firefox offers auto and manual proxy configuration options to the users.
- Open Firefox and go to its Settings.
- Go to General > Network Settings.
- Click on Settings and configure the proxy as desired.

- When the changes are made, click on OK to save them.

Для настройки параметров прокси сервера через реестр, нужно использовать следующие параметры:
– HKEY_CURRENT_USER\Software\Microsoft\Windows\CurrentVersion\Internet Settings\ProxyEnable – значение 1 разрешает использование прокси-сервера;
– HKEY_CURRENT_USER\Software\Microsoft\Windows\CurrentVersion\Internet Settings\ProxyServer – Введите значение вида <адрес сервера>:порт (например proxy.local:3128);
– HKEY_CURRENT_USER\Software\Microsoft\Windows\CurrentVersion\Internet Settings\ProxyOverride – Здесь можно указать через “;” адреса, для которых не нужно использовать прокси-сервер. Для локальных адресов используется (например ; mail.ru; vk.com).
Данный способ стал актуальным для настройки рабочих станций в домене, когда обновился IE до 11 версии. Через GPO есть возможность настраивать только до 8 версии. Какието настройки конечно применялись, но не везьде и не всегда корректно.
Proxy settings are like the rules that tell your computer how to connect to the internet through a special server (proxy server). In Windows 11 and Windows 10, these settings can be configured to meet your needs. However, there are cases where these proxy settings can be unknowingly changed by a malicious program or a network-related software. When the proxy settings are incorrect or the server is unreachable, you will have problems connecting to the internet or opening any webpages at all.
In this guide, we will show you how to permanently disable any proxy settings you may have in Windows 11 or 10. We’ll show you various methods so if one doesn’t work or you have no access to it, you can try the other.
Also see: How to Disable VPN in Windows 11
Disable Proxy Settings in Windows 11 or 10 via Settings or IE
In previous versions of Windows, we had to go through Internet Explorer to configure proxy settings. While changing settings through IE still works in Windows 10, there is now a more straightforward way to do this through the Settings app, especially for Windows 11. Follow the steps below to disable the proxy settings.
- Go to the Start Menu or Cortana.
- Search for “Settings” and open it.
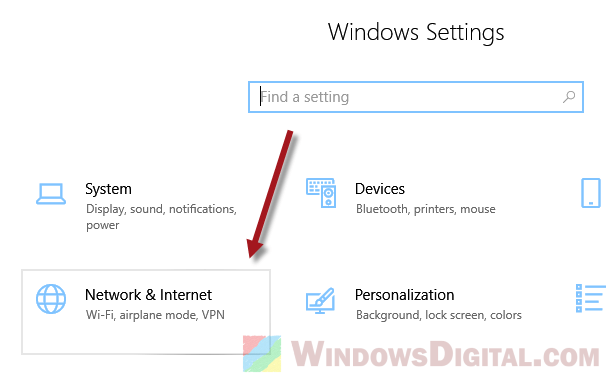
- Select “Network & Internet.”

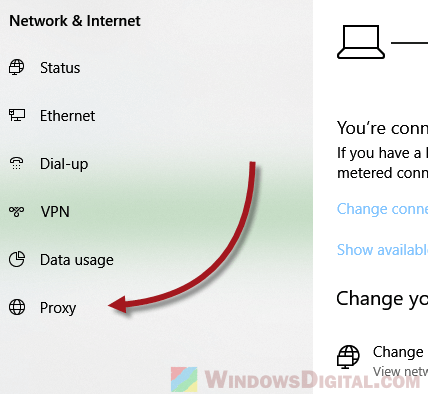
- From the left pane, click on “Proxy.”

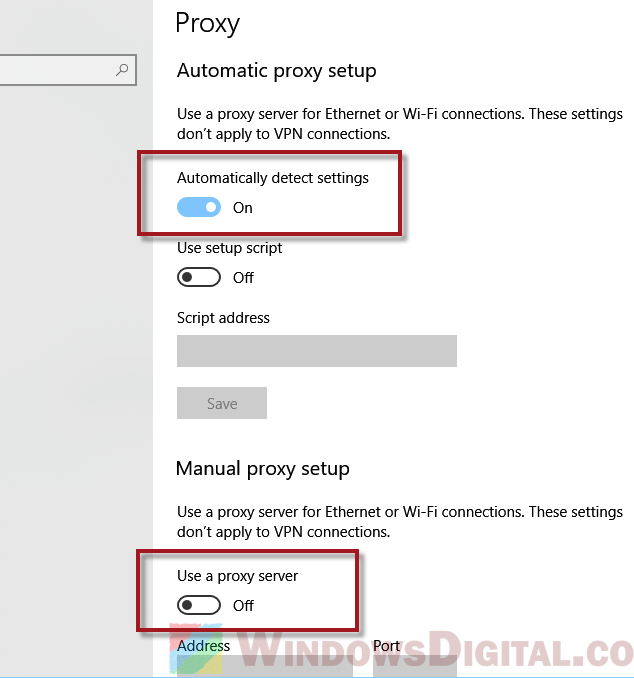
- Under “Automatic proxy setup,” switch on the “Automatically detect settings” option.
- Under “Manual proxy setup,” disable the “Use a proxy server” option.

- Close the settings window and restart your PC.
If for any reason you must use the Internet Options via IE to change the proxy settings, follow these steps:
- Open Internet Explorer.
- Click on the “Settings” icon and select Internet Options.
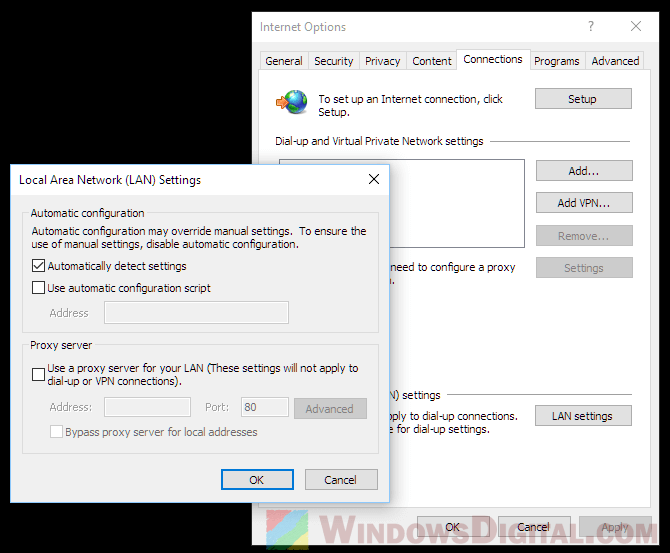
- Go to the Connections tab, then click on “LAN settings.”
- Enable “Automatically detect settings” and disable “Use a proxy server for your LAN.”

- Click “OK” and reboot your computer.
Some have reported that the automatic proxy settings checkbox will sometimes be grayed out when trying to set the proxy settings to automatic via LAN Settings in Internet Explorer, which makes it impossible to apply. If that’s the case, the method using the Settings app above should help to disable the proxy settings and set them to automatic in Windows 11 or 10.
Disable proxy settings via Registry
If the above options don’t work, you might need to try changing the proxy settings in the registry. But be careful, messing up the registry can cause very serious problems. Always back up your registry or create a system restore point first.
- Press the “Win+R” key to open the Run window.
- Type “regedit” and hit Enter to open Registry Editor.
- In Registry Editor, navigate to the following registry path:
HKEY_LOCAL_MACHINE\Software\Policies\Microsoft\Windows\CurrentVersion\Internet Settings
- Double-click on the “ProxySettingsPerUser” registry.
- Change the value to “1“.
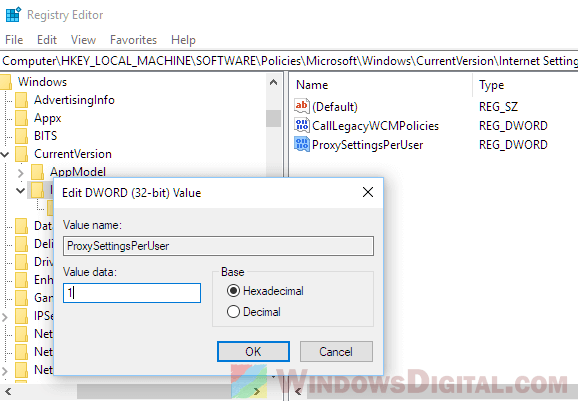
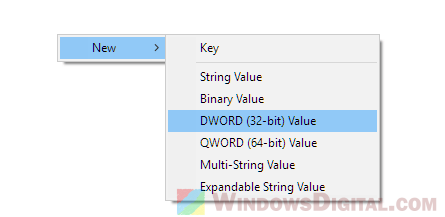
If the “ProxySettingsPerUser” registry key doesn’t exist, create it by right-clicking anywhere on the right pane in the Internet Settings registry path, and click on “New” > “DWord (32-bit) Value“. Name it “ProxySettingsPerUser” and set its value to 1. This should disable any proxy settings and set them to automatically detect settings.
Close Registry Editor and reboot your PC for it to take effect.
If your proxy problem persists
The proxy settings in the Settings app are correlated with the proxy settings in Internet Explorer. So, if the problem persists after trying to disable them, you may want to try resetting Internet Explorer settings. Note that doing so will also reset the security and privacy settings, such as sites you’ve whitelisted and blacklisted, and will wipe the parental control settings as well. Here’s a quick guide on how to reset IE settings:
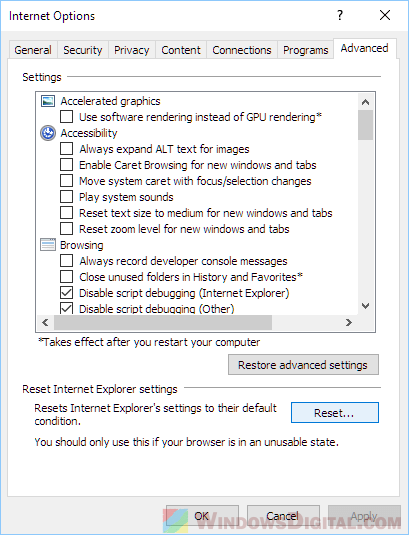
- Open Internet Explorer in Windows and click on Internet Options.
- Go to the Advanced tab.
- Under “Reset Internet Explorer settings,” click on the “Reset” button.
If you’re still having connection problems after all these steps, you might want to double-check your internet connection or call your internet service provider to make sure there are no issues on their end.
Enable settings with Group Policy
- Open Start.
- Search for gpedit. msc and click OK to open the Local Group Policy Editor.
- Browse the following path: User Configuration > Administrative Templates > Windows Components > Internet Explorer.
- On the right side, double-click the Prevent changing proxy settings policy.
- Where are proxy settings in registry?
- What is my proxy server IP address?
- What is proxy configuration?
- Are proxy settings per user?
- How do I find my Winhttp proxy settings?
- How do I disable Windows proxy?
- How do I disable proxy settings?
Where are proxy settings in registry?
Navigate within the folders in regedit to «HKEY_CURRENT_USER\Software\Microsoft\Windows\CurrentVersion\Internet Settings.» You should see a setting called «ProxyEnable.» Double-click it to edit it. Set it to 1 to enable a proxy server and 0 to disable one, connecting directly to the internet.
What is my proxy server IP address?
Check Your Operating System Settings
Selecting one of the options shows the proxy server address if you set it. Windows: Run a search and open Internet Options and select the Connections tab in that window. Clicking LAN Settings shows your proxy server address and more details about your current network configuration.
What is proxy configuration?
Proxy configuration acts as a security barrier; it ensures that the proxy server monitors all traffic between the Internet and the intranet. This is normally an integral part of security enforcement in corporate firewalls within intranets.
Are proxy settings per user?
Applies proxy settings to all users of the same computer. If you enable this policy, users cannot set user-specific proxy settings. They must use the zones created for all users of the computer.
How do I find my Winhttp proxy settings?
Click Start, click Run, type cmd, and then click OK. At the command prompt, type netsh winhttp show proxy, and then press ENTER.
How do I disable Windows proxy?
Disable network proxy using Settings app
Select Settings by pressing Windows key + X, Select Proxy under Network and Internet. Toggle off the Automatically detect settings option under Automatic proxy setup. Scroll down and toggle off the Use a proxy server slider as well.
How do I disable proxy settings?
For Google Chrome ›
In the System section, click on Open your computer’s proxy settings. On Windows 10, this will open the Proxy settings window. Under Automatic proxy setup, switch off: Automatically detect settings & Use setup script. Under Manual proxy setup, switch off: Use a proxy server, then click on Save.