
Продолжаем знакомиться с новыми возможностями ОС Windows Server 2012 R2. Ранее мы рассказывали о корпоративном аналоге DropBox в Windows Server 2012 R2 под названием Work Folders. Сегодня речь пойдет о еще одном новшестве новой серверной платформы – функции Web Application Proxy. Web Application Proxy – это новая функция роли Remote Access в Windows 2012 R2, позволяющая публиковать HTTP/ HTTPS приложения, расположенные в периметре корпоративной сети на клиентских устройствах (в первую очередь подразумеваются мобильные устройства) за ее периметром. Благодаря возможности интеграции c AD FS (служба может выступать в качестве ADFS-прокси), возможно обеспечить аутентификацию внешних пользователей, пытающихся получить доступ к опубликованным приложениям.
Web Application Proxy предоставляет такие же возможности публикации приложений, как и Forefront Unified Access Gateway (UAG), однако данная служба также позволяет взаимодействовать с другими серверами и сервисами, обеспечивая тем самым более гибкую и рациональную конфигурацию.
Web Application Proxy по сути выполняет функцию обратного прокси сервера (HTTP reverse proxy), организуя ретрансляцию запросов клиентов из внешней сети на внутренний сервер, и является межсетевым экраном на прикладном уровне.
Сервер со службой Web Application Proxy получает внешний HTTP/HTTPS трафик и терминирует его, после чего от своего имени инициирует новое подключение ко внутреннему приложению (веб-серверу). Т.е. внешние пользователи прямого доступа к внутреннему приложению реально не получают. Любой другой трафик, получаемый Web Application Proxy, отклоняется (в том числе отклоняются HTTP/HTTPS запросы, которые могут быть использованы при DoS, SSL и 0-day атаках).
Требования к организации Web Application Proxy и ключевые особенности:
- Систему можно развернуть на серверах с ОС Windows Server 2012 R2, включенных в домен Active Directory, с ролями AD FS и Web Application Proxy. Эти роли должны быть установлены на разных серверах.
- Необходимо обновить схему Active Directory до Windows Server 2012 R2 (обновлять контроллеры домена до Windows Server 2012 R2 не нужно)
- В качестве клиентских устройств поддерживаются устройства с ОС Windows, IOS (iPad и iPhone). Работы над клиентами для Android и Windows Phone пока еще не окончены
- Аутентификация клиентов осуществляется службой Active Directory Federation Services (ADFS), которая также выполняет функции ADFS – проксирования.
- Типовая схема размещения сервера с ролью Web Application Proxy представлена на рисунке. Данный сервер располагается в выделенной DMZ зоне и отделен от внешней (Интернет) и внутренней сети (Интранет) межсетевыми экранами. В этой конфигурации для работы Web Application Proxy требует наличия двух интерфейсов – внутреннего (Intranet) и внешнего (DMZ)

Установка роли ADFS в Windows Server 2012 R2
Для обеспечения дополнительной безопасности преаутентифкация внешних клиентов выполняется на сервере ADFS, в противном случае используется pass-through аутентификация на конечном сервере приложения (что менее секьюрно). Поэтому первый шаг при настройке Web Application Proxy – установка на отдельном сервере роли Active Directory Federation Services.

При установке ADFS нужно выбрать SSL сертификат, который будет использоваться для шифрования, а также DNS имена, которые будут использоваться клиентами при подключении (соответствующие записи в DNS зоне придется создать самостоятельно).

Затем нужно указать сервисную учетную запись для службы ADFS. Необходимо учесть, что имя ADFS должно быть указано в атрибут Service Principal Name аккаунта. Сделать это можно командой:
setspn –F –S host/adfs.winitpro.ru adfssvc

И, наконец, указать базу данных, в которой будет хранится информация: это может быть встроенная база на этом же сервере (WID — Windows Internal Database) или отдельная база на выделенном SQL-сервере.

Установка службы Web Application Proxy
Следующий этап, настройка самой службы Web Application Proxy. Напомним, что служба Web Application Proxy в Windows Server 2012 R2 является частью роли “Remote Access”. Установите службу Web Application Proxy и запустите мастер ее настройки.

На первом этапе мастер предложит Вам указать имя ADFS сервера и параметры учетной записи, имеющей доступ к данной службе.

Далее нужно указать сертификат (убедитесь, что в альтернативных именах сертификата содержится имя сервера ADFS).

Совет. Проверьте, что ваши DNSзоны настроены корректно: сервер с ролью WAP должен иметь возможность отрезолвить имя сервера ADFS, а он в свою очередь может разрешить имя прокси сервера. Сертификаты на обоих серверах должны включать имя службы федерации.
Публикация приложения через Web Application Proxy
После того, как установлены роли ADFS и Web Application Proxy (которая работает еще и как ADFS Proxy), можно перейти непосредственно к публикации наружу конкретного приложения. Сделать это можно с помощью консоли Remote Access Management Console.

Запустите мастер публикации и укажите, хотите ли вы использовать для преаутентификации службу ADFS (это именно наш вариант).

Затем нужно задать имя публикуемого приложения, используемый сертификат, внешний URL (имеенно его для подключения будут использовать внешние пользователи) и внутрений URL-адрес сервера, на который будут пересылаться запросы.
Совет. Если необходимо перенаправить внешнее приложение на альтернативный порт, необходимо задать его в URL, указаывающем на внутренний сервер. Например, если необходимо перенаправить внешние https запросы (443 порт) на 4443 порт, нужно указать:
Backend server URL: lync.winitpro.local:4443

Завершите работу мастера, и на этом публикация приложений окончена. Теперь, если попытаться с помощью браузера зайти на опубликованный внешний URL-адрес, то браузер сначала будет перенаправлен на службу аутентификации (ADFS Proxy), а после успешной аутентификации пользователь будет отправлен непосредственно на внутренний сайт (веб приложение).

Благодаря новой службе Web Application Proxy в Windows Server 2012 R2 возможно реализовать функционал обратного прокси сервера с целью публикации внутренних служб предприятия наружу без необходимости использования задействовать сторонние файерволы и продукты, в том числе такие, как Forefront и пр.
Download Windows Speedup Tool to fix errors and make PC run faster
While opening Microsoft Store, if you see an error message saying Your PC isn’t connected to the Internet, To use the Store, connect to the Internet and then try again, you might need to enable or configure a proxy server for UWP or Microsoft Store apps in Windows 11/10. If the default proxy setup is not working with Microsoft Store apps, you can follow this guide.
After searching online for a while I found some working methods. One is to use the Netsh command and import proxy settings from Internet options to WinHTTP, and the other is to manually configure the Proxy settings using the Registry or via Group Policy settings. You can try any of these 3 methods.
To set up proxy for Microsoft Store apps, follow these methods:
- Manually configure Proxy settings
- Using Netsh command to import proxy settings from Internet Options to WinHTTP
- Using Group Policy Editor
To learn more about these methods, continue reading.
1] Manually configure Proxy settings
In this method, we’ll create a predefined registry configuration and import it into the Registry. So first let’s make a backup of your Registry.
- Press Win + R and type in Regedit
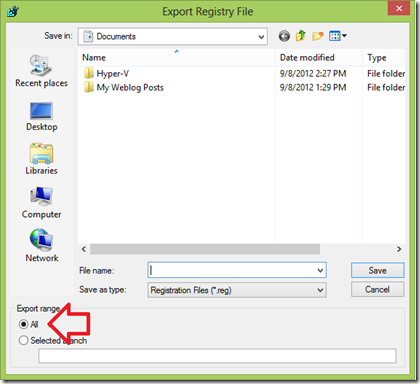
- Go to File and click on Export
- Under export range select “All”
- Type in the file name and click on Save
Now that we have made a backup close the registry editor and open a Notepad and copy the following text:
Regedit4

[HKEY_CURRENT_USER\Software\Microsoft\Windows\CurrentVersion\Internet Settings]
"MigrateProxy"=dword:00000001
"ProxyEnable"=dword:00000001
"ProxyHttp1.1"=dword:00000000
"ProxyServer"="http://ProxyServername:80"
"ProxyOverride"="<local>"
Replace “http://ProxyServername:80” with your Proxy name.
- Now go to File and click on Save As
- Change the file type to All Files
- Type in ProxyConfig.reg and click on Save.
Now that you have saved the file, double-click on ProxyConfig.reg and click Yes. Alternatively, open Registry, go to File and Import, and import the file from there. Reboot your PC and test it again.
2] Using Netsh command to import proxy settings from Internet Options to WinHTTP
The next method is using the Netsh command line. Before you do this setup your Internet Explorer Options with your Proxy settings and then follow these steps:
- Press Win + X and click on Command Prompt (Admin)
- Type in
Netsh winhttp import proxy source=ie - Close the Command prompt and restart your PC
Now the app should recognize your Proxy settings.
In case if you want to reset the Proxy in the command prompt type in the following command and hit Enter:
Netsh winhttp reset proxy
3] Using Group Policy Editor
The last method is to use Group Policy Editor to configure the Proxy settings.
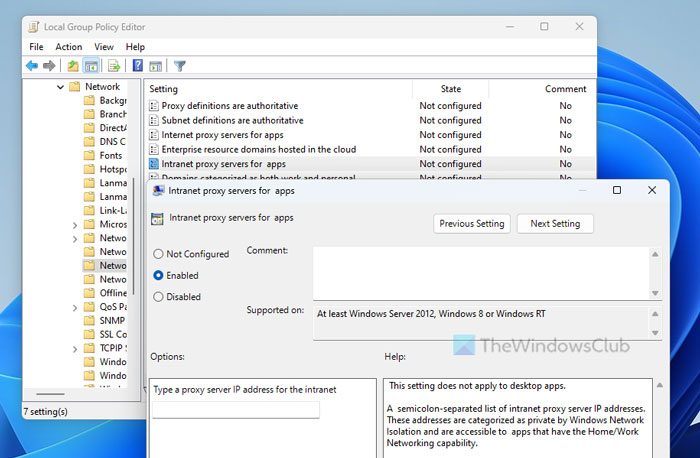
- Press Win + R and type in GPEDIT.MSC.
- Go to Computer Configuration > Administrative Template > Network > Network Isolation
- Select Internet Proxy Servers for apps
- Click on Enabled and type in your Proxy address under “Domain Proxies”
- Click on Apply, OK, and reboot your PC
I hope you find this tip helpful. If you have any difficulty following it or if it’s not working, do let us know.
If you know of any more methods to get it to work please share them with us in the comments section.
Read: How to configure Global Proxy Server Settings in Windows
Where are Windows proxy settings?
The proxy settings can be found in the Windows Settings panel. To be more specific, go to network & internet > Proxy. Then, click the Setup button and enter the necessary details to set things up as per your requirements.
What are the system requirements for Microsoft Store apps?
You can use any Microsoft Store apps if your computer or system complies with these three things:
- Your screen resolution must be 1024×768 pixels or more.
- You must have an internet connection to download the app.
- Your desired app must support your version of Windows.
Read: How to disable Proxy or Prevent changing Proxy settings in Windows.
Shyam aka “Captain Jack” is a Microsoft MVP alumnus and a Windows Enthusiast with an interest in Advanced Windows troubleshooting. Suggestions made and opinions expressed by him here are his personal ones and not of his current employers.
In today’s digital age, managing your internet connectivity is crucial, especially for users who frequently rely on applications and services provided through the Microsoft Store. Whether you are in a corporate environment, behind a firewall, or simply looking for an added layer of privacy, configuring a proxy for Microsoft Store apps can be vital. This extensive article will guide you through the process of setting up a proxy for Microsoft Store apps in both Windows 10 and Windows 11, ensuring that you can maintain a seamless digital experience.
Understanding Proxies
Before delving into the setup, it’s important to grasp what a proxy is. A proxy server acts as an intermediary between your device and the internet. When configured correctly, a proxy can help streamline browsing, enhance security, bypass geo-restrictions, and improve load times for certain applications. For Microsoft Store apps, using a proxy can help users navigate network restrictions or increase privacy while downloading and using applications.
Types of Proxies
-
HTTP/S Proxy: Mainly used for web traffic, an HTTP proxy can handle web requests and responses. HTTPS proxies are secure, encrypting traffic between the user and the server.
-
SOCKS Proxy: Unlike HTTP proxies, SOCKS servers can handle any type of traffic, whether it’s TCP or UDP. They are useful for a range of applications beyond web browsers, including various Microsoft Store apps.
-
Transparent Proxy: This type of proxy does not require any configuration on the client device as it is implemented without user intervention. However, it usually offers less privacy.
-
Anonymous Proxy: This type hides the user’s IP address while providing a connection to the internet.
-
High Anonymity Proxy: These proxies change their IP address periodically to promote user privacy, making them less detectable.
Understanding these types helps in choosing the right proxy for specific needs related to Microsoft Store app access.
Steps to Set Up Proxy for Microsoft Store Apps in Windows 10/11
Step 1: Gather Proxy Information
The first step in configuring a proxy is to have the necessary credentials and address details:
- Proxy IP Address: The IP address of the proxy server.
- Port Number: The port used by the proxy server for communications (commonly 8080 or 3128).
- Username & Password (if required): Some proxies need authentication, and knowing these credentials beforehand is crucial.
Step 2: Configure Proxy in Windows Settings
-
Open Settings:
- On Windows 10, click on the Start Menu and select the gear icon (Settings).
- On Windows 11, right-click the Start button and select Settings.
-
Navigate to the Network Settings:
- In the Windows Settings window, click on “Network & Internet”.
-
Access Proxy Settings:
- Scroll down and select “Proxy” from the list on the left.
-
Automatic Proxy Setup (optional):
- If your organization provides a URL for automatic configuration, toggle the switch under «Automatically detect settings” to ON. You may also enter a script URL if provided.
-
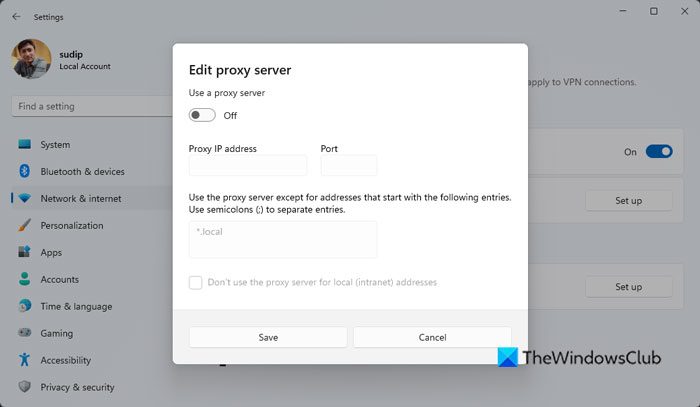
Manual Proxy Setup:
- Under “Manual proxy setup”, toggle on the “Use a proxy server” option.
- In the address field, enter the proxy IP address.
- In the port field, input the port number.
- If your proxy requires authentication, check “Use the same proxy server for all protocols” and ensure to input the username and password when prompted.
Step 3: Test the Proxy Configuration
-
Open a Web Browser: Launch any web browser (like Microsoft Edge, Google Chrome, or Firefox) to ensure web access is functioning correctly over the newly configured proxy.
-
Visit a Geo-Restricted Site: Try accessing a website that is typically geo-restricted. If it loads, your proxy has been set up correctly.
-
Check Microsoft Store: Open Microsoft Store and attempt to download or update an app to see if it resolves without issues.
Step 4: Troubleshooting Common Issues
If you run into problems, consider the following:
- Proxy Server Status: Ensure the proxy server is online and functioning.
- Firewall Configurations: The Windows Firewall or any third-party firewall can block proxy connections. Check the settings or consider temporarily disabling the firewall for testing.
- Network Connectivity: Confirm that your internet connection is active and stable.
- Recheck Settings: Make sure the IP address, port number, username, and password are correct.
- Compatibility with Microsoft Store: Some proxies might not work seamlessly with Microsoft Store apps, particularly if they’re restrictive in nature.
Step 5: Setting a Proxy for Individual Applications
While Windows provides system-wide proxy settings, you might want certain applications to use a proxy while allowing others to connect directly. For this, you can use third-party applications or configure the individual app settings if they support proxy settings.
Examples:
- Some VPN services allow you to set up application-specific proxy configurations.
- Certain software may have built-in options for proxy settings; look for these in the application settings.
Security Considerations
While proxies can enhance security and privacy, they can also expose you to risks, especially free public proxies. Here are some recommendations:
- Choose Trusted Proxies: Always select reputable proxies with positive user reviews to avoid data privacy issues.
- Use Encryption: Opt for HTTPS or SOCKS5 proxies that provide an additional layer of security.
- Regularly Update Credentials: If you’re using username and password authentication, it’s a good practice to update these periodically.
Advanced Proxy Configuration: Using Command Line
For tech-savvy users, Windows Command Prompt offers a way to configure proxy settings using command line. Here’s how to do it:
-
Open Command Prompt: Type
cmdin the Start Menu and press Enter. -
Set Proxy:
netsh winhttp set proxy proxy-ip-address:portReplace
proxy-ip-addressandportwith your proxy’s details. -
Check Proxy Settings:
netsh winhttp show proxy -
Reset Proxy: To remove the proxy, use:
netsh winhttp reset proxy
Configuration Validation Tools
To ensure proper proxy configuration, several tools can help validate its functionality. These include:
- Proxy Checker Tools: Online services can tell if your IP is masked effectively.
- Network Monitoring Tools: Help in ensuring that traffic routes through the desired proxy.
- Wireshark: Advanced users can analyze the network packets to confirm proxy usage.
Conclusion
Setting up a proxy for Microsoft Store apps in Windows 10/11 is a beneficial process that enhances privacy and navigates network limitations. While the basic setup of proxy through Windows settings is straightforward, being aware of application-specific configurations, advanced command-line setups, and making informed choices about proxies will enable a smooth and secure experience.
By following the outlined steps and best practices, you can tailor your Microsoft Store usage to fit your specific needs, ensuring both enhanced functionality and security. Whether you require a proxy for corporate compliance, bypassing limitations, or simply aiming for a more private browsing experience, this guide serves as a comprehensive resource for achieving your goals.
Setup Microsoft Web Application Proxy (WAP) on Windows Server 2019/2022. In this post, we introduce Web application proxy, its advantages and working principles. After that, we move onto how to set up Microsoft Web Application Proxy on Windows Server running 2019 or 2022.
What is Microsoft Web Application Proxy (WAP)

- Primarily, WAP is intended to offer highly secure access to online services like Exchange and SharePoint without a VPN connection. By functioning as a reverse proxy, it accomplishes this by taking inbound requests from the internet and then forwarding them to the proper internal server.
- Secondly, WAP is also an effective application for organizations that must offer protected access to web applications from external networks. Equally, it contributes to the security of internal networks by serving as a reverse proxy and offering secure authentication, authorization, encryption, and load balancing.
How Microsoft Web Application Proxy (WAP) Works

Mainly, Web Application Proxy (WAP) functions by providing web applications with reverse proxy functionality. In turn, this indicates that it serves as a gatekeeper for receiving requests and stands between the web and an internal network. Therefore, the following steps are used to break down how WAP operates:
- Processing a request: An external user attempts to access a web application hosted on the internal network.
- Authentication: WAP eliminates the requirement for each application to design its own authentication process by providing a safe, central location for user authentication.
- Authorization: Following user authentication, WAP determines whether the user is permitted access to the requested resource. In more detail, it ensures that only users with authorized device access the business applications.
- Encryption: Sensitive data is secured while being transmitted due to WAP’s ability to encrypt communication between the client and the internal network.
- Balanced loading: Incoming requests get split among several internal servers using WAP, which boosts performance and helps to guarantee high availability.
- Request transmission: The inbound request is forwarded by WAP to the proper internal server.
- Response: The client receives the response through WAP once the internal server has processed the request and returned it.
Advantages of Microsoft Web Application Proxy (WAP)
For businesses that must enable secure remote access to web applications, Web Application Proxy (WAP) offers several advantages, such as:
- Enhanced efficiency: Incoming requests are split among several internal servers using WAP, which boosts performance and helps to guarantee high availability. This makes it possible to maintain the responsiveness and accessibility of web applications for users even during periods of high traffic.
- Data protection: WAP assists in the security of internal resources and the protection of sensitive data by serving as an intermediary between the internal network and the internet. To guarantee that only authenticated and authorized users access the internal network, WAP provides security authentication, authorization, and encryption.
- Cost efficient: WAP assists enterprises in saving on the expense of building and maintaining VPN infrastructure by minimising the requirement for a VPN connection.
Setup Microsoft Web Application Proxy (WAP) on Windows Server 2019/2022
Follow these next steps to navigate how to set up Microsoft Web Application Proxy on a Windows server 2019 / 2022.
Prerequisites
- A server running Windows 2019 or 2022
- An administrator password is set up on your server.
Install Web Application Proxy
First, you need to install the Web Application Proxy server roles on your server. Follow the below guide:
Step 1 – Log in to your Windows server and open the server manager. You should see the server manager dashboard on the following screen.

Step 2 – Click on the Add roles and features. You should see the Before your begin screen.
Step 3 – Press the Next button. Select installation type screen appears.
Step 4 – Select Role-based or feature-based installation and click on the Next button. This should bring the option to Select destination server screen.
Step 5 – Choose Select a server from the server pool and click on the Next button. Next screen you see is to Select server roles screen.
Step 6 – Select Remote Access and click on the Next button.
Step 7 – Click on the Next button.
Step 8 – Now, click on the Next button. Roles service screen should appear next.
Step 9 – Select Web Application Proxy and click on the Next button. Confirm installation screen next.
Step 10 – Install button appears, which you click to start the installation. Installation progress screen appears next.
Step 11 – Click on the Close button to exit the installation windows. Your web application proxy is now installed on your server. Please proceed to the next step.
Import the ADFS Certificate
Now, you need to copy the ADFS certificate from your ADFS server to your web application proxy server and then import it to your server.
Furthermore, follow the below steps to import the ADFS certificate.
Step 1 – Type mmc.exe in the search bar and open the Microsoft Management Console as shown below.

Step 2 – Next, right click on Personal -> Certificates then go to All Tasks -> Import. This opens the Certificate Import Wizard as shown below.


Step 3 – Click on the Next button. See Certificate Window Wizard next step window.

Step 4 – Browse the ADFS certificate file that you exported from your AD FS server and click on the Next button. Likewise, you will be asked to provide password for the private key as shown below.

Step 5 – Provide your private key password, check the box to make the key exportable then click on the Next button.

Step 6 – Select “Place all certificates in the following store” and then click on the Next button.

Step 7 – Click on the Finish button. Given that, you should see your imported certificate on the following screen.

Configure Web Application Proxy
At this point, the Web Application Proxy is installed on your server. However, you need to perform post deployment configuration. Similarly, follow the below steps to configure Web Application Proxy.
Step 1 – Open the Server Manager and click Notifications.

Step 2 – Click on the Open the Web Application Proxy Wizard to start the configuration.

Step 3 – Click on the Next button. Then, ADFS server configuration screen appears.

Step 4 – Provide your ADFS server name, username, password, and click on the Next button. Server certificate selection screen appears next.

Step 5 – Select your server certificate and click on the Next button.

Step 6 – Click on the Configure button. Once the WAP is configured successfully, you should see the following screen.

Step 7 – Click on the Close button. Remote Access Management Console on the following screen appears next

Publish Web Application
In effect, you need to publish the web application from the Remote Access Management Console dashboard.
Step 1 – Click on the Web Application Proxy in the Remote Access Management Console.

Step 2 – Click on the Publish button.

Step 3 – Click on the Next button. Pre authentication screen apeears next.

Step 4 – Select Pass-through method and click on the Next button. Publishing settings screen appears next.

Step 5 – Provide the name, external URL, external certificate, and backend server URL then click on the Next button. Confirmation screen appears next.

Step 6 – Click on the Publish button. Once the Web Application has been published, you should see the following screen.

Step 7 – Click on the Close button. In essence, you should see your newly published web application on the following screen.

Thank you for reading Setup Microsoft Web Application Proxy (WAP) on Windows Server 2019/2022. We will conclude this article now.
Setup Microsoft Web Application Proxy (WAP) on Windows Server 2019/2022 Conclusion
In summary, this post explained how to set up Microsoft Web Application Proxy on Windows Server 2019 or 2022. Organizations provide secure and effective remote access to web applications via WAP. Lastly, WAP enables businesses to satisfy their demands while safeguarding sensitive data by enhancing security, performance, and remote access, as well as streamlining implementation and cutting expenses.
- Setting proxy with GPO
- Windows 10 proxy settings
- Computer proxy settings
- Proxy settings for WinHTTP API
- Setting proxy using system environment variables
- Prevent user from changing browser settings
- Powershell and proxy settings
As of June 2022 Internet Explorer browser reached end of support in Windows OS, and users are advised to use Microsoft Edge in IE compatibility mode. Especially if they have legacy apps running only on IE. Many of the settings we will explain here, related to proxy, are based on usage of Internet Explorer. Despite it, we will address all aspects of configuring proxy settings even it will become “deprecated”.
I took a big byte with this one because I wanted to cover all aspects of working with proxy settings, but it wared me out to check all details. I didn’t want to copywrite things but i wanted really to check what is going on with ceratin settings and how they work. In short, I didn’t wont to give false or deprecated info, but exact and tested information. I don’t know if I succeeded. Please comment and correct me if I am wrong somewhere.
If you read part I , you realize there are two dll-s you can use for Internet access and proxying , with different capabilities. As explained WinINET is user interactive based proxy engine and it has certain capabilities that modern browsers doesn’t have. For example ftp protocol. If you type ftp address in IE you will open ftp site but if you use Microsoft Edge, you will get prompt to open another app for browsing ftp site. In next video you can see that behavior with IE as ftp app.
There is lot of ways how to configure proxy settings on your PC or server. In this article we will explain how to set proxy with GPO, registry or netsh command. Also we will explain some specific situations and bypassing it.
Setting proxy with GPO
We will start with configuring proxy settings with GPO. We will create GPO and link it to OU.
Note
In previous versions of Internet Explorer (6, 7, and 9) to configure Internet Explorer settings you needed to use the following section in the Group Policy Editor console: User configuration > Policies > Windows Settings > Internet Explorer Maintenance. In Internet Explorer 10 (firstly appeared on Windows Server 2012 and Windows
the Internet Explorer Maintenance (IEM) section was removed from GPO Editor.
 the Internet Explorer Maintenance (IEM) section was removed from GPO Editor.
After that we edit created GPO. Navigate to User Configuration > Preferences > Control Panel Settings > Internet Settings and create new Internet Explorer 10 policy (it works for IE 11 also). Navigate to Connections and go to LAN settings

Enter setting for your proxy server in picture. Check box Use a proxy server for your LAN, and then enter IP address and port. Check also Bypass proxy server for local addresses.

There is one thing that you probably noticed on picture. There are green and red lines under different settings presented. Green means that setting is on and will be applied, and red means it is disabled. To toggle this settings use function keys
- F6 – enable selected option
- F7 – disable selected option
- F5 – enable all options on selected tab
- F8 – disable all options on selected tab
Bypass proxy settings for local addresses
This is very misunderstood setting. It means if you type http://intranet in your browser it will not use proxy to access web site. Local addresses are all URLs that doesn’t have domain suffix.
Regarding bypass, if you type http://intranet.contoso.com or http://192.168.0.34 it is not local address, and browser will try to use proxy to access it. That’s why it is usual to list your local domain and local addresses in exceptions on advanced tab. Use wildcards presented on picture example.

After GPO is applied, settings are presented in IE. If you have different proxy for different branch office-s aka LAN subnets you can use Item level targeting to use different proxy settings for different subnets. (I will not go into that area, but sometimes it is necessary. For example when using wpad or pac scripts for configuring proxy you will see it is common part of script configuration. We will talk about that in separate posts)

Windows 10 introduced new modern settings Control Panel where you can set up different computer settings. But still, it is just presentation pane. If you enter manually proxy settings here, you will have new entries in registry user path we talk about in next chapter. If you use GPO, proxy settings will be presented here because it will be read from the same location in registry. You can see words in red “some settings are managed by your organization“, if GPO is applied. Just to explain Microsoft Edge is using these settings, despite it is using WinHTTP API for accessing Internet. It is that setting in browser “Use system proxy settings” you can see in Chrome, Mozilla and similar browsers.

Setting proxy -registry settings
What happens when GPO is applied? It change registry settings. If you browse to registry key on picture, you will see all the same settings you configured on GPO

It means that you can also set user proxy settings by editing/adding registry keys. For example you can run this PowerShell script and set proxy settings for user. If keys doesn’t exist, please use New-ItemProperty instead of Set-ItemProperty.
$reg = "HKCU:\Software\Microsoft\Windows\CurrentVersion\Internet Settings"
Set-ItemProperty -Path $reg -Name ProxyEnable -Value 1
Set-ItemProperty -Path $reg -Name ProxyServer -Value "10.0.40.50:9090"
Set-ItemProperty -Path $reg -Name ProxyOverride -Value '*.contoso.com;<local>'
Set-ItemProperty -Path $reg -Name AutoDetect -Value 0
It is possible to create same registry settings with GPO also. Navigate to GPP section in GPO and create same registry keys from script. Location of settings is User Configuration > Preferences > Registry. Add next values to HKCU:\Software\Microsoft\Windows\CurrentVersion\Internet Settings registry path
- ProxyEnable (REG_DWORD) = 00000001;
- ProxyServer (REG_SZ) = 10.0.40.50:9090;
- ProxyOverride (REG_SZ) = *.contoso.com;<localhost>
Computer proxy settings
All settings we talked about are user proxy settings. If you need to setup proxy to computer object and all users logging into that computer, you need to configure two additional GPO settings. First one is Make proxy settings per-machine (rather than per user). It is located at Computer Configuration > Administrative Templates > Windows Components > Internet Explorer. When you enable this policy all users using that computer will have same proxy settings. Second setting need to override any user GPO policies it has in place. You need to enable Configure user Group Policy loopback processing mode located at Computer Configuration > Policies > Administrative Templates > System > Group Policy.
Make proxy settings per machine policy can be turned on also by registry setting . You will need to add next key on location in script.
$reg = "HKLM\Software\Policies\Microsoft\Windows\CurrentVersion\Internet Settings"
New-ItemProperty -Path $reg -Name ProxySettingsPerUser  -Value 0
For non domain-joined computers you can also use Make proxy settings per-machine GP locally. What is interesting is that you need to setup proxy settings in that way that you run IE but Run as Administrator. After that go to internet options in IE and configure all settings needed. What happens is that from that moment on, any user of that PC can change proxy settings, but if she/he open that window again proxy settings you entered as administrator will remain.
I checked what is happening in registry settings and what I discovered that somehow all Internet settings for proxy are changed in registry with entered values, but I didn’t catch a process that is changing all the values in registry. In any case result of this setting is also that if you try to change proxy setting as normal user setting is not changed. Wathc the video
Proxy settings for WinHTTP API
As we already mentioned in part I there are two different API-s used for accessing Internet over proxy. One of them WinHTTP API need its own separate proxy settings . Settings we talked about in chapters before This service also has add-on WinHTTP WPAD service that is used for configuring proxy settings using wpad script.
For system-wide proxy settings that is using this API you can use netsh command. This setting will affect all applications including Windows services which use WinHTTP API with default proxy. For example Windows Update service will not work if you are behind proxy and didn’t set this up. Syntax of this command, that you run in command shell is:
netsh winhttp set proxy 10.90.112.50:9090 "*.contoso.com;<local>"
netsh winhttp show proxy
After you run this command you will see proxy settings with show proxy command and it will look like this.

<local>
this entry correspond to Bypass proxy server for local addresses setting
These settings will be saved in the WinHttpSettings parameter under the registry key HKEY_LOCAL_MACHINE\SOFTWARE\Microsoft\Windows\CurrentVersion\Internet Settings\Connections.

You can set this proxy setting with GPO using registry wizard. Open new GPO nad navigate to Computer Configuration > Preferences > Windows Settings > Registry > New > Registry Wizard.
Select Local computer and specify the path to the WinHttpSettings parameter. Select setting and click finish. It will copy registry binary setting from your local PC to group policy entry.

Just to clarify that there is also two same settings under Connections Key with differnet names DefaultConnectionSettings and SavedLegacySettings among different registry keys. On this link you can find more about using this keys, and some help in quickly changing binary for turning on or off some common proxy setting values . For example If “Manual proxy” is checked – 9th byte value is “03“

Setting proxy using system environment variables
With new .NET Core cross platform language and general Windows love Linux attitude, you can now use environment variables for setting proxy. I first discovered this possibility when i tried to debug why certain web application is using proxy when it shouldn’t. For all apps that are using Linux like http_proxy, https_proxy entries you can now set it up. This change came with .NETcore 3.0. You can check when it all started on this link . If I am wrong please correct me. I didn’t had to much time to investigate
The environment variables used for DefaultProxy initialization on Windows and Unix-based platforms are:
- HTTP_PROXY: the proxy server used on HTTP requests.
- HTTPS_PROXY: the proxy server used on HTTPS requests.
- ALL_PROXY: the proxy server used on HTTP and/or HTTPS requests in case HTTP_PROXY and/or HTTPS_PROXY are not defined.
- NO_PROXY: a comma-separated list of hostnames that should be excluded from proxying.
New apps are using these environment variables first, and if they don’t exist user proxy settings are used. Please check this link for more details. What is interesting that PowerShell 7 is also using this feature.
If you see entries on the picture in your Windows installation check with you development team 🙂

Prevent user from changing browser settings
Even if GPO is applied to IE, netsh or any other proxy settings, users can change any of the proxy settings. Whatever change is, GPO will still overwrite user changed settings, because GPO’s are applied on regular bases in every domain.
You can prevent users from changing user proxy settings utilizing GPO “Prevent changing proxy settings”. This parameter is present in both the user and computer GPO sections under next locations
- Computer Configuration > Policies > Administrative Templates > Windows Components – Internet Explorer
- User Configuration > Policies > Administrative Templates > Windows Components Internet Explorer
Settings in the Computer Configuration section take precedence over user settings.


Powershell and proxy settings
When using PowerShell there is some recommendation what proxy settings should be used/configure. This is table about recommended proxy settings taken form this Microsoft link
| Platform | Recommended Proxy Settings | Comment |
|---|---|---|
| Windows PowerShell 5.1 | System proxy settings | Do not suggest setting HTTP_PROXY/HTTPS_PROXY environment variables. |
| PowerShell 7 on Windows | System proxy settings | Proxy could be configured by setting both HTTP_PROXY and HTTPS_PROXY environment variables. |
| PowerShell 7 on macOS | System proxy settings | Proxy could be configured by setting both HTTP_PROXY and HTTPS_PROXY environment variables. |
| PowerShell 7 on Linux | Set both HTTP_PROXY and HTTPS_PROXY environment variables, plus optional NO_PROXY | The environment variables should be set before starting PowerShell, otherwise they may not be respected. |
To find out what proxy settings is using PowerShell you can use this command
[System.Net.WebProxy]::GetDefaultProxy()

For some more info please check this link
I next part I will cover configuring proxy settings using WPAD/PAC scripts. i hope it will not be long and daunting task like this one. See you