
Задача запустить из PowerShell какой либо исполняемый файл (программу или утилиту командной строки) встречается достаточно часто. PowerShell предлагает для этого несколько различных способов, которые мы и рассмотрим далее в этой статье. Начнем с самого простого…
Прямой запуск
Самый простой способ запустить исполняемый файл в PowerShell — это перейти в директорию с файлом и стартовать его напрямую. Для примера возьмем простенькую программку, выводящую приветствие, и выполним ее командой:
Set-Location ″C:\Program Files″
.\Hello.exe

Обратите внимание, что даже находясь в нужном каталоге, требуется указывать относительный путь к исполняемому файлу. Исключение составляют файлы из директорий, перечисленных в переменной окружения (path). Например различные встроенные программы и утилиты (notepad, calc, ping и т.п.), находящиеся в директории Windows\System32, можно запускать без указания пути.

Оператор &
Если необходимо указать полный путь к исполняемому файлу, то можно воспользоваться оператором & (оператор вызова). Он позволяет выполнить строку текста, указанную в кавычках, как единую команду. Например:
& ′C:\Program Files\Hello.exe′
Поскольку оператор & не анализирует передаваемую команду, то он не может интерпретировать ее параметры. Поэтому дополнительные параметры\аргументы передаются также в виде текста, в кавычках. Для примера возьмем предыдущую программу и немного изменим ее, так что она принимает нужный текст в виде аргумента:
& ′C:\Program Files\Hello.exe′ ′Hello, world′
При желании можно указать нескольких аргументов через запятую:
& ′C:\Program Files\Hello.exe′ ′Hello,′, ′ world′
Для удобства команду и аргументы можно поместить в переменные:
$exe = ′C:\Program Files\Hello.exe′
$arg1 = ′Hello′
$arg2 = ′world′
& $exe $arg1 $arg2

Ну и если аргументов много, то их можно объединить, воспользовавшись такой конструкцией:
$exe = ′C:\Program Files\Hello.exe′
$allargs = @(′Hello,′,′world′)
& $exe $allargs

Invoke-Expression
Командлет Invoke-Expression работает примерно так-же, как и оператор & — берет текстовую строку и выполняет ее в виде команды. Например:
Invoke-Expression -Command ′C:\Windows\Hello.exe′
Однако у него есть один большой недостаток, а именно — неумение работать с пробелами. К примеру, следующая команда вызовет ошибку:
Invoke-Expression -Command ′C:\Program Files\Hello.exe′
Эта особенность делает применение командлета крайне неудобным. Хотя при необходимости подобных ошибок можно избежать с помощью дополнительных кавычек, например так:
Invoke-Expression -Command ″C:\′Program Files′\Hello.exe″

Start-Process
Командлет Start-Process запускает указанный файл в виде процесса, используя метод Start .NET класса Process. Например:
Start-Process -FilePath ′C:\Program Files\Hello.exe′
По умолчанию процесс выполняется в отдельном окне, которое закрывается по окончании процесса. Изменить такое поведение можно с помощью параметров, так следующая команда запустится в текущем окне:
Start-Process -FilePath ′C:\Program Files\Hello.exe′ -NoNewWindow -Wait
Также Start-Process позволяет передать в процесс дополнительные аргументы:
Start-Process -FilePath ′C:\Program Files\Hello.exe′ -ArgumentList ′Hello, world′ -NoNewWindow -Wait

По умолчанию командлет ничего не возвращает, но с помощью параметра -PassThru можно заставить его вернуть объект процесса. Этот объект очень удобно поместить в переменную:
$process = Start-Process -FilePath ′C:\Program Files\Hello.exe′ -Wait -PassThru
из которой можно затем можно узнать многие полезные вещи, такие как статус:
$process.HasExited
время:
$process.ExitTime
или код выполнения:
$process.ExitCode

.NET
В принципе .NET классом Process можно воспользоваться напрямую, без командлета Start-Process. К примеру, запустить процесс можно командой:
[System.Diagnostics.Process]::Start(′C:\Program Files\Hello.exe′)

Такой способ достаточно неудобен и громоздок (на мой взгляд), но чуть более гибок в использовании. Для примера запустим нашу программу в текущем окне, передадим в нее аргументы и заберем результат выполнения:
$process = New-Object -TypeName System.Diagnostics.Process
$process.StartInfo.FileName = ″C:\Program Files\Hello.exe″
$process.StartInfo.Arguments = ″Hello,world″
$process.StartInfo.RedirectStandardOutput = $true
$process.StartInfo.UseShellExecute = $false
$process.Start()
$process.WaitForExit()
$process.StandatdOutput.ReadToEnd()

WMI
С помощью WMI можно сделать практически все, в том числе и запустить программу. Для этого вполне подойдет метод Create WMI-класса Win32_Process. Этот метод запускает процесс на локальном или удаленном компьютере через RPC. Например, для выполнения программы на локальном компьютере можно воспользоваться такой командой:
([wmiclass])″Win32_Process″).Create(′C:\Program Files\Hello.exe′)
А для выполнения на удаленном компьютере команда будет выглядеть так:
([wmiclass])″\\remotecomputer\root\cimv2:Win32_Process″).Create(′C:\Program Files\Hello.exe′)

Как вариант, можно воспользоваться командлетом Invoke-WmiMethod:
Invoke-WmiMethod -Class Win32_Process -Name Create -ArgumentList ″C:\Program Files\Hello.exe″

Либо командлетом Invoke-CimMethod:
Invoke-CimMethod -ClassName Win32_Process -MethodName Create -Arguments @{CommandLine=″C:\Program Files\Hello.exe″}

WMI запускает процесс в отдельном окне и возвращает объект, содержащий идентификатор процесса (ProcessID) и результат выполнения (ReturnValue). ReturnValue может принимать следующие значения:
0 — Sucsessful Completiom
2 — Access Denied
3 — Insufficient Privilege
8 — Uncnown Failure
9 — Path Not Found
21 — Invalid Parameter
Invoke-Command
Командлет Invoke-Command умеет выполнять команды на локальном или удаленном компьютере, используя WinRM. Например, для запуска нашей программы на локальном компьютере используем команду:
Invoke-Command -ScriptBlock {″C:\′Program Files′\Hello.exe″}
При необходимости в программу можно передать аргументы:
Invoke-Command -ScriptBlock {C:\′Program Files′\Hello.exe ″Hello,world″}
Обратите внимание, что Invoke-Command не очень дружит с пробелами, поэтому во избежании ошибок приходится исхитряться с кавычками. Впрочем, подобных проблем можно избежать, например комбинируя использования командлета с оператором &:
Invoke-Command -ScriptBlock {& ′C:\Program Files\Hello.exe′}

В основном Invoke-Command применяется для удаленного управления, его главное достоинство — это возможность одновременного выполнения на нескольких компьютерах. Например:
Invoke-Command -ScriptBlock {″C:\′Program Files′\Hello.exe″} -ComputerName SRV1,SRV2,SRV3
Или так:
$scriptblock = {″C:\′Program Files′\Hello.exe″}
$Computers = @(′SRV1′,′SRV2′,′SRV3′)
Invoke-Command -ScriptBlock $scriptblock -ComputerName $Computers
По умолчанию командлет возвращает результат выполнения программы, а если запустить его в фоновом режиме (параметр -AsJob), то возвращает объект Job:
Invoke-Command -ScriptBlock {C:\′Program Files′\Hello.exe} -ComputerName localhost -AsJob -JobName Hello

Invoke-Item
Командлет Invoke-Item предназначен для применения к файлу действия по умолчанию. Так запустить исполняемый файл можно командой:
Invoke-Item -Path ″C:\Program Files\Hello.exe″
Однако наиболее удобно использовать Invoke-Item для открытия определенного типа файлов. Например так мы откроем текстовый файл:
Invoke-Item -Path ″C:\Files\test.txt″
А так все текстовые файлы в папке:
Invoke-Item -Path ″C:\Files\*.txt″

CMD
Ну и в завершение еще один способ запуска программы из PowerShell — с помощью оболочки cmd. Способ достаточно ″непрямой″, но тем не менее работающий. Следующая команда запускает новый экземпляр cmd, выполняет в нем указанную программу, завершает работу cmd и возвращает результат:
cmd /c ″C:\Program Files\Hello.exe″
Такое вот изобилие способов запустить программу предоставляет PoSh. И каждый из них хорош для определенных ситуаций.
Кстати, статья написана по мотивам PowerShell: Deep Dive and Best Practice. Рекомендую почитать, там еще много интересного.
Download Article
Open and run .exe files with PowerShell for Windows
Download Article
- Using .\ (Dot Slash)
- Using the Call (&) Operator
- Using Start-Process Cmdlet
- Using Invoke-Expression Cmdlet
|
|
|
If you need to launch an executable file from PowerShell, you have several options. If you’re in the same directory as the EXE file, type .\ before its filename (e.g., .\notepad.exe) and press Enter. You can run the EXE from a different directory using the PowerShell call operator (&), the Start-Process cmdlet, or the Invoke-Expression cmdlet. Each PowerShell run option is easy and can be used at the command line and in your PowerShell scripts.
Things You Should Know
- Use .\filename.exe to run an EXE from the current directory in PowerShell.
- To run an EXE from another directory, you can use & «C:\Windows\notepad.exe»
- To use the Start-Process cmdlet to run the program, type Start-Process -FilePath «filename.exe»
-

For example, if you want to run notepad.exe from PowerShell, type cd "C:\Windows\" and press Enter.
-

To run an EXE file from the current directory in PowerShell, you’ll need to preface the filename with .\. For example, to run notepad.exe, type .\notepad.exe and press Enter.
- Typing the .\ before the filename tells PowerShell you want to run the EXE file from the current directory.
- If you want to run the EXE file from a different directory, use the call operator (&).
Advertisement
-

If you get an error that says, «The term (EXE file name) is not recognized as a name of a cmdlet, function, script file, or executable program,» you’re either entering the wrong file name or in the wrong directory. Get-ChildItem shows you all files and permissions in the current directory.
- To show only EXE files, use Get-ChildItem *.exe.[1]
- You can also use Get-ChildItem to list files in other directories. For example, to show all executable files in C:\Program Files\Ableton\Live 11 Lite\Program, you’d use "C:\Program Files\Ableton\Live 11 Lite\Program\*.exe".
- To show only EXE files, use Get-ChildItem *.exe.[1]


Advertisement
-
\Windows\notepad.exe". In PowerShell scripting, you can run any command that’s stored in a variable by prefacing its path with an ampersand (&).[2]
Similarly, you can use the call operator to run an EXE file from the PowerShell prompt.

-
. This command will run the executable file called filename.exe from the current directory. If you’re not already in the same directory as the EXE file, use the full path to the file, e.g., Start-Process -FilePath "C:\path to\filename.exe".
- If you need to run an EXE with parameters, enter the parameters after the executable’s name. For example, to open Notepad with the window maximized, you’d use Start-Process -FilePath "C:\Windows\notepad.exe" -Wait -WindowStyle Maximized.[3]
- If you need to run an EXE with parameters, enter the parameters after the executable’s name. For example, to open Notepad with the window maximized, you’d use Start-Process -FilePath "C:\Windows\notepad.exe" -Wait -WindowStyle Maximized.[3]

Advertisement
-

\path to\filename.exe". Invoke-Expression is typically used in PowerShell scripts to evaluate expressions, run scripts, and run commands in variables. You can also use it to run any EXE file at the prompt.
- Microsoft cautions against using Invoke-Expression in PowerShell scripts that accept user input unless the script can verify that the command is safe to run.[4]
- Microsoft cautions against using Invoke-Expression in PowerShell scripts that accept user input unless the script can verify that the command is safe to run.[4]

Ask a Question
200 characters left
Include your email address to get a message when this question is answered.
Submit
Advertisement
Thanks for submitting a tip for review!
References
About This Article
Thanks to all authors for creating a page that has been read 100,229 times.
Is this article up to date?
.EXE files, or “executable files” are something we see often. Most downloaded files, especially setups, are executable files that are ready to be run and installed on your system. At other times, files may still be executable but have a different file extension, like “.msi”, “.bat”, or “.inf”.
Even though you can run such files by double-clicking them using File Explorer, the method may not be ideal for every situation. You can also run executable (.exe) files directly from Windows PowerShell. Some people may prefer the command-line method as you can run an executable without having to navigate here and there.
In this article, we show you 4 methods to run .exe files directly inside PowerShell. The commands discussed in the methods below can also be applied to PowerShell scripts. Moreover, some of them even allow you to send parameters/values to the executable file.
Table of Contents
How to Run EXE Files in PowerShell
In all of the methods discussed below, you must know the complete directory path to the file that you want to run in PowerShell. While one of the methods requires you to navigate to the .exe file directory and then execute the file, the other methods need complete file paths in the command.
In the example below, we will be running “Rufus.exe” located at “C:\Users\Subhan\Downloads.” Of course, this will change for you according to the file’s path and its name.
Run EXE File Directly from PowerShell
When we say “directly,” we mean that this method to run an executable file does not need any special PowerShell commands. All it needs is a path and the name of the file to run.
-
Launch an elevated PowerShell instance.
-
Use the “CD” command to change the directory to the executable file’s location:
CD "[PathToExecutableFile]" Files Using PowerShell 1")
Change directory using CD command Alternatively, you can also jump one folder at a time using the following pattern:
# Change directory to the root of the current volume CD\ # Change direcoty to root of the C drive CD C: CD Users CD Subhan CD Downloads -
Now that you’re inside the directory of the file, use “.\” followed by the complete name of the executable file.
Note: Apart from the [FileName], you can also change the file type/extension depending on the actual file type.
.\[FileName].exe Files Using PowerShell 2")
Run the executable file from PowerShell directly The executable file will now run.
You can also run the executable file whilst sending a parameter to the file, as in the example below:
.\Rufus.exe 10In this example, the parameter “10” will be sent to Rufus.exe.
 Files Using PowerShell 1")
 Files Using PowerShell 2")
Note that it is crucial that you use “.\” while running an executable file directly. Otherwise, it will be considered a PowerShell command and you may see an error.
Additionally, if you find yourself lost while navigating/changing the directories, or are unsure of the file name, you can use the following cmdlet to get a list of the items inside the current directory:
Get-ChildItem Files Using PowerShell 3")
Run EXE File in PowerShell Using Invoke-Expression Command
Another way to run an executable file using PowerShell is by using the “Invoke-Expression” cmdlet. You can use this cmdlet directly in PowerShell, or insert the full command inside a PowerShell script (.ps1) to run an executable. This way, you can open a document file directly inside the app/program you are writing the script for.
To run an executable file in PowerShell or PowerShell script, use the following command syntax:
Invoke-Expression -Command “[PathToExecutableFile].exe”Alternatively, the following syntax also works just as well:
“[PathToExecutableFile].exe” | Invoke-Expression Files Using PowerShell 4")
Run EXE File in PowerShell Using Start-Process Command
Like the Invoke-Expression cmdlet, you can also use the “Start-Process” command to run an executable file or a PowerShell script. Here’s how:
-
Launch an elevated PowerShell instance.
-
Use the following cmdlet to run an executable file:
Start-Process -FilePath ‘[PathToExecutableFile].exe’ Files Using PowerShell 5")
Run executable file from PowerShell using Start-Process command That’s it! The executable file should now run.
 Files Using PowerShell 5")
Alternatively, you can also change your strategy to a directory-first approach and use a different syntax of the “Start-Process” command to run an executable file. For that, you must first use the “CD” cmdlet to change your directory to the location where the executable file is located, then use the following command to run it:
Start-Process [ExecutableFileName].exeHere is an example:
 Files Using PowerShell 6")
Run EXE File in PowerShell Using “&” Call Operator
A Call Operator in Windows PowerShell allows you to run a command, function, or script. Anything followed by the “&” call operator is considered a command by PowerShell. You can use this logic of PowerShell to run an executable file simply by entering the file’s path prefixed with the call operator.
This is the syntax to be used to run an executable file in PowerShell:
& "[PathToExecutableFile].exe" Files Using PowerShell 7")
It is that simple.
Closing Thoughts
The easiest way to run an executable file, may it be a .exe, .ps1, or .msi file, is perhaps using the “&” call operator followed by the complete file path and extension. However, there are other ways to get the job done as well:
- Run the executable in PowerShell directly by using “.\” followed by the file name.
- Run the executable in PowerShell using the
Invoke-Expressioncommand. - Run the executable in PowerShell using the
Start-Processcommand.
All of the 4 aforementioned methods will execute the file directly from PowerShell. This way, you do not have to browse through File Explorer to run a file each time you need to.
To run an application, process, or script from within PowerShell you could simply enter the path to file. But this will start the process in the same environment and within the same context as your PowerShell session.
When you want to run the process as a different user, start it in a new window, or even start multiple processes simultaneously then you will need to use the Start-Process cmdlet.
In this article
In this article, we are going to take a look at the start-process cmdlet. How we can run a process with elevated permissions, run it in a new window, or even completely hidden. I will also give you a couple of useful examples to get started.
The Start-Process cmdlet allows you to run one or multiple processes on your computer from within PowerShell. It’s designed to run a process asynchronously or to run an application/script elevated (with administrative privileges).
You don’t need to use the Start-Process cmdlet if you need to run a script or other console program synchronously in PowerShell. The reason for this is that you can redirect the output of it to PowerShell.
This is one of the downsides of the cmdlet, you can’t redirect the output or error streams to PowerShell. The only option that you have is to redirect the output to text files.
So let’s take a look at how to use the cmdlet. We can use the following parameters to start a process:
| Parameter | Description |
|---|---|
| -FilePath | Specify the file, application, or process to run |
| -ArgumentList | Specifies parameters to use with the process to start |
| -Credential | User account to run the process with |
| -WorkingDirectory | The location where the process should start in |
| -NoNewWindow | Don’t open a new window for the process |
| -RedirectStandardError | Specify text file to redirect error output to |
| -RedirectStandardInput | Text file with input for the process |
| -RedirectStandardOutput | Specify text file to redirect output to |
| -WindowStyle | Normal, Hidden, Minimized, or Maximized |
| -Wait | Wait for the process to finish before continuing with the script |
| -UseNewEnvironment | The process will use its own environment variables instead of those of the PowerShell session |
So to simply open an application with PowerShell we could use the following command:
Start-Process Notepad.exe

# Simply typing notepad.exe in PowerShell will have the same result:
Notepad.exe
This will open Notepad in a new window with the same privileges as the PowerShell session. The process is run asynchronously, which means that PowerShell will continue the script, even if the process isn’t finished yet.
Waiting for a process to finish
The most common wait to start a process in PowerShell is to wait for it to finish. We can use the -wait parameter for this, which will make sure that PowerShell will wait until the process and all child-process are finished.
Let’s say we have a bat file that we want to start from PowerShell and wait for the process to finish:
# Start the process example.bat and wait for it to finish
Start-Process -FilePath "c:\temp\example.bat" -Wait
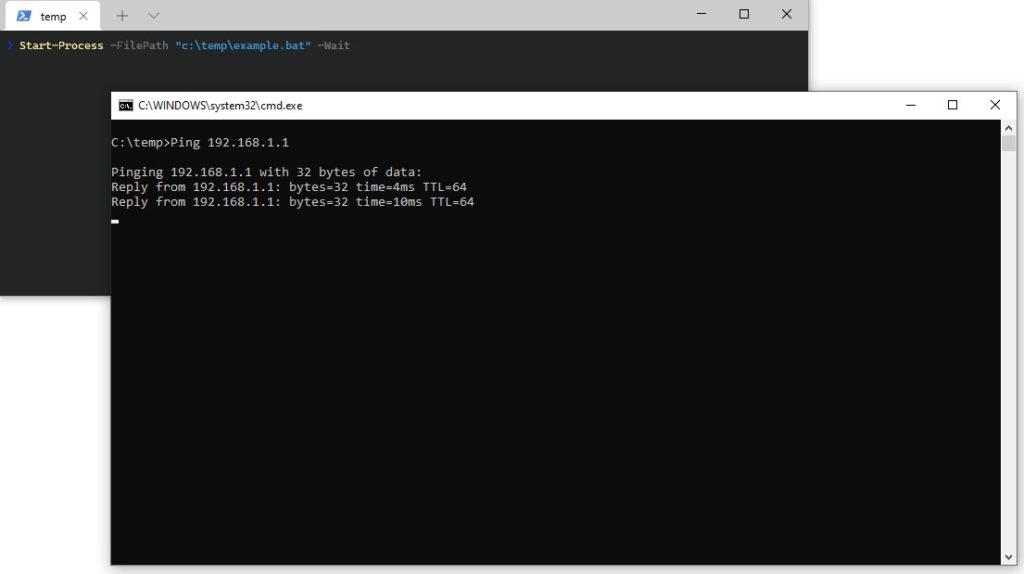
This will run the bat file and wait for it to finish before continuing the script or resuming input. Keep in mind that any output of the process isn’t captured by default. So you won’t know if the bat file failed or successfully completed.
Window size and Hidden processes
If we run the bat file with the example above, it will run the bat file in a new window. The window will have a normal size and close when the process completes. In the start-process cmdlet, we can specify the window size or even hide it completely.
We can choose between using the parameters -WindowStyle and -NoNewWindow. Obviously, we can’t use both parameters together 😉
To run the bat file without any windows we can use the following command in PowerShell:
# Start the process example.bat, without any window and wait for it to finish
Start-Process -FilePath "c:\temp\example.bat" -Wait -WindowStyle Hidden
You won’t get any feedback, except that your script will continue when the process is finished. However we can redirect the result of the process to a text file, more about that later.
To run a process in a maximized, normal, or minimized window you can use the following options:
# Default behavior:
Start-Process -FilePath "c:\temp\example.bat" -Wait -WindowStyle Normal

# Maximized
Start-Process -FilePath "c:\temp\example.bat" -Wait -WindowStyle Maximized

# Minimized
Start-Process -FilePath "c:\temp\example.bat" -Wait -WindowStyle Minimized
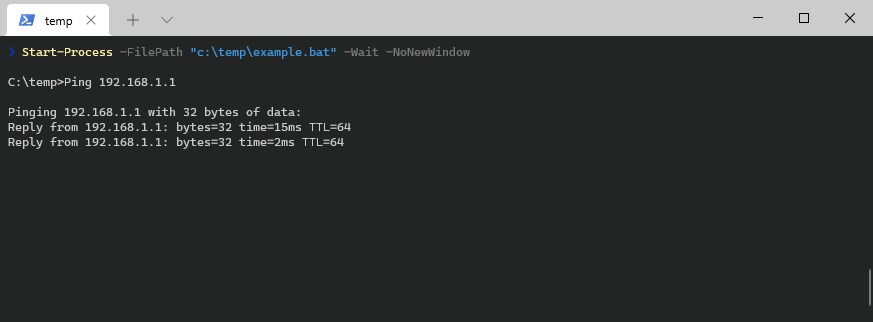
Another parameter that we can use is -NoNewWindow. This will run the process in the same window as the PowerShell script. This option only works with command-line-based processes. You can’t for example, open Notepad in the same window as PowerShell.
Start-Process -FilePath "c:\temp\example.bat" -Wait -NoNewWindow
Using Arguments with Start-Process
Some processes or scripts that you want to start require parameters (arguments). Probably your first thought is to add the arguments between the quotes in the filepath, but as you might have noticed, that won’t work.
To pass arguments to the process that you want to start, you will need to use the -arguments parameter.
Let’s run an MSI from PowerShell as an example. To run the MSI silently we will need to supply the arguments /quiet or /qn and we probably don’t want to restart as well, so we add /norestart to it.
Start-Process -FilePath "C:\temp\example.msi" -Wait -ArgumentList "/quiet /norestart"

# Or arguments as string array:
Start-Process -FilePath "C:\temp\example.msi" -Wait -ArgumentList "/quiet","/norestart"
PowerShell Start-Process Elevated
When you start a process with Start-Process it will run in the same user context as the PowerShell session. But some processes may need elevated permissions to run. To do this we can use the -Verb parameter.
Keep in mind that you can’t combine -Verb and -NoNewWindow because the process that you want to start must be opened in a new window.
To run the example.bat with elevated permissions we can use the following command:
Start-Process -FilePath "c:\temp\example.bat" -Wait -Verb RunAs
Depending on the file extension other options are also possible. We could for example print a text file with -Verb Print.
Start Process as a different user
It’s also possible to run a process as a different user. By default, the process will be executed with the credentials of the currently logged-on user.
First, you will need t to create a PSCredential object and store it as a secure string. Then you can pass the credentials to the cmdlet with the parameter -Credential.
Keep in mind that secure strings are not super secure to use, so make sure that you keep the secure string as safe as possible.
# Create credential object
# You can store these also in a text file
$username = Read-Host "Enter your username"
$secureStringPwd = Read-Host -assecurestring "Please enter your password"

# Create credential object
$credObject = New-Object System.Management.Automation.PSCredential -ArgumentList $username, $secureStringPwd

Start-Process -FilePath "c:\temp\example.bat" -Wait -Credentials $credObject
Redirecting the Output
The output of the Start-Process cmdlet can’t be passed through to PowerShell. The only option that we have is to redirect the output to a text file. Variables won’t work.
So what you can do to capture the output is:
# Redirect the output to example-output.txt
Start-Process -FilePath "c:\temp\example.bat" -Wait -RedirectStandardOutput c:\temp\example-output.txt

# Read the contents of example-output.txt
$output = Get-Content c:\temp\example-output.txt
What won’t work is :
# Storing the output into a variable will throw an error
Start-Process -FilePath "c:\temp\example.bat" -Wait -RedirectStandardOutput $output

# $result will be empty
$result = Start-Process -FilePath "c:\temp\example.bat" -Wait
If you want to capture only the error of the process then you can use:
Start-Process -FilePath "c:\temp\example.bat" -Wait -RedirectStandardError c:\temp\example-output.txt
Getting the Process ID
The last option that I want to explain is the -Passtru parameter. It will return the process object of the process that we have started. This can be useful when you want to automatically stop a process when it’s running for too long.
$process = Start-Process "C:\temp\example.bat" -PassThru

# Get the process ud
$process.ID

# Wait 1 second
Start-Sleep 1

# Kill the process
Stop-Process -id $process.Id
Wrapping Up
The Start-Process cmdlet is great to run one or multiple applications or scripts from within PowerShell. Unfortunately, we can’t easily capture the output of the process, but with a small workaround, we are still able to inspect the results in PowerShell.
I hope you found this article useful, if you have any questions, just drop a comment below.
Starts one or more processes on the local computer.
Syntax
PowerShellCopy
Start-Process
     [-FilePath] <String>
     [[-ArgumentList] <String[]>]
     [-Credential <PSCredential>]
     [-WorkingDirectory <String>]
     [-LoadUserProfile]
     [-NoNewWindow]
     [-PassThru]
     [-RedirectStandardError <String>]
     [-RedirectStandardInput <String>]
     [-RedirectStandardOutput <String>]
     [-WindowStyle <ProcessWindowStyle>]
     [-Wait]
     [-UseNewEnvironment]
     [-WhatIf]
     [-Confirm]
     [<CommonParameters>]
PowerShellCopy
Start-Process
     [-FilePath] <String>
     [[-ArgumentList] <String[]>]
     [-WorkingDirectory <String>]
     [-PassThru]
     [-Verb <String>]
     [-WindowStyle <ProcessWindowStyle>]
     [-Wait]
     [-WhatIf]
     [-Confirm]
     [<CommonParameters>]
Description
The Start-Process cmdlet starts one or more processes on the local computer. By default, Start-Process creates a new process that inherits all the environment variables that are defined in the current process.
To specify the program that runs in the process, enter an executable file or script file, or a file that can be opened using a program on the computer. If you specify a non-executable file, Start-Process starts the program that’s associated with the file, similar to the Invoke-Item cmdlet.
You can use the parameters of Start-Process to specify options, such as loading a user profile, starting the process in a new window, or using alternate credentials.
Examples
Example 1: Start a process that uses default values
This example starts a process that uses the Sort.exe file in the current folder. The command uses all the default values, including the default window style, working folder, and credentials.
PowerShellCopy
Start-Process -FilePath "sort.exe"Example 2: Print a text file
This example starts a process that prints the C:\PS-Test\MyFile.txt file.
PowerShellCopy
Start-Process -FilePath "myfile.txt" -WorkingDirectory "C:\PS-Test" -Verb PrintExample 3: Start a process to sort items to a new file
This example starts a process that sorts items in the TestSort.txt file and returns the sorted items in the Sorted.txt files. Any errors are written to the SortError.txt file. The UseNewEnvironment parameter specifies that the process runs with its own environment variables.
PowerShellCopy
$processOptions = @{
    FilePath = "sort.exe"
    RedirectStandardInput = "TestSort.txt"
    RedirectStandardOutput = "Sorted.txt"
    RedirectStandardError = "SortError.txt"
    UseNewEnvironment = $true
}
Start-Process @processOptions
This example uses splatting to pass parameters to the cmdlet. For more information, see about_Splatting.
Example 4: Start a process in a maximized window
This example starts the Notepad.exe process. It maximizes the window and retains the window until the process completes.
PowerShellCopy
Start-Process -FilePath "notepad" -Wait -WindowStyle MaximizedExample 5: Start PowerShell as an administrator
This example starts PowerShell using the Run as administrator option.
PowerShellCopy
Start-Process -FilePath "powershell" -Verb RunAsExample 6: Using different verbs to start a process
This example shows how to find the verbs that can be used when starting a process. The available verbs are determined by the filename extension of the file that runs in the process.
PowerShellCopy
$startExe = New-Object System.Diagnostics.ProcessStartInfo -Args powershell.exe
$startExe.verbs

open
runas
runasuser
The example uses New-Object to create a System.Diagnostics.ProcessStartInfo object for powershell.exe, the file that runs in the PowerShell process. The Verbs property of the ProcessStartInfo object shows that you can use the Open and RunAs verbs with powershell.exe, or with any process that runs a .exe file.
Example 7: Specifying arguments to the process
Both commands start the Windows command interpreter, issuing a dir command on the Program Files folder. Because this foldername contains a space, the value needs surrounded with escaped quotes. Note that the first command specifies a string as ArgumentList. The second command is a string array.
PowerShellCopy
Start-Process -FilePath "$env:comspec" -ArgumentList "/c dir `"%SystemDrive%\Program Files`""
Start-Process -FilePath "$env:comspec" -ArgumentList "/c","dir","`"%SystemDrive%\Program Files`""
Example 8: Run a command as an Administrator using alternate credentials
On Windows, you can run Start-Process -Verb RunAs to start a process with elevated permissions. This elevates the current user’s context. The Credential parameter allows you to specify an alternate username and password, allowing you to start a process in a different user content. However, the Credential and Verb parameters can’t be used together.
To start a process with elevated rights, using alternate credentials, you must first start PowerShell using the alternate credentials, then use Start-Process to start the process with elevated rights.
PowerShellCopy
$cred = Get-Credential
$args = '-noprofile -command "Start-Process cmd.exe -Verb RunAs -args /k"'
Start-Process pwsh.exe -Credential $cred -WindowStyle Hidden -ArgumentList $args
The example starts cmd.exe with elevated permissions from a PowerShell session that is running under alternate credentials.
Example 9: Create a detached process on Linux
On Windows, Start-Process creates an independent process that remains running independently of the launching shell. On non-Windows platforms, the newly started process is attached to the shell that launched. If the launching shell is closed, the child process is terminated.
To avoid terminating the child process on Unix-like platforms, you can combine Start-Process with nohup. The following example launches a background instance of PowerShell on Linux that stays alive even after you close the launching session. The nohup command collects output in file nohup.out in the current directory.
PowerShellCopy
# Runs for 2 minutes and appends output to ./nohup.out
Start-Process nohup 'pwsh -noprofile -c "1..120 | % { Write-Host . -NoNewline; sleep 1 }"'
In this example, Start-Process is running the Linux nohup command, which launches pwsh as a detached process. For more information, see the man page for nohup.
Parameters
-ArgumentList
Specifies parameters or parameter values to use when this cmdlet starts the process. Arguments can be accepted as a single string with the arguments separated by spaces, or as an array of strings separated by commas. The cmdlet joins the array into a single string with each element of the array separated by a single space.
The outer quotes of the PowerShell strings aren’t included when the ArgumentList values are passed to the new process. If parameters or parameter values contain a space or quotes, they need to be surrounded with escaped double quotes. For more information, see about_Quoting_Rules.
For the best results, use a single ArgumentList value containing all the arguments and any needed quote characters.
| Type: | String[] |
| Aliases: | Args |
| Position: | 1 |
| Default value: | None |
| Accept pipeline input: | False |
| Accept wildcard characters: | False |
-Confirm
Prompts you for confirmation before running the cmdlet.
| Type: | SwitchParameter |
| Aliases: | cf |
| Position: | Named |
| Default value: | None |
| Accept pipeline input: | False |
| Accept wildcard characters: | False |
-Credential
Specifies a user account that has permission to perform this action. By default, the cmdlet uses the credentials of the current user.
Type a user name, such as User01 or Domain01\User01, or enter a PSCredential object generated by the Get-Credential cmdlet. If you type a user name, you’re prompted to enter the password.
Credentials are stored in a PSCredential object and the password is stored as a SecureString.
Note
For more information about SecureString data protection, see How secure is SecureString?.
| Type: | PSCredential |
| Aliases: | RunAs |
| Position: | Named |
| Default value: | Current user |
| Accept pipeline input: | False |
| Accept wildcard characters: | False |
-FilePath
Specifies the optional path and filename of the program that runs in the process. Enter the name of an executable file or of a document, such as a .txt or .doc file, that’s associated with a program on the computer. This parameter is required.
If you specify only a filename, use the WorkingDirectory parameter to specify the path.
| Type: | String |
| Aliases: | PSPath, Path |
| Position: | 0 |
| Default value: | None |
| Accept pipeline input: | False |
| Accept wildcard characters: | False |
-LoadUserProfile
Indicates that this cmdlet loads the Windows user profile stored in the HKEY_USERS registry key for the current user. The parameter doesn’t apply to non-Windows systems.
This parameter doesn’t affect the PowerShell profiles. For more information, see about_Profiles.
| Type: | SwitchParameter |
| Aliases: | Lup |
| Position: | Named |
| Default value: | None |
| Accept pipeline input: | False |
| Accept wildcard characters: | False |
-NoNewWindow
Start the new process in the current console window. By default on Windows, PowerShell opens a new window. On non-Windows systems, you never get a new window.
You can’t use the NoNewWindow and WindowStyle parameters in the same command.
The parameter doesn’t apply to non-Windows systems.
| Type: | SwitchParameter |
| Aliases: | nnw |
| Position: | Named |
| Default value: | None |
| Accept pipeline input: | False |
| Accept wildcard characters: | False |
-PassThru
Returns a process object for each process that the cmdlet started. By default, this cmdlet doesn’t generate any output.
| Type: | SwitchParameter |
| Position: | Named |
| Default value: | None |
| Accept pipeline input: | False |
| Accept wildcard characters: | False |
-RedirectStandardError
Specifies a file. This cmdlet sends any errors generated by the process to a file that you specify. Enter the path and filename. By default, the errors are displayed in the console.
| Type: | String |
| Aliases: | RSE |
| Position: | Named |
| Default value: | None |
| Accept pipeline input: | False |
| Accept wildcard characters: | False |
-RedirectStandardInput
Specifies a file. This cmdlet reads input from the specified file. Enter the path and filename of the input file. By default, the process gets its input from the keyboard.
| Type: | String |
| Aliases: | RSI |
| Position: | Named |
| Default value: | None |
| Accept pipeline input: | False |
| Accept wildcard characters: | False |
-RedirectStandardOutput
Specifies a file. This cmdlet sends the output generated by the process to a file that you specify. Enter the path and filename. By default, the output is displayed in the console.
| Type: | String |
| Aliases: | RSO |
| Position: | Named |
| Default value: | None |
| Accept pipeline input: | False |
| Accept wildcard characters: | False |
-UseNewEnvironment
Indicates that this cmdlet uses new environment variables specified for the process. By default, the started process runs with the environment variables inherited from the parent process.
On Windows, when you use UseNewEnvironment, the new process starts only containing the default environment variables defined for the Machine scope. This has the side effect that the $env:USERNAME is set to SYSTEM. None of the variables from the User scope are included.
| Type: | SwitchParameter |
| Position: | Named |
| Default value: | None |
| Accept pipeline input: | False |
| Accept wildcard characters: | False |
-Verb
Specifies a verb to use when this cmdlet starts the process. The verbs that are available are determined by the filename extension of the file that runs in the process.
The following table shows the verbs for some common process file types.
| File type | Verbs |
|---|---|
| .cmd | Edit, Open, Print, RunAs, RunAsUser |
| .exe | Open, RunAs, RunAsUser |
| .txt | Open, Print, PrintTo |
| .wav | Open, Play |
To find the verbs that can be used with the file that runs in a process, use the New-Object cmdlet to create a System.Diagnostics.ProcessStartInfo object for the file. The available verbs are in the Verbs property of the ProcessStartInfo object. For details, see the examples.
The parameter doesn’t apply to non-Windows systems.
| Type: | String |
| Position: | Named |
| Default value: | None |
| Accept pipeline input: | False |
| Accept wildcard characters: | False |
-Wait
Indicates that this cmdlet waits for the specified process and its descendants to complete before accepting more input. This parameter suppresses the command prompt or retains the window until the processes finish.
| Type: | SwitchParameter |
| Position: | Named |
| Default value: | None |
| Accept pipeline input: | False |
| Accept wildcard characters: | False |
-WhatIf
Shows what would happen if the cmdlet runs. The cmdlet isn’t run.
This parameter was introduced in PowerShell 6.0.
| Type: | SwitchParameter |
| Aliases: | wi |
| Position: | Named |
| Default value: | None |
| Accept pipeline input: | False |
| Accept wildcard characters: | False |
-WindowStyle
Specifies the state of the window that’s used for the new process. The default value is Normal. The acceptable values for this parameter are:
NormalHiddenMinimizedMaximized
You can’t use the WindowStyle and NoNewWindow parameters in the same command.
The parameter doesn’t apply to non-Windows systems. When using on non-Windows systems, you never get a new window.
| Type: | ProcessWindowStyle |
| Accepted values: | Normal, Hidden, Minimized, Maximized |
| Position: | Named |
| Default value: | None |
| Accept pipeline input: | False |
| Accept wildcard characters: | False |
-WorkingDirectory
Specifies the location that the new process should start in. The default is the location of the executable file or document being started. Wildcards aren’t supported. The path must not contain characters that would be interpreted as wildcards.
| Type: | String |
| Position: | Named |
| Default value: | None |
| Accept pipeline input: | False |
| Accept wildcard characters: | False |
Inputs
None
You can’t pipe input to this cmdlet.
Outputs
None, System.Diagnostics.Process
This cmdlet generates a System.Diagnostics.Process object, if you specify the PassThru parameter. Otherwise, this cmdlet doesn’t return any output.
Notes
PowerShell includes the following aliases for Start-Process:
- All platforms
saps
- Windows
start
Native commands are executable files installed in the operating system. These executables can be run from any command-line shell, like PowerShell. Usually you run the command exactly as you would in bash or cmd.exe. The Start-Process cmdlet can be used to run any native commands, but should only be used when you need to control how the command is executed.
Start-Process is useful for running GUI programs on non-Windows platforms. For example, run Start-Proces gedit to launch the graphical text editor common the GNOME Desktop environments.
By default, Start-Process launches a process asynchronously. Control is instantly returned to PowerShell even if the new process is still running.
- On the local system, the launched process lives on independent from the calling process.
- On a remote system, the new process is terminated when the remote session ends, immediately following the
Start-Processcommand. Therefore, you can’t useStart-Processin a remote session expecting the launched process to outlive the session.
If you do need to use Start-Process in a remote session, invoke it with the Wait parameter. Or you could use other methods to create a new process on the remote system.
When using the Wait parameter, Start-Process waits for the process tree (the process and all its descendants) to exit before returning control. This is different than the behavior of the Wait-Process cmdlet, which only waits for the specified processes to exit.
On Windows, the most common use case for Start-Process is to use the Wait parameter to block progress until the new process exits. On non-Windows system, this is rarely needed since the default behavior for command-line applications is equivalent to Start-Process -Wait.
This cmdlet is implemented using the Start method of the System.Diagnostics.Process class. For more information about this method, see Process.Start Method.
- about_Quoting_Rules
- Debug-Process
- Get-Process
- Start-Service
- Stop-Process
- Wait-Process