
If-Else statements are the basis of any programming language, also in PowerShell. They are used to test if a condition is met, allowing you to perform different actions based on the result.
Multiple conditions, if-not statements, and else-if statements give you a variety of options to test conditions in each situation. A good understanding of the if statements and the different methods can really help you write better PowerShell scripts.
In this article
In this article, we are going to take a look at the PowerShell If Else statements, using the different methods like if not, if and, and how to use multiple conditions.
PowerShell If Statement
Let’s start with the basic If statement in PowerShell. The If statement without any operators will check if a condition is true or not. When the condition is true, the script block will be executed. The condition is placed between parenthesis ( ) and the script block is placed between curly brackets { }.
if (condition) {
  # code to execute if condition is true
}
In the example below, we have set the variable $isAdmin to True. Next, we are going to check with an if statement if the variable is set to true and write an output:
$isAdmin = $true

if ($isAdmin) {
    Write-Host "You have administrator privileges."
}
In the example above we used a simple variable that is set to $true for the condition statement. But we can also use a comparison operator in the condition. Comparison operators return true or false depending on the result. Try the following inside your PowerShell window:
$num = 10
$num -gt 5

# Result
True
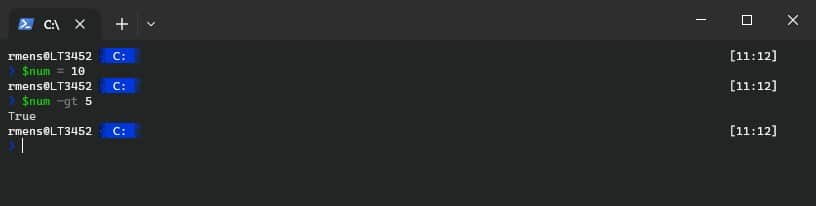
As you can see, the comparison operator returned true. So if we add this example inside the condition part of the If statement, we can test if the number $num is greater than 5, and output a string to the console:
$num = 10

if ($num -gt 5) {
  # $num is greater then 5
  Write-Host "$num is greater then 5"
}
Other comparison operators that you use in PowerShell are:
| Operator | Counter-Part operator | Description |
|---|---|---|
| -eq | -ne | Equal or not equal |
| -gt | -lt | Greater or less than |
| -ge | Great than or equal to | |
| -le | Less than or equal to | |
| -Like | -NotLike | Match a string using * wildcard or not |
| -Match | -NotMatch | Matches or not the specified regular expression |
| -Contains | -NotContains | Collection contains a specified value or not |
| -In | -NotIn | Specified value in collection or not |
| -Replace | Replace specified value |
Using Cmdlets in If Conditions
Besides variables and comparison operators, we can also use cmdlets inside the if statement condition. For example, we can create a PowerShell session to Server01 only if the ping to the server was successful, using the test-connection cmdlet.
if (Test-Connection -TargetName Server01 -Quiet) {
  New-PSSession -ComputerName Server01
}else{
  Write-Host "Unable to connect to server01"
}
Tip
Want to learn more about writing PowerShell scripts, then make sure that you read this getting started with PowerShell scripting guide
If-Else Statement
An if statement is often accompanied by an else statement in PowerShell. The else part of the statement is executed when the condition is false or null. Taking our last example, we can add an else statement that will tell us if the $num is less than 5:
$num = 10

if ($num -gt 5) {
  # $num is greater then 5
  Write-Host "$num is greater then 5"
}else{
  # $num is less then 5
  Write-Host "$num is less then 5"
}
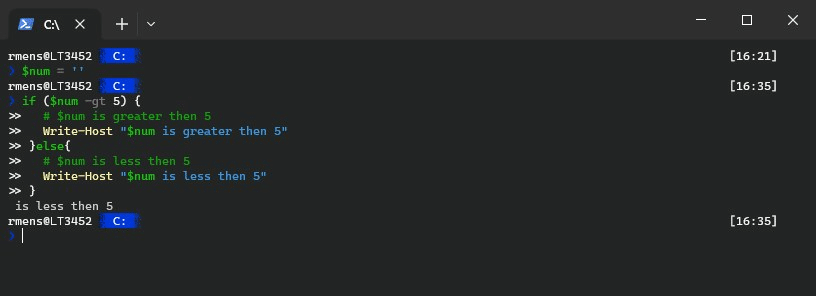
The else part of the if-else statement will also trigger when the variable isn’t set. For example, if we set the variable $num to an empty string, the else condition will trigger:
If Elseif Else Statement
We can expand our If Else statement even further with an elseif statement. Elseif allows you to test for an additional condition. Good to know is that you are not limited to one elseif condition, you can add as many as you want between your if and else statements. But keep in mind that when the if statement or one of the elseif statements is met, then others won’t be tested anymore.
$num = 10

if ($num -gt 10) {
  Write-Host "$num is greater then 10"
}elseif ($num -gt 5) {
  Write-Host "$num is greater then 5"
}else{
  Write-Host "$num is less then 5"
}

# Result
10 is greater then 5
Another option for multiple elseif statements is to use a switch statement or use a collection and the -in comparison operator. The -in operator allows you to check if the collection contains the specified value or not. For example, we can check if the fruit is listed in the collection:
$collection = @(
  'apple',
  'banana',
  'kiwi',
  'raspberry'
)

$fruit = 'kiwi'
if ($fruit -in $collection) {
  write-host "$fruit is a approved fruit"
}

# Result
kiwi is a approved fruit
PowerShell If And Statement
If And statements in PowerShell allow you to test for multiple conditions inside a single if. This sometimes eliminates the need for nested If statements or multiple if-else statements. If and statements check if two or more conditions are true. When all conditions are true, then the script block is executed:
# Using the -and operator
if ((condition1) -and (condition2)) {
  # code to execute when condition 1 and condition 2
  # are both true
}
I prefer to place each condition between parenthesis ( ) , which makes the code more readable. But they are not always necessary, in the example above you could also leave them out, like this:
if ($num -ge 1t -and $num -lt 20) { #code }
So let’s start with a simple example, we are going to check if the number is between 10 and 20. We first check if the variable $num is greater than 10 and in the second condition if it’s less than 20.
$num = 12

if (($num -gt 10) -and ($num -lt 20)) {
  Write-Host "$num is between 10 and 20"
}

# Tip: you could also use the -in operator to check if the number is withing a range:
if ($num -in 11..19) {
  Write-Host "$num is between 10 and 20"
}
Note that we are testing if the number is between 10 and 20. If you want to include 10 and 20 then use the -ge (greater than or equal to) and -le operators (less than or equal to).
Using If Or statements
Similar to the if and to check if multiple conditions are met, can we also test if one of the conditions is met with the conditional operator -or. When using the -or operator only one of the conditions must be true for the script block to be executed.
if ((condition1) -or (condition2)) {
  # code to execute when condition 1 or condition 2 is true
}
For example, we can check whether the use user role is admin or developer before we continue:
$role = "developer"

if (($role -eq 'admin') -or ($role -eq 'developer')) {
  # code to execute
  write-host 'The user is allowed to continue'
}
The PowerShell If statement checks if a particular condition is true, but sometimes you only want to check if a condition is false. For this, we can use the If Not statement in PowerShell. This will check if a condition is not met. An if not statement is written by placing the condition between parenthesis ( ) and place an ! or -not in front of it:
if (!(condition1)) {
  # code to execute when condition 1 is false
}

# or using -not
if (-not(condition1)) {
  # code to execute when condition 1 is false
}
A good example for this is the Test-Path cmdlet, which checks if a path or file exists. Before we copy files to a directory we need to check if the folder exists, if not, we need to create it.
If (!(Test-Path -Path $pathToFolder -PathType Container)) {
  New-Item -ItemType Directory -Path $pathToFolder | Out-Null
}
PowerShell Ternary Operator
One line if statements are common practice in many programming languages these days. A one-line if statement is actually called a ternary operator, and we can use it in PowerShell 7. The ternary operator is great when you have simple short if statements that you can write on a single line. When an if statement triggers a multi-line script block, then the ternary operator isn’t the best choice.
The ternary operator uses the following structure for the if-else statement:
<condition> ? <script-when-true> : <script-when-false>;
Let’s take our example from the beginning of the article. We are going to check if the number is larger than 5 or not. Instead of writing the full if-else statement which is 5 lines long at least, we can write it on a single line using the ternary operator:
$value = 10
$value -gt 5 ? (Write-Host 'Greater than 5') : (Write-Host 'Less than or equal to 5')
PowerShell If Null
Another common practice is to check if a variable or result from a cmdlet is null or not. A null variable is a variable that has not been assigned a value or has been explicitly assigned a null value. Simply set, a null variable doesn’t have any data stored in it.
To check if a variable or result is null or empty we compare it with the $null variable. The $null variable must be on the left side, to make sure that PowerShell compares the value correctly.
Let’s say we want to check if a variable is empty or not. If we would place the variable with the empty string on the left side, the result would be that the variable is not empty
$var = ""

if ($var -eq $null) {
  Write-Host "The variable is null."
}else{
  Write-Host "The variable is not empty."
}

# Result
The variable is not empty.
However, if we place the $null variable first, then the result would be that the variable is empty:
$var = ""

if ($null -eq $var) {
  Write-Host "The variable is null."
}else{
  Write-Host "The variable is not empty."
}

# Result
The variable is null.
The different results happen because of two reasons in PowerShell:
$nullis a scalar value. Comparison operators return a Boolean value when the value on the left is a scalar, or matching values/empty array if it’s a collection.- PowerShell performs type casting left to right. Which results in incorrect comparisons when
$nullis cast to other scalar types.
So if you want to check if a value is null, then you must place the $null on the left side.
Checking if a value is null in PowerShell isn’t only used with variables. You can also use it to check if a cmdlet returns any data or not. For example, we can check if a PowerShell module is installed with the following code:
if ($null -eq (Get-Module -ListAvailable -Name Microsoft.Graph)) {
   Write-host "Microsoft Graph module is not installed"
}
Wrapping Up
PowerShell If Else statements are the basis of writing scripts. They allow you to compare values and make decisions in your script based on the results. When using multiple elseif conditions you might want to consider using the PowerShell Switch statements. This allows you to check multiple conditions in a cleaner and simpler way.
I hope you found this article useful, if you have any questions, just drop a comment below.
One of the most powerful tools in PowerShell scripting is the ability to make decisions. The If, ElseIf, and Else statements allow you to control the flow of your script based on specific conditions, making your code more adaptable and efficient. This article walks through the essentials of PowerShell’s conditional statements and demonstrates how to use them to handle various scenarios in your scripts.
Overview and Quick Syntax Example
PowerShell’s If, ElseIf, and Else statements let you set conditions and define actions based on whether those conditions are met. Here’s the basic syntax:
If (condition) {
    # Code to execute if condition is true
} ElseIf (another_condition) {
    # Code to execute if the first condition is false and this condition is true
} Else {
    # Code to execute if none of the conditions are met
}
For example, if you want to check whether a service is running, you could write:
$service = Get-Service -Name "Spooler"
If ($service.Status -eq "Running") {
    Write-Host "The Print Spooler service is running."
} Else {
    Write-Host "The Print Spooler service is not running."
}
Here, the script checks if the Spooler service is running. If it is, it prints a message confirming this; otherwise, it informs you that the service isn’t running.
Using Comparison Operators
PowerShell’s If statements rely heavily on comparison operators to evaluate conditions. Here’s a quick reference for common operators:
- -eq: Equal to
- -ne: Not equal to
- -gt: Greater than
- -lt: Less than
- -ge: Greater than or equal to
- -le: Less than or equal to
- -like: Wildcard pattern match (e.g.,
-like "*.txt") - -notlike: Does not match pattern
Example: Age Validation
$age = 25

If ($age -ge 18) {
    Write-Host "You are eligible to vote."
} Else {
    Write-Host "You are not eligible to vote."
}
This script checks if a user’s age is 18 or older, printing eligibility to vote accordingly. Try updating the $age variable in the script above to see the differences. You can also set $age = Read-Host -Prompt "Enter your age" to get a dynamic response.
Examples of When to Use If Else
Use If statements anytime you need your script to evaluate a condition and respond differently based on the outcome. Here are some practical situations where If, ElseIf, and Else statements come in handy:
- File Existence Checks: Verify if a file or directory exists before attempting operations on it.
- User Input Validation: Process data based on input values or formats.
- Configuration Validations: Confirm system configurations, such as services, environment variables, or registry settings.
- Error Handling: Check error flags or variables to guide corrective actions.
Example: Checking if a File Exists
$filePath = "C:\Data\ImportantFile.txt"
If (Test-Path -Path $filePath) {
    Write-Host "File exists at $filePath."
} Else {
    Write-Host "File not found at $filePath."
}
If the file exists at the specified path, the script confirms it. Otherwise, it alerts you that the file isn’t there.
How to Use Multiple Conditions with ElseIf and Else
In cases where you need to evaluate multiple conditions, ElseIf can be added after an If statement to test additional conditions. If none of these conditions are met, the Else block runs by default.
Example: Checking for Specific File Types
$fileName = "Report.docx"

If ($fileName -like "*.pdf") {
    Write-Host "This is a PDF document."
} ElseIf ($fileName -like "*.docx") {
    Write-Host "This is a Word document."
} ElseIf ($fileName -like "*.xlsx") {
    Write-Host "This is an Excel document."
} Else {
    Write-Host "Unknown file type."
}
This script checks if a file is a PDF, Word, or Excel document. If it doesn’t match any of these types, the Else block runs, indicating an unknown file type.
Logical Operators in If Statements
PowerShell allows you to combine multiple conditions in an If statement using logical operators like -and, -or, and -not. These operators help you create complex conditions.
Example: Checking Multiple Conditions
$cpuUsage = 75
$memoryUsage = 85

If ($cpuUsage -gt 70 -and $memoryUsage -gt 80) {
    Write-Host "High CPU and memory usage detected!"
} ElseIf ($cpuUsage -gt 70 -or $memoryUsage -gt 80) {
    Write-Host "High CPU or memory usage detected."
} Else {
    Write-Host "CPU and memory usage are within normal limits."
}
Here, the script checks if both CPU and memory usage are high. If both values exceed their thresholds, a specific message is displayed. If only one exceeds the threshold, a different message appears. If neither does, it confirms that everything is normal.
Nested If Statements
Sometimes, you may need to test a condition within another condition. Nested If statements allow you to build layers of conditions, enabling more specific control based on complex scenarios.
Example: Validating Directory and File
$directory = "C:\Data"
$filePath = "C:\Data\ImportantFile.txt"

If (Test-Path -Path $directory) {
    If (Test-Path -Path $filePath) {
        Write-Host "File found in the directory."
    } Else {
        Write-Host "File not found in the directory."
    }
} Else {
    Write-Host "Directory does not exist."
}
In this example, the script first checks if the directory exists. If it does, it then checks for the file within that directory. If the directory doesn’t exist, it skips the file check altogether.
The Switch Statement as an Alternative to If Else
In cases where you need to evaluate a single variable against multiple values, a Switch statement is a clean alternative to using multiple ElseIf statements. Switch is often more readable and can simplify your code.
Example: User Role Check
$userRole = "Admin"

Switch ($userRole) {
    "Admin" { Write-Host "You have administrative privileges." }
    "Editor" { Write-Host "You can edit content." }
    "Viewer" { Write-Host "You have read-only access." }
    Default { Write-Host "Unknown role." }
}
In this script, Switch checks the user role and displays the appropriate message based on their access level.
Best Practices with If Else Statements
To get the most out of If Else statements, keep these best practices in mind:
- Use ElseIf for Multiple Conditions: Avoid using multiple
Ifstatements back-to-back when you only need one condition to be true.ElseIfimproves readability and efficiency. - Combine Logical Operators Carefully: When using
-andor-or, consider the order of conditions to avoid unexpected results. - Avoid Deep Nesting: Nested
Ifstatements can make scripts hard to read. Consider refactoring complex conditions withSwitchor breaking them into functions. - Default with Else: Always include an
Elseblock as a fallback unless you’re certain other conditions cover all possibilities.
Conclusion
The If Else structure in PowerShell gives you the flexibility to adapt your scripts based on specific conditions, enabling dynamic responses to various scenarios. Whether you’re handling file checks, system configuration, or user input, mastering conditional statements will make your scripts more effective. You can click here to learn how to write comments in PowerShell.
If you want to dive deeper into PowerShell and expand your scripting skills, sign up for our in-depth PowerShell course at ServerAcademy.com. Check it out here: Administration and Automation with Windows PowerShell.
Happy scripting, and see you in the course!
Логические операторы If, Else и ElseIf используются в PowerShell для проверки различных условий. Оператор If используется для проверки условия и выполнения определенного действия, которое нужно выполнить если условие выполнено (TRUE). Если условие не выполнено (FALSE, вы можете назначить другое действие с помощью Else или ElseIf.
К условным конструкциям в PowerShell относятся операторы:
- IF
- IF…ELSE
- IF…ELSEIF…ELSE
- SWITCH
В условных конструкциях используются операторы сравнения PowerhShell, такие как ( -eq, -ne, -gt, -lt, -ge, -le и т.д.) и операторы сравнения (-not, -and, -or).
Логические сравнения лежат в основе практически всех алгоритмических языков программирования. В PowerShell при помощи инструкции If можно выполнять определенные блоки кода только в том случае, когда заданное условие имеет значение True.
Рассмотрим несколько примеров использование операторов If Else в PowerShell.
Самая простая конструкция PowerShell с If выглядит так:
$isActive = $true


if ($isActive) {
   Write-Output "В переменной содержится значение True"
}
Команды внутри фигурных скобок {} (называется ScriptBlock) выполняются только в том случае, если выполнены условия внутри if ().
В нашем примере строка if ($isActive) сравнивает переменную с булевыми значениями True и False. Если условие выполняется (переменная $isActive = $true), выполняется код из конструкции ScriptBlock — {…action …}. Если условие не выполняется ScriptBlock пропускается.

В отличии от оператора If, оператор Else не является обязательным. Код из ScriptBlock оператора Else выполняется тогда, когда результат предыдущих проверок равен Fasle.
$isActive = $true
if ($isActive) {
   Write-Output "The value is True"
}
else {
   Write-Output "The value is False"
}
Elseif используется, если нужно проверить несколько значений. Оператор Elseif можно использовать несколько раз.
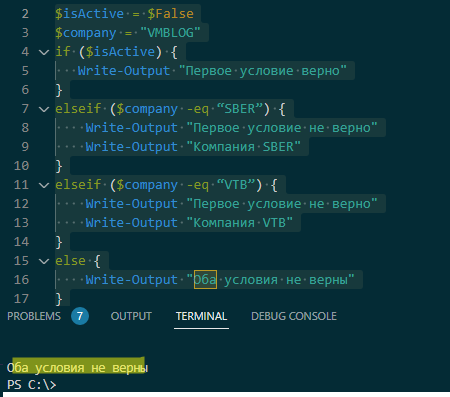
$isActive = $False
$company = "VMBLOG"
if ($isActive) {
   Write-Output "Первое условие верно"
}
elseif ($company -eq “SBER”) {
    Write-Output " Второе условие не верно"
    Write-Output "Компания SBER"
}
elseif ($company -eq “VTB”) {
    Write-Output "Второе условие не верно"
    Write-Output "Компания VTB"
}
else {
    Write-Output "Первое условие неверно, пользователь не активен"
}
В результате выполнения этого скрипта на экран будет выведена надпись “Первое условие неверно, пользователь не активен”.
Если условий проверки очень много, становится неудобные использовать контракцию If Else. При большом количестве проверяемых условий лучше применять логический оператор Switch, которые позволяет объединить список условий в одной конструкции. Switch поочередно сопоставляет проверяемое значение (value) с каждым заданным условием (condition), и если находит совпадение, то выполняет действие (action).
Базовый синтаксис конструкции PowerShell с использованием оператор Switch выглядит так:
Switch (value) {
condition 1 {action}
condition 2 {action}
condition x {action}}
Problem
As with most languages, there is the ability to use if else statements. In this article we will look at how to use if/else statements along with how to use the switch statement in PowerShell.
Solution
In this tutorial, we will learn how to declare, and use if/else and switch statements in PowerShell, along with several examples for a clear understanding.
Initial considerations
- A very basic knowledge of coding in any other programming language will be assumed.
- No interaction with SQL Server will be covered in this article, that will be covered in a separate article.
Important note: I will be presenting all the examples using Windows PowerShell, but that shouldn’t be a showstopper for you to follow along in any other OS of your choosing.
PowerShell If-Else Statement Examples
Below we will take a look at several different examples.
PowerShell If-Else statements in general in
If/else statements are conditional blocks that allow you to execute a specific set of code if a certain condition (or several conditions) is (are) met. This allows you to print a logical flow to whatever piece of software you are designing to solve a particular problem.
You can nest blocks of if/else statements, depending on your particular use case, so we will be checking how to do it in PowerShell.
There are a few combinations of these conditional blocks that we can use, so let’s check them out:
PowerShell If statement on its own
You can simply use an if conditional block (or several one after the other) to evaluate a condition and execute a set of actions, without requiring an else block. Here is an example code block:

The syntax is pretty straightforward as you can see, it’s just three different if statements without an else block. However, I want to point out something peculiar about PowerShell that’s a bit different than most programming/scripting languages, and it’s the comparison operators that it uses to evaluate conditions.
In this example, you don’t see the classic “variable == 10” or “variable > 10” or “variable < 10”, and it’s because in PowerShell you don’t make comparisons that way, you do it just like in the screenshot above.
Here is a list of comparison operators that you can find in PowerShell. Source – Microsoft’s official documentation.
| Type | Operator | Comparison test |
|---|---|---|
| Equality | -eq | equals |
| -ne | not equals | |
| -gt | greater than | |
| -ge | greater than or equal | |
| -lt | less than | |
| -le | less than or equal | |
| Matching | -like | string matches wildcard pattern |
| -notlike | string does not match wildcard pattern | |
| -match | string matches regex pattern | |
| -notmatch | string does not match regex pattern | |
| Replacement | -replace | replaces strings matching a regex pattern |
| Containment | -contains | collection contains a value |
| -notcontains | collection does not contain a value | |
| -in | value is in a collection | |
| -notin | value is not in a collection | |
| Type | -is | both objects are the same type |
| -isnot | the objects are not the same type |
Now, after seeing this list you might also be wondering “how can I compare one condition and/or the other”? Good question, and here’s the list of logical operators that you can use, followed by another example. Source – Microsoft’s official documentation.
| Operator | Description | Example |
|---|---|---|
| -and | Logical AND. TRUE when both | (1 -eq 1) -and (1 -eq 2) |
| statements are TRUE. | False | |
| -or | Logical OR. TRUE when either | (1 -eq 1) -or (1 -eq 2) |
| statement is TRUE. | True | |
| -xor | Logical EXCLUSIVE OR. TRUE when | (1 -eq 1) -xor (2 -eq 2) |
| only one statement is TRUE | False | |
| -not | Logical not. Negates the statement | -not (1 -eq 1) |
| that follows. | False | |
| ! | Same as -not | !(1 -eq 1) |
| False |

One final detail to wrap up this example: the operators (as we saw with variables in the previous article, and as you can see in the screenshot) are not case sensitive, so -AND will work exactly the same as -and, and the same applies for the rest of the comparison and logical operators.
PowerShell If statement with an Else block
If your logic requires the introduction of an else block, here’s a PowerShell script example of how you can use it:

Pretty straightforward, just specify the else block right after the if and you’re good to go.
Nested PowerShell If-Else Statements
So far we covered the basics, but what if your logic requires an extra layer of complexity and you require several layers of if/else blocks to model a specific flow? Let’s take a look at a few examples:


The purpose of these examples is to show the following:
- To nest if/else statements you must use the keyword elseif, which must have a condition specified (unlike a flat else block which directly contains the code to execute).
- You can have as many elseif blocks as you like.
- Within an elseif block you can have additional if/else blocks.
- If you write your if/else block in a single line, then PowerShell won’t bark at you (unlike languages like Python that do require a particular indentation).
Up to this point, you’re covered enough to use if/else statements inside a script of your own. With that said, let’s now shift our attention to a structure that can be functionally equivalent to an if/else condition, the switch statement.
PowerShell If-Else Statements compared to Switch Statements
Switch statements are just like if/else statements, conditional blocks that allow you to specify a logic in your script, based on a condition (or a set of them). The difference between them is that the switch (at its basic level) evaluates a variable against a set of possible values, although in PowerShell the switch statement is beefed up (trust me, you’ll see).
Since both if/else and switch statements are used for the same purpose at the basic level, you can go with whatever you feel more comfortable with. However, with the switch, you can end up with more elegant/readable code (which is definitely a plus), like the following example:


As you can see, both solutions deliver the exact same result, but the switch takes all the elegance/readability points straight to the bank.
PowerShell Switch Statements
As I mentioned before, the switch statement is beefed up in PowerShell because it can be used in different ways to accomplish different things, as opposed to the kind of “dry style” of the if/else block. Let’s take a look at a few examples to see it in action:
Using the default keyword for switch in PowerShell

You use the default keyword when you want to do something if none of the above options made a match. In this particular example, you could also omit the use of the default keyword, but you would have to make sure that the initial value assigned to the $day variable that stores a desired value, providing the exact same effect.
Using the break statement for PowerShell Switch
This keyword is used to break the execution of the entire switch statement when a certain condition is met, preventing a waste of time/resources in continuing with the evaluation of the rest of the conditions if there’s no point in doing so. Let’s take a look at a couple of examples to understand this better:

Using the exact same example of the days of the week, I’ve slightly introduced a tiny change: I’m setting the $dayOfWeek variable to 1 and in the possible values within the switch, I’ve specified 1 for Sunday and Monday on purpose. As you can see, the output of the variable $day is “Monday” because it was the last option that made a match, but let’s see what happens when we introduce the break keyword:

Note the result is different because when the match was made and the break was encountered, the rest of the options weren’t evaluated anymore, so make sure to write efficient code when using this structure.
Storing the output in a variable for PowerShell Switch
Speaking of efficient and elegant code, let’s take a look at a fancier way to store the output of a switch statement:

The efficiency part comes in the form of the breaks within each block to make it stop as soon as a match was made, and the elegant part comes in the form of the removal of the assigning of the value to the $day variable within each block. Therefore, by assigning the value in this way, you achieve the same end result in a fancier way.
Using wildcards to perform comparisons for PowerShell Switch
Yes, you read right, wildcards. In PowerShell you can perform comparisons using wildcard expressions, pretty handy right. Let’s take a look at some examples so you can get a good idea how to use wildcards:

As you can see, there are different ways to achieve different results, based on how you use the different wildcards, pretty cool I’d say. Just be careful to specify the keyword -wildcard if you plan to use wildcards, otherwise it won’t work even if you are trying to do comparisons using them.
Comparing multiple items per block for PowerShell Switch
There might be very specific cases where you need to compare multiple items per block, so you can achieve it like this:

Using regular expressions (regex) for comparisons with PowerShell Switch
PowerShell allows you to perform comparisons using regular expressions. I’m not going to take a deep dive into what regular expressions are nor how to master them, but still I need to fulfill my duty to present you at least an example of how you can use them within a switch statement, so let’s have a quick look:

As with the use of wildcards, the usage or regular expressions won’t work if you don’t specify the keyword -regex, so make sure to keep that in mind.
Using the -file keyword to parse the content of a file for PowerShell Switch
See, I wasn’t joking when I mentioned that the Switch statement in PowerShell was beefed up. This is by far one of the coolest things I’ve seen implemented in a programming/scripting language, for a “simple” switch statement. You can use the -file keyword to pass the path of a file and evaluate it against certain conditions to perform a set of actions. Pure awesomeness, so let’s take a look at it:
Here’s the contents of my file “C:\loveLetter.txt”

Here’s how the switch statement is used:

As with wildcards and regular expressions, if you omit the -file keyword it won’t work. Additionally, make sure that the file exists, that it is a text file, and that the path is a valid one. I would guess that if you are trying to parse a very large file, then your chances at succeeding will be bounded by the resources available within your computing device.
With this, I’d like to wrap up this article. Even though we only covered if/else and switch statements, you were able to see how versatile PowerShell is.
Next Steps
- In case you missed it, check out the previous article PowerShell for the SQL Server DBA – Variable Fundamentals.
- Now that you learned these two statements to control certain logical flows for your scripts, make sure to make your life easier by picking the right tool for the right problem.
- Make sure to aim for cleaner/elegant code when crafting your scripts, you saw the difference that the Switch statement can make against the if/else equivalent in that regard. Your future you and others will definitely praise you for that (hopefully).
- In the next article we will be taking a look at for loops and while loops, so stay tuned!
Логические операторы IF ElseIf и Else в Powershell относятся к основным командам условий не только в этом языке, но и в других. Благодаря таким операторам в наших скриптах добавляются условия.
Вы можете представить скрипт, где вам нужно поставить запятую в выражении «Казнить нельзя помиловать». В зависимости от того к чему это выражение применяется запятая будет стоять в разных местах и эту проблему решает условный оператор.
Условия
Самих условий может быть несколько. Каждый будет разобран дальше.
If
Этот оператор работает самый первый из блока условий и является обязательным в случае любых условий. Когда мы хотим проверить само существование значение достаточно указать переменную:
$uslovie = $true
if ($uslovie) {
   Write-Output "Условие выполнено"
}
Результат любого сравнение приравнивается к 2 булевым значениям — это True (правда, существует) и False (ложь, не существует, $None). Если вы передаете переменную в условие без каких либо дополнительных операторов, то само существование значения у переменной позволяет выполнить следующую часть и написать «Условие выполнено». Та часть, которая экранируется в фигурные скобки называется ScriptBlock.
На следующем примере, в первом случае у нас вернется True, так как значение у переменной существует. Во втором случае мы проверяем переменную, которая не хранит никаких значений (она не была объявлена), а значит соответствует $null и вернет False:
$uslovie = 1
if ($uslovie) {
   Write-Output "Условие выполнено"
}

# Переменная notexist не имеет значения, т.е. равно $null
if ($notexist) {
   Write-Output "Условие не выполнено"
}

Else
Этот оператор не является обязательным. Else используется когда результаты предыдущих проверок равен Fasle:
$uslovie = $false
if($uslovie) {
   Write-Output "Условие равно True"
}
else {
   Write-Output "Условия равны False"
}

Обратите внимание, что я использую Powershell ISE, а не консоль. При запуске в консоли, при таком написании, у нас будут ошибки:
- Имя «else» не распознано как имя командлета, функции, файла сценария или выполняемой программы.
- The term ‘else’ is not recognized as the name of a cmdlet, function, script file, or operable program.
Связано это с тем, что консоль выполняет каждою строку отдельно и оператор else воспринимается как отдельный. Для избежания таких ситуаций есть множество способов решения:
- Объявлять операторы в одну строку.
- Использовать функции.
- Хранить скрипт в файле и импортировать его.
Эти способы и другие будут рассмотрены далее.
Elseif
Представим, что нам нужно проверить существование нескольких значений. Мы можем это сделать так:

Для избежания таких сложно читаемых конструкций используется дополнительное условие elseif.
Elseif не является обязательным и выполняется после IF. В отличие от else, который работает в случае когда все операторы вернули False, оператор elseif может проверять на True и False. Переписав предыдущий пример, но с новым оператором, условие будет выглядеть так:
$uslovie1 = $false
$uslovie2 = $true
if ($uslovie1) {
   Write-Output "Первое условие выполнено"
}
elseif ($uslovie2) {
    Write-Output "Первое условие не выполнено"
    Write-Output "Второе условие выполнено"
}
else {
    Write-Output "Условия не выполнены"
}

В отличие от других операторов elseif может использоваться множество раз. Тот оператор, который первый вернет True, отменит выполнение следующих условий.
Операторы сравнения
Когда нам нужно проверить не только существование значения, но и эквивалентность или упоминание, нам нужно использовать операторы сравнения.
-eq проверка эквивалентности
С помощью оператора -eq можно проверить полное соответствие между значениями. Для примера это может быть строка или число:
$num = 33
if($num -eq 33) {
   Write-Output "Число совпадает"
}
Если бы значения не совпадали, то результат был бы False и условие было бы не выполненным. Проведем пример со всеми условиями:
$num = 33
if ($num -eq 33) {
   Write-Output "Число 33"
}
elseif ($num -eq 34) {
   Write-Output "Число 34"
}
else{
   Write-Output "Другое число"
}
Powershell, по умолчанию, не является зависимым от регистра. Это значит, что «Строка» и «строка» будут эквивалентны друг другу. Что бы проверить равенство с учетом регистра нужно использовать -ceq:
$str = 'Строка'
if ($str -ceq 'строка') {
   Write-Output 'Первая буква маленькая'
}
elseif ($str -ceq 'Строка') {
   Write-Output 'Первая буква большая'
}
else{
   Write-Output 'Другое число'
}
Самые первые примеры, которые были показаны выше, являются сокращенным вариантом написания с оператором -eq:
$str = 'строка'

if($str) {Write-Host 'Ok' }
# Одинаковые условия
if($str -eq $True ) {Write-Host 'Ok'}
Важно понять работу следующего примера:
$bo = $false

if ($bo -eq $false){'Pass'}
Так как проверка на эквивалентность $false правдива, результат работы условия будет True.
-ne или не соответствие
Когда нужно проверить отсутствие конкретного значения используется команда -ne:
if( 5 -ne $value )
{
    'Pass'
}
Как уже писалось выше, если первое условие возвращает True второе выполняться не будет:
$value = 6
if ( 5 -ne $value )
{
    'Pass Ne'
}
elseif (6 -eq $value)
{
    'Pass Eq'
}
Так же как и в предыдущем случае если оператор учета регистра -cne.
Для примера так мы запустим сервис, если он не равен Running:
$Service = 'WinRM'
if ( (Get-Service -Name $service).Status -ne 'Running' )
{
    Start-Service -Name $Service
    Write-Host "Сервис запущен"
}
-gt -ge -lt -le проверка на большее и меньшее значение
Аналогично предыдущим примерам мы можем включать проверку на большее и меньшее значение, для примера выполним такое условие:
$numeric = 5
if ( $numeric -lt 5 ){
    'Число меньше 5'
}
elseif ($numeric -ge 5){
    'Число больше 5'
}
else{
    'Число равно 5'
}
Дословно операторы выше переводятся как Less than (меньше чем) и Gt (больше чем) и именно поэтому выполняется условие else. Другие операторы, включающие букву ‘e’ вместо ‘t’ выполняют так же проверку на равенство, например ge — Greater or equal (больше или равно). Таких операторов достаточно много:
- gt — больше чем;
- cgt — больше чем, но с учетом регистра;
- ge — больше или равно;
- cge — больше или равно с учетом регистра;
- lt — меньше чем;
- clt — меньше чем, но с учетом регистра;
- le — меньше чем или равно;
- cle — меньше чем или равно с учетом регистра.
Не совсем ясно зачем делать учет регистра в определении количества, но такая возможность тоже есть.
-like проверка вхождений
В Powershell есть возможность проверки вхождений используя -like и определенный синтаксис:
- ? — обозначение единственного пропущенного символа;
- * — обозначение любого количества пропущенных символов.
$computer = 'AD-Moscow-001'
if ($computer -like 'AD*') {'Этот компьютер AD'}
Выше мы проверяли начинается ли строка с символов AD. Если бы мы искали конец строки нужно было указывать символ * до последнего элемента:
$computer = 'AD-Moscow-001'
# Это условие не пройдет, так как проверяется конец строки
if ($computer -like '*AD') {'Pass if'}
# Это условие не пройдет, так как проверяется полное соответствие
elseif ($computer -like 'AD') {'Pass elsif 1'}
# Это пройдет
elseif ($computer -like 'AD*1') {'Pass elsif 2'}
Варианты использования:
- like — поиск вхождения, не чувствителен к регистру;
- clike — поиск вхождения, чувствителен к регистру;
- notlike — проверка на отсутствие вхождения, не чувствителен к регистру;
- cnotlike — проверка на отсутствие вхождения, чувствителен к регистру.
-match использование регулярных выражений
Для проверки с использованием регулярных выражений есть свой оператор -match. Конечно, синтаксис в использовании регулярных выражений и -like отличается:
$computer = 'AD-Moscow-001'
if ($computer -match '^AD-\w\w\w\w\w\w-001') {'Pass if'}
Если не указывать маску/шаблон, то match будет искать по полному совпадению:
$computer = 'AD-Moscow-001'
if ($computer -match 'AD-Moscow-001') {'Pass if'}
Так же есть несколько вариантов использования регулярных выражений:
- match — регулярные выражения не чувствительные к регистру:
- cmatch — чувствительные к регистру;
- notmatch — поиск не совпадающих, не чувствительных к регистру значений;
- cnotmatch — поиск не совпадающих, чувствительных к регистру значений.
-is проверка типов
Часто бывает необходимость проверить тип данных перед дальнейшем использованием. Использование сложения со строкой и числом приводит к разным последствиям. Для избежания этих проблем нужно проверять типы. На примере ниже я проверяю является ли значение числом:
$int = 1
if ($int -is [int]){'Значение число'}
Таких типов данных в Powershell около 13:
- [string] — строка;
- [char] — 16-битовая строка Unicode;
- [byte] — 8 битовый символ;
- [int] — целое 32 битовое число;
- [long] — целое 64 битовое число;
- [bool] — булево значение True/False;
- [decimal] — 128 битовое число с плавающей точкой;
- [single] — 32 битовое число с плавающей точкой;
- [double] — 64 битовое число с плавающей точкой;
- [DateTime] — тип данных даты и времени;
- [xml] — объект xml;
- [array] — массив;
- [hashtable] — хэш таблица.
Так же можно использовать ключ -isnot, который выполняет противоположные действия.
Условия в массивах
Когда мы работаем с коллекциями, массивами или листами проверка вхождений работает немного иначе чем в предыдущих примерах. Тут важно учитывать не только порядок, но и логику:
@(1,3,4,5) -eq 4
4 -eq @(1,2,3,4)
Этот пример так же будет работать с логическими операторами:
$array = @(1,2,3,4)
if (4 -eq $array){'Проверка пройдена 1'}
elseif ($array -eq 4){'Проверка пройдена 2'}
Обратите внимание, что в случае с -ne, который ищет неравенство, результат будет True если хотя бы одно число и строка не совпадает с указанной:
$array = @('string1','string4','string3','string2')
$array -ne 'string1'
if ($array -ne 'string2'){'Проверка пройдена'}
Когда используются операторы типа ge, lt и другие, результат будет True если хотя бы одно из значений будет больше:
$array = @(6,2,3,4)
$array -ge 4
if ($array -ge 4){'Passed'} 
Для поиска вхождений в массивах обычно используются операторы описанные далее.
-contains
При использовании contains у нас возвращаются булевы значения True и False и является более логичным для проверки массивов:
$massive = @('node1','node2','node3')
$massive -contains 'node1'
if ($massive -contains 'node1'){'Passed'} 
Другие варианты использования:
- contains — без учета регистра;
- ccontains — с учетом регистра;
- notcontains — отсутствие значения без учета регистра;
- cnotcontains — отсутствие значение с учетом регистра.
-in
Этот оператор создан для удобства людей, которые пишут на других языках. Он отличается от contains порядком проверяемых значений. В этом случае массив должен находиться справа:
$massive = @('node1','node2','node3')
$massive -in 'node1'
'node1' -in $massive
if ($massive -in 'node1'){'Passed 1'}
elseif ('node1' -in $massive){'Passed 2'} 
Доступные варианты:
- in — регистр не имеет значения;
- cin — регистр имеет значение;
- notin — отсутствие вхождения, регистр не имеет значения;
- cnotin — отсутствие вхождения, регистр имеет значения.
Больше примеров можно увидеть в статье Работа с массивом в Powershell и листами на примерах.
Логические операторы
Когда нам нужно комбинировать условия удобно использовать логические операторы.
-not
Использование этого оператора переворачивает результат. Если результат значения равен False, то используя not, выражение все равно будет выполнен:
if (-not $notexist ){'Passed 1'} 
Если вы хотите использовать предыдущие операторы тоже, тогда их нужно помещать между скобок:
$hs = @('ex1','ex2','ex3')
if (-not ('ex4' -in $hs) ){'Passed 1'}
У -not есть алиас в виде восклицательного знака ! :
if (!('ex4' -in $hs) ){'Passed 1'}
-and
And позволяет связывать несколько значений. Условие будет выполнено только в том случае, если все значения будут True:
$cost = 13
if (($cost -gt 2) -and ($cost -lt 16)){Write-Host 'Выполнено'}
Если хотя бы одно из выражений было бы равно False, то все условие относилось бы к False:
$cost = 13
if (($cost -gt 2) -and ($cost -lt 10)){Write-Host 'Выполнено 1'}
elseif (($cost -gt 2) -and ($cost -lt 14)){Write-Host 'Выполнено 2'}
Мы так же можем проверять существование нескольких значений:
$cost = 13,14,15
if (($cost[0]) -and ($cost[1]) -and ($cost[2]) ) {'Верно'}
-or
Отличия -and от -or в том, что нам достаточно получить True только от одного выражения:
$a = 4
$b = 7
if (($a -ge 4) -or ($b -eq 2)){Write-Host 'ок'}
Вы можете комбинировать несколько операторов для верного выполнения условия, главное помещать их в кавычки:
$a = 4
$b = 7
if (($a -ge 4) -and ($b -eq 7) -or ($b -eq 7)){Write-Host 'ок'}
Использование выражений при сравнении в Powershell
Мы можем использовать команды Powershell в сравнениях:
if (Get-NetAdapter){Write-Host "Сетевой адаптер установлен"}Командой Get-NetAdapte мы получаем список адаптеров. Если бы список был пуст, то он бы вернул $null и выражение бы не выполнилось.
Можно использовать серию скриптов, но главное экранировать в скобки:
if ( (Get-Process -Name *powersh*) -and (Get-Service) ) {'Ok'}
Проверка на $null
Мы уже писали о сложностях работы с $null в Powershell, но главное придерживаться правила, что это значение должно быть слева:
if ( $null -eq $value )Переменные
Вы можете назначать переменную через условие, а в самом ScriptBlock работать с ней:
if ( $proc = Get-Process Notepad* ){$proc | Stop-Process}Процесс Notepad будет остановлен в случае, если такой процесс существует.
Мы так же можем назначать результат работы условий с помощью переменной:
$a = 33
$result =if ( $a -eq 22 ){$a += $a}
elseif ($a -eq 33){$a += 1}
else {$a}

$a
Эти способы весомо ухудшают читаемость кода и я бы не советовал их использовать.
…
Теги:
#powershell