
PowerShell has been a staple of Windows for many years but in recent times Microsoft has made a pretty substantial change to it. It’s now both open source and cross-platform, available not only on Windows but also on macOS and Linux.
This new version is the future of PowerShell and whether you want to use it on Linux professionally, to learn, or just to poke around with, it’s not too difficult to get installed.
Here’s what you need to know.
Downloading and installing PowerShell on Linux
While PowerShell on Linux isn’t exactly the same as on Windows — modules and commands specific to Windows aren’t usable — it’s available for folks who need it. Microsoft is moving away from Windows PowerShell and into this cross-platform affair.
We’ll be installing PowerShell 7, and the process is really straightforward.
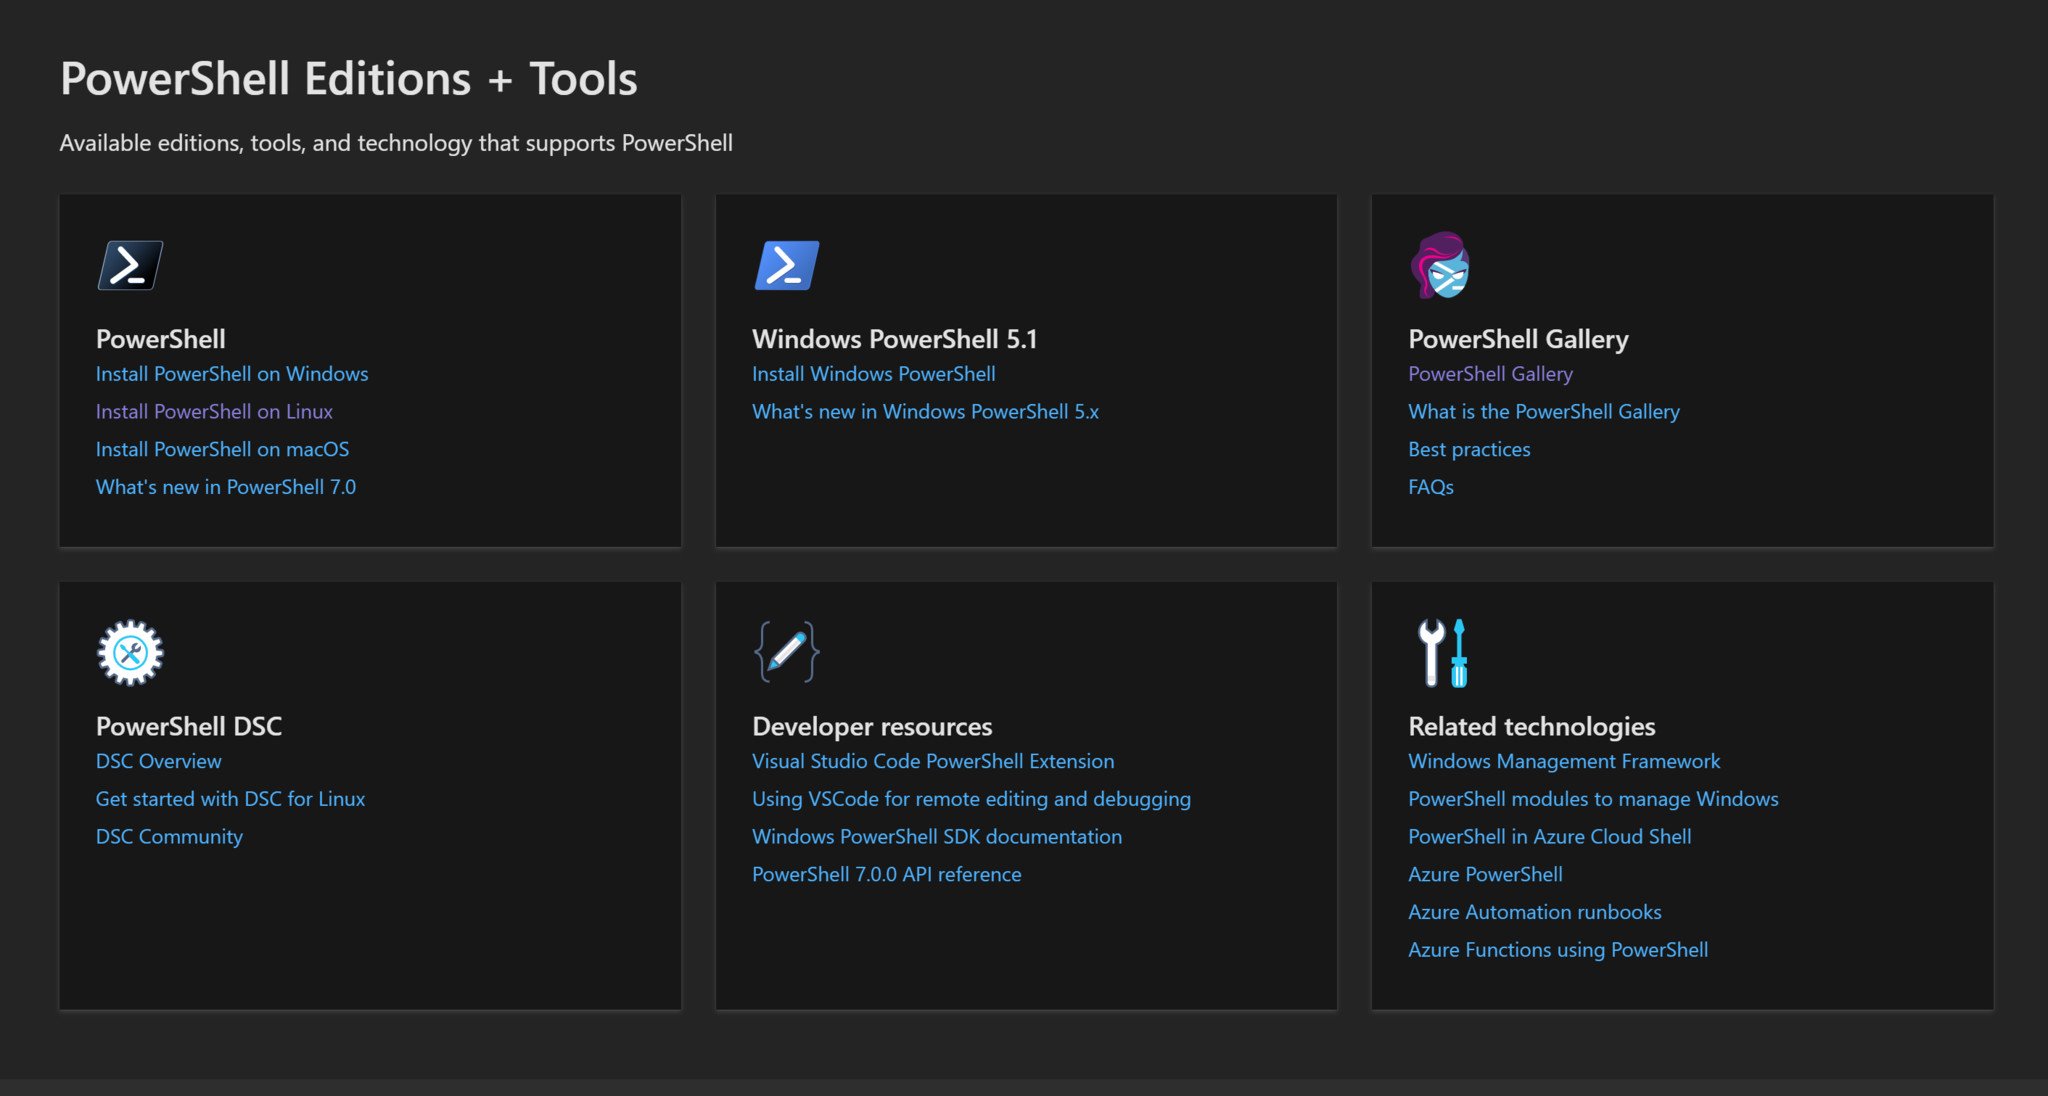
- Go to the PowerShell release page.
- Download the installer that matches your Linux distro.
- Locate the downloaded file on your machine.
- Double click to install.
A fairly short installation process will now occur, using a software installer that may vary depending on which distro you’re using.
Powershell being a command-line tool on Linux and not a traditional application means you won’t be able to launch it directly from your desktop GUI. Instead, you’ll launch it from the terminal.
All the latest news, reviews, and guides for Windows and Xbox diehards.
If you’re on Arch Linux you can install PowerShell from the AUR by grabbing the latest release binary.
You could also use the Snap Store to install PowerShell if that’s a way you like to get your packages.
snap install powershell --classicOne final word is that the official Microsoft documentation says that PowerShell 7 isn’t supported on Ubuntu 20.04 LTS, but that’s not really the case. Whether it’s a missing update to the text or it just works anyway, PowerShell in this guide was installed on Ubuntu 20.04. Admittedly there were some issues using the direct download but the Snap install works just fine.
How to launch PowerShell inside the terminal
You may see PowerShell in your app drawer but to use it, open up a new terminal window and enter this simple command.
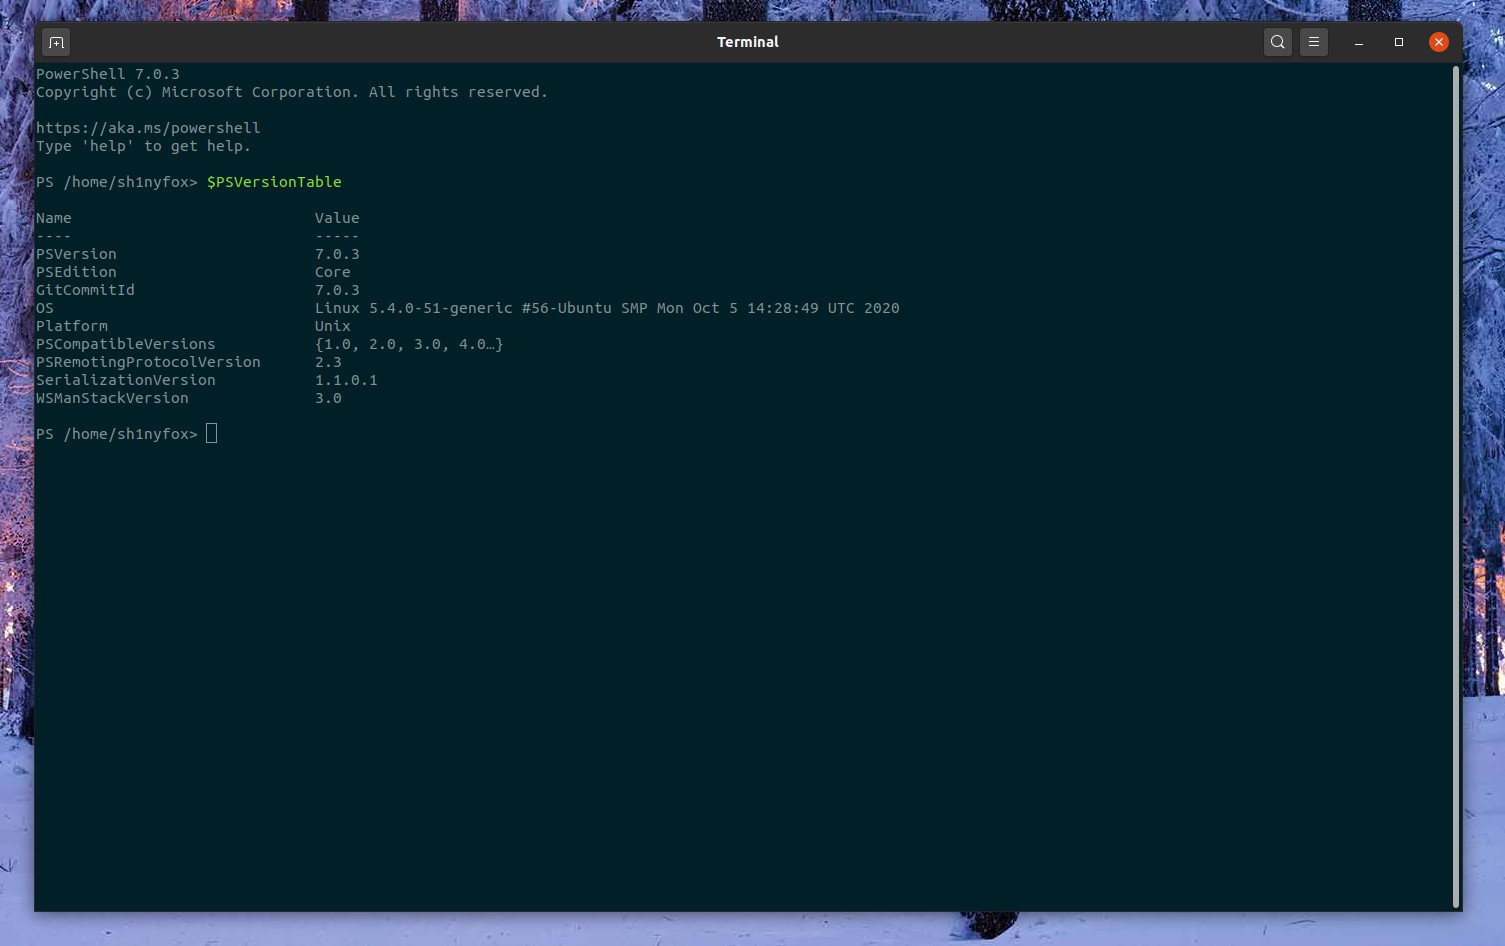
pwshYou’ll now see a short bit of blurb beginning with the PowerShell version, and your command line will change from yourusername@yourlinuxmachine to PS /home/yourusername.
You’re now all set to use PowerShell on your Linux machine. Any time you want to use it, simply enter the command to launch it and exit out when you’re done by typing exit.
But if you’re going to use it a lot, you might want to set it as the default shell for your Linux terminal.
Setting PowerShell as the default terminal shell
PowerShell’s bonus is that it doesn’t totally replace and overwrite your existing shell; any Linux commands you could normally enter can also be entered in PowerShell. As such, if you’re going to use PowerShell a lot, you can set it as your default shell and not worry about losing any functionality.
There are a few different ways you can achieve this, but one of the easiest is by changing the default in
/etc/passwdand if you installed it as a Snap then there’s a slight difference to the steps.
First up, it’s a good idea to make sure PowerShell is added as a valid login shell in
/etc/shells.
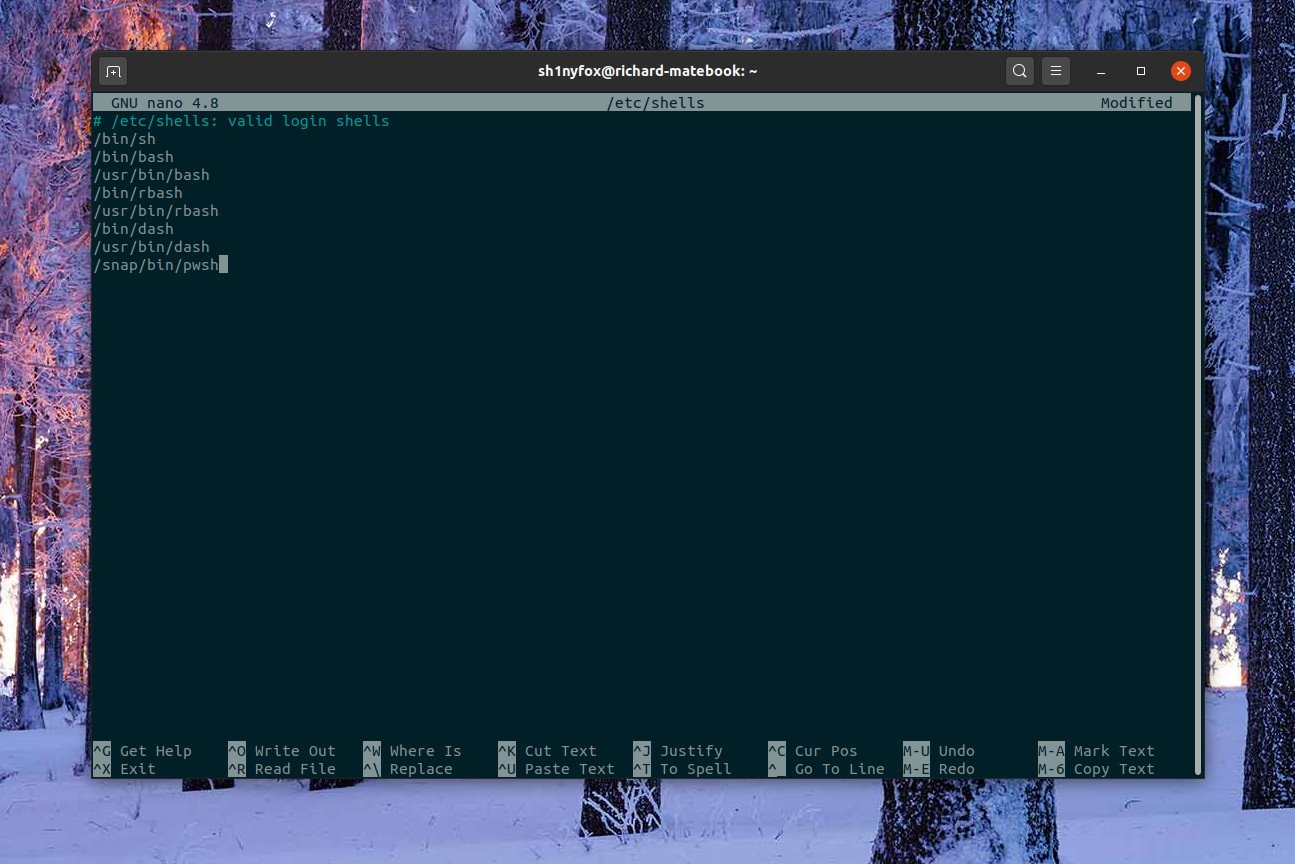
- In the terminal enter
sudo nano /etc/shells(substituting nano for your preferred text editor as required). - If you see an entry for pwsh then you’re good and can close the file.
- If you need to add PowerShell, type
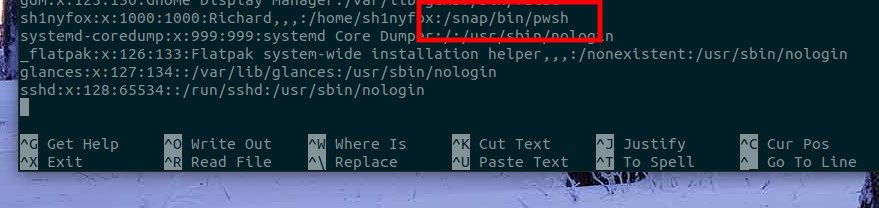
/usr/bin/pwshto the end of the text file. - If you installed via Snap, add
/snap/bin/pwshinstead. - Close out of nano by pressing ctrl + X and selecting yes to save.
Next, in the terminal, follow these steps.
- Enter
sudo nano /etc/passwd(again, substitute nano for your preferred text editor as required).
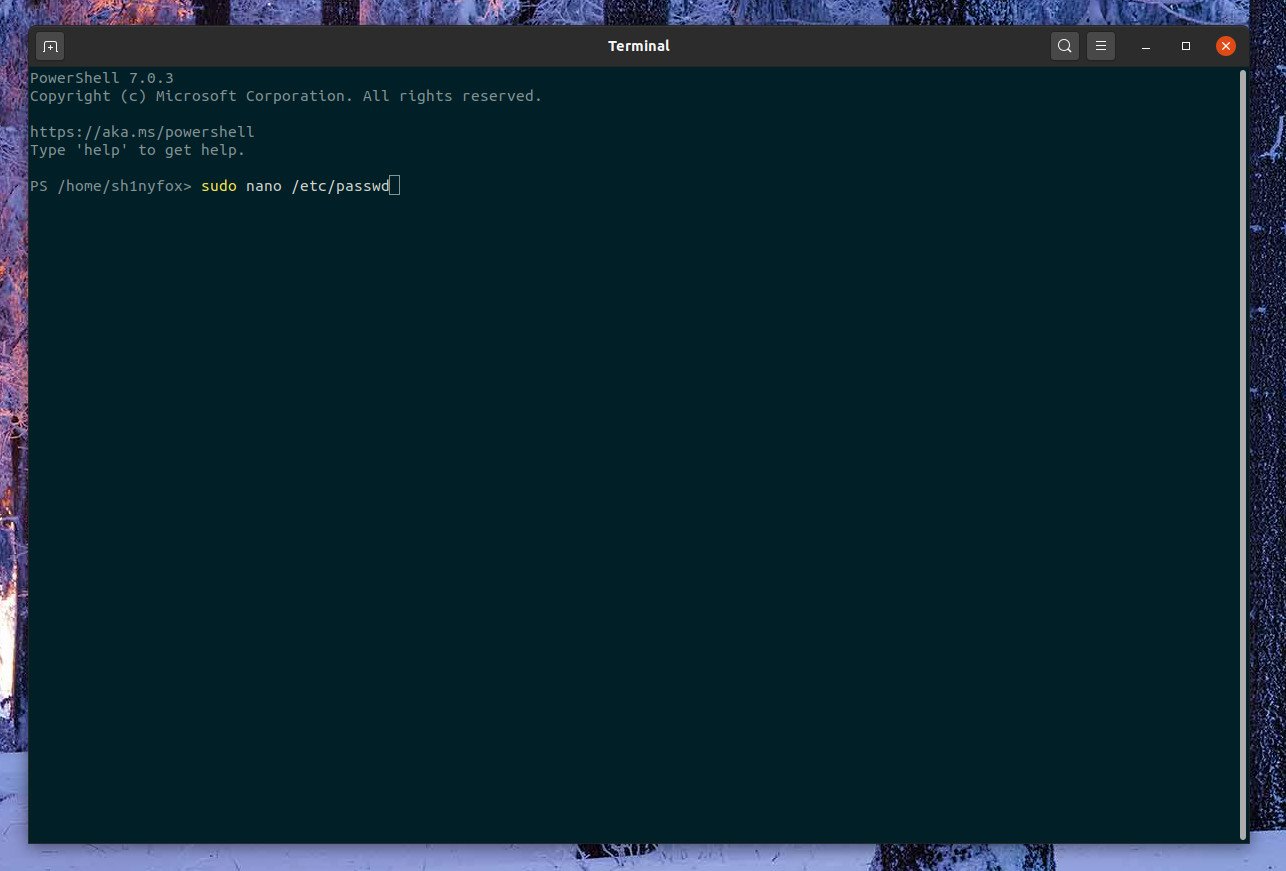
- Scroll towards the bottom until you see an entry that ends in
/bin/bash. - Change this to either
/bin/pwshor if you installed from Snap/snap/bin/pwsh.
- Exit and save the file.
- Log out of your PC and log back in.
Once logged back in opening a new terminal window should now immediately present you with PowerShell in place of the standard bash shell.
After Microsoft fell in love with Linux (what has popularly come to be known as “Microsoft Loves Linux”), PowerShell which was originally a Windows-only component, was open-sourced and made cross-platform on 18 August 2016, available on Linux and Mac OS.
PowerShell is a task automation and configuration management system developed by Microsoft. It is made up of a command language interpreter (shell) and scripting language built on the .NET Framework.
It offers complete access to COM (Component Object Model) and WMI (Windows Management Instrumentation), thereby allowing system administrators to carry out administrative tasks on both local and remote Windows systems as well as WS-Management and CIM (Common Information Model) enabling administration of remote Linux systems plus network devices.
Under this framework, administrative tasks are fundamentally carried out by particular .NET classes called cmdlets (pronounced command-lets).
Similar to shell scripts in Linux, users can build scripts or executables by storing groups of cmdlets in files by following certain rules. These scripts can be used as independent command-line utilities or tools.
Table of Contents
Install PowerShell in Linux Systems
To install PowerShell in Linux, we will use the official Microsoft repository that will allow us to install through the most popular Linux package management tools such as apt-get or apt and yum or dnf.
Install PowerShell On Ubuntu
First import the public repository GPG keys, then register the Microsoft Ubuntu repository in the APT package sources list to install Powershell:
$ sudo apt-get update
$ sudo apt-get install -y wget apt-transport-https software-properties-common
$ wget -q "https://packages.microsoft.com/config/ubuntu/$(lsb_release -rs)/packages-microsoft-prod.deb"
$ sudo dpkg -i packages-microsoft-prod.deb
$ sudo apt-get update
$ sudo apt-get install -y powershell
Install PowerShell On Debian 11
PowerShell for Debian distribution releases is published to package repositories for easy installation and updates.
$ sudo apt update
$ sudo apt install -y curl gnupg apt-transport-https
$ curl https://packages.microsoft.com/keys/microsoft.asc | sudo apt-key add -
$ sudo sh -c 'echo "deb [arch=amd64] https://packages.microsoft.com/repos/microsoft-debian-bullseye-prod bullseye main" > /etc/apt/sources.list.d/microsoft.list'
$ sudo apt update
$ sudo apt install -y powershell
Install PowerShell On Debian 10
$ wget https://packages.microsoft.com/config/debian/10/packages-microsoft-prod.deb
$ sudo dpkg -i packages-microsoft-prod.deb
$ sudo apt-get update
$ sudo apt-get install -y powershell
Install PowerShell On RHEL Systems
PowerShell for RHEL-based distributions such as CentOS Stream, Rocky, and AlmaLinux are published to official Microsoft repositories for easy installation and updates.
---------- On RHEL, CentOS, Rocky & AlmaLinux 9 ----------
$ curl https://packages.microsoft.com/config/rhel/9.0/prod.repo | sudo tee /etc/yum.repos.d/microsoft.repo
$ sudo dnf install --assumeyes powershell

---------- On RHEL, CentOS, Rocky & AlmaLinux 8 ----------
$ curl https://packages.microsoft.com/config/rhel/8/prod.repo | sudo tee /etc/yum.repos.d/microsoft.repo
$ sudo dnf install --assumeyes powershell

---------- On RHEL/CentOS 7 ----------
$ curl https://packages.microsoft.com/config/rhel/7/prod.repo | sudo tee /etc/yum.repos.d/microsoft.repo
$ sudo dnf install --assumeyes powershell
How to Use Powershell in Linux
In this section, we will have a brief introduction to Powershell; where we will see how to start powershell, run some basic commands, and look at how to work with files, directories, and processes. Then later dive into how to list all available commands, and show command help and aliases.
To start Powershell, type:
$ pwsh

PowerShell 7.3.3
PS /root>
You can check the Powershell version with the command below:
PS /root> $PSVersionTable

Name                           Value
----                           -----
PSVersion                      7.3.3
PSEdition                      Core
GitCommitId                    7.3.3
OS                             Linux 5.10.0-9-amd64 #1 SMP Debian 5.10.70-1 (2021-09-30)
Platform                       Unix
PSCompatibleVersions           {1.0, 2.0, 3.0, 4.0…}
PSRemotingProtocolVersion      2.3
SerializationVersion           1.1.0.1
WSManStackVersion              3.0
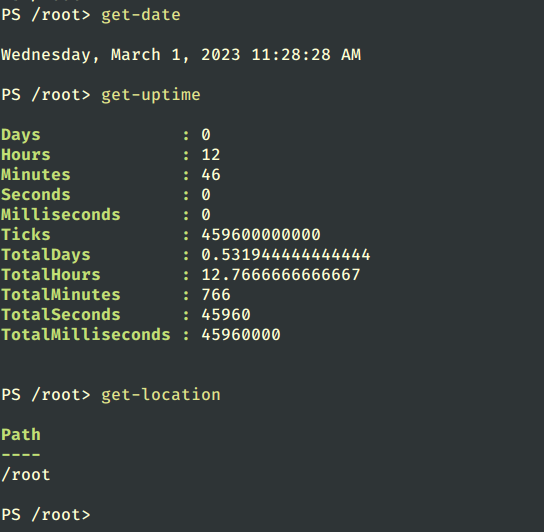
Running some basic Powershell commands on Linux.
get-date          [# Display current date]
get-uptime        [# Display server uptime]
get-location      [# Display present working directory]
Working with Files and Directories in Powershell
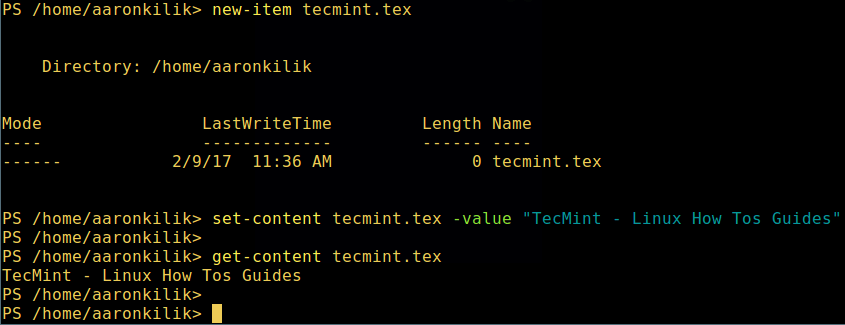
1. Create a new empty file using the two methods below:
new-item  tecmint.tex
OR
“”>tecmint.tex
Then add content to it and view the file content.
set-content tecmint.tex -value "TecMint Linux How Tos Guides"
get-content tecmint.tex
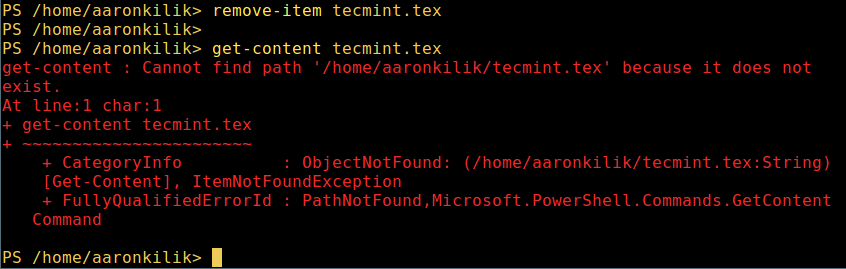
2. Delete a file in powershell.
remove-item tecmint.tex
get-content tecmint.tex
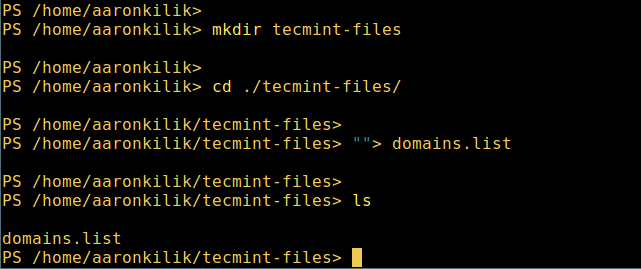
3. Create a new directory.
mkdir  tecmint-files
cd  tecmint-files
“”>domains.list
ls
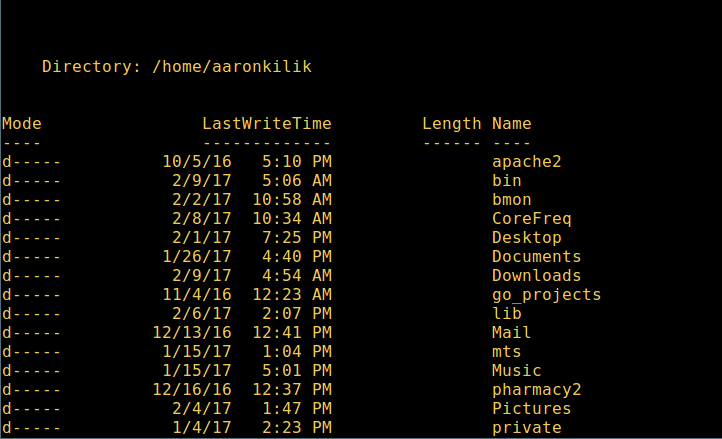
4. To perform a long listing, which displays details of a file/directory including mode (file type), and last modification time.
dir
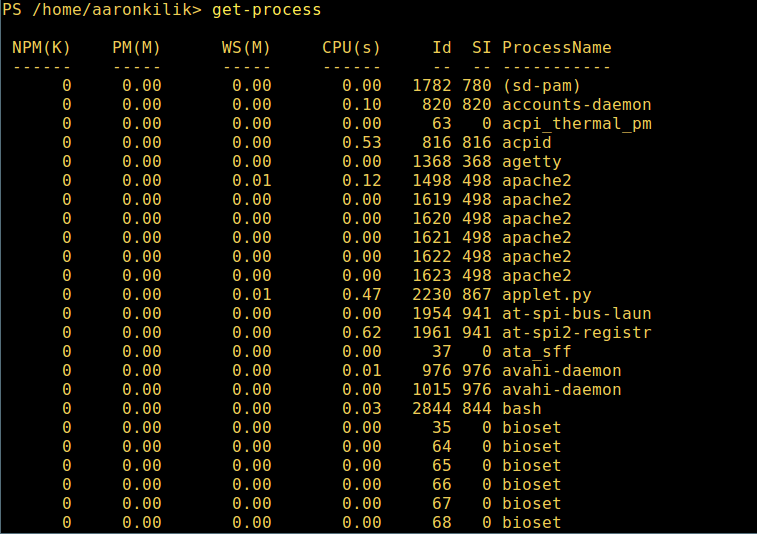
5. View all running processes on your system:
get-process
6. To view details of a single/group of running processes with a given name, provide the process name as an argument to the previous command as follows:
get-process apache2
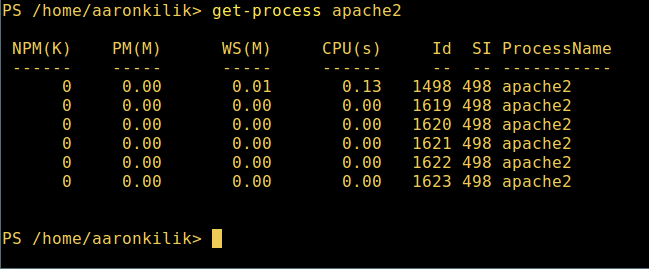
Meaning of the units in the output above:
- NPM(K) – the amount of non-paged memory that the process is using, in kilobytes.
- PM(K) – the amount of pageable memory that the process is using, in kilobytes.
- WS(K) – the size of the working set of the process, in kilobytes. The working set consists of the pages of memory that were recently referenced by the process.
- CPU(s) – the amount of processor time that the process has used on all processors, in seconds.
- ID – process ID (PID).
- ProcessName – the name of the process.
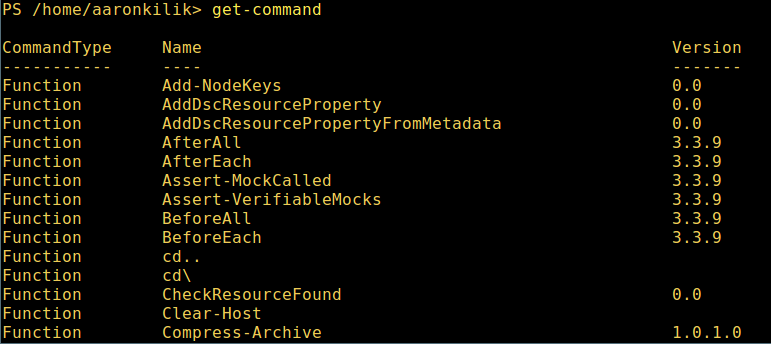
7. To know more, get a list of all Powershell commands for different tasks:
get-command
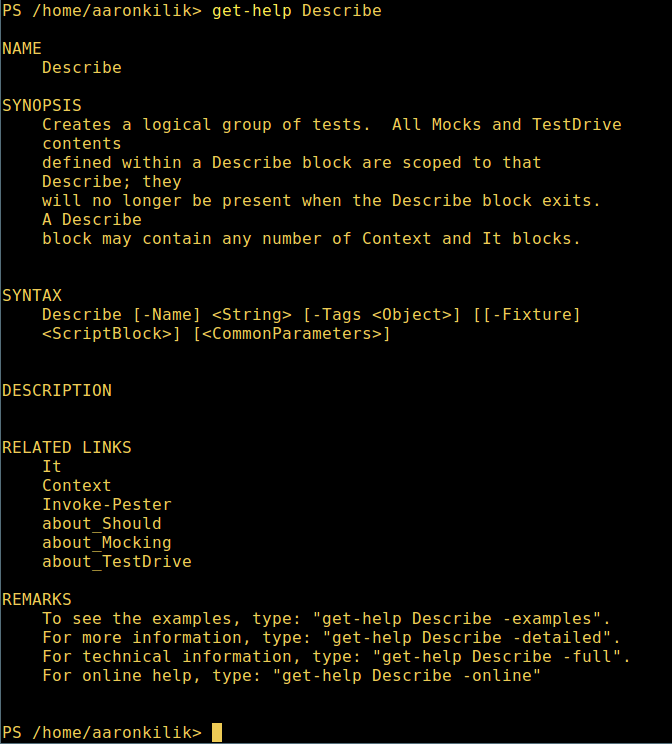
8. To learn how to use a command, view its help page (similar to the man page in Unix/Linux); in this example, you can get help for the Describe command:
get-help Describe
9. view all available command aliases, type:
get-alias

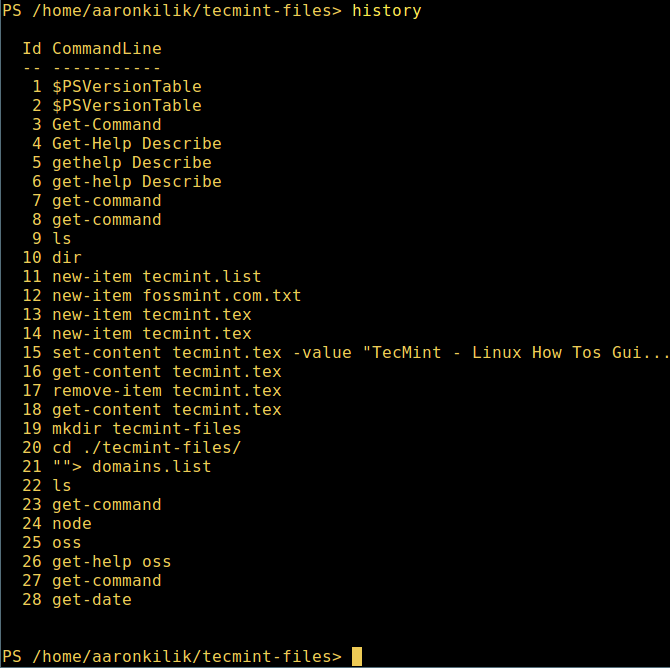
10. Last but not least, display command history (list of commands you had run previously) like so:
history
That’s all! for now, in this article, we showed you how to install Microsoft’s Powershell in Linux. To me, Powershell still has a very long way to go in comparison to the traditional Unix/Linux shells which offer, by far better, more exciting and productive features to operate a machine from the command line and importantly, for programming (scripting) purposes as well.
Visit Powershell Github repository: https://github.com/PowerShell/PowerShell
However, you can give it a try and share your views with us in the comments.
PowerShell сегодня является открытой кроссплатформенной оболочкой и языком сценариев, который можно установить и использовать как в Windows, так и в Linux, MacOS и других платформах. В этой статье мы рассмотрим, как установить PowerShell в популярных дистрибутивах Linux (CentOS, RHEL, Debian, Kali, Mint, Ubuntu). Статья скорее всего будет полезна Windows администраторам, знакомым с PowerShell, перенести свой опыт в Linux.
Содержание:
- Как установить PowerShell Core в Ubuntu 20.04 и Linux Mint 20?
- Установка PowerShell Core в Debian 11
- Установка PowerShell в CentOS и Red Hat Enterprise Linux (RHEL) 7 и 8
- Установка PowerShell Core 7.x в Kali Linux.
- Установка PowerShell в Linux с помощью Snap
- Как удалить PowerShell в Linux?
- Запуск и использование PowerShell в Linux
- Полный список скомпилированных пакетов PowerShell под различные платформы доступен в официальном репозитарии https://github.com/PowerShell/PowerShell/releases.
- Информация о поддержке версий PowerShell в различных версиях дистрибутивов Linux есть здесь: https://docs.microsoft.com/en-us/powershell/scripting/install/installing-powershell-on-linux?view=powershell-7.2
На данный момент пакет PowerShell отсутствует почти во всех стандартных репозиториях Linux. Поэтому для установки PowerShell на Linux сначала нужно скачать пакет репозитория Microsoft, импортировать ключи и использовать стандартный менеджер пакетов вашего Linux дистрибутива для установки PowerShell.
Также напомним, что на Linux можно установить только PowerShell Core (основан на .NET Сore). В Linux нельзя штатно установить классический Windows PowerShell 5.1 (отличия между PowerShell Core и Windows PowerShell). На момент написания статьи максимальная доступная версия PowerShell Core 7.2 LTS.
Как установить PowerShell Core в Ubuntu 20.04 и Linux Mint 20?
Перед установкой PowerShell в Ubuntu и Linux Mint нужно обновить список пакетов:
sudo apt-get update -y
Скачайте GPG ключи репозитория Microsoft:
wget -q https://packages.microsoft.com/config/ubuntu/$(lsb_release -rs)/packages-microsoft-prod.deb -O packages-microsoft-prod.deb
Установите GPG ключи Microsoft:
sudo dpkg -i packages-microsoft-prod.deb
Обновите список пакетов, добавив пакеты из packages.microsoft.com:
sudo apt-get update
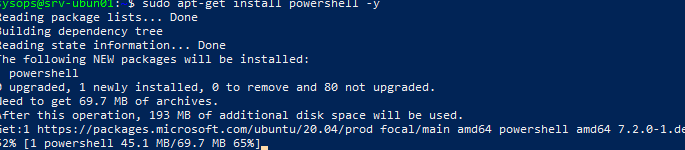
Установите PowerShell:
sudo apt-get install powershell -y
Пакет powershell будет автоматически обновляться менеджером пакетов apt:
sudo apt update
Если на компьютере была установлена предыдущая версия PowerShell Core, она будет удалена.
Также вы можете скачать и установить DEB пакет powershell вручную:
wget -q https://github.com/PowerShell/PowerShell/releases/download/v7.2.0/powershell-lts_7.2.0-1.deb_amd64.deb
sudo dpkg -i powershell_7.2.0-1.deb_amd64.deb
Разрешить зависимости и закончить установку:
sudo apt-get install -f
Установка PowerShell Core в Debian 11
Для установки PowerShell Core версии 7.0+ в Debian 11 bullseye, сначала нужно загрузить GPG ключи репозитория Microsoft:
wget https://packages.microsoft.com/config/debian/11/packages-microsoft-prod.deb
Теперь нужно зарегистрировать скачанный GPG ключ:
sudo dpkg -i packages-microsoft-prod.deb
Обновите список программ в менеджере пакетов:
sudo apt update
Установите PowerShell:
sudo apt install -y powershell

Обновление PowerShell будет происходить автоматически, когда вы запускаете обновление всех пакетов командой:
sudo apt update
Если нужно обновить только пакет PowerShell:
sudo apt install powershell
Установка PowerShell в CentOS и Red Hat Enterprise Linux (RHEL) 7 и 8
Установка PowerShell в Linux CentOS и Red Hat Enterprise Linux (RHEL), Oracle Linux выполняется одинаково:
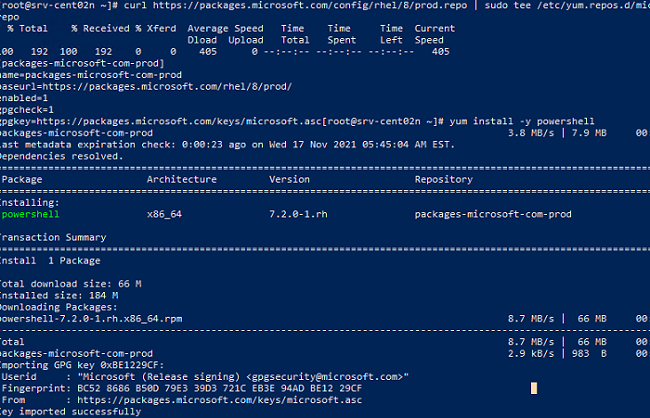
Зарегистрируйте в yum новый репозиторий Microsoft RedHat:
curl https://packages.microsoft.com/config/rhel/8/prod.repo | sudo tee /etc/yum.repos.d/microsoft.repo
Установите последнюю доступную версию PowerShell Core с помощью менеджера пакета yum (dnf):
sudo yum install -y powershell
Обновляется пакет стандартно через yum:
sudo yum update powershell
Также можно установить PowerShell из RPM файла:
sudo yum install https://github.com/PowerShell/PowerShell/releases/download/v7.2.0/powershell-lts-7.2.0-1.rh.x86_64.rpm
Установка PowerShell Core 7.x в Kali Linux.
Чтобы установить PowerShell в Kali, достаточно выполнить команду:
apt update && apt -y install powershell
Установка PowerShell в Linux с помощью Snap
Вы можете использовать snap для установки PowerShell в различных дистрибутивах Linux. Так же этот метод установки можно рекомендовать для дистрибутивов Linux для которых нет официальной поддержки posh.
Команда установки PowerShell через snap:
sudo snap install powershell --classic
Обновление PowerShell через snap выполняется автоматически, но вы можете обновить его вручную:
sudo snap refresh powershell
Как удалить PowerShell в Linux?
Рассмотрим команды удаления PowerShell в различных дистрибутивах Linux:
- Удалить PowerShell Core в Ubuntu/Linux Mint:
sudo apt remove powershell - Удалить PowerShell в Debian:
sudo apt remove powershell - Удалить PowerShell в Kali Linux:
sudo apt -y remove powershell - Удаление PowerShell в CentOS и Red Hat Enterprise Linux (RHEL):
sudo yum remove powershell - Удалить PowerShell через Snap:
sudo snap remove powershell
Запуск и использование PowerShell в Linux
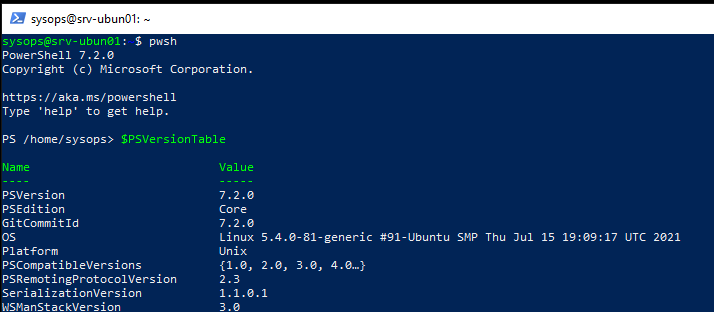
Чтобы запустить командную оболочку PowerShell в Linux, выполните команду:
pwsh
Проверить какая версию PowerShell установлена на данном хосте Ubuntu можно командой:
$PSVersionTable
При наборе команд PowerShell можно использовать стандартное автодополнение с клавишей TAB.
В нашем примере установлен PowerShell Core 7.2.0:
PSVersion 7.2.0
PSEdition Core
OS Linux 5.4.0-81-generic #91-Ubuntu SMP Thu Jul 15 19:09:17 UTC 2021
Platform Unix
Бросается в глаза, что команды в оболочке PowerShell выполняются в несколько раз дольше, чем в оболочке bash. Можно сравнить время выполнения с помощью простых команд:
time pwsh -Command Get-History
time bash -c history
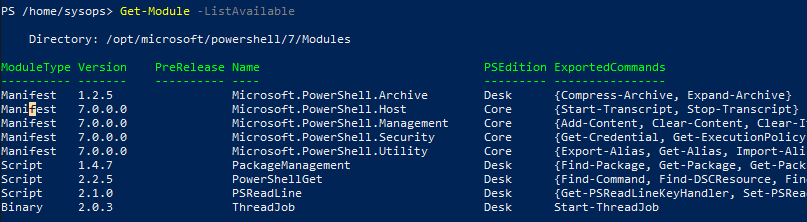
По умолчанию в Linux доступен небольшой список встроенных модулей:
Get-Module –ListAvailable
- Microsoft.PowerShell.Archive
- Microsoft.PowerShell.Host
- Microsoft.PowerShell.Management
- Microsoft.PowerShell.Security
- Microsoft.PowerShell.Utility
- PackageManagement
- PowerShellGet
- PSReadLine
- ThreadJob
Можно установить другие модули, в том числе VMWare PowerCLI.
Получить текущую дату:
Get-date
Узнать аптайм хоста:
get-Uptime
Вывести содержимое текущшего каталога:
Dir
Или
Get-ChildItem
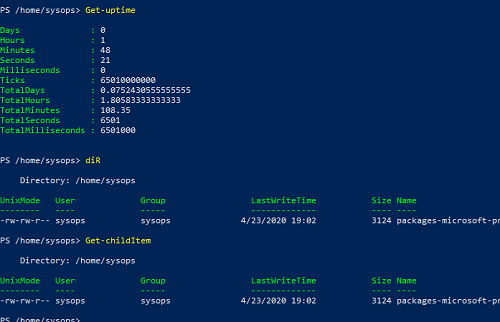
Обратите внимание, что в Linux PowerShell регистр команд не имеет значения.
Вывести историю выполненных команд PowerShell:
History
Получить справку по команде:
Get-help Get-History
Для запуска скрипта PowerShell из bash:
pwsh /home/sysops/CheckDrive.ps1
Более подробно об особенностях и сценариях использования PowerShell для администрирования и автоматизации в Linux мы рассмотрим в следующей статье.

Microsoft and Open Source together do not surprise me anymore.
When Microsoft first announced that it is going to open source .NET, I was shocked. But then it open sourced Visual Studio Code, SQL Server, and more.
The last time I paid attention to Microsoft’s love for Open Source (and Linux) was when it announced Bash on Windows. That was big. Linux’s Bash Shell on Windows, thanks to Ubuntu.
When Microsoft announced that it was bringing its command line platform PowerShell on Linux. PowerShell is now open source and is available on Linux and macOS.
What is PowerShell?
PowerShell is a tool which lets you interact with the command-line shell and automate tasks, primarily for Windows. For things like starting a service, running a web request, you need to use the PowerShell (as an administrator) on Windows.
If we go by its official description, it is “a task automation and configuration management framework from Microsoft, consisting of a command-line shell and associated scripting language built on the .NET Framework.”
Basically, it’s a command line framework that allows administrative tasks on local and remote Windows systems, among other things. Tightly coupled with .NET, PowerShell has been a quite a hit in the Windows domain.
Install PowerShell on Linux using Snap
Linux already has more powerful and versatile shells available at its disposal. I don’t think regular Linux users are going to start using PowerShell, but then, that’s not the aim anyway. PowerShell on Linux is aimed at developers who must use PowerShell or .NET perhaps.
Whatever may be the reason for you to use PowerShell on Linux, you can easily install it using Snap.
First, make sure that Snap support is enabled on your Linux system. Thereafter, all you have to do is to use the following command:
sudo snap install powershell --classic🚧
I was unable to make PowerShell as the default using the chsh command. It’s acceptable since, there is an icon for PowerShell in the system menu.
If you would rather not use Snap, you can find installation instructions for various Linux distributions in its documentation. You can find docker images for some, and also find it listed in some of the popular package managers.
Install PowerShell using Microsoft Repository on Ubuntu
🚧
The repo you are going to configure below contains some .NET versions. Ubuntu’s native repo provides many .NET packages too, but different versions. So keep caution while using .NET packages from this repo.
If you are using Ubuntu, you can set up the official Microsoft repository and install PowerShell from it. First, update your system:
sudo apt update
Now, you should install some prerequisite packages.
sudo apt-get install -y wget apt-transport-https software-properties-common
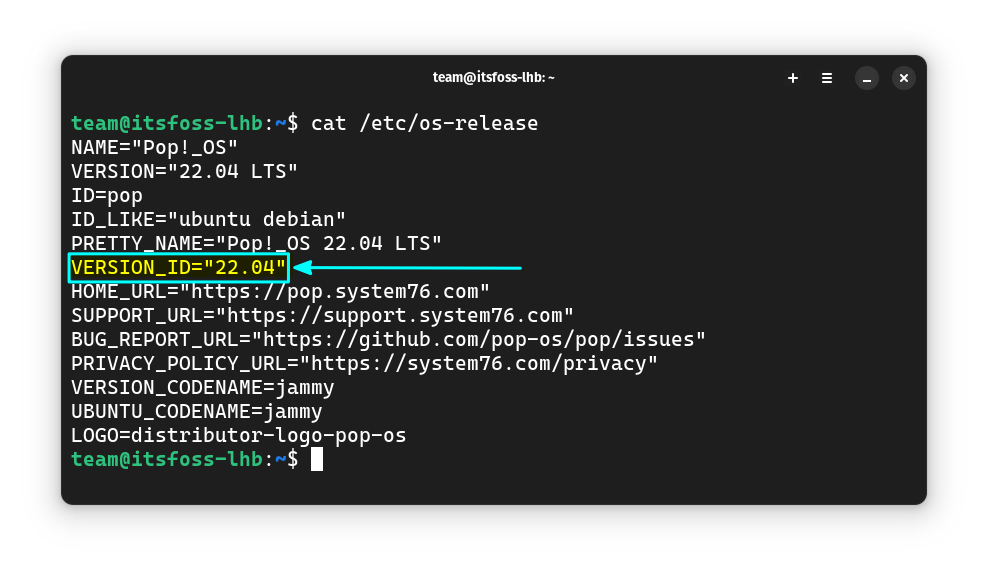
Now, get the version of Ubuntu you are using.
source /etc/os-release
Remember that, distributions like Pop!_OS, Linux Mint, etc. use Ubuntu at its base. So, on the next step, where we need the VERSION_ID, it implied the version code of Ubuntu, which the distribution is based.
Download and register the Microsoft repository keys. Just copy and paste the command, one by one.
wget -q <https://packages.microsoft.com/config/ubuntu/$VERSION_ID/packages-microsoft-prod.deb>
sudo dpkg -i packages-microsoft-prod.deb
rm packages-microsoft-prod.deb
Now, you can update the software sources on the system and install PowerShell.
sudo apt update
sudo apt-get install -y powershell
📋
The repository includes a package for PowerShell LTS and Preview versions also.
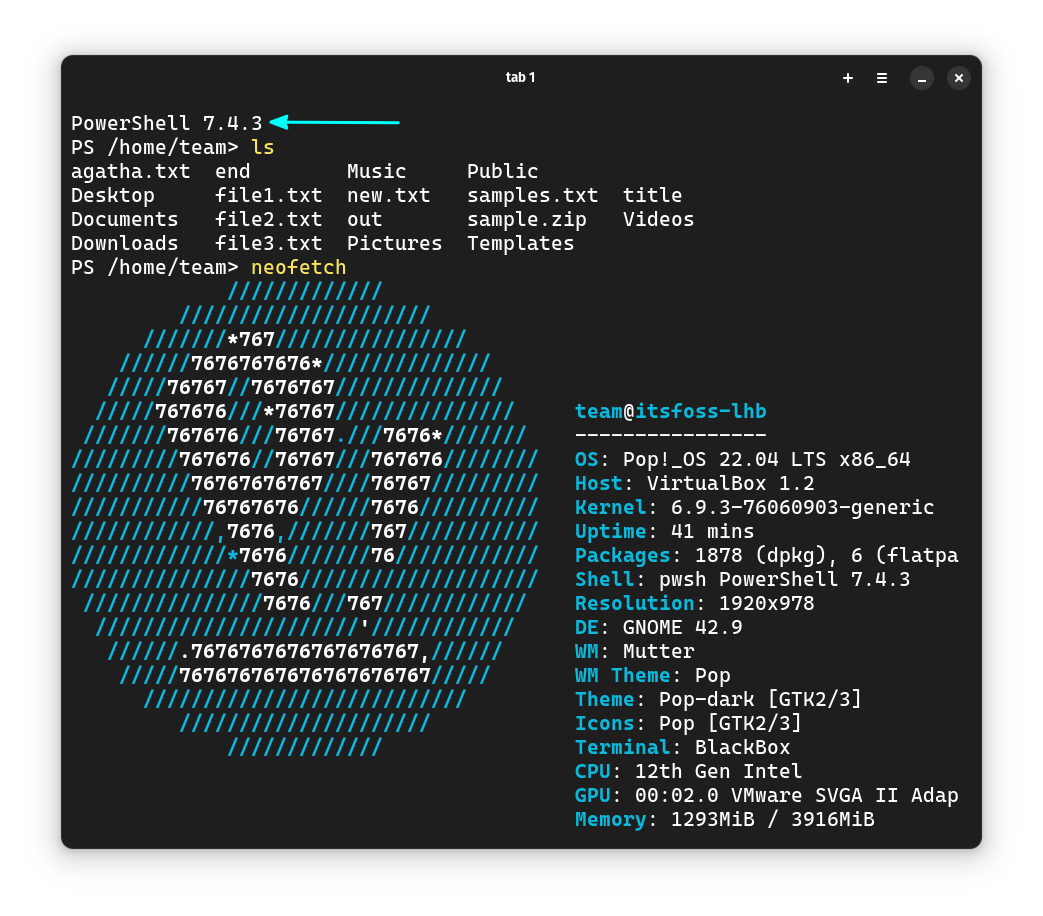
That’s it. You can log in to PowerShell, by issuing the command:
pwsh
Unlike the Snap version, there is no GUI icon to appear on the app menu.
How to Change the Default Shell in Linux?
Tried another shell and liked it so much that you want to use it all the time by making it the default shell? Here’s how you can change the default shell in Linux.
It’s FOSSAbhishek Prakash

For beginners, you can start learning PowerShell by following the PowerShell documentation. You can find more about it on its GitHub repository:
💬Have you tried PowerShell on Linux? Let me know your thoughts!
About the author
Abhishek Prakash
Created It’s FOSS 11 years ago to share my Linux adventures. Have a Master’s degree in Engineering and years of IT industry experience. Huge fan of Agatha Christie detective mysteries 🕵️♂️
Microsoft PowerShell has been traditionally thought of as a Windows-only product but not anymore. As of PowerShell v6, the full capabilities of PowerShell are now available cross-platform with Linux as the most popular.
In this tutorial, you’re going to learn how to get started from scratch by installing PowerShell on Ubuntu (other Linux distributions are similar), how to run commands, and even install some modules.
Let’s get started!
Prerequisites
This tutorial will contain various demos. If you’d like to follow along, be sure you have the following:
- Any supported Linux distribution – This tutorial uses Peppermint 10 which is based on Ubuntu 18.04 (LTS).
- An account with root access.
Updating Package Repository
Before jumping to installing PowerShell on Linux, you must first update the apt package manager’s repository list. Some distributions of Linux use the apt package manager to install apt packages; PowerShell is one of them.
To ensure that apt can find the PowerShell package and any dependency when downloading, you must first update apt’s package repository list. To do that, run [apt update](<https://www.cyberciti.biz/faq/what-does-sudo-apt-get-update-command-do-on-ubuntu-debian/>).
Installing PowerShell on Linux
Now that you’ve updated the package repositories, it’s time to install PowerShell on Linux. Since this tutorial is using an Ubuntu-based distribution, you have two different ways to install PowerShell; using snap packages or via the .NET SDK.
Installing PowerShell via Snap Packages
The easiest way to install PowerShell on Ubuntu is via snaps. Snaps are packages that work across several Linux versions and distributions.
To install PowerShell on Linux via a snap package, open a terminal and run the snap install Linux command with sudo rights to using the snap package name of powershell.
By default, snap packages are limited in scope for security reasons. Specifying the
--classicparameter allows you to make changes to your system outside the security sandbox.
sudo snap install powershell --classic
Installing PowerShell via the .NET SDK
1. Sometimes you’ll find that the PowerShell snap package does not contain the latest version of PowerShell. When that happens, you can always opt for the .NET SDK route which is always going to be updated.
PowerShell is packaged with .NET Core so when you install the .NET SDK, you get PowerShell too!
Download and install the latest available .NET SDK by running the below command using the apt package manager. As of this writing, the latest available .NET SDK package is v5.0.8. You can check the latest available version here.
sudo apt install dotnet-sdk-5.0
2. Now, install PowerShell via the dotnet application using dotnet tool install. The dotnet tool command specifies a NuGet package which PowerShell is packaged as.
By specifying the --global option, dotnet installs the PowerShell package to ~\.dotnet\tools and ensures the directory is in the system PATH so you can execute it from anywhere.
dotnet tool install --global PowerShell 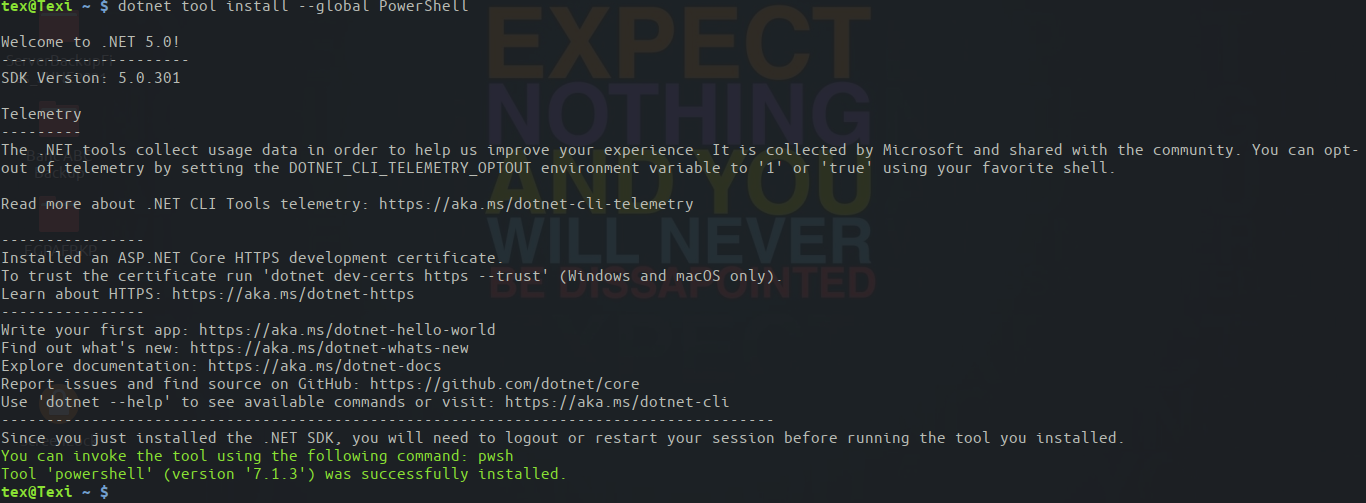
Running Basic PowerShell Commands on Linux
Now that you have PowerShell installed on Linux, what next? Let’s start by running a few basic commands. To start PowerShell, simply run pwsh and you’ll be dropped into the PowerShell interactive console.
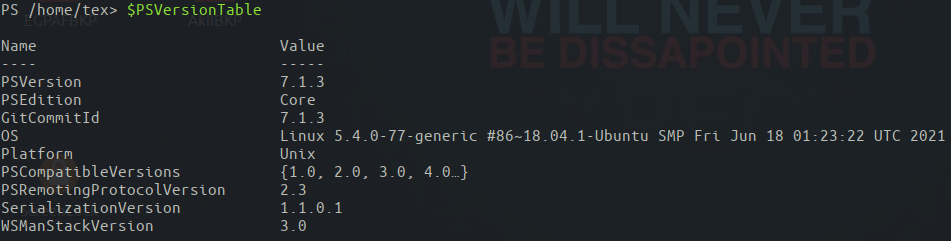
Being a cross-platform scripting language, PowerShell on Linux supports all of the commonly known commands from CMD and Linux’s command line shell such as sudo apt update. No need to open a Bash terminal!
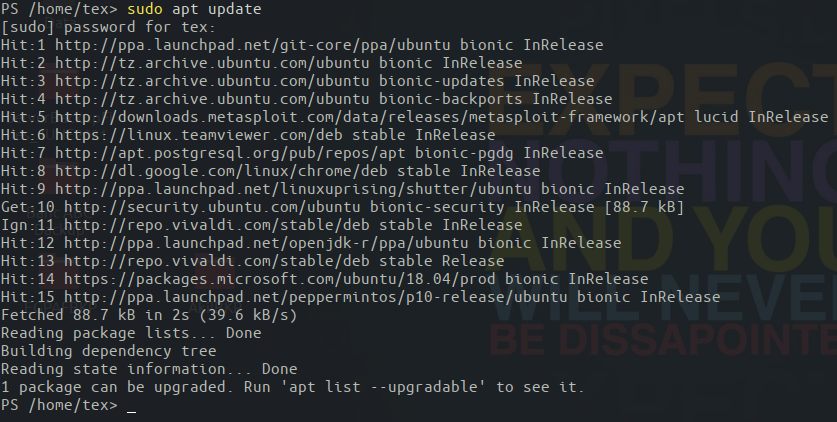
From here on out you can run thousands of built-in PowerShell commands. While you’re at it, check what version of PowerShell is installed using $PSVersionTable. You should see that the PSEdition shows as Core and Platform is Unix.
Once you’re done in the PowerShell console, exit by running the exit command. This command will drop you back into your Bash terminal.
PowerShell on Linux Limitations
Just because you can install PowerShell and run commands on it doesn’t necessarily mean you can do everything possible on Windows. After all, Linux being Open Source, is a completely different operating system and some commands will not be available for features not available in Linux.
Windows -ne Linux
For example, since Linux doesn’t have a registry, you won’t see any PowerShell drives. The Get-PSDrive cmdlet will still be available but it will only return the mounted Linux storage volumes and other standard PS Drives. You can see an example below.
Get-PSDrive | Format-Table -Auto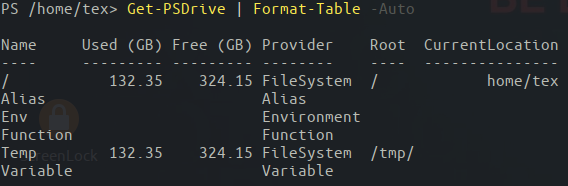
Unlike Microsoft Windows, Linux neither has Common Information Model (CIM) nor Windows Management Instrumentation (WMI). Both of these assist in providing information about the management of devices and applications to the Windows operating system.
You can see below that the Windows PowerShell cmdlet Get-CimInstance isn’t available in PowerShell on Linux.
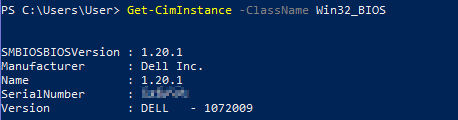
Get-CimInstance -ClassName Win32_BIOS
But if you try to use Get-CimInstance in Windows PowerShell, you’ll see below that it works as expected.
No Scheduled Jobs
Another drawback of PowerShell on Linux is the lack of scheduled jobs. Scheduled jobs are a handy feature in Window PowerShell that allows you to run tasks in the background via the Windows Task Scheduler.
To create a scheduled job in Windows PowerShell requires you to register the job via the Register-ScheduledJob cmdlet. You’ll see an example of copying some Excel workbooks that works in Windows PowerShell below. You’ll notice that the Register-ScheduledJob cmdlet isn’t found.

Although you can’t schedule a job, you can still invoke background jobs using the Start-Job command. The Start-Job cmdlet allows you to run background jobs in PowerShell to execute a task with no interaction with the current session.
Perhaps you’d like to list all files in /var/backups but do so in the background. You could create the command to execute in a ScriptBlock and create a job called GetAllBackupFiles invoke with Start-Job, as shown below.
Start-Job -Name GetAllBackupFiles -ScriptBlock {Get-ChildItem /var/backups -Recurse}
Once the background job starts, you can then receive the output from that job using the Retrieve-Job cmdlet by specifying the -Name that you provided when starting it.
Retrieve-Job -Name GetAllBackupFiles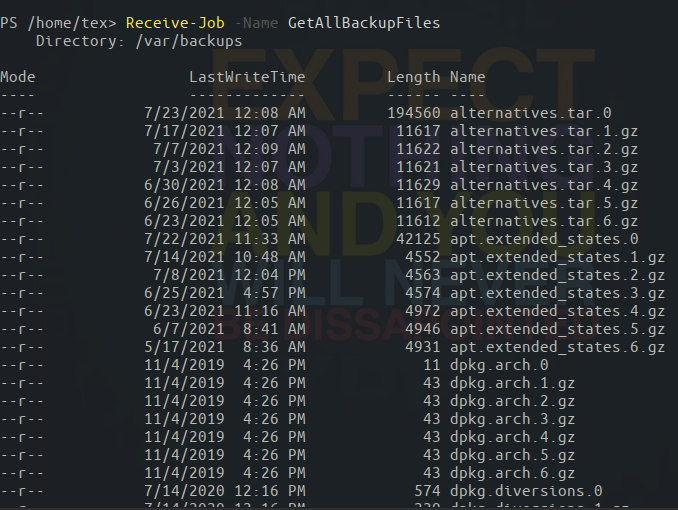
Working with PowerShell Modules on Linux
An important concept in Windows PowerShell is the PowerShell module. PowerShell modules are groups of commands built as “packages” built both from Microsoft and via the PowerShell community.
Finding Installed Modules
By default, PowerShell on Linux, like Windows, installs various modules. Find all of those modules by running the Get-Module command, as shown below. The ListAvailable parameter tells Get-Module to return all modules on the filesystem; not just loaded modules.
Get-Module -ListAvailableYou can see below that the Pester module is installed in /root/.local/share/powershell/Modules which is the user location for PowerShell modules. You’ll learn how to install modules in an upcoming section.
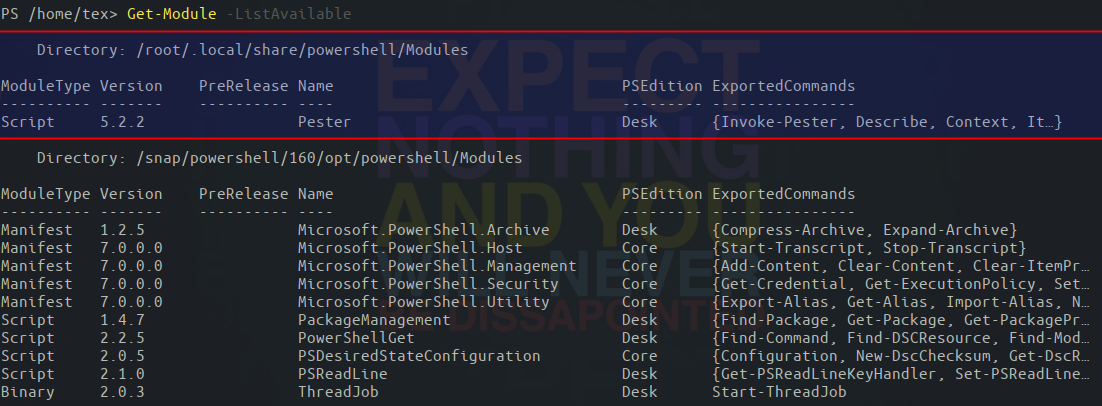
You can see each location to install modules by looking at the PSModulePath environment variable, as shown below. Since the value of $env:PSModulePath is one string, the tutorial is using the split operator to split the string on colons (not semicolons like Windows) to display each path on a different line.
$env:PSModulePath -split ':'
Installing PowerShell Modules on Linux
Even though PowerShell on Linux comes with various modules already installed, chances are you’re going to need more functionality. When that happens, you can leverage the PowerShell Gallery. The PowerShell Gallery is a repository of thousands of modules that work both in Windows and Linux.
Using the Install-Module cmdlet, you can install modules on Linux just like you can on Windows. But first, you should find the module you’re looking for using Find-Module.
Let’s say you’d like to run some Pesters tests using the popular Pester testing framework. Pester comes packaged in a module. Check to see if the Pester module is available in the PowerShell Gallery using the Find-Module cmdlet.
You can see below that Find-Module found the available Pester module.

Once you’ve verified the Pester module is available, now install the module using the Install-Module cmdlet specifying the Name of the module.
Install-Module -Name PesterWhen you run Install-Module, PowerShell will prompt you about an untrusted repository because the repository is marked as untrusted. For testing, this warning is nothing to worry about so type A to confirm.

Once the module has been installed, now run the Get-InstalledModule cmdlet and you’ll see that Pester has been installed and its commands are now available.

You’ll also see that by using the Get-Command cmdlet, you can also find all commands inside of the Pester module, as shown below.
Get-Command -Module Pester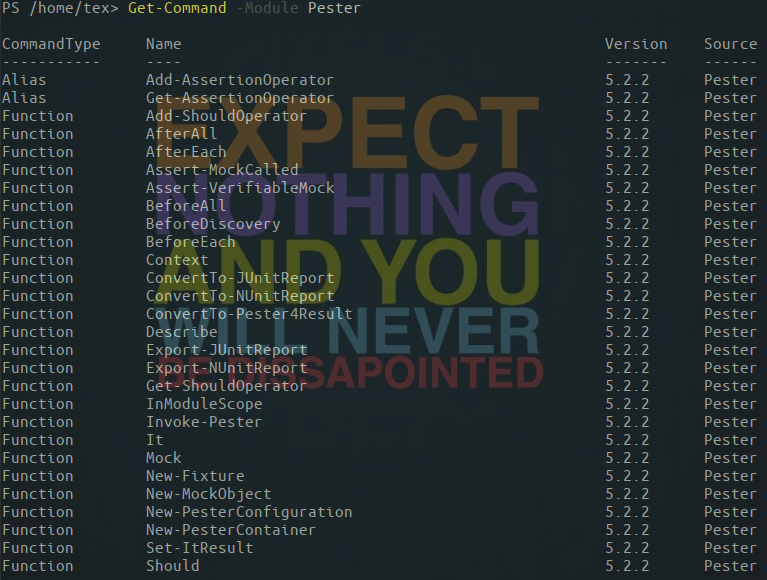
Running PowerShell Scripts From Bash
To wrap up this tutorial, let’s end with running PowerShell scripts from Bash. Throughout this tutorial, you’ve been interactively running PowerShell commands inside of a PowerShell console. If you have a PowerShell script you need to execute, there’s no need to drop into the PowerShell console. Instead, you can execute the script directly from Bash.
To demonstrate running a PowerShell script from Bash, open your favorite Linux text editor and paste the following command and save the file as DrivesInformation.ps1. This script will simply enumerate all of the PS drives.
In your Bash terminal, instead of running pwsh, hitting Enter and then running the script inside of the PowerShell console, invoke the script directly from Bash. To do this, run pwsh again but this time specify the PowerShell script you just created, as shown below.
You’ll see that you receive the same output you would inside of the interactive PowerShell session directly in your Bash terminal.
pwsh /home/tex/DrivesInformation.ps1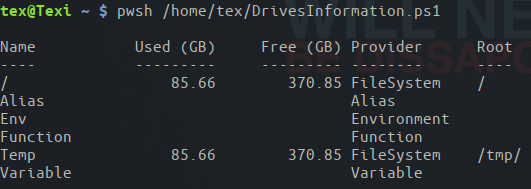
Conclusion
You should now have a good start at running PowerShell in Linux! It’s now up to you to start learning more about PowerShell and automating all you can!