
Provide feedback
Saved searches
Use saved searches to filter your results more quickly
Sign up
Appearance settings
Приложение Windows Post Install (WPI) — это удобный инструмент для автоматизации процесса установки программного обеспечения на компьютеры с операционной системой Windows. С помощью WPI вы можете создать собственный набор программ, которые будут автоматически устанавливаться после установки Windows, что значительно экономит время и усилия. Программа поддерживает широкий спектр приложений и позволяет настроить установку под ваши нужды. WPI идеально подходит для системных администраторов, IT-специалистов и пользователей, которые часто переустанавливают операционную систему или настраивают новые компьютеры. Простота использования и гибкость настроек делают Windows Post Install незаменимым помощником в работе с программным обеспечением.
Приложения и игры /
Windows Post Install скачать бесплатно на ПК и телефон
09.06.2024
Название
Windows Post Install
Распространяется
бесплатно
19.1 MB
Возможности Windows Post Install и полезные функции
Windows Post Install — это удобное приложение, которое позволяет автоматизировать процесс установки и настройки программ на вашем компьютере после переустановки Windows. С его помощью вы сможете быстро и легко восстановить все необходимые приложения, настроить системные параметры и сохранить время на рутинных задачах. Программа предлагает широкий выбор программ для установки, а также возможность создавать собственные скрипты для индивидуальной настройки. Удобный интерфейс и простая инструкция делают использование приложения максимально удобным и эффективным. Windows Post Install — ваш надежный помощник в обновлении операционной системы!
Установка драйверов
Автоматическая установка необходимых драйверов для обеспечения оптимальной работы устройств на компьютере.
Настройка интернета
Помощь в настройке сетевых параметров для подключения к интернету и обеспечения стабильного соединения.
Установка программ
Предложение выбора и автоматическая установка необходимых программ для повседневного использования компьютера.
Резервное копирование
Создание резервных копий важных данных для защиты от потери информации при сбоях в работе системы.
Очистка системы
Удаление временных файлов, кэша и других ненужных данных для оптимизации работы операционной системы.
Настройка безопасности
Повышение уровня безопасности компьютера путем установки антивирусов, брандмауэров и других средств защиты.
Описание и фото Windows Post Install
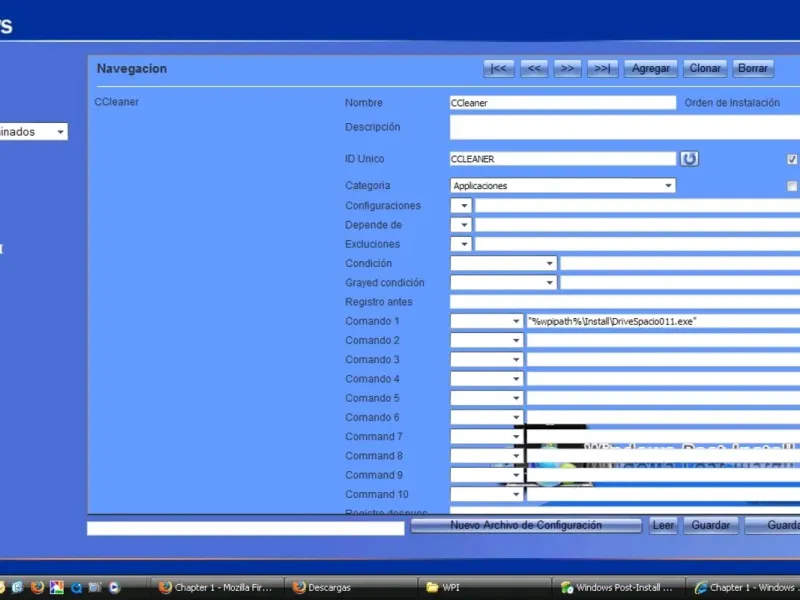
01
Приложение позволяет легко управлять установкой программ. В нем можно выбрать предустановленные опции, настроить конфигурации и зависимости, а также исключить ненужные компоненты. Удобный интерфейс с категориями и командами делает процесс настройки простым и интуитивно понятным. Приложение поддерживает автоматизацию задач и создание новых конфигурационных файлов, что экономит время и усилия.
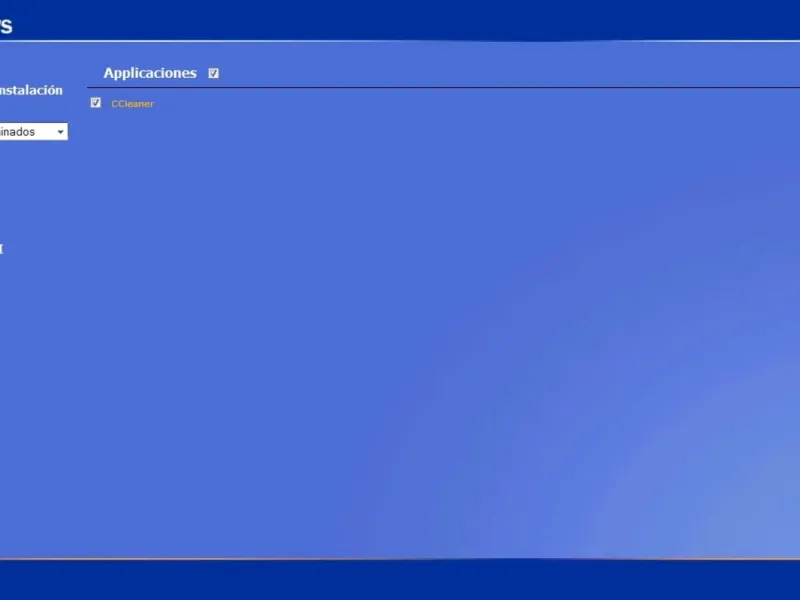
02
Приложение предлагает удобный интерфейс для установки программ. Слева расположены кнопки для начала установки, выбора предустановленных программ, настроек, руководства и информации о приложении. В правой части экрана отображается список доступных приложений, таких как CCleaner. Приложение позволяет быстро и легко управлять установкой программного обеспечения, обеспечивая пользователю максимальное удобство и эффективность.
Как скачать и установить Windows Post Install на Windows Desktop
Нажмите кнопку “Скачать”, чтобы начать загрузку Windows Post Install для Windows
Откройте установочный файл .exe в папке Загрузки и дважды щелкните его
Следуйте инструкциям во всплывающем окне, чтобы установить Windows Post Install на Windows Desktop
Теперь вы можете открыть и запустить Windows Post Install на Windows Desktop
Отзывы о Windows Post Install
Обновлено:
11.02.2025
3
Ирина
Установка прошла нормально. Весь процесс, в принципе, хороший. Но вот производительность оставляет желать лучшего порой. В общем, неплохо, но есть над чем работать.
5
Наталья
Система установилась, как по маслу! Никаких проблем с драйверами, всё летает! Эмоции просто зашкаливают! В следующий раз только с этой аппой буду работать. Респект разработчикам!
5
Ольга
Просто шикарное приложение! Установил свою системы за 20 минут, и всё пашет как часы! Супер удобно! Серьезно, я в шоке от скорости. Оптимизация на высоте, почувствуйте крутую скорость работы!
5
Анна
Это просто мечта! Всё пошло без заиканий, каждая настройка на месте и работает идеально! Я в восторге! Совсем не жалею о скачивании, теперь всегда буду качать только через вас!
4
Кристина
Удалось установить быстро и удобно. Ничего не тормозит, очень рад. Но вот интерфейс мог бы выглядеть чуть поярче. Всё же я больше опытный пользователь, так что это не критично.
5
Сергей
Офигенная штука! Всё обновил, настроил, и работаю себе на здоровье. Интерфейс понятный, а скорость установки радует. Реально, не ожидал, что будет так легко. Выручили конкретно!
3
Артем
В общем, не плохо, но есть нюансы. Установка на разные системы шла с трудом. Надеюсь, будут исправлены баги, чтобы улучшить общее впечатление.
5
Виктор
Ребята, это просто находка! Всё сделали быстро и без лишних заморочек! Каждая деталь продумана, и результат на лицо! Теперь каждый знакомый будет только так устанавливать. Круто, что придумали!
5
Игорь
Ужасно рад, что нашёл Windows Post Install! Установка завершилась мгновенно, и все драйвера установились. Я даже не успел пошевелить пальцем! Всех поздравляю с находкой!
Похожие приложения и аналоги Windows Post Install
windows
setup
configuration
utility
The Windows Post-Install Wizard is a utility that runs after installing Windows to help configure basic settings. It guides users through tasks like setting the time zone, connecting to the internet, creating a user account, and more.
What is Windows Post-Install Wizard?
The Windows Post-Install Wizard is a utility that automatically launches after installing the Windows operating system. Its purpose is to guide the user through configuring some basic settings in order to have a functional system.
Some of the key tasks that the Post-Install Wizard assists with include:
- Setting the correct time zone based on location
- Connecting to the internet by detecting available WiFi networks or configuring Ethernet
- Creating the first administrator user account and setting a password
- Agreeing to the Microsoft Services Agreement
- Choosing privacy settings
- Configuring security options like turning on Windows Defender
The wizard uses a step-by-step interface with clear options and descriptions to make it easy for both new and experienced users to setup Windows with just some basic choices. It aims to have the OS ready for daily use as quickly as possible. The process usually only takes a few minutes. Advanced configuration can still be done afterwards through the Settings app and Control Panel.
Windows Post-Install Wizard Features
Features
- Guides users through initial Windows configuration
- Sets time zone based on location
- Helps connect to Wi-Fi and configure internet access
- Creates user account(s)
- Activates Windows and registers license key
- Configures basic Windows settings and preferences
Pricing
- Free
- Bundled with Windows OS
Pros
Simplifies initial setup process for new users
Automates tedious configuration tasks
Provides recommendations based on location and network
Allows creating user accounts early in process
Activates Windows license during initial setup
Cons
Provides limited configuration options
May not detect all hardware and devices
User has little control over setup process
Requires internet access for activation and updates
May still require additional setup after completing
Official Links
The Best Windows Post-Install Wizard Alternatives
Top
Os & Utilities
and
System Configuration
and other similar apps like Windows Post-Install Wizard
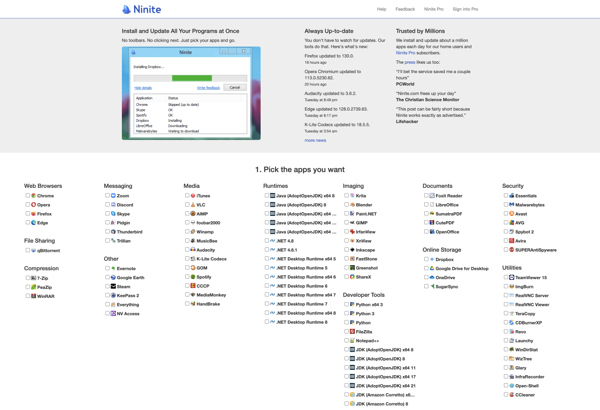
Ninite
Ninite is a free software application that streamlines the process of installing multiple programs on a new Windows computer. It allows users to select from a list of over 100 popular free software options, including web browsers, media players, productivity software, utilities, and more.Once the desired programs are selected, Ninite…
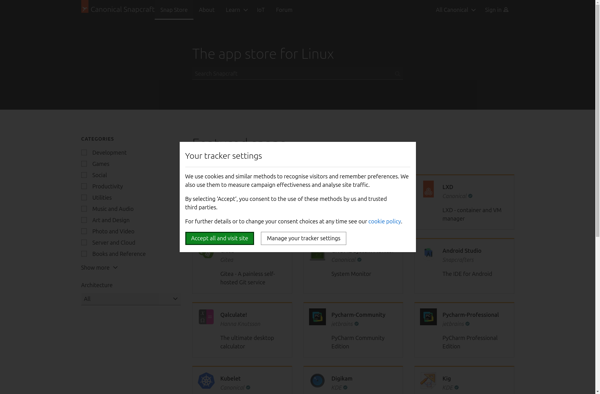
Snap Store
Snap Store is an app store and software distribution platform for the Linux desktop operating system. It provides users access to applications called snaps that work natively across most common Linux distributions like Ubuntu, Fedora, Debian, Arch Linux, and more without system modifications.Key features of Snap Store and snaps include:Ease…
Mac App Store
The Mac App Store is a digital distribution platform developed by Apple Inc. for macOS applications. It was launched in January 2011 as part of Mac OS X Snow Leopard version 10.6.6. The Mac App Store allows users to easily browse, purchase, download, and install applications for their Mac computers,…
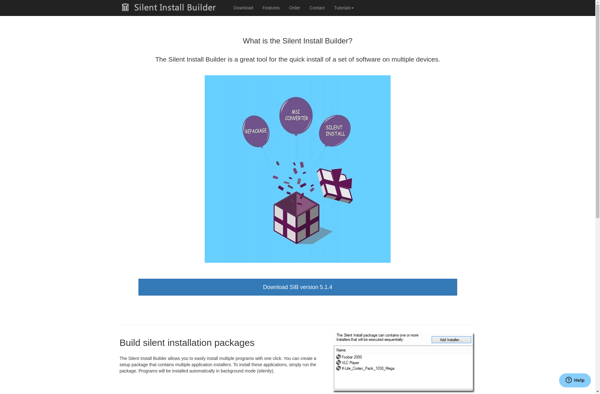
Silent Install Builder
Silent Install Builder is a software tool developed by Ethan Breton LLC that makes it easy to create silent install setup packages for many types of common Windows software. A silent installer runs an installation in the background without requiring user input. This allows IT staff to efficiently deploy software…
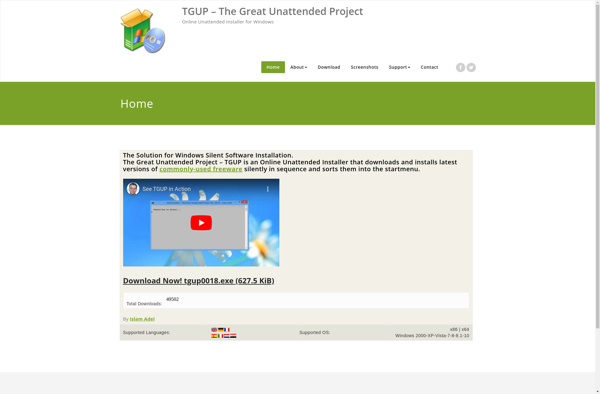
TGUP — The Great Unattended Project
TGUP (The Great Unattended Project) is an open-source remote administration and automation software for Windows. It allows system administrators to remotely perform unattended management, deployment, and automation tasks on computers without any user interaction.Some key features of TGUP include:Remote command execution — Run commands, scripts, and install software remotely on…
VBDeploy
VBDeploy is an open source automation server designed specifically for deploying Visual Basic applications. It helps VB developers and ops teams streamline packaging, versioning, and distributing VB 6, VB.NET, and VBA apps to various environments.Key features include:Intuitive GUI and command-line interfacesCreating installers, zips, and other packagesSetting version numbers and release…
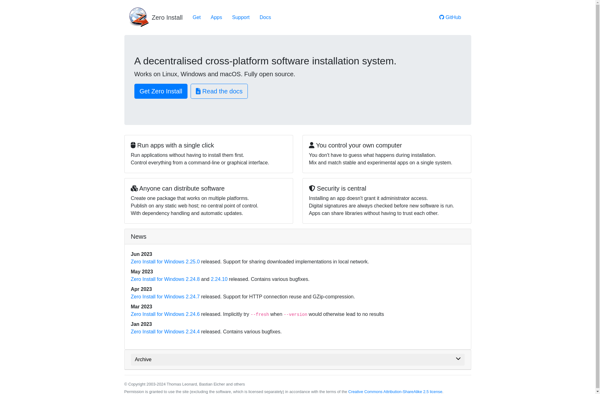
Zero Install
Zero Install is an open source software distribution system that allows applications to be run directly from network resources without needing local installation. It works by determining dependencies and downloading the latest software versions on-demand. Some key features of Zero Install include:Decentralized distribution — Apps can be run from anywhere…
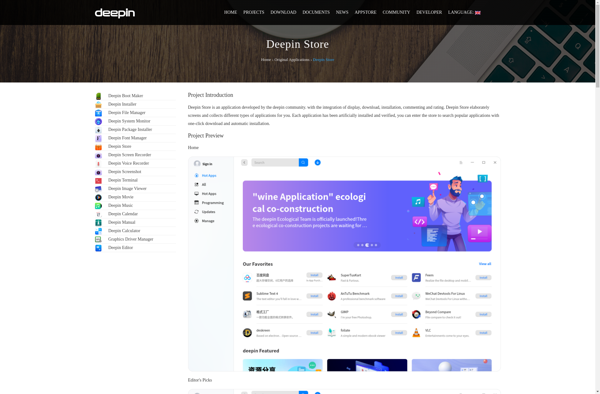
Deepin Store
Deepin Store is the official app store and software center for Deepin Linux, providing an intuitive way to find, install, and manage applications on Deepin systems. It serves as a centralized repository of applications that are certified to work properly on Deepin.The Deepin Store features a clean and modern graphical…
Get Mac Apps
Get Mac Apps is a website focused on reviewing and recommending Mac applications. Launched in 2019, the site provides in-depth reviews and curated lists of the top apps across various categories like productivity, utilities, creativity, and more.The goal of Get Mac Apps is to help Mac users discover new software…
Ketarin
Ketarin is an open-source application installer and package manager for Windows operating systems. It provides functionality similar to package managers on Linux and macOS systems, but tailored for Windows.The key features of Ketarin include:Automatic updates for installed applications — Ketarin can check for new versions of your apps and install…

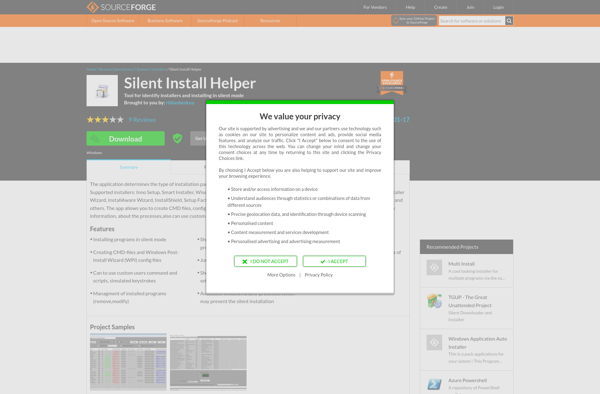
Silent Install Helper
Silent Install Helper is a free utility designed to help IT administrators and power users create answer files for silently installing software on Windows systems. With Silent Install Helper, you can easily create answer files (also called unattended installation files) for over 200 popular applications, including web browsers, office suites,…
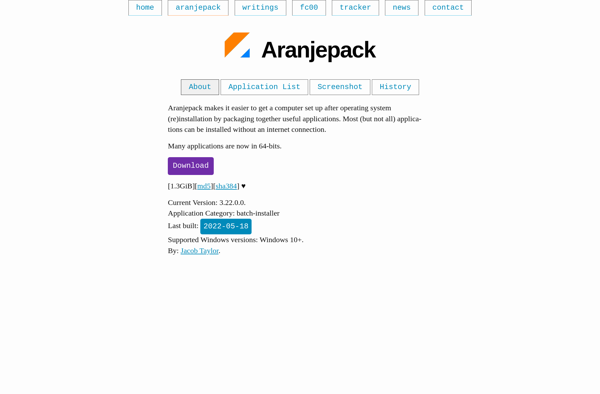
Aranjepack
Aranjepack is a free and open source software application designed for local data archiving. It provides users with a simple way to collect, describe, preserve and access digital content.Some key features of Aranjepack include:Intuitive user interface for uploading, organizing and searching contentSupport for various file types including documents, images, audio,…
Windows Post-Install Wizard (WPI for short) is a hypertext application designed for giving users choice. While Windows XP offers many ways of customizing the setup process out of the box, its major drawback is the lack of being able to select which applications an end user may install. In the past, end users and administrators needed to either download the files manually, or create overly complex scripts that could only be used once. WPI allows you to create one image, which can then be custom configured, and optionally, automated, so that end users can install any applications.
WPI is a simple to use automation program for the choice and installation of multiple programs, tweaks and scripts. No longer will you need a dozen CD’s or more when doing a fresh Installation. No longer will you need multiple files when you are servicing another PC. With Windows Post-Install Wizard all that you will need is 1 or 2 CD\DVD’s to fully install your PC with all of your apps, scripts, registry files or tweaks. Instead of having to re-download those apps like adobe reader, flash or updates to programs you can have them all on one disk. With WPI you can have all of them all on one disk and then have a nice interface for selecting which apps to install and after configured properly WPI will install all of them without any needed input from you. WPI also and is commonly used added to your windows installation disks. This way you can automate the complete process of Windows and program installations.
With your typical setup of WPI you have your OS and all of the apps, tweaks and such on one disk. After windows installs, WPI kicks in and you are given a selection of everything you have configured WPI with, then you can select the ones you want or simply let the timer run out and your default apps will install.
Highlights of the newest version!
A «Actual» .exe luancher for WPI FINALLY! Very important update as the .exe has MANY, MANY built in features!
HUGE, monstrous update!
Totally new layout option! (See the style tab in the options area.)
Loads of new features! Please read the changelog!
All themes are now included in the main dl…
Known Bugs\Issues!
The rewind button DOES NOT work on the media player… (Probably never has)
Nero 7 messes with the IE scripting engine and WPI will not work if Nero 7 has been installed or is currently installed. HOWEVER, This link to Nero Cleantool —> HERE has been reported to fix this issue. So if you wish to use WPI and have had Nero7 installed you will want to «clean» your system first.
v8.0.3 Updates - Released May 30th, 2010
========================================================================
* Fixed a path bug in the installer.v8.0.2 Updates - Released May 27th, 2010
========================================================================
* Changed language file codes: dk-> da, and se -> sv.* Fixed bug in USSF dealing with msi archives.
* Updated the media player code for the installer.
* Updated new file error handling code some more.
~~~~~~~~~~~~~~~~~~~~~~~~~~~~~~~~~~~~~~~~~~~~~~~~~~~~~~~~~~~~~~~~~~~~~~~~
Updated the Installer to handle custom images and backgrounds.Added a "None" option to the combobox for installer background image.
This will make the top titlebar transparent in case you want to use a
full size background image.You can now put custom images and backgrounds in your theme folder to
override the selected ones in Options->Style tab:* If Wallpaper_Installer.jpg or Wallpaper_Installer.png exists, it will be
used as the window background image.
Window size is 430x460 pixels.* If InstallBg.png exists, this will be used as the title bar background
image. Use in conjunction with "None" in the combobox.
No more than 428x60 pixels.* If InstallLogo.png exists, it will be used as the title image.
No more than 430x60 pixels.* If ProgressBar.png exists, it will be used for the progress bar image.
This will also be used in the main window for the count down timer.
Must be 400x20 pixels.* If Wallpaper_InstallItems.jpg or Wallpaper_InstallItems.png exists,
it will be used for the background image for the install items textbox.
Box size is 400x256 pixels.7Fresh theme uses most of the above options.
~~~~~~~~~~~~~~~~~~~~~~~~~~~~~~~~~~~~~~~~~~~~~~~~~~~~~~~~~~~~~~~~~~~~~~~~* Fixed bug with install order value not being placed in the grid when
changed.v8.0.1 Updates - Released May 17th, 2010
========================================================================
* Locked the size of the Installer window.* Fixed bug in "Copy audio folder to harddrive" setting the default
path every time.* Fixed an issue with tf.Close() and a bad path name in the theme
loader.* Fixed bug in Options wizard that would still change the theme colors
if hit Exit instead of Save.* Fixed a bug in the tooltips dealing with carriage returns.
Note: For a new line press Shift+Enter. For a new paragraph, just hit
Enter.v8.0.0 Updates - Released May 10th, 2010
========================================================================
* UTF-16 is now supported for foreign language custom characters. To
update your config.js file, load it in a text editor, like Notepad++,
and save it in UCS-2 Little Endian format. It will then be edittable
within WPI.* Added command line argument "continue" to automatically continue an
aborted installation. You will not be presented with the alert to
continue or cancel.
WPI.exe continue=true* Added command line argument "language" to switch saved language. Use
two letter language code.
WPI.exe language=de* The tool tips text location for Left and Right were reversed.
~~~~~~~~~~~~~~~~~~~~~~~~~~~~~~~~~~~~~~~~~~~~~~~~~~~~~~~~~~~~~~~~~~~~~~~~
Added a new layout design that shows the program's logo (png image) and
a short description under the main text. The main use of the second
line would be for version, system requirements, exclusions, etc. It
does use much more real estate, but looks much nicer than the old boring
list.To toggle the traditional list style and the new layout, go to Options
Wizard -> Style tab -> Use alternate layout with program's logos.Be sure to adjust the style sheet: .txt_logo, .shortDescTxt_logo,
.grayTxt_logo, .forceTxt_logo, and .checkedTxt_logo.
~~~~~~~~~~~~~~~~~~~~~~~~~~~~~~~~~~~~~~~~~~~~~~~~~~~~~~~~~~~~~~~~~~~~~~~~* Updated the tool tips to not show "undefined" when nothing is
specified in the Description field.* Fixed a bug in CreateShortcut() if the sub-folder doesn't exist; it
will be created now.* If a category carries over to the next column or page, the spacing for
next category has been fixed.* Fixed a small bug in determining the width of the layerboxes div to
set the width of the columns properly. This in turn fixed fixed the
text being cut off too soon.~~~~~~~~~~~~~~~~~~~~~~~~~~~~~~~~~~~~~~~~~~~~~~~~~~~~~~~~~~~~~~~~~~~~~~~~
Added {JSCRIPT}=TimedWaitForProgram(ImageName,Minutes) to monitor
installers, or any program, to close before moving on to next install
item. This was requested for installers or scripts that do not wait
properly when they launch installers from inside themselves.Usage: {JSCRIPT}=TimedWaitForProgram("Setup.exe",10)
The image name is case sensitive. Minutes is the amount of time WPI
will wait before moving on in case the program hangs/crashes.WPI will check every 3 seconds or until the specified minutes is
reached.To see the actual image name, open a command prompt window, start the
program/installer, at the command prompt type "tasklist". This will
give a list of all the running programs.
~~~~~~~~~~~~~~~~~~~~~~~~~~~~~~~~~~~~~~~~~~~~~~~~~~~~~~~~~~~~~~~~~~~~~~~~* Updated the progress bar in the installer to finally keep the value
centered all the time.* The euDock theme is now localized. No more making custom images for
each language.~~~~~~~~~~~~~~~~~~~~~~~~~~~~~~~~~~~~~~~~~~~~~~~~~~~~~~~~~~~~~~~~~~~~~~~~
The Options -> Style tab has been reduced to remove a lot of theme
bloat. You can no longer change the skin of individual gadgets. You
can still change the installer background image and the progress bar
image.There is now a new "Selected skin" drop-down box that has 8 skins to
keep all the gadgets the same colors. Much better consistancy. More
skins will be added later.This reduced the archive size and number of files down significantly.
If you want to make your own skin, use the Skin Builder here:
http://www.dhtmlx.com/docs/products/skinBuilder/index.shtmlPlease upload it to the forum to share with others and maybe have it
included with future WPI releases.
~~~~~~~~~~~~~~~~~~~~~~~~~~~~~~~~~~~~~~~~~~~~~~~~~~~~~~~~~~~~~~~~~~~~~~~~* Updated the Configurations tab in the Config Wizard to use 2 grids.
* Took out option to have maximize button on window border. Until I can
listen for it and redraw the data properly, no point in having it.* Updated the internet check. Now done within the launcher.
* Put the Change Log tab back in the About window.
* If ReadMe.txt file exists in main folder, a Read Me button will be
displayed above the Install button. Use this to give the user important
information about the install package. Like, certain items require user
input (not totally silent), drivers need to reboot, etc.* Francesco ported USSF from AutoIT to JavaScript; I finished it up. No
more false positives from virus scanners thinking USSF is a virus. And
I have full control of it now.* Francesco updated the launcher to disable the X close button on the
window so reg keys are sure to get set back properly.* Added function {JSCRIPT}=ErrorReporting().
Usage: {JSCRIPT}=ErrorReporting(Enable,Notify,WindowsOS,Programs)
This works just like the Windows XP's Error Reporting, but also for
Vista and newer.* Fixed bug in Config Wizard when added a new entry it would always ask
if want to update UID when it doesn't need to be.* Added function {JSCRIPT}=PowerOptions().
Usage: {JSCRIPT}=PowerOptions(too many to list)
This works just like the Windows' Power Options. Settings are visible
for both desktops and laptops to make things easier.
Note: A reboot is required for all changes to take affect.* Added function {JSCRIPT}=ScreenSaver().
Usage: {JSCRIPT}=ScreenSaver("ssbezier",Minutes,t/f)
"Screen saver is secure" will either show logon screen if Fast User
Switching is enabled, or ask for a password if not. The account must
have a password assigned.
Note: A reboot is required for all changes to take affect.* Added function {DIRMOVE}.
Usage: {DIRMOVE} "C:\Test" "D:\Test"
Note: Both paths must be in quotes.
Note: If final destination folder does not already exist, you must
specify it.* Fixed a bug with %CDROM% not being set. It was, but then cleared
right after.* The sub windows will now resize automatically to match different font
sizes.* Broke down the Conditions and Grayed Conditions menus in Config
Wizard for easier navigation.~~~~~~~~~~~~~~~~~~~~~~~~~~~~~~~~~~~~~~~~~~~~~~~~~~~~~~~~~~~~~~~~~~~~~~~~
Updated all of the themes to a new rendering engine. The html code is
no longer in the theme folder. This way all the themes will match and
function properly. All images may be replaced or removed. Many items
in the theme are still customizable. This is done via the new
wpi_theme.js in each theme folder. The type of theme is defined in the
wpi.inf file: Windows, euDock, CorporateIT, or Accordion.The names of the images are hard coded in and can not be changed and
they must be PNG images.The background image can either be called Wallpaper.jpg or
Wallpaper.png. Or no image and set a background color.If Title.png exists it will be used. If does not exist, text will be
used. To have no image and no text, copy in Title.png from
/Commom/imgs/.If TitleBG.png exists, it will be used as the background pattern. Or
set a color in wpi_theme.js.SmallBarT.png a SmallBarB.png, if exist will be used. Erase them to not
use them. The heights can be specified in some themes.If SidePanel.png exists, it will be used as the background for the side
panel (Begin Install, Select All, Select None, etc.). And/or a color
can be specified. The width of the side panel is also customizable.If Logo.png exists, it will be used as a second image. It is mainly
meant for a company logo/watermark when don't want a big background.
Usually would be light colored, almost transparent. Set it's right
edge and bottom edge location.
PinkRibbon and Woody themes are examples.If Bottom.png exists, it will be placed in the bottom bar at center.
If BottomBG.png exists, it will be used as the background pattern. Or
set a color in wpi_theme.js.You can specify and customize text to be placed in the bottom bar in
wpi_theme.js. Can not have both image and text.The exit button can be on left or right side, and show or not show the
text.Not all theme types have all the customizable features. If it's not in
wpi_theme.js then it can't be modified so don't try to add anything from
other types.Went through every css file and removed several old items that are no
longer used, and changed the names of several items.
~~~~~~~~~~~~~~~~~~~~~~~~~~~~~~~~~~~~~~~~~~~~~~~~~~~~~~~~~~~~~~~~~~~~~~~~~~~~~~~~~~~~~~~~~~~~~~~~~~~~~~~~~~~~~~~~~~~~~~~~~~~~~~~~~~~~~~~~~~~~~~~~
Added Network Wizard to facilitate entry of user IP information,
create Windows' users, etc.This wizard is meant to be set up ahead of time. If you have a business
with 25 users/computers, you would make an entry for each user/computer
with their specific information: IP address, computer name, Workgroup,
etc. If you also use a winnt.sif or XML file, you do not need to enter
any user specific data, so you only need one "universal" file with global
settings (ie, Display, Unattended, Windows key, etc).Once the install process is started, a window will open and you pick
which user/computer you are installing for. Or hit Cancel and nothing
will be changed. The user may also be specified from a command line
argument: user="Ritter, Mark". To specify a different network settings
file: network=iowa_office_networkoptions.js.In the grid you will see an entry ".default". This entry can not be
deleted. You can use it for Administrator account, or other non-specific
users.User information:
-----------------
Friendly name: Ritter, Mark or Mark Ritter. This is the name you specify
in command line args.Computer name: Enter the name for user's computer. If left blank no
change will be made.Windows user account information:
---------------------------------
User name: Mark. This will create a new user account in Windows.User password: Leave blank if don't want one.
Administrator: Check to give this user Administrator rights, else will
be a limited user.Join workgroup:
---------------
Workgroup: Name of your Workgroup.Options:
--------
Reboot after settings are applied: Checking this will reboot the
computer so the newly created user account can be logged on to for user
specific settings/programs.Auto logon user: Automatically log on to this newly created user.
Clear auto logon user when WPI is finished: This is recommended so any
user password is cleared from registry, and if multiple accounts exist,
allows selection of desired one again.The rest of the settings are the usual network adapter settings for IP
address, DNS servers, etc.No support for domains is included. That needs to be done on the
Active Directory server.Alt+K shortcut key.
~~~~~~~~~~~~~~~~~~~~~~~~~~~~~~~~~~~~~~~~~~~~~~~~~~~~~~~~~~~~~~~~~~~~~~~~* Added function {JSCRIPT}=SetSecurityCenter_XP().
Usage: {JSCRIPT}=SetSecurityCenter_XP(Firewall,Updates,Virus,Disabled,
Disabled)* Broke down the Commands menu in Config Wizard for easier navigation.
* Added function {JSCRIPT}=SetAutoLogonUser().
Usage: {JSCRIPT}=SetAutoLogonUser("Name","Password","Domain")
Note: Password is optional. If not on domain, use computer name.* Added function {JSCRIPT}=ClearAutoLogonUser().
Usage: {JSCRIPT}=ClearAutoLogonUser()* Added function {JSCRIPT}=RenameComputer().
Usage: {JSCRIPT}=RenameComputer("Name")
Note: Reboot computer to take affect.* Added function {JSCRIPT}=CreateWindowsUser().
Usage: {JSCRIPT}=CreateWindowsUser("Name","Password",Administrator)
Note: Password is optional. Administrator=true/false.
Switch user to take affect.* Added function {JSCRIPT}=DeleteWindowsUser().
Usage: {JSCRIPT}=DeleteWindowsUser("Name",true)
Note: If second arg is true, all associated files will be deleted.* Added function {JSCRIPT}=SetFirewall().
Usage: {JSCRIPT}=SetFirewall(state)
Note: true or false for enabled or disabled.* Added function {JSCRIPT}=SetFilePrinterSharing().
Usage: {JSCRIPT}=SetFilePrinterSharing(state)
Note: true or false to enabled or disable file and printer sharing.* Added function {JSCRIPT}=MapNetworkDrive().
Usage: {JSCRIPT}=MapNetworkDrive("Letter","Path",Reconnect)
Note: true or false for Reconnect at logon.
Note: No path checking is done.* Added function {JSCRIPT}=ShareFolder().
Usage: {JSCRIPT}=ShareFolder("ShareName","Path")
Note: No path checking is done.* Added function {JSCRIPT}=SetPageFileSize().
Usage: {JSCRIPT}=SetPageFileSize(DriveLetter,InititalSize,MaximumSize,
NoPageFile)
Note: Reboot computer to take affect.* Added function {JSCRIPT}=FormatDrive().
Usage: {JSCRIPT}=FormatDrive(Drive,Label,FileSystem,ClusterSize,
QuickFormat,EnableCompression)
Note: Requires user input during install process.* Added option to dropdown box in Options -> General -> "Eject CD when
WPI is finished".* Updated WriteRegKey() to handle all key types properly. REG_MULTI_SZ
did not work before.* No special characters are allowed in UID now. Only A-Z and 0-9.
* Added command line arg "force" to force the install process. At least
one item must be set to Forced for this to work.
Usage: wpi.exe force=true* Removed a bunch of code for CorporateIT theme.
* Added global variable %userprofileroot%.
XP: C:\Documents & Settings
Vista: C:\Users
Usage: {COPY} d:\UserStuff.txt %userprofileroot%\Mark* Improved the IE6 PNG fix code some more.
* Updated images to work with IE6 better.
* Fixed bug in Config's commands grid in how it showed some items.
* Now checks for changes in the wizards before creating a new file or
loading an existing file.* The list of configurations was not being updated in the Details tab.
* Updated saving of all options files.
* Updated the Ajax code for when checking for an update.
* Francesco updated his WPI.exe launcher more. Mainly, the Office reg
keys are set before WPI is launched. You won't have to set them in your
batch file anymore. FROM NOW ON, USE WPI.EXE TO START WPI.* Removed "Do Office debugger check" option. No longer needed with
launcher.* Added "global" flag to setEnvVar(). If true, then variable is system
wide. If not, only the current process (WPI installer) and any batch
files after will see them, and will clear upon exit.* Created a new way to update the useroptions.js and config.js in a much
more user-friendly way. Will make future updates much easier.* The Options and Config wizards are now opened in their own window.
This makes Options smaller, but Config larger, to best utilize space.* Updated how often the Dependent Of and Excludes combo boxes get
populated. Much faster now when switching items, especially with large
configs.* These environment variable are now ceated when WPI is started for use
in batch files: %HDD%, %CDDRV%, %WPIPATH%, %ROOT%, %OSLANG%, %OSLOCALE%.* Added function {JSCRIPT}=removeEnvVar().
Usage: {JSCRIPT}=removeEnvVar("Variable")
Note: You don't need to specify the %'s.* Music is stopped before Install Finish sound is played.
* Francesco made WPI Launcher that will use the proper 32/64bit MSHTA
based on your system. Find it on the main forum thread.* Updated the way the config.js version is checked. Much more flexible
for future updates.
Notes and Extras
Suggested disk folder layout:
With the above folder layout all your config entries should read like:
[«%wpipath%\Install\Blah.exe» /switch]
Here is a small tutorial on how to add an app to WPI!
Ok this is a sample (Very simple) configuration for CCleaner (A.K.A Crap Cleaner)
This assumes you have all of the WPI files either in the WPI folder at the root of your Windows cd or all of the WPI folders (Common, Graphics, WPIScripts, Tools, Install and Themes) and the file WPI.hta at the root of your cd.
Remember this is just the most basic and required entries for a program!
1. Download the app and place it in the WPI\Install Folder. (CCleaner.exe in this example)
2. Run WPI.hta and click on the “Config” button\Icon area.
3. Go to the very top area above the config section and click on the button that says “Add”
4. Enter in the name section “CCleaner” No quotes! Then press the TAB button to activate the rest of the wizard.
5. You will notice the Unique ID (UID) section gets automatically filled in for you.
6. All apps are selected to be installed by default right from the start so if you don’t want it selected by default you must uncheck this box.
7. Choose a category for your app to be displayed in. If you want the app to be displayed in a category you don’t see simply chose other and a box will appear that will allow the entry of you choice.
8. In the commands tab click on «Add» at the controls area just right of the command line pane and then the the little folder icon and browse to your folder that contains the app, preferably the .\WPI\Install folder then select the CCleaner installer, this will place the appropriate path in the command line.
9. Add the necessary switch(s) for the program to run silently. For CCleaner the switch is /S so you would have your command line looks like so = «%wpipath%\Install\CCleaner.exe» /S (This can be easily done for most standard apps by simply clicking on the USSF button on the far right of the command line.) Other switches for apps that USSF cannot identify you can try looking at the forum section here = MSFN Application Installs section,
10. Select the Save and then the Exit buttons and you have now configured your first app!
Afterwards you configure WPI to run with your CD using whichever method you choose. We suggest using one of the pre compiled and nicely provided $oem$ (Source folder if your are using Vista or Server 2008) folders that can be found in the downloads section. Then you can use an app like nLite, vLite, CDImageGUI or the Makeiso* program included in the tools folder to make your CD w\WPI bootable again.
* MakeIso.exe = Adds make bootable .iso to the right click menu of folders. It is a silent installer so DO NOT click on it 50x a simple double click is all that is need to install it. It can be uninstalled from the add\remove programs menu! Just go to the source folder (The one that contains I386 and WPI) and right click then select Make Bootable ISO…
_____________________________________________________________________
I have seperated the tools out from the main archive. You can download the tools here:
Tools archive.
Contents of the tools archive:
WPI Config Lister
CDSwitch <— 3 Custom themes for CDSwitch
MakeISO.exe
Cleanup.exe (Deletes ALL icons from the desktop)
Reboot.exe (Dialog box that will reboot in 60 sec unless cancel is pressed)
_____________________________________________________________________
Here is a quick start package that will set your windows disk up to use WPI after the desktop loads.
This is for use with all versions of Windows 2000, XP and 2003!
To make use of this archive all you need to do is unRAR it and place the %oem% folder beside the I386 and WPI folders.
http://www.wpiw.net/downloads/Post_$OEM$.rar
Contents of the Post %OEM% archive:
cmdlines.txt
RunWPI.inf
_______________________________________________________________________
Here is a quick start package that will set your windows disk up to use WPI with runonceex.
This is for use with all versions of Windows 2000, XP and 2003!
To make use of this archive all you need to do is unRAR it and place the %oem% folder beside the I386 and WPI folders.
http://www.wpiw.net/downloads/$OEM$.rar
cmdlines.txt
RunWPI.exe
_______________________________________________________________________
Here is mritters RUN_ WPI solution!
http://www.wpiw.net/downloads/$OEM$_RunWPI.cmd.rar
CleanUpWPI.cmd
cmdlines.txt
RunOnceEx.cmd
RunWPI.cmd
Use is as the same as the one above…
_______________________________________________________________________
This is for use with all versions of Windows Vista, Server 2008 and Windows 7!
To make use of this archive all you need to do is unRAR it and place the Sources folder at the root of your CD.
Sources Folder.
Contents of the Sources archive:
setupcomplete.cmd (This needs to be several folders deep so I preset the folders for you)
________________________________________________________
Over 2000 .png images for your pleasure to use in your tooltips or whatever!
PNG Collection.
________________________________________________________
Please remember and donate!
Edited by Kelsenellenelvian