
Well, if you happen to have a Nokia Lumia, or another Windows Phone gear, Microsoft has released the so-called Project My Screen program, which mirrors your phone’s screen on your computer via a simple USB cable connection. Sounds pretty handy, and it is indeed so, but there is no easy screen recording function built in. The forces of nature don’t like vacuum, though, so this omission was quickly remedied by reverse-engineering Microsoft’s screen mirroring app over at XDA-Devs. Here’s what to do, if you want to document the actions you do on your WP device display:
2. Extract the ZIP into a «WinPhoneProjection-master» folder, then extract the content of the MyProjectionClient archive into another folder;
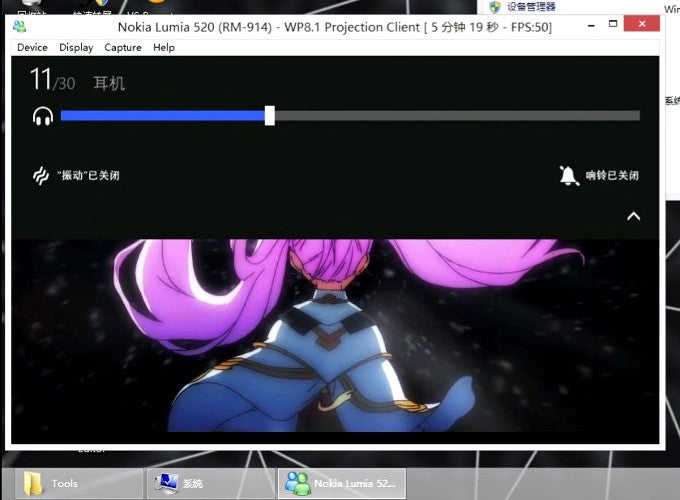
3. Hook up your handset to your computer via the microUSB cable, and fire up the MyProjectionClient executive. You should be able to see your phone when you click on the «Device» menu in the opened client, and tell the software what to record. At this time, a prompt on your Windows Phone device will appear, asking you for permission to record the phone’s screen. Tap «Yes» on the phone’s prompt;
4. If, for some reason, the projection client doesn’t recognize your phone, unplug the device, and go to your Windows PC Device Manager. Click on the View drop-down at the top of the window, then click on «Show Hidden Devices». List the «Universal Serial Bus Devices» menu, and delete every Windows Phone device reference there, such as «Nokia Lumia 920 (RM-820))», and so on. If the option «Delete driver software for this device» is available, by all means check this one as well;
5. Go into the Settings app on your phone and to the «project my screen» option, then connect your handset to your computer. Open the Project My Screen client on your computer, and press «Yes» on your phone’s screen prompt. As a warning, the engineered client has issues with full recording of 1080p displays for now, which would hopefully be remedied at some point. You can also set the parameters like video output format and such, though we recommend to stick with MPEG-4 if you don’t have a more powerful machine.
View Full Bio
Daniel, a devoted tech writer at PhoneArena since 2010, has been engrossed in mobile technology since the Windows Mobile era. His expertise spans mobile hardware, software, and carrier networks, and he’s keenly interested in the future of digital health, car connectivity, and 5G. Beyond his professional pursuits, Daniel finds balance in travel, reading, and exploring new tech innovations, while contemplating the ethical and privacy implications of our digital future.
Как сделать скриншот экрана смартфона Lumia все прекрасно знают. Достаточно кликнуть две кнопки, а именно включения телефона и увеличения громкости, после чего снимок экрана сохранен в ваших картинках на телефоне. А вот как записать видео того, что происходит на экране Windows Phone, знают немногие.
Обычный скриншот экрана не обладает такой функциональностью, как, например, демонстрация работы какой-либо программы или видеопрохождения увлекательной игры. Поэтому запись видео с экрана Windows Phone носит важную миссию для пользователей.
И так, чтобы сделать видеозапись содержимого экрана Windows Phone, необходимы: проектор экрана, программа Project My Screen и программа CamStudio.
На каждом смартфоне Windows Phone 8.1 в настройках присутствует функция «Проектор экрана». А программу Project My Screen для персонального компьютера скачать можно здесь.
Установив программу Project My Screen, подключаем смартфон к ПК через USB-кабель и запускаем Project My Screen на компьютере. На смартфоне на запрос разрешения использование функции проектора экрана кликаем «да».
После этого можно все содержимое экрана смартфона Lumia видеть на экране ПК. Проекция идет на весь экран, поэтому для удобства не помешает второй монитор. После получения изображения, необходимо его записать. Для этого используем бесплатное приложения CamStudio, которое можно скачать здесь. Для записи видео с экрана в программе CamStudio выбираем область записи (Region). Это или целый рабочий стол, или одно окно, или выделенная часть экрана. Также в настройках выбираем формат записи.
Далее нажимаем красную кнопку (Record) и переходим в Project My Screen на ПК. Все, что делается на смартфоне, не только отображается на экране ПК, но и записывается. После успешной записи возвращаемся в CamStudio, останавливаем происходящее и сохраняем видео. Запись видео с экрана Windows Phone осуществлено.
Если вам интересна тема видеонаблюдения тогда смотрите здесь: https://magazun.com/ip-videonabludenie/
Use video recorder on your Microsoft Lumia 950 XL Windows Phone 10.0
Read help info
You can record video clips with your phone’s video recorder.
Step 1 of 16
1. Find «Camera»
Slide your finger left on the screen.
Step 2 of 16
1. Find «Camera»
Press Camera.
Step 3 of 16
2. Turn on the video recorder
If the camera is turned on, press the video recorder icon.
Step 4 of 16
3. Turn video light on or off
Press the video light icon to turn the function on or off.
Step 5 of 16
4. Select white balance
Press arrow right.
Step 6 of 16
4. Select white balance
Press WB.
Step 7 of 16
4. Select white balance
Turn the wheel to find the required setting.
Step 8 of 16
4. Select white balance
Press the middle of the screen.
Step 9 of 16
5. Select resolution
Press the menu icon.
Step 10 of 16
5. Select resolution
Press Settings.
Step 11 of 16
5. Select resolution
Press the drop down list below «Video recording».
Step 12 of 16
5. Select resolution
Press the required resolution.
Step 13 of 16
6. Record video clip
Point the camera lens at the back of your phone at the required object.
Drag two fingers together or apart to zoom in or out.
Step 14 of 16
6. Record video clip
Press the record icon to start recording.
Drag two fingers together or apart to zoom in or out.
Step 15 of 16
6. Record video clip
Press the stop icon to stop recording.
Drag two fingers together or apart to zoom in or out.
Step 16 of 16
7. Return to the home screen
Press the Home key to return to the home screen.
1. Find «Camera»
Slide your finger left on the screen.
Press Camera.
2. Turn on the video recorder
If the camera is turned on, press the video recorder icon.
3. Turn video light on or off
Press the video light icon to turn the function on or off.
4. Select white balance
Press arrow right.
Press WB.
Turn the wheel to find the required setting.
Press the middle of the screen.
5. Select resolution
Press the menu icon.
Press Settings.
Press the drop down list below «Video recording».
Press the required resolution.
6. Record video clip
Point the camera lens at the back of your phone at the required object.
Drag two fingers together or apart to zoom in or out.
Press the record icon to start recording.
Drag two fingers together or apart to zoom in or out.
Press the stop icon to stop recording.
Drag two fingers together or apart to zoom in or out.
7. Return to the home screen
Press the Home key to return to the home screen.
Send us your comments
Please let us know how we could improve our device guides
Enter your comments here then click the ‘Send’ button
Nowadays, taking a screenshot of your mobile screen is a relatively common thing. Maybe you’ve stumbled on a good tweet or meme that you thought should go to your digital memoirs or maybe you’re helping someone figure out how to use their new smartphone.
Whatever the reason, we can all agree screenshots are very useful thing in everyday mobile use. That’s why it comes as no surprise that Microsoft added a very handy way of taking screenshots on their Mobile OS – lock button + volume up.
Still, sometimes a screenshot just doesn’t cut it. Take for instance if you want to give a step by step walk-through on how to use an app or record yourself playing your favourite game. A screenshot is simply not an ideal choice in either scenario.
But what if I told you that you could capture a video of your windows phone screen? Yes, it’s very much possible and lucky for us it’s a relatively painless process.
Screen Record in Window Phone
You’ll need:
- A USB Cable that is compatible with your device
- A computer running Windows 7 or later
- Project My Screen App. Get it from Microsoft.
Steps
1. First, make sure your Windows phone is running either Windows 8.1 Phone or Windows 10 Mobile. You can get easily the update but its availability depends on the model of your handset and your locality.
2. Download and install the Project My Screen App program from Microsoft. After installing the program, you’ll get two shortcuts on your desktop.
One is for the launching the main app and the other is a shortcut to an example configuration file. More on that later.
3. Connect your phone to your computer using a compatible USB cable and wait for it to be detected. Once it’s detected, you’ll have Windows Phone visible as a portable device in My Computer/This PC.
4. Now launch the main app from the desktop shortcut.
5. Once it has launched, head over to your phone and unlock it if was locked. You’ll get a prompt at the top asking you to allow screen projection. Accept by tapping the yes button.
| Allow Screen Projection Prompt on W10M |
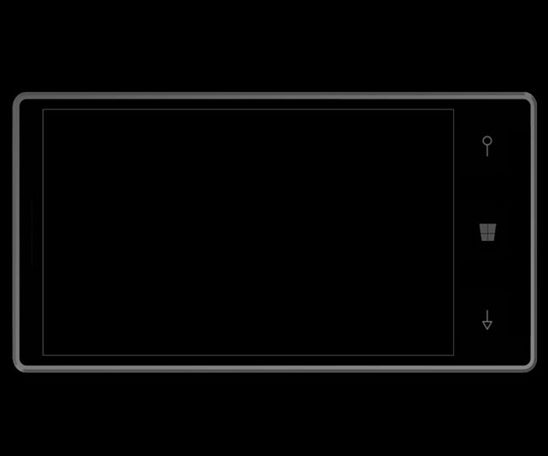
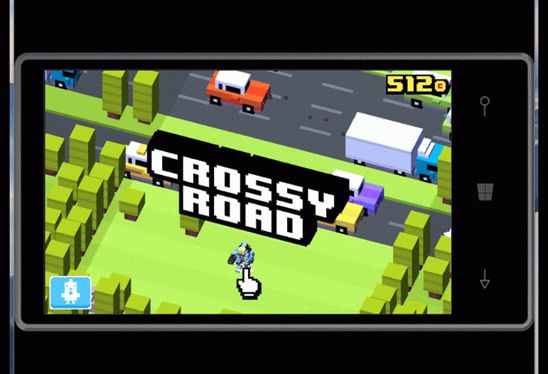
6. The screen should now be projected in the app’s window. To access some useful shortcuts use the F1 button. You can for instance toggle full screen mode using F or Alt+Enter, toggle the background phone image using B, change the projected orientation using the arrow keys and display the frame rate using R.

|
| W10M Screen Projection on Project My Screen App |
7. Now comes the tricky part on how to save this projection. To do that you’ll need a screen recording software to capture the app’s window or the whole screen depending on your needs. I know it’s not the most ideal way of doing this, but it’s the only way to achieve this as far I can tell.
Some good freewares you can use include CamStudio or Active Presenter (the free edition). I would recommend the latter; it’s quite robust and easy to use. It’s what I use to capture and partly edit the video tutorial I linked at the top of the steps.
Customizing Project My Screen’s Output
Now onto the configuration file. If you need to tweak the settings of the video output to your preference, you’ll need to edit a configuration file and pass it as a parameter using command line when launching the program.
The config file is simply an XML file meaning you can edit it using a text editor, though something with syntax highlighting like Notepad++ or Sublime Text is recommended.

|
| Launching Project My Screen App with Custom Settings |
I won’t get into how to edit this file because it’s not actually easy; at least it wasn’t for me. That needs a post of its own. It’s a trial and error thing based on my experience.
However if you have the patience you can play around with it using the instructions in the example config file.
I for one managed to change the background phone image to that of a Lumia 430 and its position (you can check this video on my youtube channel to see what it looks like) but it took me a couple of days just to do that.
If you need the config file that I used for that just drop me a comment below and I’ll share it.

|
| Projection with Custom Phone Image and Position |
If you’ve any question or comment regarding this tutorial, just leave it in the comment section below and I’ll get to you as soon as I can.
Thanks for reading and good luck capturing your screen!
Taking a screenshot on your Lumia is relatively easy–simultaneously pressing the power key and volume up—but recording your screen requires a bit more know-how. Here’s how to do it.
There are times when a simple screenshot just won’t do. For instance, you may want to show somebody one of Windows Phone’s cool features, such as Cortana, or you might want to show off your Minecraft: Pocket Edition skills (tips and tricks, here).
Follow these steps to start recording your Windows Phone. There are two things you’ll need.
Project My Screen
The Project My Screen feature is already on your phone since Windows Phone 8.1, under settings. However, you’ll also need it installed on your PC, which you can find here.

Once installed, connect your phone to your PC using a USB cable and start the Project My Screen app on your PC. Tap “yes” on your phone when asked if you want to allow screen projection.
You should now see your Lumia projected onto your PC display.
Now for stage two, the recording of your screen.
CamStudio
As a free, open source screen-recorder program, CamStudio is simple to use.
It can record your entire desktop, single windows, or specific parts of your screen; those settings can be found in the “Region” settings of the CamStudio program.
Select the region, hit record, and navigate back to the Project My Screen app on your PC. As you interact with your phone, it’ll be displayed and recorded on your PC. Recording options are AVI, MP4, or SWF.
Due to the multitude of video codecs available and because different PCs have different setups, head over to the “video options” setting to select what works for you.
After that, share your recording with your friends, family, or followers anyway you see fit.
If you’re looking for a way to record your screen, give this a try and share your creations with us. Alternatively, if you’ve found another way, share that with us, too.