
Before you proceed to download the software below, see our official installation guide.
Chances are that you’re coming from an outdated tutorial, so it’s recommended to follow the guide above to prevent any issues with the installation.
Windows on Raspberry imager
Download version 2.3.1
See the changelog
Customization options
Requirements:
- a computer with Windows 10 version 1703 or later. (Wine is not supported — see the PE-based installer for other OSes)
- a Raspberry Pi 2 rev 1.2, 3, 4 or 400. (minimum RAM requirement is 1 GB, but it will generally result in poor performance, especially on boards older than Raspberry Pi 4)
-
a good/reliable drive that has at least 8 GB of available space. It can be:
- an SD card (A1 rating is highly recommended; non-A1 rated cards may be too slow)
- an USB device (preferably SSD, or any drive that has decent random I/O speeds).
A slow drive can also cause other issues, besides being a bottleneck.
- a Windows 10 ARM64 build 19041 or newer image (up to Windows 11 version 2022 / build 22621): WIM/ESD, ISO or FFU
Windows on Raspberry PE-based installer
This is not a straightforward wizard tool like the Windows-only imager, so please follow the appropriate guide for it: How to install from other OSes.
Download package version 1.1.0
See the changelog
Customization options
Requirements:
Same as for the Windows-only version, with some exceptions:
- no specific OS required, as long as the tools needed to create the PE-based installer are available or can be compiled for it.
- the Windows ARM64 image can only have the ISO format. The reason for this is that some required files from the ISO cannot be found in the WIM/ESD.
- storage-wise, you need either:
- a drive that has at least 32 GB, for self-installation
- a drive that has at least 8 GB for the installation media, and another destination drive that has at least 16 GB for the OS (e.g.: an USB drive and an SD card)
Boot partition mount utility
Easily mount the boot partition of your Windows on Raspberry installation. Works directly on the Raspberry Pi or another computer.
Download version 1.1.0
PiMon
A simple hardware monitor for your Raspberry Pi running Windows. (https://github.com/driver1998/PiMon)
Download the latest version
See the changelog
Windows images
See the Getting Windows Images guide.
What about FFU images?
FFU images can speed up the deployment process significantly, especially on slow devices. They are not available for download due to legal reasons, but you can safely generate them yourself: How to generate FFU images?
If you click our links and make a purchase, we may earn an affiliate commission.
Learn more
Windows 11 was officially released at the end of 2021 for traditional PCs, and you can already get it running on a Raspberry Pi. It’s not as straightforward as installing a Linux distribution that’s made for the Raspberry Pi, but the procedure isn’t that complicated. I will explain everything in this article.
The easiest way to install Windows 11 on a Raspberry Pi is to use WoR Flasher on Raspberry Pi OS directly, to flash Windows 11 on a SSD disk. It’s also possible to use the same tool on a PC, from a Windows or Linux system.
There are some prerequisites required in order to make this work, so we’ll start there. Then I’ll give you the step-by-step guide to get Windows 11 running on your Raspberry Pi. In a few minutes (with a good Internet connection), you can have Windows 11 up and running on your Raspberry Pi!
If you’re new to Raspberry Pi or Linux, I’ve got something that can help you right away!
Download my free Linux commands cheat sheet – it’s a quick reference guide with all the essential commands you’ll need to get things done on your Raspberry Pi. Click here to get it for free!
Want the best experience? Become a premium member for ad-free browsing, access exclusive content, and ask questions in our private forums. Your membership helps support the site!
Prerequisites To Install Windows 11 on Raspberry Pi
Windows 11 is not a traditional operating system you’d normally run on a Raspberry Pi, so there are a few things you’ll have to get right in order to start the procedure below.
Hardware Prerequisites
Windows 11 “works” on a Raspberry Pi, but don’t expect perfect performance. It’ll be slow, regardless of which hardware you use. Knowing this, it would be better to use the best hardware you can in order to ensure the best results while doing this experiment.
Here are my recommendations to get the best results:
- A Raspberry Pi 5 or Pi 4 with 8 GB of RAM: These are the best models available right now. A Pi 4 with 4 GB or a Pi 400 will do the job, but I wouldn’t expect something decent on an older model.
You can find a great kit here if you don’t have one yet. - A USB drive, ideally an SSD: to install Windows on. Using an SSD will slightly improve the performance, so it is best if you can get one.
SSD is cheap, and you can get one with a USB cable directly on Amazon (here is my favorite, and here is a cheaper but solid option that you can put in a USB adapter like this one). - Optional: a decent SD card. Only if you follow the first method, installing Windows from Raspberry Pi OS.
You can read my benchmark of the best SD cards here, or get the winner on Amazon if you don’t have anything good enough.
Software Prerequisites
The only thing you need is to have an up-to-date firmware that allow the boot from a USB device, and even take is as the default option.
Basically, if you already booted from a USB drive or if your Raspberry Pi device is new (2021 and further), it should be fine. You have nothing to do.
If not, you need to update the firmware to the latest version, and set the USB boot by default in raspi-config.
I explain everything in my course, there is an entire project where I explain how to boot from a USB disk, but in a nutshell, here are the commands you need:sudo apt update
sudo apt full-upgrade
sudo rpi-eeprom-update
sudo raspi-config

Once done (or if you know your device is already ready for this), you can move to the next step.
In any case, you can still come back to this if you see that your Raspberry Pi is not using the USB drive to boot.
Are you a bit lost in the Linux command line? Check this article first for the most important commands to remember and a free downloadable cheat sheet so you can have the commands at your fingertips.
Method 1: Install Windows 11 from Raspberry Pi OS
The easiest way to install Windows 11 on Raspberry Pi, is to do it directly from Raspberry Pi OS. Unlike the second method, you don’t need to go on weird sites to find the correct image to download, the process is straightforward, and the tool will do everything for you.
Here are the required steps to install Windows 11 directly from Raspberry Pi OS:
- Install Pi-Apps on Raspberry Pi OS.
- Use Pi-Apps to install WoR Flasher.
- Use WoR Flasher to create the USB drive with Windows 11.
We’ll now see how to do this step-by-step. And if you want to watch this tutorial in video, here is the corresponding video on my channel:
Install Raspberry Pi OS on Raspberry Pi
Before going further, you need to have Raspberry Pi OS running on your Raspberry Pi. I recommend using an SD card for Raspberry Pi, and a USB drive (key, SSD, or NVMe) for Windows.
If you start from scratch, you can follow this tutorial to get Raspberry Pi OS on your SD card and do the initial configuration. You’ll need an internet connection and an up-to-date system.
I’m testing this on a Raspberry Pi 4 (4 GB) and Raspberry Pi OS Bullseye, but the system version and Raspberry Pi model shouldn’t matter that much. If you already have an SD card ready with Buster on it, go with it.
Install Pi-Apps on Raspberry Pi
Then, you need to install Pi-Apps. Pi-Apps is a tool to install many applications easily on your Raspberry Pi. It’s not mandatory, but it will make the next steps way easier for you.
You can find the installation details on their GitHub page here, but basically, you can install it in one command:
- Open a terminal.
- Copy and paste this line:
wget -qO- https://raw.githubusercontent.com/Botspot/pi-apps/master/install | bash
That’s it, Pi-Apps is now available in the main menu, you can move to the next step.

Use Pi-Apps to Install WoR Flasher
Now that Pi-Apps is installed, we can use it to install WoR Flasher on Raspberry Pi OS. WoR stands for “Windows on Raspberry Pi” and is a tool to install Windows 11 on a USB disk in a few clicks.
Here is how to install it:
- Open Pi-Apps. You’ll find it in your main menu, under Accessories.
- Go in “All Apps” or “Tools” and find “Windows Flasher” near the end.
- Select it and click on “Install”.

Pi-Apps will do everything for you. You will have to wait a few minutes, and then it’ll be installed on your Raspberry Pi.
Use WoR Flasher to Install Windows 11
Once WoR Flasher installed, start it from the main menu – it’s under the Accessories submenu too. The interface is straightforward, it will ask you:
Then, the long part of the process will start. The tool will download all the required files, it may take a while depending on the Raspberry Pi model, your connection speed, and the USB disk you use. Just make sure your Pi stays powered on the whole time and does not go into sleep mode.
Once everything is ready, you’ll get a success message confirming that everything is ready.
Note: if you experience any issue with the disk formatting. I recommend installing Gparted, deleting all the partitions on the USB drive and even creating a new partition table. This way, the tool will start from scratch, and it should improve the chances of success (I got a few issues with this too).
First Boot
Shut down your Raspberry Pi, remove the SD card containing Raspberry Pi OS, and only keep the USB drive with Windows 11 connected. Start your Pi and wait a few seconds. If you followed the prerequisites carefully, the device should boot from USB and display something like this:
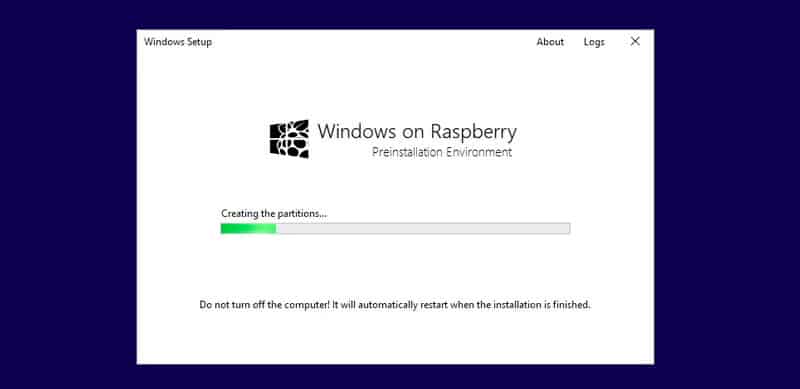
This will take a long time, especially if you are not following my guidelines to use the best Raspberry Pi model with an SSD drive. You won’t get this splash screen using the second install method, which I will show you next.
Once everything is ready, it will reboot (maybe several times) until it shows the traditional Windows 11 first boot wizard. You just need to follow it to get your system ready.
Method 2: Install Windows 11 from Another Windows PC
The second method is to use another computer to prepare the USB drive with Windows 11 on it. If you already followed my tutorial on how to install Windows 10 on Raspberry Pi, it’s basically the same thing.
Note: This method does not work on the Raspberry Pi 5 at this time. The software used, Windows on Raspberry Imager, does not have Pi 5 support.
It’s not very complicated, but there are more steps involved, and more ways to mess things up than with the Raspberry Pi OS method. It might be slightly faster, though, if you don’t have already Raspberry Pi OS ready on a SD card.
Here are the main steps to install Windows 11 on Raspberry Pi from another PC:
- Download and install WoR Flasher on your PC.
- Download a script to get an image of Windows 11.
- Run the script to download the Windows 11 files.
- Use WoR imager to get everything on the USB drive.
I will now explain each step in details.
Download Images
Before everything else, you need to download two things:
Once you have both files on your PC, you can move to the next step.
Download Windows Files
Before doing anything else, you need to download the Windows files. The zip file you get from UUPdump is only a script, there is no Windows image in it yet.
Extract everything in a new folder and run this script:uup_download_windows.cmd

It will take a while, especially with a slow Internet connection as there are a few gigabytes to download from the servers, but eventually, you’ll get an ISO file in the same folder.
Mine is named:22631.4391.241016-1425.23H2_NI_RELEASE_SVC_PROD3_CLIENTCORE_OEMRET_A64FRE_EN-US.ISOand is around 7 GB.
Once you have it in your folder, you can move to the final step, writing it with WoR Imager.
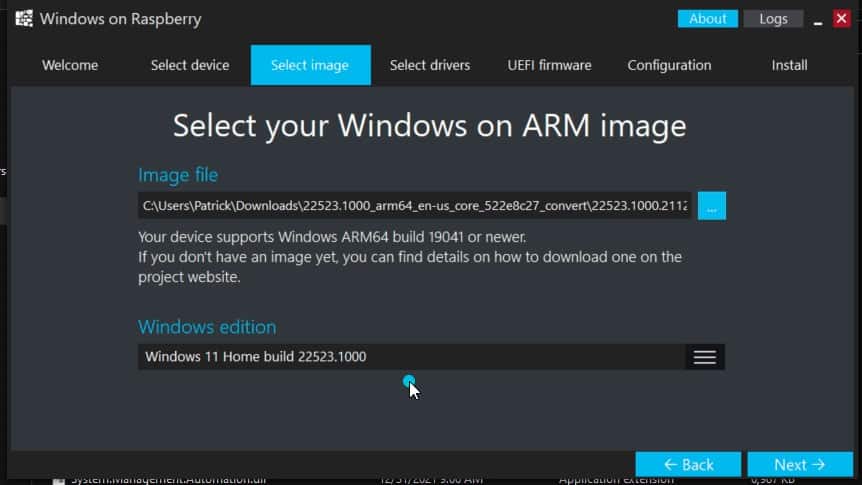
Final Step: Write to USB Drive Using WoR Imager
Next, you’ll want to load Windows on Raspberry Imager. There’s nothing to install, you just need to extract all the files and run the WoR.exe file.
Follow the wizard to copy everything on your USB drive:
- Select the language.
- Then the storage drive and the Raspberry Pi model you’ll use.
- Browse to pick the image you just downloaded (located in the script folder).
- Choose to get the latest version of the drivers and firmware.
- Confirm the default configuration, and click Install.
The tool will then take a few minutes to copy everything on the selected device. It may take more or less time depending on the USB drive you use. An SSD with USB 3 is generally way faster than a SD card or an older USB key.
Once done, you can plug the USB drive into your Raspberry Pi and boot it. If your Pi isn’t booting from USB properly, you may have to change the boot order in raspi-config.
First Boot
Whichever method you choose, the first boot will start with a welcome wizard, where you can configure a few things like the language, the country and time zone, the keyboard layout, etc. It will also ask you to name your device and connect to your Microsoft account (unfortunately, I haven’t found a way to avoid this…).
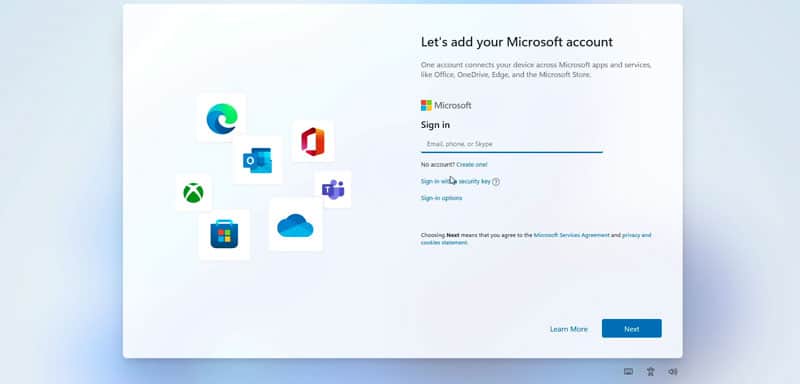
At the end of this wizard, you’ll get the traditional first session opening message (“Getting things ready for you”) and finally, you’ll access the Windows 11 interface:

Optional: Getting Full Use of the Raspberry Pi’s Memory
The Windows ARM image may limit your Raspberry Pi from using all of its available memory if you’re using a model with more than 3 GB RAM. To unlock the full use of your RAM:
- Before Windows 11 loads, mash the ESC key to load the Setup menu.
- Go to Device Manager > Raspberry Pi Configuration > Advanced Configuration and disable Limit RAM to 3 GB

- Press F10 and Y to save changes. Hit ESC to get all the way back to the main menu, and choose Continue to reboot.

That’s it—you should have the full use of your RAM in Windows now.
Want to chat with other Raspberry Pi enthusiasts? Join the community, share your current projects and ask for help directly in the forums.
You may also like:
- Master Raspberry Pi in 30 days with this
- Create an image of your SD card (safety first!)
- 57 Raspberry Pi commands you need to know
- Remote access your Pi from anywhere (best apps)
- Auto start any program when the Raspberry Pi boots up
Final Thoughts & Going Further
Everything seems to work correctly, I haven’t spent much time on it, but I didn’t notice any major issues. The only thing is that everything is too slow for me. I prefer running a Linux distribution optimized for this device (even if it means that some apps are not available) than using Windows and have everything going slower than on Linux.
But I understand that some of you may need Windows to work on specific apps with only a Raspberry Pi available. So, even if I wouldn’t recommend it in my favorite systems for the Raspberry Pi, it’s good to see it running correctly. The network is working, I got my files synchronized with my PC thanks to OneDrive (even if I don’t want that but anyway), and you can use Microsoft Store to install any apps like on any traditional computer.
In short, installing Windows 11 on a Raspberry Pi is a fun project to experiment. It may help some of you access apps that are not available on Linux, and you can install it even if the Raspberry Pi is the only computer you have. But don’t expect too much from it, for most of us it will only stay an experiment, not the system we’ll use every day on the Raspberry Pi.
If Windows is not required for you, you can find other options that look like Windows but work way better, for example take a look at Twister OS or some of these desktop environments.
Whenever you’re ready, here are other ways I can help you:
The RaspberryTips Community: If you want to hang out with me and other Raspberry Pi fans, you can join the community. I share exclusive tutorials and behind-the-scenes content there. Premium members can also visit the website without ads.
Master your Raspberry Pi in 30 days: If you are looking for the best tips to become an expert on Raspberry Pi, this book is for you. Learn useful Linux skills and practice multiple projects with step-by-step guides.
The Raspberry Pi Bootcamp: Understand everything about the Raspberry Pi, stop searching for help all the time, and finally enjoy completing your projects.
Master Python on Raspberry Pi: Create, understand, and improve any Python script for your Raspberry Pi. Learn the essentials step-by-step without losing time understanding useless concepts.
You can also find all my recommendations for tools and hardware on this page.
I’m the lead author and owner of RaspberryTips.com.
My goal is to help you with your Raspberry Pi problems using detailed guides and tutorials.
In real life, I’m a Linux system administrator with web developer experience.
Операционная система Windows 10 Home и Pro для устройств с процессором ARM 64 бит. Подходит для PaspberryPI версий 2, 3 и 4. С версией 5 не проверено.
Для установки системы нужно воспользоваться утилитой Windows on Raspberry imager или распаковкой резервной копии Acronis.
Установка используя Windows on Raspberry imager.
Этот метод требует наличия интернета для обновления загрузчика и скачивания драйверов. Если доступа в сеть нет, используйте альтернативный метод с записью образа диска на флешку.
Подключите к компьютеру MicroSD карту объемом 32 ГБ или больше на которую требуется записать ОС.
Распакуйте архив Windows on Raspberry imager 2.3.1.zip и запустите приложение WoR.exe.
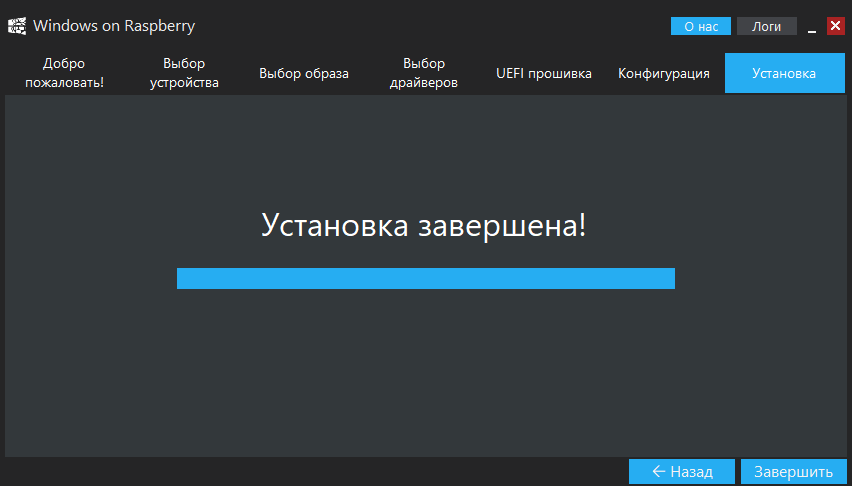
Появится окно
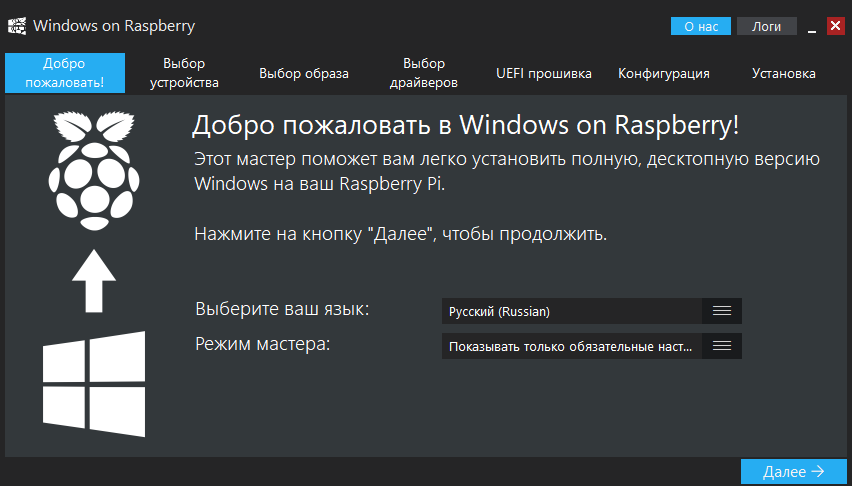
В нем нажимайте далее и в следующем окне выбирайте MicroSD карту и модель Raspberry PI.
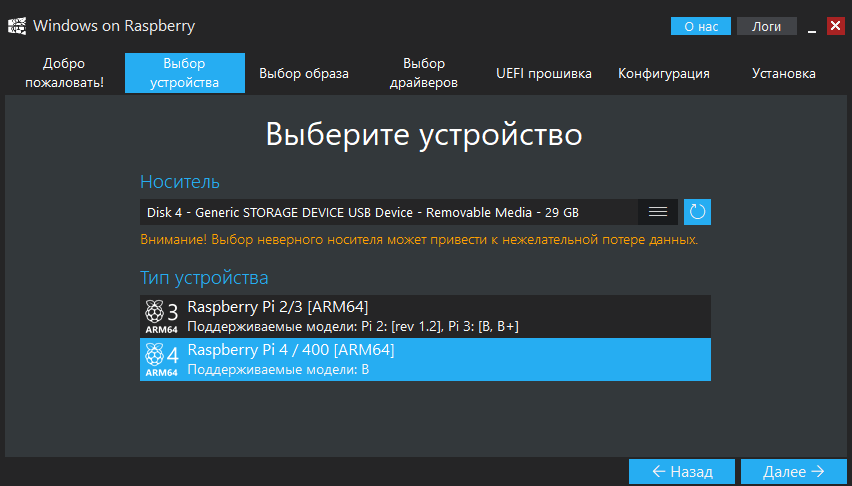
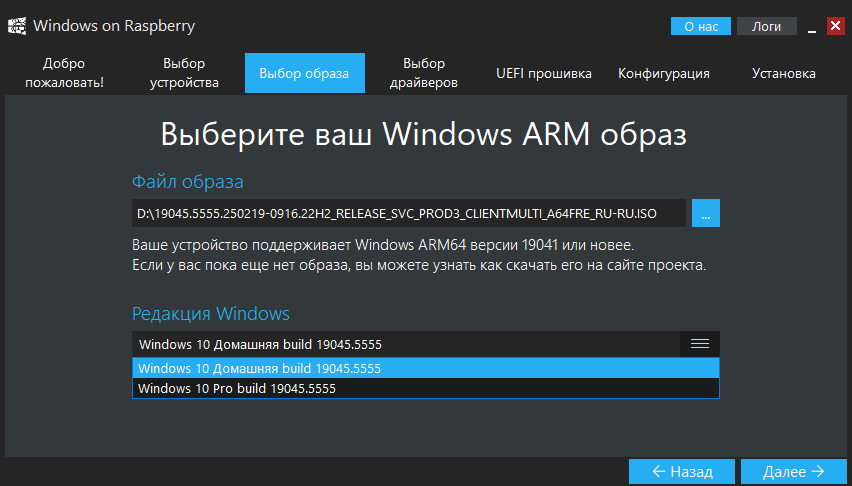
Затем укажите путь к образу диска и выберите редакцию Home или Pro.
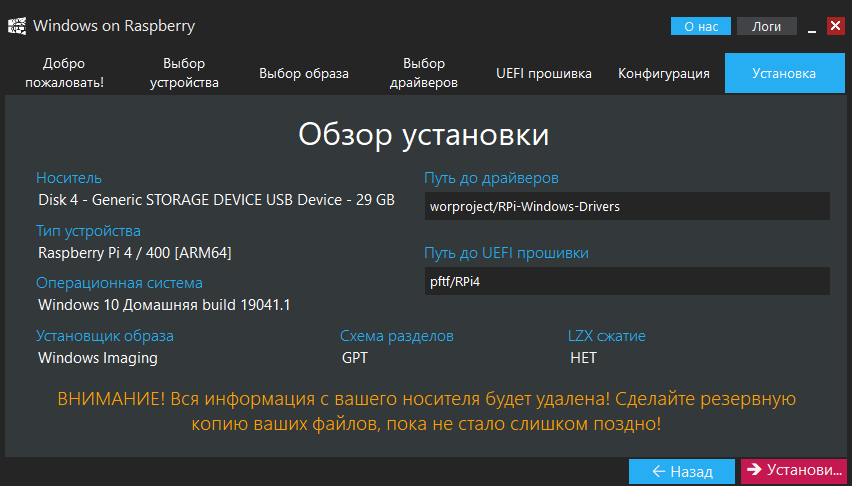
В следующем окне проверьте что все сделано верно (убедитесь что диск выбран правильно) и нажите на кнопку Установить.
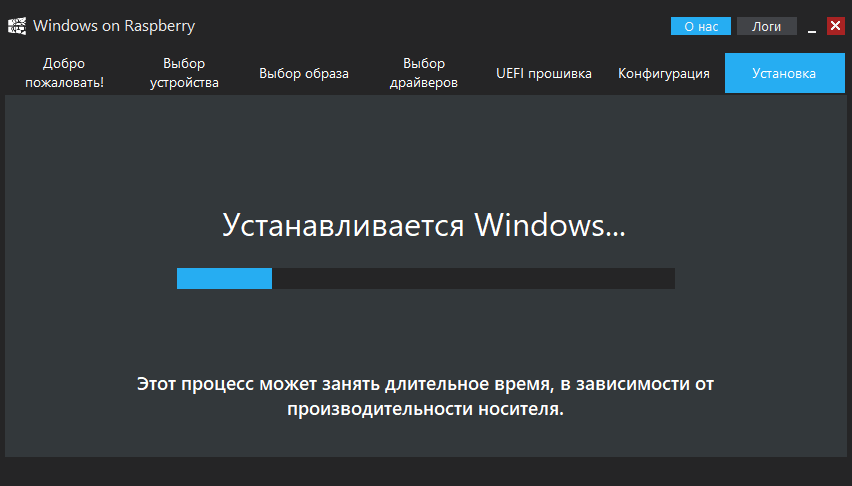
Установка занимает примерно 20 минут и зависит от производительности MicroSD карты.
По ее окончанию можете закрыть приложение и извлечь MicroSD карту из кардридера и подключить ее к Raspberry PI.
Необходима качественная MicroSD карта объемом не меньше 32 ГБ (ОС требует около 18 ГБ). Низкокачественная может приводить к невозможности загрузки системы, к появлению синего экрана во время загрузки или работы и очень медленной работе системы.
Альтернативный метод установки — восстановление резервной копии на MicroSD карту из файла Windows_10_Pro_22H2_19045.5555_ARM64_RPI4_full_b1_s1_v1.tib. Он подходит только для RaspberryPI 4 и 400.
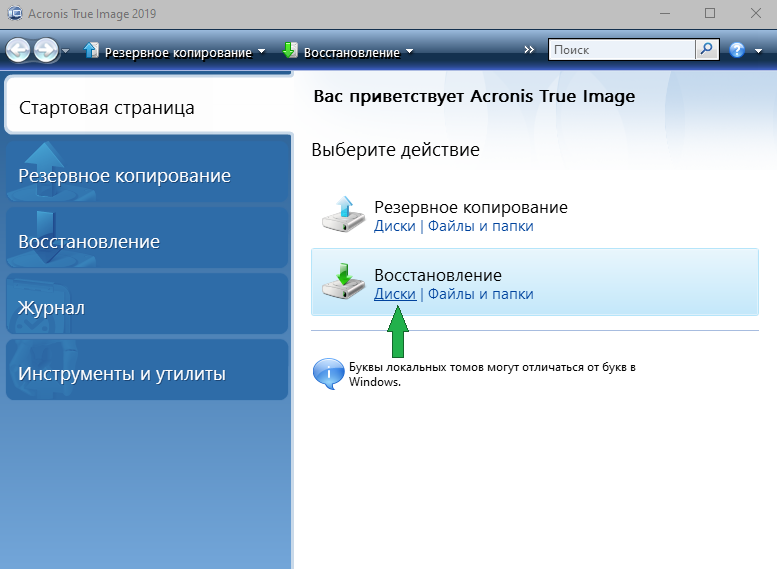
Для этого понадобится Acronis True Image 2019. Его можно скачать в сети или воспользоваться флешкой Сергея Стрельца.
Требуется запустить Acronis True Image 2019 и выбрать восстановление диска.
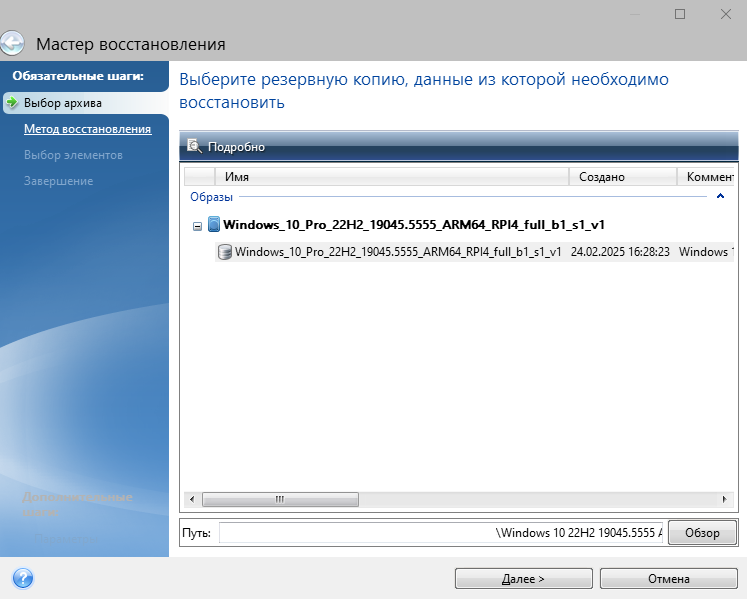
После нажав «Обзор» выбрать путь к файлу Windows_10_Pro_22H2_19045.5555_ARM64_RPI4_full_b1_s1_v1.tib.
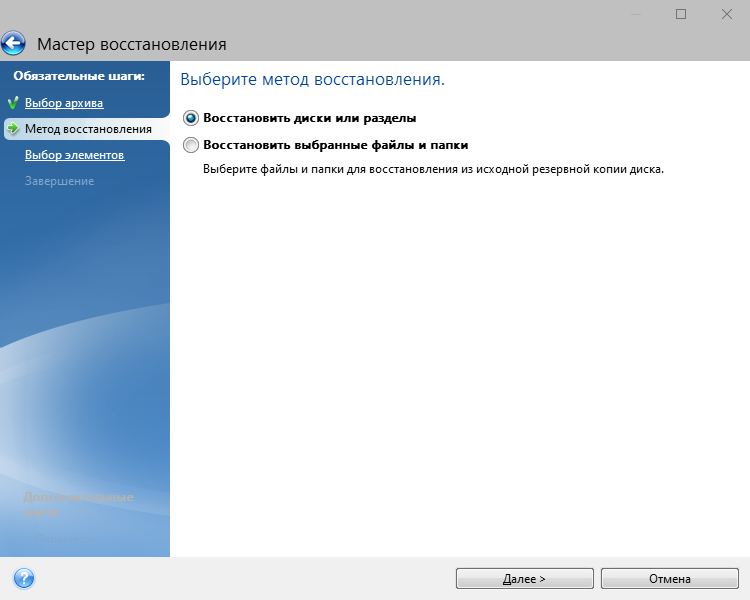
На следующей странице нужно выбрать «Восстановить диски или разделы».
Далее нужно отметить галочками все строки в таблице.
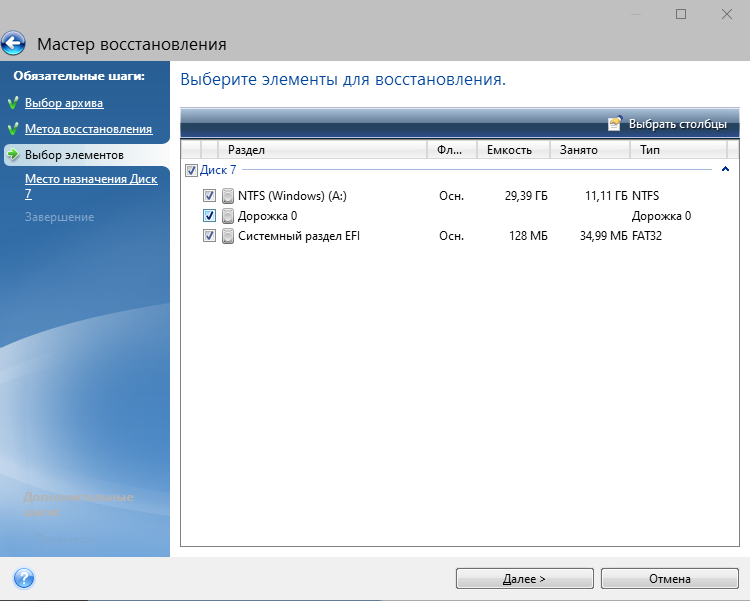
После нужно выбрать MicroSD карту на которую будет восстановлена резервная копия. Это ответственный момент и убедитесь что не перепутали с другим диском, иначе потеряете все данные на нем!

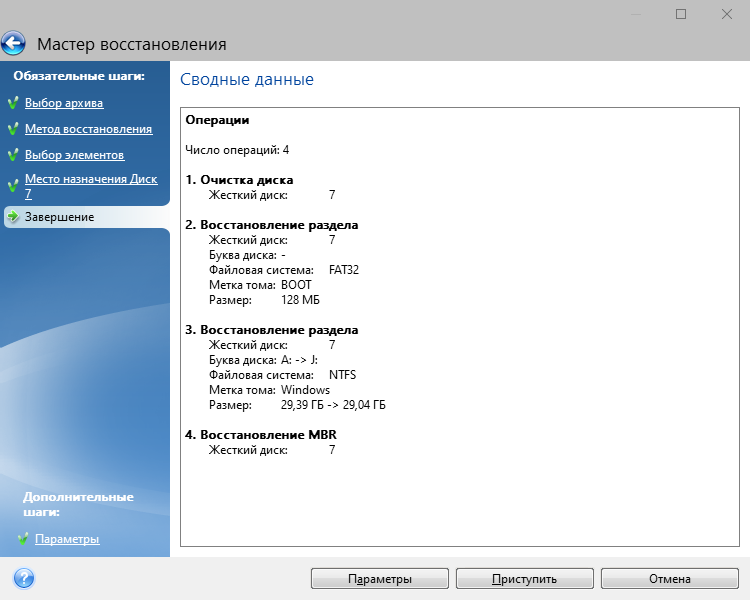
На следующем шаге следует нажать кнопку «Приступить».
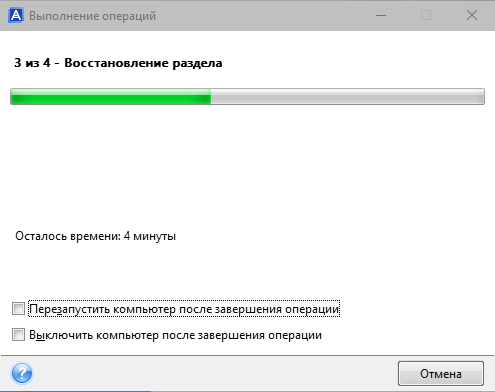
Это запустит процесс восстановления резервной копии на выбранный диск, что потребует 4 — 10 минут в зависимости от скоростных характеристик MicroSD карты.
По окончанию этого процесса появится окно информирующее о результатах выполнения.
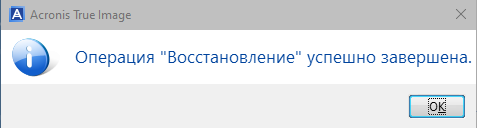
Теперь можно извлечь MicroSD карту из кардридера и подключить ее к Raspberry PI.
Файл 19045.5555.250219-0916.22H2_RELEASE_SVC_PROD3_CLIENTMULTI_A64FRE_RU-RU.iso это оригинальная версия и никаких модификаций не производилось.
В резервную копию Windows_10_Pro_22H2_19045.5555_ARM64_RPI4_full_b1_s1_v1.tib внесены следующие изменения:
- Для уменьшения износа MicroSD карты, отключены подкачка, гибернация, индексирование, частично телеметрия и сохранение времени доступа к файлам.
- Изменена тема на светлую и изменены цвета.
- Заменено меню «Пуск» на классическое (показано на скриншоте).
Установлены приложения.
- 7-Zip — создание и распаковка архивов.
- VLC — аудио и видео плеер.
- PureBasic — IDE для разработки приложений для Windows ARM64 на языке бейсик.
Удалены приложения OneDrive, Люди, Карты, Кортана, Xbox.
Скриншоты сняты в Raspberry PI 4B с немного настроенной ОС, которая была сохранена в файле Windows_10_Pro_22H2_19045.5555_ARM64_RPI4_full_b1_s1_v1.tib.
Скачать Windows 10 22H2 19045.5555 ARM64
Credit(s)
- https://www.youtube.com/watch?v=-WAP9-95-QM
- https://www.youtube.com/watch?v=BI-HJg_ONAc
- https://discord.com/channels/711407999503302696/
Getting the Windows 10 Image
- Go to UUP
- For Type select ‘Windows (Insider version)’
- For Version select ‘Windows 10 Insider Preview 21296.1000 (rs_prerelease) [arm64]’
- Select your language
- For Edition select ‘Windows 10 Home’
- For Type Download select ‘Download ISO compiler in OneClick! (run downloaded CMD-File)’
- Select the link starting with ‘creatingISO’ to download the script
- Double-click the script to run
- If prompted, select ‘View more’ and then ‘Run anyway’
- Close the CMD window when it has completed (you should see green text in the CMD window and a .ISO file in the same folder as your CMD script)
Reduce the Windows 10 footprint
- Download NTLite (Stable)
- Install and run
- Select the free license and then select ‘OK’
- Using an app like 7-zip or WinRar, open the ISO
- Go into the ‘sources’ folder and locate ‘install.wim’
- Right-click and extract to a destination of your choice
- I just used whatever folder WinRar suggested (which was something like «..\Downloads\iso-name’
- Back in NTLite, select ‘Add’ -> ‘Image file (WIM, ESD, SWM)’
- Locate and select your .wim file
- Accept the warning about the isolated image
- Select the image from the Source List and then select ‘Load’
- Select the Preset tab
- Select ‘Import’
- Locate and select the ‘..\Neon_3.0_\0.3.0.xml’ file you download from the Discord server (see Credits, above) ntlite channel
- Select ‘OK’ on the Import preset dialog
- On the right-side Preset pane, double-click the ‘0.3.0’ preset
- On the left-side Components pane, select ‘Registry’
- Drag-and-drop the Registration Entries in the ‘..\Neon_3.0_\Regestries’ folder into the Registry Queue pane in NTLite
- Select ‘Apply’
- Select ‘Process’ and accpet the prompt
- Select ‘OK’ when it completes
- Close NTLite
- Using 7-Zip, open the .wim file
- You should also see a NTLite text document in that folder
- Double-click on ‘Program Files’
- Delete the ‘Internet Explorer’ folder
- Click the folder with an up arrow to navigate back up a level (to ‘install.wim’)
- Double-click on ‘Program Files (Arm)’
- Drag-and-drop the ‘..\Neon_3.0_\Replacement Files\Edge’ folder into the 7-Zip window
- Select ‘OK’ on the prompt
- Delete the ‘Internet Explorer’ folder
- Delete the ‘Windows Defender’ folder
- Delete the ‘Windows Mail’ folder
- Click the folder with an up arrow to navigate back up a level (to ‘install.wim’)
- Drag-and-drop the ‘..\Neon_3.0_\Replacement Files\Edge’ folder into the 7-Zip window
- Double-click on ‘Program Files (x86)’
- Delete the ‘Internet Explorer’ folder
- Click the folder with an up arrow to navigate back up a level (to ‘install.wim’)
- Double-click ‘Users’
- Double-click ‘Default’
- Double-click ‘AppData’
- Double-click ‘Roaming’
- Double-click ‘Microsoft’
- Double-click ‘Windows’
- Double-click ‘Start Menu’
- Double-click ‘Programs’
- Delete the file ‘OneDrive.link’
- Click the folder with an up arrow 8 times to navigate back up a level (to ‘install.wim’)
- Double-click ‘Windows’
- Delete the ‘Cursors’ folder
- Drag-and-drop the ‘..\Neon_3.0_\Replacement Files\Cursors’ folder into the 7-Zip window
- Select ‘OK’ on the prompt
- Delete the ‘Web’ folder
- Drag-and-drop the ‘..\Neon_3.0_\Replacement Files\Web’ folder into the 7-Zip window
- Select ‘OK’ on the prompt
- Double-click the ‘SysArm32’ folder
- Delete the file ‘BingMaps.dll’
- Click the folder with an up arrow to navigate back up a level (to ‘Windows’)
- Double-click the ‘System32’ folder
- Delete the ‘Recovery’ folder
- Delete the file ‘BingMaps.dll’
- Click the folder with an up arrow to navigate back up a level (to ‘Windows’)
- Double-click the ‘SysWoW64’ folder
- Delete the file ‘OneDriveSetup.exe’
- Delete the file ‘BingMaps.dll’
- Click the folder with an up arrow to navigate back up a level (to ‘Windows’)
- Double-click the ‘WinSxS’ folder
- Delete the folder starting with ‘arm64.x86_microsoft-windows-onedrive-setup_’
- Close 7-Zip
Prepare Your External Media
- Download the Raspberry Pi Imager
- Run the Imager
- For OS select ‘Erase’
- For Device select your external media
- Select ‘Write’
Get latest UEFI Firmware
- Download: https://github.com/pftf/RPi4/releases/download/v1.22/RPi4_UEFI_Firmware_v1.22.zip
- Download: https://github.com/raspberrypi/firmware/files/5983076/bar2-fw.zip
- Replace the files within RPu4_UEFI_Firmware_v1.22.zip with the files form bar2-fw.zip
Write the Image to the External Media
- Download the WOR Imager
- Run the WOR Imager
- Select you language, then Next
- Select your external media
- Select your Raspberry Pi model, then Next
- Click ‘Ok’ if prompted
- How to check your EEPROM version
- Select the .wim file that you created (leaving Windows 10 Home as the version), then Next
- Select ‘Use the latest package available on the server’, then Next
- Drag-and-drop the
RPu4_UEFI_Firmware_v1.22.zipinto the window, then Next - Select Next, then Install
- When the install is complete, safely eject the external media from Windows
Windows Installation and Custom Settings
- Plug the usb into a USB port on the RPi
- Plug in the power and hit [Esc] when you see the Large Raspberry logo
- Go to ‘Device Manager’ -> ‘Raspberry Pi Configuration’ -> ‘Display Configuration’
- Enable ‘Virtual 720p’
- Disable ‘Native resolution’
- Press [Esc]
- Go to ‘Advance Configuration’
- Disable ‘Limit RAM to 3 GB’
- Press [Esc] and [Y] to accept
- Select ‘Continue’ and then press [Enter]
- Let it start and restart a few time
- It might complain about the network interface, ignore it and let it do it’s thing
Overclock the Raspberry Pi
- Download The WoR Control Panel from the Discord (see Credits, above) wor-control-panel channel
- Run the .exe and go to the Overclocking tab
- Select ‘Mount Partition’
- Drag the bottom most slider all the way to the right
- Close WoR-CP and reboot

Join our monthly Unpacking Software livestream to hear about the latest news, chat and opinion on packaging, software deployment and lifecycle management!
Learn More

Join the Chocolatey Team on our regular monthly stream where we put a spotlight on the most recent Chocolatey product releases. You’ll have a chance to have your questions answered in a live Ask Me Anything format.
Learn More

Join us for the Chocolatey Coding Livestream, where members of our team dive into the heart of open source development by coding live on various Chocolatey projects. Tune in to witness real-time coding, ask questions, and gain insights into the world of package management. Don’t miss this opportunity to engage with our team and contribute to the future of Chocolatey!
Learn More

Webinar from
Wednesday, 17 January 2024
We are delighted to announce the release of Chocolatey Central Management v0.12.0, featuring seamless Deployment Plan creation, time-saving duplications, insightful Group Details, an upgraded Dashboard, bug fixes, user interface polishing, and refined documentation. As an added bonus we’ll have members of our Solutions Engineering team on-hand to dive into some interesting ways you can leverage the new features available!
Watch On-Demand

Join the Chocolatey Team as we discuss all things Community, what we do, how you can get involved and answer your Chocolatey questions.
Watch The Replays

Webinar Replay from
Wednesday, 30 March 2022
At Chocolatey Software we strive for simple, and teaching others. Let us teach you just how simple it could be to keep your 3rd party applications updated across your devices, all with Intune!
Watch On-Demand

Livestream from
Thursday, 9 June 2022
Join James and Josh to show you how you can get the Chocolatey For Business recommended infrastructure and workflow, created, in Azure, in around 20 minutes.
Watch On-Demand

Livestream from
Thursday, 04 August 2022
Join Paul and Gary to hear more about the plans for the Chocolatey CLI in the not so distant future. We’ll talk about some cool new features, long term asks from Customers and Community and how you can get involved!
Watch On-Demand

Livestreams from
October 2022
For Hacktoberfest, Chocolatey ran a livestream every Tuesday! Re-watch Cory, James, Gary, and Rain as they share knowledge on how to contribute to open-source projects such as Chocolatey CLI.
Watch On-Demand