
This article provides an ultra-simplified guide to settign up nvidia-smi in WSL 2 on Windows Operating System.
Why Install nvidia-smi on WSL 2
WSL 2 allows Windows user to run Linux applications alongside and interact with other Windows-based programs on Windows operating system. If such applications requires acceleration using Nvidia Graphical Processing Units (GPU), setting up nvidia-smi is a must.
Installing WSL 2
1. Run the following command in terminal, running with administrative privileges:
ℹ️ Note that the installation requires a minimum of 20.2 GB.
# Install WSL 2 and Ubuntu
wsl.exe --install
# Update WSL 2 to latest version
wsl.exe --update
Verify
You should see the following successful terminal output:
...
Installing: Windows Subsystem for Linux
Windows Subsystem for Linux has been installed.
Installing: Windows Subsystem for Linux
Windows Subsystem for Linux has been installed.
Installing: Ubuntu
Ubuntu has been installed.
The requested operation is successful. Changes will not be effective until the system is rebooted.
...
2. Restart PC to allow WSL 2 to take effect.
3. Run the following command in terminal, running with administrative privileges:
# Update WSL 2 to latest version
wsl.exe --update
# Unregister the distribution to avoid the following error [3].
wsl --unregister Ubuntu
Verify
You should see the following successful terminal output:
Checking for updates.
Updating Windows Subsystem for Linux to version: X.X.XX.
Installing nvidia-smi
1. Once you are done installing WSL 2, open the Ubuntu Desktop app. A Ubuntu bash terminal should appear.
Set your username and password, following instructions in terminal.
2. Run the following commands in the Ubuntu terminal:
ℹ️ The commands below uses the example of downloading CUDA Toolkit 12.3, as of this writing. The runfile is 4.07 GB.
# Remove old GPG key. For the reason, please refer to [1]
sudo apt-get update
sudo apt-key del 7fa2af80
# Get the runfile from official Nvidia download site
wget https://developer.download.nvidia.com/compute/cuda/12.3.2/local_installers/cuda_12.3.2_545.23.08_linux.run
# Install gcc required for Nvidia CUDA Toolkit
sudo apt-get update && apt-get install build-essential
 Run the runfile and follow instructions in terminal to fully download
sudo sh cuda_12.3.2_545.23.08_linux.run
Export PATH and LD_LIBRARY_PATH
export PATH=$PATH:/usr/local/cuda-12.3/bin:
export LD_LIBRARY_PATH=$LD_LIBRARY_PATH:/usr/local/cuda-12.3/lib64:
Verification
You should see a similar output as shown below:
Sat Jan 13 14:41:21 2024
+---------------------------------------------------------------------------------------+
| NVIDIA-SMI 535.104.07             Driver Version: 537.34       CUDA Version: 12.2     |
|-----------------------------------------+----------------------+----------------------+
| GPU  Name                 Persistence-M | Bus-Id        Disp.A | Volatile Uncorr. ECC |
| Fan  Temp   Perf          Pwr:Usage/Cap |         Memory-Usage | GPU-Util  Compute M. |
|                                         |                      |               MIG M. |
|=========================================+======================+======================|
|   0  NVIDIA GeForce RTX 3060 ...    On  | 00000000:01:00.0  On |                  N/A |
| N/A   52C    P8              11W /  85W |    111MiB /  6144MiB |      1%      Default |
|                                         |                      |                  N/A |
+-----------------------------------------+----------------------+----------------------+

+---------------------------------------------------------------------------------------+
| Processes:                                                                            |
|  GPU   GI   CI        PID   Type   Process name                            GPU Memory |
|        ID   ID                                                             Usage      |
|=======================================================================================|
|  No running processes found                                                           |
+---------------------------------------------------------------------------------------+
Uninstall WSL 2 and nvidia-smi :fire:
In case you need to remove all that is downloaded using this guide, please follow the instructions in [4].
Remember to restart PC after all is done.
References
- NVIDIA GPU Accelerated Computing on WSL 2
- CUDA Toolkit 12.3 Update 2 Downloads
- Error code: Wsl/Service/CreateInstance/MountVhd/ERROR_FILE_NOT_FOUND
- How to uninstall WSL2 on Windows 10
What is Nvidia-smi Command Utility?
The NVIDIA System Management Interface (nvidia-smi) is a command-line utility based on the NVIDIA Management Library (NVML) designed to help manage and monitor NVIDIA GPU devices. It provides the best nvidia-smi commands to monitor and track your GPU, and it is installed with the CUDA toolkit.
NVIDIA-smi ships with NVIDIA GPU display drivers on Linux and 64-bit Windows. Nvidia-smi can report query information as XML or human-readable plain text to standard output or a file. See the nvidia-smi documentation for more details.
How to Run Nvidia-smi Command Utility?
The nvidia-smi command utility gets typically installed in the driver installation step. It cannot/does not get installed in any other installation steps. If you install an NVIDIA GPU driver using a repository that is maintained by NVIDIA, you will always get the nvidia-smi command utility with any recent driver install.
How to run nvidia-smi on Windows?
Nvidia-SMI is stored in the following location by default:C:\Windows\System32\DriverStore\FileRepository\nvdm*\nvidia-smi.exe. On my Windows 10 machine, nvidia-smi.exe can be found in C:\Windows\System32. Since C:\Windows\System32 is already in the Windows PATH, running nvidia-smi from the command prompt should now work out of the box.
If nvidia-smi is executed from the command prompt (CMD) in Windows, the following error is returned:
C:\Users>nvidia-smi
'nvidia-smi' is not recognized as an internal or external command, operable program or batch file.
Please go to the file browser and then go to C drive and type nvidia-smi in the search bar and sometimes when the exe file opens wait for the right click to enter the properties copy location path and then go to the command prompt and use the one in the previous step Change the copy path to the working directory, then write «nvidia-smi» and press Enter.
How to run nvidia-smi on Ubuntu Linux?
There exists a tool named “nvidia-smi” which helps to manage this hardware all through the terminal on the Linux operating system. When dealing with this tool, an error with the statement “nvidia-smi command not found” may occur on the system.
$ nvidia-smi
NVIDIA-SMI has failed because it couldn’t communicate with the NVIDIA driver. Make sure that the latest NVIDIA driver is installed and running.
At this time, you need to check whether the nvidia driver is correctly installed, or update to the latest version of nvidia-drivers.
Examples of Nvidia-smi Commands
This command monitors your GPU. We will explain this utility in detail later.
This tool is similar to the above command except for the information displayed in detail.
It monitors your GPU every second, refreshing and tracking the output itself for each second.
$ watch –n 1 -d nvidia-smi
To list all available NVIDIA devices, run:
$ nvidia-smi -L
GPU 0: NVIDIA GeForce RTX 3060 Ti (UUID: GPU-fa3da260-9c42-828f-981a-f6d7b48d77b3)
To list certain details about each GPU, try:
$ nvidia-smi --query-gpu=index,name,uuid,serial --format=csv index, name, uuid, serial
0, NVIDIA GeForce RTX 3060 Ti, GPU-fa3da260-9c42-828f-981a-f6d7b48d77b3, [N/A]
To monitor overall GPU usage with 1-second update intervals:
$ nvidia-smi dmon
# gpu   pwr gtemp mtemp    sm   mem   enc   dec  mclk  pclk
# Idx     W     C     C     %     %     %     %   MHz   MHz
    0     19     41      -     0      0      0      0    405    210
    0     19     41      -     0      0      0      0    405    210
    0     19     41      -     0      0      0      0    405    210
To monitor overall GPU usage with 1-second update intervals:
$ nvidia-smi pmon
# gpu        pid  type    sm   mem   enc   dec   command
# Idx          #   C/G     %     %     %     %   name
    0      22010     C    98    56     -     -   python3
    0      22010     C    98    56     -     -   python3
    0      22010     C    98    55     -     -   python3
Nvidia-smi command output metrics and detailed descriptions
Below is an output of «nvidia-smi» command line.
Two tables are generated as the output where first reflects the information about all available GPUs (above example states 1 GPU). The second table tells you about the processes using GPUs. Let’s dig into it more.
Temp: Core GPU temperature is in degrees Celsius. We need not worry about it since it will be controlled by DBM datacentres except to care about your hardware. The above “44C” in the table shown is normal but give a call when it reaches 90+ C.
Perf: Denotes GPU’s current performance state. It ranges from P0 to P12 referring to maximum and minimum performance respectively.
Persistence-M: The value of the Persistence Mode flag where “On” means that the NVIDIA driver will remain loaded(persist) even when no active client such as Nvidia-smi is running. This reduces the driver load latency with dependent apps such as CUDA programs.
Pwr: Usage/Cap: It refers to the GPU’s current power usage out of total power capacity. It samples in Watts.
Bus-Id: GPU’s PCI bus id as “domain:bus:device.function”, in hex format which is used to filter out the stats of a particular device.
Disp.A: Display Active is a flag that decides if you want to allocate memory on a GPU device for display i.e. to initialize the display on GPU. Here, “Off” indicates that there isn’t any display using a GPU device.
Memory-Usage: Denotes the memory allocation on GPU out of total memory. Tensorflow or Keras(TensorFlow backend) automatically allocates whole memory when getting launched, even though it doesn’t require it.
Volatile Uncorr. ECC: ECC stands for Error Correction Code which verifies data transmission by locating and correcting transmission errors. NVIDIA GPUs provide an error count of ECC errors. Here, the Volatile error counter detects the error count since the last driver loaded.
GPU-Util: It indicates the percent of GPU utilization i.e. percent of the time when kernels were using GPU over the sample period.
Compute M.: Compute Mode of specific GPU refers to the shared access mode where compute mode sets to default after each reboot. The “Default” value allows multiple clients to access the CPU at the same time.
GPU: Indicates the GPU index, beneficial for multi-GPU setup. This determines which process is utilizing which GPU. This index represents the NVML Index of the device.
PID: Refers to the process by its ID using GPU.
Type: Refers to the type of processes such as “C” (Compute), “G” (Graphics), and “C+G” (Compute and Graphics context).
Process Name: Self-explanatory
GPU Memory Usage: Memory of specific GPU utilized by each process.
Other metrics and detailed descriptions are stated on Nvidia-smi manual page.
Sign in to your XDA account
Linux may have a fantastic Command-Line Interface, but Windows 11 is a lot better than its predecessors when it comes to supporting powerful terminal commands. There’s a lot you can do with the default terminal app on Microsoft’s flagship OS. And that’s before you attempt to install WSL2, which brings a plethora of Linux commands to Windows.
For instance, Nvidia-SMI is a tool that’s a must-use for those with GPUs from Team Green. In this article, we’ll go over everything you need to know to get the most out of this utility.

Related
Best GPUs for gaming in 2024
The GPU is arguably the most important part of any gaming PC build, so we’re here to help you choose the right one
What is Nvidia-SMI?
The Nvidia System Management Interface, or Nvidia-SMI, is a CLI-based utility that lets you monitor and analyze your graphics card, making it a great alternative for those who wish to avoid using third-party applications. On its own, the nvidia-smi command displays some information on your system. But once you combine it with other keywords and commands, you can oversee most of your GPU parameters from the Windows Terminal.
Fortunately, you don’t need to configure multiple APIs or frameworks to get Nvidia SMI up and running. As long as you have the Nvidia drivers installed on your Windows 11 machine, you can use this tool right out of the box.
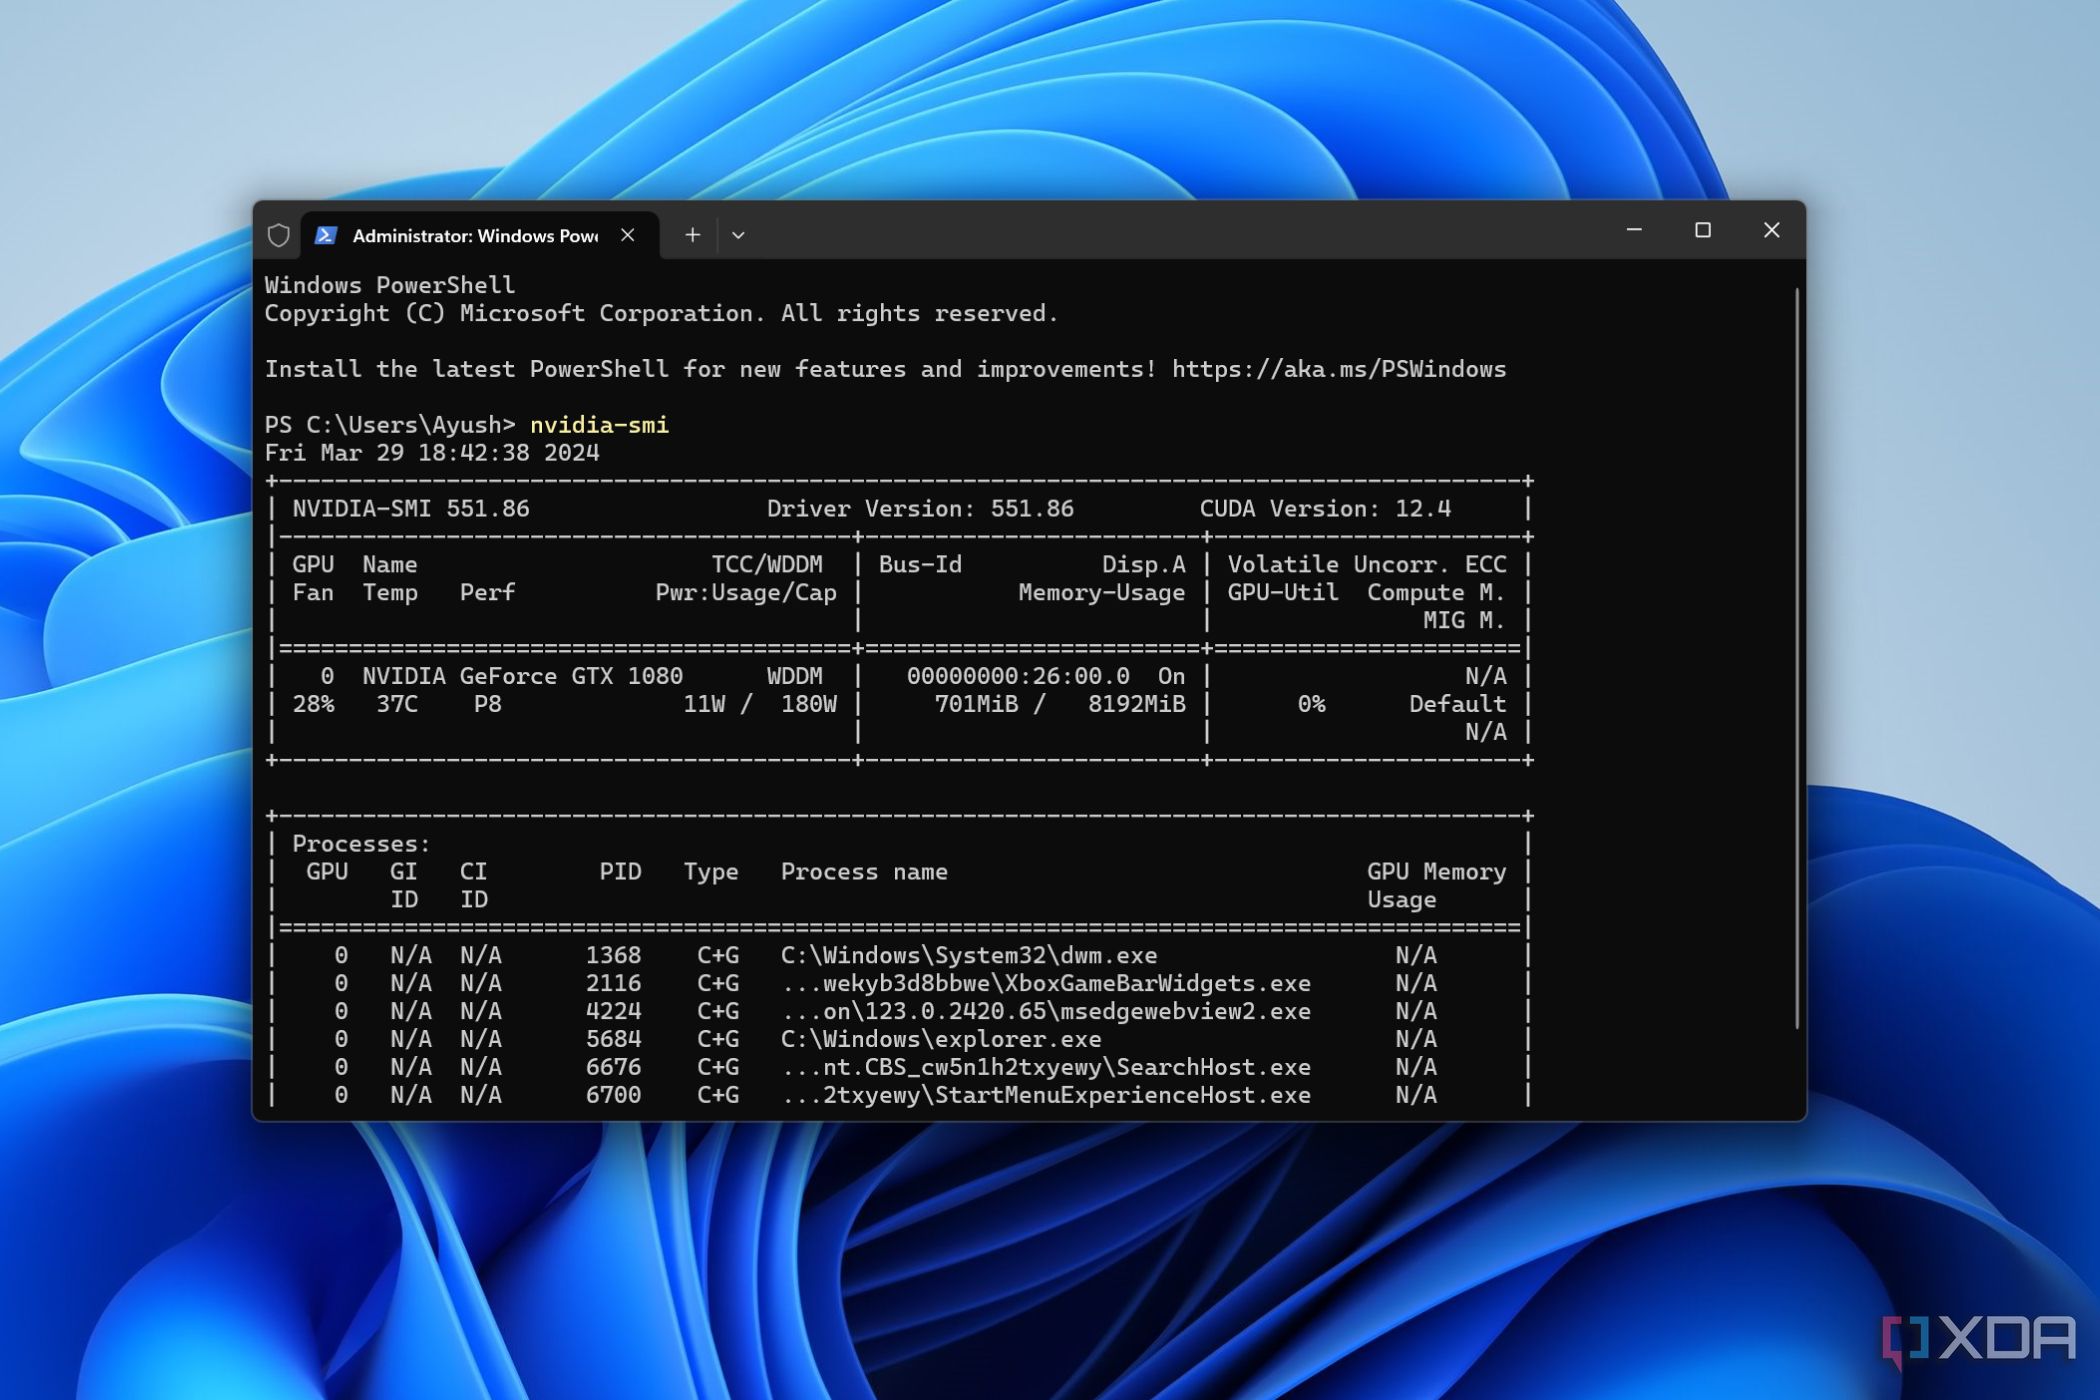
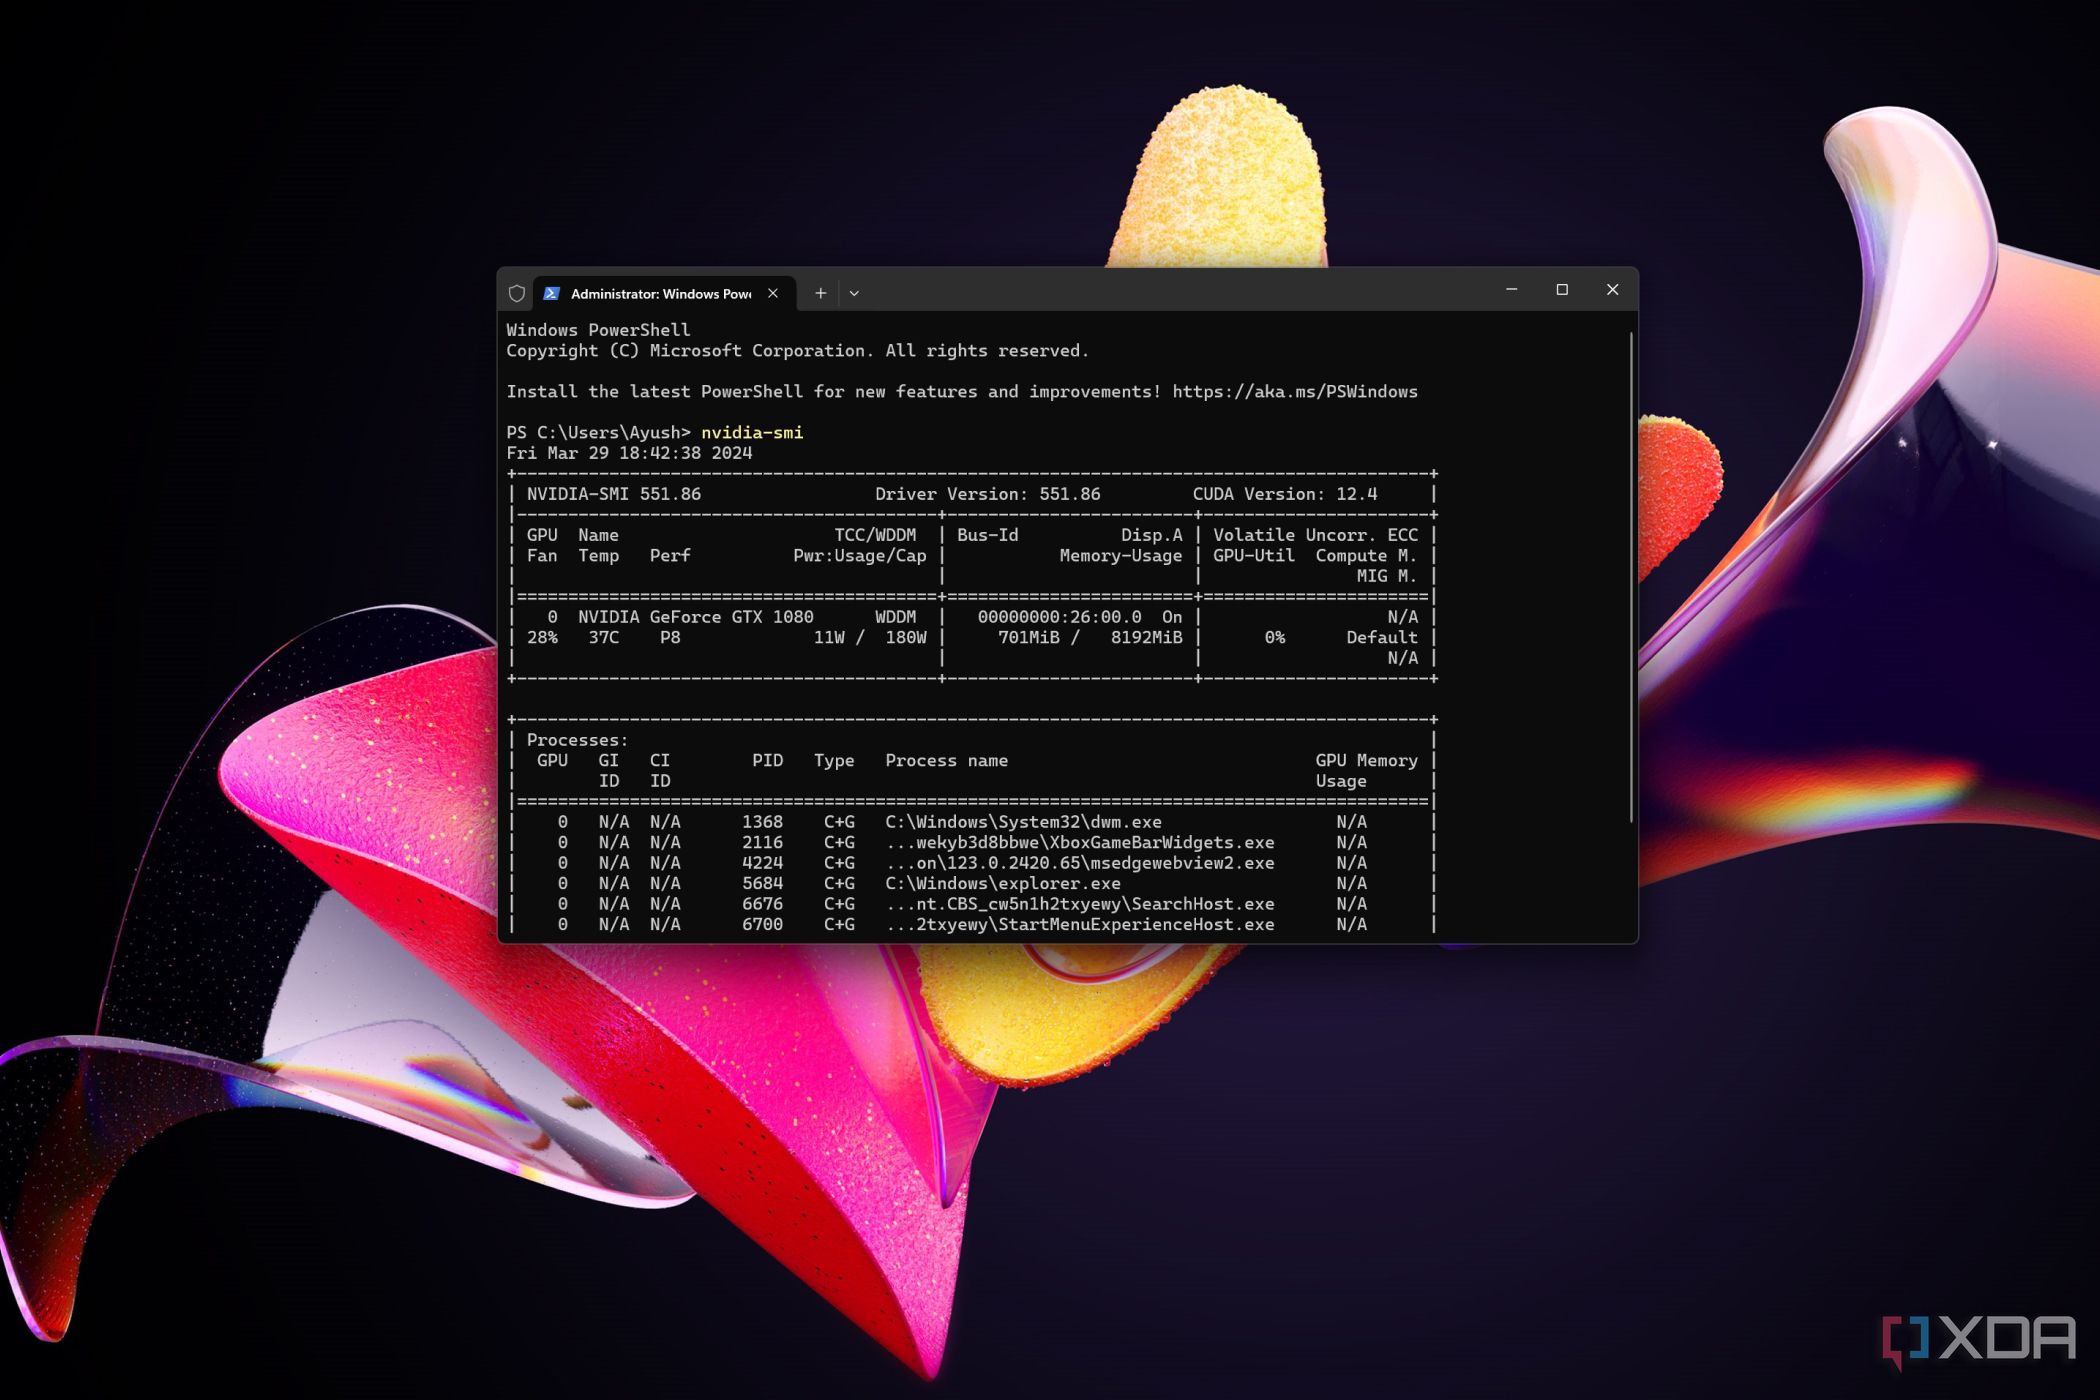
How to run Nvidia-SMI?
The Terminal built into Windows 11 can be used to run Nvidia-SMI and its associated commands. All you have to do is:
-
Right-click on the Start button and select Terminal (Admin).

-
Type the following command and press Enter.
nvidia-smi
- Nvidia-SMI will appear and display several GPU metrics.


Using additional parameters
If you’re looking for specific information, the nvidia-smi command also supports parameters you can use to get into the weeds. Here are some important ones worth highlighting:
Managing your GPU metrics using Nvidia-SMI
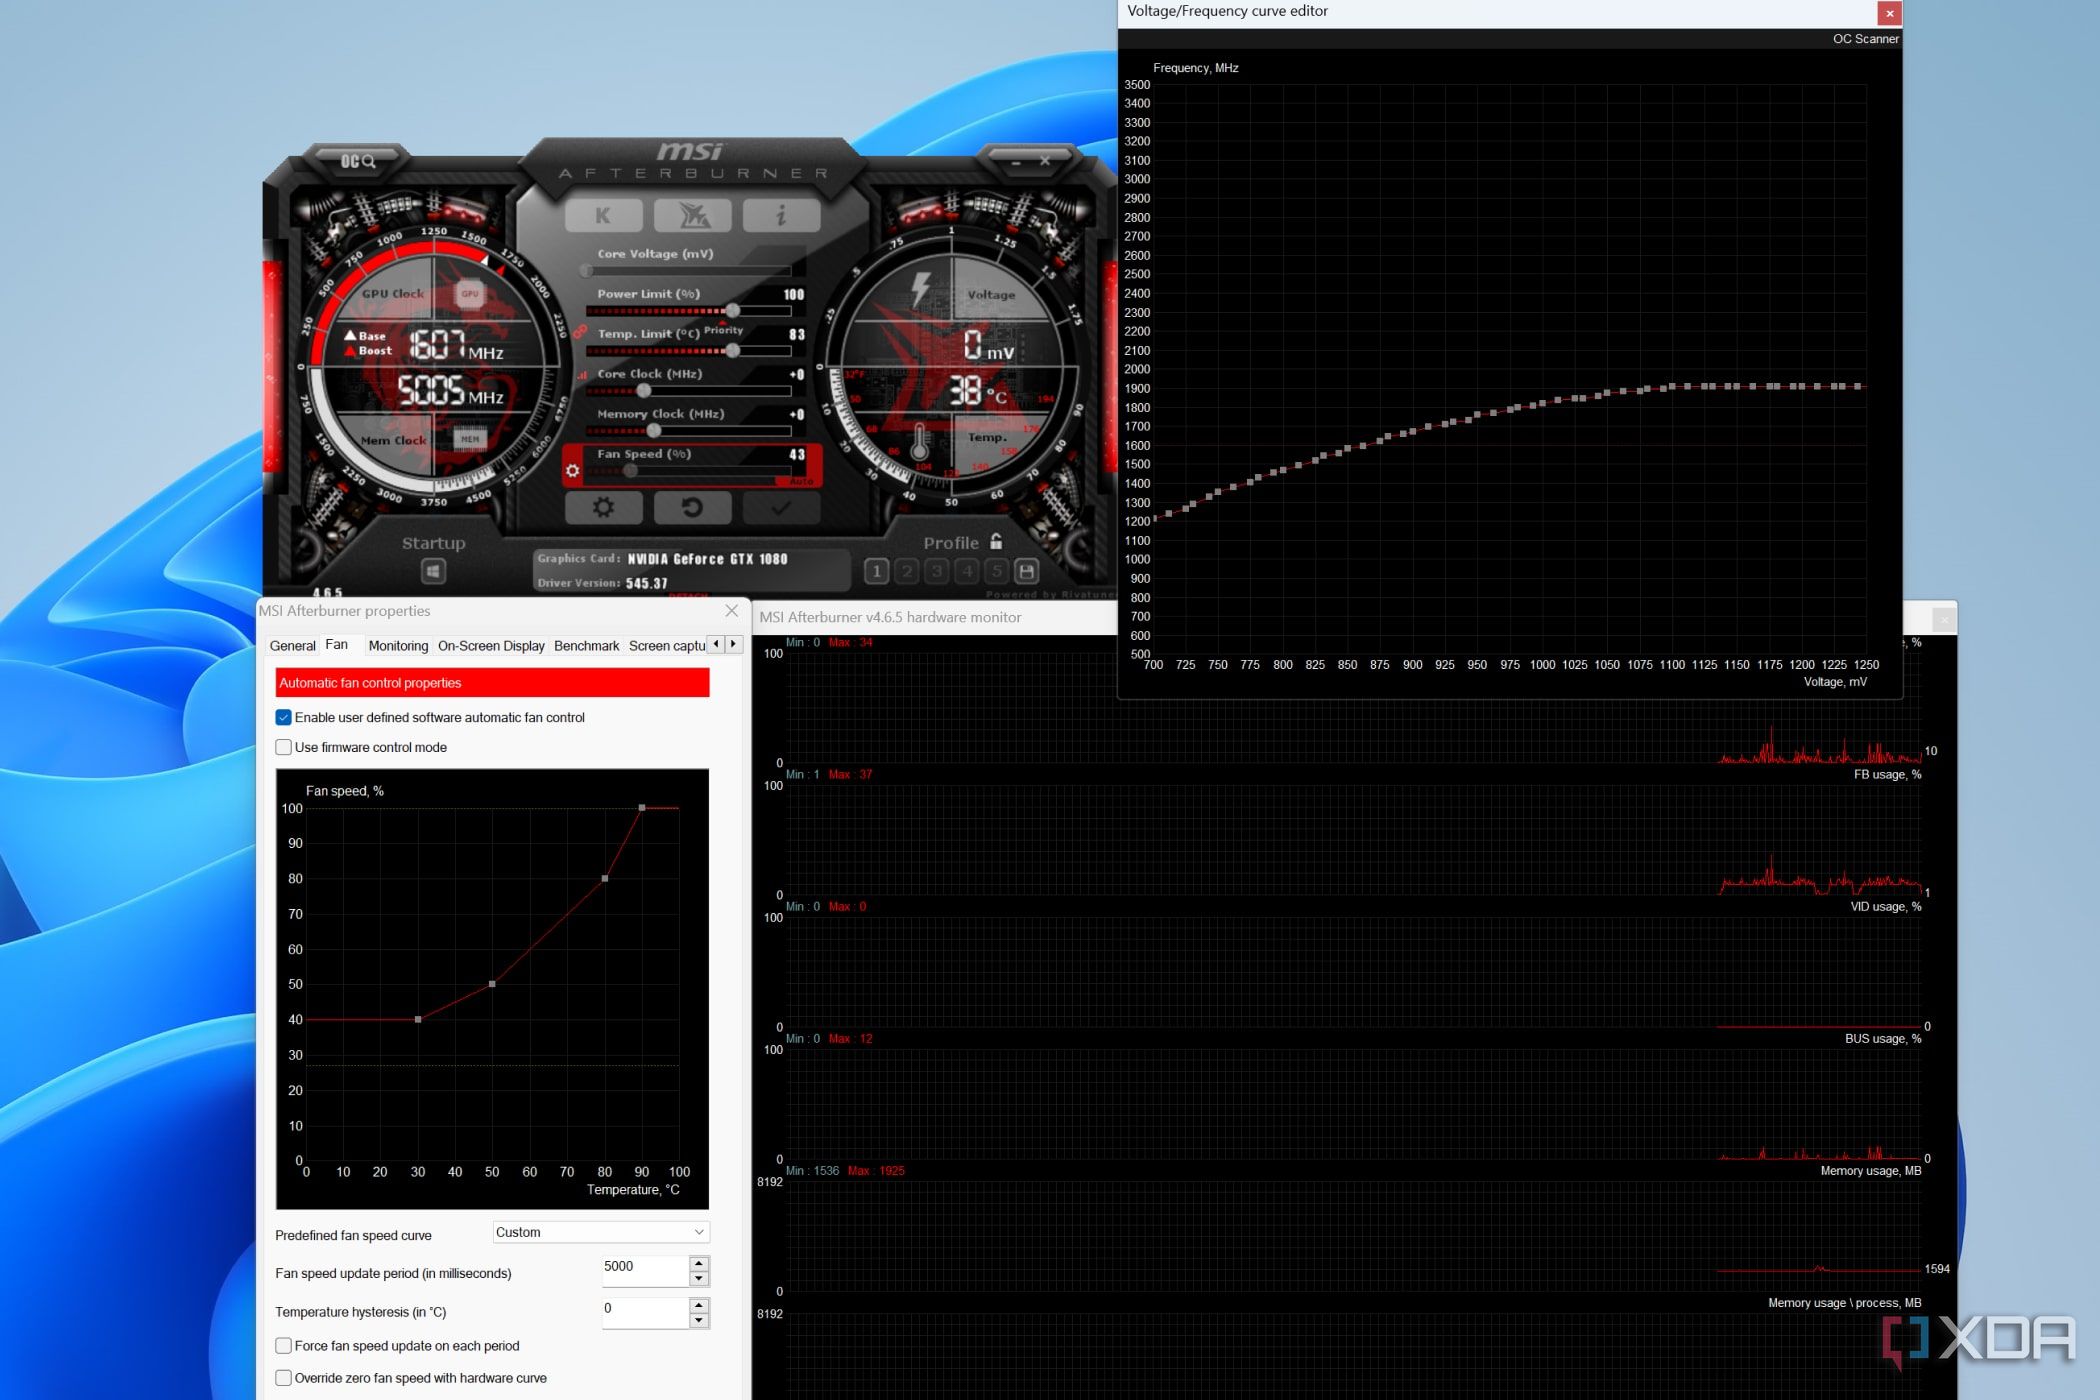
That’s it for this article! Although Nvidia-SMI is a convenient utility if you’re used to a terminal interface, its functionality is somewhat limited if you stick to Windows 11.
For instance, while it does support memory overclocking, Nvidia-SMI always shows errors when setting the core frequency via the -lgc parameter on Windows 11, making it impossible to properly underclock or overclock your core clock. Similarly, it’s impossible to enter persistence mode using -pm 1 if you’re using Windows instead of Linux. So, you’ll have to use a third-party utility like MSI Afterburner to push your high-end GPU past its limits.
Related
How to use MSI Afterburner to overclock and monitor your PC
From overclocking to undervolting, MSI Afterburner is a really useful software. Here’s how you can use it to improve your GPU’s performance.
Provide feedback
Saved searches
Use saved searches to filter your results more quickly
Sign up
System Properties > Advanced > Environment Variables > System Variables -> Path -> Edit > New > insert folder path with nvidia-smi
- Go to the file explore then go to the C drive in the search bar type nvidia-smi.
- Wait sometimes when exe file is open right click go to the properties copy the location path.
Does NVIDIA-SMI work on Windows?
NVIDIA-smi ships with NVIDIA GPU display drivers on Linux, and with 64bit Windows Server 2008 R2 and Windows 7. Nvidia-smi can report query information as XML or human readable plain text to either standard output or a file.
Where is NVIDIA-SMI installed Windows?
Verify driver installation The nvidia-smi.exe is located at C:\Program Files\NVIDIA Corporation\NVSMI\nvidia-smi.exe .
Can you download NVIDIA on Windows 10?
How do I install the NVIDIA Display Driver under Windows 7, Windows 8, or Windows 10? Download the latest NVIDIA display driver from the NVIDIA Download Drivers page. If your browser asks you if you wish to Save or Run the file, select Save.
What kind of drivers do I need for nvidia smi?
NVIDIA-smi ships with NVIDIA GPU display drivers on Linux, and with 64bit Windows Server 2008 R2 and Windows 7. Nvidia-smi can report query information as XML or human readable plain text to either standard output or a file.
Where is the nvidia smi file stored in Windows?
Nvidia-SMI is stored by default in the following location. C:WindowsSystem32DriverStoreFileRepositorynvdm*nvidia-smi.exe. Where nvdm* is a directory that starts with nvdm and has an unknown number of characters after it.
What does the NVIDIA System Management Interface do?
The NVIDIA System Management Interface (nvidia-smi) is a command line utility, based on top of the NVIDIA Management Library (NVML), intended to aid in the management and monitoring of NVIDIA GPU devices.
Which is Nvidia GPU does this utility support?
This utility allows administrators to query GPU device state and with the appropriate privileges, permits administrators to modify GPU device state. It is targeted at the Tesla TM, GRID TM, Quadro TM and Titan X product, though limited support is also available on other NVIDIA GPUs.
How do I install nvidia-SMI on Windows 10?
System Properties > Advanced > Environment Variables > System Variables -> Path -> Edit > New > insert folder path with nvidia-smi
- Go to the file explore then go to the C drive in the search bar type nvidia-smi.
- Wait sometimes when exe file is open right click go to the properties copy the location path.
Where is nvidia-SMI installed Windows?
Verify driver installation The nvidia-smi.exe is located at C:\Program Files\NVIDIA Corporation\NVSMI\nvidia-smi.exe .
Why is Nvidia-SMI not working?
NVIDIA-SMI has failed because it couldn’t communicate with the NVIDIA driver. Make sure that the latest NVIDIA driver is installed and running. and also some trying like this: Run prime-select query to get all possible options.
Where can I find the nvidia smi driver?
For who is searching at google for “nvidia smi windows”, then arriving here. Driver from Microsoft during windows update. In nvidia program files folder, search for smi, find .ex_ file, this is the archive for nvidia-smi.exe, extract the archive.
Where can I find the latest Nvidia drivers?
If you download and install the latest driver for your GPU from http://www.nvidia.com/drivers, it should install it. I have used the windows file find utility before, but can’t find this file. If your driver comes from Microsoft i.e. installed via Microsoft updates, then I think it does not include this utility.
What does the NVIDIA System Management Interface do?
The NVIDIA System Management Interface (nvidia-smi) is a command line utility, based on top of the NVIDIA Management Library (NVML), intended to aid in the management and monitoring of NVIDIA GPU devices.
Which is Nvidia GPU does this utility support?
This utility allows administrators to query GPU device state and with the appropriate privileges, permits administrators to modify GPU device state. It is targeted at the Tesla TM, GRID TM, Quadro TM and Titan X product, though limited support is also available on other NVIDIA GPUs.