
How to Fix Windows Update Error 0x8007000d in Windows 10
Error 0x8007000d occurs specifically when system files become corrupt, or Windows Update components become outdated. Despite that, there are ways you can fix error 0x8007000d, which we will explain in this article.
What is Error 0x8007000d
Many users experienced error 0x8007000d when installing the Cumulative Update for Windows 10 Version 1511 for x64-based Systems (KB3124200). Most recently, people witnessed the resurgence of the error again when attempting to update Windows 10 version 20H2. Specifically, many got error 0x8007000d when trying to install updates KB4586853 and KB4592438.
On a side note, many users get this same error code (0x8007000d) when trying to activate Windows 10.
What Causes Error 0x8007000d
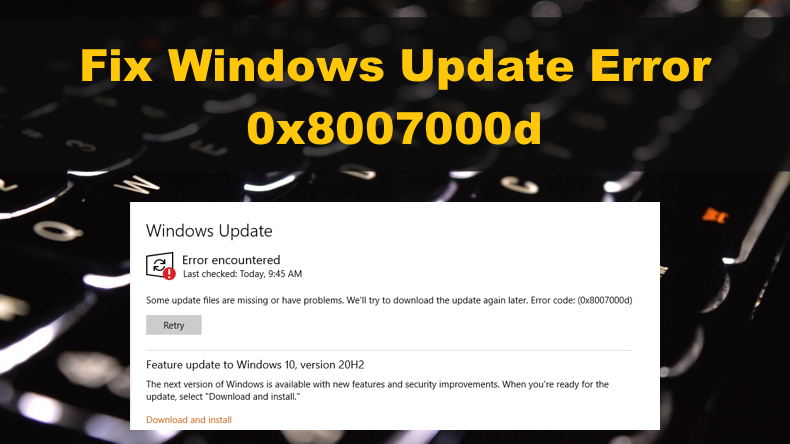
0x8007000d may occur due to any number of reasons. The problem is that this error message doesn’t provide much information about what triggered it. However, error 0x8007000d is usually accompanied by the following message:
Some update files are missing or have problems. We’ll try to download the update again later. Error code: (0x8007000d)
According to our research, this error may occur for two reasons:
- Some system files have become corrupt.
- Some Windows Update components have become outdated.
Video Instructions on How to Fix Windows Update Error 0x8007000d
Table of Contents:
- Introduction
- Solution 1. Run the Windows Update Troubleshooter
- Solution 2. Update Windows 10 Using the Windows Update Assistant
- Solution 3. Clear the Windows Update Cache Folder
- Solution 4. Run the Deployment Image & Servicing Management (DISM) Scan
- Solution 5. Run the System File Checker (SFC) Scan
- Solution 6. Reset Windows Update Components Manually
- Solution 7. Configure the Group Policy Setting
- Video Instructions on How to Fix Windows Update Error 0x8007000d
Download Computer Malware Repair Tool
It is recommended to run a free scan with Combo Cleaner — a tool to detect viruses and malware on your device. You will need to purchase the full version to remove infections. Free trial available. Combo Cleaner is owned and operated by Rcs Lt, the parent company of PCRisk.com read more.
Solution 1. Run the Windows Update Troubleshooter
If Windows Update components fail due to corruption, you can run the Windows Update Troubleshooter to repair the files and many other issues. We recommend running the troubleshooter twice in a row for the result.

1. Right-click the Start Menu button and click Settings.
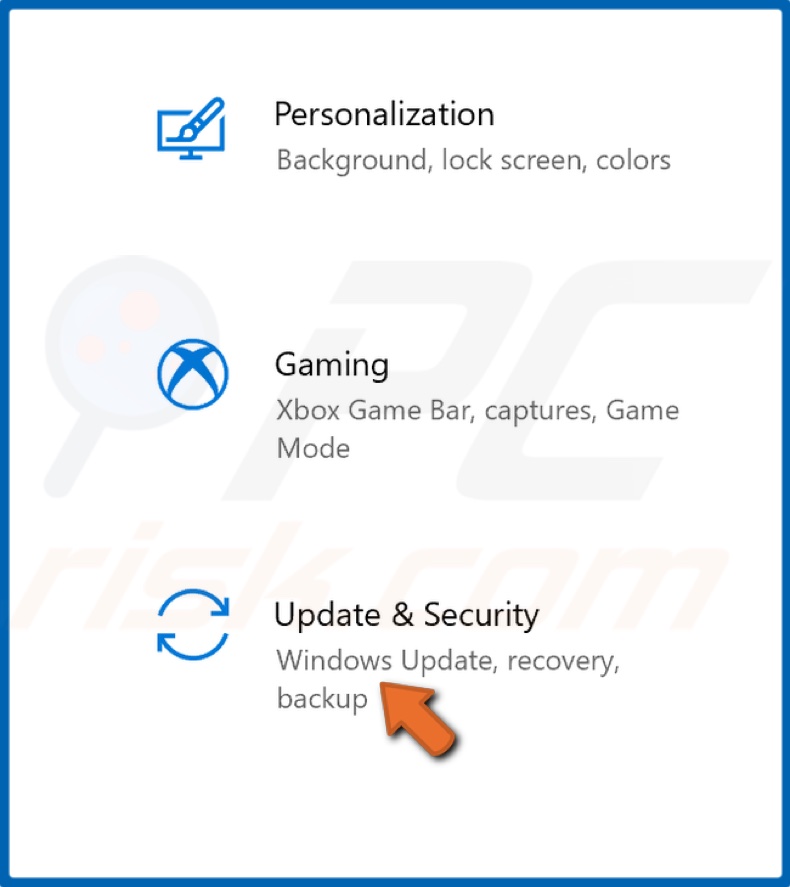
2. Select Update & Security.
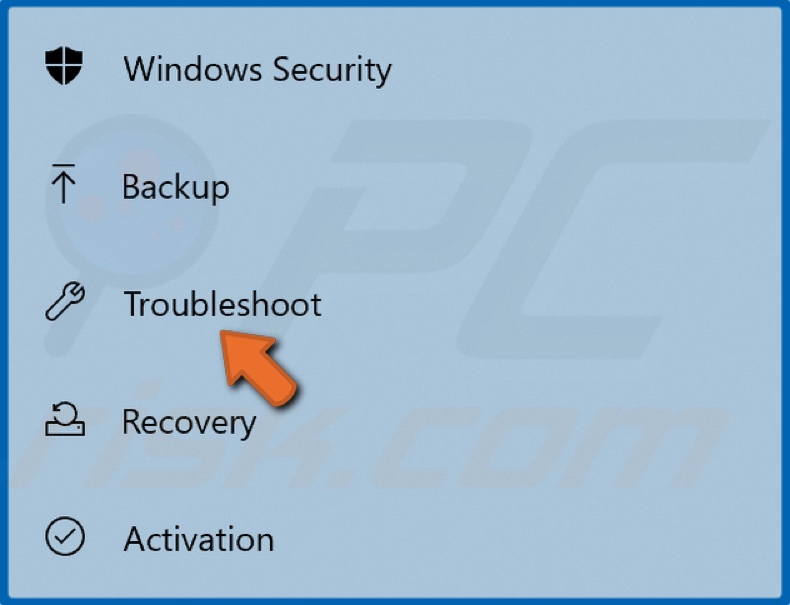
3. Click Troubleshoot.
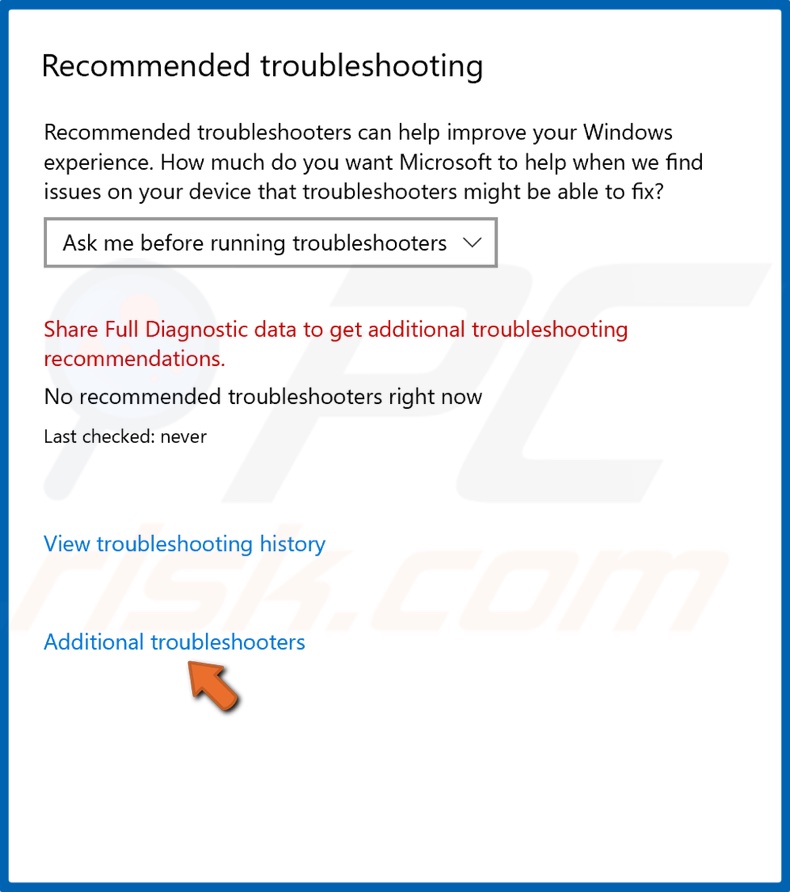
4. Click Additional troubleshooters.
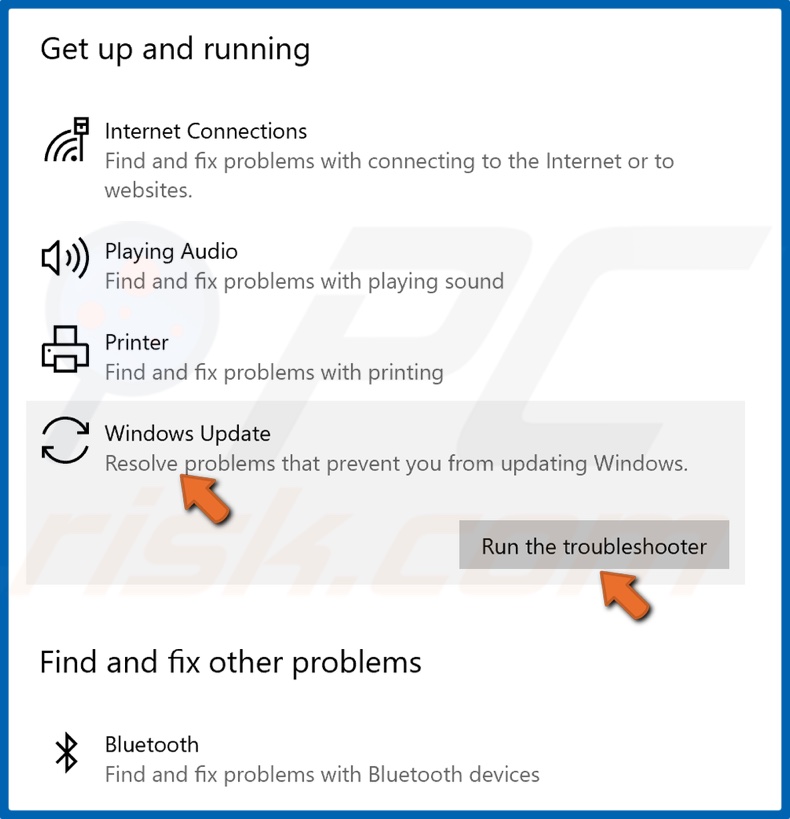
5. Select Windows Update and click Run the troubleshooter.
6. If the troubleshooter detects an issue, it will select and apply a fix automatically.
7. Try updating Windows.
[Back to Table of Contents]
Solution 2. Update Windows 10 Using the Windows Update Assistant
Windows 10 Update Assistant is designed to install the latest Windows 10 updates that users might miss or choose not to install. The Update Assistant ensures that you have the latest Windows 10 version running on your computer.
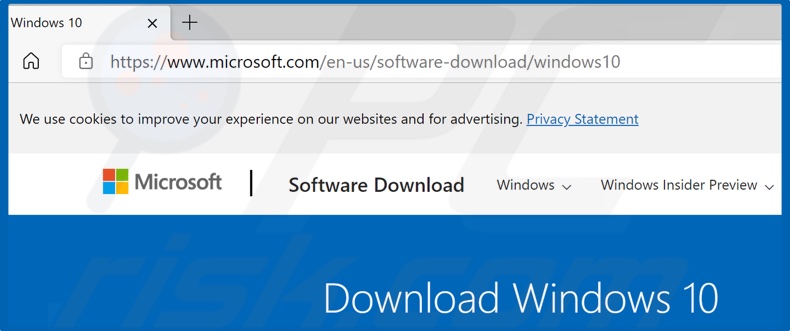
1. Open your web browser and go to the Windows 10 Update Assistant download page.
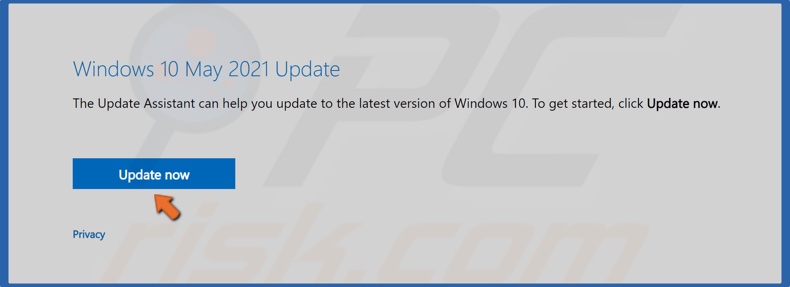
2. Click Update now to get the Windows 10 Update Assistant.
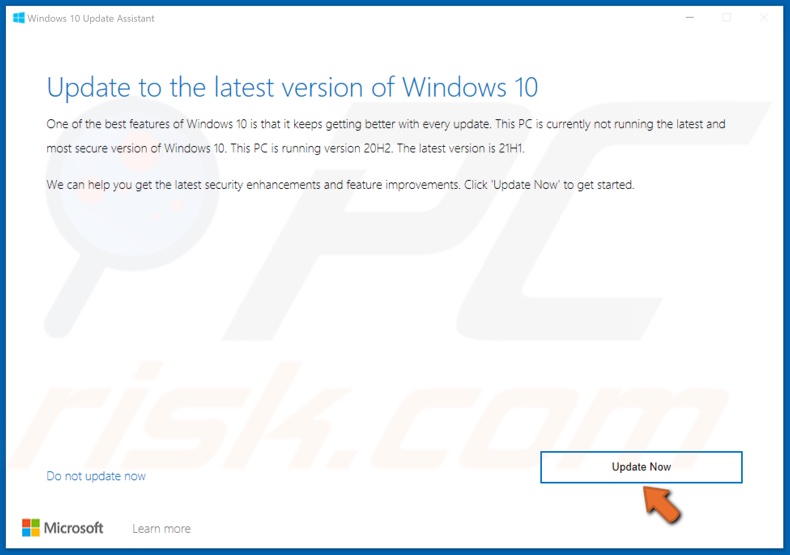
3. Once downloaded, Run the Update Assistant executable file.
4. Then, click Update Now.
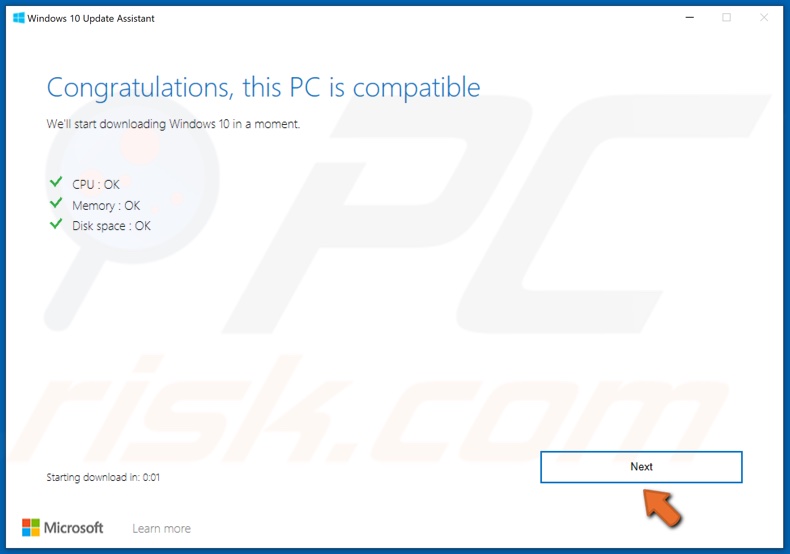
5. Click Next.
6. Allow Windows to update. The update process may take a while.
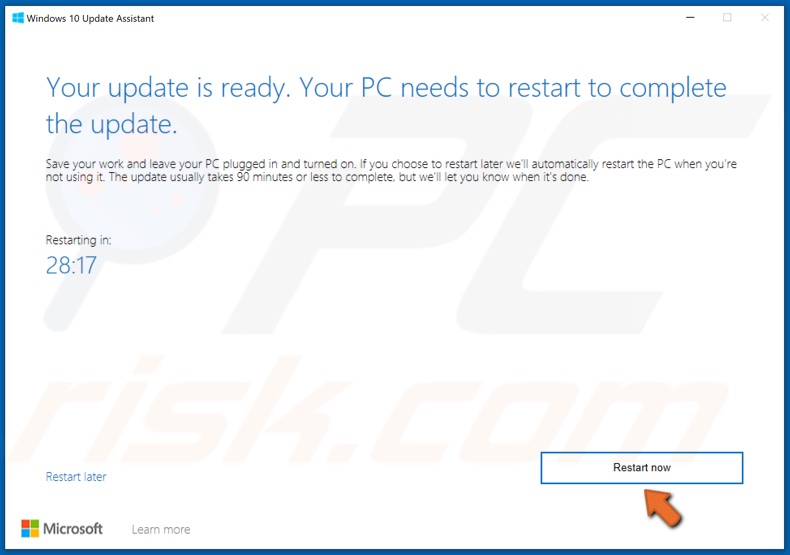
7. Click Restart now when prompted.
[Back to Table of Contents]
Solution 3. Clear the Windows Update Cache Folder
1. Hold down Windows+R keys to open Run.
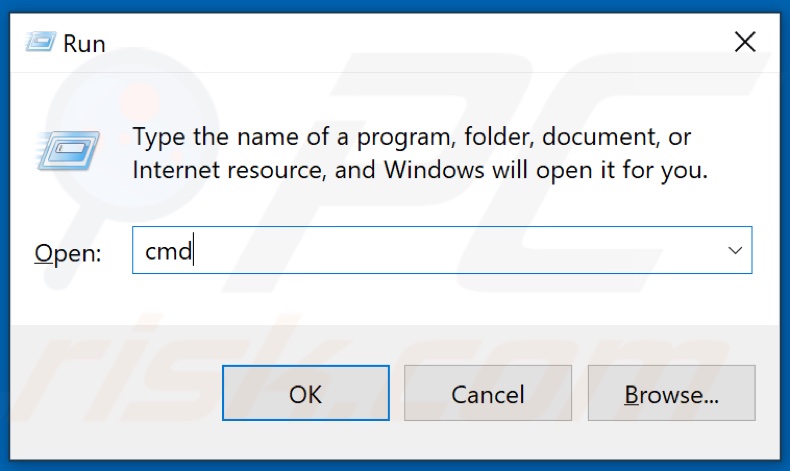
2. In the Run dialog box, type in CMD and hold down Ctrl+Shift+Enter keys to open the elevated Command Prompt.
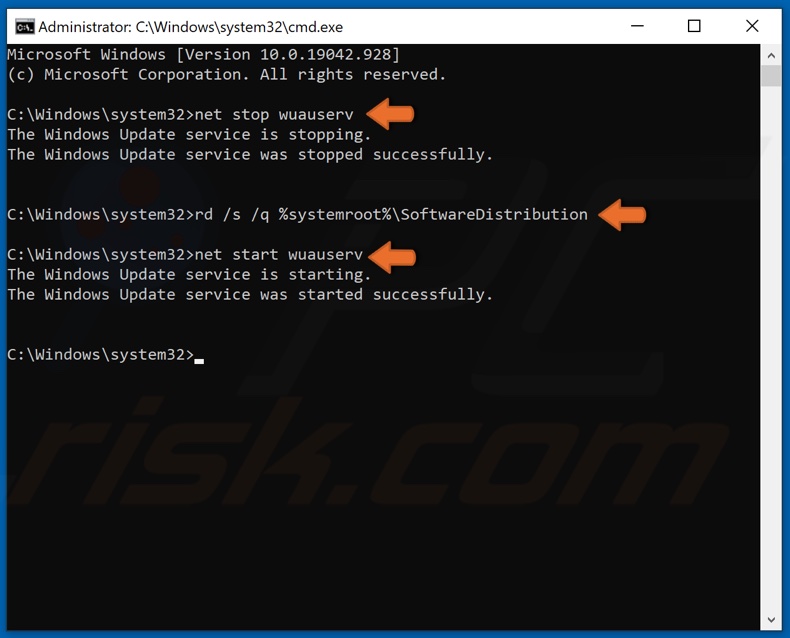
3. In the Command Prompt window, type in net stop wuauserv and press Enter to stop Windows Update Service.
4. Then, type in rd /s /q %systemroot%\SoftwareDistribution and press Enter to clear the Update cache folder.
5. Then, type in net start wuauserv to restart the previously stopped Windows Update Service.
6. Close the Command Prompt and try updating Windows.
[Back to Table of Contents]
Solution 4. Run the Deployment Image & Servicing Management (DISM) Scan
1. Hold down Windows+R keys to open Run.
2. In the Run dialog box, type in CMD and hold down Ctrl+Shift+Enter keys to open the elevated Command Prompt.
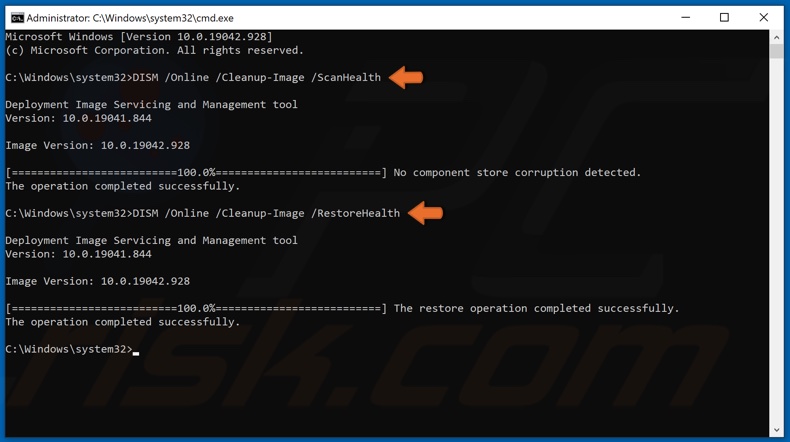
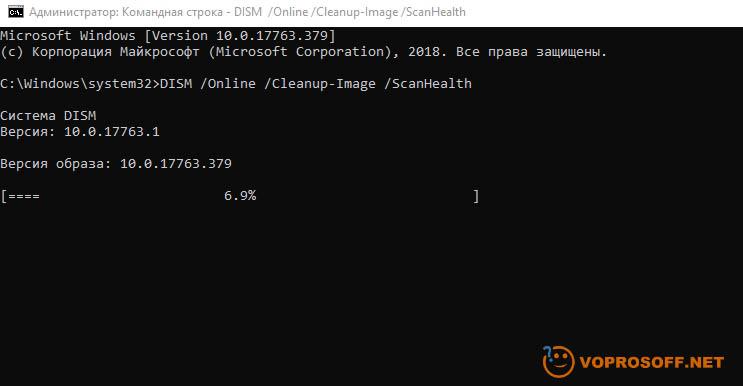
3. In the Command Prompt window, type in DISM /Online /Cleanup-Image /ScanHealth and press the Enter key. This parameter will scan the component store for corruption.
4. Type in the DISM /Online /Cleanup-Image /RestoreHealth and press Enter.
5. Once the process has been completed, close the Command Prompt and try updating Windows 10.
[Back to Table of Contents]
Solution 5. Run the System File Checker (SFC) Scan
1. Hold down Windows+R keys to open Run.
2. In the Run dialog box, type in CMD and hold down Ctrl+Shift+Enter keys to open the elevated Command Prompt.
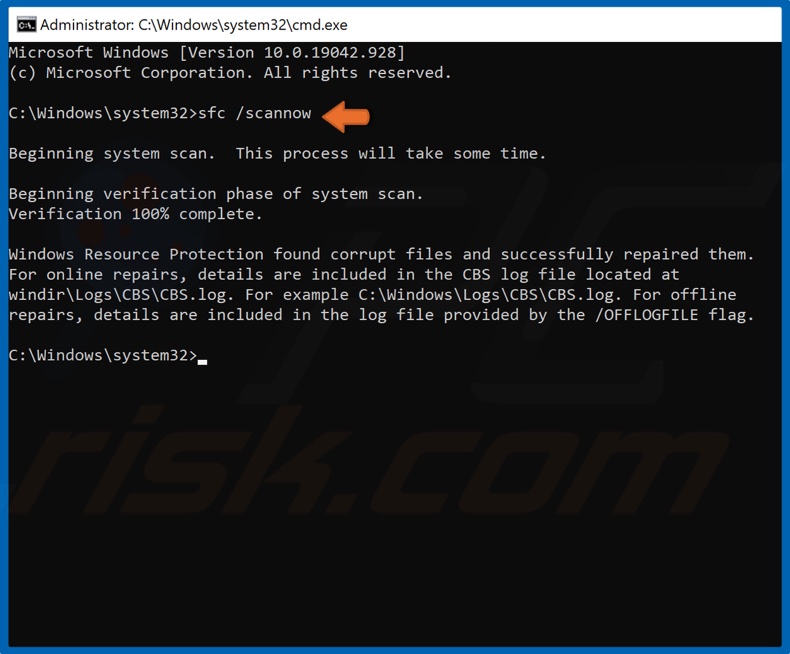
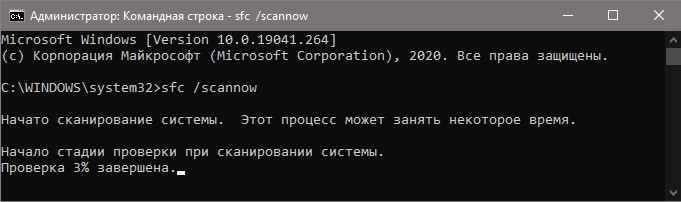
3. In the Command Prompt window, type in SFC /ScanNow and press the Enter key to start the scan and repair missing or corrupt files.
4. Once the scan has been completed, restart your PC and try updating Windows.
[Back to Table of Contents]
Solution 6. Reset Windows Update Components Manually
1. Hold down Windows+R keys to open the Run.
2. In the Run dialog box, type in CMD and then hold down Shift+Ctrl+Enter keys to open Command Prompt with administrative privileges.
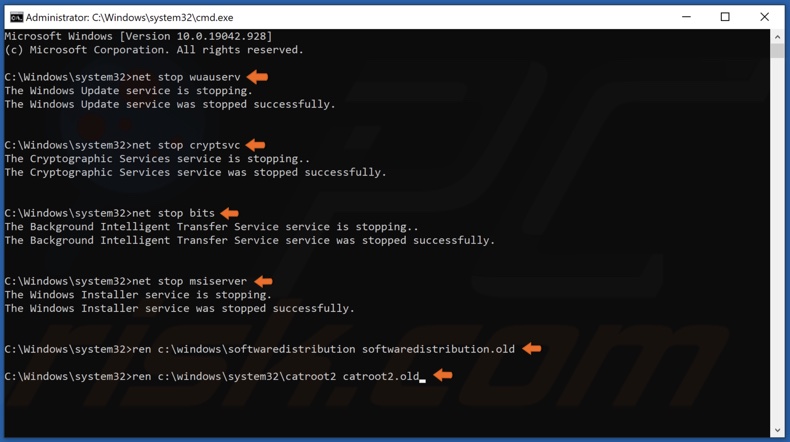
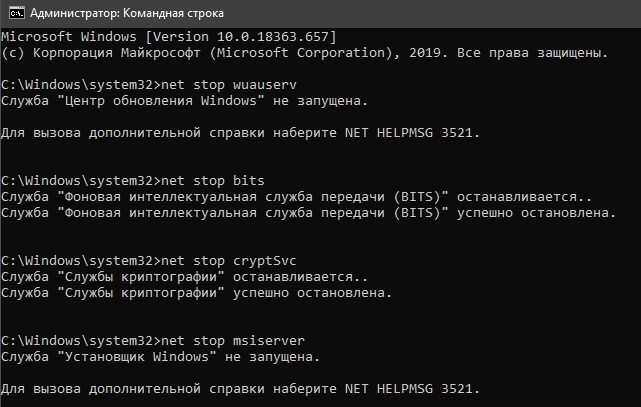
3. Type in the following commands and press Enter after typing in each one:
- net stop wuauserv
- net stop cryptSvc
- net stop bits
- net stop msiserver
After the services have been disabled, rename the SoftwareDistribution and Catroot2.
4. Type in ren C:\Windows\SoftwareDistribution SoftwareDistribution.old and press Enter.
5. Then, type in ren C:\Windows\System32\catroot2 Catroot2.old and press Enter.
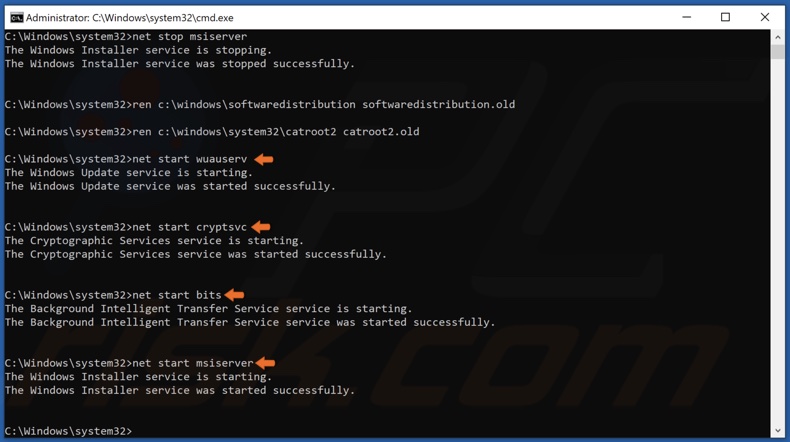
6. Type in the following commands and press Enter after typing in each one:
- net start wuauserv
- net start cryptSvc
- net start bits
- net start msiserver
7. Close the Command Prompt and try updating Windows
[Back to Table of Contents]
Solution 7. Configure the Group Policy Setting
This solution is not possible on Windows 10 Home Edition since the Home Edition does not have the Group Policy Editor.
1. Hold down Windows+R keys to open the Run.
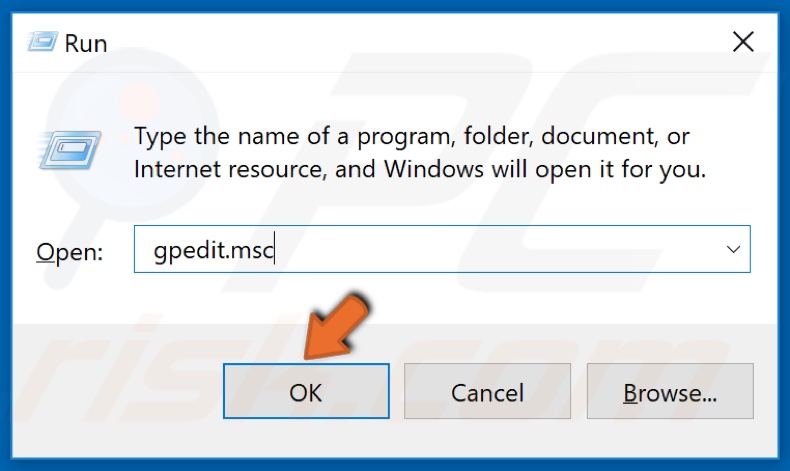
2. In the Run dialog box, type in gpedit.msc and click OK.
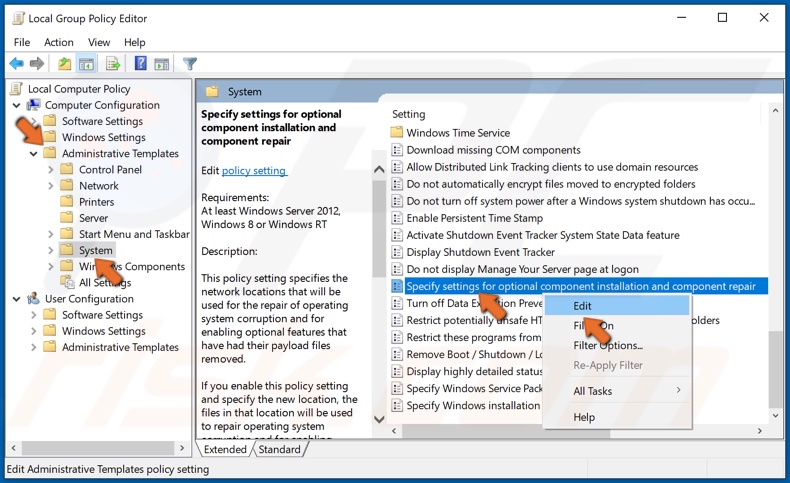
3. In the left pane, expand Administrative Templates and select System.
5. In the right pane, right-click Specify Settings for Optional Content Installation and click Edit.
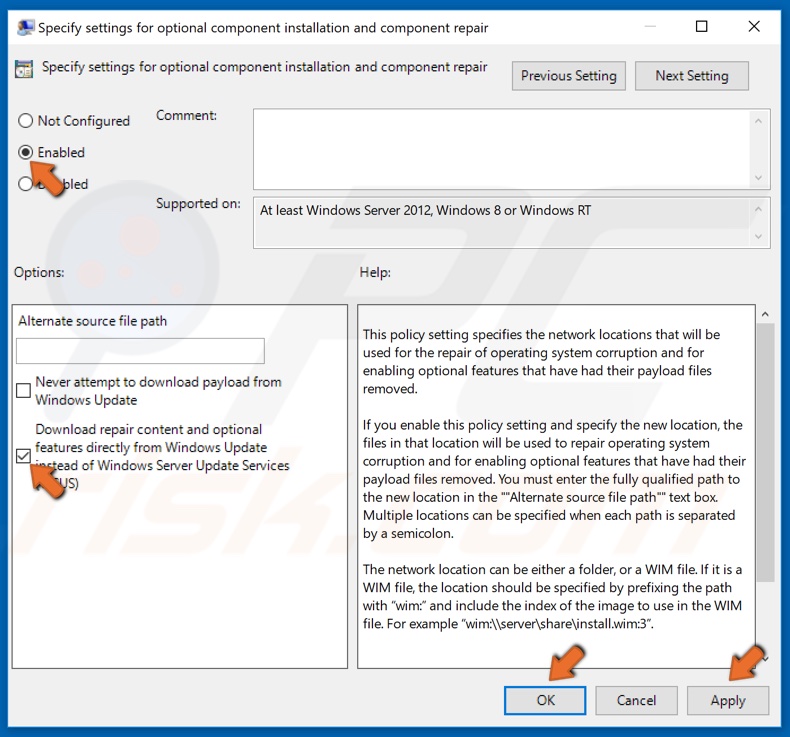
6. At the top-right of the window, select the Enabled option.
7. Then, mark the Download Repair Content and options features directly from Windows Update instead of Windows Server Update Services (WSUS) checkbox.
8. Click Apply and click OK to save the changes.
[Back to Top]
Сообщение об ошибке с кодом 0x8007000d может появляться в различных ситуациях: обновление или установка Windows, активация системы, использование отдельных системных инструментов.
В этой инструкции о том, как исправить ошибку 0x8007000d при обновлении Windows 11 или Windows 10, в том числе и при ручной установке обновлений, во время установки системы или её активации, а также о возможных причинах ошибки.
Ошибка 0x8007000d при обновлении Windows
Самый распространенный случай ошибки 0x8007000d — соответствующая ошибка обновления в Центре обновлений или при использовании автономного установщика обновлений. Причиной обычно является поврежденные файлы скачанных обновлений. Для быстрого решения можно использовать следующие шаги:
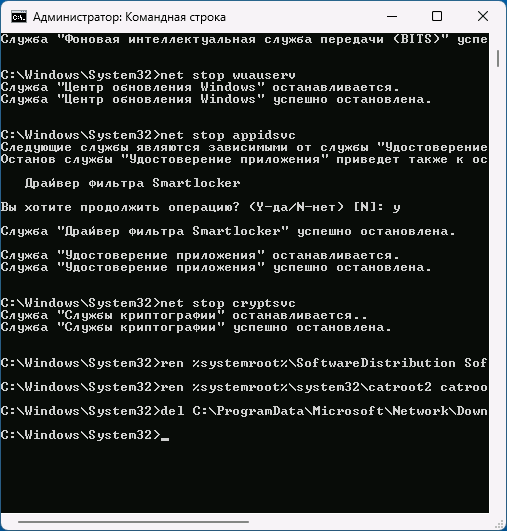
- Запустите командную строку от имени администратора (для этого можно начать набирать «Командная строка» в поиске на панели задач, затем нажать правой кнопкой мыши по результату и выбрать нужный пункт меню).
- По порядку введите следующие команды, нажимая Enter после каждой:
net stop bits
net stop wuauserv
net stop appidsvc
net stop cryptsvc
ren %systemroot%\SoftwareDistribution SoftwareDistribution.bak
ren %systemroot%\system32\catroot2 catroot2.bak
del C:\ProgramData\Microsoft\Network\Downloader\qmgr*
net start bits
net start wuauserv
net start appidsvc
net start cryptsvc

- Перезагрузите компьютер и выполните скачивание обновлений в Центре обновлений повторно, затем попробуйте выполнить их установку.
Если предыдущий вариант не помог, причиной могут оказаться поврежденные системные файлы, чтобы устранить ошибку:
- Запустите командную строку от имени администратора.
- По порядку выполните следующие две команды (процесс их выполнения может занять продолжительное время, и они могут «зависать», наберитесь терпения):
dism /online /cleanup-image /restorehealth
sfc /scannow

- Перезагрузите компьютер, затем проверьте, была ли решена проблема.

Если обновление выполняется через Центр обновлений и вы получаете сообщение об ошибке с указанным кодом, либо файл обновления скачан со стороннего сайта, используйте официальный каталог обновлений Майкрософт для загрузки файла обновления и его ручной установки: в поле поиска введите KB-номер обновления, скачайте нужную версию файла и запустите его.

Обычно один из предложенных способов решает проблему. Однако, если это не сработало, попробуйте дополнительные варианты из инструкции Способы исправить ошибки Центра обновления Windows.
При установке
Следующий распространенный вариант — ошибка 0x8007000d при установке Windows с флешки, а иногда при запуске установки из уже запущенной системы. Для первого случая наиболее частая причина — повреждение файлов на накопителе или невозможность их чтения по какой-либо причине.
Основные способы исправить ошибку при чистой установке ОС с флешки:
- Попробуйте использовать другой USB-накопитель для создания загрузочной флешки.
- Загрузите ISO-образ системы из другого источника, лучше всего — с официального сайта Майкрософт.
- Попробуйте использовать другие разъемы USB, например 2-й версии вместо 3-й или наоборот. В случае ПК используйте разъемы на задней панели системного блока.
Если эта же ошибка появляется при установке Windows 11/10 «внутри» уже запущенной системы, оптимальным вариантом будет запуск чистой установки путем загрузки с USB-накопителя. Если этот вариант не подходит, попробуйте:
- Выполнить проверку целостности и восстановление системных файлов с помощью команд
dism /online /cleanup-image /restorehealth
sfc /scannow
- Если установка выполняется с использованием образа ISO со сторонних сайтов, использовать оригинальный образ системы.
- При наличии сторонних антивирусов на компьютере — временно отключить их.
При активации
Ошибка 0x8007000d при активации Windows 11/10 может быть вызвана различными причинами, но чаще всего в наших реалиях возникает при активации «неофициальными» методами, а причиной может быть:
- Неработоспособность сервера активации, если используется ручная активация с использованием альтернативных серверов.
- Антивирус — как сторонний, так и встроенный Microsoft Defender.
Решение для этой ситуации — поискать альтернативные методы.
В случае лицензионной Windows и ошибках активации в ней, причинами могут быть:
- Временная недоступность серверов активации (если до этого с активацией всё было в порядке), как из-за проблем на стороне Майкрософт, так и по причине использования VPN, прокси, стороннего файрволла, утилит для блокировки/отключения функций телеметрии Windows.
- Повреждение системных файлов Windows, как и в предыдущих случаях, попробуйте выполнить команды восстановления в командной строке, запущенной от имени администратора, после чего перезагрузить компьютер:
dism /online /cleanup-image /restorehealth
sfc /scannow
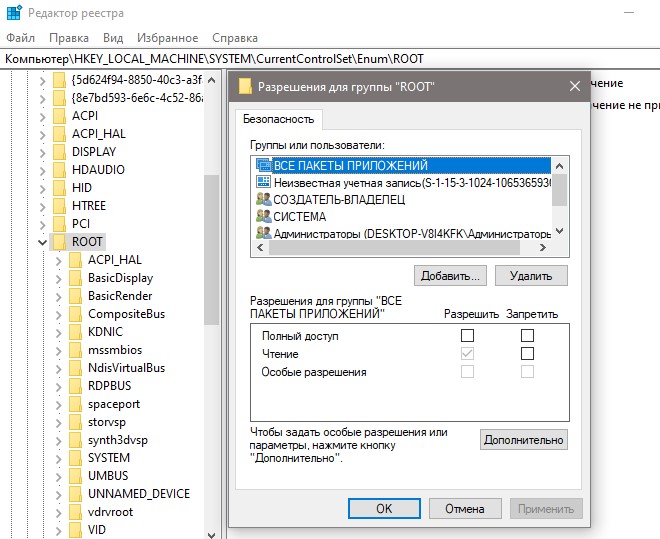
- Неправильные разрешения для раздела реестра
HKEY_LOCAL_MACHINE\SYSTEM\CurrentControlSet\Enum\ROOT
и его подразделов. Возможное решение (причина маловероятна и если вы не уверены в своих действиях, лучше не менять разрешения): вручную предоставить полный доступ к разделу для группы «СИСТЕМА», подробнее на тему: Как стать владельцем раздела реестра в Windows.
В завершение — некоторые дополнительные возможные причины и подходы к исправлению ошибки 0x8007000d в различных ситуациях, если предыдущие варианты не сработали:
- Ранее случалось, что рассматриваемая ошибка при установке обновлений в Центре обновлений была вызвана проблемами со стороны Майкрософт, которые затем были решены. Если вы получаете сообщение об указанной ошибке при установке одного конкретного обновления, а действия из первой части инструкции не помогли, может иметь смысл подождать несколько дней, не предпринимая каких-либо дополнительных действий.
- При появлении ошибки после каких-либо недавних обновлений, модификации системы, установки программ, можно попробовать использовать точки восстановления системы на дату, когда проблема не наблюдалась.
- Иногда причиной ошибки 0x8007000d при установке обновлений или активации оказываются сторонние службы и фоновые приложения. Проверьте, появляется ли ошибка, если использовать режим чистой загрузки Windows.
- Вы можете переустановить Windows, исправив большинство ошибок и не затрагивая пользовательские программы и данные: для этого достаточно смонтировать образ Windows (правый клик по файлу ISO — Подключить) и запустить файл setup.exe с него.

- Ошибка 0x8007000d в процессе установки обновлений или операционной системы обычно говорит о повреждении данных в каких-либо из используемых файлов. Иногда причиной оказываются выходящие из строя накопители или ошибки оперативной памяти. Это редкий случай, но проверка оперативной памяти и диска на ошибки не будет лишней.

Надеюсь, один из предложенных вариантов был результативен в вашем случае. Буду благодарен, если вы сможете оставить комментарий о том, при каком процессе вы столкнулись с рассмотренной ошибкой и что сработало для её исправления: эта информация может быть полезной другим пользователям.
Error 0x8007000d is an update-related issue in Windows and it typically occurs when you are upgrading Windows to its latest version i.e. Windows 11. Recently, several users reported facing this error code when they installed the latest cumulative update KB5031356 on their systems.
You may sometimes succeed in initiating the upgrade via Windows Update. However, this will either fail or get stuck at a certain percentage. Since you are here, you must have faced this issue and are not able to install or even upgrade to the recent OS Build version. This prevents all updates from installing on Windows including non-security or optional updates.
What causes Update Error 0x8007000d?
This update error 0x8007000d occurs when either the system files or folders have been corrupted. Corrupt files or stored caches in the Microsoft Store may also result in similar error codes. You may attempt the SFC and DISM tools to find and repair file corruption within your system.
Purge Windows Cache folders to solve the cache problems within SoftwareDistribution and catroot2 folders. If this error persists even after applying these fixes, go for troubleshooting Windows Update or Reset Update Components. Let’s explore these tweaks in more detail –
Update error code 0x8007000d Fixes
To solve the Update error 0x8007000d on Windows 11/10, try the following suggestions –
1] Run Windows Update Troubleshooter
Windows Update, in general, fails due to corrupt Windows update components. Since bugs and errors are pretty common in Windows 10 OS, the company provides an essential tool that works to minimize such issues. Here’s how to run the troubleshooter –
Windows 11:
- Press Windows + X, and select Settings.
- Navigate to the below path inside Settings –
System > Troubleshoot > Other troubleshooters
- Locate Windows Update, and hit the Run button available on its right end.

- Click Next and follow the on-screen instructions.
- As soon as this troubleshooting task is completed, restart your PC.
Sign back into your device again and check if this resolves the update error 0x8007000d on your Windows PC.
Windows 10:
- First of all, launch the Settings app by pressing Windows + I.
- Select Update & Security and click Troubleshoot on the right pane.
- Find and click on Additional troubleshooters next.
- On the right pane, you will find an option to Windows Update.
- Well, click on it once and hit Run the troubleshooter.

- The repairing task begins immediately afterward.
Restart your PC when this troubleshooting method is completed.
2] Scan and Repair Missing/Corrupt System Files
The presence of corrupt/damaged system files in Windows may also lead to an error code 0x8007000d. To counter this, one may attempt the System File Checker.
Running this command-line utility program scans the entire PC for outdated files and repairs the same (if exists any). Here’s how to proceed –
- Press Win + R to invoke the Run dialog.
- Type cmd at the void and simultaneously press Ctrl + Shift + Enter keys to launch the Command Prompt.
- On the User account control window, tap Yes to go ahead.
- Now, type
sfc/scannowon the elevated prompt and press the Enter key.

- This process will take a few minutes to complete, so wait accordingly.
- Once over, Reboot the Windows 10 device and check whether this solves the update error 0x8007000d or not.
3] Initiate a DISM scan
Sometimes the SFC scan fails to fix the underlying causes. In such cases, one should run the Deployment Image Servicing and Management in-built tool to repair the corrupt files. Here is the complete procedure –
- Go to the Search and type Command Prompt.
- Right-click on the top result and choose Run as Administrator.
- If the UAC window comes into view, tap Yes.
- Copy/paste the following code near the blinking cursor and hit Enter –
dism.exe /online /cleanup-image /scanhealth

- The execution process begins immediately afterward, so wait accordingly.
- When the scanning/repairing completes successfully, execute the below code –
dism.exe /online /cleanup-image /restorehealth
- This command too will take a few minutes to finish. When this completes and reports fixing the underlying cause, Restart the PC.
- Now, try upgrading the Windows 10 OS without receiving the error code 0x8007000d.
4] Enable Windows Update using Group Policy Editor
Sometimes, the disabled update components may cause this error 0x8007000d while performing an OS Build upgrade. If this indeed is the case, enable Windows Update components via Policy Editor. Here are the essential steps to work on –
- Jointly press the Win and R keys to open the Run dialog.
- Type
gpedit.mscat the void and press OK to start the Group Policy Editor. - On the upcoming window, reach out to the following path –
Computer Configuration/ Administrative Templates/ System
- Scroll down and locate the “Specify settings for optional component installation and component repair” policy.

- Once you find this policy, double click the same to open the respective window.
- Here, check the Enabled radio button and hit OK to save the recent changes.

- Finally, Restart your Windows and check for Updates from the next login.
5] Manually download standalone packages and install them on your PC
Microsoft uploads the standalone packages for each and every cumulative update that came for either Windows 11 or 10 OS. All of them remain available on the Update catalog website. Go visit this site, and look for the latest patch update number that came for your version of Windows 10. Windows 11 users may visit this website instead.
Now that you have the KB number with you, copy/paste the same into the Microsoft update catalog’s search field. Press Enter and you will find a list of updates corresponding to different system architectures. Pick the one that suits your system configuration and hit the download button.
Click the top link on the succeeding window and the patch file starts downloading. Double-click on the downloaded setup file and the error 0x8007000d resolves automatically thereafter.
Here’s a detailed description of how to download and install updates manually into your system.
6] Manually Reset the Windows Update Components
If none of the above solutions resolve the error 0x8007000d, you should try to manually reset the Windows update components.
To perform this task, you need to start Windows Console as an Admin and execute a few command lines. Here’s how to proceed –
- Right-click anywhere on the taskbar and select Task Manager.
- When this desktop app comes into view, click File followed by Run new task.
- Under the text box, type cmd (Admin) and hit the OK button.
- Now, run each of the below codes separately. They are meant to stop the essential core services –
net stop bits
net stop wuauserv
net stop appidsvc
net stop cryptsvc
- Subsequently, remove the qmgr*.dat from Windows 10 OS executing the command line –
Del “%ALLUSERSPROFILE%\Application Data\Microsoft\Network\Downloader\qmgr*.dat- Afterward, navigate to the System32 folder running the below code –
cd /d %windir%\system32
- Now, copy/paste the following codes to re-register .dll files. They, in turn, reset the corrupted Windows Update components. Don’t forget to press Enter at the end of each command line –
regsvr32.exe atl.dll
regsvr32.exe urlmon.dll
regsvr32.exe mshtml.dll
regsvr32.exe shdocvw.dll
regsvr32.exe browseui.dll
regsvr32.exe jscript.dll
regsvr32.exe vbscript.dll
regsvr32.exe scrrun.dll
regsvr32.exe msxml.dll
regsvr32.exe msxml3.dll
regsvr32.exe msxml6.dll
regsvr32.exe actxprxy.dll
regsvr32.exe softpub.dll
regsvr32.exe wintrust.dll
regsvr32.exe dssenh.dll
regsvr32.exe rsaenh.dll
regsvr32.exe gpkcsp.dll
regsvr32.exe sccbase.dll
regsvr32.exe slbcsp.dll
regsvr32.exe cryptdlg.dll
regsvr32.exe oleaut32.dll
regsvr32.exe ole32.dll
regsvr32.exe shell32.dll
regsvr32.exe initpki.dll
regsvr32.exe wuapi.dll
regsvr32.exe wuaueng.dll
regsvr32.exe wuaueng1.dll
regsvr32.exe wucltui.dll
regsvr32.exe wups.dll
regsvr32.exe wups2.dll
regsvr32.exe wuweb.dll
regsvr32.exe qmgr.dll
regsvr32.exe qmgrprxy.dll
regsvr32.exe wucltux.dll
regsvr32.exe muweb.dll
regsvr32.exe wuwebv.dll
- Next, use the below commands to reset the network services –
netsh winsock reset
netsh winhttp reset
- Once over, restart the services that you have stopped initially. To do so, use the below codes –
net start bits
net start wuauserv
net start appidsvc
net start cryptsvc

- At last, Reboot your system so that the changes made come into effect after the next login.
I hope the above fixes work to address the update error 0x8007000d on your computer. If you have any queries or suggestions related to this article, ask us in the comment section.
Installing the latest Windows 10 updates is one of the best ways to ensure your device is protected against the latest cyber threats. Microsoft rolls out new security updates every month on Patch Tuesday, as well as two major OS updates twice a year. But error code 0x8007000d may sometimes prevent you from updating your OS. Let’s explore what you can do to troubleshoot this problem.
Contents
- 1 How Do I Fix Windows 10 Error 0x8007000d?
- 1.1 Reset Windows Update Components
- 1.2 Run the Windows Update Troubleshooter
- 1.3 Use the Windows 10 Update Assistant
- 1.4 Disable Background Programs
- 1.5 Uninstall Mixed Reality
- 1.6 Conclusion
Reset Windows Update Components
Reset the Software distribution folder where your computer saves the temporary update files.
- First, type cmd in the Windows Search bar and right-click on the Command Prompt app. Select Run as administrator.
- Then, run the following commands one by one and press Enter after each one:
net stop bitsnet stop wuauservnet stop appidsvcnet stop cryptsvcDel "%APPDAATA%\Microsoft\Network\Downloader\*.*"rmdir %systemroot%\SoftwareDistribution /S /Qrmdir %systemroot%\system32\catroot2 /S /Qregsvr32.exe /s atl.dllregsvr32.exe /s urlmon.dllregsvr32.exe /s mshtml.dllnetsh winsock resetnetsh winsock reset proxynet start bitsnet start wuauservnet start appidsvcnet start cryptsvc
- Restart your computer and check for updates again.
Run the Windows Update Troubleshooter
- Go to Settings and select Update and Security.
- Click on the Troubleshoot option (left pane).
- On the right pane, scroll down to Additional troubleshooters.
- Run the Windows Update troubleshooter and check the results.
If error 0x8007000d persists, relaunch Command Prompt with admin rights and run the DISM.exe /Online /Cleanup-image /Restorehealth command. Press Enter and wait until the machine completes the process. Then run the sfc/scannow command. Restart your computer and try to install the problematic updates again.
Use the Windows 10 Update Assistant
- Launch the Control Panel, and go to Programs and features.
- Click on View installed updates and locate the problematic update.
- Select it and hit the Uninstall button.
- Then go to C:/windows/softwaredistribution/download and delete all the files and directories. Restart your computer.
- Download the Windows 10 Update Assistant from Microsoft.
- Launch the assistant to make sure you’re running the latest Windows 10 version. Let the device install the newest updates.
- Note: During the install, between 60-85%, the progress may slow down. Have a little patience, don’t restart the device.
- Restart your computer when prompted.
- Once the assistant has finished updating your machine, go back to Update and Security and check for updates again.
Disable Background Programs
Make sure to disable all the programs running in the background, including your antivirus and firewall. Some of these programs may interfere with Windows Update preventing it from installing the latest updates.
Launch the Task Manager, click on the Processes tab, right-click on the program you want to close, and select End task.
Disconnect external hardware and check for updates again. Don’t forget to re-enable your antivirus and firewall protection after you installed the updates.
Alternatively, you can also clean boot your computer and use only a limited set of drivers, processes, and programs.
Uninstall Mixed Reality
Many users solved this problem by uninstalling Mixed Reality. While it’s still unclear how Mixed Reality could interfere with WU, it’s worth giving this workaround a try.
Go to Settings, select Apps, and click on the Mixed Reality Portal. Hit the Uninstall button to remove the app. Restart your computer and check for updates again.
Conclusion
To sum up, error code 0x8007000d indicates the Windows Update files got corrupted, and the tool could not install the latest OS updates. Reset the Windows Update components, and run the Update troubleshooter to fix the problem. If the issue persists, download the Windows 10 Update Assistant. Did you find other solutions to fix error 0x8007000d? Let us know in the comments below.
Разберемся, как решить проблему с ошибкой, которая возникает при попытке установить Windows Server, Windows 7 или Windows 10 и узнаем причину ее возникновения.
В первую очередь сравним, сколько весит образ установочного файла и итоговый объем занятой памяти на usb-флешке. Видим, что на флешке не все файлы, отсюда и возникшая ошибка «Windows не удается открыть необходимый файл G:Sourcesinstall.wim . Убедитесь , что имеются все файлы , необходимые для установки, и перезапустите установку. Код ошибки 0x8007000D«.
Теперь разберемся почему мы видим данное сообщение.
Снова перейдем к нашей USB-Flash и посмотрим в свойствах дисках тип файловой системы: FAT32. Файловая система FAT32, в отличии от NTFS имеет ограничение на размер файла в 4 Гб, из-за чего у нас и отличается размер исходного образа от записанного на флешку и проявляется ошибка.
Как решить проблему с ошибкой 0x8007000d?
Скорее всего загрузучную флешку вы делали с помошью программы Ultra ISO. Данная программа всегда форматирует флешку под файловую систему FAT32. Рекомендую в данном случае воспользоваться программой Rufus, в которой вы можете задать тип файловой системы NTFS и создать загрузочную флешку.
- Remove From My Forums
-
Question
-
Hello,
I have tried severely to install new window on my laptop from boot-able usb drive but it keeps on saying «Windows cannot open the required file D:SourcesInstall.wim. Make sure all files required for installation are available and restart the
installation. Error Code: 0x800700D». What I do to resolve the problem. Please I need help.-
Edited by
Isaac Mintah
Sunday, May 14, 2017 4:01 PM
-
Edited by
All replies
-
Hi,
Maybe you use corrupted ISO and it’s the most possible reason.
Download again new iso, and use utility like windows usb tool to create usb bootable and install windows
https://www.microsoft.com/fr-fr/download/windows-usb-dvd-download-tool
Merci de marquer comme réponse les sujets qui vous ont permis d’avancer afin que cela puisse être bénéfique aux personnes qui rencontrent le même problème.
-
Edited by
matteu31400
Sunday, May 14, 2017 6:07 PM -
Proposed as answer by
Alvwan
Tuesday, May 16, 2017 9:31 AM
-
Edited by
-
Hello,
I have tried severely to install new window on my laptop from boot-able usb drive but it keeps on saying «Windows cannot open the required file D:SourcesInstall.wim. Make sure all files required for installation are available and restart the
installation. Error Code: 0x800700D». What I do to resolve the problem. Please I need help.Looks like corrupted or incorrect way of doing it. Don’t know which version you want to install, but make sure that:
1. .iso image is not corrupt
2. USB key formatted as NTFS (since e.g. install.wim might be >4GB, FAT32 has a max file size)
3. The USB-key install partition is marked Active (using diskpart).That’s actually all you need to do to make it work. (Windows 7/2008R2 and later)
-
Proposed as answer by
Alvwan
Tuesday, May 16, 2017 9:32 AM
-
Proposed as answer by
-
Hi,
Just checking in to see if the information provided was helpful. Please let us know if you would like further assistance.
Best Regards,
Alvin Wang
Please remember to mark the replies as answers if they help.
If you have feedback for TechNet Subscriber Support, contact
tnmff@microsoft.com. -
Problem is your pendrive type is FAT32, so its file capacity maximum is under 4 gb
may be Install.wim file is 4 gb that why you facing this problem
Try to convert your pendrive fat32 to ntfs
-
Changing the USB to NTFS does not fix this issue. I did this and still have the same error. I believe it is the size of the install.wim file and you have to split it into 2 files as it is over 4GB. There are programs that do this, I believe I had to
do this with Server 2012R2 as well.UPDATE: I used DISM to split the file and then I used UltralISO to remove the install.wim file and inject the 2 files I created with dism. Recreated the ISO and then used that to create a bootable USB.
This is now working
-
Edited by
Pam Mc
Thursday, July 30, 2020 7:16 PM
-
Edited by
-
Is there a way you can guide or help me. I fell into the same problem. I’m trying to Bootcamp my Mac to Windows10
- Remove From My Forums
Проблема с установкой из образов
-
Вопрос
-
Добрый день всем!
У меня не первый раз возникает проблема при развертывании Windows Server 2012R2 и по факту уже Windows Server 20016. На старте установки выходит следующее
сообщение:Windows не удается открыть необходимый файл G:Sourcesinstal.wim . Убедитесь , что имеются все файлы , необходимые для установки, и перезапустите установку.
Код ошибки 0x8007000D— Образы скачиваются через центр VLSC. И Internet Explorer’ом и другими браузерами.
— Образ Server 2016 скачивался с сайта майкрософт (Trial)
— Пишу как правило через ULtra USO на флеш носитель (на разные) как «зарузочный жесткий диск»
— Образы скачивались несколько раз, в разное время
— С имеющихся флеш носителей встают все версии клиенсткие и Win7 и 8 без проблем
Прошу помочь разобраться с этой ошибкой, или подсказать где капать ее решение
Ответы
-
Добрый день всем!
У меня не первый раз возникает проблема при развертывании Windows Server 2012R2 и по факту уже Windows Server 20016. На старте установки выходит следующее
сообщение:Windows не удается открыть необходимый файл G:Sourcesinstal.wim . Убедитесь , что имеются все файлы , необходимые для установки, и перезапустите установку.
Код ошибки 0x8007000D— Образы скачиваются через центр VLSC. И Internet Explorer’ом и другими браузерами.
— Образ Server 2016 скачивался с сайта майкрософт (Trial)
— Пишу как правило через ULtra USO на флеш носитель (на разные) как «зарузочный жесткий диск»
— Образы скачивались несколько раз, в разное время
— С имеющихся флеш носителей встают все версии клиенсткие и Win7 и 8 без проблем
Прошу помочь разобраться с этой ошибкой, или подсказать где капать ее решение
Флэшки как отформатированы? Производители часто форматируют их под FAT32, а в этой файловой системе есть ограничение на размер файла — 4GB. Образы установки клиентских Windows в этот размер обычно влезают, а серверных — нет.
Слава России!
-
Помечено в качестве ответа
2 февраля 2017 г. 12:55
-
Помечено в качестве ответа
Кож ошибки 0x8007000d очень обширный и может встречаться в Windows 10 при обновлении, установке и активации системы. В данной инструкции разберем, как исправить код ошибки 0x8007000d в Windows 10 для разных сценариев.
Если ошибка 0x8007000d появляется при установке Windows 10, то это означает, что повреждена установочная флешка или записанные данные на ней. В этом случае, нужно заново создать установочную флешку, желательно на другой носитель, и повторить установку. Также, отформатируйте флешку в формат ntfs, если будет ошибка, что не удалось найти install.wim.
Если вы видите ошибку «Установщик обнаружил ошибку: 0x8007000d. Недопустимые данные«, то обратитесь к данному руководству.
Ошибка 0x8007000d при обновлении Windows 10
Ошибка 0x8007000d при обновлении появляется, если компоненты центра обновления повреждены или имеются поврежденные системные файлы. Разберем пункты, которые должны устранить данную проблему.
1. Запуск SFC и DISM
Запустите командную строку от имени администратора и введите ниже команды по очереди:
sfc /scannow
DISM.exe /Online /Cleanup-image /Scanhealth
DISM.exe /Online /Cleanup-image /Checkhealth
DISM.exe /Online /Cleanup-image /Restorehealth
2. Сброс компонентов WU
Запустите командную строку от имени админа и введите ниже команды по порядку, нажимая Enter после каждой:
net stop bits
net stop wuauserv
net stop appidsvc
net stop cryptsvc
Ren %systemroot%SoftwareDistribution SoftwareDistribution.lol
Ren %systemroot%system32catroot2 catroot2.lol
net start bits
net start wuauserv
net start appidsvc
net start cryptsvc
3. Вручную установить KB
У Майкрософт есть свой каталог обновлений, где можно отдельно скачать патч и двойным кликом его просто установить. Обратитесь к данному руководству по скачиванию и установке отдельных патчей.
4. Обновить при помощи Media Creation Tool
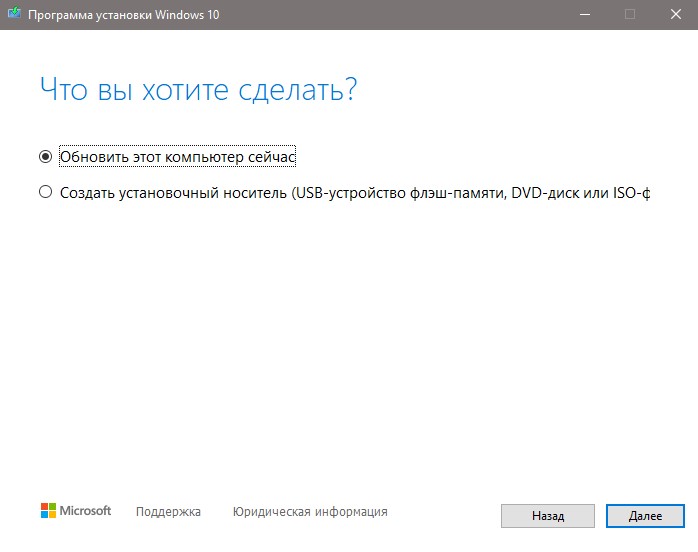
Перейдите на официальный сайт Microsoft и скачайте утилиту нажав на «Скачать средство сейчас«. При запуске утилиты, выберите «Обновить этот компьютер сейчас» и следуйте рекомендациям на экране.
Ошибка 0x8007000d при активации Windows 10
Если ошибка 0x8007000d появляется при активации Windows 10 вводя команды slmgr, то это может быть связано с недостаточным разрешением для корневого каталога.
- Нажмите Win+R и введите regedit, чтобы отрыть редактор реестра. В реестре перейдите по пути:
HKEY_LOCAL_MACHINESYSTEMCurrentControlSetEnumROOT
- Нажмите правой кнопкой мыши по папке ROOT и выберите «Разрешения».
- В группах выделите «СИСТЕМА» и разрешите галочками полный доступ.
Смотрите еще:
- Код ошибки 4,3,2,1: 0x80070005 при обновлении браузера Chrome
- Ошибка 0x8007000e при обновлении функций в Windows 10
- Ошибка 0x80070003 Центра обновления Windows 10
- Исправить ошибку 0x80070005 обновления Windows 10
- Исправить код ошибки 0x80070002 в Windows 10
[ Telegram | Поддержать ]
Ошибка 0x8007000d, возникающая в Windows 7, 8 и 10, говорит о повреждении установочных файлов, их отсутствии или невозможности прочтения. Происходит это по многим причинам, а для исправления ошибки можно воспользоваться другой загрузочной флешкой или диском, а также дополнительно проверить системные файлы.
System File Checker
Начнем с проверки системы встроенной в Windows утилитой System File Checker. Она проверяет системные файлы на целостность, так как именно в случае их повреждения часто выходит ошибка 0x8007000d.
Запустить System File Checker можно через Командную строку от имени администратора. Через команду cmd в окне «Выполнить» (win+R). Командная строка по умолчанию запускается без прав администратора, поэтому лучше открыть ее через «Пуск».
Если у вас Windows 7 или 8, найдите в списке папку «Стандартные», нажмите правой кнопкой мыши на Командной строке и выберите «Запустить от имени Администратора». В операционной системе Windows 10 нужно перейти в «Пуск», найти раздел «Служебные – Windows» и нажать правой кнопкой на Командной строке. Далее выберите «Дополнительно» и нажмите на «Запуск от имени администратора».
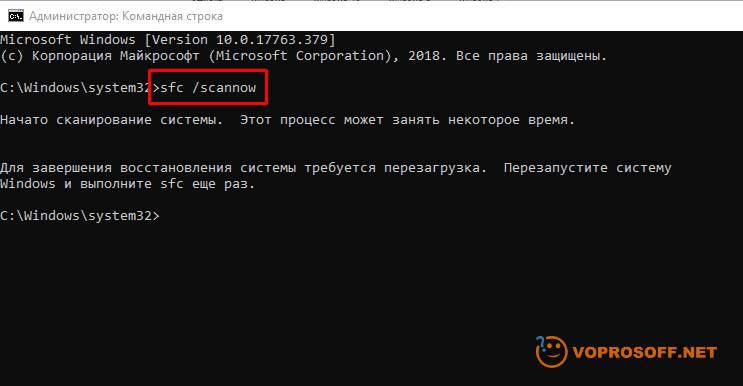
Оказавшись в Командной строке, впишите команду sfc /scannow. Нажмите Enter, после чего начнется сканирование системных файлов (может потребоваться перезагрузка, как на скриншоте), а найденные ошибки и повреждения будут устранены. После завершения проверки попробуйте установить Windows, и проверьте, исчезла ли теперь ошибка 0x8007000d.
Использование другого образа
Если причина ошибки в повреждении образа установочного диска с Windows, попробуйте заново его перезаписать на флешку или диск. Если это не поможет, скачайте в сети новый дистрибутив, заведомо рабочий.
Когда ошибка 0x8007000d появляется при установке системы с диска, попробуйте сделать это с флешки. Перенесите на нее все файлы с диска и попробуйте установить систему. Отметим, что для установки Windows 8 и 10 не требуется создание загрузочной флешки с помощью специализированных программ. Главное при установке Windows войти в Bios (клавиша F2 или Del), и выбрать в разделе Boot загрузку с flash-карты.
Системная утилита DISM
Автор считает, что эти материалы могут вам помочь:
В операционную систему Windows встроена системная программа DISM. Аббревиатура расшифровывается, как «Система обслуживания развертывания и управления ими». Она помогает восстановить образ системы для устранения проблем с установкой или обновлением Windows.
Откройте Командную строку и введите поочередно несколько команд для проверки, сканирования и восстановления образа:
- DISM /Online /Cleanup-Image /CheckHealth
- DISM /Online /Cleanup-Image /ScanHealth
- DISM /Online /Cleanup-Image /RestoreHealth
После ввода каждой из них нужно дождаться завершения процесса проверки или сканирования, прежде чем вводить следующую команду. Когда все три операции будут выполнены, попробуйте установить Windows еще раз.
Каждый раз, когда вы делитесь этой статьей в социальной сети, ее автор становится немного счастливее! Пожалуйста нажмите на одну из кнопок выше!
Дата публикации: 24.02.2017 10:41
Ошибка 0x8007000d при установке windows 7 могут возникать по нескольким причинам. Ниже мы опишем основные причины появление данной ошибки и методы её устранения.
Как устранить ошибку 0x8007000d
Во первых может быть поврежден сам образ установочного диска, можно попробовать перезаписать заново этот образ и если после этого ни чего не изменится, то нужно попытаться скачать другой дистрибутив, желательно с официального сайта Microsoft, так как скаченные с торрентов дистрибутивы, часто бывают не совсем корректно настроенные. Во вторых нужно попробовать заменить кабель / шлейф от жесткого диска, может дело в нём. Часто причина кроется именно в этом. Так же проблема может скрываться в самом CD-rom. Тут нужно либо заменить сам привод, либо попробовать записать образ на флешку и попытаться установить windows с флешки. Если вы ни когда не устанавливали windows с флешки и не знаете, как записать образ на флешку, найти инструкцию можно будет на нашем сайте. Самый простой и быстрый способ записать образ Windows это воспользоваться программой UltraISO. Что бы разобраться с этой программой не требуется высоких знаний, она проста в использование и с ней разберется даже обычный пользователь. Конечно же, перед установкой системы, желательно отформатировать жесткий диск подключив его к другому стационарному компьютеру, и если диск проработал ни один год, то проверить его на ошибки, это можно сделать программой Victoria. Последнее что мы порекомендуем, это зайти в настройки BIOS сначала сбросить его до заводских настроек, затем в меню boot выставить приоритет на жесткий диск, а самим после перезагрузки зайти в меню загрузки и от туда уже выбрать источник загрузки флешку или CD-rom. Это основные причины появления ошибки 0x8007000d при установки Windows.
С сообщениями об ошибках, препятствующими выполнению какого-либо действия, пользователи устройств с Windows сталкиваются достаточно часто. Среди распространённых сбоев, возникающих в различных условиях (в процессе инсталляции, обновления или активации Windows), может повстречаться и код 0x8007000d. В зависимости от сценария и источника появления неисправности, решить её можно разными способами.

Причины ошибки
Наличие ошибки 0x8007000d обычно обусловлено такими факторами:
- нарушение целостности, отсутствие установочных файлов, невозможность корректного прочтения (сбой при инсталляции ОС), что провоцирует ряд разнообразных причин;
- повреждение жёсткого диска, наличие сбойных секторов (при обновлении ОС);
- сбой вызван отсутствием доступа к разделу реестра (при активации ОС);
- несовместимость драйвера (при загрузке драйверов, обновлении).

Ошибка 0x8007000d при установке Windows 10
Если выполнялась установка операционной системы и в определённый момент процесс был прерван сообщением с таким кодом, это значит, что повреждён или загрузочный накопитель, с которого осуществлялась инсталляция, или же находящиеся на нём данные. Тогда сбой устранить несложно, но от юзера потребуются определённые навыки.
Чтобы убрать сбой 0x8007000d, возникающий при установке Windows 10, применяют такие меры:
- Создание нового загрузочного накопителя – флешки или оптического носителя (предпочтительнее применить другой накопитель, чтобы избежать повторения сбоя). Процесс установки должен завершиться корректно.

- Перезапись данных на тот же носитель. Если образ был повреждён изначально, потребуется найти новый, исправный дистрибутив и, записав его на флешку, снова попробовать установить систему.

СОВЕТ. Лучше скачать образ ОС с подходящей разрядностью с официального ресурса Microsoft, чтобы дистрибутив был гарантированно без изъянов, чего не скажешь о многочисленных сборках с просторов сети.
Ошибка 0x8007000d при обновлении Windows 10
Чаще всего сбой появляется в ходе инсталляции апдейтов Windows и является следствием воздействия различных факторов. Ошибка обновления встречается при нарушении целостности компонентов оснастки «Центр обновления» или повреждении системных данных. Причин её появления немало, а потому применимы различные решения, эффективные при определённых условиях. Разберём подробно, как можно убрать ошибку, возникшую на этапе обновления Windows 10 и препятствующую процедуре.
Запуск инструмента устранения неполадок
Нечасто, но всё же в отдельных обстоятельствах на помощь придёт штатная утилита. Решение заключается в проверке и исправлении выявленных неисправностей. Запустить средство можно следующим образом:
Запуск SFC и DISM
Нередко сбой вызван повреждением файлов системы, поэтому целесообразно проверить их штатной утилитой SFC (System File Checker). Ещё одно встроенное средство, которое будет полезно в исправлении повреждённых данных, – DISM (Deployment Image Servicing and Management). В ходе процесса сканирования ошибочный элемент будет выявлен и исправлен.
Для выполнения задачи поиска и исправления следует проделать следующие шаги:
- запустим Командную строку (администратор), выбрав соответствующий пункт из контекстного меню «Пуск»;

- вводим sfc/scannow и жмём клавишу ввода. Действие запустит процесс сканирования, что займёт некоторое время;

- по завершении сканирования в терминале задаём поочерёдно команды (жмём Enter вслед за каждым запросом):
dism.exe /online /cleanup-image ScanHealth
dism.exe /online /cleanup-image /CheckHealth
dism.exe /online /cleanup-image /RestoreHealth
- закрываем терминал, перезагружаем устройство, после чего пробуем обновить систему.


Применение редактора групповой политики
Если метод выше не помог и система продолжает выдавать ошибку, для её исправления можно применить оснастку «Редактор групповой политики»:
Очищение папки обновлений
Иногда убрать сбой можно, очистив каталог, включающий накопившиеся данные:
Сброс компонентов WU
Этот метод во многих случаях эффективен в устранении 0x8007000d и некоторых прочих проблем обновления.
Сброс компонентов Windows к изначальному состоянию выполняется путём ввода команд в терминале. Помимо Центра обновления, потребуется деактивировать и прочие связанные службы – BITS и службы криптографии. Выполняем следующие шаги:
- открываем Командную строку от имени администратора (например, из меню «Пуск»);
- поочерёдно задаём команды (каждый запрос отправляем клавишей Enter):
net stop bits
 net stop wuauserv
 net stop appidsvc
 net stop cryptsvc
- требуется также удалить qmgr*.dat, введя запрос Del «%ALLUSERSPROFILE%Application DataMicrosoftNetworkDownloaderqmgr*.dat»;
- меняем имена каталогам, куда сохраняются данные обновлений, запуская поочерёдно команды:
Ren %systemroot%SoftwareDistribution SoftwareDistribution.bak
Ren %systemroot%system32catroot2 catroot2.bak
- сбрасываем Winsock, прописав запрос netsh winsock reset;

- запускаем ранее остановленные службы:
net start bits
 net start wuauserv
 net start appidsvc
 net start cryptsvc
- перезагрузим устройство и попробуем обновить ОС. Смотрим, принесли манипуляции результат или нет.


Вручную установить KB
Если неисправность возникла при инсталляции через «Центр обновления Windows» накопительного патча, решить вопрос можно путём его загрузки с ресурса Microsoft и последующей инсталляции.
Чтобы скачивать пакеты, потребуется проделать шаги:
Если название патча неизвестно, в поиске можно ввести версию ОС, например Windows 10, чтобы затем из результатов выдачи выбрать нужный вариант.
Обновить при помощи Media Creation Tool
К обновлениям компонентов применим способ использования свежего образа ISO Windows 10 напрямую или с использованием Media Creation Tool, для чего потребуется его загрузка с ресурса Microsoft, а после старта утилиты следует применить вариант «Обновить этот компьютер сейчас». Дальше остаётся действовать согласно подсказкам на экране.

Альтернативный способ – использование Помощника по обновлению Windows 10.
Чистая загрузка Windows
Код 0x8007000d нередко бывает следствием конфликта компонентов Windows с загружённым пользователем защитным софтом или прочим ПО. Чтобы выяснить это, можно использовать возможность чистой загрузки Windows (только с интегрированными приложениями и оснастками):
Чтобы вернуть Windows в режим обычной загрузки, выполняем обратные действия.
СОВЕТ. Если источник проблемы выявлен, например, в случае блокировки установки новых обновлений антивирусом (или удаления файлов в ходе процедуры), можно отключить его на время или добавить службу в исключение.
Ошибка 0x8007000d при активации Windows 10
Не всегда проходит гладко и активация системы. Сбой 0x8007000d, прерывающий процесс обновления, может появиться также при попытке активировать ОС (в том числе посредством SLMGR – команды slmgr /dlv) либо приложение пакета MS Office. Ошибка появляется, когда не удалось найти файлы активации.
Как исправить ошибку с кодом 0x8007000d, которая не даёт активировать Windows 10:
- первым делом стоит применить штатное средство устранения неисправностей;
- актуален также способ чистой загрузки системы (описан выше);
- вручную назначить разрешения к разделу системной учётной записи.
Так как ошибка 0x8007000d при процедуре активации Windows 10 нередко вызвана неправильно заданными в реестре правами доступа, для её исправления следует исправить настройку.
ВНИМАНИЕ. Работа с системным реестром требует от пользователя определённых навыков, поскольку неправильные правки могут привести к неприятным последствиям. Рекомендуем предварительно сделать копию реестра на случай форс-мажора.
Для исправления ошибки выполняем следующие действия:
- открываем реестр посредством консоли «Выполнить» (Win+R) и запроса regedit;
- идёмпо ветке HKEY_LOCAL_MACHINESYSTEMCurrentControlSetEnumROOT;
- жмём ПКМ по ROOT и выберем «Разрешения…»;
- отмечаем в группах «СИСТЕМА» и в блоке разрешений даём полный доступ, отметив соответствующий пункт;
- применяем правки, перезагружаемся и пробуем снова активировать Windows.

Продукты Microsoft, в частности Windows и программы Office, могут быть также активированы по телефону, чем и можно воспользоваться, если вышеописанные действия не дали результата.
Представленные способы решения ошибки 0x8007000d, возникающей при различных условиях, обычно срабатывают в том или ином случае. Независимо от того, известен ли источник проблемы, пробуйте разные пути решения в соответствии со сценарием появления сбоя.
- Remove From My Forums
-
Вопрос
-
I’m using a USB flash drive to try to install Windows 8 64-bit with tools but it’s failing with this message:
«Windows cannot open the required file E:Sourcesinstall.wim. Make sure all files required for installation are available, and restart the installation. Error code: 0x8007000D»
Do I need to use a DVD-9? I currently don’t have a DVD-9 and using a USB seemed really convenient.
Ответы
-
Thanks for the reply Ben.
I’ve checked the hash using FCIV and it looks fine.
I recreated the bootable USB flash drive by using the following tool
http://www.microsoftstore.com/store/msstore/html/pbPage.Help_Win7_usbdvd_dwnTool and it appears to work fine (although I’m running into the «Select the driver to be installed» problem).I used PowerISO previously which I have just uninstalled. PowerISO appears to create an erroneous bootable USB flash drive.
Now, I’ll look up how to get past this driver issue in the other existing threads.
Thanks all!
-
Помечено в качестве ответа
15 сентября 2011 г. 23:01
-
Помечено в качестве ответа