
Не удалось обнаружить правильно установленный сетевой адаптер — как исправить?
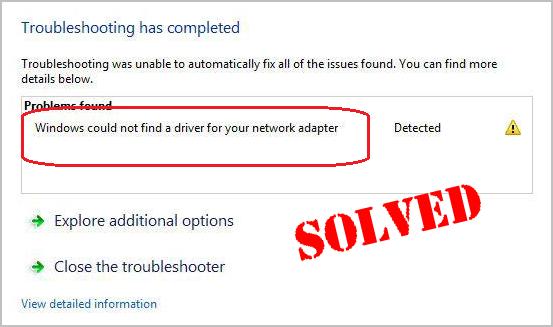
При отсутствии Интернета на компьютере или ноутбуке, как по кабелю, так и по Wi-Fi, запустив встроенное устранение неполадок сети вы можете получить сообщение: «Установите драйвер для сетевого адаптера. Windows не удалось обнаружить правильно установленный сетевой адаптер».
В этой пошаговой инструкции подробно о том, как исправить ошибку «Не удалось обнаружить правильно установленный сетевой адаптер» в Windows 11 и Windows 10, как установить драйвер сетевого адаптера и дополнительная информация, которая может быть полезной при решении проблемы.
Сетевой адаптер в диспетчере устройств

Начать решение проблемы рекомендую с диспетчера устройств и установки драйверов, возможно, не только для Ethernet или Wi-Fi адаптера.
Первые шаги будут следующими:
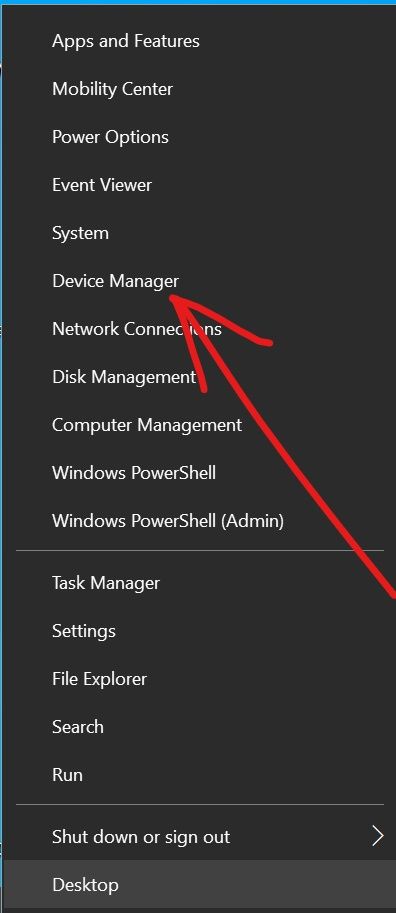
- Нажмите правой кнопкой мыши по кнопке «Пуск», выберите пункт «Диспетчер устройств».
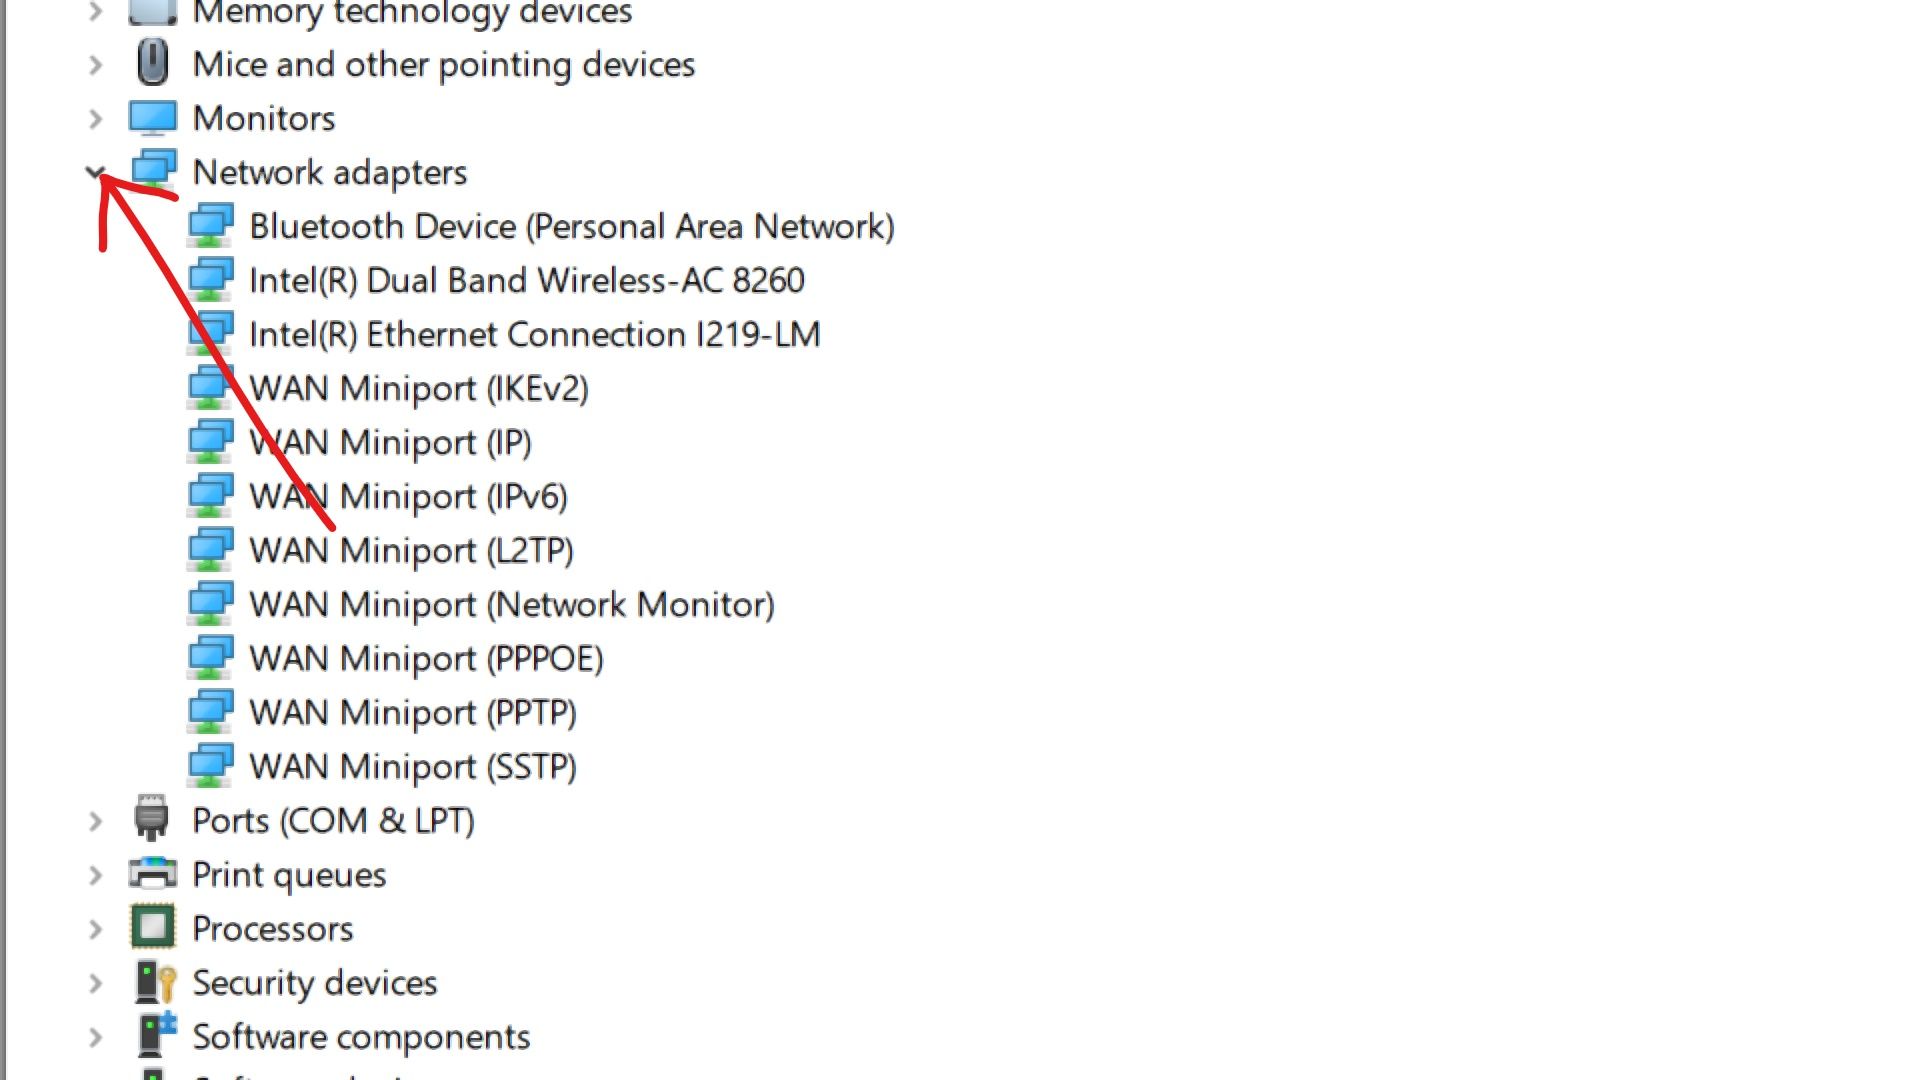
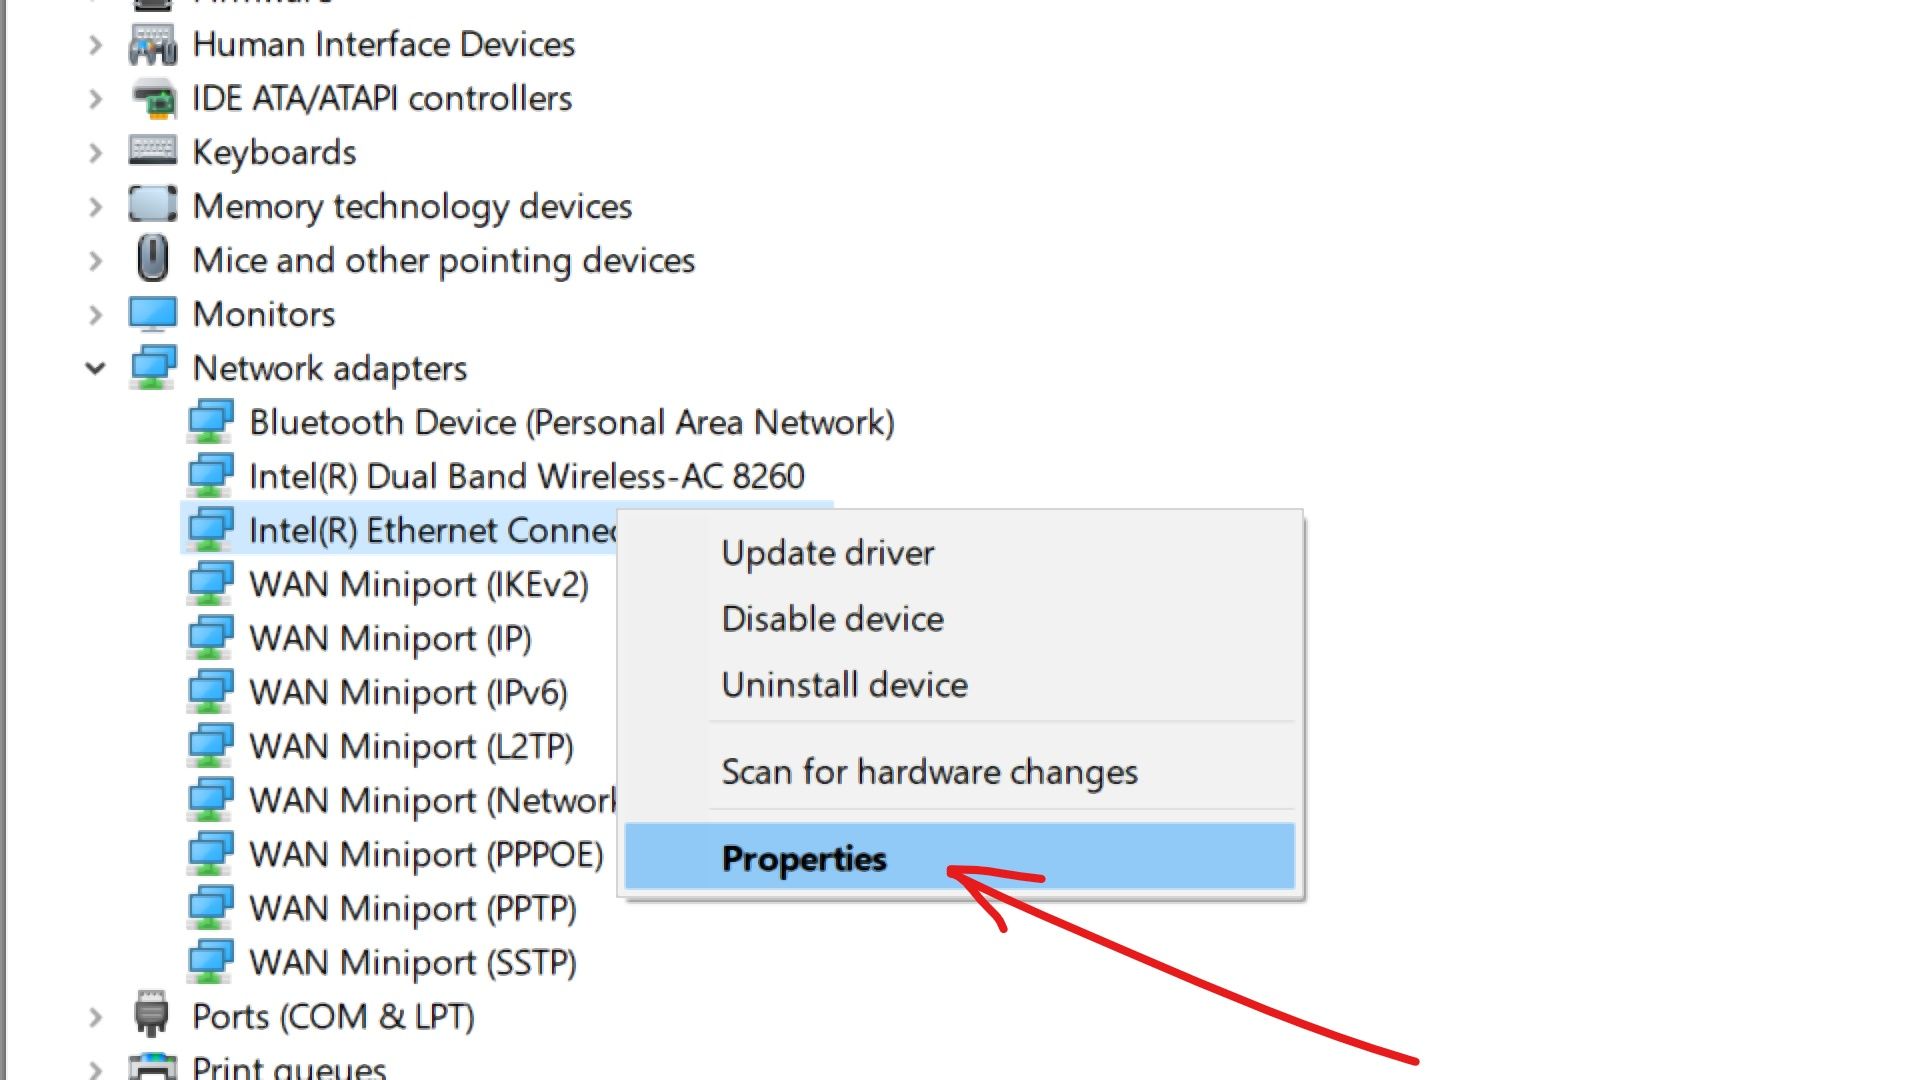
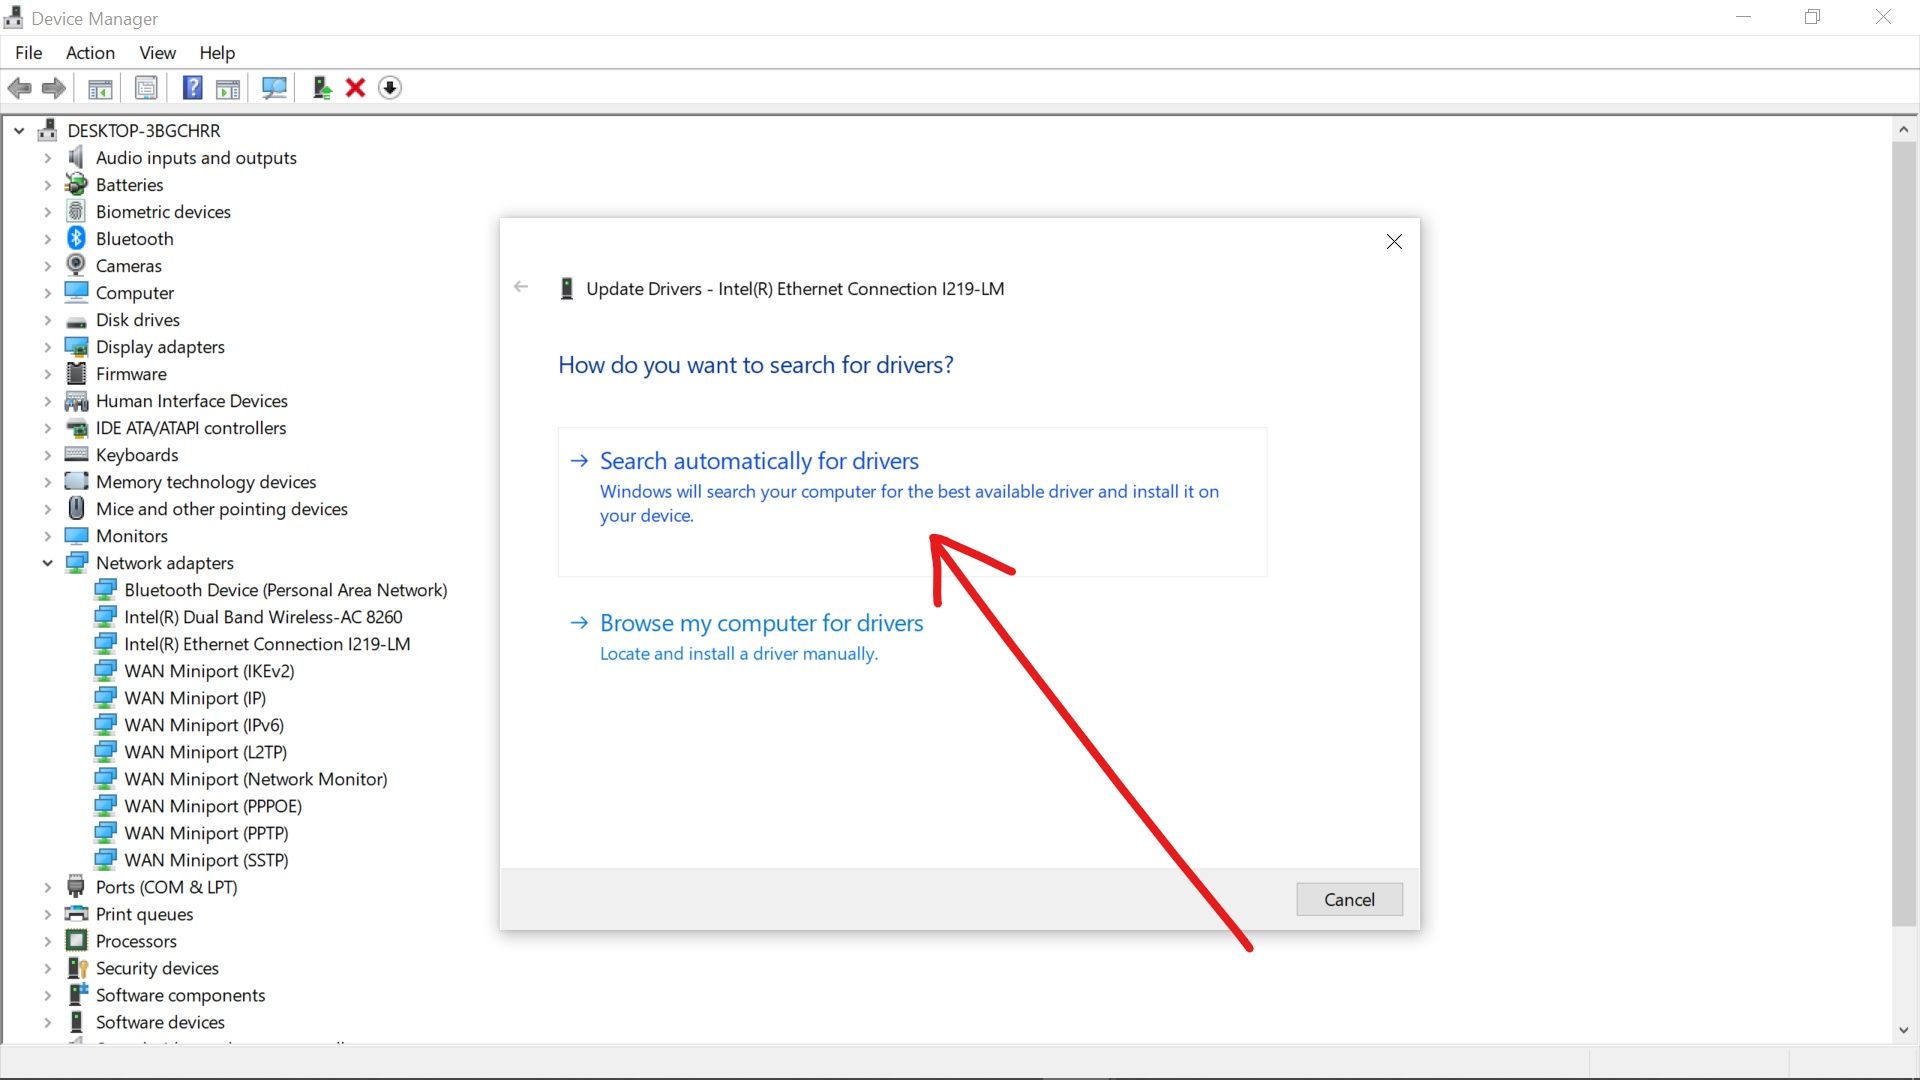
- В диспетчере устройств раскройте раздел «Сетевые адаптеры» и посмотрите, есть ли в списке нужные Ethernet (для подключения кабелем) или Wi-Fi (WLAN) адаптеры. Учитывайте, что адаптеры «WAN Miniport», как на изображении ниже — это не то, что нужно.
- Если адаптеры есть в списке, но рядом со значком адаптера вы видите значок со стрелкой, значит адаптер отключен: нажмите по нему правой кнопкой мыши и выберите пункт «Включить».
- Если на значке адаптера отображается желтый восклицательный знак, дважды нажмите по такому адаптеру и посмотрите код ошибки и её описание на вкладке «Общие» в пункте «Состояние устройства» — этот код может помочь разобраться, в чём дело: выполните поиск по коду ошибки в Интернете.
- Для сетевого адаптера с ошибкой также можно попробовать следующий подход: правый клик — удалить устройство и, после удаления, выбрать пункт «Обновить конфигурацию оборудования» в пункте меню «Действие» диспетчера устройств — иногда это помогает быстро решить проблему.

- При отсутствии нужных сетевых адаптеров в списке, в главном меню диспетчера устройств в пункте «Вид» включите показ скрытых устройств и посмотрите, присутствуют ли какие-либо неизвестные устройства или устройства с ошибками (желтым восклицательным знаком) в других разделах диспетчера устройств. Если таковые есть в наличии — возможно, это и есть нужный сетевой адаптер, далее рассмотрим, как заставить его работать.

Драйверы сетевой карты или Wi-Fi адаптера
При наличии сетевой карты или Wi-Fi адаптера в разделе «Сетевые адаптеры» диспетчера устройств, а также при наличии неизвестных устройств и устройств с ошибками в других разделах, первое, что следует попробовать — вручную установить нужные драйверы. Общий порядок действий:
- Используя другой компьютер или даже смартфон найдите официальную страницу поддержки вашей модели материнской платы (для ПК) или ноутбука. Для этого в любой поисковой системе обычно достаточно ввести «модель_устройства поддержка».
- На странице поддержки вашего устройства найдите раздел для загрузки драйверов, а на нем — нужные драйверы для сетевых адаптеров, которые могут называться: Network Driver, LAN Driver, Ethernet Driver для подключения кабелем, либо Wi-Fi, WLAN, Wireless LAN — для Wi-Fi подключения. Внимание: может оказаться, что на официальном сайте представлены драйверы сетевой карты только для предыдущих версий системы, в этом случае рекомендую скачать их — как правило, они исправно работают и на Windows 11/10.

- Дополнительно рекомендую скачать имеющиеся драйверы чипсета, а для ноутбуков, при наличии — драйверы управления электропитанием (Могут называться: Power Management, ACPI, ATK. Дополнительно имеет смысл загрузить драйверы Intel ME или Management Engine). Иногда при их отсутствии возможны проблемы при включении сетевого адаптера.
- Установите скачанные драйверы в следующем порядке: Чипсет — Управление электропитанием (если были доступны) — Драйвер сетевой карты и/или Wi-Fi адаптера.
- При необходимости, перезагрузите компьютер и проверьте, решило ли это проблему.
- В некоторых случаях, когда сетевой адаптер отображается в диспетчере устройств, но работает неправильно, может помочь следующий подход: нажмите правой кнопкой мыши по сетевому адаптеру, выберите «Обновить драйвер», затем используйте следующие пункты: Найти драйверы на этом компьютере — Выбрать драйвер из списка доступных драйверов на компьютере. Посмотрите, присутствуют ли в списке другие совместимые драйверы (не те, что установлены в текущий момент). При их наличии — попробуйте выбрать, нажать «Далее» и проверить, решило ли это проблемы с сетью и Интернетом после установки драйвера.


Если по какой-то причине загрузить и установить драйверы с официального сайта не удается, вам могут пригодиться способы найти драйвер неизвестного устройства, а также описание использования SDI — программы с открытым исходным кодом для автоматического поиска и установки драйверов.
Включение сетевого адаптера в БИОС/UEFI
При отсутствии любых признаков наличия сетевого адаптера в диспетчере устройств может оказаться, что он отключен в БИОС/UEFI вашего компьютера или ноутбука.
- Зайдите в БИОС/UEFI, на ноутбуке это обычно клавиша F2, на ПК — Del, но бывают и другие варианты: Как зайти в БИОС на компьютере или ноутбуке.
- Найдите опцию для включения LAN Controller, Onboard LAN, Ethernet Controller, Gigabit LAN, Integrated NIC (это варианты пунктов для Ethernet-адаптера).
- Или опцию WLAN, Wireless LAN, Wi-Fi Adapter (для беспроводной сети).

- Установите её значение в «Enabled». Сами параметры включения и отключения сетевых адаптеров могут находиться в разделах: Advanced, Configuration, Chipset, Onboard Devices, Integrated Peripherals, Network Configuration, но возможны иные варианты.

- Сохраните настройки БИОС и перезагрузите компьютер.


Если причина была именно в этом, то после перезагрузки Windows автоматически определит ваше сетевое устройство и установит драйверы для него.
В случае, если предыдущие варианты не помогли решить проблему «Установите драйвер для сетевого адаптера. Windows не удалось обнаружить правильно установленный сетевой адаптер», можно попробовать следующие методы:
- Если проблема появляется после завершения работы и последующего включения, но исчезает, если использовать пункт «Перезагрузка», попробуйте отключить быстрый запуск Windows.
- Выполните сброс сетевых параметров: Как сбросить сетевые настройки Windows 11, Сброс сетевых настроек Windows 10.
- Если проблема появилась недавно, а Windows не переустанавливалась, могут помочь точки восстановления системы на дату, когда всё работало исправно.
Надеюсь, один из вариантов поможет исправить ситуацию: буду рад прочитать о сработавшем решении в комментариях ниже.
You couldn’t search online? Besides, are you seeing the error saying Windows could not find a driver for your network adapter? Don’t worry. You won’t be stuck with it there. Here in this article, you’ll the real fix to solve the problem. Read on to find how…
Try these fixes:
- Modify the Power Management setting of your network adapter
- Update your network adapter driver
Solution 1: Check the power management of your network adapter
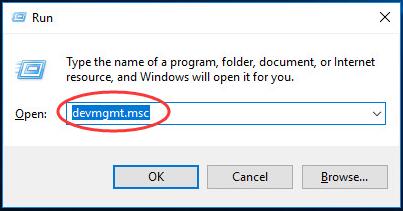
- On your keyboard, press the Windows logo key and R together to bring up a Run box.
- Type devmgmt.msc and press Enter to open Device Manager.

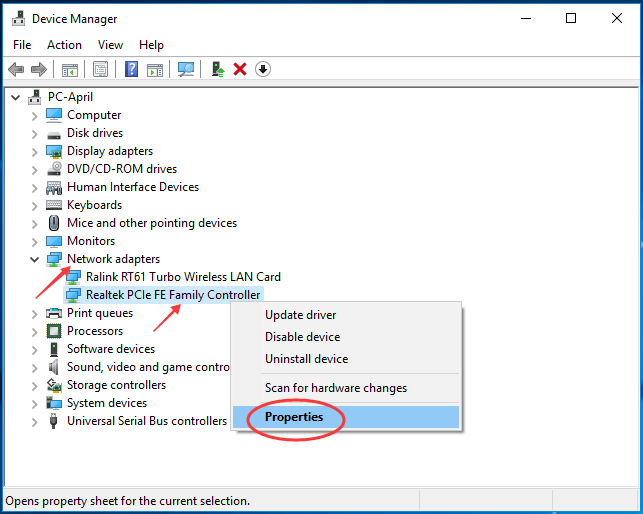
- Double-click Network adapters. Then right-click on your network adapter to select Properties.

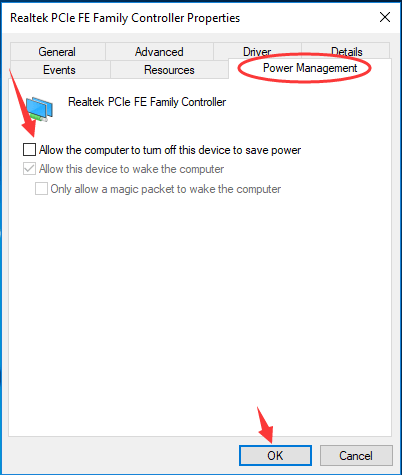
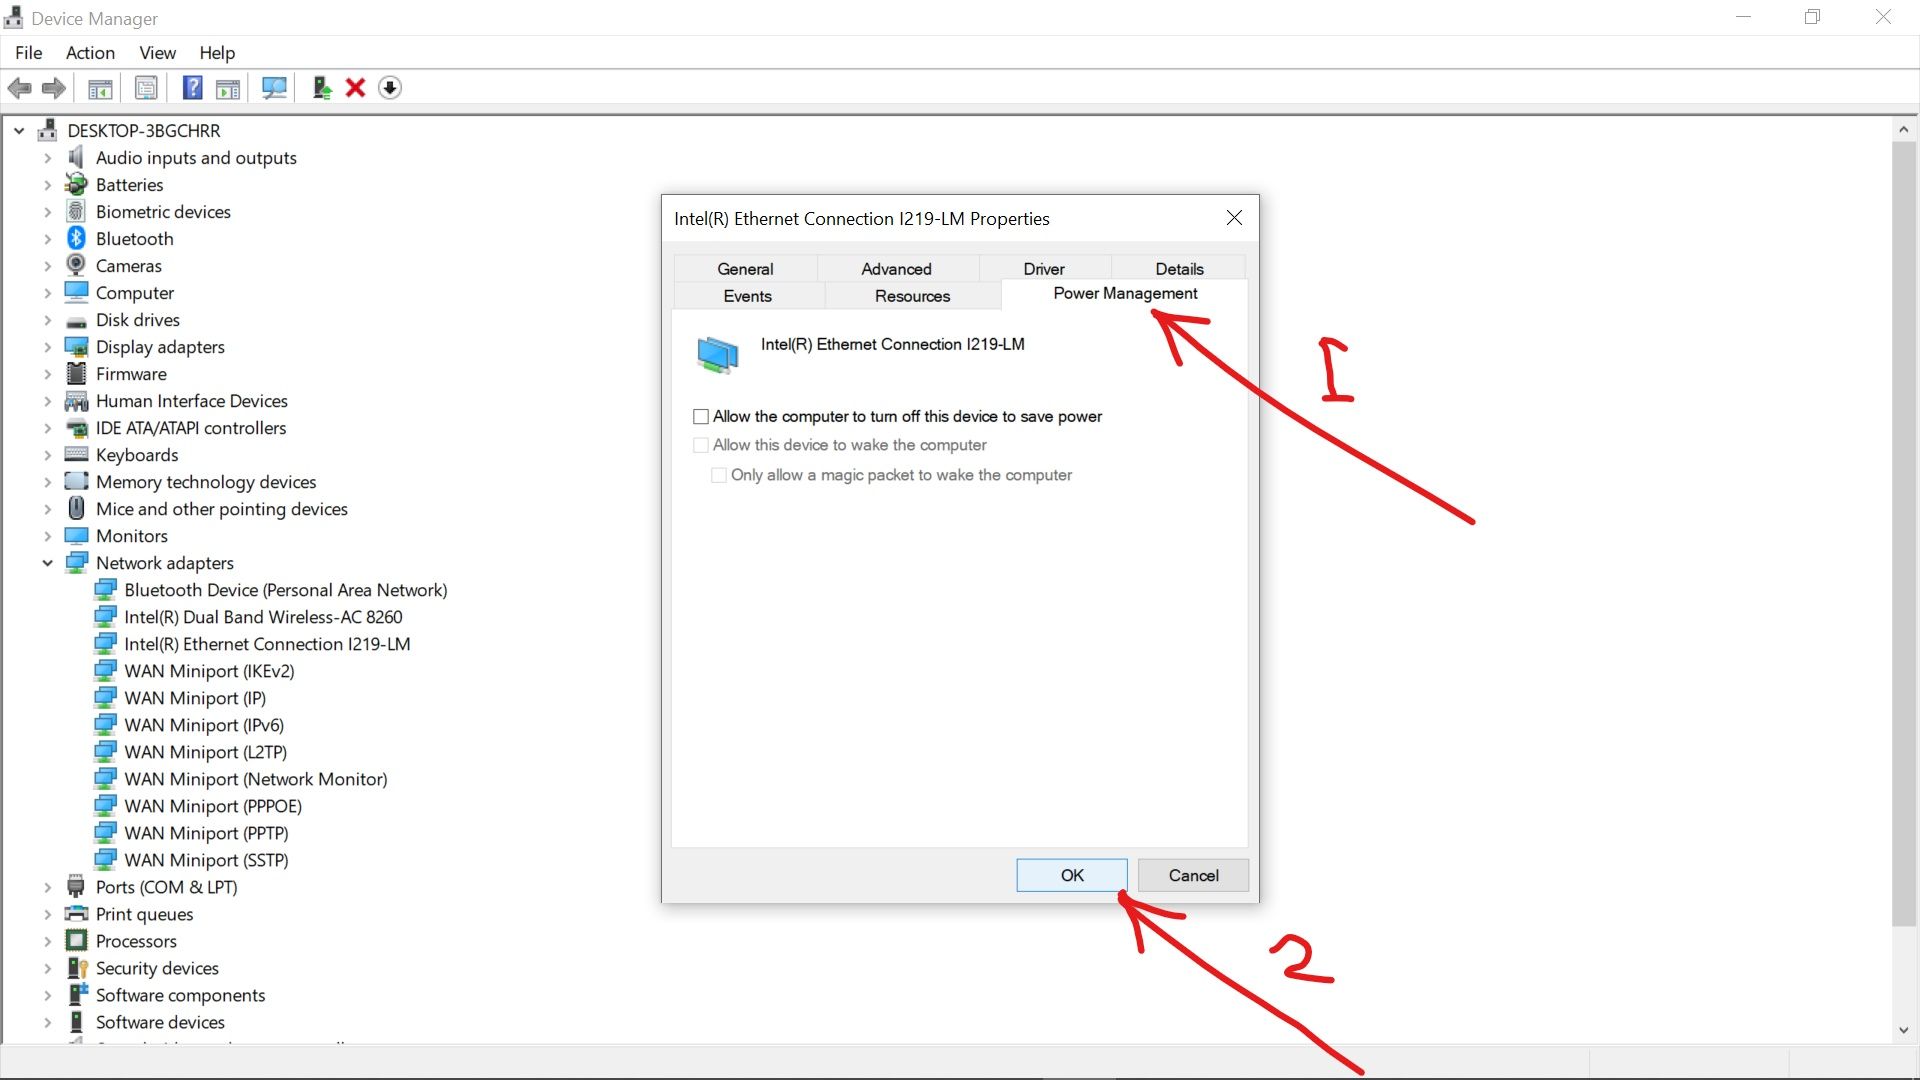
- Choose to view on Power Management pane. Untick the box of Allow the computer to turn off this device to save power. Then click OK to save your setting.

- Run Windows Network troubleshooter again to see if the error still exists.
If the error keeps there, it’s very likely that there was something wrong with your network adapter driver. Go on with the following solution.
Solution 2: Update your network adapter driver
If the system on your computer fails to find a driver for your network adapter, you can download and install one by yourself, or if you don’t have the time, patience or computer skills to update your network adapter driver manually, you can do it automatically with Driver Easy.
Driver Easy will automatically recognize your system and find the correct drivers for it. You don’t need to know exactly what system your computer is running, you don’t need to risk downloading and installing the wrong driver, and you don’t need to worry about making a mistake when installing.
You can update your drivers automatically with either the FREE or the Pro version of Driver Easy. But with the Pro version it takes just 2 clicks:
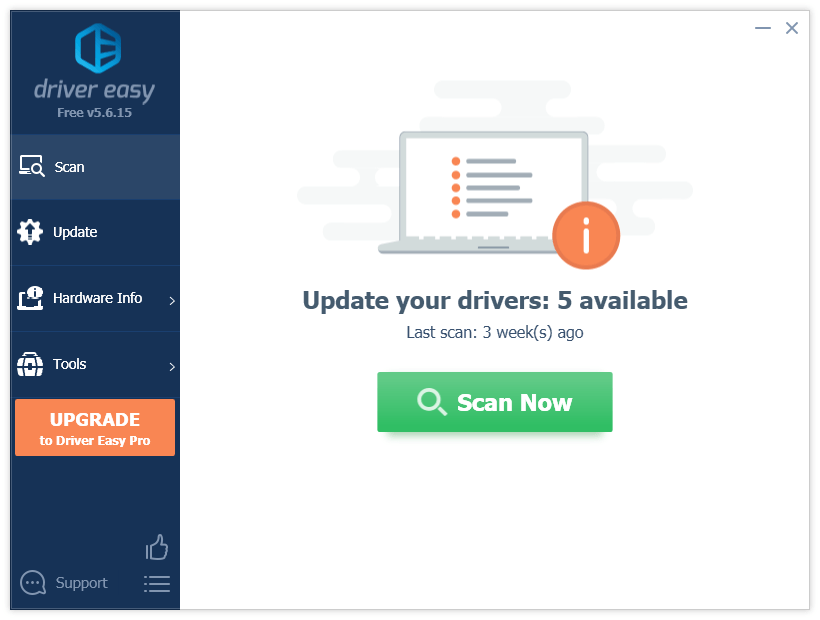
- Download and install Driver Easy.
- Run Driver Easy and click the Scan Now button. Driver Easy will then scan your computer and detect any problem drivers.

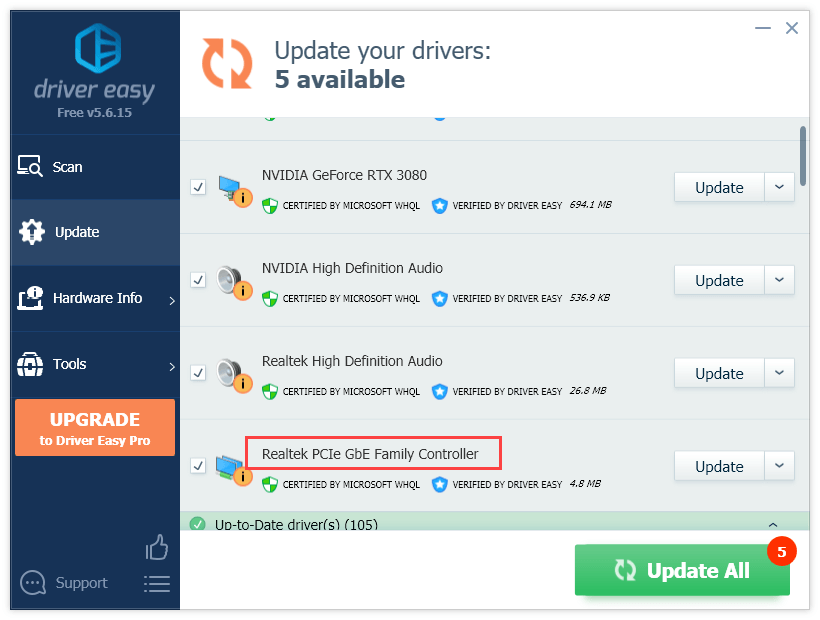
- Click Update next to the device you want to update.
Or click Update All to automatically download and install the correct version of all the drivers that are missing or out of date on your system (this requires the Pro version – you’ll get full tech support and a 30-day money-back guarantee).
It needs a network connection for Driver Easy to help you update all the drivers with one click. But without the Internet, you still can use its Offline Scan feature to update your network adapter drivers.

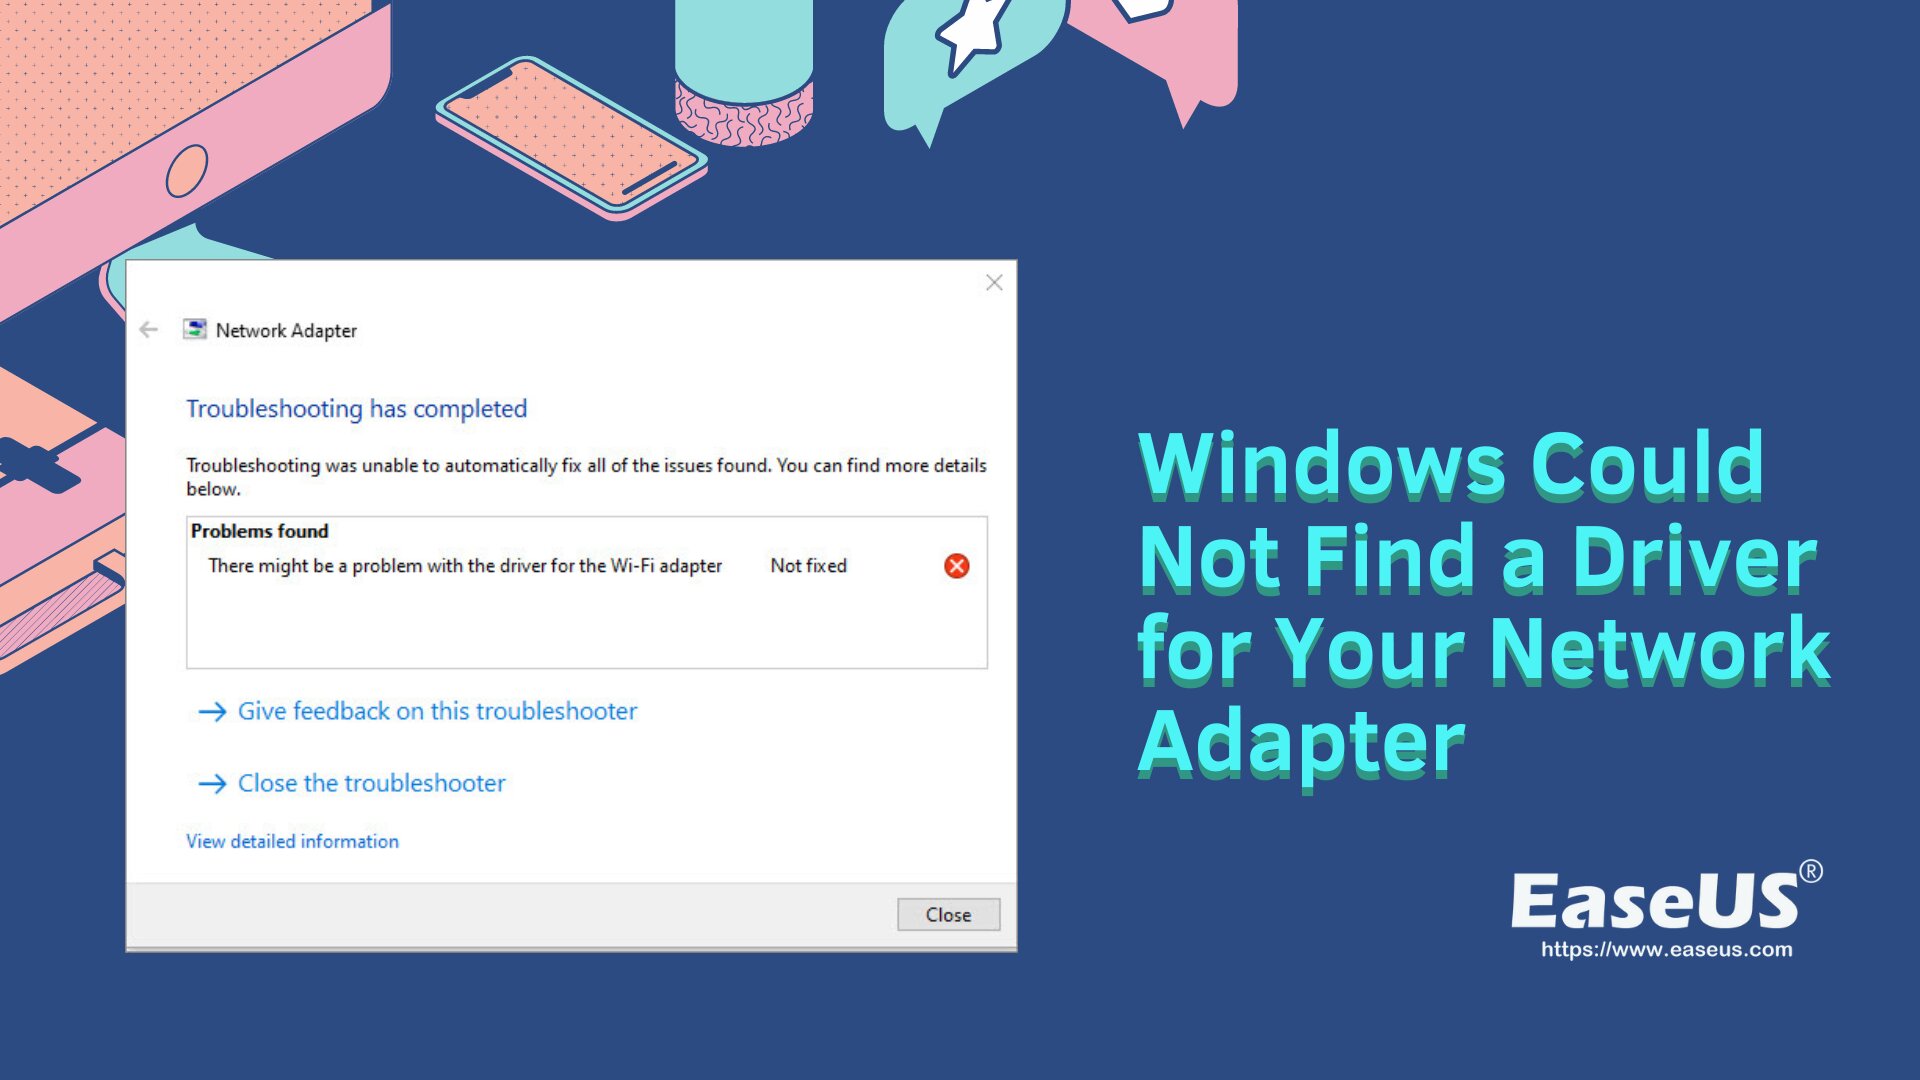
Is your PC unable to connect to the internet? You might get the error “Windows could not find a driver for your network adapter”. A common problem often occurs when your network adapter drivers are out of date.
A network adapter is a fundamental component that enables your PC to connect to the internet. If your computer cannot connect to the available network, chances are that your PC is missing a LAN driver for Windows 11,10,7 or later.
The issue can be easily highlighted by running the troubleshooter. Usually, the error states says, “Windows could not find a driver for your network adapter.”
In this blog, let us take a closer look at how you can resolve this issue easily.
Also Read: A Driver Cannot Load on This Device
Ways To Fix Windows Could Not Find a Driver For Network Adapter
Windows is an advanced operating system with built-in diagnostic capabilities to find and troubleshoot errors. If you are facing an issue related to the network adapter driver on Windows 10 PC, chances are that your computer can fix the problem on its own.
The first and most common way to solve the error is manually installing the required drivers. The error “Windows could not find a driver for your network adapter” only occurs when the driver installed for the adapter is either outdated, corrupted, or it is unavailable to use.
Here’s how you can resolve the issue –
- Press Windows + R on your keyboard to bring up the Run box.
- Type – devmgmt.msc and press Enter to open the Device Manager.
- In the Device Manager, click on the network adapter and select the adapter from the dropdown.
- Right-click on your network adapter and from the context menu, click on→Update Driver.

- This will open up a new window that has two options. One asks you to connect to the internet and find the best available drivers to install. The second one allows you to find the driver file on your PC.
- If you have a downloaded driver file ready, simply click on browse computer.

- Locate the driver software on your hard disk and install it right away. Restart your PC, and it should do the trick for you.
If installing the updated network adapter driver for Windows 10 manually does not crack it for you, there’s another way that you can try; however, it has its ups and downs. What you have to do is completely remove the network adapter from your PC and uninstall the existing drivers.
Also Visit: How to Find Existing Driver Versions on Your Windows PC
This way, when you restart, the computer will automatically install the latest drivers, and your PC might start running properly. Here’s how you can do that!
- Press Windows + R on your keyboard to bring up the Run box.
- Type – devmgmt.msc and press Enter to open the Device Manager.
- In the Device Manager, click on the network adapter and select the adapter from the dropdown.
- Right-click on your network adapter to open the context menu. Click on the Uninstall Device option.

- Remove the network adapter completely by following the onscreen instructions to uninstal the driver.
- On the top of the window, you will find an Action toggle. Click on it and then click on Scan for hardware changes.

- Once the scan is completed, your PC will have automatically reinstalled the adapter.
These are the two ways integrated within the operating system that you can use to rectify the situation with the network controller driver. It is possible that these do not yield the expected results as their use case is somewhat limited.
If you do not get the resolution through these two ways, do not worry as there’s another way to handle the error. Check out the next section to find out more!
Advanced Driver Updater: The Ultimate Fix to Windows Could Not Find a Driver for Network Adapter
Advanced Driver Updater is a tool used to update all the missing drivers from a PC. It works flawlessly with your computer and finds the list of all the drivers that are outdated, corrupted or missing on your PC.
The tool can find the latest drivers for your network adapter and resolve the connectivity issue in just a few clicks –
- Install the Advanced Driver Updater from the below button.
- Click on Start Scan to initiate the search for missing drivers. The software will search for all the missing drivers, which means the ones other than your network adapter will also be highlighted.

- The scanning might take a few minutes based on the number of applications and drivers on your PC. Ideally, it takes not more than 5 minutes.


- Find your Network Adapter Driver to install on priority, or if you have time, you can simply click on the Update driver and let the software work and you can also update all outdated driver in one click.

After initiating the process, give the software time to install the drivers. Once the process is completed, restart your computer, and your problem will be solved.
Also Read: How to Update Drivers On PC
In Conclusion
If you are missing out on multiple drivers and your PC is turning into a sluggish machine, scanning it with Advanced Driver Updater is a good option. It will highlight the outdated, missing, and corrupt drivers causing the problem. Download the software today and see the impact for yourself.
I hope the blog gives you the solution you need. “Windows could not find a driver for your network adapter” is a common problem, and you are not the only one facing it. So relax and use the given fixes to resolve the issue. Good Luck!
Recommended-
Fix – Unable To Connect To Intel 82579LM Gigabit Network Connectivity Driver
Here’s How To Fix Wi-Fi Network Not Showing Up Issue On Windows PC (2022)
How to Download HP Network Driver for Windows 11,10,8,7
How To Fix Realtek Ethernet Drivers That Keep Disappearing
Key Takeaways of Windows Couldn’t Find a Driver for Your Network Adapter Windows 10:
The error «Windows couldn’t find a driver for your network adapter» means that the driver installed for the adapter is either outdated, corrupted, or unavailable. And there could be various other factors. Well, for whatever reason, if you’re unable to find a network adapter driver on Windows, don’t worry.
Just follow this how-to guide. We’re going to provide you with the best solutions with useful techniques and operational steps. So, be patient, stay focused, and read this tutorial thoroughly.
Various factors, including outdated or missing drivers, software conflicts, or faulty hardware, can cause this issue, and in the outcome, Windows can’t find a network adapter driver. Let’s face it, why do we need to resolve this problem instantly? The answer is simple: keeping an updated network adapter driver is necessary for a stable and secure network connection.
If your network adapter driver is outdated or missing, you could experience slow connection speeds, dropped connections, or even total network failure. Different factors can cause the «Windows Could Not Find a Driver for Your Network Adapter» error on Windows 10, such as:
- An outdated or missing network adapter driver
- Corrupted driver files
- Faulty hardware, more
Before resolving the problem, it’s crucial to identify the root cause by inspecting hardware components, verifying driver files, and updating the network adapter driver. Also, keep your network adapter driver up-to-date, and don’t let this frustrating error disappoint you.
Fix «Windows Could Not Find a Driver for Your Network Adapter in Windows 10» Error
It’s time to empower yourself with the know-how to update your network drivers on your Windows 10 device. Lucky for you, we have some valuable tips and four methods — both automated and manual — that come with clear, concise instructions to make the process more accessible and stress-free.
Whether you prefer a more hands-on approach or a more automated process, we’ve got you covered with all the information you need to update your network driver with ease. To kick things off, let’s start with Fix #1 — the user-friendly EaseUS DriverHandy.
With just a single click, this method can effortlessly update all your drivers in a snap. Say goodbye to pesky network issues and say hello to a smoother online experience. Let’s get started!
Fix 1. Update Network Adapter Driver with Third-party Driver Update Software — EaseUS DriverHandy
EaseUS DriverHandy automates the entire process for you, making driver updates a breeze. This powerful tool ensures that your computer is always running smoothly with the most up-to-date and appropriate drivers for all your components and devices. EaseUS DriverHandy can automatically scan for and update the network adapter driver with a single click.
Begin the process of updating network drivers in Windows 10 using EaseUS DriverHandy:
Let’s start. Here’s how you can update the network adapter driver in Windows 10 through EaseUS DriverHandy:
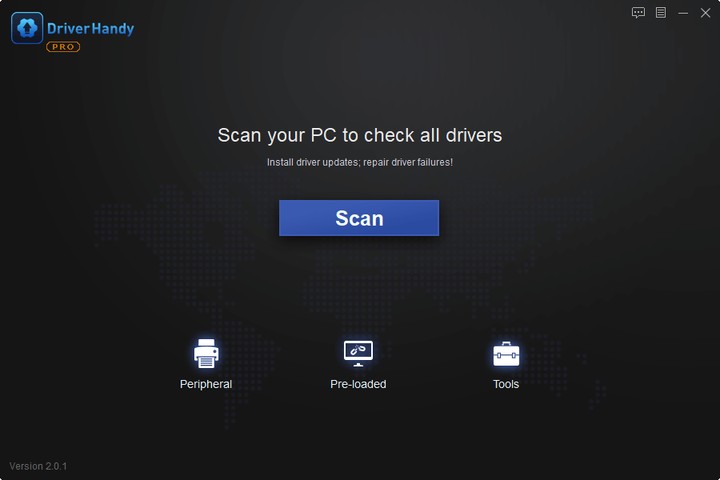
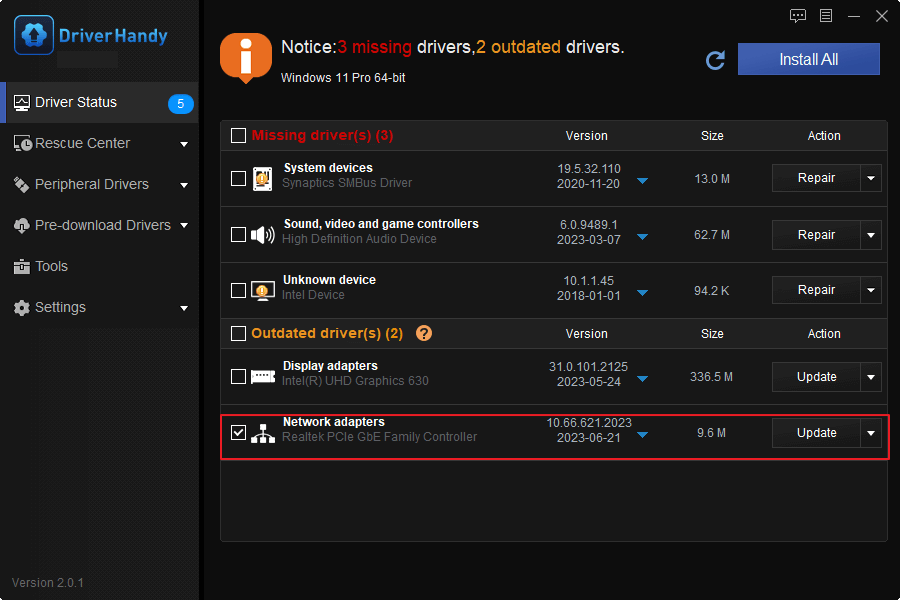
Step 1. Launch EaseUS DriverHandy and click «Scan» to let the software scan problematic or outdated drivers on your PC.
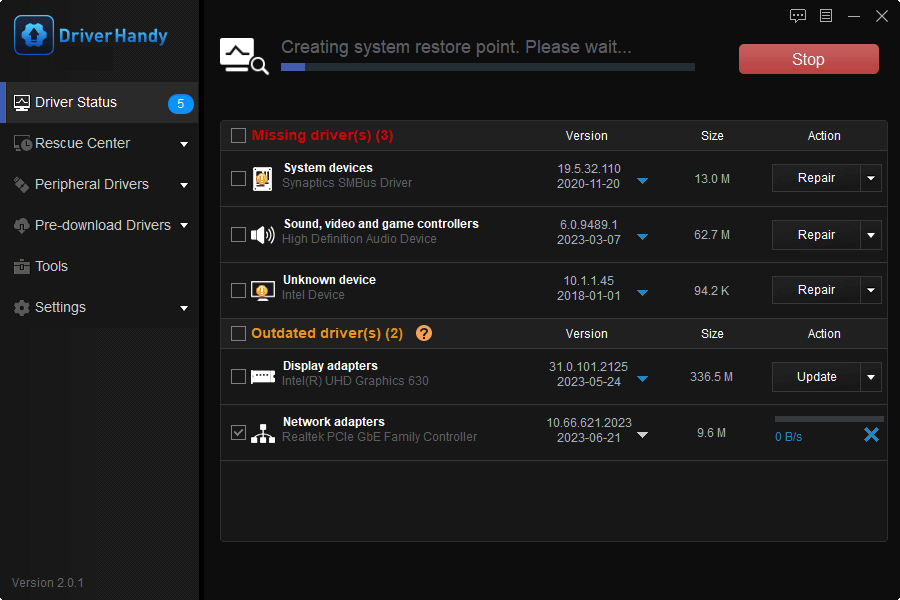
Step 2. Find the outdated Network Adpater Driver, and select «Update».
Wait for the software to download and install the driver automatically.
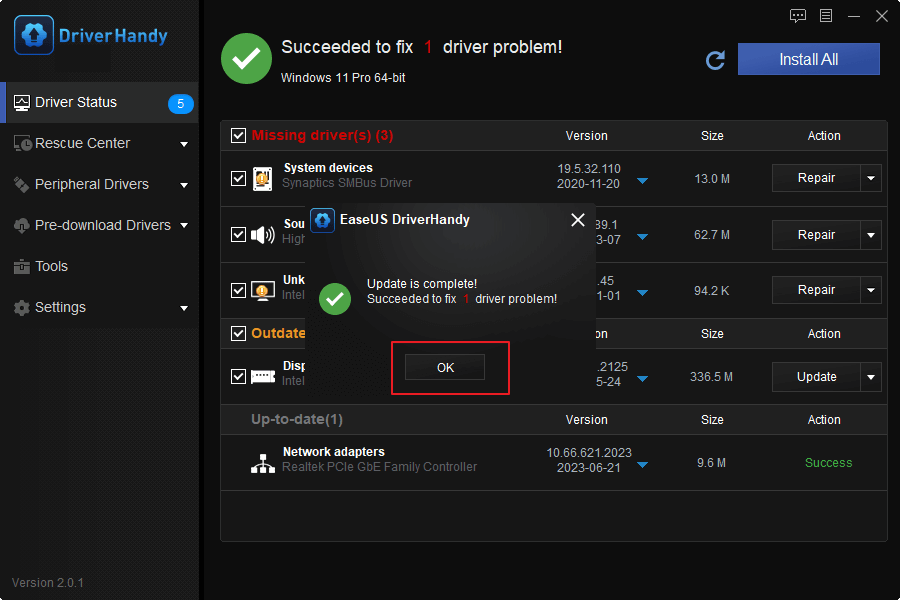
Step 3. Click «OK» to finish the Network Adapter driver update process.
Say goodbye to frustration and hello to simplicity. If you want to streamline your PC maintenance and ensure that your network drivers are always up-to-date, try EaseUS DriverHandy today.
Benefits of using third-party software EaseUS DriverHandy for updating drivers:
- Ease of use: Automated process eliminates the need for technical knowledge or experience.
- Reliable driver updates: Software can identify the correct drivers needed for your system, ensuring optimal performance and stability.
- Time-saving: The entire process can be completed in just a few minutes, freeing up time for other important tasks.
Fix 2. Update the Network Adapter Driver via Windows Update
Windows update feature is an easy way to update your drivers. The latest updates may occasionally be unavailable through the Windows update feature. In that case, you can download and install the desired drivers manually. Follow the steps to update your network adapter driver via Windows update:
Step 1. Go to «Settings.»
Step 2. Click «Update & Security.»
Step 3. Click on «Windows Update.»
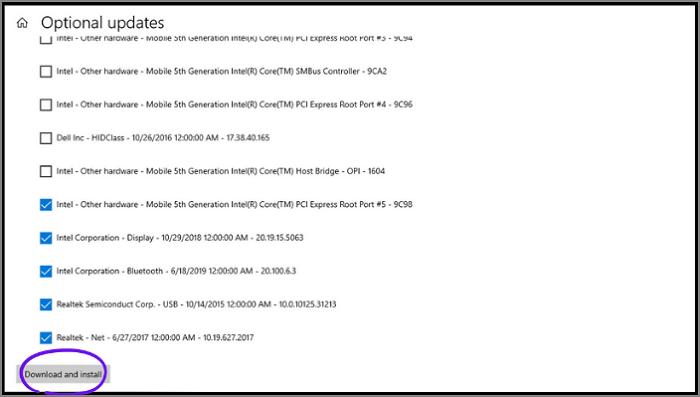
Step 4. Click «View optional updates.»
Step 5. Click «Driver updates.»

Step 6. If there are available any new updates, check-mark them to select them.
Step 7. Click on «Download and install» from the left corner.
Note: If you don’t find any new updates in the Windows update feature, use third-party software such as EaseUS DriverHandy to update network adapter drivers automatically. This tool saves you time and effort, and you don’t need to search for and download drivers manually, ultimately improving your device’s performance and stability.
Fix 3. Update the Network Adapter Driver via Device Manager
Device Manager is also an easy way to update the network adapter drivers. You’ll find two options, the first option is (Search automatically for drivers) and the second option is (Browse my computer for drivers). If you choose the first option, the Device Manager will automatically install drivers. On the other hand, if you select the second option, you have to arrange the driver files.
Follow these simple steps to update network adapter drivers using Device Manager:
Step 1. Type «Device Manager» in the search bar of the taskbar. Once it appears, click on it to open it.
Step 2. Expand «Network adapters» by clicking on greater than sign (>).
Step 3. From the expanded list, right-click on the desired network drivers.
Step 4. Click «Update driver.»

Step 5. Choose any option from two (Search automatically for drivers) or (Browse my computer for drivers).
Fix 4. Download and Install Network Adapter Driver from the Manufacturer’s Website
This method is a little bit tricky if you want to download network adapter drivers from the manufacturer’s website. You can visit the official support website of the hardware manufacturer to download and install the latest driver.
You will have to perform each step carefully because in this method, technical expertise is essential for you to find and download relevant and exact driver files. So, this task may be difficult for beginners. But don’t worry if you’re one of them. You can use Fix #1 to get the latest and relevant network adapter drivers automatically.
For instance, you need to visit the Intel website if you have an Intel device. If you have a Dell or HP computer, you should visit their manufacturer’s websites. It’s Intel, so I’ll visit Intel’s website. Follow these steps:
Step 1. First, go to the Intel support website and click «Drivers & Software.»
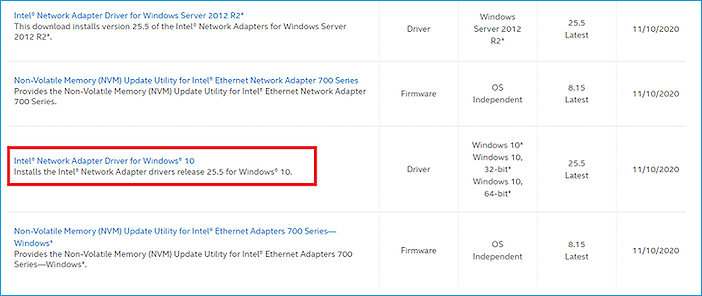
Step 2. Select «Ethernet Products» when prompted to select your product.
Step 3. Select the appropriate version of the Intel network adapter driver according to your operating system.
Step 4. Click «View Details» and click «Download.»
Step 5. After downloading the driver file, double-click on the downloaded file (.exe) and follow the on-screen instructions to install the latest driver.
Step 6. Once the installation process is complete, restart your PC/laptop.
Tips to Keep Network Adapter Healthy and Network Connection Stable
Are you tired of buffering, slow-loading pages, and a weak network connection? Say goodbye to these frustrating issues caused by a faulty network adapter. Don’t let a defective adapter prevent you from browsing, streaming, and enjoying hassle-free internet. A stable and long-lasting network connection is crucial, and we’re here to share some expert tips to help you.
| Tip 1: Keep your Windows 10 up-to-date with the latest version. | Your computer needs the latest security and feature updates to avoid potential threats, so update your Windows 10 regularly. |
| Tip 2: Update your network adapter driver regularly. | Regular updates can optimize your network connection and keep it stable and healthy. Stay on top of any improvements and bug fixes that can significantly impact your internet experience. |
| Tip 3: Ensure proper connection and function of the network adapter. | Check your cables and connections regularly to ensure everything is plugged in and functioning correctly. Sometimes, a loose or faulty connection can cause frustrating network issues. |
| Tip 4: Use only compatible drivers for your network adapter. | Using the wrong driver can cause connectivity issues and prevent you from accessing the internet. |
| Tip 5: Download drivers only from trusted and reliable sources. | Malware or virus-infected drivers can cause serious harm to your computer, so be careful and only download drivers from trusted sources. |
| Tip 6: We recommend using a reliable driver updater tool like EaseUS DriverHandy to install the latest drivers automatically. | This will save you time and effort in finding the correct drivers for your network adapter, ensuring it stays healthy and functioning at its best. |
By following these tips, you can say goodbye to a weak and unstable network connection and hello to hassle-free browsing, streaming, and working!
Frequently Asked Questions (FAQs)
When it comes to updating your network adapter driver, you may have some questions or concerns. Here are common questions and their answers to help you understand the process better.
1. What are the benefits of updating my network adapter driver?
You’ll get several benefits from updated network adapter drivers because updated drivers can improve the stability and performance of your internet connection. The latest drivers often fix bugs, and several other benefits you can get by updating your network adopter driver.
2. What should I do if Windows 10 can’t find a driver for my network adapter?
If Windows 10 can’t locate the proper driver for your network adapter, you can take matters into your own hands and manually download and install the latest driver from the manufacturer’s website. But if you don’t feel easy or you’re not comfortable with the manual idea, don’t worry! Here is another easier solution! Use EaseUS DriverHandy to automatically scan your system for outdated or missing drivers and quickly find and install them.
3. How do I check if my network adapter driver is up-to-date on Windows 10?
You can check if your network adapter driver is up-to-date on Windows 10 by going to Device Manager. In the Device Manager, expand the «Network adapters» list, right-click on the desired driver, and select «Update driver» from the pop-up menu. A new Windows will be opened where you can choose to either search automatically for the updated driver or browse your computer for the driver. If you select the option to search automatically, Windows will check for any available updates and prompt you to download and install them if any are found.
4. Can I manually install a driver for my network adapter if Windows 10 can’t find it automatically?
Yes, sure, you can manually install a driver for your network adapter if Windows 10 can’t find it automatically. You can download the latest driver from the manufacturer’s website and install it manually using Device Manager. Alternatively, if you’re uncomfortable with the manual method or don’t have such type of technical expertise, then you can use EaseUS DriverHandy to install all drivers automatically.
Conclusion
Keeping your network adapter driver up-to-date is crucial for a stable and secure network connection. Outdated drivers can cause issues like slow internet speeds, frequent disconnections, and security vulnerabilities. By regularly updating your drivers, you can ensure that your network connection is running smoothly and securely. If you’re having trouble finding or installing the correct driver manually, don’t worry! EaseUS DriverHandy is an excellent option. With its user-friendly interface and reliable performance, DriverHandy can quickly and easily fix any driver-related issues and keep your network adapter driver up-to-date on Windows 10.
On Windows 10 and other versions of the Windows operating system, you need a network adapter to connect to the internet through a wired or wireless network.
Sometimes, you might get an error that your network adapter is missing. This can be very frustrating because you won’t be able to connect to the internet.
There are some simple fixes you can use to fix this issue, including:
- removing and reinserting your computer battery
- turning off Antivirus and VPN apps
- restarting your computer
But these might not be enough to fix the issue.
So, in this article, I’m going to show you 5 better ways you can fix the network adapter missing error so you can start connecting your computer to the internet again.
Windows 10 has a built-in network reset tool that can reset your settings to default. This often fixes this issue for you.
To fix the network adapter missing error with this solution, follow the detailed steps below:
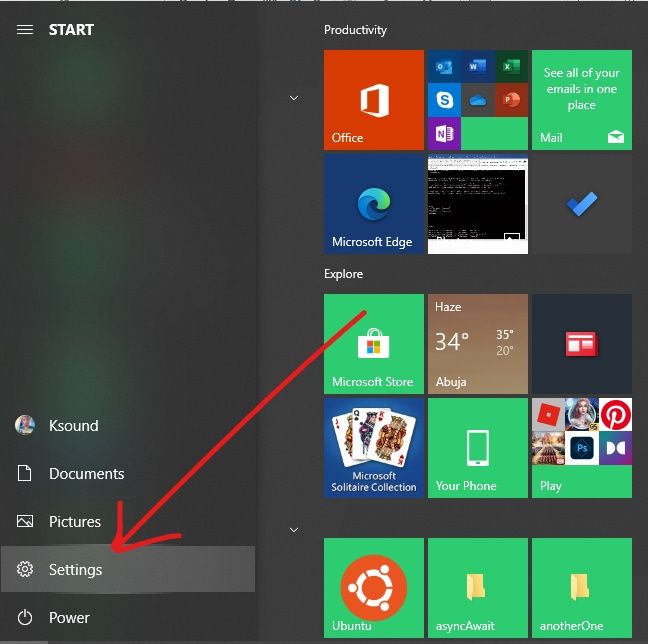
Step 1: Click on Start and select Settings.
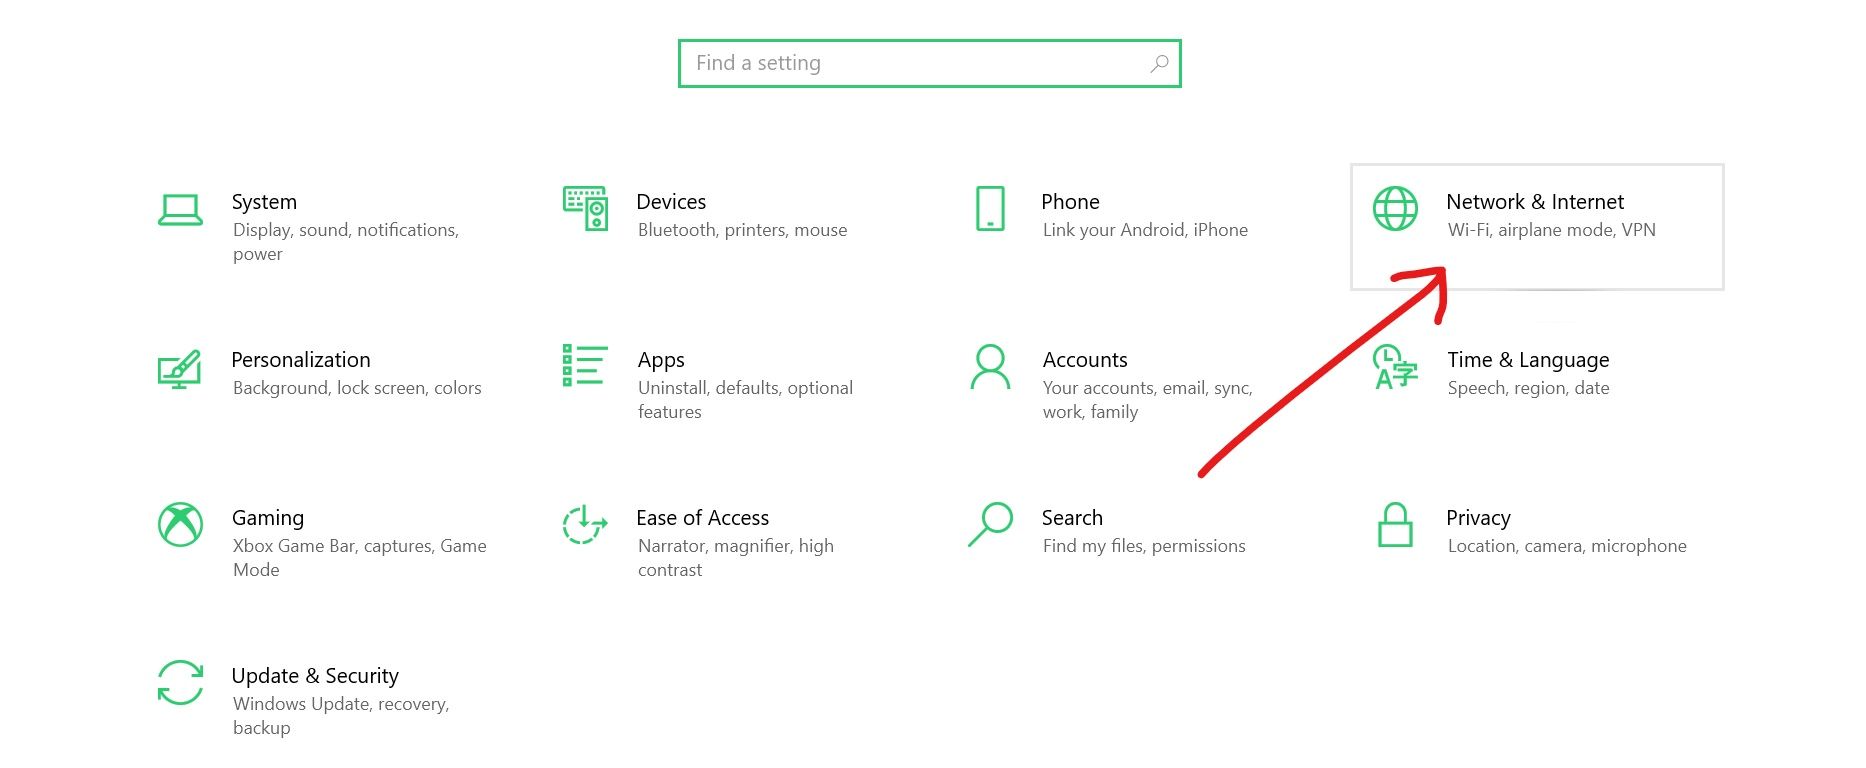
Step 2: Choose Network and Internet from the menu tiles.
Step 3: Under “Status”, click the Network reset link.
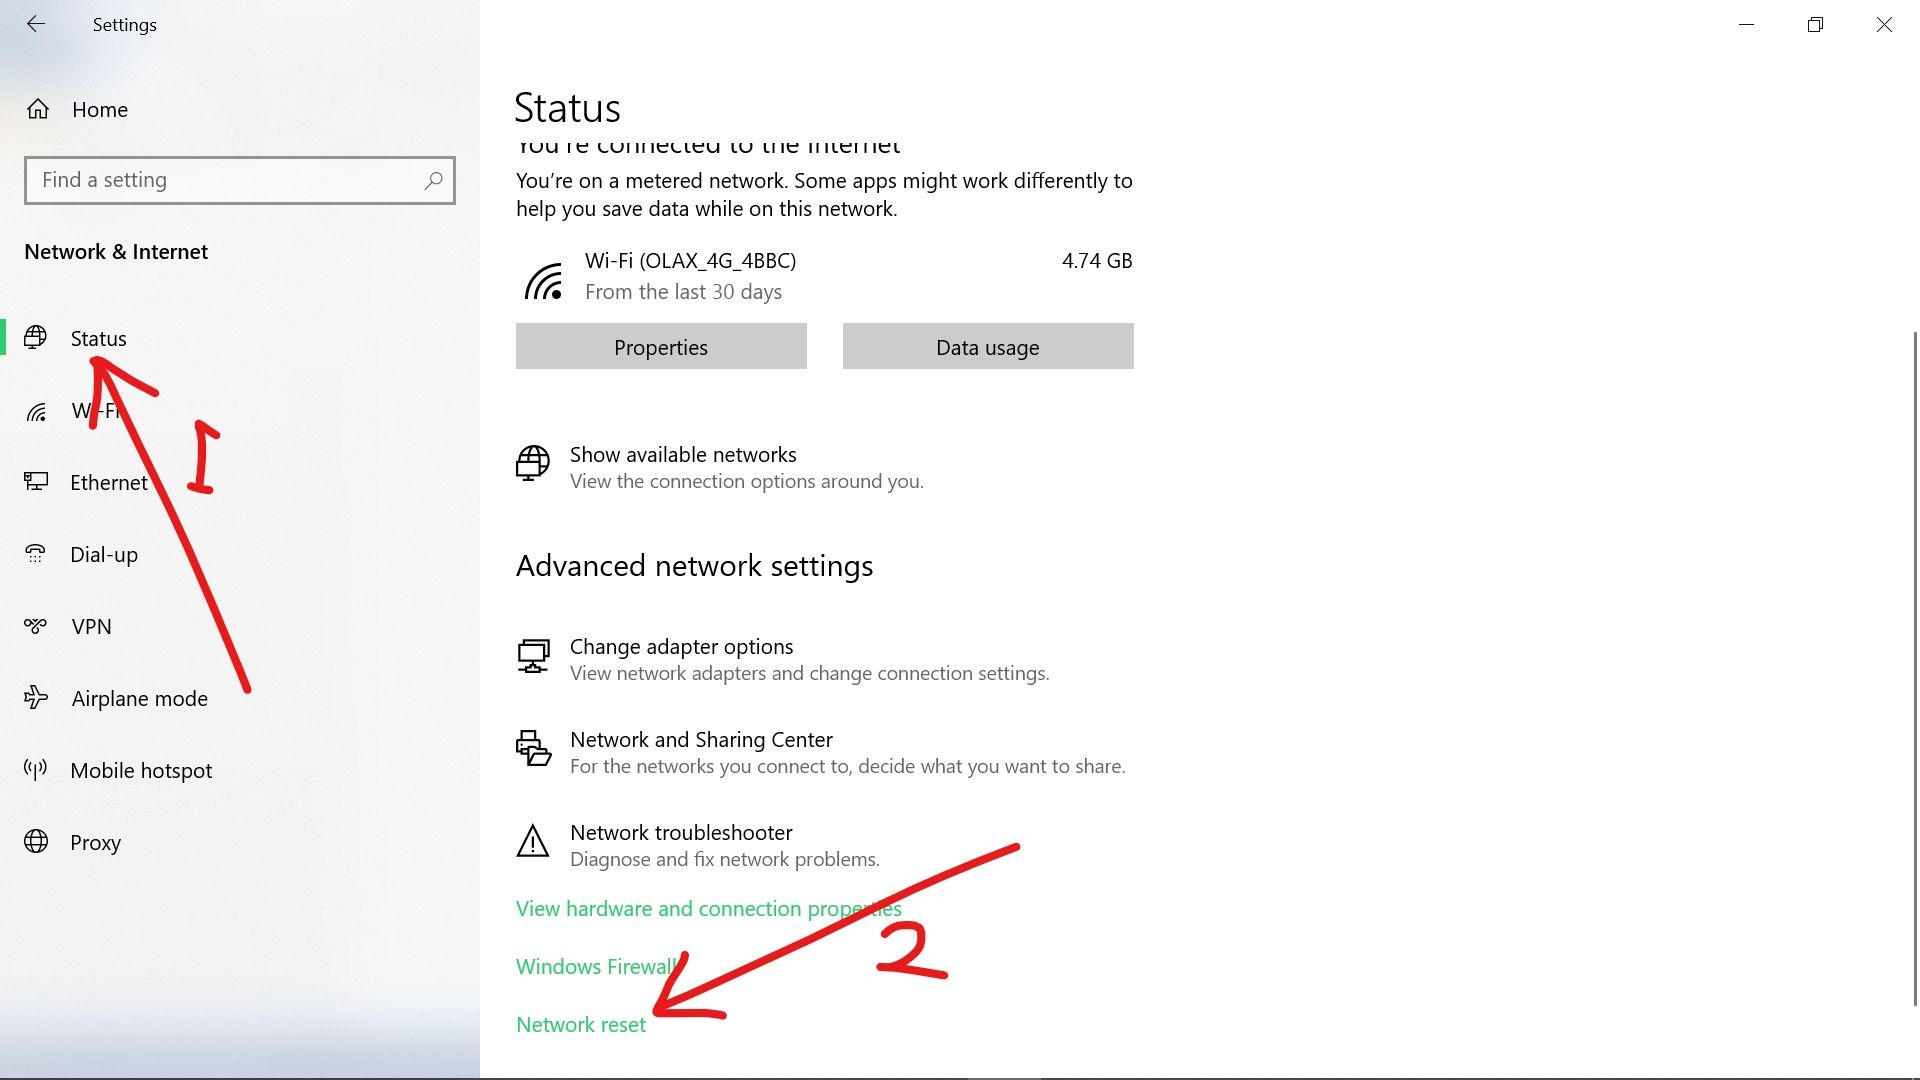
Step 4: Click the Reset now link.
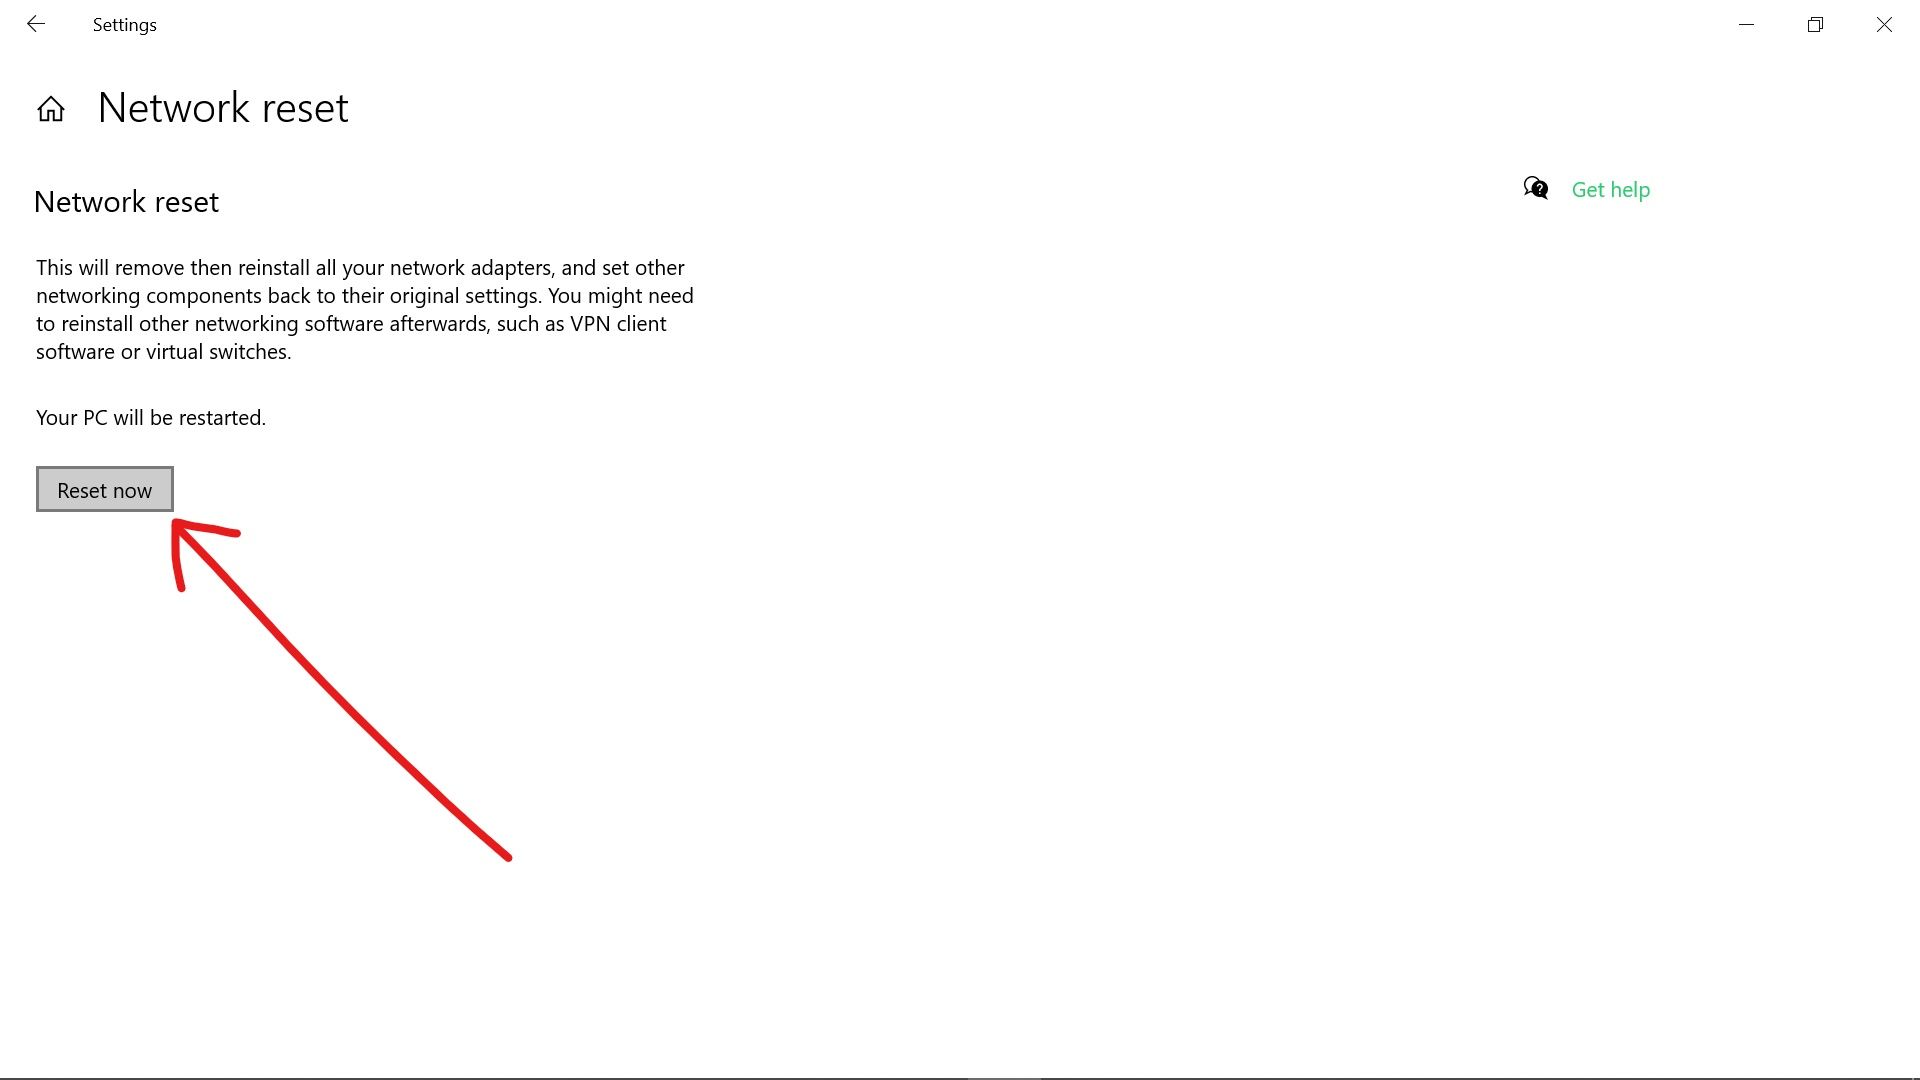
If you use this fix, be aware that you have to reinstall any VPN app on your computer and also reenter WiFi passwords.
How to Fix Network Adapter Missing by Checking the Driver’s Power Management Settings
Windows 10 is optimized for better power management, so when your laptop battery is low, some devices could be turned off to save power.
You could experience the network adapter missing error due to this power optimization.
To turn off this feature for your network adapter driver, follow the steps below:
Step 1: Right-click on Start and select Device Manager.
Step 2: Expand Network Adapters.
Step 3: Right-click on the affected network adapter and select Properties.
Step 4: Switch to the Power Management tab and uncheck «Allow the computer to turn off this device to save power» and click «Ok».
How to Fix Network Adapter Missing by Resetting Winsock Settings in the Command Line
Winsock is a program that determines how network services are used on a Windows computer.
If things go wrong with Winsock, it could cause the network adapter missing error.
To reset Winsock, follow the steps below:
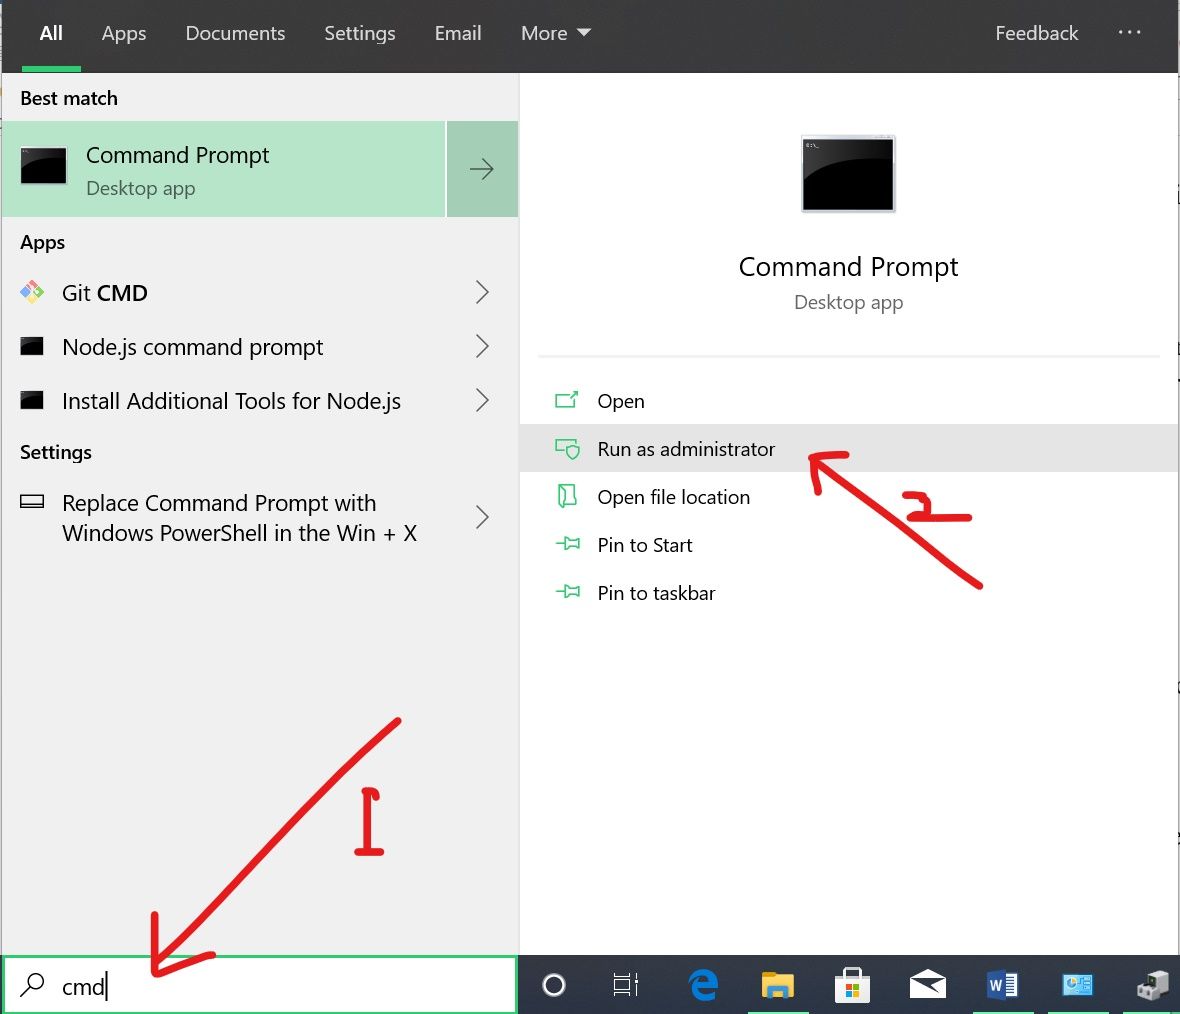
Step 1: Click on Start and search for «cmd», then select «Run as Administrator» on the right.
Step 2: In the command line, type in «netsh winsock reset» and hit ENTER.
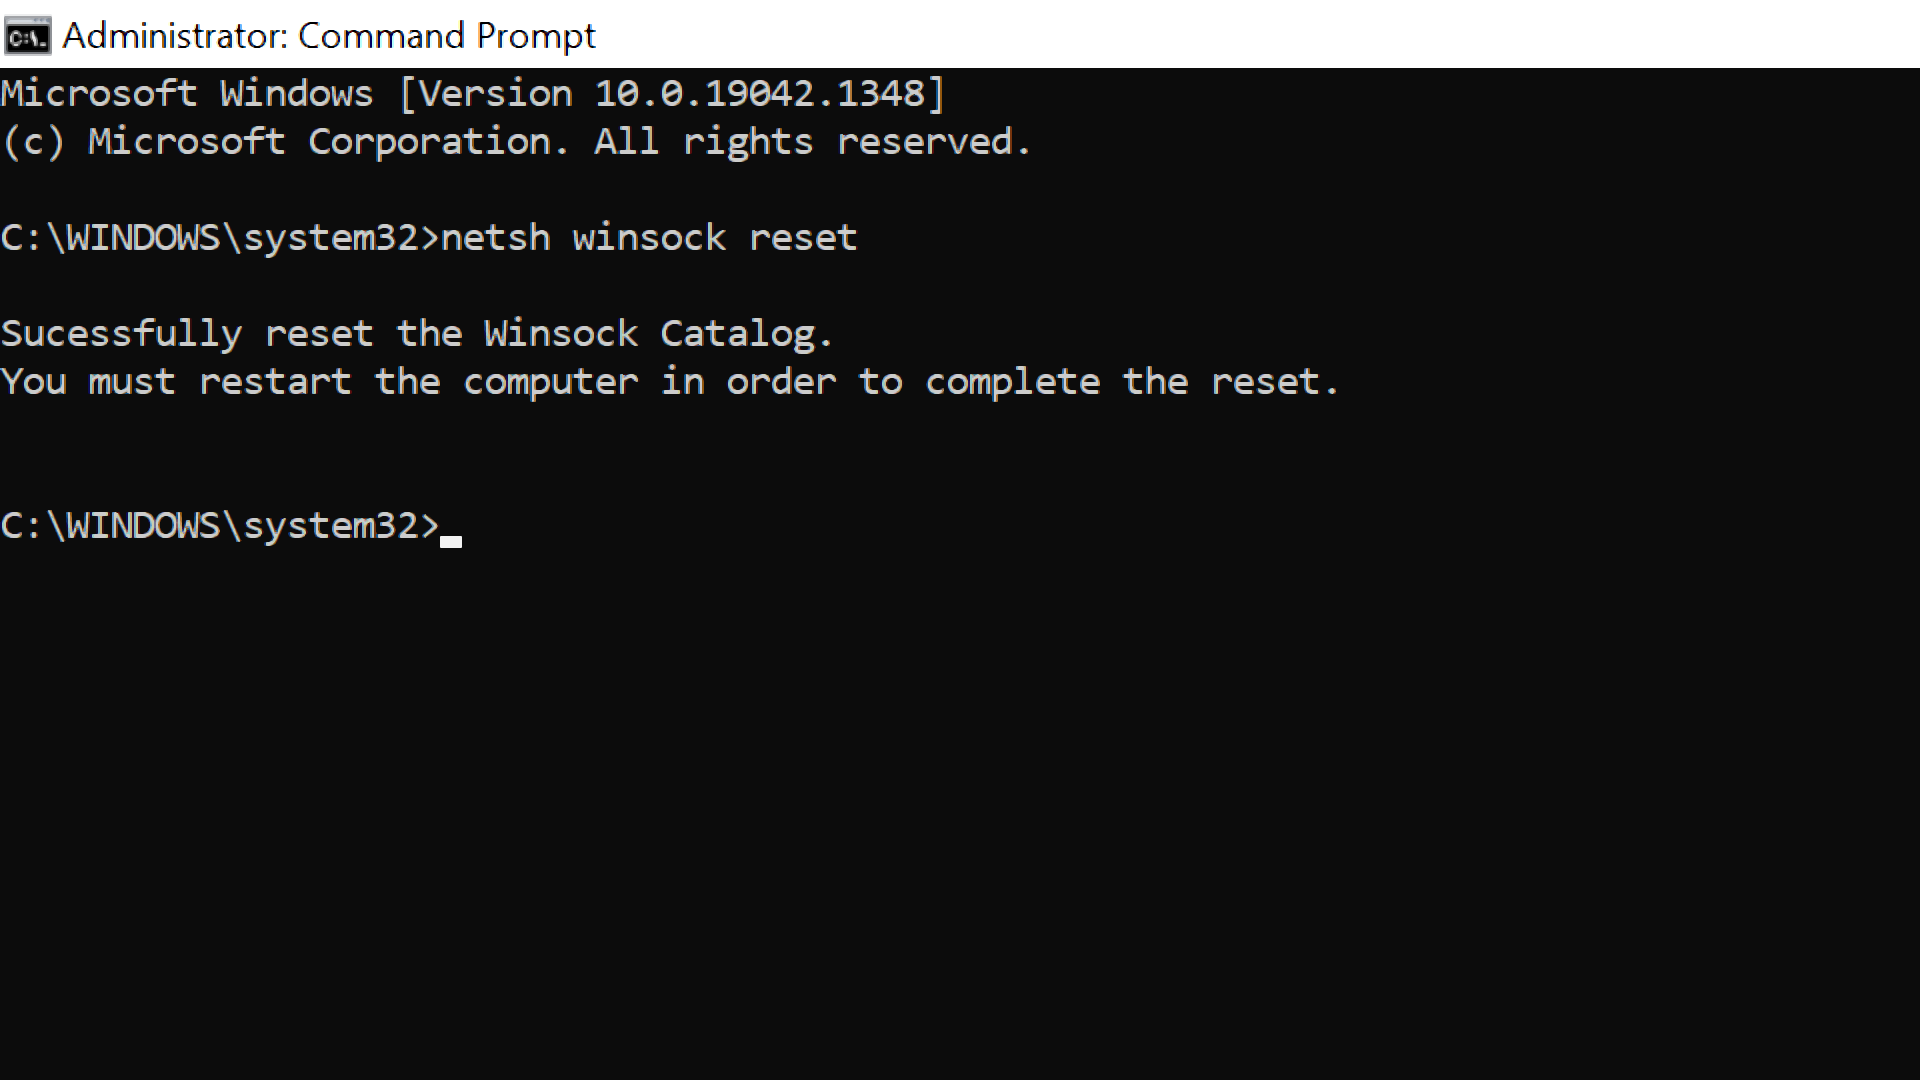
Step 3: Restart your computer.
How to Fix Network Adapter Missing by Reinstalling or Updating the Network Adapter Driver
If the solutions already discussed fail to work for your computer, then you should try and reinstall or update your network adapter driver to fix the issue.
To reinstall your network adapter driver, you should follow the steps below:
Step 1: Click on Start and select Device Manager.
Step 2: Expand Network Adapters.
Step 3: Right-click on the affected driver and select Uninstall device.

Step 4: Choose Search automatically for updated driver software.
Step 5: Restart your computer and the driver will be automatically reinstalled for you.
Conclusion
In this detailed guide, you learned how you can fix the network adapter missing error so you can connect to the internet again with your computer.
If you find this article helpful, consider sharing it with your friends and family so it can help them too.
Thank you for reading.
Learn to code for free. freeCodeCamp’s open source curriculum has helped more than 40,000 people get jobs as developers. Get started