
Ошибка с кодом 0x0000007c является новой неполадкой, которая появляется при попытке подключиться к принтеру по сети. При попытке установить связь высвечивается сообщение со сбоем. Иногда дополнительно просят установить драйвер для средства печати. С этой ошибкой столкнулось очень много пользователей, о чем свидетельствуют десятки страниц с обсуждением проблемы на различных форумах. При чем поломка не привязана к конкретной модели принтера или версии Windows 10. Вот все, что нам удалось разузнать о данной ошибке, а также все известные способы исправления, подтвержденные другими пользователями.
Совет! Ошибка 0x000006e4 похожа на 0x0000007c, поэтому стоит попробовать способы из нашего соответствующего руководства — вот ссылка.
Почему появляется ошибка 0x0000007c?
Ключевая причина проблемы подключения компьютера к принтеру заключается в проблемном октябрьском обновлении Windows 10. После его установки и начала появляться ошибка. Мы можем сделать вывод, что это не единственная причина, так как сбой возникает только у определенной группы людей. Иными словами, сюда наслаиваются какие-то настройки системы, но выяснять это с нашей стороны не имеет большого смысла. Единственное, что дополнительно нужно отметить – в Microsoft подтвердили осведомленность о данной неисправности и пообещали его исправить в одном из декабрьских обновлений.
Как исправить ошибку 0x0000007c?
Сегодня есть 3 эффективных исправления, которые уже помогают пользователям. Это скорее временные решения до момента, когда Microsoft выпустит полноценный патч. Как показывает опыт, обещания не всегда выполняют, а еще реже –вовремя.
Что следует попробовать:
- Изменить ключи в реестре. Это решение посоветовали в технической поддержке и оно имеет наибольшие шансы на успех.
- Удалить проблемное обновление. Изменения откатятся и проблема может уйти сама собой.
- Особым способом переустановить принтер. Как минимум несколько пользователей отписали, что у них это срабатывает.
Вносим исправления в реестр
Эффективность способа подтверждена в системах: Windows 10 2004, 20H2, 21H1, 21H2, 1909, 1809, Server 2019. Суть способа в том, что отключить ту проверку безопасности, которая и вызывает проблемы при подключении к принтеру. В результате несколько снижается степень безопасности, но многие годы обходились без данной функции и еще немного можно потерпеть. Во время следующего обновления, когда внесут исправление, придется вручную включить опцию.
Что нужно сделать:
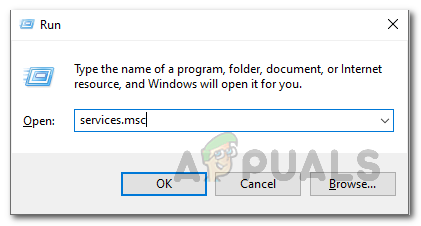
- Открываем редактор реестра с помощью слова regedit (его нужно ввести в строку «Выполнить»).
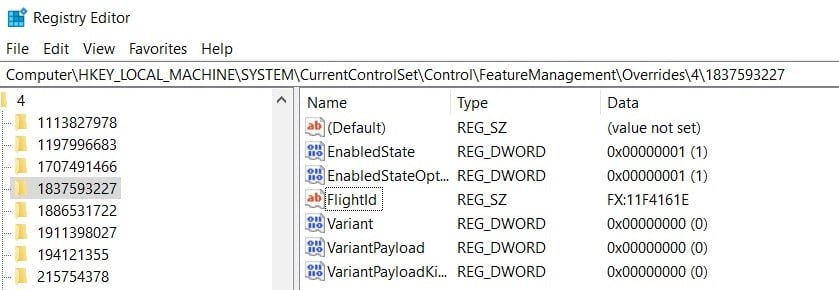
- Идем по пути HKEY_LOCAL_MACHINE \ SYSTEM \ CurrentControlSet \ Policies \ Microsoft \ FeatureManagement \ Overrides.
- Вместо значения 713073804 вставляем 00000000. Здесь могут изначально стоять и другие значения: 3598754956, 1921033356 и другие.
Удаляем проблемное обновление
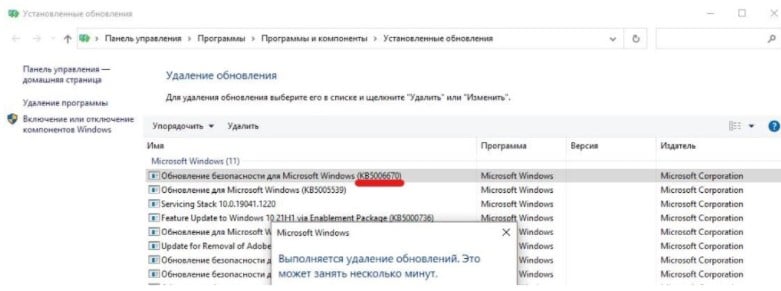
На сегодняшний день чаще всего ошибку 0x0000007c вызывает обновление KB5006670 для Windows 10 или KB5006674 для Windows 11. Их удаление может сработать.
Как удалить накопительное обновление:
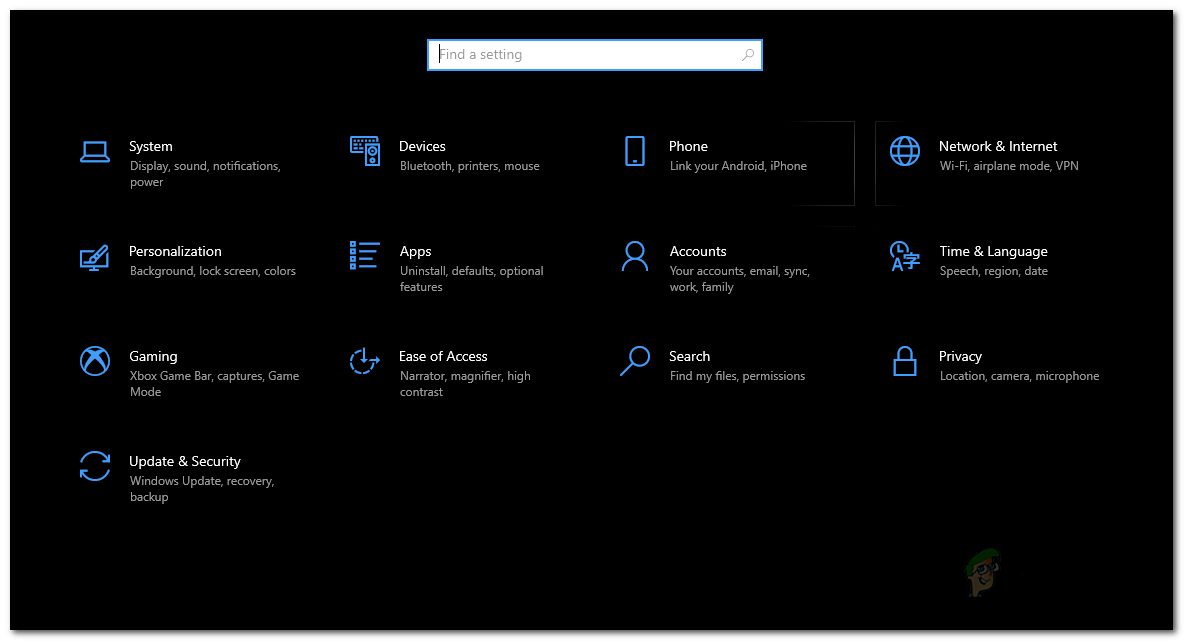
- Нажимаем комбинацию Win + I и переходим в «Обновление и безопасность» или «Центр обновления Windows» (в Windows 11).
- Жмем по кнопке «История обновлений», затем – «Удалить обновления».
- Из списка выделяем проблемное обновление и удаляем его.
Важно! Чтобы исправление сработало, дополнительно нужно выключить автоматическое обновление. В противном случае оно будет переустановлено без вашего ведома и проблема сохранится.
Переподключаем принтер
Последнее решение, которое много пользователей похвалили. Возможно, вы уже пробовали удалить и заново подключить устройство, но в стандартном исполнении процедура не работает. Просто следуйте инструкции ниже.
Руководство по переподключению принтера:
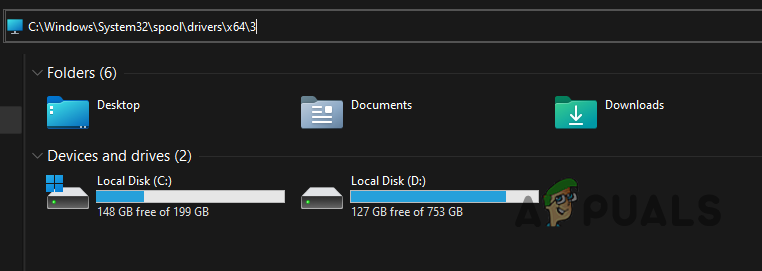
- Переходим по пути C:\Windows\System32\spool\drivers\x64\3, вырезаем все содержимое последней папки и переносим его на рабочий стол.
- Открываем раздел «Службы» (проще всего вставить в поиск файл services.msc и открыть его.
- Перезагружаем «Диспетчер печати» (останавливаем процесс и запускаем его заново).
- Скачиваем из интернета файл драйверов без автоустановки, просто в виде inf-файла.
- Удаляем принтер и вручную добавляем его стандартным образом, только во время его установки нужно указать путь к inf-файлу драйвера.

Есть и другие способы, не подтвердившие свою эффективность в борьбе с ошибкой 0x0000007c, которые мы пока не можем рекомендовать нашим читателям. Мы больше надеемся на ваш опыт. Пожалуйста, напишите в комментариях, удалось ли вам исправить данную проблему и как именно.
,
If Windows cannot add/connect to shared printer with error «Operation Failed with error 0x0000007c: Windows Cannot Connect to the Printer», or if the installed shared printer is not responding when you try to print in Windows 10, continue reading below to fix the problem.
In the last few months, September and October 2021, Microsoft has been continuously releasing security updates that cause problems installing or printing to shared printers. Microsoft says it is working to resolve these issues, but once again many users are experiencing a lot of network printing problems after installing the Windows 10 Cumulative Update 2021-10 (KB5006670). & the November 9, 2021—KB5007186 updates.

This tutorial contains instructions to resolve the following network printing errors on Windows 10:
-
«Windows Cannot Connect to the Printer: Operation failed with error 0x0000007c», when trying to add a shared network printer.
-
«Printer Not Responding» when you try to print on a network printer.
-
0x000006e4 (RPC_S_CANNOT_SUPPORT)
-
0x0000007c (ERROR_INVALID_LEVEL)
-
0x00000709 (ERROR_INVALID_PRINTER_NAME)
FIX: Error 0x0000007c – Cannot Add a Network or a Shared Printer.
Method 1. Install KB5007253 update.
The first method to resolve the above mentioned errors is to install KB5007253 from the Microsoft Update Catalog. *
* Important: Before installing the update first download and install the latest Servicing Stack Update according your Windows 10 version (if the latest SSU is not already installed).
Method 2. FIX 0x0000007c error in Network Printing by Modifying Registry (FIX No1).
1. Open Command Prompt as Administrator.
2. In command prompt give the corresponding command below according your Windows 10 version:
Windows 10 versions 2004, 20H2, 21H1 and 21H2:
- reg add HKEY_LOCAL_MACHINE\SYSTEM\CurrentControlSet\Policies\Microsoft\FeatureManagement\Overrides /v 713073804 /t REG_DWORD /d 0 /f
Windows 10 version 1909:
- reg add HKEY_LOCAL_MACHINE\SYSTEM\CurrentControlSet\Policies\Microsoft\FeatureManagement\Overrides /v 1921033356 /t REG_DWORD /d 0 /f
Windows version 1809 and Windows Server 2019:
- reg add HKEY_LOCAL_MACHINE\SYSTEM\CurrentControlSet\Policies\Microsoft\FeatureManagement\Overrides /v 3598754956 /t REG_DWORD /d 0 /f
3. Restart your computer and check if the printing problem has been resolved.
Method 3. FIX Network Printing Error 0x0000007c by Modifying Registry (FIX No2).
Since after applying the latest Windows 10 updates, administrative credentials are required to install or print to shared printers, go ahead and add the following registry entries to your system: *
1. Open Command Prompt as Administrator
2. Give the following command in order (press Enter after each command):
- reg add «HKEY_LOCAL_MACHINE\Software\Policies\Microsoft\Windows NT\Printers\PointAndPrint» /v RestrictDriverInstallationToAdministrators /t REG_DWORD /d 0 /f
- reg add «HKEY_LOCAL_MACHINE\Software\Policies\Microsoft\Windows NT\Printers\PointAndPrint» /v UpdatePromptSettings /t REG_DWORD /d 0 /f
- reg add «HKEY_LOCAL_MACHINE\Software\Policies\Microsoft\Windows NT\Printers\PointAndPrint» /v NoWarningNoElevationOnInstall /t REG_DWORD /d 0 /f
3. Restart your PC and try to print.
* Note: For Domain Computers (workstations), you have to modify the Domain Group Policy to allow the installation of shared printers without administrative credentials needed. To do that:
1. Open the Group Policy Management.
2. Right click on the Default Domain Policy and select Edit.
3. Navigate to: Computer Configuration > Policies > Administrative Templates > Printers > Point and Print Restrictions.

4. Set the Point and Print Restrictions policy to Disabled and click OK.

5. Close the Group Policy Editor and give this command to apply the change.
- gpupdate /force
6. Now proceed and install the shared printer(s) on workstations.
7. After installation to keep your network secure, configure the Point and Print Restrictions policy as follows:
a. Set the Point and Print Restrictions Group Policy setting to Enabled.
b. Select Users can only point and print to these servers and type below the names of the print servers.
c. At When installing drivers for a new connection, select Show warning and elevation prompt.
d. At When updating drivers for an existing connection, select Show warning and elevation prompt.

e. Click OK and close the Group Policy Editor.
f. Run the «gpupdate /force» command to update the Domain Policy.
Method 4. FIX 0x0000007c Network Printing error by Removing KB5006670, KB5007186 & KB5008212 Updates.
If your shared printer is not responding when printing on it, or you cannot install a network printer with error 0000007c after installing KB5006670 or KB5007186, proceed and apply the following simple steps:
-
Uninstall the KB5007186 and/or KB5006670, KB5008212 updates.
-
Prevent KB5007186 & KB5006670 update to be installed again until Microsoft fixes the problem on a future update.
Step 1. Uninstall KB5006670, KB5007186, KB5008212 from Windows 10:
1. Open Command Prompt as Administrator.
2. In command prompt give the following commands and press Enter:
- wusa /uninstall /kb:55007186
-
wusa /uninstall /kb:5006670
- wusa /uninstall /kb:5008212

3. Click Yes to remove the update.

4. When the uninstall process is complete, restart your PC.
5. After restart proceed to install your printer.
Step 2. Prevent KB5006670 Update Installation.
1. Download the Show or Hide updates tool «wushowhide.diagcab» tool from: https://www.majorgeeks.com/files/details/wushowhide.html
2. Run the tool, click Next and then select Hide updates.

3. Let the tool to find the available update and when this done, select the 2021-10 Cumulative Update for Windows 10 (KB5006670) or the KB5007186 or the KB5008212 and click Next.

4. When the troubleshooting is complete close the troubleshooter and restart your PC.
That’s all folks! Which method worked for you?
Please leave a comment in the comment section below or even better: like and share this blog post in the social networks to help spread the word about this.
If this article was useful for you, please consider supporting us by making a donation. Even $1 can a make a huge difference for us.
- Author
- Recent Posts
Konstantinos is the founder and administrator of Repairwin.com. Since 1995 he works and provides IT support as a computer and network expert to individuals and large companies. He is specialized in solving problems related to Windows or other Microsoft products (Windows Server, Office, Microsoft 365, etc.).
Recently, several users complained of getting an error code 0x0000007c when they were trying to install a printer on their devices. Basically, when one tries to install a printer driver, he/she gets a prompt – “Do you trust this printer?”. Upon clicking “Install Driver”, there appears an error message that reads the following –
"Windows cannot connect to the printer, operation failed with error 0x0000007c"Or,
ERROR_INVALID_LEVEL, Error 0x0000007c
What causes the Printer Error 0x0000007c in Windows?
The error code 0x0000007C may occur because of varied reasons. Some of them are as follows –
- Corrupted Windows registry
- Faulty entries of applications that were already removed from your device
- Missing system files
Knowing what exactly causes this issue in the first place may help you to get rid of this problem on your PC. Let’s learn the ways by which you can fix it on Windows 11/10 –
How to Fix Printer Error 0x0000007c in Windows 11/10
If you are getting an error code 0x0000007c while printing documents on Windows 11 or 10 PC, try out the below workarounds one after another. Make sure to read the solution in-depth. By doing so, you may realize or guess which solution is gonna work for you.
1] Uninstall the Buggy Update
The best way to resolve any Printer-related issue is by uninstalling the cumulative update. Upgrading the existing Build OS reset some of its components and thus causes Printer errors. Get rid of the recent patch updates and your printer will start functioning completely fine.
However, if you hadn’t installed any recent security/non-security/optional updates and yet are experiencing a printer issue, follow the next workaround.
2] Purge Print Spooler contents
If you don’t want to roll back your operating system to its previous build, you may re-add your Printer. Here’s how can you uninstall and manually add a printer to your Windows 11/10 PC –
- First of all, open File Explorer by pressing Win + E.
- When Windows Explorer opens up, reach out to the path below –
C:\Windows\System32\spool\drivers\x64\3
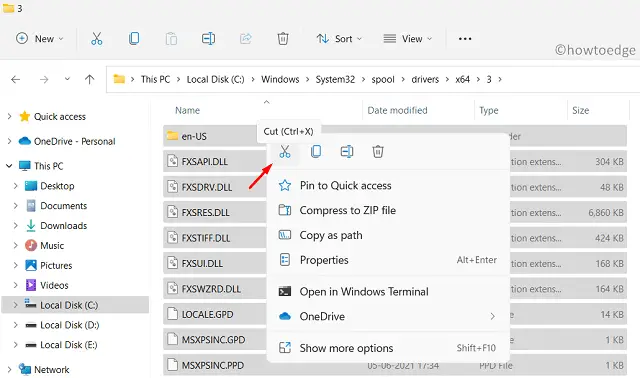
Note: If you are on a 32-bit based PC, navigate to this path instead –
C:\Windows\System32\spool\drivers\W32X86\3
- After you browse the above folder, cut all its contents and move them to a separate folder. Keep this folder somewhere safe as you might require it if this solution doesn’t work.
- Press Win + R to start the Run dialog.
- Type “
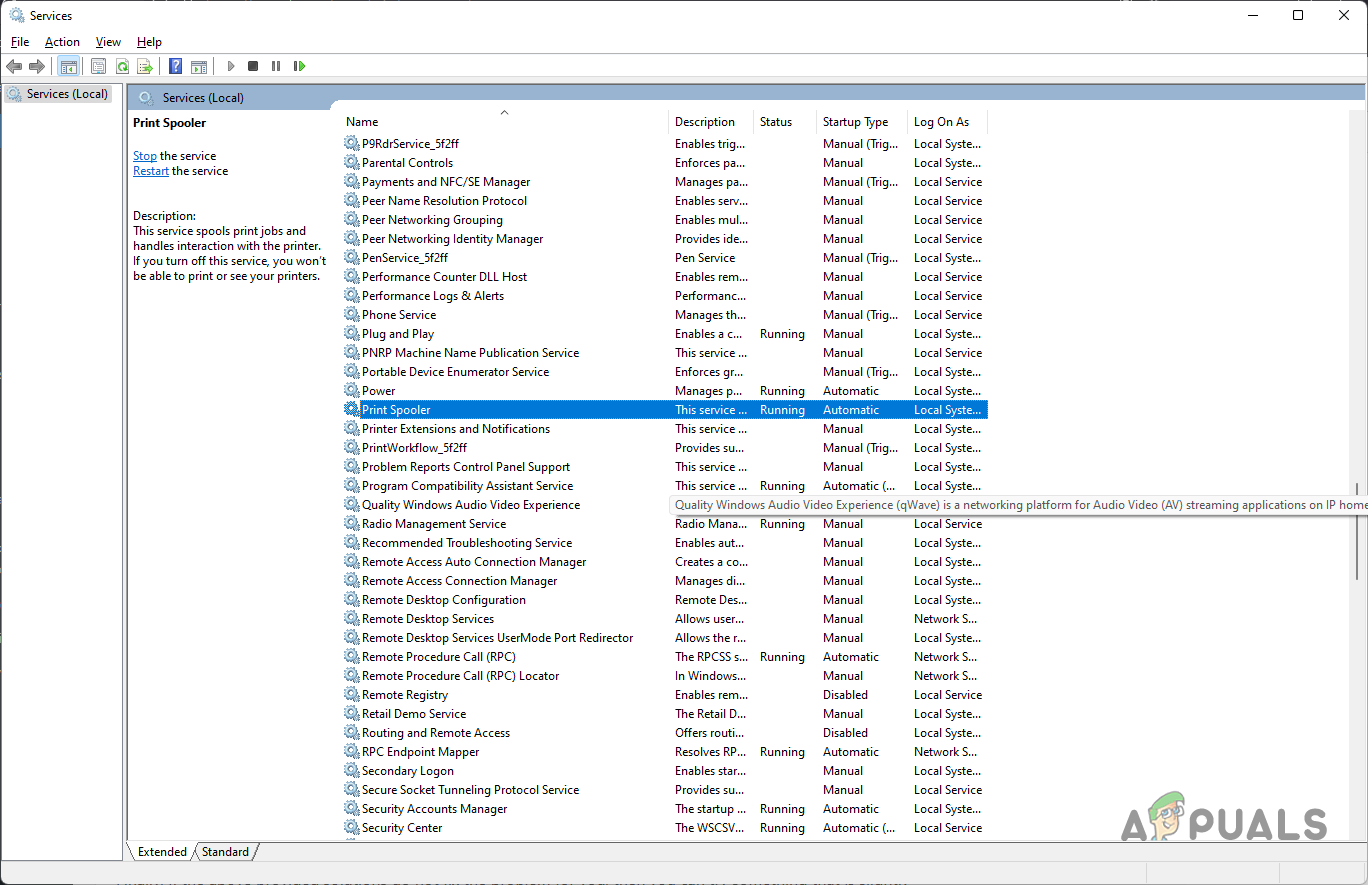
services.msc” on it and hit OK. - When the Services window comes into the display, search for the service that goes by the name – “Print spooler”.
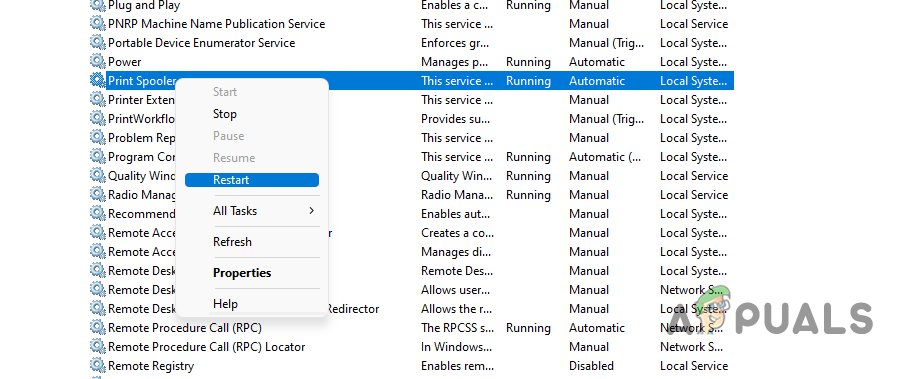
- Right-click on this service, and hit the option – Properties.

- Select “Automatic” using the drop-down menu next to the Startup type, and hit the option – Start.

Thus far, we have removed the stored driver cache and restarted the print spooler service. Now, you open the Control Panel and remove the previously installed Printer. After you remove it successfully, follow this guideline to manually add a printer to your computer.
Note: Make sure to restart the Print spooler service that you stopped earlier. Otherwise, you may get into some other printer-related issues or bugs.
I hope this way helps to fix the printer error 0x0000007c without uninstalling the recent security/non-security updates on Windows 11/10 PC.
3] Run System File Checker
If this error is occurring just because your PC lacks a few important files and folders, running an SFC scan might bring back those missing files. Here’s how can you use this tool to fix the missing system files issue –
- Press Win + S, and type “CMD”.
- Right-click on the top result, and select the option – Run as administrator.
- Doing so will launch the Command Prompt as Admin.
- On the elevated console, type the following, and press Enter –
sfc /scannow

- Let this code run as long as it reaches 100%.
- When it reaches this mark, close CMD, and restart your PC.
When attempting to connect to a shared network printer, the error message “Windows cannot connect to the printer. Operation failed with error 0x0000007c” may appear, preventing successful printer installation. The error code 0x0000007c corresponds to ERROR_INVALID_LEVEL, indicating a mismatch or incompatibility in the expected interface level between the client and the print server.

This issue often arises after installing Windows updates KB5006670 (Windows 10) or KB5006674 (Windows 11), which introduced changes to the Print Spooler service, leading to authentication and driver installation problems.
Additional causes include corrupted or outdated printer drivers, misconfigured registry settings, and conflicts with the Print Spooler service. Now that you know the causes, let’s discuss the solutions.
1. Uninstall Problematic Security Update
As mentioned earlier, one way to fix this problem is by uninstalling the security update that caused the error. The specific update in most cases is KB5006670. Uninstalling Windows updates is fairly simple. If a Windows update causes issues, uninstalling it can usually resolve the matter right away.
However, for this solution to work properly, you should pause Windows updates temporarily. Otherwise, Windows might automatically reinstall the update, and the problem may return.
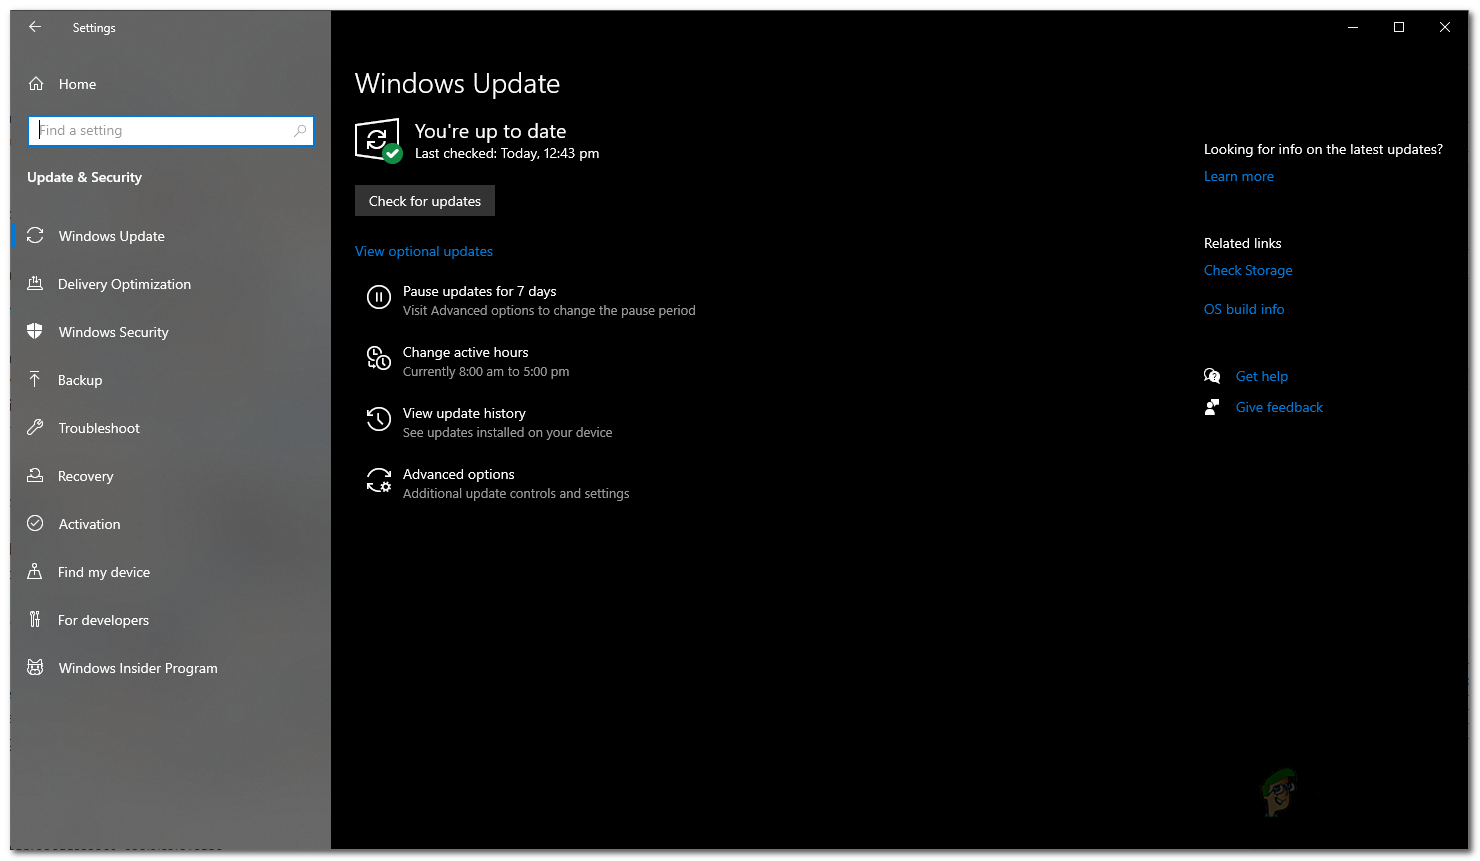
- First, press the Windows key + I on your keyboard to open the Windows Settings window.
- Go to Windows Update from the navigation menu.

Windows Settings - Click on View update history.

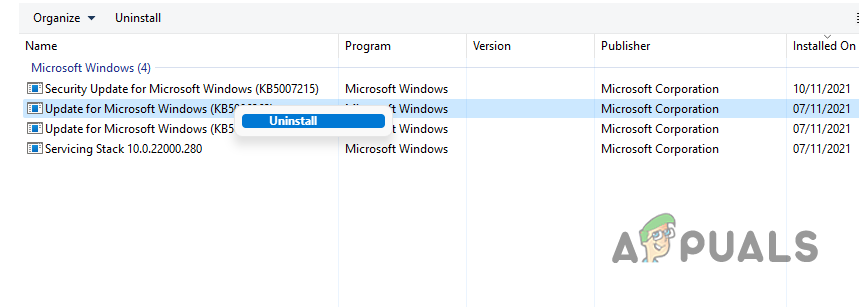
Windows Update Settings - On the new page, under Update history, click Uninstall updates.
- A Control Panel window listing installed updates will open.
- Find the KB5006670 update in the list.
- Double-click on it to uninstall it.

Uninstalling Windows Update - After uninstalling, return to the Windows Update section in Settings.
- Click Pause updates for 7 days to stop updates for a week.
Windows Update Settings - Finally, restart your computer.
- Check if the problem is resolved after your computer restarts.
2. Reinstall the Printer
Another way to fix the error is by reinstalling the printer. However, before reinstalling, it’s important to clear the drivers folder on your computer. The location of this folder is slightly different depending on whether you have a 64-bit or 32-bit version of Windows, but don’t worry as we’ll explain both below. You’ll also need to restart the Print Spooler service using the Services manager.
- Open File Explorer.
- Copy and paste one of the following addresses into the address bar, depending on your system type:
64-bit OS: C:\Windows\System32\spool\drivers\x64\3

32-bit OS: C:\Windows\System32\spool\drivers\W32X86\3

Navigating to Printer Driver Folder - Once inside the folder, cut all the files and paste them somewhere safe, like your desktop.
- Next, press Windows key + R to open the Run dialog box.
- Type services.msc and hit Enter to open the Windows Services window.

Opening up Windows Services - Find the Print Spooler service in the list.

Print Spooler Service - Right-click on it and select Restart.

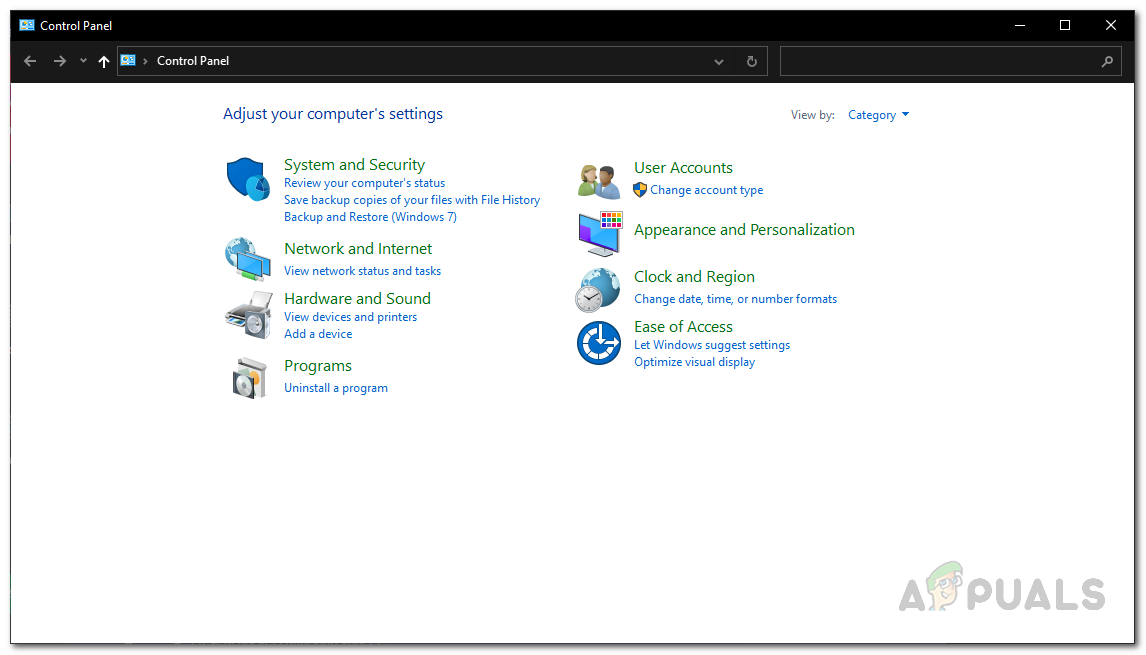
Restarting Print Spooler Service - After restarting the service, open the Control Panel (search for it in the Start menu).
- Click on Uninstall a program.

Control Panel - Uninstall the printer from the list by double-clicking on it.
- Now, manually add the printer again and install the required drivers by downloading them from the printer manufacturer’s website.
- After these steps, your printer should work normally, and the error message should be gone.
3. Cancel Driver Installation Midway
If the solutions above do not work for you, here’s another method that has worked for some users. To try this, first download the drivers for your printer from the manufacturer’s website. Begin the installation process, and when prompted to connect the printer using a cable, select the option to connect to a remote printer instead.
Once the connection is established, cancel the installation. After doing this, check to see if the problem still exists. This workaround may seem a bit unusual, but it has resolved the issue for some people.
Kamil Anwar
Kamil is a certified MCITP, CCNA (W), CCNA (S) and a former British Computer Society Member with over 9 years of experience Configuring, Deploying and Managing Switches, Firewalls and Domain Controllers also an old-school still active on FreeNode.
Issue: Hello. I received the error 0x0000007c operation failed when installing the network shared printer. The connection fails, and I cannot connect the printer due to the error. It is Windows 11. Maybe the issue is with the OS, but I saw some posts about Windows 10 and this issue too. Can you help me fix this problem?
Solved Answer
The network printing error 0x0000007c in Windows is the issue with 10 and 11 versions that got apparently caused by the security update released in October. The widespread issue leads to problems when adding the network printer or even printing. The update was needed for the particular Windows Print Spooler vulnerabilities, but the upgrade led to a wide range of issues with network printing problems like the “Windows cannot connect to the printer. Operation failed with error 0x0000007c” issue.
These updates got released in October and November because the PrintNigthmare vulnerability caused major issues and needed to be addressed.[1] But the security fix causes problems for users now.[2] The issue is triggering errors for organizations because the network printing is not capable of properly working. The issue was addressed by Microsft, so the fix from their end is provided. However, it is not that helpful for everyone.
The problem remains to bother people for a while, but it is possible to solve the issue. Security updates are for the security improvements, but functionality issues now need to be solved. Uninstalling the update that caused the issue could be a simple solution. That works if you stop the later updates too until the permanent fix for the error is getting released.
Otherwise, the network printing error 0x0000007c in Windows is not solved. At the time, there are some workarounds that could work for users. There are a few of them, so you might want to follow these steps and try a few variants to permanently solve the issue with network printers. You can see which is working for you.
Another fix released by the Microsft is released, but it is only addressing the problematic changes after the October update.[3] The registry editing can be found below, but there are more triggers and causes for the error 0x0000007c, so you should follow with the more in-depth solutions. Also, for the quick system check and file repair, try to run FortectMac Washing Machine X9 that can fix additional issues occurring during the fixing processes and help further improve the performance of the OS.

1. Remove the Windows 11 and Windows 10 updates
- Go to Start and then open the Settings app.
- After that click on Updates & Security.
- Click on View Update History.

- Now click on Uninstall Updates.
- Choose the recently installed update based on your operating system build.
- Click Uninstall.
- Restart your PC.

2. Restart Print Spooler service
Fix it now!
Fix it now!
To repair damaged system, you will have a 24hr Free Trial and the ability to purchase the licensed version of the Fortect Mac Washing Machine X9.
3. Manually replace the mscms.dll file
- Navigate to the following folder: C:\\Windows\\system32\\
- If you have a 32 bit Windows installed, navigate to the following folder and paste the previously copied mscms.dll file in it: C:\\windows\\system32\\spool\\drivers\\w32x86\\3\\
- If you have a 64 bit Windows installed, navigate to the following folder and paste the previously copied file in it. C:\\windows\\system32\\spool\\drivers\\x64\\3\\
- Look for mscms.dll in the directory copy the file.
- Reboot.

4. Create a new local port
Fix it now!
Fix it now!
To repair damaged system, you will have a 24hr Free Trial and the ability to purchase the licensed version of the Fortect Mac Washing Machine X9.
5. Remove the incompatible Printer drivers
- Press Windows + R to open Run box.
- Type printmanagement.msc and hit Enter.
- This will open print management.
- From the left pane, click All Drivers.
- Right-click on the printer driver and click Delete.
- Repeat the above steps with all drivers.
- Restart windows.
Edit Windows Registry – The workaround
Fix it now!
Fix it now!
To repair damaged system, you will have a 24hr Free Trial and the ability to purchase the licensed version of the Fortect Mac Washing Machine X9.
These registry values need to be put into the Windows client. Reboot after the new value is added in.
- Windows 10 2004, 20H2, 21H1 and 21H2: [HKEY_LOCAL_MACHINE\\SYSTEM\\CurrentControlSet\\Policies\\Microsoft\\FeatureManagement\\Overrides] “713073804”=dword:00000000 or the
- Windows 10 1909: [HKEY_LOCAL_MACHINE\\SYSTEM\\CurrentControlSet\\Policies\\Microsoft\\FeatureManagement\\Overrides]
“1921033356”=dword:00000000 - Windows 10 1809 and Windows Server 2019: [HKEY_LOCAL_MACHINE\\SYSTEM\\CurrentControlSet\\Policies\\Microsoft\\FeatureManagement\\Overrides]
“3598754956”=dword:00000000
Microsoft should release the formal update and fix for this in the future. It is stated that December 2021 patch Tuesday includes the permanent solution.
Repair your Errors automatically
ugetfix.com team is trying to do its best to help users find the best solutions for eliminating their errors. If you don’t want to struggle with manual repair techniques, please use the automatic software. All recommended products have been tested and approved by our professionals. Tools that you can use to fix your error are listed bellow:
do it now!
Download Fix
Happiness
Guarantee
do it now!
Download Fix
Happiness
Guarantee
Compatible with Microsoft Windows
Compatible with OS X
Still having problems?
If you failed to fix your error using FortectMac Washing Machine X9, reach our support team for help. Please, let us know all details that you think we should know about your problem.
Fortect will diagnose your damaged PC. It will scan all System Files that have been damaged by security threats. Mac Washing Machine X9 will diagnose your damaged computer. It will scan all System Files and Registry Keys that have been damaged by security threats. To repair damaged system, you will have a 24hr Free Trial and the ability to purchase the licensed version of the Fortect malware removal tool. To repair damaged system, you have to purchase the licensed version of Mac Washing Machine X9 malware removal tool.
Access geo-restricted video content with a VPN
Private Internet Access is a VPN that can prevent your Internet Service Provider, the government, and third-parties from tracking your online and allow you to stay completely anonymous. The software provides dedicated servers for torrenting and streaming, ensuring optimal performance and not slowing you down. You can also bypass geo-restrictions and view such services as Netflix, BBC, Disney+, and other popular streaming services without limitations, regardless of where you are.
Don’t pay ransomware authors – use alternative data recovery options
Malware attacks, particularly ransomware, are by far the biggest danger to your pictures, videos, work, or school files. Since cybercriminals use a robust encryption algorithm to lock data, it can no longer be used until a ransom in bitcoin is paid. Instead of paying hackers, you should first try to use alternative recovery methods that could help you to retrieve at least some portion of the lost data. Otherwise, you could also lose your money, along with the files. One of the best tools that could restore at least some of the encrypted files – Data Recovery Pro.