
На чтение 3 мин. Просмотров 3.8k. Опубликовано
Видеоредактор Windows Movie Maker предназначен для монтажа и редактирования клипов. Муви Мейкер работает с картинками и видеофайлами, видеоредактор поддерживает разные форматы аудио и видео. Добавлять материал можно как с компьютера, так и с подключенного к нему устройства. Для того, чтобы можно было взаимодействовать с файлами разных форматов, следует скачать кодеки для Windows Movie Maker.
Навигация
- Для чего нужны кодеки
- Автоматическое обновление библиотеки
- Как скачать набор кодеков из Интернета
Для чего нужны кодеки
Кодек — это специальная программа, которая позволяет работать с определенными типами аудио- и видеоданных. Она необходима для цифровой обработки входящих данных. В случае, если кодек отсутствует в операционной системе, импортировать файлы для работы в Movie Maker не получится.
Проверить наличие кодеков в операционной системе можно так:
- Нужно открыть проигрыватель Windows Media Player. В нем надо запустить тот файл, который пользователь хочет импортировать для Муви Мейкер.
По умолчанию, Windows Media Player является основным проигрывателем этой операционной системы и поставляется вместе с базовым комплектом ПО для работы.
- Если файл проигрывается без проблем, то файл можно загрузить в Movie Maker.
Если файл не воспроизводится, необходимо скачать кодеки Movie Maker.
Автоматическое обновление библиотеки
Если проверка показала, что в Movie Maker нельзя импортировать файл, нужно обновить базу данных. Так как через Movie Maker осуществить это нельзя, то лучше воспользоваться Windows Media Player.
- Необходимо открыть Windows Media Player.
- В окне плеера нужно вызвать контекстное меню.Это делается щелчком правой кнопки мыши.

- Далее нужно кликнуть по кнопке «Дополнительные возможности».
- В открывшемся диалоговом окне нужно перейти на вкладку «Проигрыватель».

- Установите галочку в поле «Автоматическое обновление».
- Если версия Windows Media Player не имеет такого поля, следует перейти на вкладку «Библиотека».

- В этой вкладке нужно поставить галочку. В поле «Искать дополнительные сведения в Интернете».


Теперь плеер будет автоматически искать и добавлять информацию, необходимую для открытия файлов. Такой способ не гарантирует того, что система обязательно загрузит требуемый кодек.
Как скачать набор кодеков из Интернета
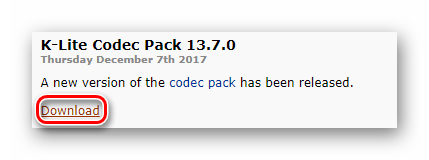
Если автоматическое обновление кодеков не помогло, можно воспользоваться готовым пакетом. Одним из самых популярных является K-Lite Codec Pack.
Загрузить его можно следующим образом:
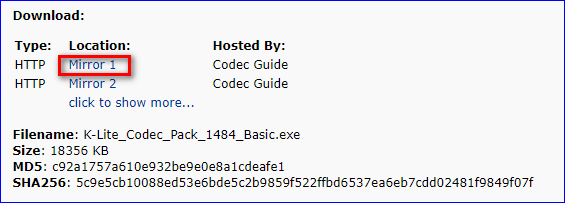
- Перейдите по ссылке.
- Кликните по кнопке Download Basic.

- Выберите одну из доступных ссылок для загрузки пакета.

- В открывшемся окне нажмите «Сохранить».
Скачанный файл является приложением. Следовательно, его нужно скачать и установить.
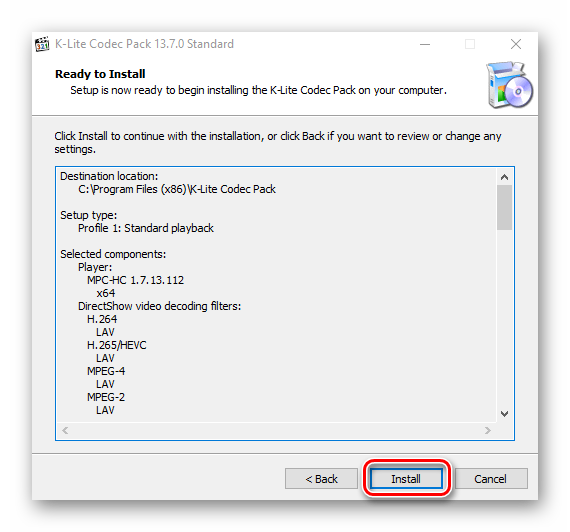
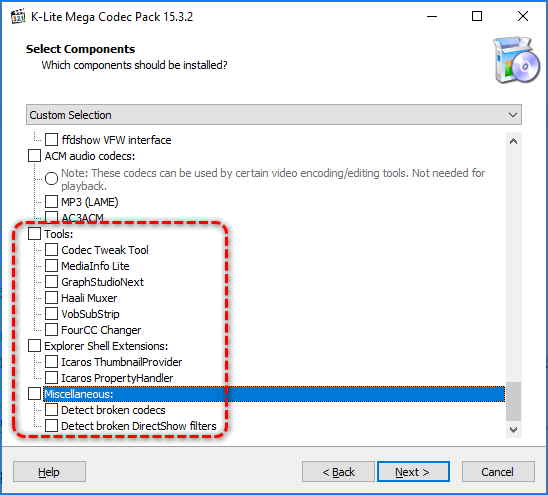
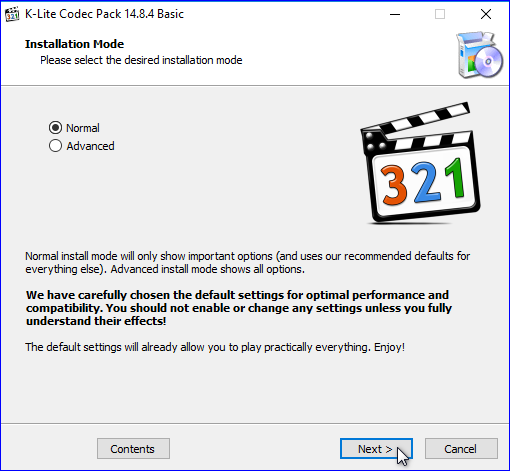
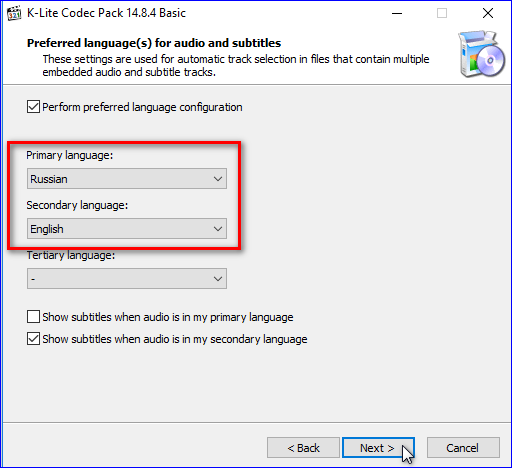
- Открыв скачанный пакет, следует в поле выбора поддерживаемых форматов для работы выбрать их галочками.

- Кликните по кнопке Next.
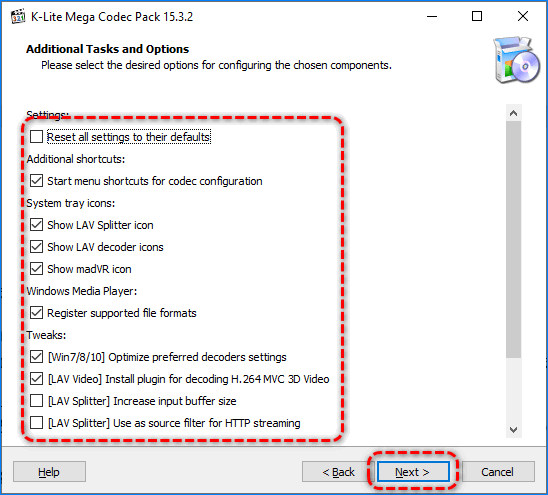
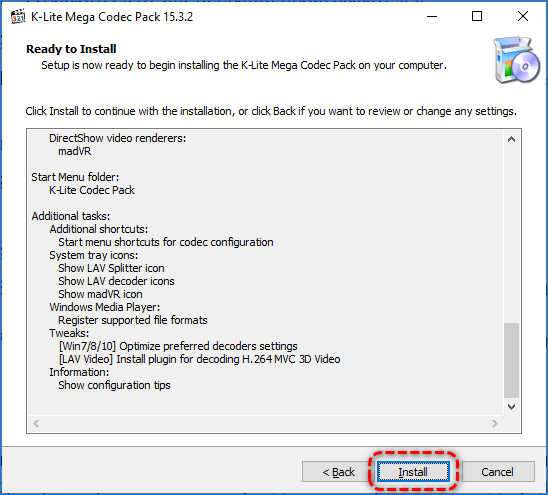
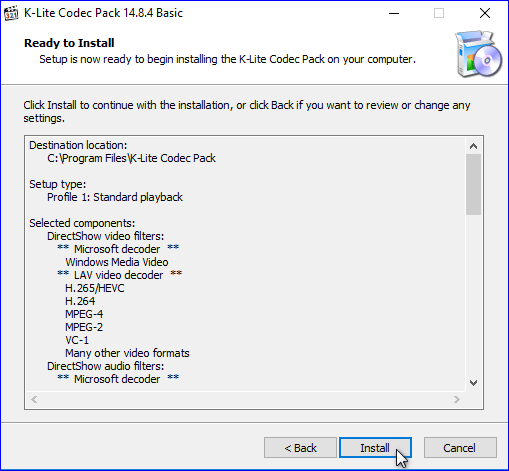
- В появившемся окне отобразятся все загружаемые форматы и путь их сохранения. После проверки нажмите кнопку Install.

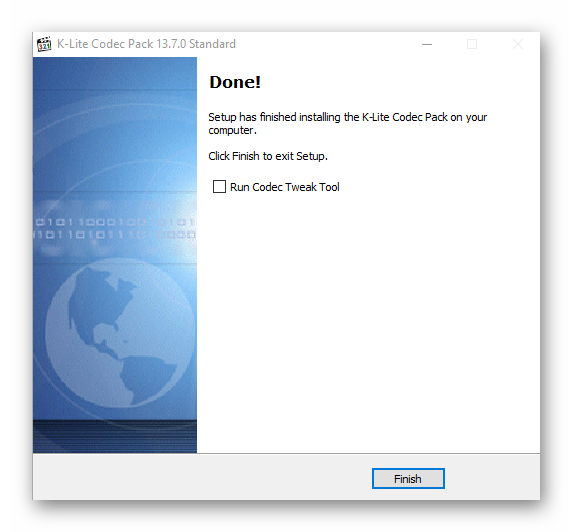
- Дождитесь окончания установки.


K-Lite Codec Pack позволит работать с большинством известных форматов. Теперь для работы в Movie Maker можно добавлять ранее недоступные файлы аудио и видео.
24 January 2024 Senior Product Manager
Summary
Windows Movie Maker, developed by Microsoft, is free video editing software loved by Windows users. It offers practical editing functions, including cutting, merging, adding effects and themes, and adjusting playback speed. However, it has limited video encoding formats.
I. What video encoding formats does Windows Movie Maker support?
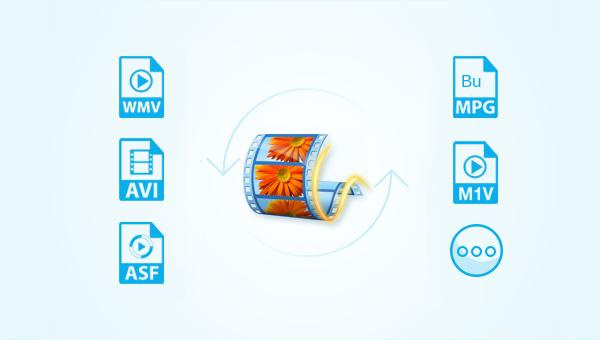
As we mentioned in the introduction just now, the video encoding formats that Windows Movie Maker can support are relatively limited, so what file formats does it support? The details are as follows: ASF, AVI, WMV, MPEG, MPG, M1V, MP2, WM, WMA, etc. In addition, the editor will give a brief introduction to some of the common video formats, let’s go and find out together.
ASF Format : It is a data format developed by Microsoft for Windows 98 that includes audio, video, images, and control command scripts. It is very suitable for transmission on the IP network, so it is often used in on-demand, live broadcast, and distance education.
WMV Format: Also known as Windows Media Video Format, the extension is (.wmv). This video format is a video compression format, so the video size of this format is relatively small, suitable for playback and transmission on the Internet. Now mainstream players on the market, such as: RealPlayer, Windows Media Player, VLC player, etc., all support playing videos in this format.
AVI Format: Its English full name is Audio Video Interleaved, which is an audio and video interleaved format. It is a multimedia file format launched by Microsoft in November 1992. It encapsulates the audio and video data in one file, and the audio and video are arranged interlaced by frame, so as to achieve the effect of synchronous playback of audio and video. There are many files in AVI format in the titles of some games, educational software, and multimedia CDs.
WMA Format: It is a new audio format introduced by Microsoft that is as famous as the MP3 format. This format exceeds MP3 in terms of compression ratio and sound quality, and is far better than RA (Real Audio), and can produce better sound quality even at a lower sampling frequency.
From the file formats supported by Windows Movie Maker software, we can easily see that, except for the several common formats described in detail above, other commonly used video formats (such as MP4 format) cannot be edited with the help of this software. Don’t worry, the editor will recommend a video editing tool with high market praise——Renee Video Editor Pro . This software can not only support the conversion of almost all video formats, but also provides a series of practical video editing tools. Function. Let’s take a closer look at this software.
II. How to use Renee Video Editor Pro for format conversion?
1. What is Renee Video Editor Pro?
Renee Video Editor Pro It is a video recording and editing tool that integrates computer screen recording, video post-production and format conversion functions. Among them, the computer screen recording function can set the recording area and screen size, and can also set the watermark, cursor style, sound source and saved format, automatic recording plan, etc., whether it is online movies, meeting video records, or game screens, software Operation steps, etc., it can help you record and save to the computer with one click.
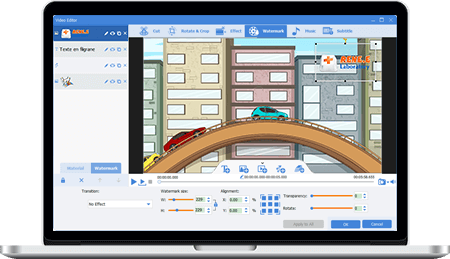
This software enhances video content with post-production tools for editing, merging, cropping, rotating, adding animations, transitions, filters, dubbing, music, and sound effect removal. It also allows subtitle creation and importation. Upon completion, videos can be converted to multiple formats, including MXF, AVI, MKV, MP4, MOV, M2TS, M4V, AAC, AC3, etc., with support for free video and audio format conversion.
Hot Topic Renee Video Editor Pro– Multi-function Video Editing Software
Multiple edit tools Edit videos with tools like cut, crop, merge and rotate.
Multiple effects Users can add effects, watermark, subtitle, background music, and even remove watermarks.
Support multiple formats It can edit videos / audios in different formats.
Format Conversion Support to convert videos and audios into different formats.
Output formats recommendation Provide output format recommendation on the basis of different models.
Different Effects Effects, watermark, background music and subtitle can be added to videos.
Multiple Edit Tools Merge, crop, rotate, cut and transform video easily.
Convert Convert videos and audios into different formats.
Free TrialFree TrialFree Trial 2000 users have downloaded and enjoyed Renee Video Editor Pro!
2. How to use Renee Video Editor Pro for format conversion?
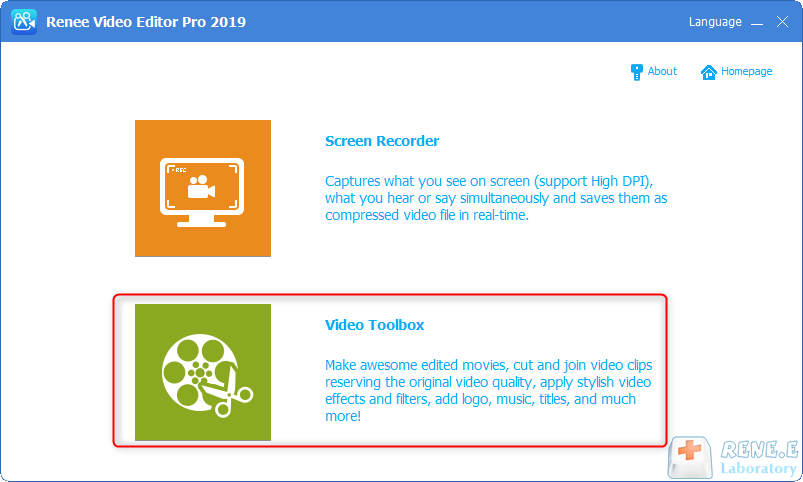
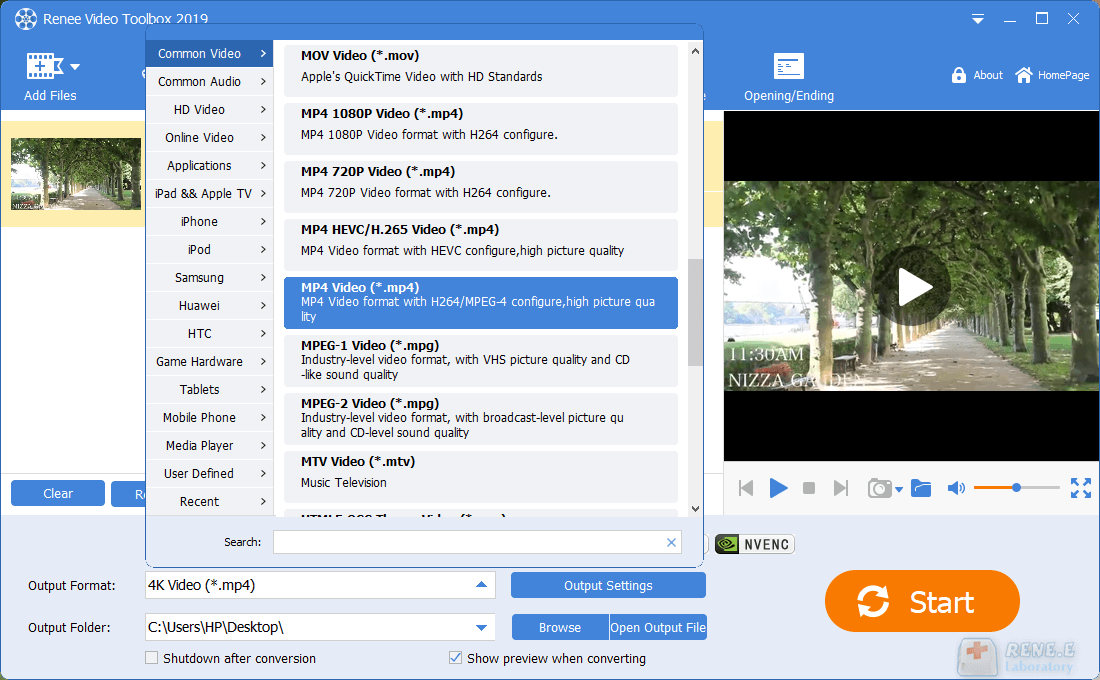
Step 1: After downloading and installing, run Renee Video Editor Pro and select the (Video Toolbox) option.
Step 2: Next, find the (Add File) button and import the video file that needs to be converted into Renee Video Editor Pro.
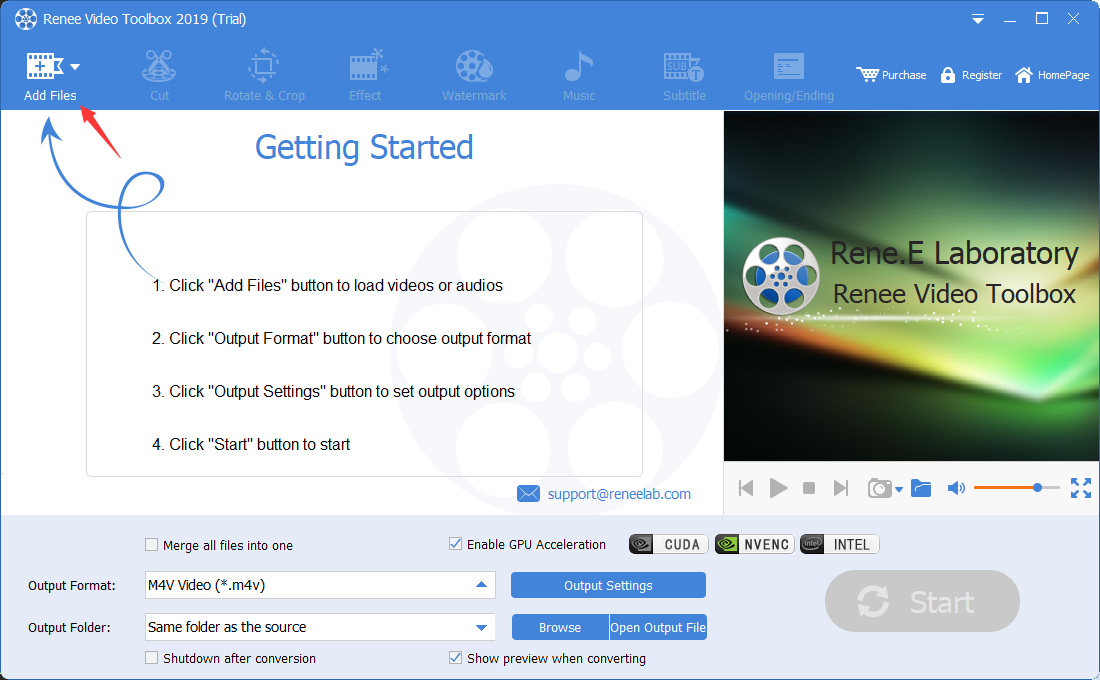
Step 3: Once the video file is uploaded, choose your required output format suitable for various devices from the provided options, or specify it in the search box below. For further video edits and parameter adjustments like format, quality, size, aspect ratio, bit rate, and frame rate, go to Output Settings.
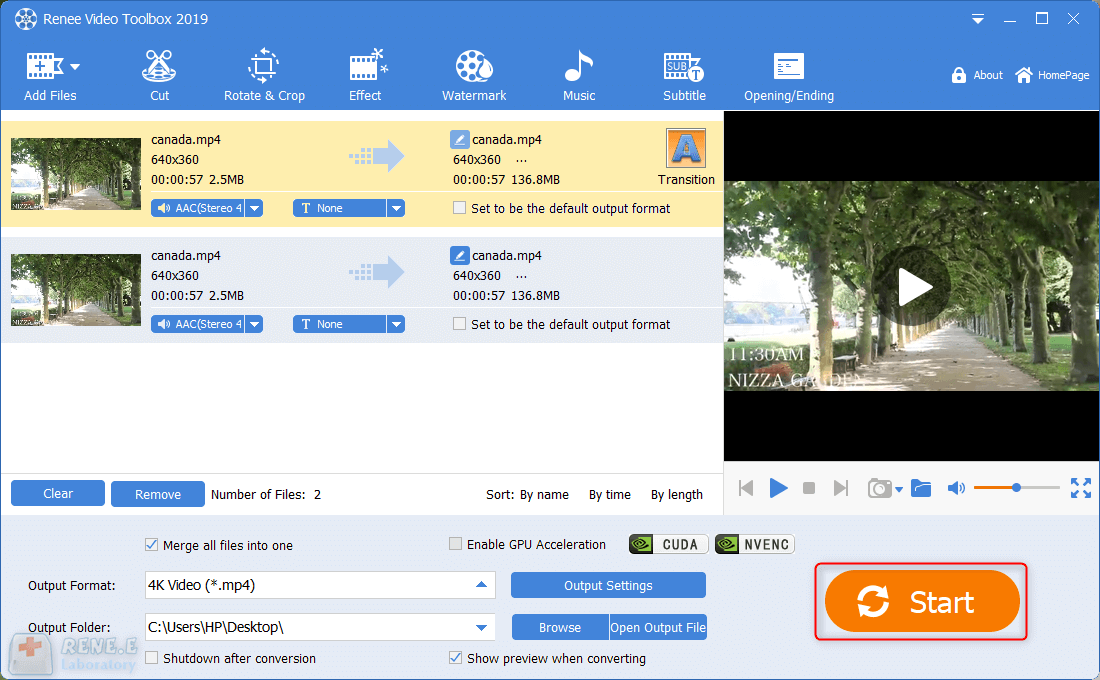
Step 4: Save your settings and return to the main page. Select the destination for the saved file by specifying the ‘Output Folder’. Then, press the 'Start' button located in the bottom right to initiate the video conversion and export process, which is designed to be both quick and user-friendly.
In addition to format conversion, you can perform a series of editing operations on the added video files through the editing function provided in the top menu bar, such as (cutting), (rotating and cropping), (special effects), (watermark), (Music), (Subtitle), (Opening/Ending), etc.
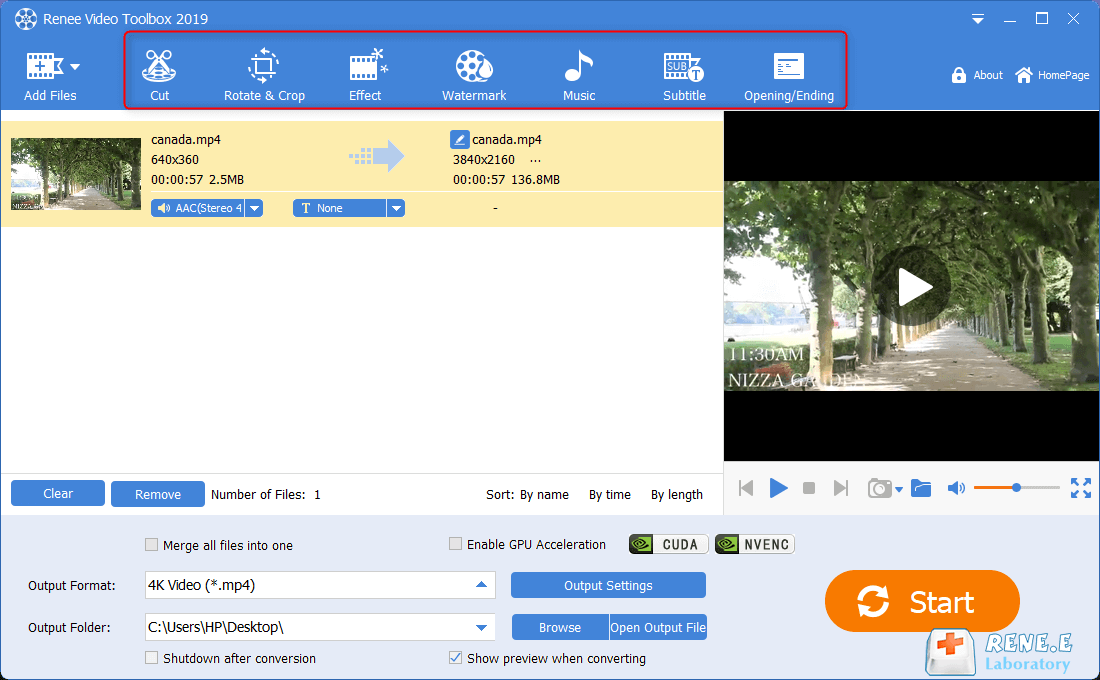
Description of editing functions in the top menu bar of Renee Video Editor Pro:
cut: Trim video clips; adjust playback speed.
Rotate and crop: Rotate the video 90 degrees clockwise, or adjust the video to achieve up-down mirroring or left-right mirroring; crop the size of the video screen.
special effects: Add filter effects, zoom effects or volume effects to your video.
watermark: Add watermark files in the form of text, pictures, videos or graphics to video files; or remove watermarks from videos.
music: Add extra audio and sound to video files; or remove original audio from video.
subtitle: Add subtitles to the movie, and you can customize the position, font and size of the subtitles.
Opening/Ending: You can add pictures or videos as titles or trailers, set the duration and transition effects of titles and trailers, add text to titles and trailers, and support adjusting the color and font size of text, etc.
Approved: Fortect
Speed up your computer’s performance now with this simple download.
If you are getting a Movie Maker codec installation error code on your computer, you should check out these troubleshooting methods. At the top of our custom Windows Movie Maker window, click the Tools menu and choose Options. At the top of the options window, click the General tab. Activate the “Load codecs automatically” test pack in the “General” area simply by clicking on this option. Click on the “OK” button.
Drag the target flat file into the data stream and frequently add a red error path from the OLE DB target to the target flat file. When the Configure Error Output screen appears, change the Error Handling drop-down menu to Redirect String and click OK to save the changes.
Script:
For example, let’s say we load data from a flat file on a daily basis. vthe SaleAmount column, which must contain only integers (numbers). If in any wayThis column contains incorrect data. My partner and I don’t want the linked package to failinstead, we want to redirect many lines to error output.
Resolution:
Approved: Fortect
Fortect is the world’s most popular and effective PC repair tool. It is trusted by millions of people to keep their systems running fast, smooth, and error-free. With its simple user interface and powerful scanning engine, Fortect quickly finds and fixes a broad range of Windows problems — from system instability and security issues to memory management and performance bottlenecks.

Change the proof type to integer in the flat file source (connection manager) as shown below
Once you have found the correct data types for the information, navigate to the error output table on the left, then configure as shown below
Add a view associated with the multicast transform to check your presence with the correct data as shown above. All records go to successful exit as shown below
Let’s add another label to the input file with the wrong SaleAmount
As many can see, the error line is often redirected to error output, while the main line is redirected to output.success. SSIS does not specify the column name depending on which row is being redirected. Custom code will probably be written for more details on column names, description, etc. In this example method, we can use some of our flat files and validation data in your main file, or we can immediately load this file into an intermediate table and write tsql tasks to validate it and find out what short period of data is invalid and Recovered data is rejected when loading.
Various transformations in SSIS provide error outputin case the operation should not be performed on the input data. We can redirect errorsStrings from different sources, mods and targets. Out appears in the exampleWe use a flat file source.
How do you handle errors in SSIS?
The arrow is blue.Red arrow.Red cross on Excel source.
Create connection as text file path using Flat File ConnectionDirector. I used the following data for some good tests
How do I manually install a codec?
Introduction.1 Double-click a video or audio file.2 Click the web help button.3 Click the WMPlugins link.4 Click the link to go to the entire codec download site.5 Click I Accept.6 Click on the correlatorTo download the codec.7 When the download is complete, click the Run button.
Applies to: SQL (all server supported versions)m) SSIS integration runtime in Azure Data Factory
In the previous task, the Lookup Currency Key transformation simply fails to generate a match when the transformation tries to process the corrupted flat file sample, resulting in an error. Since the conversion uses the default settings for the error result, any error causes the conversion to fail. If this fails, the conversion associated with the package will fail.
What is error output can you redirect rows from sources transformations and destinations in SSIS?
The error output gives you three options for handling SSIS errors: Error Component: If an error occurs, the transform, source, target, etc. will be wrong. Ignore Error: The string error type is ignored. Redirect strings: it returns the valid strings to the specified destinationia, and lines cannot be output.
Instead of allowing the exact conversion to fail, configure this component to permanently redirect the erroneous string to another processing path using any error output. Using a separate error handler provides more options. For example, you can very well clean up the data and then reprocess the erroneous row. Or you can save the current error line with error detection later for viewing and re-processing.
In this task, you set up the lookup currency key translation to redirect all strings that are often Fail to output errors. In the error branch of the Data Integration Services flow, these lines are passed to the file.
By default, two additional new columns in Integration Services error output, ErrorCode and ErrorColumn, ideally contain the numeric code of the error and the ID of the column in which the error occurred. In this task, before the surprise writes the error lines to the data file, use the script component to start using the Integration Services API and describe the error.
Configure Output Of Calculation Errors
-
In the SSIS toolbox, expand the General node and drag a script component to the design level of the Stream Data tab. Place the script to the right of the Lookup Currency Key transformation.
-
In the Select Script Component Type dialog, select Convert and then OK.
-
To connect two components, select the Lookup Currency Key transform, then drag the element’s red arrow onto the new Script transform.
How do I import MP4 into Windows Movie Maker?
Step 1: Download and install VLC, then launch it on your computer. VLC applies to both Windows and Mac. Step 2. Click the “Add” button to add the file you want to import MP4 video files into Windows Movie Maker. Step 3: Click on the output video, choose a suitable format, which is easily compatible with Windows Movie Maker.
The red arrow represents the result of the error as well as the search key’s currency conversion.Selecting the red arrow to connect the facelift to the component script redirects individual processing errors to the component script, processes the errors as a whole, and sends them to the target.
-
Download Windows Live Essentials and begin installation.Make sure you select Current Selection for the programs you want to download.Make sure you only select Photo Gallery and Movie Maker and hit the full install button.Wait for the installation to complete.
In the Customize Error Output dialog, in the Error column, select Redirect and then OK.
-
In the data flow design surface, select the name “Script” in the component as the new script component and change the name to “Get Error Description”.
Speed up your computer’s performance now with this simple download.
How do I skip bad rows in SSIS?
Add a flat file connection manager. Select a text file.Click the Advanced tab, delete all columns except for one column.Change the data type of this remaining column to DT_WSTR and length = 4000.
What is error output?
Error output allows the SSIS developer to create a separate route where error strings can be linked.
Для импорта видео- или аудиофайла необходимо наличие в системе соответствующего кодека, иначе Windows Movie Maker не сможет импортировать файл. Чтобы проверить, доступен ли необходимый кодек, запустите программу Проигрыватель Windows Media и выберите команду Проигрывается>Дополнительные параметры, перейдите в открывшемся окне на вкладку Проигрыватель и установите флажок Автоматически загружать кодеки. Теперь попробуйте открыть с помощью проигрывателя нужный видеофайл. Если он воспроизводится без проблем, следовательно, в системе установлены нужные кодеки. При необходимости проигрыватель Windows Media загрузит кодек самостоятельно.
В некоторых случаях проигрыватель Windows Media может не обнаружить необходимые кодеки. На выручку придет самый популярный пакет кодеков K-Lite Codec Pack, загрузить который можно с Web-сайта по адресу http://www.free-codecs.com/download/K_Lite_Codec_Pack.htm (или введите в Google запрос «K-Lite»). В этом пакете содержатся абсолютно все кодеки, которые вам могут пригодиться для просмотра и редактирования любых видео- и аудиофайлов. Пакет представляет собой обычный исполняемый файл, дважды щелкните на нем для установки кодеков. Во время установки можно выбрать желаемые кодеки; их довольно много, поэтому если у вас есть затруднение в выборе, оставьте все как есть, чтобы установить кодеки, выбранные по умолчанию. В большинстве случаев, этого будет достаточно для воспроизведения любых видео- и аудиофайлов.

Кодек (от англ. сodec, сокращение от слов coder/decoder, т.е. кодировщик/декодировщик) — это программа, обеспечивающая цифровую обработку видео- и аудиоданных. К популярным кодекам относятся всем известные кодеки DivX, XviD, MPEG и др.
Ниже представлен список форматов файлов, импорт которых поддерживается программой Windows Movie Maker.
- Видеофайлы: ASF, AVI, DVR-MS, M1V, MP2, MPEG, MPG, MPV2, WM, WMV.
- Аудиофайлы: AIF, AIFC, AIFF, ASF, AU, MP2, MP3, MPA, SND, WAV, WMA.
- Файлы с изображениями: BMP, DIB, GIF, JPEG, JPG, PNG, TIFF, WMF.
Программой Windows Movie Maker не поддерживаются файлы формата QuickTime с расширением .mov. Такой файл нужно преобразовать в один из поддерживаемых файлов с помощью такой программы, как, например, ImTOO MOV Converter.
Захват видео с пленочной цифровой видеокамеры стандарта miniDV
Цифровая видеокамера стандарта miniDV — самый популярный тип видеокамеры на данный момент. Видеокамеры с магнитными кассетами данного стандарта отличаются небольшой ценой и высоким качеством изображения. Постепенно эти видеокамеры вытесняются другими моделями на жестких дисках и SD-картах, в которых используются другие стандарты кодирования, однако стандарт miniDV пока и не думает сдавать свои позиции. И если видеозаписи с жесткого диска цифровой видеокамеры перенести так же просто, как и файлы из любой папки Windows, то видеопоток с видеокамеры стандарта miniDV необходимо «захватить». Сделать это можно как с помощью отдельной программы (такой как Adobe Premiere), так и благодаря встроенным возможностям Windows Movie Maker.

Для импорта вам понадобится мастер Импорт видео. Подключите видеокамеру к компьютеру в режим воспроизведения. Если программа Windows Movie Maker уже запущена, мастер будет запущен автоматически. В противном случае щелкните на ссылке Файлы с цифровой видеокамеры на панели Импорт.
В открывшемся окне мастера введите имя файла для импорта, выберите папку для его хранения и формат файла. Формат AVI потребует 13 Гбайт свободного пространства на жестком диске для одного часа видеозаписи, а формат WMV — всего 2 Гбайт, однако за счет несколько худшего качества. Кроме того, файлы WMV поддерживаются не всеми программами для редактирования видео.
Щелкните на кнопке Далее. В очередном окне следует решить, нужно скопировать все содержимое видеокассеты или только отдельные фрагменты. Выбрав первый вариант, щелкните на кнопке Далее, чтобы начать импорт. Во втором случае кассета будет перемотана на начало и начнется ее воспроизведение. При этом в диалоговом окне будет показано оставшееся время импорта, объем занятого и свободного дискового пространства. Если вам нужно импортировать с кассеты только первые 20 мин., щелкните на кнопке Стоп по достижении этого значения.
Если вы решили скопировать только фрагменты видеозаписи, выбрав соответствующий переключатель в предыдущем окне, то в новом окне появится возможность перейти к нужному кадру видеозаписи, с которого начнется захват. Используйте кнопки управления для перехода к требуемому кадру. Также можно указать время завершения импорта, если вам точно известна продолжительность желаемого видеофрагмента.
Теперь, когда весь нужный видеоматериал импортирован в коллекцию, пора приступить к созданию своего шедевра!
Читаем дальше: Windows Movie Maker: редактирование видеоматериала.
Кодеки для Movie Maker
На данный момент кодеки выпускаются огромными пакетами, где из них можно выбрать самые необходимые для установки. Больше всего, пользуется спросом K-Lite Codec Pack. Он помогает устранить проблемы с импортом файлов формата mp4, mpeg-2 и других.
Установка кодеков для Виндовс Муви Мейкер
Сразу стоит оговориться, что официальная поддержка программы была остановлена вначале 2017 года. Но это не помешает кодеки для windows movie maker скачать бесплатно.
На данный момент старую версии, с окончанием 2012 невозможно скачать с официально сайта Microsoft, что и говорить про 2.6. С выходом в мир Виндовс 10, их заменили на другую программу с похожим функционалом. Но далеко не все перемены к лучшему и большинство пользователей отдают своё предпочтение уже полюбившимся утилитам.
К сожалению, официальный сайт кодеков доступен только на английском языке, но даже им не владея, можно с лёгкостью разобраться как перейти к загрузке нужной версии кодеков.
Далее, можно выбрать одну из следующих версий пакета кодеков:
Кодеки установлены, теперь можно импортировать ранее недоступные форматы видео. Например, наконец-то появляется поддержка популярного видео формата avi, которого ранее не поддерживался.
Вот и весь процесс установки недостающих кодеков для Windows Movie Maker. Кодеки доступны для всех новых операционных систем, включая виндовс 7.
Насколько бы ни был развит современный рынок видеоредакторов, некоторые до сих пор не могут забыть стандартные программы, которые ранее были предустановлены на любой из старых ОС Виндовс.
Скачать K-Lite Codec Pack бесплатно
| Рекомендуем! InstallPack | Стандартный установщик |
|---|---|
| Официальный дистрибутив Movie Maker | |
| Тихая установка без диалоговых окон | |
| Рекомендации по установке необходимых программ | |
| Пакетная установка нескольких программ |
рекомендует InstallPack, с его помощью вы сможете быстро установить программы на компьютер, подробнее на сайте.
Источник
Windows Movie Maker не видит видео в формате MP4 (MPEG-4)
Windows Movie Maker не видит видео в формате MP4 (MPEG-4) по простой причине – приложение безнадежно устарело. Оно не работает с новыми версиями кодеков – алгоритмами преобразования и сжатия мультимедийного контента.
Почему одни MP4 файлы открываются, а другие нет?
Формат MP4 появился в 1998 году. Он представляет собой группу алгоритмов сжатия аудио и видео, которые постоянно совершенствуются. Кроме изображения и звука в состав MP4 могут входить текст, трёхмерные объекты, средства для управления правами и интерактивное медиа.
Видеоролики и фильмы, сжатые очень старыми версиями кодеков, Movie Maker открывает. Новые фильмы, клипы и ролики в интернете сжимаются свежими редакциями кодека MPEG-4, и штатный видеоредактор Windows ME – Vista с ними не работает, даже если такое программное обеспечение установлено на компьютере.
Выходы из ситуации:
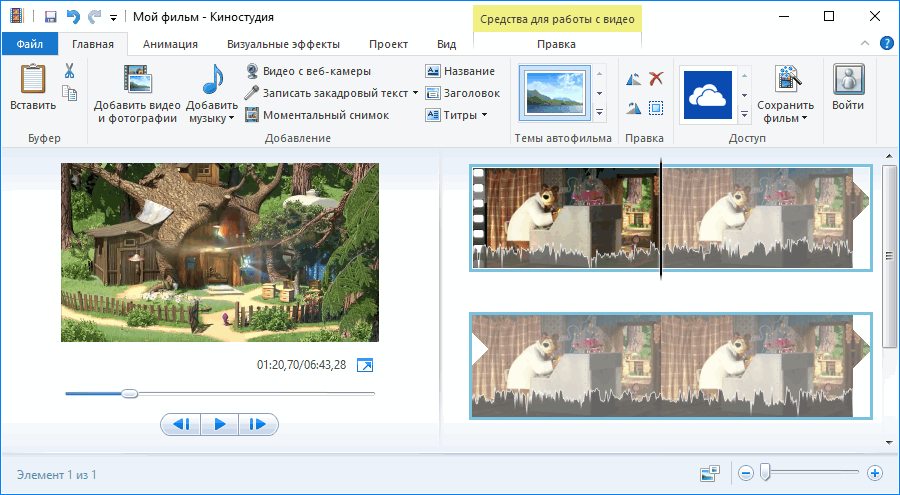
Киностудия также больше не развивается, однако начинающему пользователю предлагает больше возможностей:
Загрузить Киностудию можно по ссылке, подробная инструкция по установке.
Приложение распространяется в составе Основных компонентов Windows, отдельного установщика не существует.
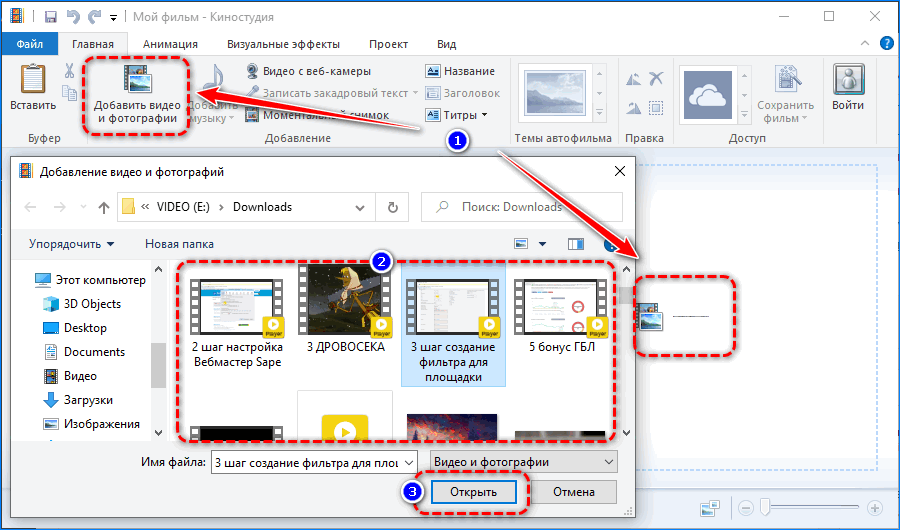
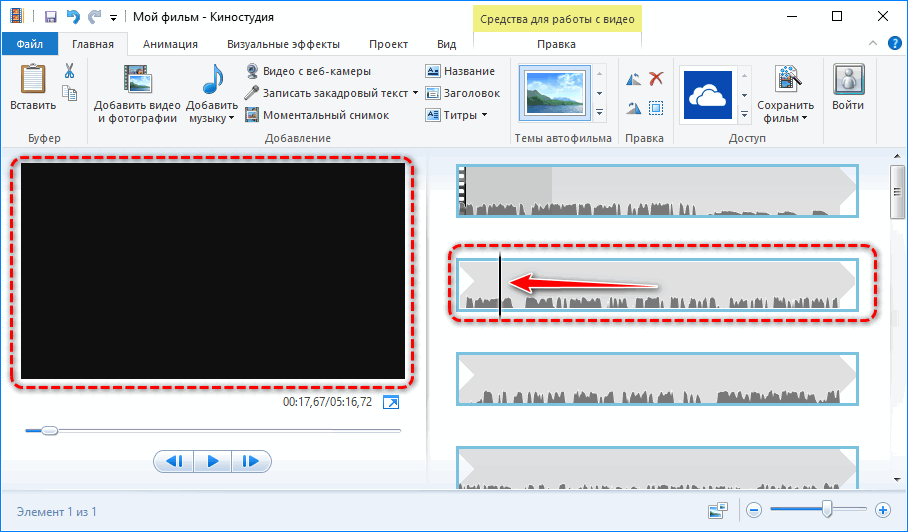
После запуска Киностудии перетащите видео, которое не видит программа Movie Maker, на панель раскадровки (расположена справа) или импортируйте файл функцией «Добавить…».
Иногда даже обновленный инструмент для видеомонтажа может не отображать видео – вместо стоп-кадров в правой части окна увидите серый фон, а в окне предварительного просмотра через Windows Media Player правее – черный прямоугольник. В этом случае может помочь конвертирование файла, замена видеоредактора на современный, иногда – обновление кодеков. Начнем с них.
Как обновить кодеки
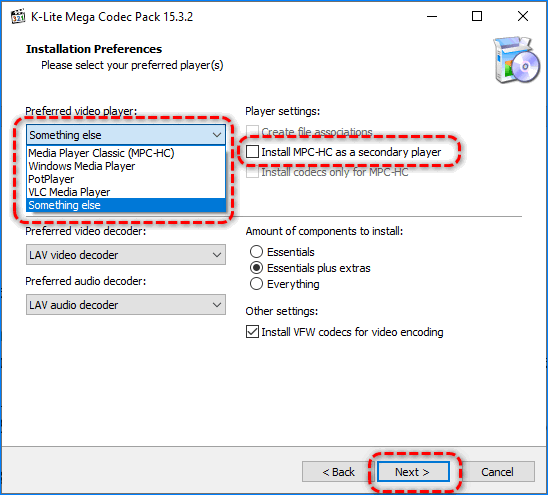
Для работы с видео Киностудии нужен проигрыватель WMP. Если соответствующий софт отсутствует, приложения не смогут раскодировать содержащиеся в MP4 потоки. Лучшим набором дешифраторов для мультимедиа признан K-Lite Codec Pack.

Если K-Lite Codec Pack на компьютере не обнаружится, в первом окне просто нажмите Next.
После перезапуска компьютера попробуйте импортировать проблемный файл.
Конвертирование
Если опять не загружается видео в MP4 в видеоредактор, конвертируйте файл в родной для Windows Media Player формат WMV. Рассмотрим на примере Movavi Video Converter.
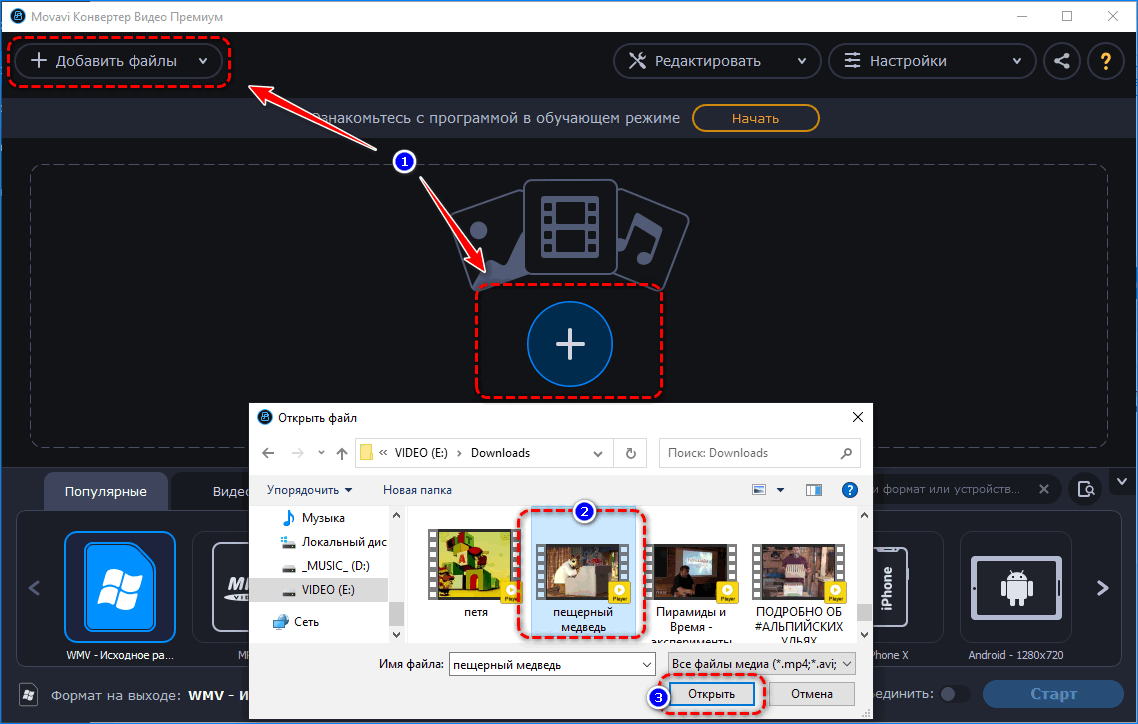
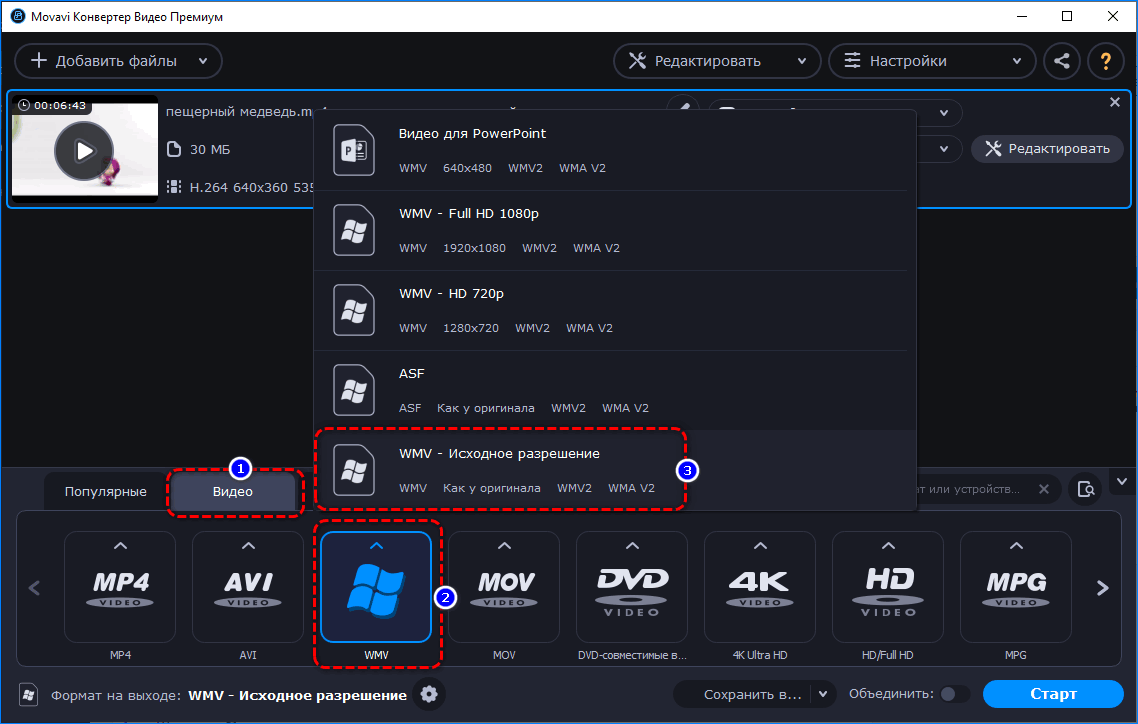
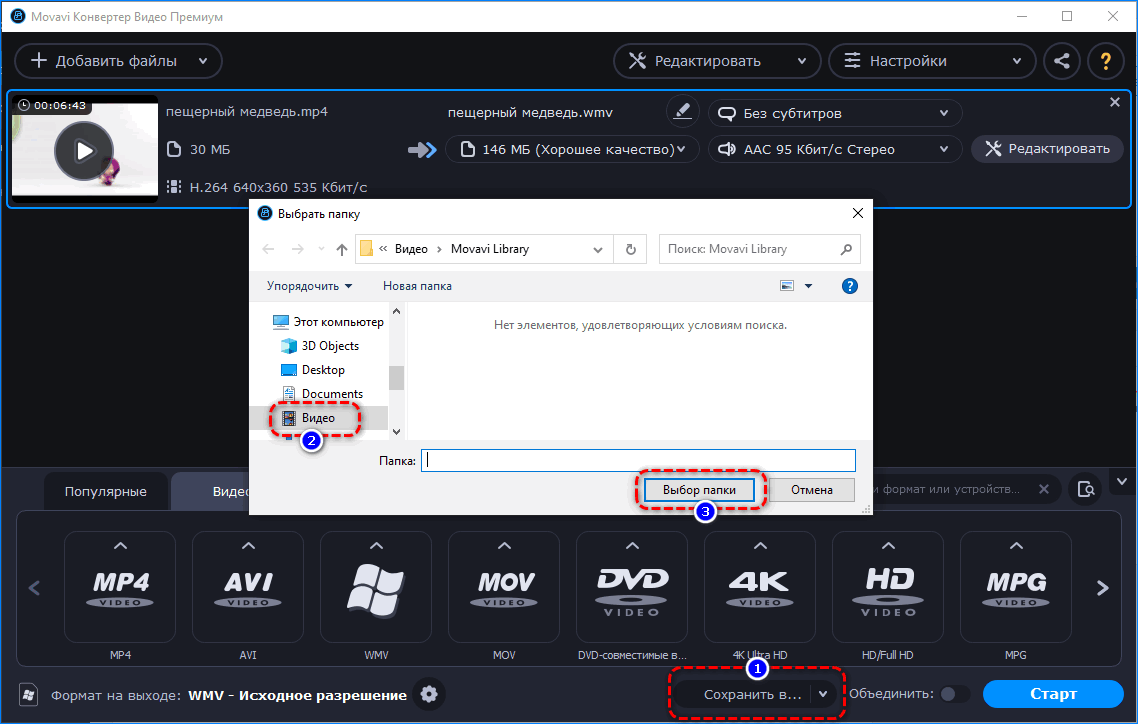
Если этого не сделать, файл появится в исходной директории.
Конвертированный фильм загрузите в видеоредактор. Проблем с экспортом и отображением возникнуть не должно.
В ином случае — воспользуйтесь современным редактором видео, времена стандартного приложения от Microsoft прошли.
| Рекомендуем! InstallPack | Стандартный установщик |
|---|---|
| Официальный дистрибутив MoveMaker | |
| Тихая установка без диалоговых окон | |
| Рекомендации по установке необходимых программ | |
| Пакетная установка нескольких программ |
рекомендует InstallPack, с его помощью вы сможете быстро установить программы на компьютер, подробнее на сайте.
Источник
Windows Movie Maker: импорт материалов/подключение видеоустройства/кодеки
Данная статья посвящена вопросам работы с программой Windows Movie Maker, а именно процессу подключения видеоустройства, импорта материалов, а также ознакомлению с кодеками и их установкой на компьютер.
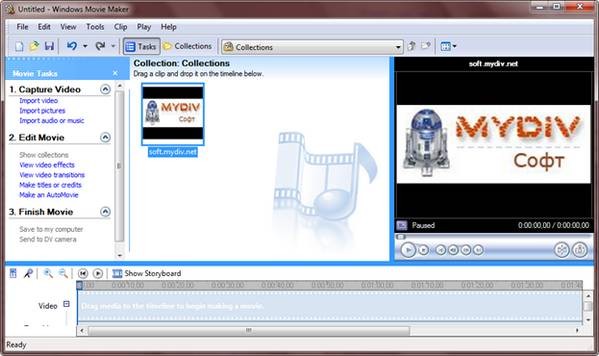
на картинке изображено главное окно программы Windows Movie Maker 2.6
Данное приложение позволяет не только импортировать видео с локального или сетевого жесткого диска, но и получить его с цифровой или аналоговой видеокамеры (поддерживается большое количество устройств).
Эта статья собственно и посвящена вопросам добавления материалов и процессу подключения видеоустройства. Также в ней мы разберемся с кодеками и их установкой на компьютер.
Добавление материалов в программу Windows Movie Maker:
Программа Windows Movie Make поддерживает возможность добавления фотографий, аудио- и видеофайлов, а также захват видео с цифровой или аналоговой видеокамеры.
Стоит отметить, что последняя возможность доступна лишь при подключении самой видеокамеры к персональному компьютеру.
К примеру, если вы правильно подключили видеокамеру, то в панели задач появится новый пункт «Capture from video device» (Запись с видеоустройства).
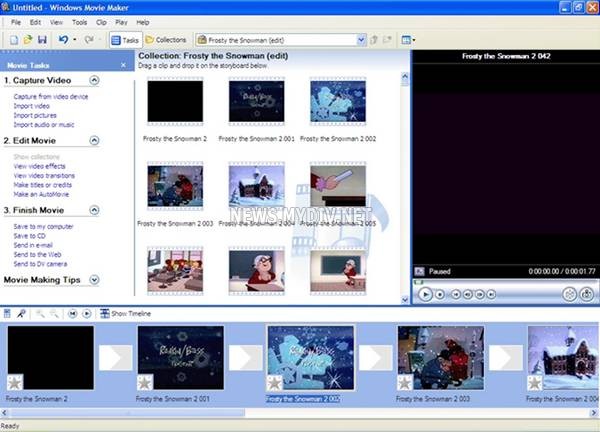
на картинке изображено главное окно программы Windows Movie Maker 2.6, с появившимся пунктом «Capture from video device» (Запись с видеоустройства)
О том, как правильно подключить видеокамеру к ПК, Вы сможете прочитать чуть ниже, а сейчас вернемся к импорту файлов.
Для начала напомним, что все импортируемые материалы отображаются в каталоге «Collections» (Коллекции), т.к. они сохраняются в нем при создании нового проекта. Стоит отметить, что при желании, Вы легко можете сделать в этой папке любое количество дополнительных подпапок с произвольными названиями.
Вот несколько способов импорта материалов в программы Windows Movie Maker:
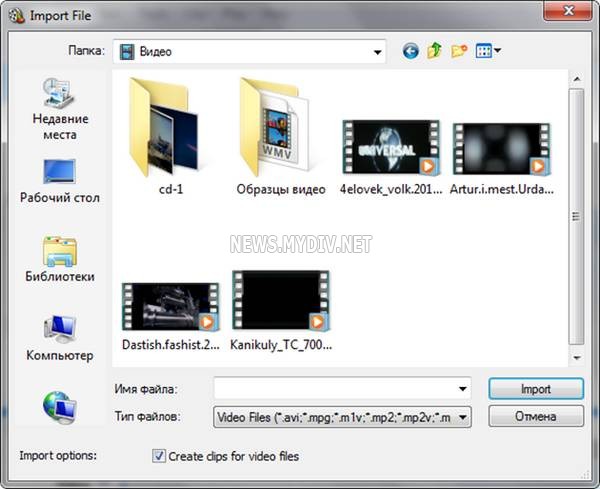
на картинке изображено окно программы Windows Movie Maker 2.6, предназначенное для импорта видеофайлов
2. Помимо этого, файлы можно просто перетащить мышью из проводника на панель «Collections» (Коллекции).
4. В случае, если Вы хотите импортировать данные с видео- или Web-камеры, прежде всего Вам нужно будет подключить ее к ПК. Далее необходимо перевести ее в режим воспроизведения и кликнуть по ссылке «Capture from video device» (Запись с видеоустройства). В случае если данный линк отсутствует, необходимо убедиться, что камера подключена правильно и щелкнуть на кнопке, которая позволяет показать/скрыть задачи. В итоге будет запущен мастер, позволяющий импортировать видео, с помощью которого данные с цифрового фотоаппарата или видеокамеры будут перенесены на Ваш компьютер.
Как правильно подключить видеоустройство к ПК?
В большинстве современных видеокамер, которые присутствуют на рынке, используется формат DV (MiniDV). При этом запечатленные данные сохраняются на магнитной кассете. Поэтому вначале, Вам необходимо обязательно перемотать кассету и только потом подключать видеокамеру к ПК. Чтобы это сделать Вам понадобится порт USB или FireWire. Стоит отметить, что использовать USB-порт крайне не желательно, т.к. в основном большинство видеокамер поддерживают передачу данных с сохранением максимального качества только через порт FireWire. А если использовать USB-порт, то велика вероятность, что Вы получите видеоролик с низким качеством.
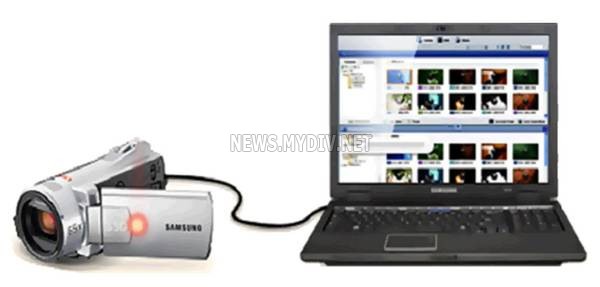
на картинке изображена видеокамера, подключенная к ноутбуку
В случае, если на Вашем ПК нет поддержки порта FireWire, то Вам придется купить внешнюю плату FireWire, которую можно легко установить в разъем PCI. Такие платы можно приобрести практически в любом компьютерном магазине. Не забудьте также о соответствующем проводе, который подключается к порту видеокамеры DV-Out и входу FireWire на компьютере.
Для того чтобы подключить к ПК цифровой фотоаппарат достаточно воспользоваться кабелем к порту USB, т.к. абсолютно все устройства подобного рода оснащены USB-портом и поддерживают передачу данных с высочайшим качеством, как собственно и цифровые видеокамеры. Сразу же после того, как Вы подключите фотоаппарат к ПК, он будет распознан ОС, и Вы с легкостью сможете скопировать данные, сохраненные на карте памяти устройства в любую папку на винчестере Вашего компьютера. А оттуда уже импортировать файлы одним из вышеописанных способов.
Еще можно воспользоваться кардридером, который подключается к USB-порту и обеспечивает высокую скорость передачи информации.
Для того, чтобы подключить Web-камеру Вам также понадобиться порт USB или, в очень редких случаях порт FireWire.
Ну, а в случае, если Вы хотите захватить видео с телевидения, то Вам придется купить себе внутренний или внешний ТВ-тюнер.
Зачем нужны кодеки, где их скачать и какие форматы файлов поддерживает программа Windows Movie Maker?
Для импорта аудио- или видеофайлов в программу Windows Movie Maker необходимо, чтобы в операционной системе был установлен соответствующий кодек.
Одними из самых популярных кодеков являются MPEG, DivX, AVI, XviD, и т.д.
Вот список форматов, импорт которых поддерживает программа Windows Movie Maker:
Видеофайлы: AVI, ASF, DVR-MS, MPEG,MPG, MP2, WMV, M1V, WM, MPV2.
Аудиофайлы: AIF, AIFF, AIFC, AU, ASF, MPA, MP2, MP3, WAV, SND, WMA.
Изображения: BMP, JPG, JPEG, PNG, GIF, TIFF, WMF, DIB.
Для того чтобы проверить, установлен ли нужный кодек в Вашей ОС, необходимо просто открыть в программе «Проигрыватель Windows Media» нужный Вам видеофайл, который Вы хотите использовать для создания собственного ролика.
Если открытый файл воспроизводится без возникновения каких-либо проблем, то в ОС установлены нужные кодеки.
Поэтому советуем установить какой-либо популярный пакет кодеков:
В данных подборках содержатся самые разнообразные кодеки, которые Вам понадобятся для просмотра и редактирования аудио и видеофайлов различных форматов.
Стоит отметить, что во время установки любого из перечисленных пакетов, Вы сможете выбрать кодеки, которые хотите инсталлировать в операционную систему. Однако в большинстве случаев, можно оставить настройки, как есть, т.к. этого будет вполне достаточно для воспроизведения большинства форматов файлов.
Источник
Скачать кодеки для Windows Movie Maker

Зачем нужны кодеки для Movie Maker? Для корректной работы старой версии видеоредактора на операционной системе Windows XP / Vista / 7 необходимы дополнительные базовые компоненты, без которых будет невозможно воспроизведение некоторых типов файлов или вероятны технические сбои. Скачать кодеки для Windows Live можно на официальном ресурсу K-Lite или сайте Media Player.
Что такое кодек?
Это специальная программа, предназначенная для кодирования и декодирования мультимедиа файлов. За обработку звукозаписей отвечают аудиокодеки, за работу с видео и его воспроизведение — видеокодеки.
В процессе работы над роликов в видеоредакторе задействуются сразу оба вида кодеков. Если Movie Maker не имеет некоторых компонентов в своей основе, это может повлечь за собой некорректное воспроизведение готового аудиофайла или ролика.
Кодеки отвечают за распаковку отснятого материала на компьютере и за его возвращение в исходный формат по завершению работы в видеоредакторе. Эти компоненты сжимают аудио- и видеозапись до размеров, считываемых операционной системой и разными цифровыми устройствами. Благодаря кодированию и декодированию файлов пользователи могут воспроизводить мультимедиа файлы практически в любом формате.
Особенности работы Movie Maker
Редактор видео Windows Movie Maker ранее входил в основной состав ПО для операционных систем от компании Microsoft. Однако после выхода Windows 10 Майкрософт прекратили официальную поддержку видеоредактора и обновление его составляющих. В результате у пользователей с предыдущими версиями ОС осталась старая версия редактора, которая может работать некорректно в связи с прекращением обновлений.
Наиболее часто встречающиеся ошибки и технические сбои Movie Maker, связанные с отсутствием подходящих кодеков:
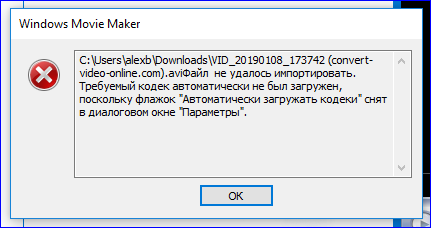
Во избежание подобных ошибок и технических сбоев, рекомендуется обновить кодеки для Movie Maker.
Как установить кодеки на ПК?
Базовые кодеки для операционной системы Windows находятся на сайте K-Lite Codec Pack. Здесь пользователь может бесплатно скачать кодеки для Movie Maker и тем самым улучшить работу видеоредактора.
Для установки codec pack на ПК нужно выполнить следующие действия:


Базовые кодеки будут установлены в систему Windows. Теперь при загрузке любых файлов в Movie Maker, видеоредактор будет считывать их корректно и не искажать исходный формат.
Важно: Старая версия Movie Maker не поддерживает формат MP4. Даже при обновлении кодеков видео данного формата будут недоступны для работы.
Cкачать обновленную версию Movie Maker
Ещё одно решение проблемы — удалить старый Windows Movie Maker и загрузить последнюю версию редактора. На сайте Media Player доступна для скачивания Киностудия, рассчитанная под операционную систему Windows 7 и выше.
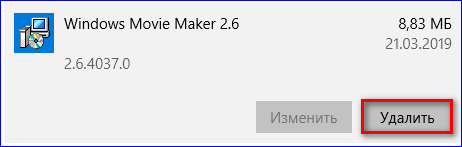
Чтобы удалить старую версию Movie Maker с ПК, нужно выполнить следующие действия:
Кодеки — базовые компоненты операционной системы, без которых невозможно воспроизведение аудио, видео и изображений. Для создания ролика в Movie Maker важно иметь подходящий набор кодеков, чтобы преобразить готовый файл в подходящий формат. Скачать их можно на официальном сайте K-Lite Codec Pack или на сайте Media Player, где также есть последняя версия Киностудии с готовыми компонентами.
Источник
This is the error i get when trying to import a MP4
The file C:\Users\Jims\Documents\Motorcycle Racing & Riding Pics\Helmet Cam Videos\9-6-2014 Clay Peak\GOPR0001.MP4 cannot be imported because the codec required to play the file is not installed on your computer. If you have already tried to download and install the codec, close and restart Windows Movie Maker, and then try to import the file again.
How do i get the codecs installed
Replies (24)
* Please try a lower page number.
* Please enter only numbers.
* Please try a lower page number.
* Please enter only numbers.
534 people found this reply helpful
Was this reply helpful?
Sorry this didn’t help.
Great! Thanks for your feedback.
How satisfied are you with this reply?
Thanks for your feedback, it helps us improve the site.
How satisfied are you with this reply?
Thanks for your feedback.
We understand how inconvenient this issue has brought you. Let me help you with your issue that Movie Maker is unable to edit MP4 files. It is possible that an outdated codecs or video driver is causing the issue. For us to isolate and for initial troubleshooting kindly follow the instruction below:
— Ensure that you have the proper codecs to play your videos and audio files. Audio and Video require codecs to play the file and it’s important to have the right codecs installed or updated in your PC.
Note: If can’t find the codec you need you may convert the video to a supported format (eg. wmv) and then add it to your Windows Live Movie Maker project.
-Ensure that your video card drivers are up to date. Movie Maker makes extensive use of the video card GPU (graphics processing unit). The display driver affects the reliability, performance, and compatibility of the video card with various software.
To determine the version and video card driver date, run the DirectX Diagnostic Tool (dxdiag):
1. Click on Start button and type dxdiag in the Search programs and files box and press Enter key on the keyboard.
2. Click on the Display tab and you will see the driver details including the driver version.
3. If your video card driver seems outdated please go to the video card driver manufacturer and see if a newer version is available.
Also you may refer to this article for more information about codecs.
Let us know how things turn out.
4 people found this reply helpful
Was this reply helpful?
Sorry this didn’t help.
Great! Thanks for your feedback.
How satisfied are you with this reply?
Thanks for your feedback, it helps us improve the site.
How satisfied are you with this reply?
Thanks for your feedback.
Does the go-pro come with a disc and software to install?
If so, this will include the codec.
A quick internet search has shown a lot of people have had success by installing the latest version of quicktime.
Unfortunately not all codecs will work with all versions of software and you may find that the gopro mp4 file will not work with your version of MM and you need to convert the file to say a wmv before editing.
Was this reply helpful?
Sorry this didn’t help.
Great! Thanks for your feedback.
How satisfied are you with this reply?
Thanks for your feedback, it helps us improve the site.
How satisfied are you with this reply?
Thanks for your feedback.
8 people found this reply helpful
Was this reply helpful?
Sorry this didn’t help.
Great! Thanks for your feedback.
How satisfied are you with this reply?
Thanks for your feedback, it helps us improve the site.
How satisfied are you with this reply?
Thanks for your feedback.
We understand how inconvenient this issue has brought you. Let me help you with your issue that Movie Maker is unable to edit MP4 files. It is possible that an outdated codecs or video driver is causing the issue. For us to isolate and for initial troubleshooting kindly follow the instruction below:
— Ensure that you have the proper codecs to play your videos and audio files. Audio and Video require codecs to play the file and it’s important to have the right codecs installed or updated in your PC.
Note: If can’t find the codec you need you may convert the video to a supported format (eg. wmv) and then add it to your Windows Live Movie Maker project.
-Ensure that your video card drivers are up to date. Movie Maker makes extensive use of the video card GPU (graphics processing unit). The display driver affects the reliability, performance, and compatibility of the video card with various software.
To determine the version and video card driver date, run the DirectX Diagnostic Tool (dxdiag):
1. Click on Start button and type dxdiag in the Search programs and files box and press Enter key on the keyboard.
2. Click on the Display tab and you will see the driver details including the driver version.
3. If your video card driver seems outdated please go to the video card driver manufacturer and see if a newer version is available.
Also you may refer to this article for more information about codecs.
Let us know how things turn out.
Was this reply helpful?
Sorry this didn’t help.
Great! Thanks for your feedback.
How satisfied are you with this reply?
Thanks for your feedback, it helps us improve the site.
How satisfied are you with this reply?
Thanks for your feedback.
Note: Please read the system requirements before installing Windows Essentials 2012.
If this did not solve your issue, please give us an update for us to further investigate your concern.
9 people found this reply helpful
Was this reply helpful?
Sorry this didn’t help.
Great! Thanks for your feedback.
How satisfied are you with this reply?
Thanks for your feedback, it helps us improve the site.
How satisfied are you with this reply?
Thanks for your feedback.
Note: Please read the system requirements before installing Windows Essentials 2012.
If this did not solve your issue, please give us an update for us to further investigate your concern.
Was this reply helpful?
Sorry this didn’t help.
Great! Thanks for your feedback.
How satisfied are you with this reply?
Thanks for your feedback, it helps us improve the site.
How satisfied are you with this reply?
Thanks for your feedback.
Thank you for getting back to us. With regards to your concern that you do not want to update Window Live Mail once you update Movie Maker. Please be informed that there is no way to update Movie Maker only as Movie Maker and Live Mail are both part of Windows Essentials.
Also about your issue that MP4 is unable to play on Movie Maker. For us to isolate your issue, kindly try to play the file on Windows Media Player. If it plays there it is possible that the old Movie Maker is causing the issue as it is not detecting the codec that is installed on your computer.
Hope this helps. Let us know how things turn out.
This is the error i get when trying to import a MP4
Источник