
Sign in to your MUO account

Almost all Windows 11 users have moved their files to different folders or drives at least once in their life. Transferring files between folders is simple enough, but did you know there are many ways to do that?
You can move files using File Explorer, the Command Prompt, Windows PowerShell, or even the context menu outside those apps. So, these are the several ways you can move files in Windows 11.
1. How to Move Files by Dragging and Dropping Them
Many users move files in Windows 11 with the drag-and-drop method—a simple method to transfer files within File Explorer and on the desktop. Furthermore, this is the most intuitive method, as it’s like using your hand to grab a paper document from one folder and place it in another.
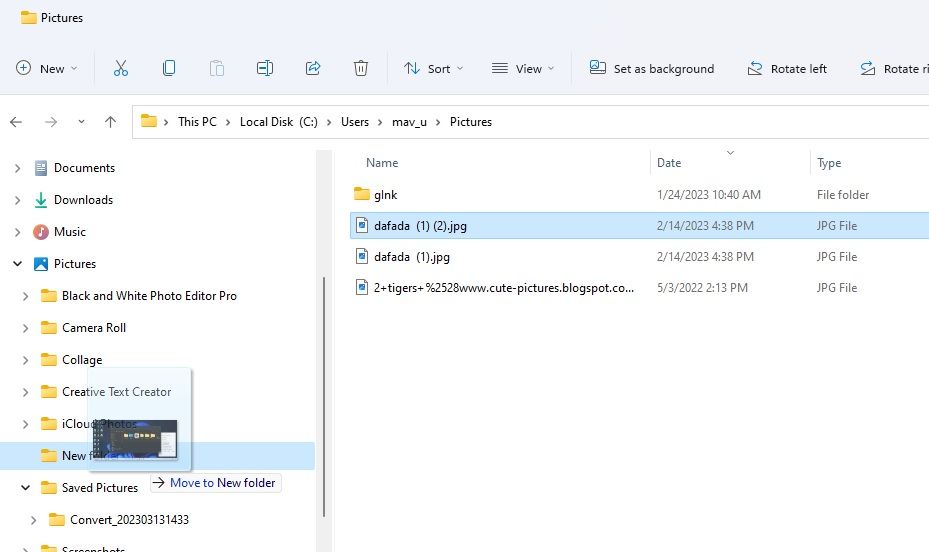
You can drag and drop a file by opening a folder in Explorer, left-clicking a file, and holding the mouse button. Then drag the file over a directory you want to move it to on Explorer’s left sidebar. Release the left mouse button when you see a Move to tooltip.
Although you can use the sidebar for moving files, opening a second Explorer window can sometimes be easier. You can open double windows by pressing the Windows key + E hotkey twice. Then bring up the directory you want to move the file to in one window and drag it there.
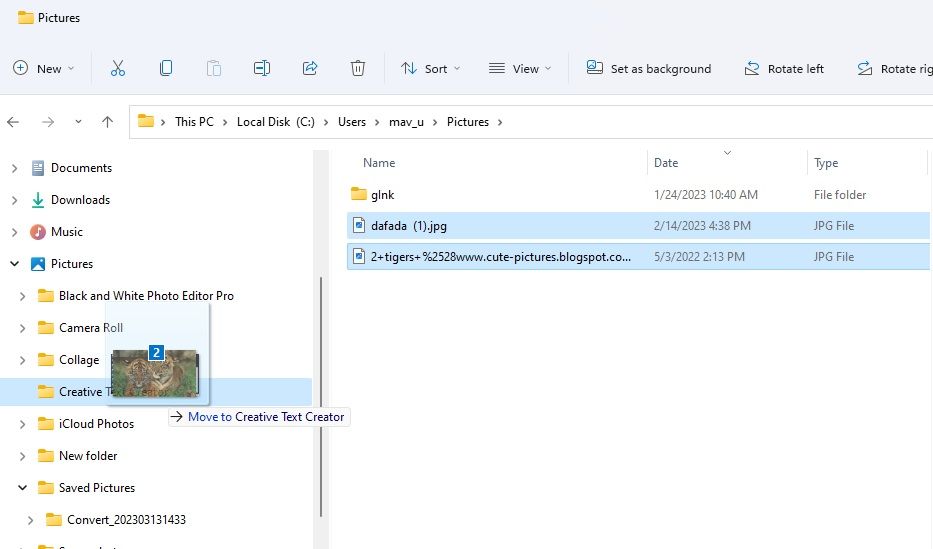
To move multiple files with the drag-and-drop method, hold the Ctrl key. Select the files you want to move and release the Ctrl key; left-click and hold the files to drag them to a folder. When dragging, you should see a number on the file that shows how many files the selection includes.
2. How to Move Files by Cutting and Pasting
Cutting and pasting enable you to move files by selecting two different options. First, you remove a file from its current location by selecting the cut option. That file disappears from its original folder when you select paste to move it elsewhere. This is how you can cut and paste a file within Explorer:
- To view File Explorer, click that app’s library folder taskbar icon.
- Open a folder that includes some files to move.
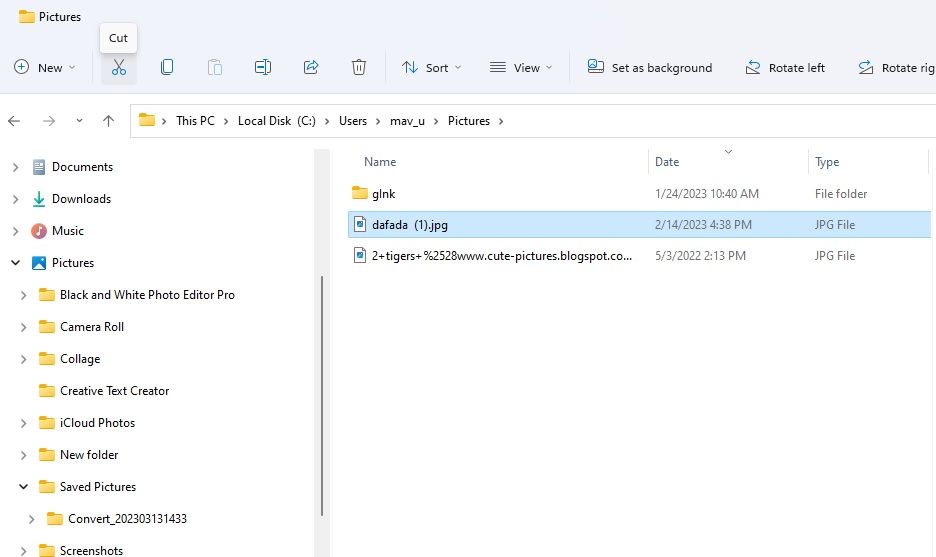
- Select a file to move with your mouse.
-
Click the Cut option (scissors button) on Explorer’s command bar.

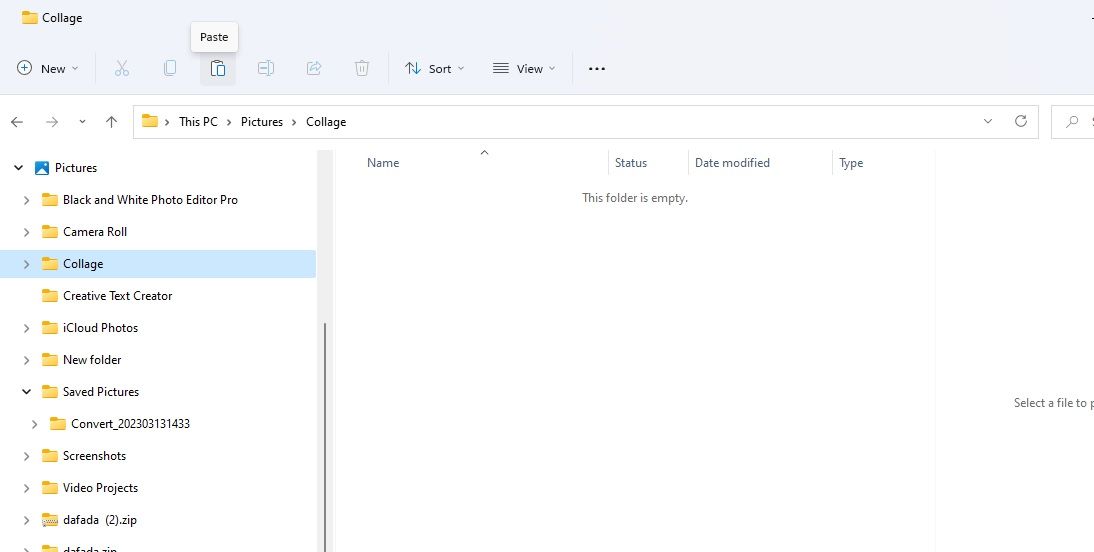
- Then open another directory to move the cut file into.
-
Click the Paste button on the command bar. The file will then appear within the folder you’ve opened to move it to.

Alternatively, you can utilize the Cut and Paste context menu options. Right-click a file to move and select Cut. Then right-click inside a folder or the Windows desktop area and select Paste.
Ctrl + X is the hotkey for cutting files. Select a file you want to move and press that keyboard shortcut to cut it. Then you can move it anywhere by pressing the Ctrl + V keyboard shortcut.
3. How to Move Files With the Command Prompt
The Command Prompt has many file management commands. You can utilize that app for moving files by entering text commands. You’ll need to include full file and folder paths in your commands. These are the steps for transferring a file with the Command Prompt.
- Activate the file and folder search box by pressing both the Windows logo + S keys on your keyboard.
- Type Command Prompt into the file search tool.
- Open the Command Prompt app your search query finds by selecting its Run as administrator option.
-
Input this command for moving a file:
move "full file path" "full destination folder path"
- Press Enter to move the file.
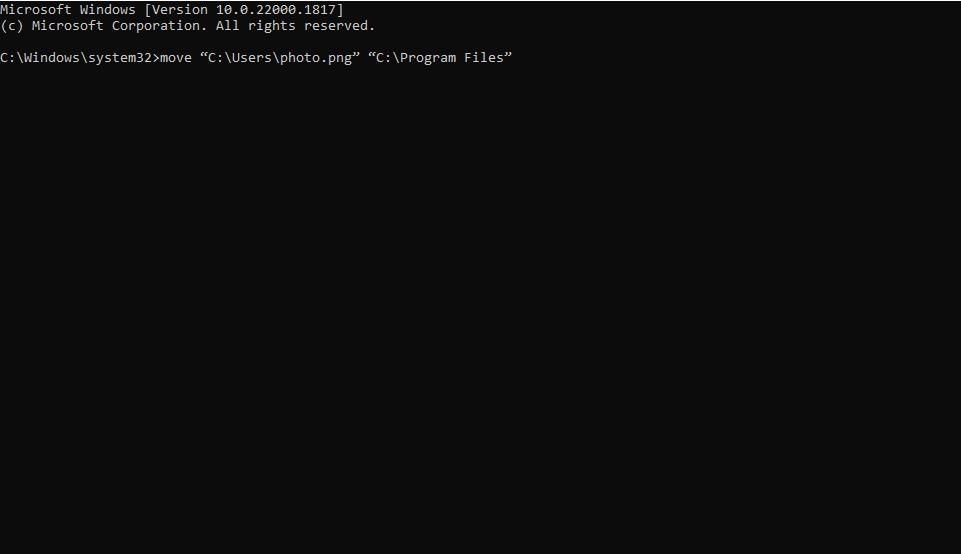
Of course, you’ll need to replace the entire file and destination folder paths in that command with actual locations. For example, suppose you want to move a photo.png file in the Users folder to the Program Files directory. The command for moving that photo.png file would look like this:
move "C:\Users\photo.png" "C:\Program Files"
4. How to Move Files With PowerShell
PowerShell is another command-shell app with which you can move files. It enables you to transfer files much the same as in the Command Prompt by inputting commands that include source and destination locations. This is how to move files with PowerShell:
- Open Windows 11’s Start menu and input PowerShell in the search box.
- Select Run as administrator for Windows PowerShell along the right of the search tool.
-
Enter this PowerShell command:
Move-Item "full file path" "full destination folder path"
- Then press Return to run the command and move the file.
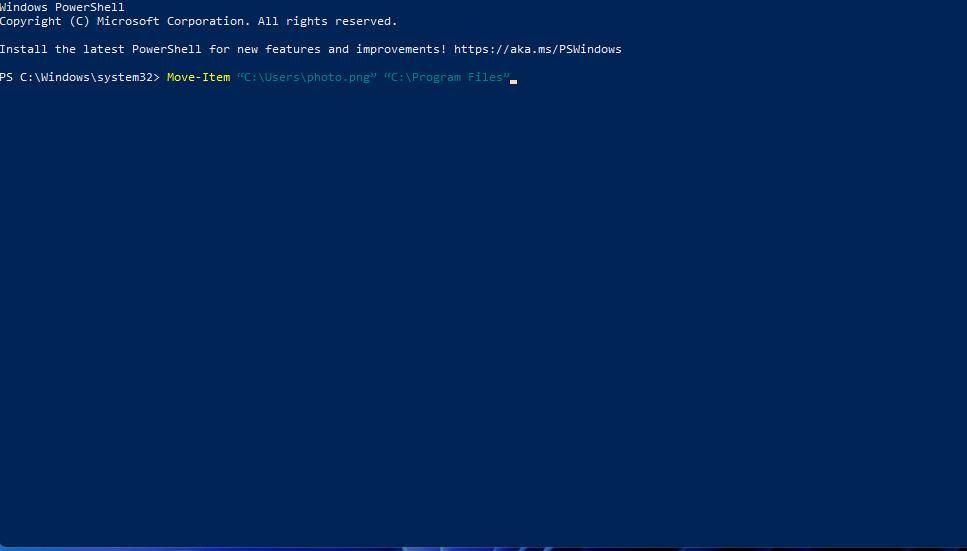
You’ll need to modify the contents of the command within the inverted commas much the same as in Command Prompt. Delete full file path and full destination folder from the command. Then input the actual file and folder paths there. For example, this would be the PowerShell command for moving photo.png:
Move-Item "C:\Users\photo.png" "C:\Program Files"
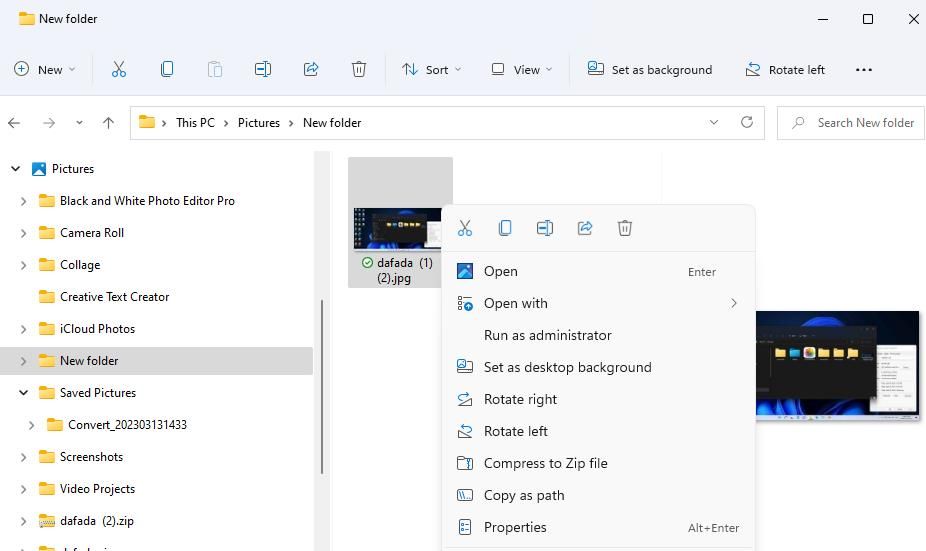
Windows 11’s classic context menu includes a Send to submenu from which you can select to copy files to various locations. Of course, copying a file is not the same as moving it. However, you can also transfer files to custom folders added to the Send to menu as follows:
- Open Explorer and a directory containing the file you want to move.
- Right-click the file and select Show more options.
-
Then select the Send to submenu.

- Move the cursor over a custom folder to move a file in without selecting it.
- Hold the Shift key and click a custom folder to move the file into that directory.

Note that this method for moving files with the Send to submenu only works for folders added by users. Check out this guide to adding shortcuts to the Send to menu for further details about how to add folders there.
Alternatively, you can select to move files with a more specific Move to folder context menu option. However, Windows 11’s context menu doesn’t include such an option by default. You’ll need to add one, as covered within our article about adding a move to folder context menu option.

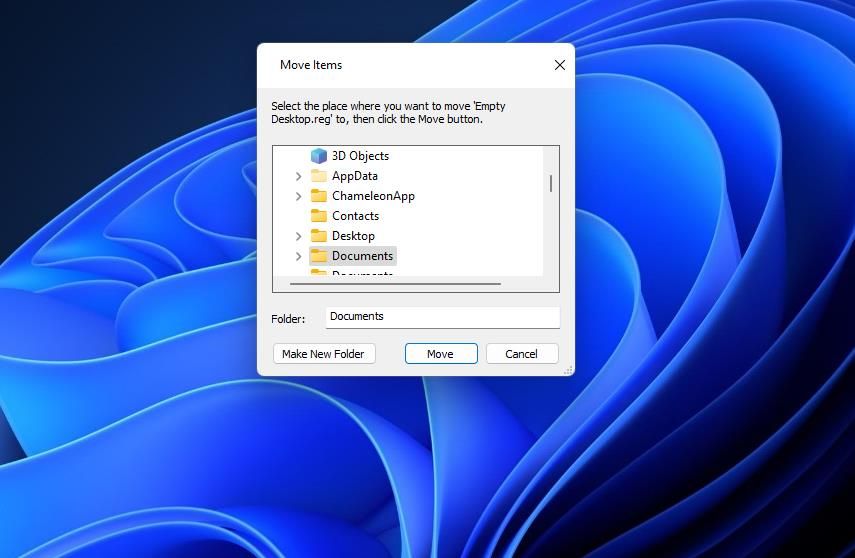
After adding a Move to folder context menu option, right-click a file on the desktop or within File Explorer and select Show more options; then click the Move to folder option to bring up a navigation window. Select a directory to move the file to and click Move.
7. How to Automatically Move Files
It’s also possible to get files automatically moved to a different folder. However, you’ll need to create a batch file to do that since Windows doesn’t have any built-in options you can select to move files into another directory automatically. This article about automatically moving files tells you how to set up such a script on Windows and Mac platforms.
How Do You Like to Move Your Files in Windows 11?
So, try moving some files with all the methods above. Then you can choose whatever way to move files you like best. You can also transfer files between Windows computers with USB sticks, cables, third-party software, and network drives.
In the Windows Command Prompt, we use the move command to move files from one directory to another (cut and paste).
The syntax of the move command is as follows:
move <Source> <Target>We can also use the move command to move folders from one location to another.
Command Options
| /Y | Do not ask for confirmation if a duplicate file is found at the destination. The destination file will be overwritten. |
| /-Y | Ask before overwriting destination files. |
Examples
Move sales.doc in the current directory to C:\backup directory:
move sales.doc C:\backupMove C:\data\sales.doc to C:\backup directory. The file will be overwritten if it already exists in the destination folder:
move /y C:\data\sales.doc C:\backupMove C:\data\finance to C:\backup folder:
move C:\data\finance C:\backupMove all files in a directory
You can use wildcards with the move command. For example, the following command moves all files in the C:\data to C:\backup.
move /y C:\data\* C:\backupThe following command moves all files with a .doc extension to the backup folder:
move /y C:\data\*.doc C:\backupIn the following example, all files whose names start with screenshot are moved to the C:\backup directory.
move /y C:\data\screenshot* C:\backup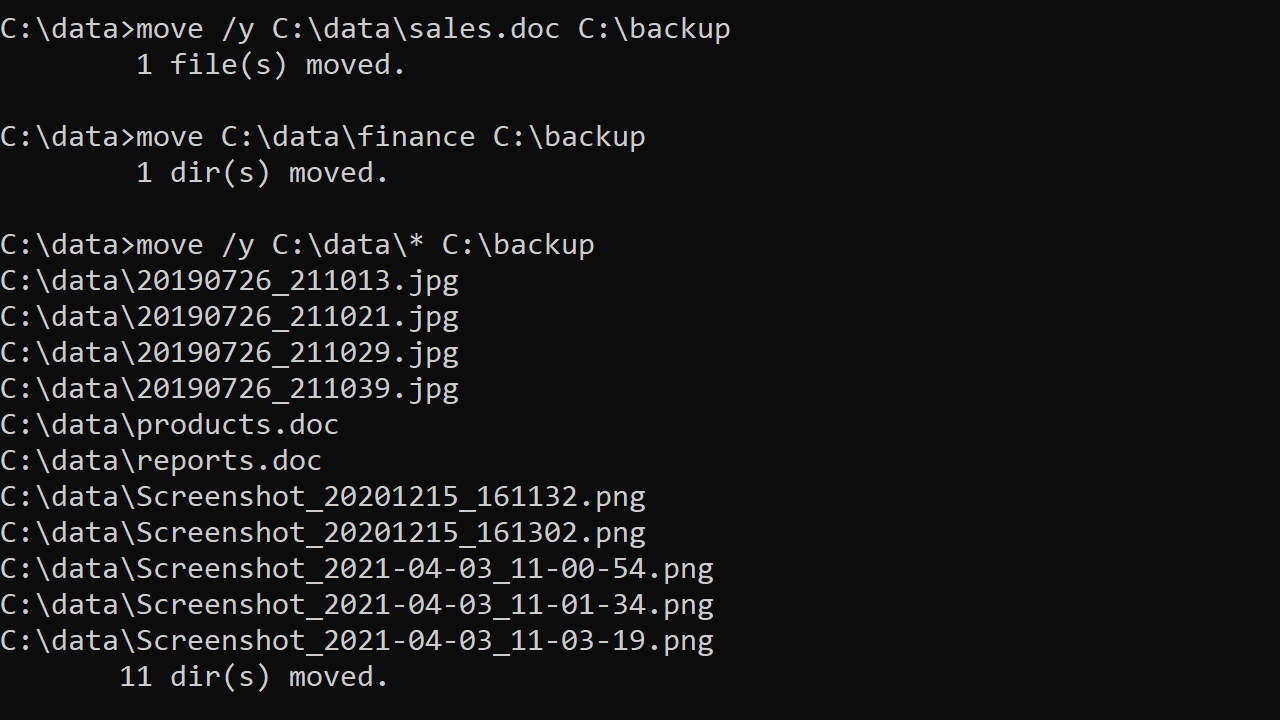
Move two or more files
To move two or more files without using wildcards, you have to use a for loop, as shown in the following example:
for %i in (sales.doc, products.doc) do move /y %i C:\backupIf you want to run the for command in a batch file, you would use two % (%%) with the variable.
for %%i in (sales.doc, products.doc) do move /y %%i C:\backupThe move command deletes the source file after it is copied to the destination. If you want to keep the original file, use the copy or xcopy.
The right-click context menu for files on Windows 10 has a ‘Send to’ option. The sub-menu lets you send the file to a device connected via Bluetooth, to your email client, to your fax machine, and to create a shortcut on your desktop. If you need to copy or move files, you can drag & drop them on to other folders that you have open. Drag & drop makes it pretty easy but if there’s a certain folder that you often have to copy/move files to, then doing it from the context menu is far easier then dragging & dropping. Here’s how you can use the context menu to copy/move files to a folder of your choice.
The first thing you need to do is determine which folder you want to move or copy files to from the context menu. Once you’ve determined that, find the folder, right-click it, and from the context menu select Send to>Desktop (create shortcut). This will create a shortcut to the folder on your desktop.
Visit your desktop and rename the shortcut if you need to. Remove the Shortcut from the name if you like, or give it a different name altogether.
Next, open File Explorer, paste the following in the location bar and tap Enter.
shell:sendto
In the folder that opens, paste the shortcut to your folder that you created on your desktop. Feel free to move it instead of copying it. It doesn’t need to be present on the desktop for this to work.
To copy a file to your folder from the context menu, right-click it and select Send to. The sub-menu for the Send To option will list the folder shortcut that you placed before. Select it and a copy of the file will be created in that folder.
To move the file, i.e., remove it from its current location and place it inside your pre-selected folder, right-click the file and select Send To from the context menu. Hover your cursor over the folder option, hold down the Shift key, and then click the folder option.
You can do this for as many folders as you like. Remember to give the folder shortcuts a good name and be mindful that you do not clutter the Send to sub-menu. If at any time you want to remove the folder location from the Send To sub-menu, open File Explorer, and type the following in the location bar.
shell:sendto
Delete the folder shortcut and it will be removed from the Send To sub-menu.

Fatima Wahab
Fatima has been writing for AddictiveTips for six years. She began as a junior writer and has been working as the Editor in Chief since 2014.
Fatima gets an adrenaline rush from figuring out how technology works, and how to manipulate it. A well-designed app, something that solves a common everyday problem and looks
Last Updated :
20 Oct, 2020
The move is an internal command found in the Windows Command Interpreter (cmd) that is used to move files and folders/directories. The command is robust than a regular move operation, as it allows for pattern matching via the inclusion of Wildcards in the source path.
The command is a very generic one and is available (in one form or the other) in almost every single operating system out there (under different aliases). In this article, we will learn about the move command and would learn various uses/applications of it.
Description of the Command :
MOVE [/Y | /-Y] [drive:][path]dirname1 dirname2
- [drive:][path]filename1 –
Specifies the location and name of the file or files you want to move. - destination –
Specifies the new location of the file. The destination can consist of a drive letter and colon, a directory name, or a combination. If you are moving only one file, you can also include a filename if you want to rename the file when you move it. - [drive:][path]dirname1 –
Specifies the directory you want to rename. - dirname2 –
Specifies the new name of the directory. - /Y –
Suppresses prompting to confirm you want to overwrite an existing destination file. - /Y –
Causes prompting to confirm you want to overwrite an existing destination file.
The switch /Y may be present in the COPYCMD environment variable. This may be overridden with /-Y on the command line. The default is to prompt on overwrites unless the MOVE command is being executed from within a batch script. The above output can be obtained by executing the command move /? in cmd.
The above text is a little cryptic at first, but the command is really basic and follows the minimal blueprint.
Syntax :
MOVE [options] (Source) (Target)
Key :
- [option] –
An optional flag denoted by /Y or /-Y, that is used to suppress the confirmation prompt on overwritten files. The default is to prompt on overwrites unless the MOVE command is being executed from within a batch script. - (Source) –
A path of the file/files that would be used to move them. This path can contain wildcards ( * ? ) in the path. If more then files are made to move, then wildcards are used. - (Target) –
A path for the new location of the file.
Using the Command :
Throughout this section, we would take the following directory as example for demonstrating the usage of move command.

Moving a File from One Folder to Another :
move source_path destination_path
- source_path –
It is the path of the file which we are willing to move, and the destination_path is the location to which we want the file to be moved.
Example :
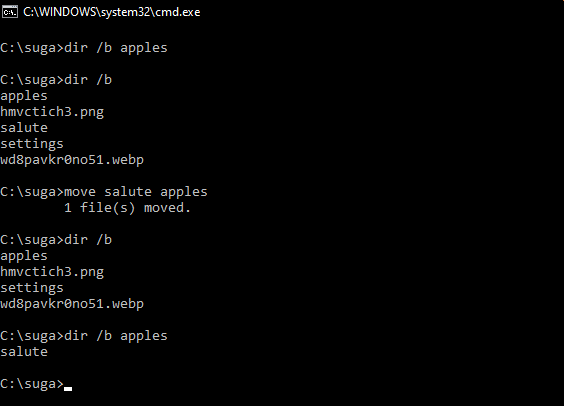
- The Dir /b command is used to list all the files and folders inside a directory.
- In the above example, we have moved an extension-less file named salute from C:\suga to C:\suga\apples directory.
Moving Multiple Files from One Path to Another :
move source_path destination_path
- source_path –
It is a path containing wildcards that will allow more than one file to be taken as a source. The destination_path is now a path to a directory where the moved files would reside (should not contain wildcards).
Example :

- In the above example we have moved all the files inside C:\suga folder which matches the pattern *.* to C:\suga\Apples directory.
- It should be noted that wildcard in source_path should match with the file(s) otherwise it would result in source_path being null, and a subsequent error.
Moving Directory from One Path to Another :
move source_dir_path Destination_dir_path
- source_dir_path –
It is the path to the directory to which we are moving, and destination_dir_path is the new location where it would be moved to.
Example :

- In the above example, we have moved the C:\suga\apples directory to C:\Users\Public directory.
- Multiple Directories can be moved using the method described in Moving multiple files from one path to another (with little modification to make is eligible for directories).
Moving a File to Another Folder with a Same Name File already existing :
There are two ways to tackle this situation –
- Abort the move process.
- Continue the move process, by overwriting the existing file with the newer one.
By default, the move command upon encountering any name collisions would prompt the user, asking whether he wants to rewrite the existing file with the new one, or stop the move process (via a Y/N prompt). To abort the move process, the user can simply enter N in the prompt input, stating that the file should not be overwritten. The prompt seeking for user input (for overwrite of files) appears as follows –
Overwrite {full_file_path}? (Yes/No/All):
When the users enter N in the prompt the output appears as follows –
Overwrite {full_file_path}? (Yes/No/All): N

0 file(s) moved.
When the user enters Y in the prompt the output appears as follows –
Overwrite {full_file_path}? (Yes/No/All): Y

1 file(s) moved.
To continue the move process by overwriting existing files (on all name collisions), a /Y switch needs to be added to the command as follows –
move /Y source_path destination_path
This tutorial explains how to move files or directories to another location on a Windows system.
Move files to another directory
move filename destinationFolder
Example: to move file ‘data.docx’ to the folder ‘d:\backup\folder’
move data.docx d:\backup\folder\
You can also rename the file while moving it to the new location
move data.docx d:\backup\folder\newData.docx
We can’t move multiple files with single command. i.e the below command would not work.
move file1 file2 D:\folder1\folder2
This would give the error The syntax of the command is incorrect.
However we can use wildcards to move files in bulk. For example, if you want to move all text files from current folder to a new location you can use the below command.
move *.txt destinationDirectory
To move all files starting with letter ‘A’, you can use below command.
move A* destinationDirectory
Move directories
Syntax:
move directory newDirectoryPath
Example: To move the directory ‘data’ to ‘D:\data\folder1\’
move data D:\data\folder1
1. Can we move multiple directories using wild cards like the way we do it with files?
No, wild cards does not work for directories. You get the below error
C:\>move tmp* Documents\folder1\
The filename, directory name, or volume label syntax is incorrect.
2. How to specify the directories/files which have white spaces in the names?
You need to enclose the name of the file/directory in double quotes.
Example: move "file with spaces" "D:\directory with spaces"
Errors
If you do not have write privileges on source file/directory or on the destination folder, you would get error as below.
C:\Users\user1>move mydata.pdf c:\users\user2
Access is denied.
        0 file(s) moved.