
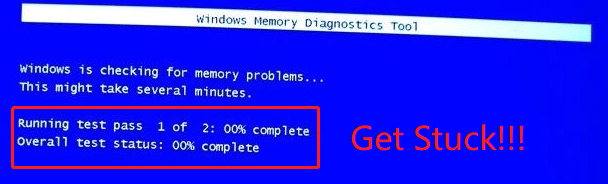
Microsoft provides Windows 10 and older systems users with a tool to verify and test the RAM. However, lots of users said that the tool stuck for ten hours or even an entire day. This is a bothering question, but the solution guide could do help. If you are beset with the issue, follow the solution guide to fix Windows Memory Diagnostic tool stuck.
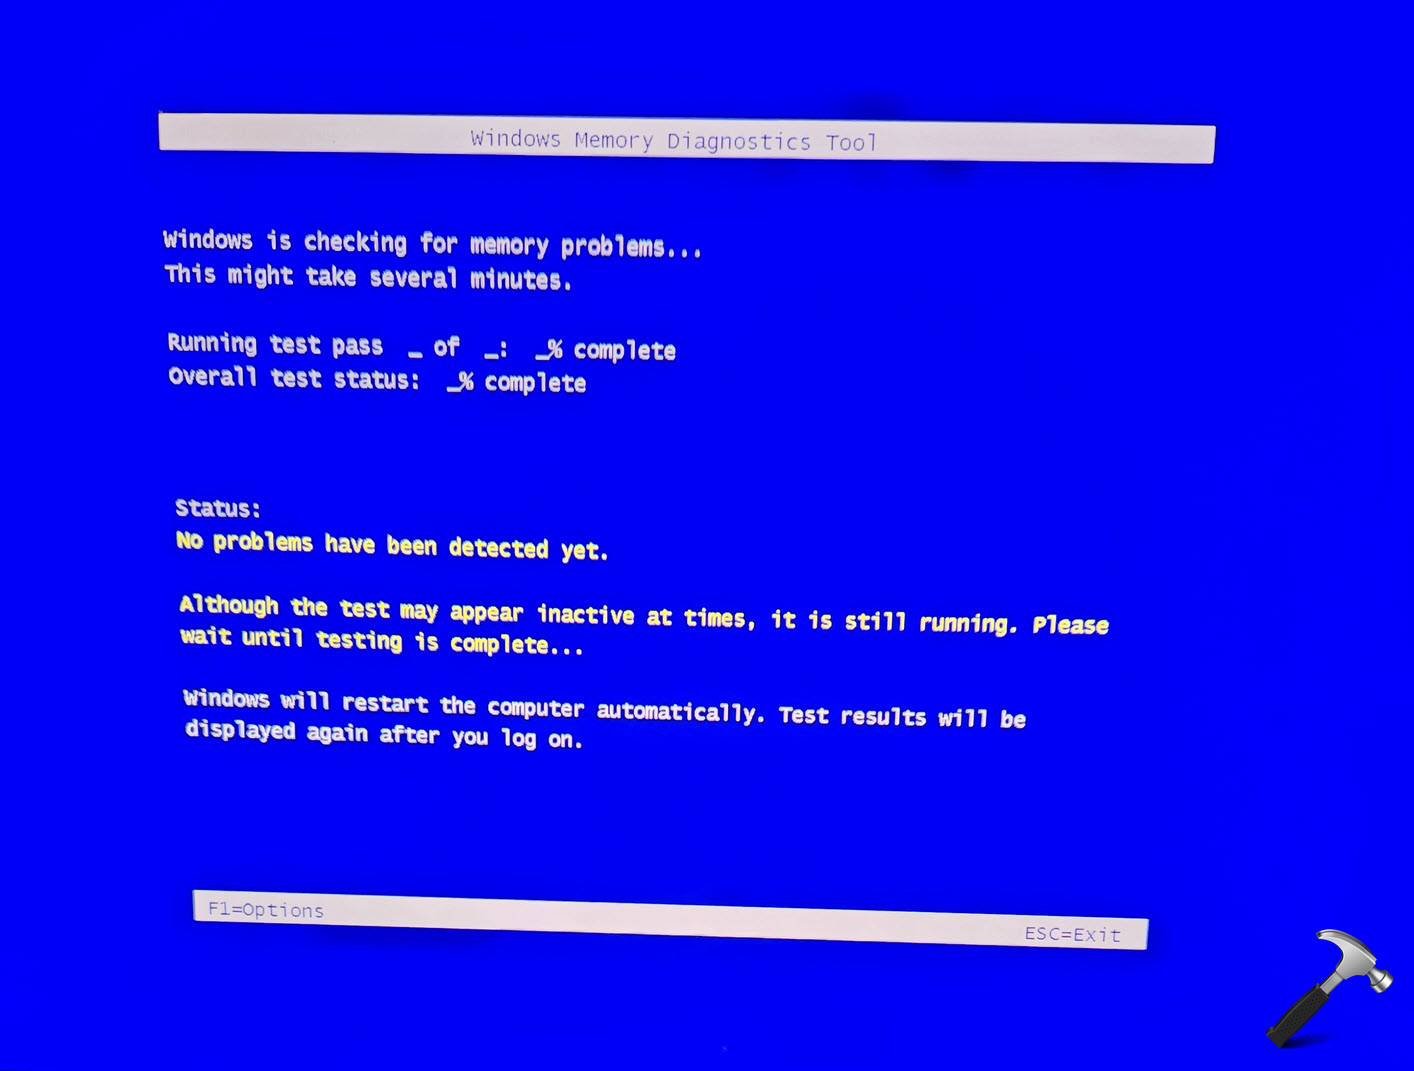
In Windows 10 or older systems, users can run Windows Memory Diagnostic to verify and test RAM. Normally, the RAM verification in extended mode can finish in 15 minutes to over 20 hours, depending on the RAM size.
Tip: MiniTool Partition Wizard is a free tool for verifying and testing hard drives. For example, it can test the hard drive speed, and check if the hard drive has file system errors or bad sectors.
MiniTool Partition Wizard FreeClick to Download100%Clean & Safe
However, according to lots of users’ reports, this tool did not work as expected and get stuck at 1% or 21% for an entire day without any progression. In this case, some actions need to be taken, and they are displayed below.
Note: If the RAM verification is frozen at a point for less than 20 hours, it should not be a problem, and you should wait patiently until it finishes.
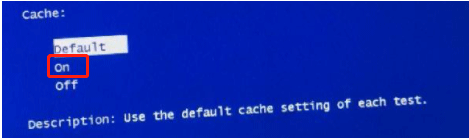
Fix 1: Switch to Cache On
Try to switch to the On mode in the Cache section. The steps are below:
- On the blue screen of the memory test, press the F1 key for options.
- Use the Tab key to reach the Cache
- Press the Down Arrow key to select the On
- Press the F10 key to save the change and let the test go on.
Now check the issue like “Windows Memory Diagnostic tool stuck at 21”.
If the above solution is not helpful, there might be interference by third-party software, so please try running the tool after performing a clean boot.
Here is the tutorial:
Step 1: Press Windows + R to open the Run window.
Step 2: Input msconfig in the Run window and press the Enter key to open the System Configuration window.
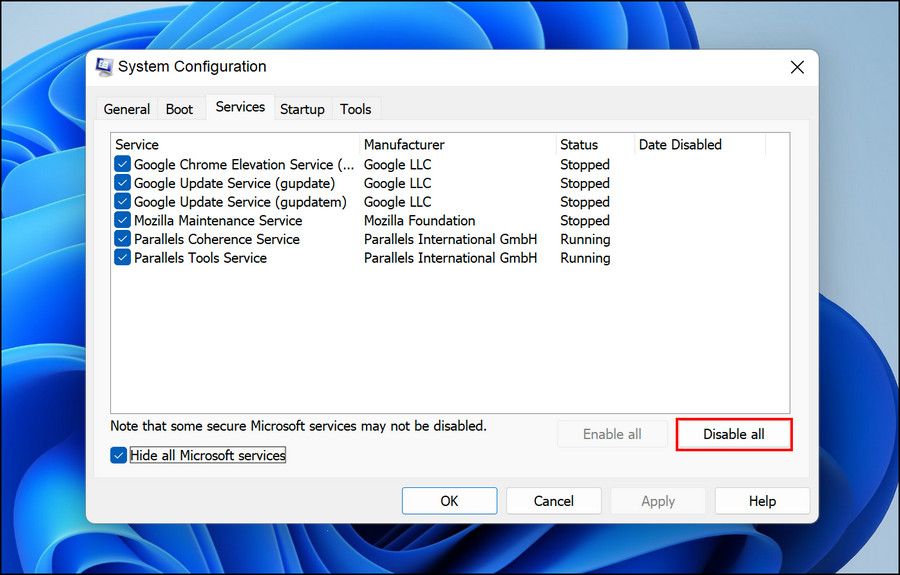
Step 3: On the pop-up window, switch to the Services tab. Then, tick the checkbox for Hide all Microsoft services and click the Disable all button.

Step 4: Click the Apply button to save the changes.
Step 5: Open Task Manager by right-clicking the Windows taskbar and choosing Task Manager.
Step 6: On the Task Manager window, choose the Startup tab and disable all the services under the Startup tab.

Step 7: Close Task Manager and go back to the System Configuration window and click the OK button.
Step 8: Restart your computer.
Your computer will start in clean boot mode. Once it boots, run Windows Memory Diagnostic tool again and see if the tool works perfectly.
If the tool works fine after the reboot, it means that the “Windows Memory Diagnostic tool stuck at 21” resulted from the interference by the third-party software, and you can consider uninstalling recently installed programs that could have contributed to the issue.
Bottom Line
That’s all about how to fix “Windows Memory Diagnostic tool stuck”. Do you solve the issue by applying the above two fixing methods? If you have any other useful solutions, please share them with us. Thanks in advance.
Windows comes with a Memory Diagnostic tool that helps verify and test the RAM of your device. Users launch it to check the RAM for any issues present. However, some users face that this tool is stuck or working improperly in their system. In this article, we have suggested three ways you can fix Windows memory diagnostic tool stuck or not working in your Windows OS.
Page Contents
Depending on the RAM size, the Memory Diagnostic Tool can take anywhere from 15 minutes to more than 20 hours in the extended mode to finish its testing process. The app is generally known to get stuck at 1% and 21% progression for hours. It could be due to some system glitch. When this happens, you can try the following fixes.
Fix 1: Perform a Clean boot before running the tool
This could be your solution if a third-party software is preventing this tool from completing the test. The Windows starts with a minimal set of drivers and startup apps in the clean boot mode. It allows you to determine if the background program/app is interfering with other programs. To perform a clean boot, follow the steps below.
- Open the Start Menu and search for System Configuration.
- In the Windows that opens, go to Services tab.
- Check the Hide all Microsoft services box. Then, click on Disable all.
- Click Apply to save the changes.

- Now, right click on the Windows icon and go to Task Manager in the menu that pops.
- Open Startup apps tab.
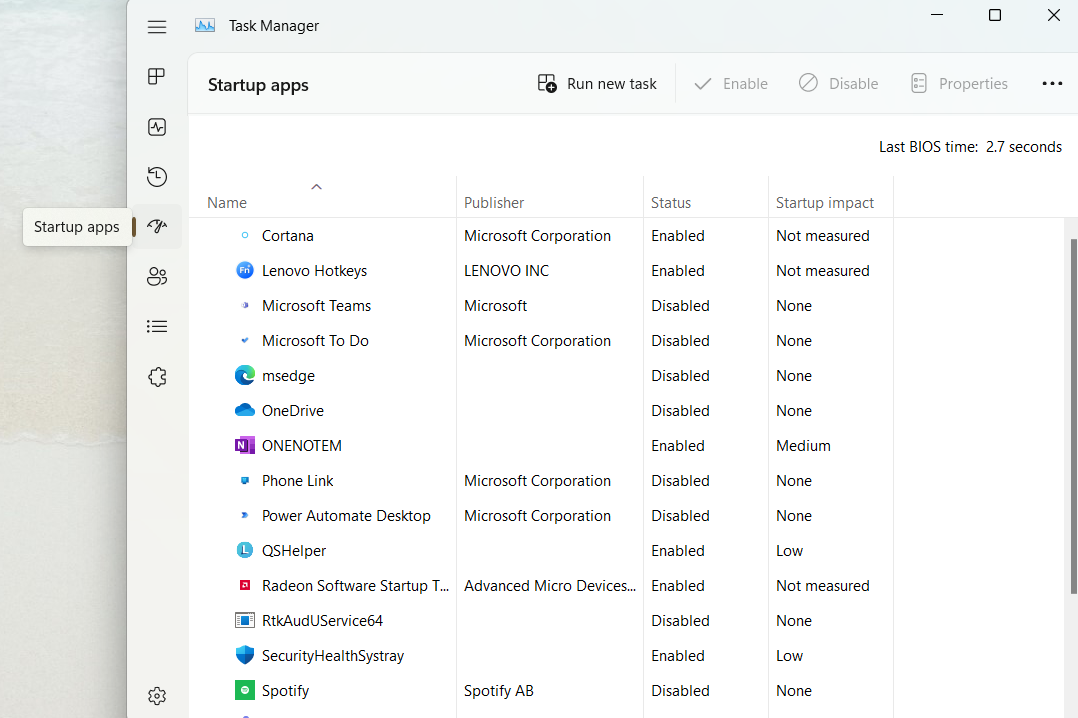
- One by one, click on all the items that have their status as enabled, and click on the disable button.
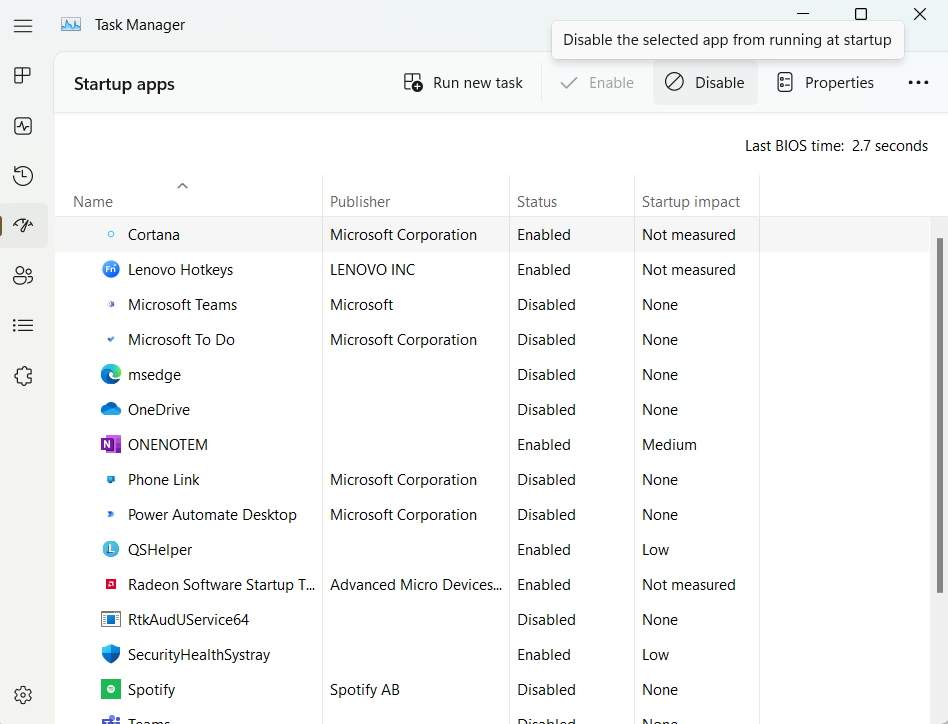
Do ensure that all the services in the Startup apps tab have their status as Disabled.
- Close the Task Manger and go to the System Configuration Window. Click OK.
Now Restart your PC. Your system will start in a Clean Boot mode. Try running the tool again and see if the issue is resolved.
Fix 2: Use MemTest86
Using Memtest86 will help you determine whether the issue is with the RAM or the tool. If this test completes without any error, you will need to run the memory diagnostic tool once again to check if the issue at hand is solved. To run the test, you first need to make sure that you have a working USB drive and that it is empty, as it is to be used as a bootable drive. Follow the steps below to go ahead.
- Download MemTest86 from its website (https://memtest86.com).
- When it is done, right click on the downloaded folder and select Extract All. And then click on Extract.
- Next, connect the USB drive with your device.
- From the recently extracted folder, run imageUSB.exe file in your system.
- When the connected and detected drive is ensured, click on the Write button.
- The process will take some time. Once it is done, close the ImageUSB tool by clicking on Exit.
All you need to do now is to shut down your PC, Insert the USB flash, and restart the system. The tool will automatically run after your PC Restarts.
Fix 3: Wait till the tool completes the process
At times, tool being stuck for a few hours is not a glitch. When run in extended mode, it may get stuck at 21%, 88%. 89%, and 90% progress for more than 4 hours. Unless the progress is stuck at 21% for an entire day, you can let it run and finish the process without any interruption.
Of course, you have a couple fixes suggested here to try if it is stuck for an entire day without any progress.
Hence, we have covered all the fixes you can try on your own. If the problem still persists, the issue could be deeper, and you would probably need PC repair tool to fix it. You need to simply download and install it from the web, Start the Scan and select the option of Repair All. This ultimate solution will fix the problem for sure.
RELATED ARTICLES
Readers help support Windows Report. We may get a commission if you buy through our links.
Read our disclosure page to find out how can you help Windows Report sustain the editorial team. Read more
Windows 10 and older systems come with a Windows memory diagnostic tool to verify and test the RAM. When launched, it will check the RAM for any issues while working on your system.
Unfortunately, some users have reported the Windows memory diagnostic tool stuck problems after running the tool.
How long should a Windows Memory Diagnostic take?
The Windows Memory Diagnostic tool in extended mode can take anywhere from 15 minutes to 20+ hours, depending on the RAM size.
When run in extended mode, Windows Memory diagnostics can take a couple of hours to finish the testing process. Also, the Windows Memory Diagnostic tool is known to get stuck at 1% and 21% progression for hours.
However, if the tool is stuck for an entire day or more than 10 hours, this problem can be due to a system glitch.
In this article, we have listed a few troubleshooting steps to help you resolve the Windows memory diagnostic tool stuck/frozen issue on your Windows system.
1. Wait for the tool to complete the process

When run in extended mode, the Windows Memory Diagnostic tool can take more than 8 hours to complete the process. At times the tool may get stuck at 21%, 88%, 89%, and 90% progression for hours. You may see no progress for more than 4 hours as well.
However, this is normal with the Windows Memory Diagnostic tool. Unless the tool is stuck at 21% for an entire day, you can let the tool run a few hours and let the process complete without any interruption.
If the tool has been stuck for more than a day without any progression, you may try other troubleshooting steps listed in this article.
2. Run the tool after performing a clean boot

- Press the Windows key + R to open Run.
- Type msconfig.msc and click OK. This will open the System Configuration window.
- In the System Configuration window, open the Services tab.
- Check Hide all Microsoft services box. This will hide all the Microsoft Windows services required by the system.
- Next, click the Disable All button.
- Click Apply to save the changes.
- Right-click on the Taskbar and select Task Manager.
- In Task Manager, open the Startup tab.

- Select all the services one by one and click the Disable button. Make sure you have disabled all the services under the Startup tab.
- Close Task Manager, and in the System Configuration window, click OK.
- Restart your computer.
- Your system will start in Clean Boot mode.
- Rerun Windows Memory Diagnostic tool and check if the issue is resolved.

If third-party software prevents the Windows Memory Diagnostic tool from completing the test, then running the tool in Clean Boot mode should help. In Clean Boot mode, Windows starts with a minimal set of drivers and startup programs, allowing you to determine if a background program is interfering with other programs.
3. Test with MemTest86

- Make sure you have a working USB Drive to use as a bootable drive. Make sure the drive is empty, as
- Download MemTest86 from the website.
- Right-click on the downloaded folder and select Extract All.
- Click on Extract.
- Connect your USB drive to the computer.
- From the recently extracted folder, run the imageUSB.exe file.
- Make sure your connected drive is detected in the ImageUSB window and click on the Write button.
- Once done, click the Exit button to close the ImageUSB tool.
- Next, shut down your computer. Insert the USB flash and restart the system.
In most cases, the tool will automatically run after restart. If your system fails to boot from the USB flash drive, change the boot priority drive by changing the BIOS setting.
Using the Memtest86 will help you determine if the issue is with your RAM or Windows Memory Diagnostic tool. If the test completes without any error, run the diagnostic tool again to check for any improvements.
- Recent Windows 11 update lets you disable profanity filter in voice typing
- Microsoft wants Windows 10 users to upgrade to Windows 11 or Copilot + PCs
- Windows 11 KB5055627 update makes File Explorer more fluid
It is common for the Windows Memory Diagnostic Tool to get stuck at 21% or 29% without any progression for hours.
However, if the tool is frozen for more than 20 hours, try these troubleshooting tips to fix the problem.
Let us know in the comments section below which solution helped you solve the Windows Memory Diagnostic Tool stuck issue on your PC, to help out other fellow users.
Tashreef Shareef
Tashreef Shareef is a software developer turned tech writer. He discovered his interest in technology after reading a tech magazine accidentally. Now he writes about everything tech from Windows to iOS and streaming services to IoT at WindowsReport.
The Windows Memory Diagnostic Tool is a useful program that checks your RAM for potential issues. It usually locates and fixes issues that can result in slower system performance, frequent freezes or hangs, and blue screens.
The system will typically suggest automatically that you run the Memory Diagnostic Tool when you begin experiencing any of the above problems, but you can run it manually as well. And while the tool usually performs its job without issue, there are times when you can experience problems with it, such as when it gets stuck during the scan process.
Below, we take a look at the troubleshooting methods you can try if you face issues while using the Memory Diagnostics Tool on your Windows PC.
What Are Some Potential Causes Behind the Problem?
In most cases, the Memory Diagnostic Tool gets stuck either in the middle of performing a scan or when the users are analyzing the memory diagnostic results. The Memory Diagnostic Tool is a great way to resolve Windows memory problems, so it can be a huge setback if it decides not to work.
There can be quite a few reasons why you might be facing issues with the tool, and we have listed the most common ones below:
- An application or background process can interfere with Memory Diagnostic tool, causing it to freeze and crash.
- The tool itself could be suffering from a nasty bug or data corruption, which is preventing it from functioning properly.
- Alternatively, data corruption might affect a different component of your system, which then causes the Memory Diagnostic Tool to fail.
Now that we know about the potential causes, let’s have a look at the different troubleshooting methods you can try to get the Memory Diagnostic Tool up and running again.
1. Wait It Out
Before we move on to the solutions, it is important to note that the diagnostic tool can take anywhere from a few minutes to over 20 hours. This is why we recommend that you wait for some time before trying out the troubleshooting steps.
Consider leaving your computer in its current state overnight and checking back on it the next morning. If you notice any progress, then the utility just might be working slowly. If the tool has still made no progress after then, then it’s safe to assume it is actually stuck.
As we mentioned earlier, the Memory Diagnostic Tool may fail to do its job properly because a background process or application is interfering with it.
In this case, we suggest that you launch the system in a Clean Boot state and then try performing the action that was previously causing the error. This state launches the system with only a minimal set of drivers and programs, disabling all non-Microsoft services, much like the Windows Safe Mode.
If the issue does not occur in the Clean Boot state, then it implies that a background process within the system is indeed the culprit.
In that case, you can try uninstalling any recently installed third-party programs and see if that makes a difference.
Follow these steps to boot Windows into the Clean Boot state:
- Type msconfig in Windows search and click on the Open button for System Configuration.
-
In the following dialog, head over to the Services tab and checkmark the box associated with Hide all Microsoft Services.

-
Click Disable all.
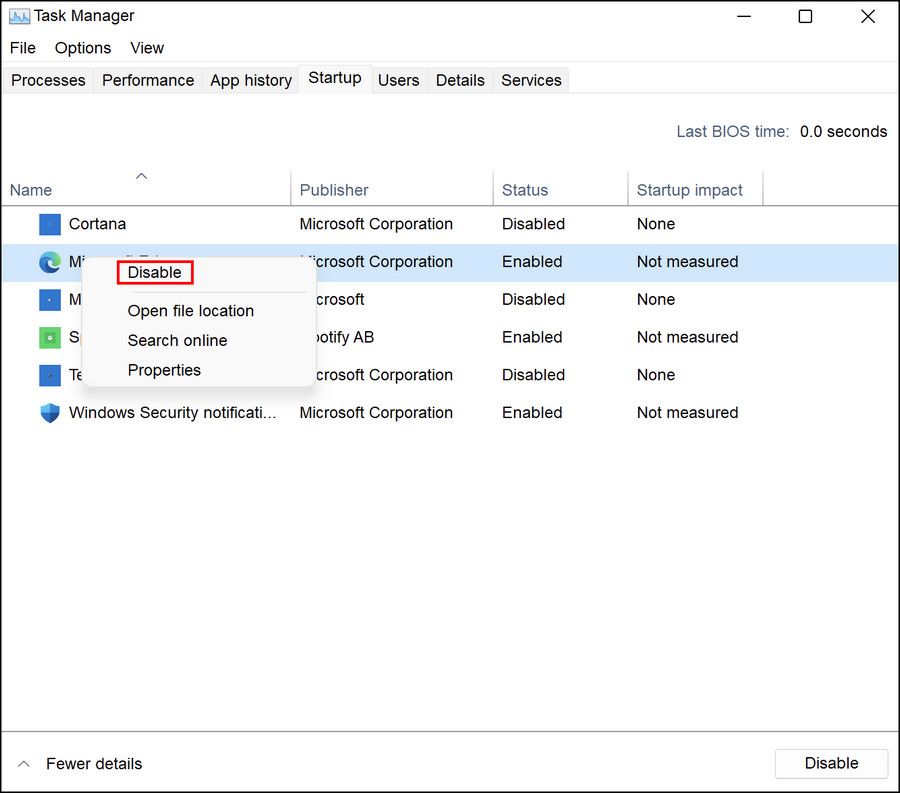
- Once done, launch the Task Manager and navigate to the Startup tab.
-
Right-click on the apps here one by one and choose Disable.

- Now, go back to the System Configuration dialog and click on the OK button.

You can now restart your PC (or later) and upon reboot, your system will automatically launch in the Clean Boot state. Try running the Memory Diagnostic Tool again and check if there are any issues this time.
If the tool works fine in this state, then it is best to identify the culprit within the system and eliminate it to avoid such issues in the future. For this purpose, you can first try uninstalling the recently installed programs on the system. In case you are not sure about the apps, head over to the System Configuration dialog again and navigate to the Services tab.
You should now see a list of all the available apps on your computer. Start by dividing the available services into two parts. Then, enable all the services in the first part, and see if the issue occurs. If it does, then it means that one of the apps from the first section is the culprit.
Keep narrowing down the problematic app until you find it. This is a time-taking process, so we only recommend proceeding with it if the other methods mentioned in this guide are not doing the trick for you.
Another fix that worked for users was enabling the cache in the Memory Diagnostic Tool. While the real reason behind why this works is unclear, we suggest you give it a shot and see if it works for you.
Here is what you need to do:
- In the memory test screen, press the F1 key.
- Head over to the Cache section by pressing the Tab key, and then use the arrow key to select the On option.
- Press the F10 key to implement the change and check if it makes any difference.
If you still haven’t been able to get around the issue or are in a hurry, then you can try using a third-party program to test the memory of your system.
Our guide on how to test your PC for failing hardware covers a handy memory checking tool, called MemTest86. It’s worth a try if the built-in Windows tool doesn’t want to co-operate with you.
Test Your Computer’s RAM Without Any Problems
You should have resolved the issue using the troubleshooting methods we mentioned above by now. If however, none of the suggestions work for you, then you can try reporting the issue to Microsoft’s official support team. Till they launch an official fix for the problem, you can try using a similar third-party solution to fix the problem.