
Windows 11 comes with a new built-in video and music player called “Media Player”, aimed to replace the old classic media player. This media player was once known as Groove Music, but has since been updated in Windows 11. However, there is a pretty common issue where the Windows 11 Media Player will shut down as soon as it opens, as if nothing had happened. This guide will talk about this problem and show you how to fix it.
Also see: How to Play AVI Files on Windows 11
Repair or reset the Media Player
First off, you can try fixing or resetting the media player. This might get rid of any software issues making the media player close all of a sudden. Make sure to close the media player first by doing this:
- Hit Win + i to open the Windows Settings.
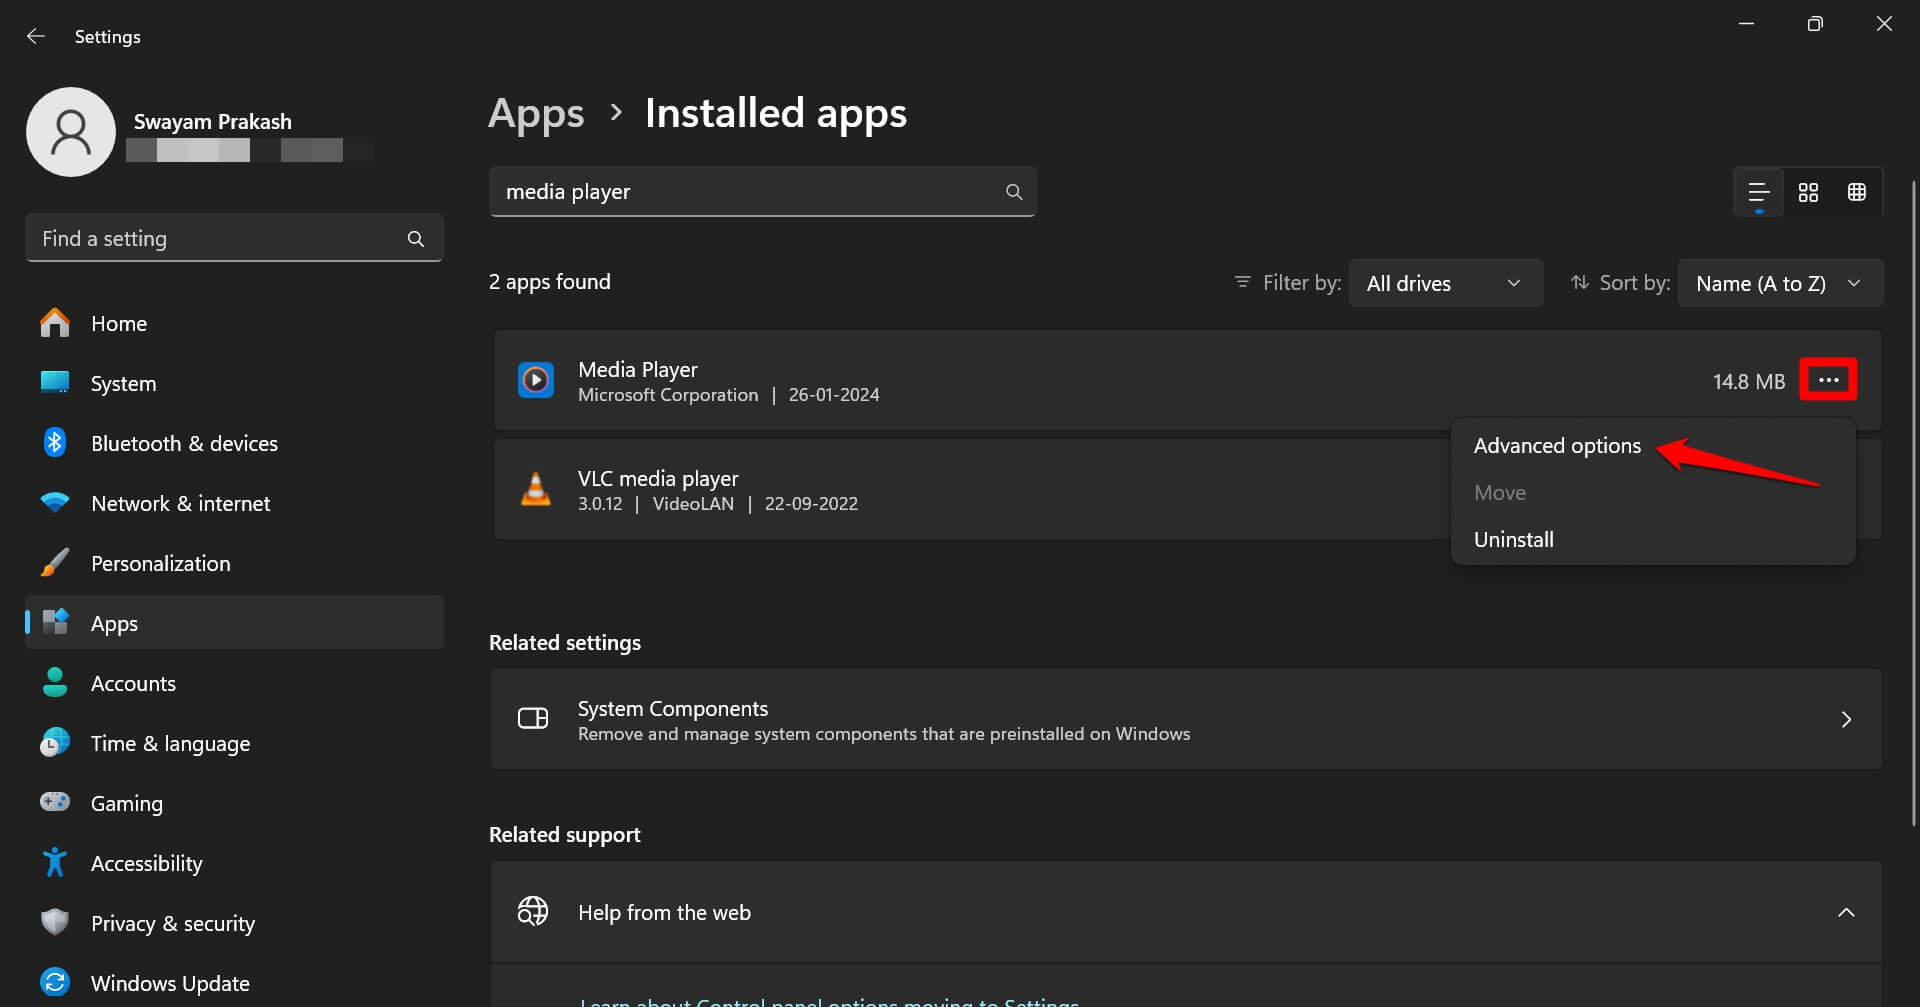
- Go to Apps.
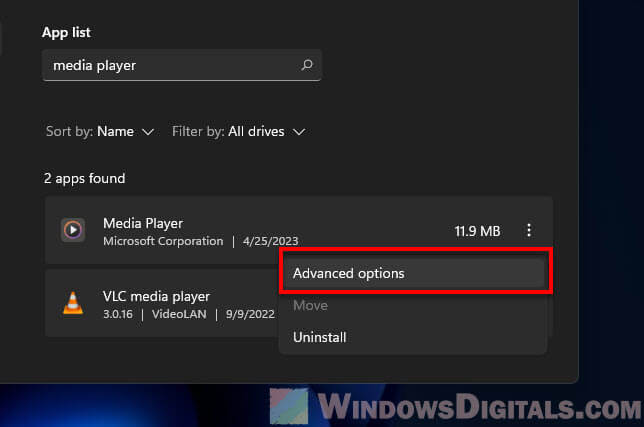
- Look for “Media Player” under the Apps & features section and click on it.
- Hit the Advanced options link.

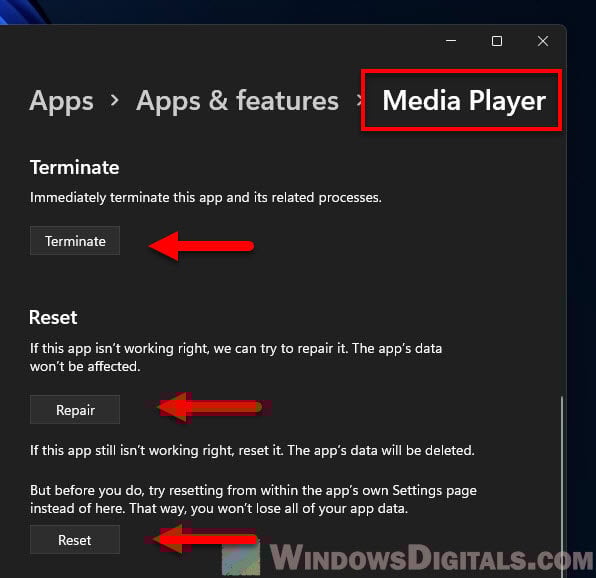
- Scroll down and click on the Terminate button to close any open instances of the media player.
With the media player closed, here’s how to fix or reset it:
- In the same Advanced options window, hit Repair. This tries to fix any issues without changing your settings or data.
- If it’s still not working, hit Reset. This brings the media player back to its original settings and might fix the problem.

After fixing or resetting, open the media player again to check if it’s working.
Useful tip: Clearing Recent Media History in Windows 11 Media Player
Reinstall the Windows 11 Media Player
If the media player is still not behaving, you might want to reinstall it. This makes sure you’re using the latest version and can fix problems caused by messed up or missing files. Here’s how:
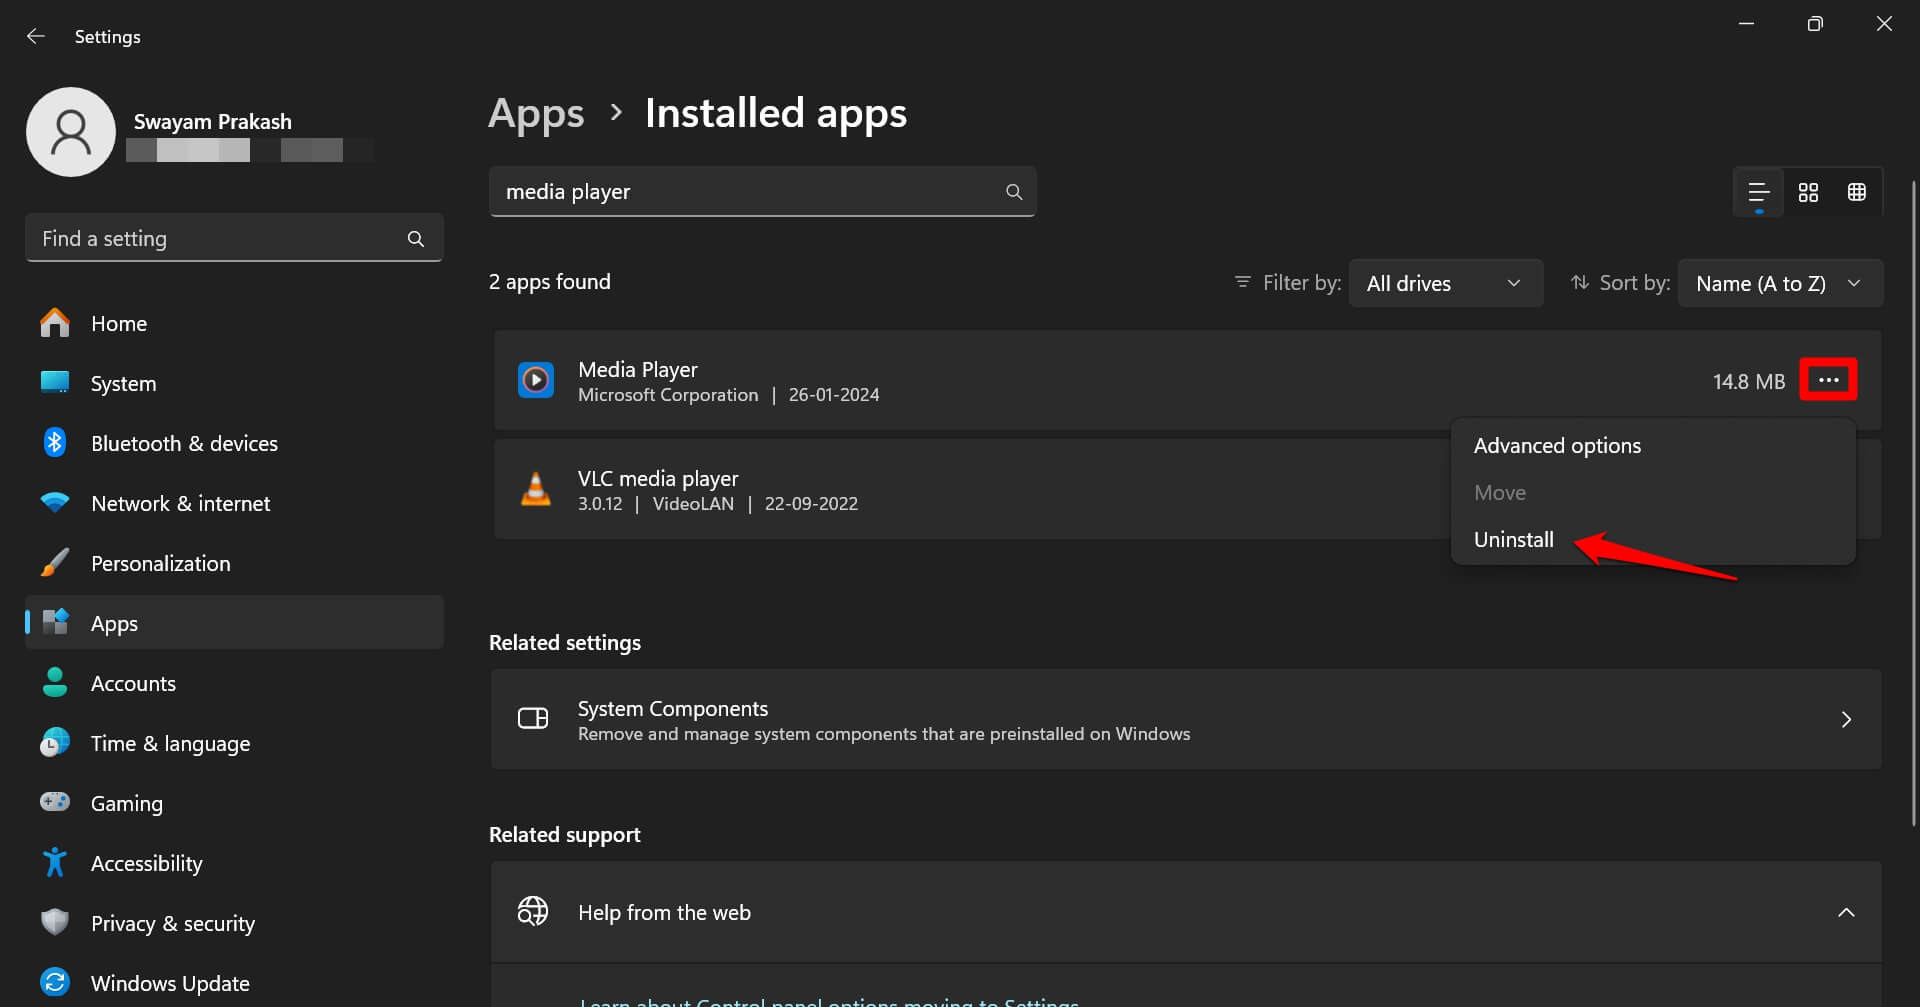
- Press Win + I to jump into the Windows Settings.
- Choose Apps.
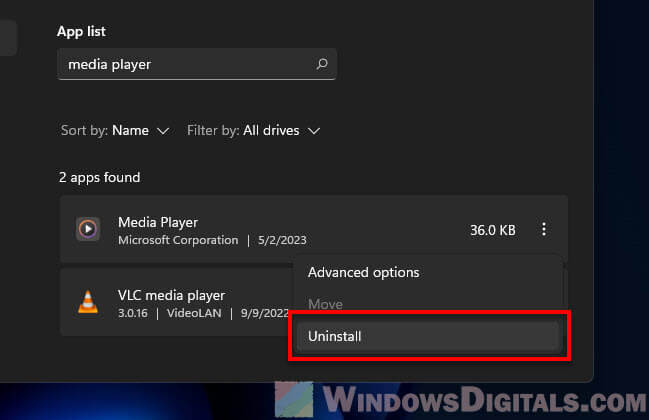
- Search for “Media Player” under the Apps & features section and click on it.
- Click on Uninstall and follow the instructions to remove the media player.

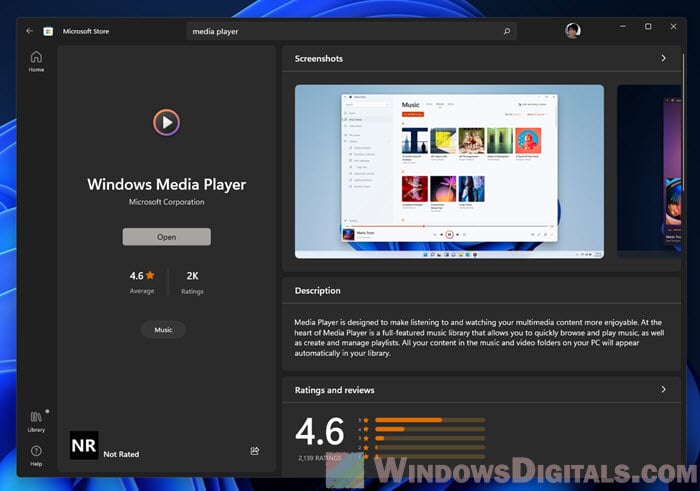
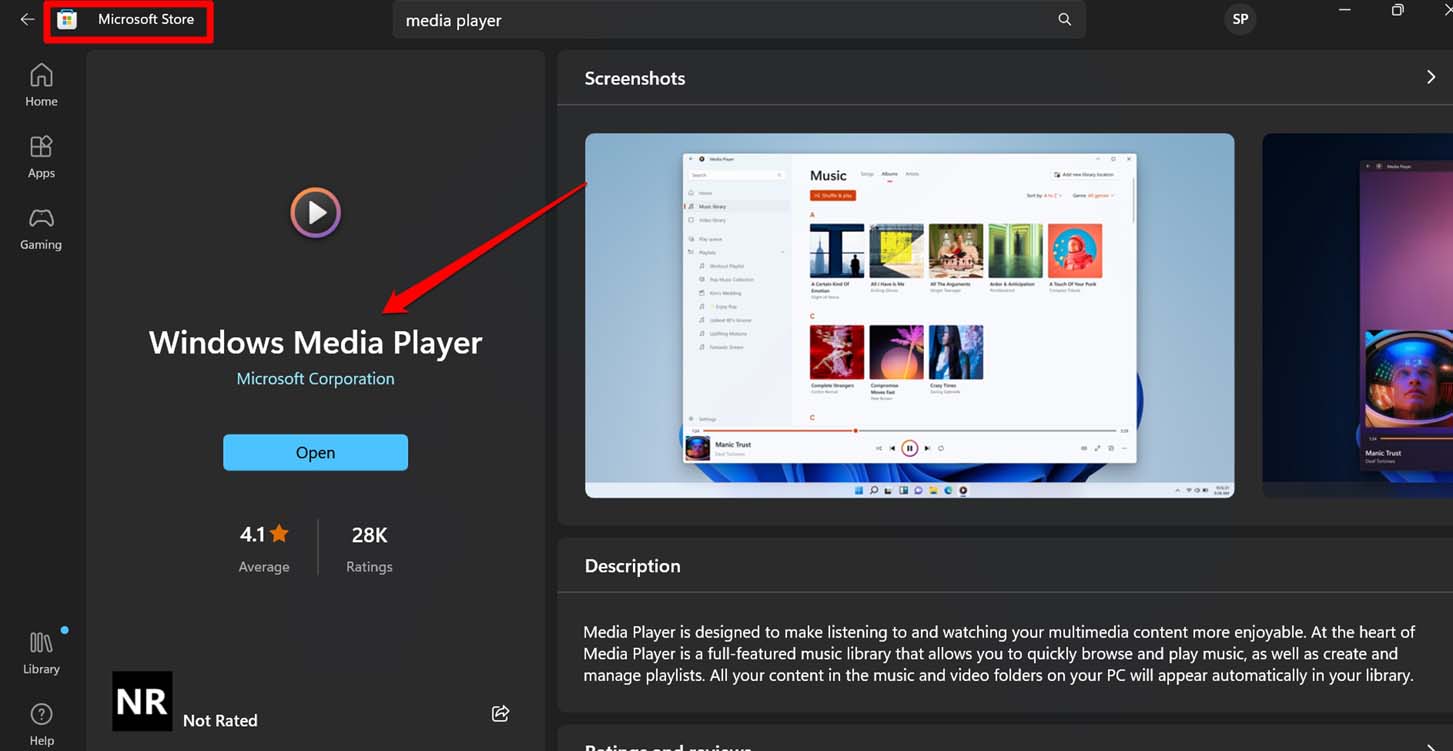
To put it back, go to the Microsoft Store:
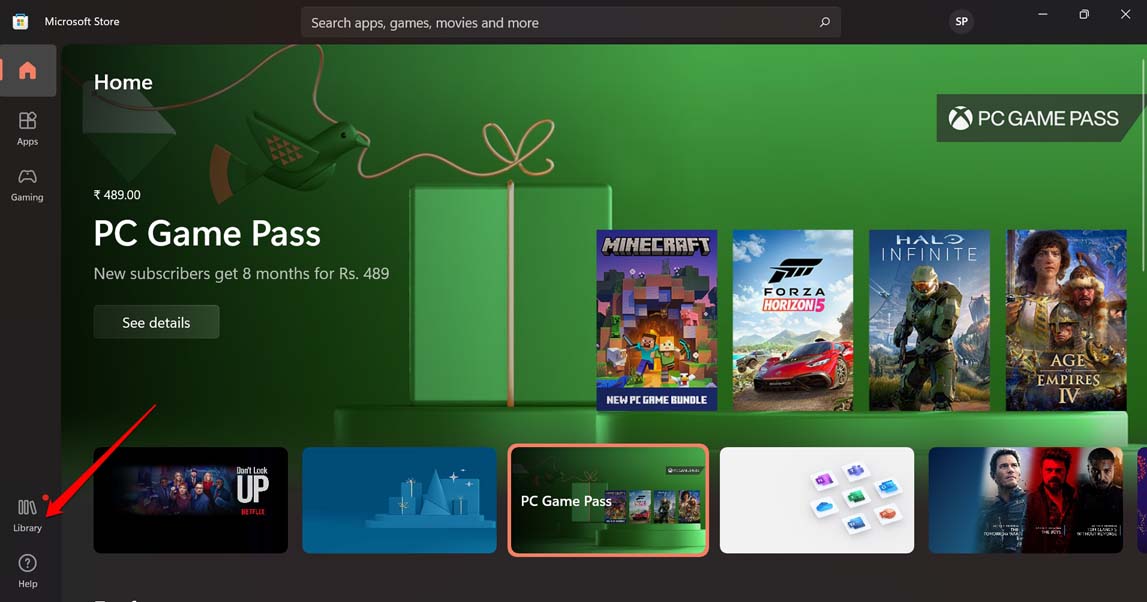
- Open the Microsoft Store app.
- Search for “Windows Media Player.”
- Find the app, then hit Install.

Try opening the media player again to see if it’s fixed. Reinstalling might reset your settings, so you may have to adjust them again.
Linked issue: Windows 11 Photos App Not Working or Crashing (Fix)
Try a clean boot and see if the Media Player crashes
A clean boot might show if other software is making the media player close. It starts Windows with just the basics, so you can tell if another program is the problem. Here’s how to do a clean boot:
- Press Win + R to open the Run box.
- Type msconfig and hit Enter to get to the System Configuration.
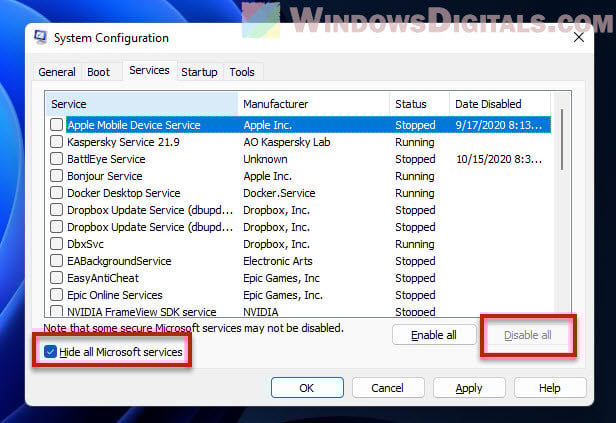
- Go to the Services tab.
- Tick Hide all Microsoft services, then hit Disable all.

- Switch to the Startup tab and open Task Manager.
- In Task Manager, turn off all startup items.
- Close Task Manager and click OK in System Configuration.
- Restart your PC.
After a clean boot, see if the media player still closes by itself. If it stops, a third-party app might be causing the issue. You can turn services and startup items back on one at a time to find the troublemaker. Remember to go back to normal startup mode by turning everything back on once you’re done.
Recommended fix: How to Startup Repair Windows 11/10 using Command Prompt
Try playing a different video file
The issue might also be with a bad video file. If the media player quits right after you try to open a certain video, try a different one to see if the problem stays. If other videos work fine, the first file might be broken or not supported.

If you run into any troubles:
- Make sure the video file works with Windows Media Player. Check the file type to see if it’s supported.
- Try another media player, like VLC, for the video. These players handle more file types and have cool features.
- If the video’s broken, look into a video repair tool.
- Check the drive with the video for errors using Windows CHKDSK. Open Command Prompt as admin, type
chkdsk /f X:(swap “X” with your drive letter), and hit Enter.
Handy guide: How to Play VOB Files on Windows 11
Update your graphics drivers
Old or wrong graphics drivers can mess with the Media Player. Try to update your graphics drivers and see if it fixes the issue:
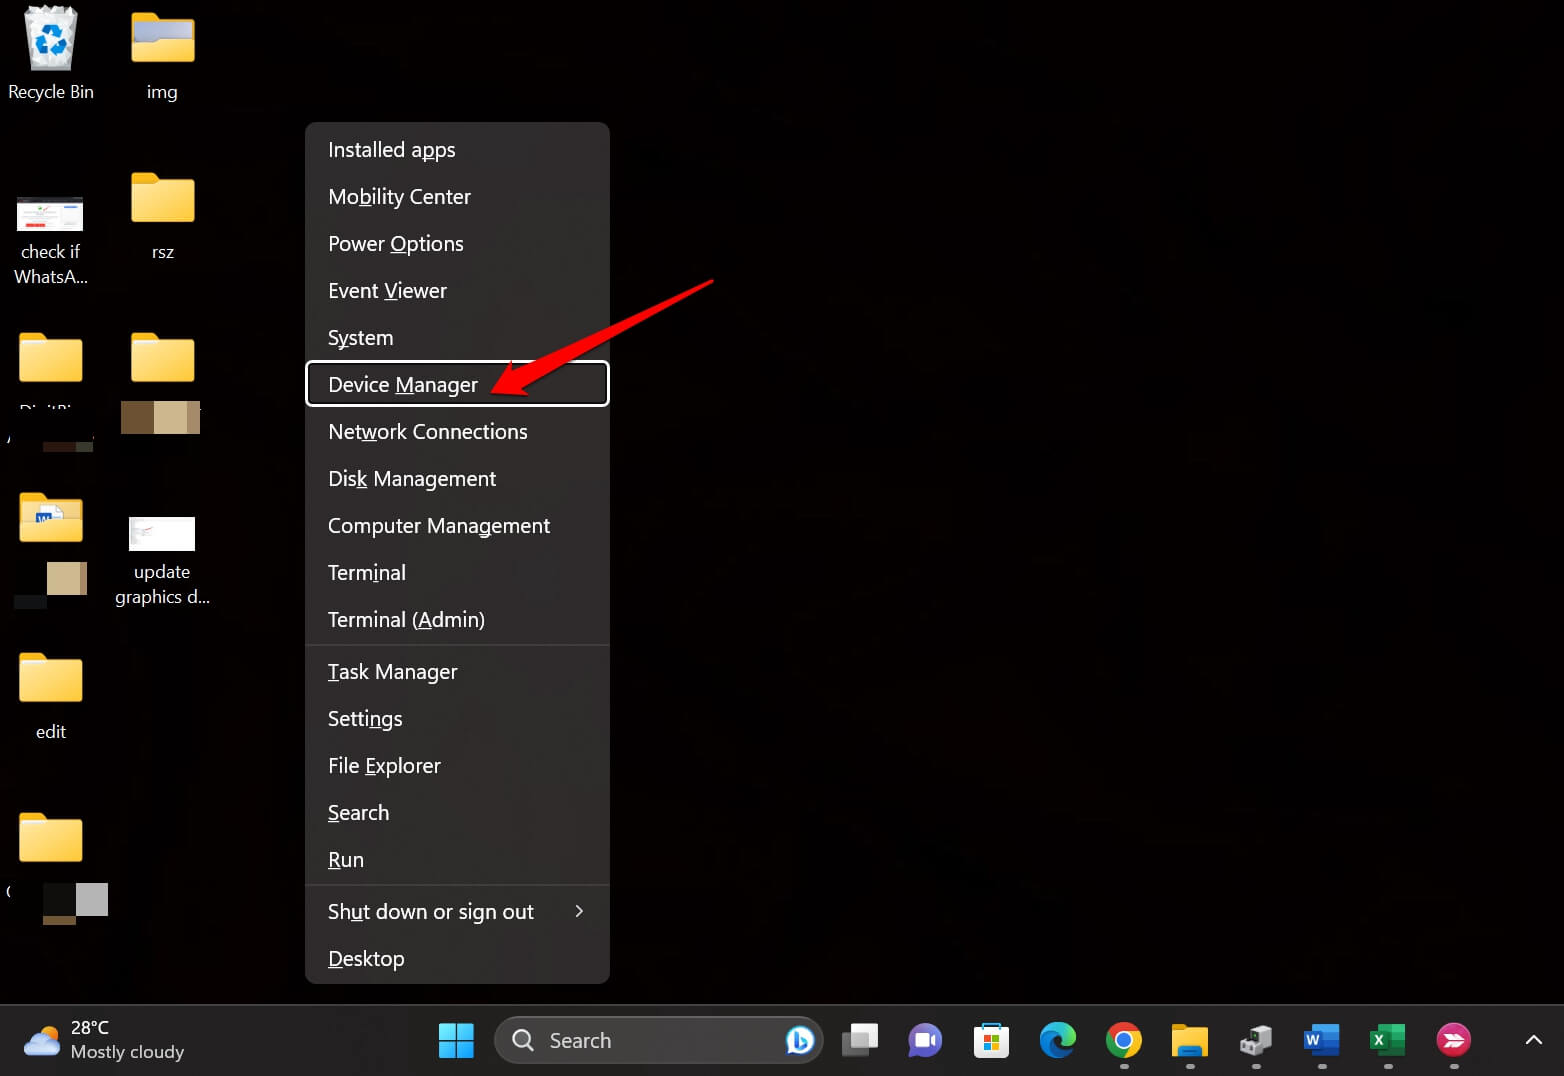
- Hit Win + X and pick Device Manager.
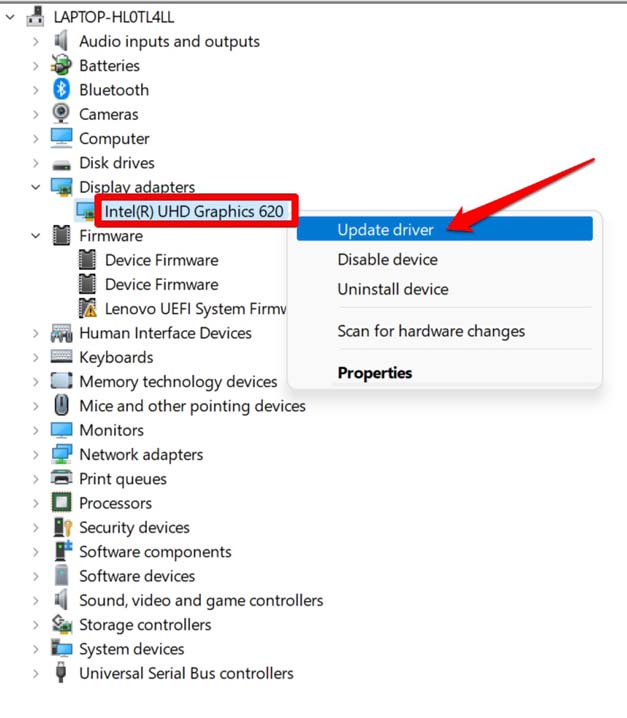
- Open the Display adapters section.
- Right-click your graphics adapter and choose Update driver.
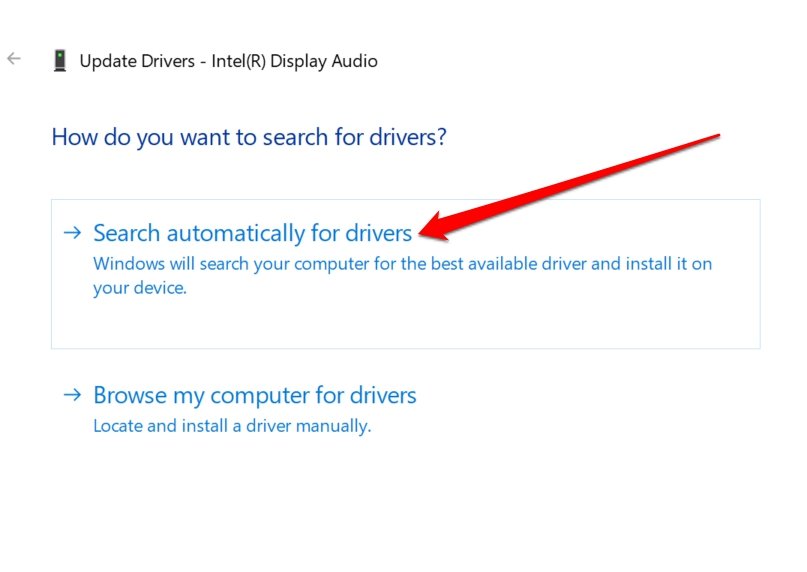
- Select Search automatically for updated driver software and follow along.
After updating, restart your PC and see if the media player is now stable.
If these solutions don’t help, you’ll need to dig deeper, like the checking the events that causes the crashes of the app. You can open the Event Viewer, and check under Windows Logs > Application for more clues. Use the error details there for further troubleshooting, or reach out to forums like Reddit for more help.
Applies ToWindows 7 Enterprise Windows 7 Home Basic Windows 7 Home Premium Windows 7 Professional Windows 7 Starter Windows 7 Ultimate
Симптомы
На компьютере под управлением Windows 7 Установка сторонних процессор цифровой обработки сигналов (DSP) подключаемого модуля проигрыватель Windows Media. В этом случае при попытке воспроизвести список воспроизведения, проигрыватель Windows Media перестает отвечать на запросы (зависает) или аварийно завершает работу.
Решение
Сведения об исправлении
Существует исправление от корпорации Майкрософт. Однако данное исправление предназначено для устранения только проблемы, описанной в этой статье. Применяйте это исправление только в тех случаях, когда наблюдается проблема, описанная в данной статье. Это исправление может проходить дополнительное тестирование. Таким образом если вы не подвержены серьезно этой проблеме, рекомендуется дождаться следующего пакета обновления, содержащего это исправление.
Если исправление доступно для скачивания, имеется раздел «Пакет исправлений доступен для скачивания» в верхней части этой статьи базы знаний. Если этот раздел не отображается, обратитесь в службу поддержки для получения исправления.
Примечание. Если наблюдаются другие проблемы или необходимо устранить неполадки, вам может понадобиться создать отдельный запрос на обслуживание. Стандартная оплата за поддержку будет взиматься только за дополнительные вопросы и проблемы, которые не соответствуют требованиям конкретного исправления. Чтобы получить полный список телефонов поддержки и обслуживания клиентов корпорации Майкрософт или создать отдельный запрос на обслуживание, посетите следующий веб-сайт корпорации Майкрософт:
http://support.microsoft.com/contactus/?ws=supportПримечание. В форме «Пакет исправлений доступен для скачивания» отображаются языки, для которых доступно исправление. Если нужный язык не отображается, значит исправление для данного языка отсутствует.
Предварительные условия
Для установки предварительные компоненты не требуются.
Необходимость перезагрузки
После установки исправления компьютер необходимо перезагрузить.
Сведения о замене исправлений
Это исправление не заменяет ранее выпущенные исправления.
Сведения о файлах
Английский (США) версия данного исправления устанавливает файлы с атрибутами, указанными в приведенных ниже таблицах. Дата и время для файлов указаны в формате UTC. Дата и время для файлов на локальном компьютере отображаются в местном времени с вашим текущим смещением летнего времени (DST). Кроме того, при выполнении определенных операций с файлами, даты и время могут изменяться.
Примечания к сведениям о файлах Windows 7
-
Файлы MANIFEST (.manifest) и MUM (.mum), устанавливаемые для каждой среды, указаны отдельно в разделе «Сведения о дополнительных файлах для Windows 7». MUM и файлы МАНИФЕСТА и связанные файлы каталога безопасности (.cat), очень важны для поддержания состояния обновляемого компонента. Файлы каталога безопасности, для которых не перечислены атрибуты, подписаны цифровой подписью корпорации Майкрософт.
Для всех поддерживаемых 86-разрядных версий Windows 7
|
Имя файла |
Версия файла |
Размер файла |
Дата |
Время |
Платформа |
|---|---|---|---|---|---|
|
Wmpeffects.dll |
12.0.7600.20614 |
352,256 |
11-Jan-2010 |
07:04 |
x86 |
Для всех поддерживаемых 64-разрядных версий Windows 7
|
Имя файла |
Версия файла |
Размер файла |
Дата |
Время |
Платформа |
|---|---|---|---|---|---|
|
Wmpeffects.dll |
12.0.7600.20614 |
605,184 |
11-Jan-2010 |
07:59 |
x64 |
Статус
Корпорация Майкрософт подтверждает, что это проблема продуктов Майкрософт, перечисленных в разделе «Относится к».
Дополнительные сведения
Дополнительные сведения о подключаемых модулях DSP проигрыватель Windows Media посетите следующий веб-узел Microsoft Developer Network (MSDN):
Общие сведения о подключаемых модулях DSP проигрыватель Windows MediaДополнительные сведения о подключаемых модулях проигрыватель Windows Media посетите следующий веб-узел корпорации Майкрософт:
Описание 824684 Стандартные термины, используемые при описании обновлений программных продуктов Майкрософт
Решение в данном документе и информация представляет текущее представление корпорации Майкрософт в отношении обсуждаемых вопросов на дату публикации. Это решение доступно в корпорацию Майкрософт или стороннего поставщика. Корпорация Майкрософт не рекомендует специально любого стороннего поставщика или сторонних решений, описываемых в данной статье. Также возможны другие сторонние поставщики или сторонних решений, которые не описаны в этой статье. В условиях меняющейся рыночной эту информацию не следует рассматривать как обязательство корпорации Майкрософт. Microsoft не может гарантировать и не утверждает точности сведений и решений, предоставленных корпорацией Майкрософт или упомянутыми разработчиками сторонних.
Корпорация Майкрософт не дает никаких гарантий и исключает все представления, гарантии и условия ли прямых, косвенных или установленных законом. Они включают, но не ограничиваются или гарантий условия заголовка, НЕНАРУШЕНИЯ, исправив ошибку, товарности и пригодности для определенной цели, по отношению к продукции, решения, услуг или других материалов или сведений. Не Корпорация Майкрософт не несет ответственности за любые решения независимых производителей, упомянутые в данной статье.
Сведения о дополнительных файлах
Дополнительная информация о файлах для Windows 7
Дополнительные файлы для всех поддерживаемых 86-разрядных версий Windows 7
|
Имя файла |
X86_cbf56195e254ab07dc5da0b54ed62958_31bf3856ad364e35_6.1.7600.20614_none_a7b639563307cb26.manifest |
|
Версия файла |
Неприменимо |
|
Размер файла |
710 |
|
Дата (UTC) |
11-Jan-2010 |
|
Время (UTC) |
10:15 |
|
Платформа |
Неприменимо |
|
Имя файла |
X86_microsoft-windows-mediaplayer-wmpeffects_31bf3856ad364e35_6.1.7600.20614_none_f9f88d2c09ab05c3.manifest |
|
Версия файла |
Неприменимо |
|
Размер файла |
7,538 |
|
Дата (UTC) |
11-Jan-2010 |
|
Время (UTC) |
07:26 |
|
Платформа |
Неприменимо |
Дополнительные файлы для всех поддерживаемых 64-разрядных версий Windows 7
|
Имя файла |
Amd64_5fa88bcc4d7e9030eed703f3f57a6145_31bf3856ad364e35_6.1.7600.20614_none_41dc55155463fbf4.manifest |
|
Версия файла |
Неприменимо |
|
Размер файла |
1,068 |
|
Дата (UTC) |
11-Jan-2010 |
|
Время (UTC) |
10:15 |
|
Платформа |
Неприменимо |
|
Имя файла |
Amd64_microsoft-windows-mediaplayer-wmpeffects_31bf3856ad364e35_6.1.7600.20614_none_561728afc20876f9.manifest |
|
Версия файла |
Неприменимо |
|
Размер файла |
7,540 |
|
Дата (UTC) |
11-Jan-2010 |
|
Время (UTC) |
08:24 |
|
Платформа |
Неприменимо |
Нужна дополнительная помощь?
Нужны дополнительные параметры?
Изучите преимущества подписки, просмотрите учебные курсы, узнайте, как защитить свое устройство и т. д.
Some Windows 10 users have had Windows Media Player and Windows Media Center crashing every time it’s opened. 3rd party apps such as Plex, HDHomeRun, Subtitle Edit and VisualSubSync have also been affected. Some users who also tried opening folder containing media files had Windows Explorer crashing or Windows restarting. Obviously, CompPkgSup.DLL is faulting module.
This error is caused by a bug in Windows Update KB4013429 which caused Windows DVD Player and a lot of other media applications that use Microsoft MPEG-2 handling libraries to crash. This means that update caused a malfunction on any application that used Microsoft DTV-DVD Video Decoder (msmpeg2vdec.dll) that used the inbuilt DVD/MPEG2 decoder.
This issue can be solved by uninstalling Update KB4013429, applying update fix KB4015438, disabling Microsoft DTV-DVD Video Decoder or running the CompPkgSup fixer. This article will provide the various methods to get this fixed.
Method 1: Uninstalling Windows Update KB4013429
This update caused the whole issue. Removing it will fix the issue temporarily. Make sure you disable automatic updates for the mean time to prevent Windows from downloading it again.
- Press WIN + I to open Windows settings.
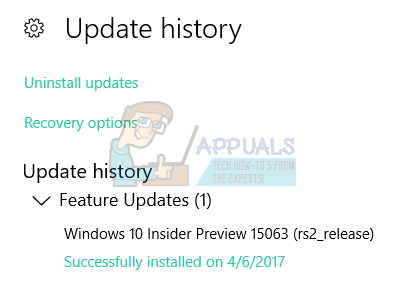
- Select Update & Security and navigate to Update history > Uninstall update

- A Control Panel window will open showing all installed updates. Click on the “Search Installed Updates” search bar at the upper-right and type KB4013429.
- Double-click on KB4013429 in the search result and click OK to confirm the update removal.

- Reboot your PC and try running your media applications again.

Method 2: Applying Windows Update
Microsoft responded promptly to fix this bug with the update KB4015438. You don’t need to uninstall the faulty update in method 1 to fix this.
- Press CTRL + I to open Windows settings.
- Select Update & Security and select Check for Updates. Windows will check for updates and begin downloading pending updates. If automatic updates are disabled, make open the list of pending updates and install update KB4015438.
- Reboot your PC and try running your media applications again.
Alternatively, you can download the standalone cumulative update and install it manually from here
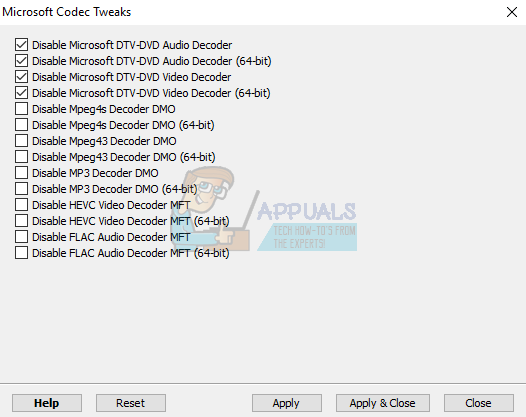
Method 3: Using the Codec Tweak Tool
Using the Codec Tweak Cool from codecguide.com, you can disable Microsoft DTV-DVD Video Decoder and stop it from crushing your applications. Note that doing this may break video playback in certain apps.
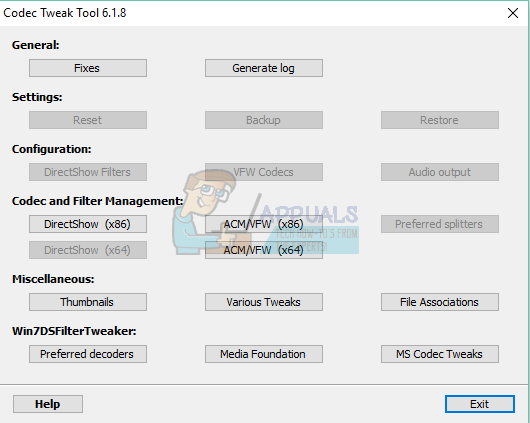
- Download the Codec Tweak Tool from here.
- Run the application with admin privileges or grant the UAC prompt when it appears.
- Select MS Codec Tweaks under Win7DFilterTweaker.

- Check the first 4 boxes as shown in the image below to disable.

- Click Apply & Close.
- Try to run your media applications again to confirm if the error has been resolved.
Method 4: Replacing CompPkgSup
You can CompPkgSup.dll with a previous working version of the DLL so it doesn’t cause crashes.
- Download CompPkgSup.dll from here.
- Copy CompPkgSup.dll to C:\Temp. If the Temp folder doesn’t exist on your system, you should create it. You may be asked to grant Admin privileges, which you should grant.
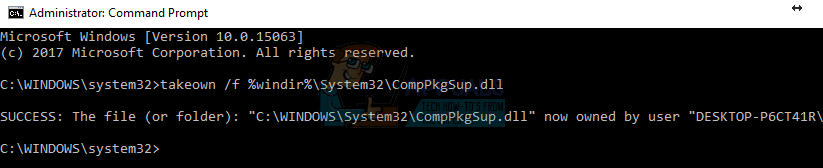
- Press the Start button and type “cmd”. Right-click on “Command Prompt” and click “Run as Administrator”. Accept the UAC prompt when the prompt comes up.
- Enter the following commands in the elevated command prompt:takeown /f %windir%\System32\CompPkgSup.dll

icacls %windir%\System32\CompPkgSup.dll /grant administrators:F

copy C:\temp\CompPkgSup.dll %windir%\system32\CompPkgSup.dll
- After this operation, CompPkgSup.dll will be copied to the system32 folder. Try launching the media applications which were producing the errors and check if they’ve stopped.

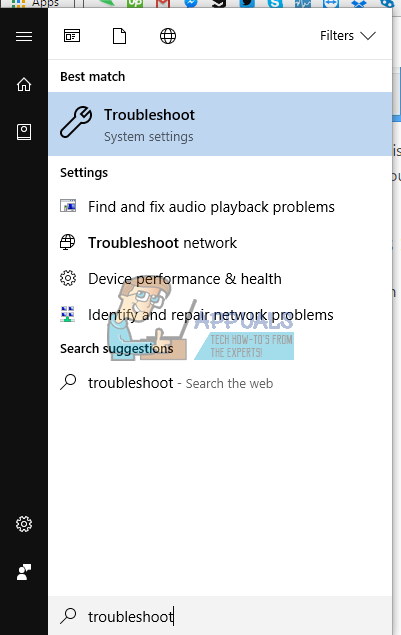
Method 5: Using Windows Troubleshooter
- Open the Start Menu and type troubleshooting

- Scroll down the list of troubleshooting options, select Video Playback and Run the troubleshooter.

- If the Troubleshooter identifies any issues, Apply the fix and then check if you can open any multimedia applications.

Kevin Arrows
Kevin Arrows is a highly experienced and knowledgeable technology specialist with over a decade of industry experience. He holds a Microsoft Certified Technology Specialist (MCTS) certification and has a deep passion for staying up-to-date on the latest tech developments. Kevin has written extensively on a wide range of tech-related topics, showcasing his expertise and knowledge in areas such as software development, cybersecurity, and cloud computing. His contributions to the tech field have been widely recognized and respected by his peers, and he is highly regarded for his ability to explain complex technical concepts in a clear and concise manner.
Is Windows 11 Media Player Not Loading. Here is the Detailed Guide to Fix Windows Media Player has Stopped Working.
This guide explains various useful troubleshooting methods to fix the Windows Media Player on a Windows 11 machine. While playing an audio or video file on the popular native media player from Windows, you may get the ‘Windows Media Player Has Stopped Working’ error.
For long-time Windows users, Windows Media Player is one of the essential apps in the Windows ecosystem. It supports a wide variety of audio and video files. Over the various generations of MS Windows, the Windows Media Player has undergone a significant transformation, aesthetic and feature-wise.
Reasons for Windows Media Player Has Stopped Working Issue
Here are some of the reasons why Windows Media Player has become unresponsive.
- Bug on the current version of Windows Media Player installed on the PC.
- Technical issue in the current system version running on the computer.
- You are playing a file on Windows Media Player that is corrupt.
- The file you are trying to play is in an unsupported format.
- One or more system files on the PC have become corrupt, causing the Windows Media Player to become dysfunctional.
Implement these troubleshooting tips to fix the Windows Media Player in Windows 11.
1. Force Close and Relaunch Windows Media Player
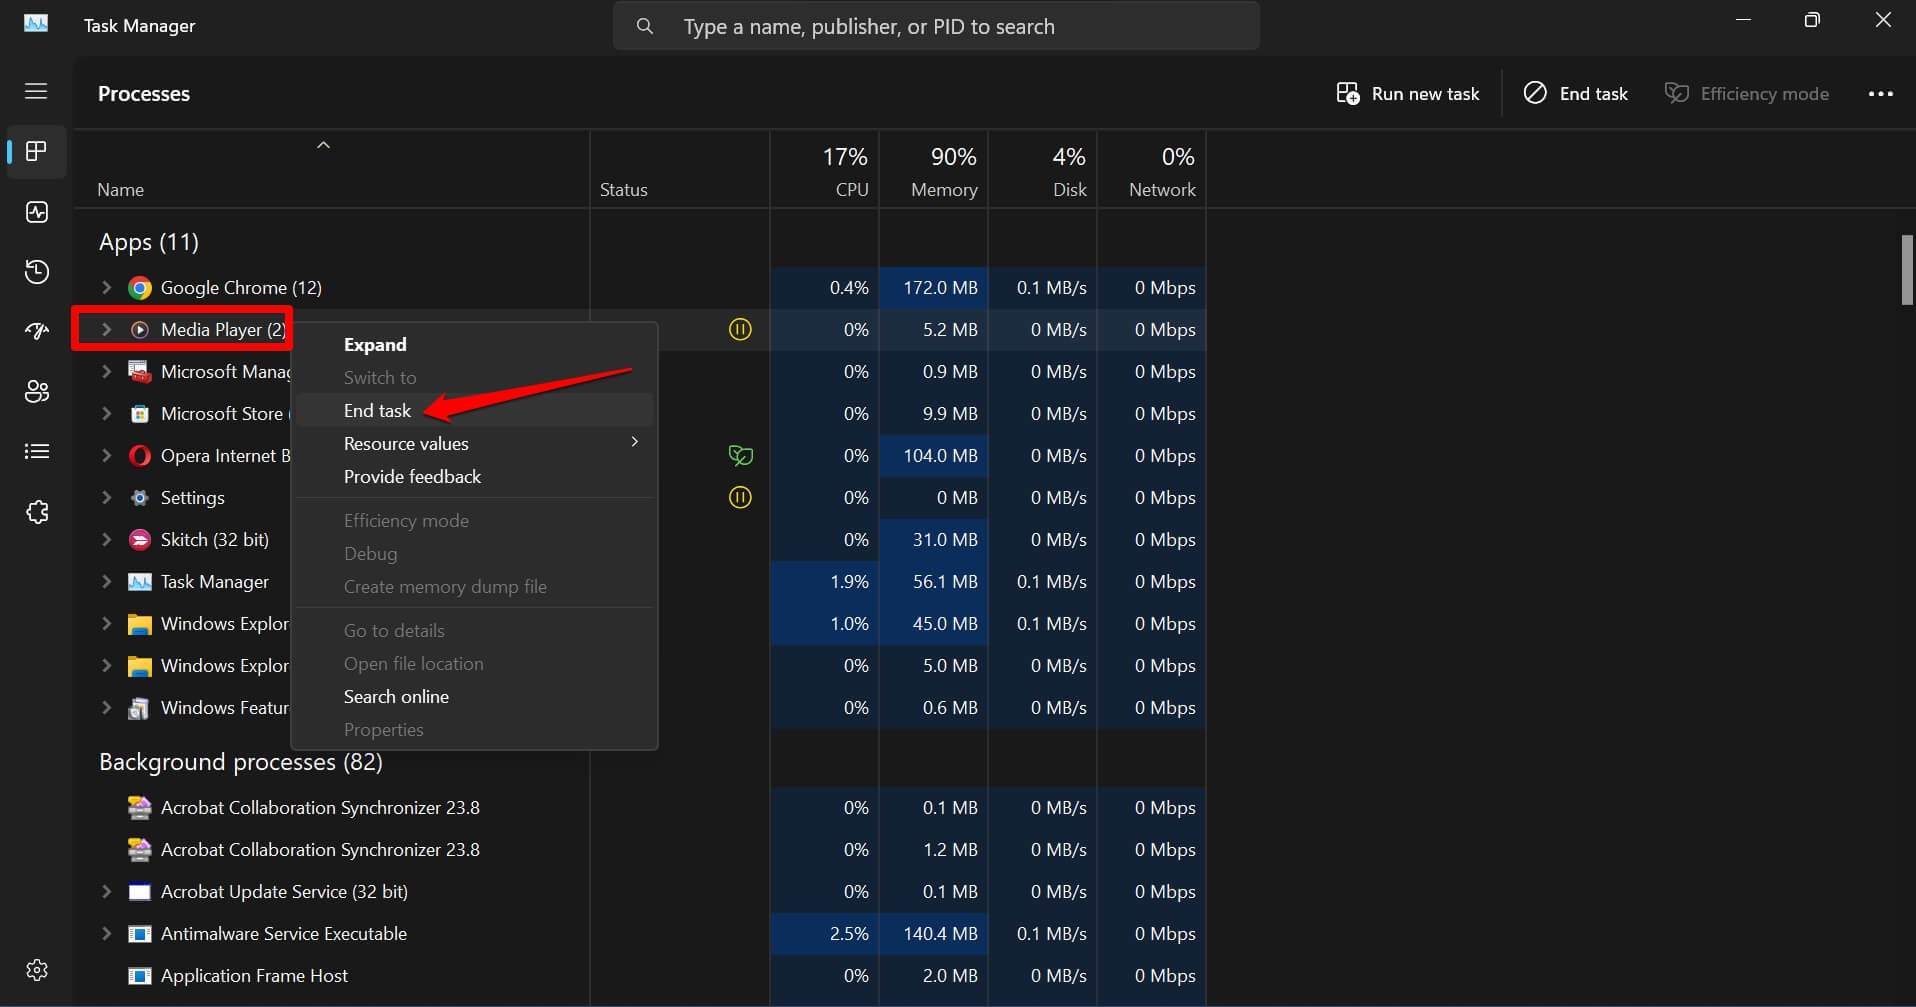
Start the troubleshooting with force closing the Media Player from Task Manager. Then launch it. Often, this simple trick can fix random glitches in the application.
- Press Ctrl + Shift + Esc to launch the Task Manager.
- Go to Media Player, and right-click on it.
- Select End Task.

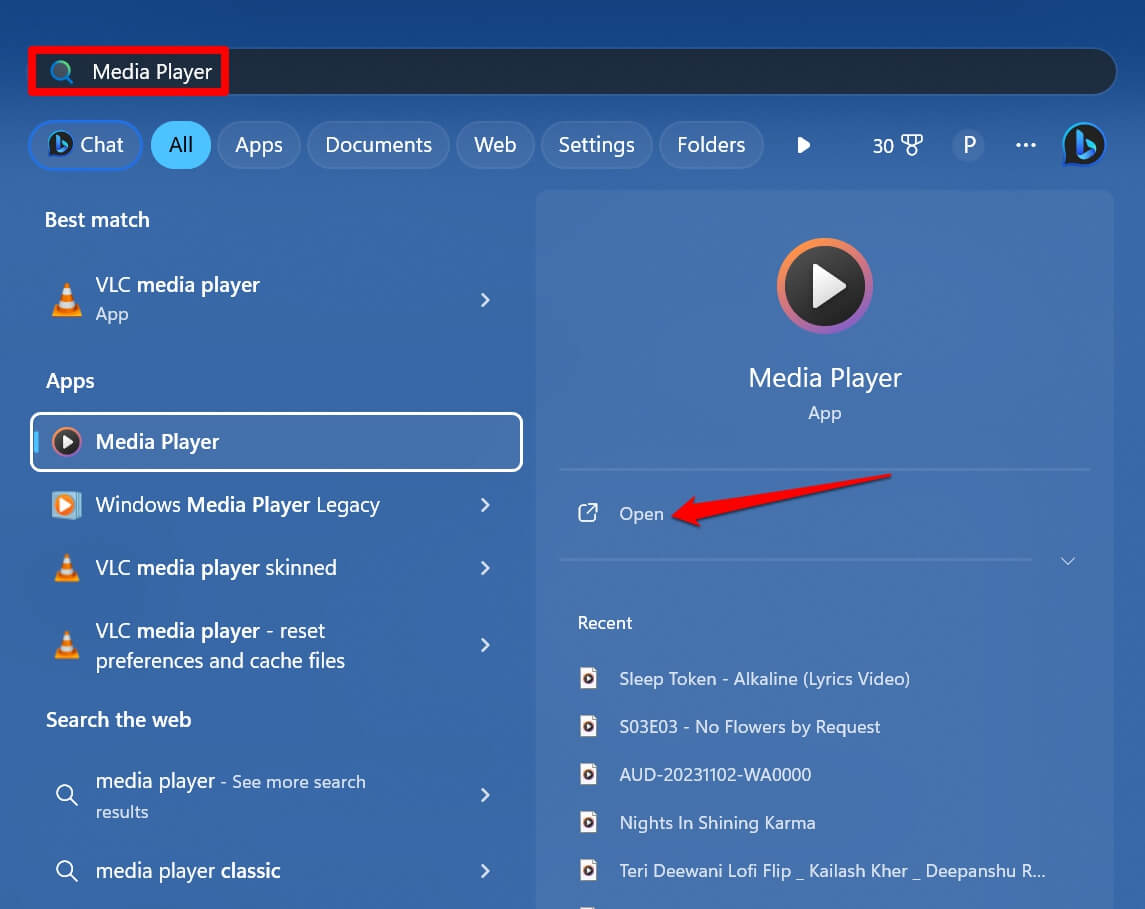
- Press the Windows key to launch the search panel.
- Type Media Player and click Open.

2. Disable and Re-enable Windows Media Player
You can disable the Media Player and re-enable it on Windows 11. This can often fix bugs in the application.
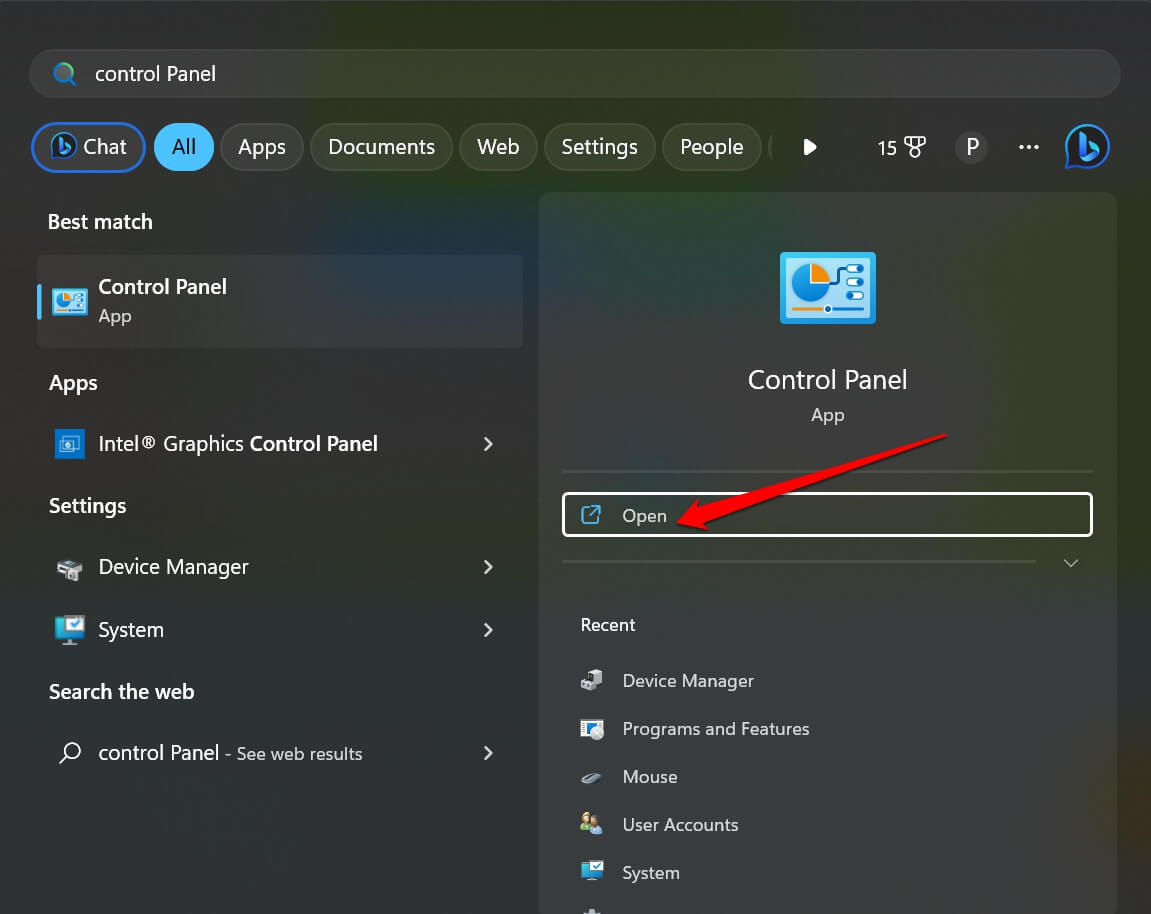
- Launch Control Panel using Windows Search.

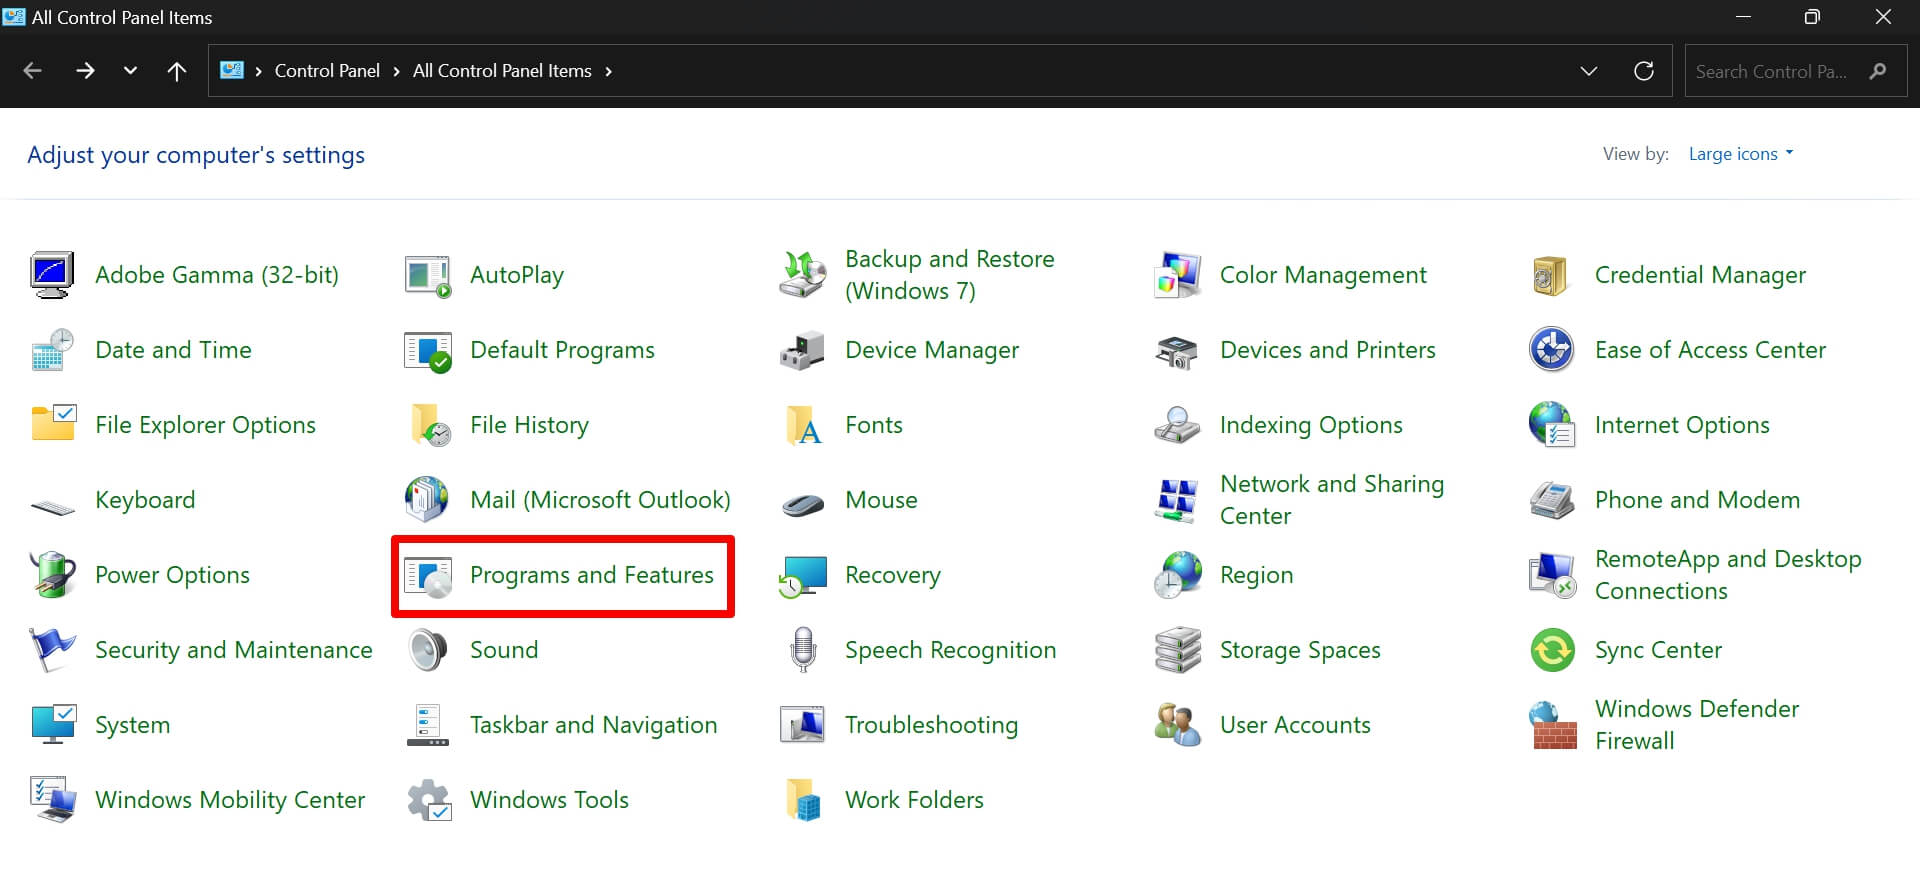
- Go to Programs and Features.

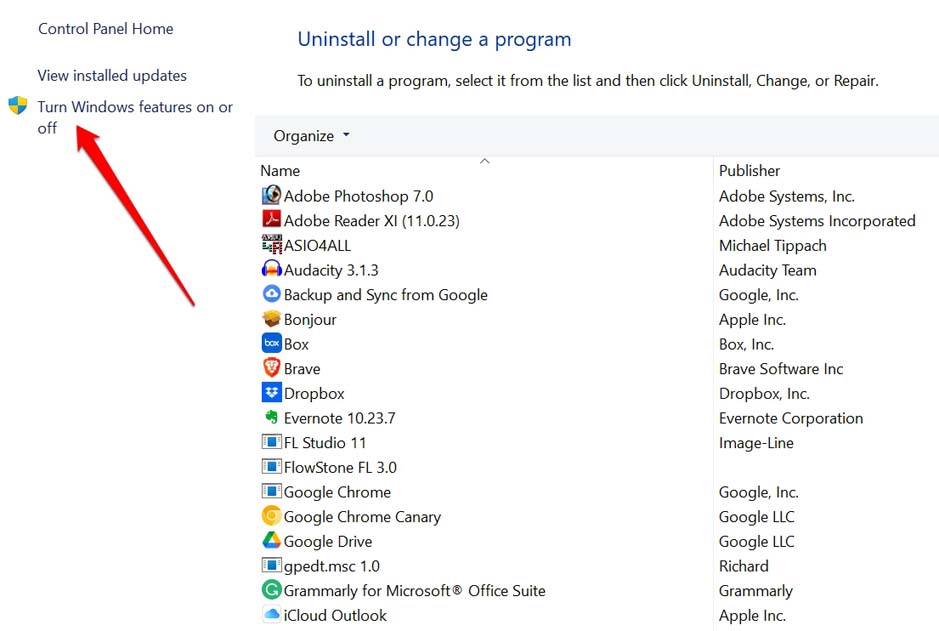
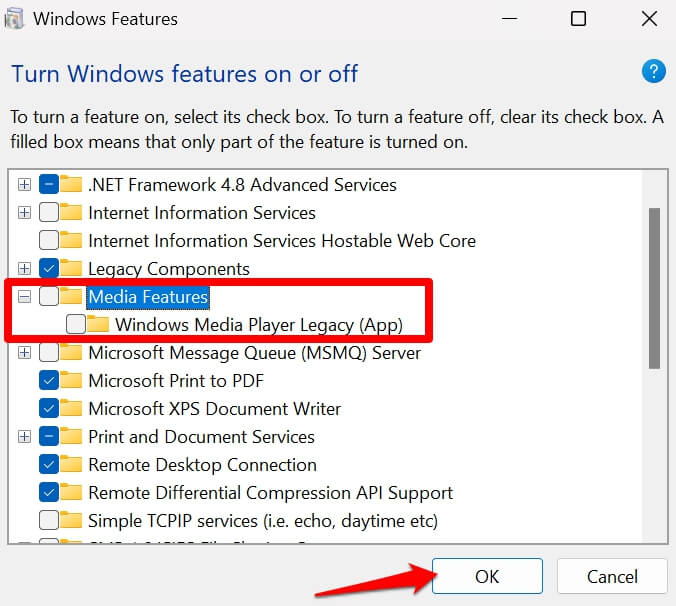
- On the upper-left corner, click the option Turn Windows feature on or off.

- On the dialog box, uncheck Media Features and Windows Media Player Legacy.

- Now, restart the PC and follow the Steps 1 to 3.
- Check the box next to Media Features and Windows Media Player Legacy.
Launch the Media Player and start playing audio or video files on it.
3. Use the Windows Media Player Troubleshooter
Use the dedicated in-built troubleshooter for Windows Media Player and fix any issues with the app.
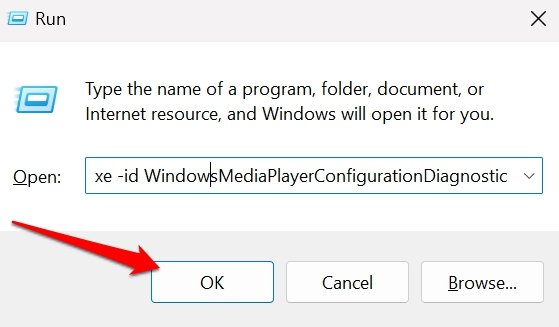
- Press Windows + R to launch the Run box.
- Type msdt.exe -id WindowsMediaPlayerConfigurationDiagnostic
- Press enter.

- Click Next on the troubleshooter dialog box.

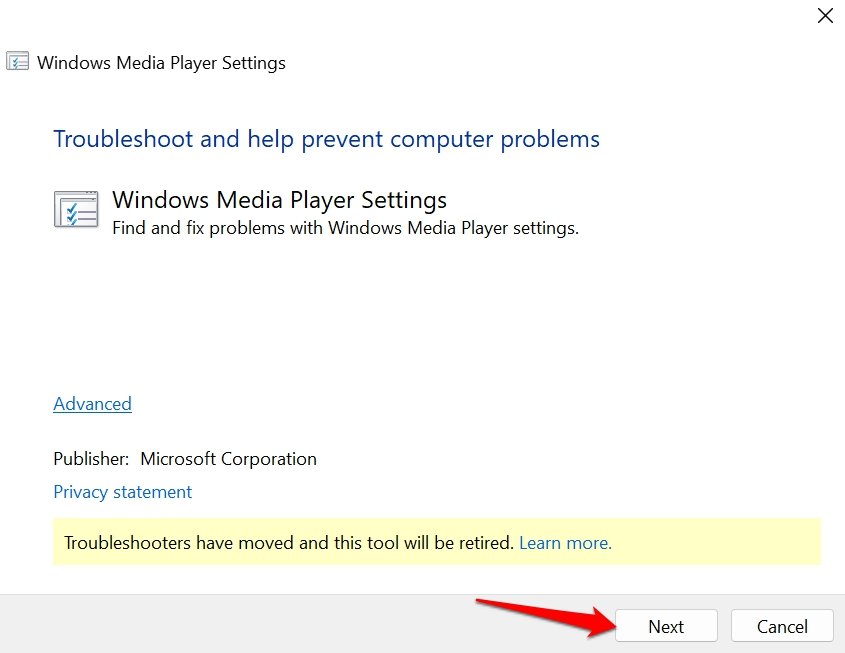
Follow the instructions to continue and complete the troubleshooting process. After the troubleshooting, launch Media Player and check if it is working.
4. Update Windows Media Player
You can install version updates for Windows Media Player from the Microsoft Store. That will fix the bugs on the current build of the application that your PC is running.
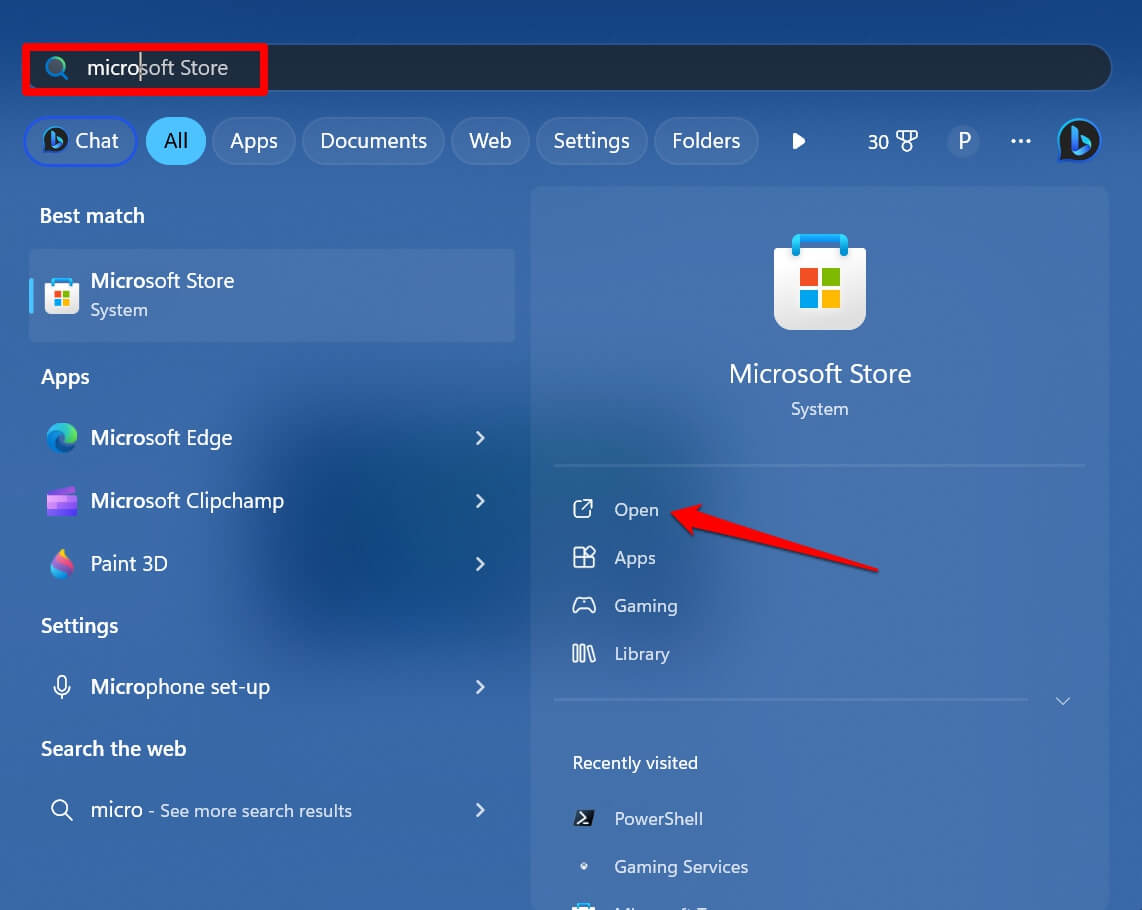
- Press the Windows key.
- In the search panel, type Microsoft Store.

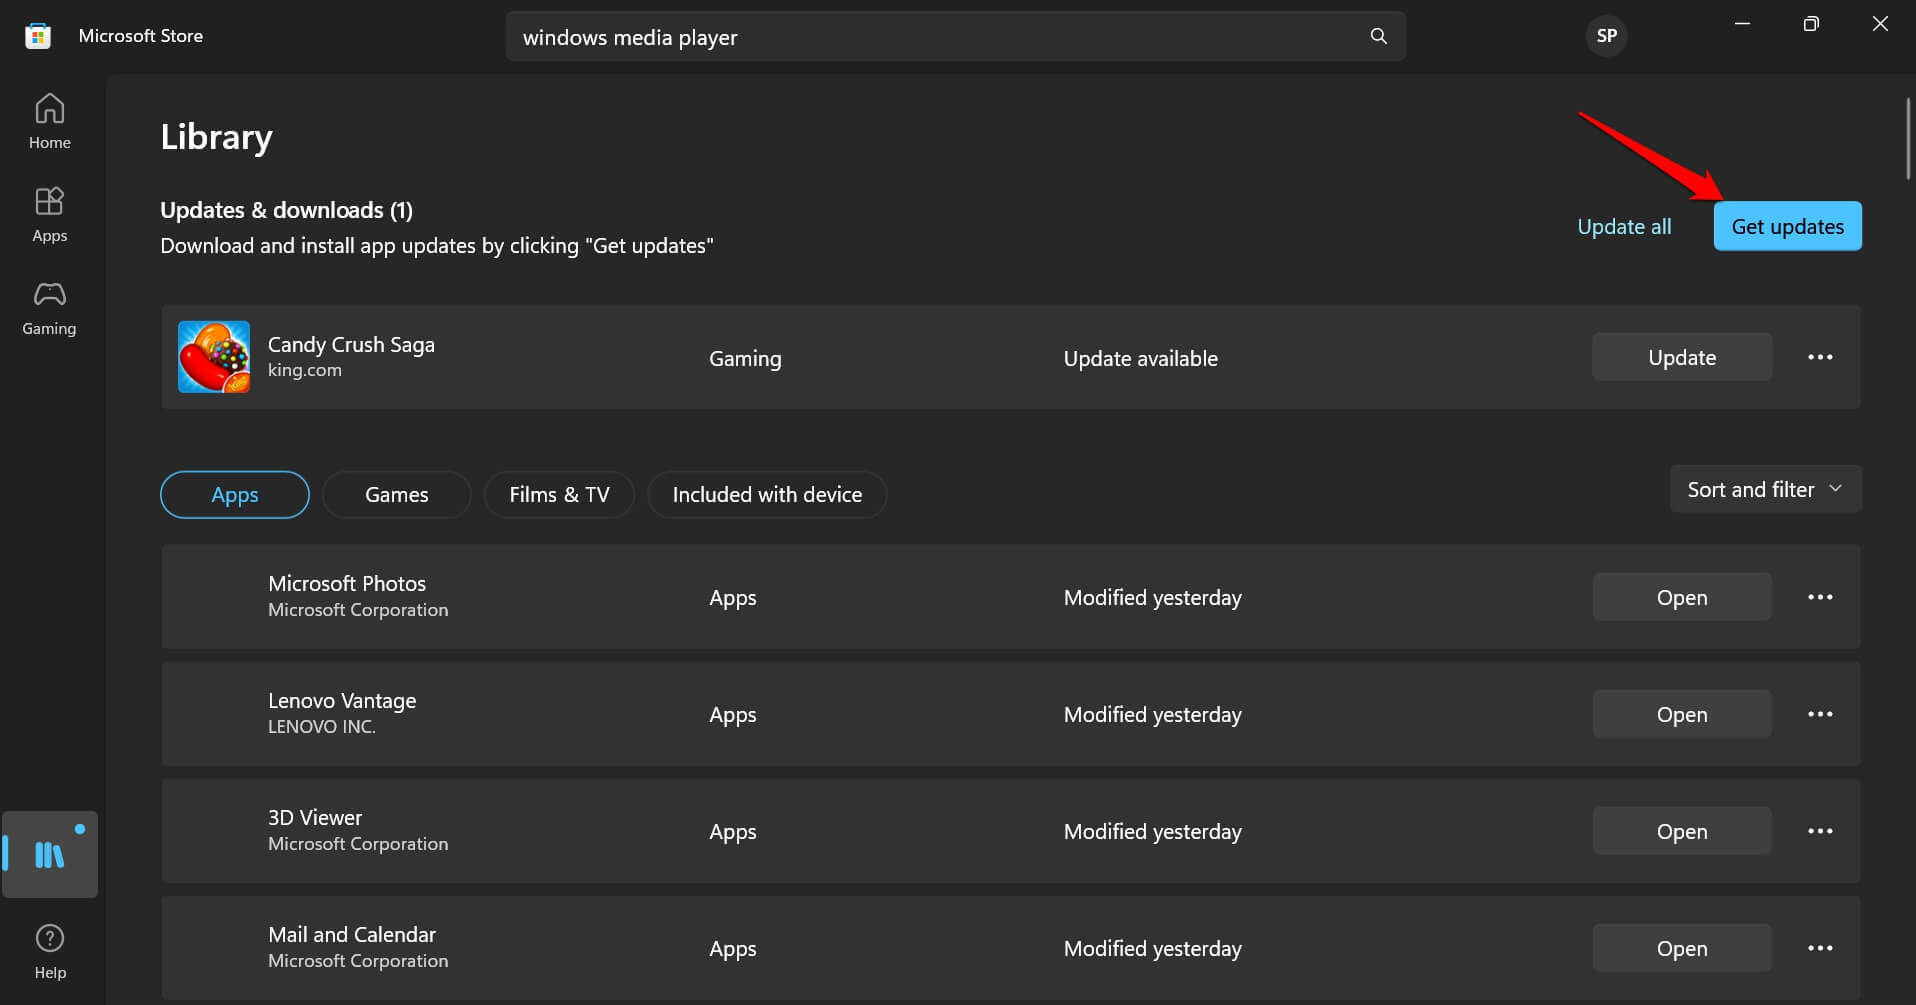
- Click on Library.

- Next, click on Get All Updates.

- If a new update for the Media Player is available, it will automatically install.
- Relaunch Windows Media Player after the update process is complete.
NOTE: The updates will be fetched only when the computer is connected to a WiFi.
5. Repair Windows Media Player
Often, repairing an application on a Windows app can fix the bugs. Here are the steps to repair the Media Player app on Windows 11.
- Press Windows + I hotkeys to launch the settings.
- On the left side, click on Apps.
- Go to Installed Apps.

- In the search field, type Media Player.
- Click the 3-dot menu icon next to Media Player.
- Select Advanced Options.

- Scroll to the Repair button. Click on it.


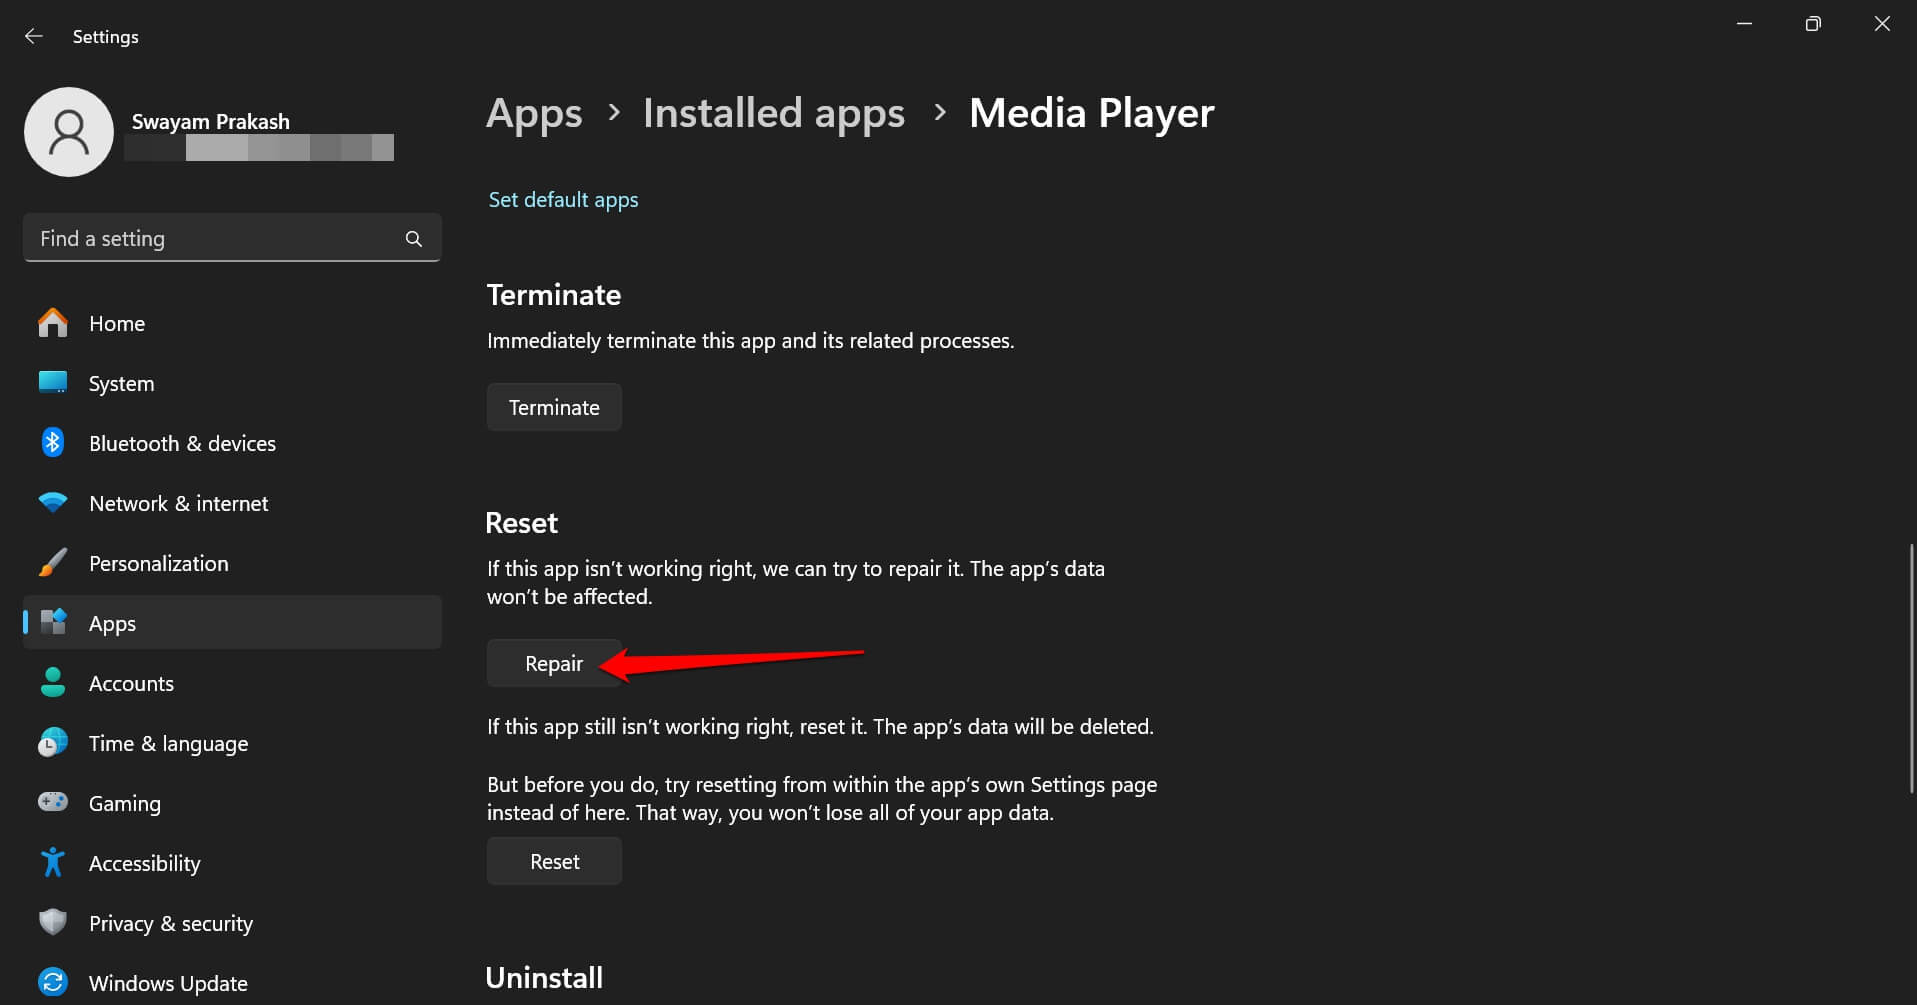
Follow the instructions to complete the repair process. Once the repair is over, relaunch the Media Player and check if it plays the audio and video files without any errors.
TIP: You may also follow the above steps and Reset the app. A reset will change the settings within the app to default parameters and delete the app data.
6. Update the Audio Driver
If the Windows Media Player cannot play audio files, update the audio driver. Here are the steps to update the audio driver on Windows 11.
- Press Windows + X hotkeys.
- Select Device Manager from the menu.

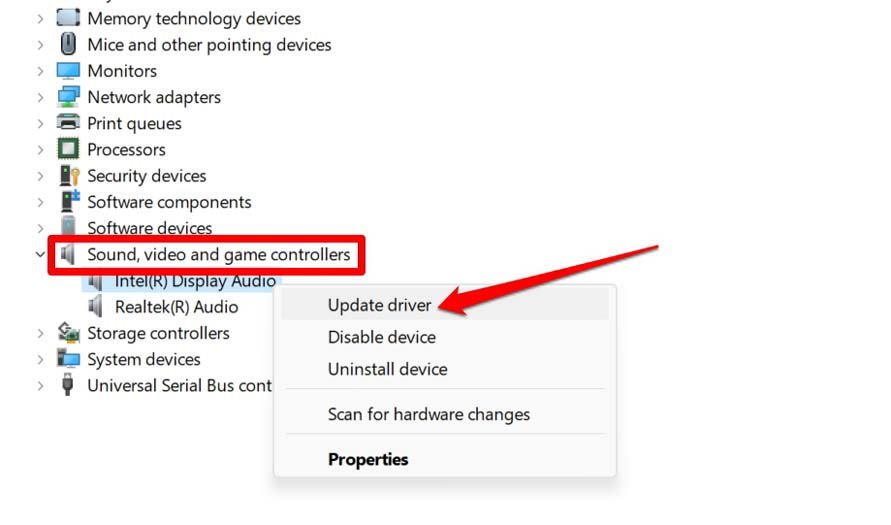
- Scroll to Sound, Video, and Game Controllers and expand it.
- Within that, right-click on the Audio driver and select Update Driver.

- Select Search Automatically for Drivers.

The system will start searching for the latest drivers and install them. Make sure your PC is connected to the WiFi.
7. Update the Graphics Driver
If you cannot play video files on Windows Media Player, update the graphics driver of the PC.
- Press Windows + X to launch the power user menu.
- Select Device Manager.
- Scroll to Display Adapter and expand it.
- Right-click on the graphics unit and select Update Driver.

- Click on Search Automatically for Drivers.

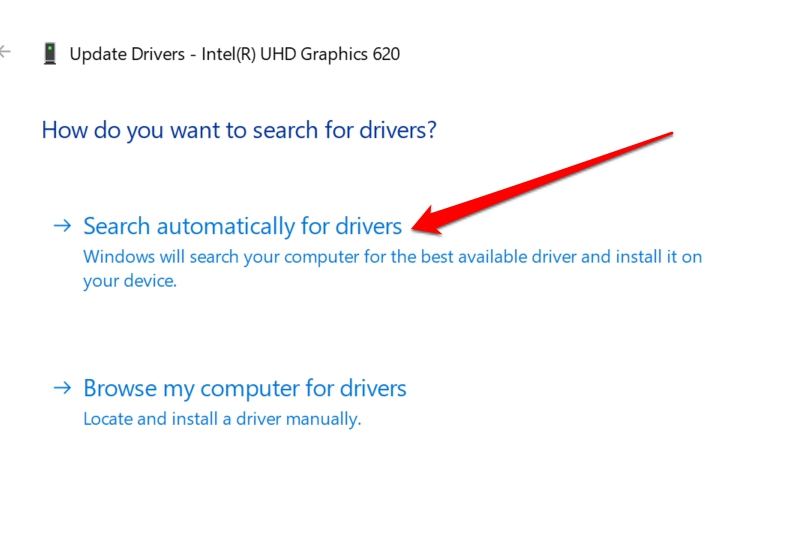
Launch Media Player after the graphics driver is updated. Play a video and check if it runs without any error message.
8. Delete the Windows Media Player Library
This troubleshooting method will clear the junk data in the Windows Media Library. You can then run Media Player on Windows 11 without any errors.
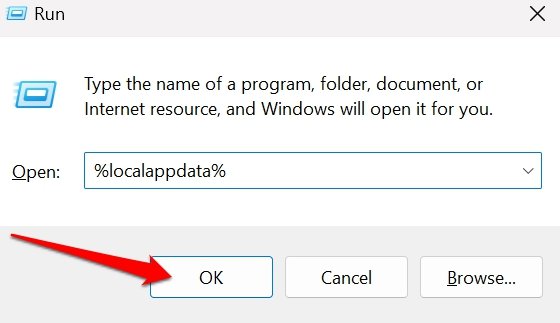
- Press Windows + R to access the Run box.
- Type %localappdata% and press enter.

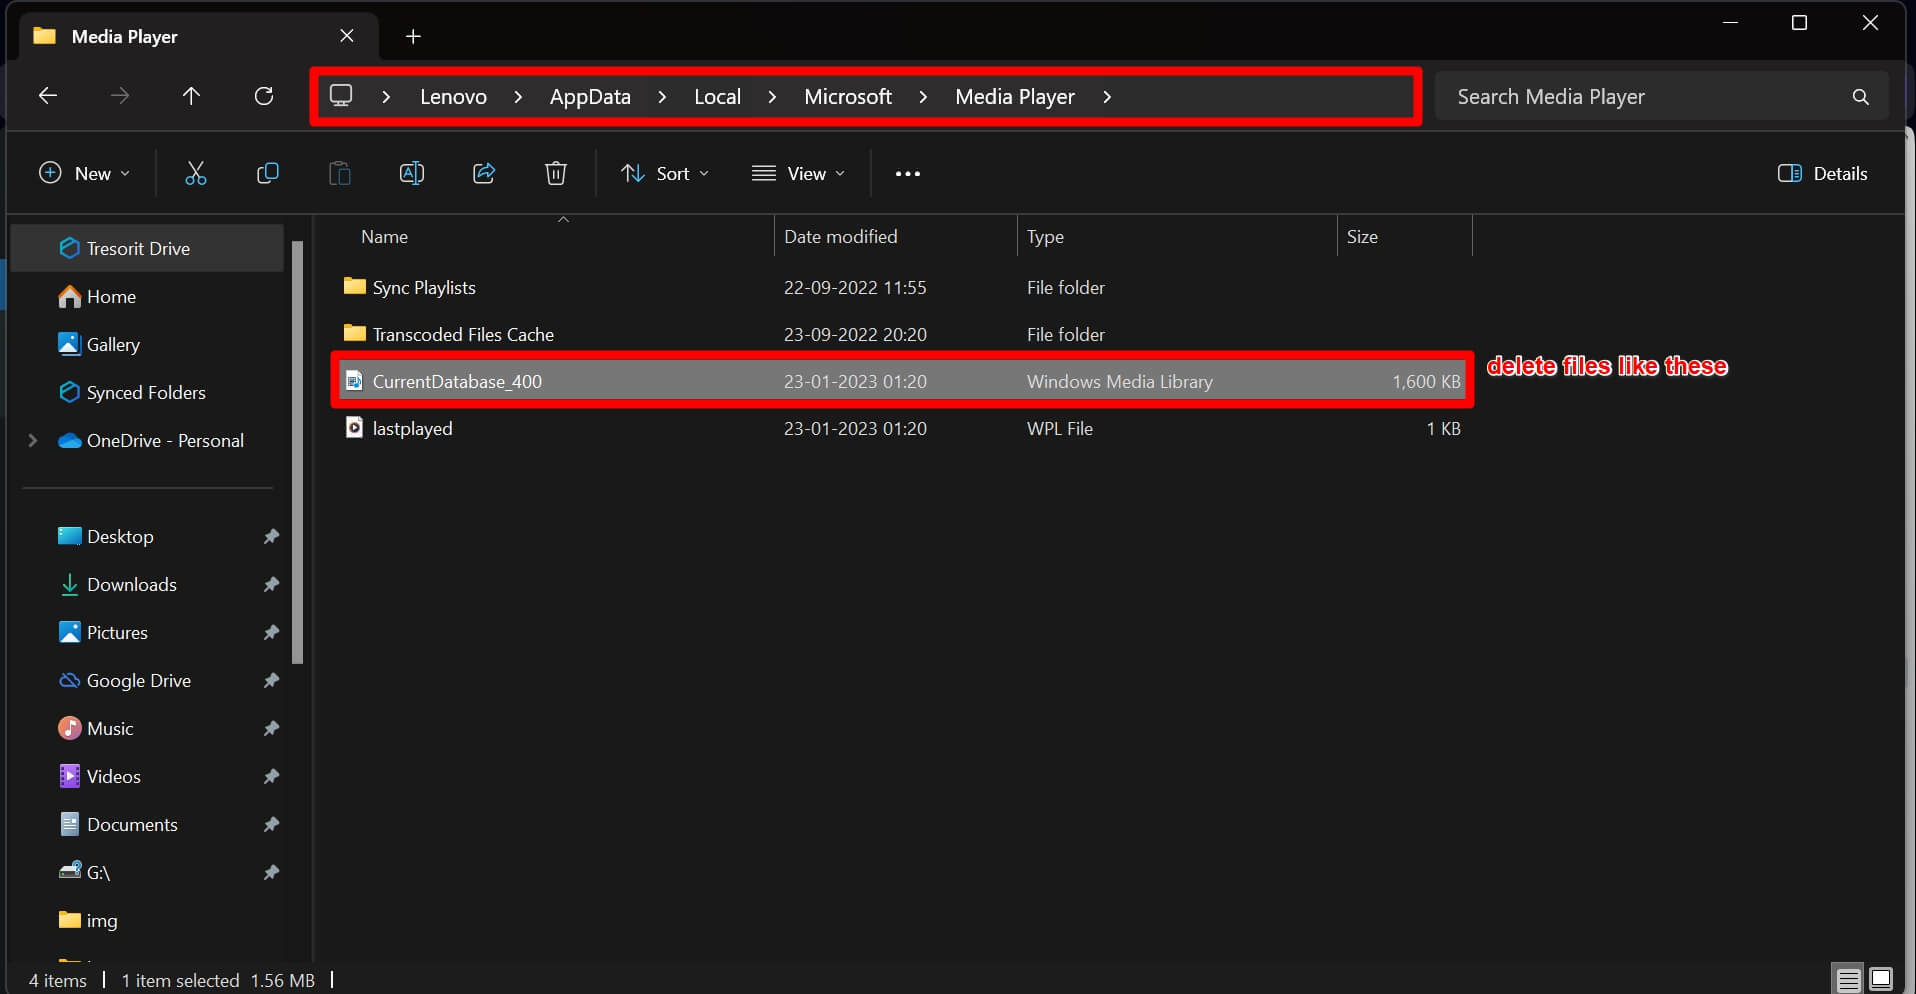
- Go to the folders Microsoft > Media Player.
- Select the files with the Type mentioned as Windows Media Library.
- Then press Shift + Delete to remove the selected files.

- Now, launch the Media Player.
The Windows Media Player should run without any problems.
9. Uninstall and Reinstall Media Player
If other tips and tricks do not fix the “Windows Media Player Has Stopped Working” error, you can uninstall the app temporarily. Following that, reinstall it from the Microsoft Store.
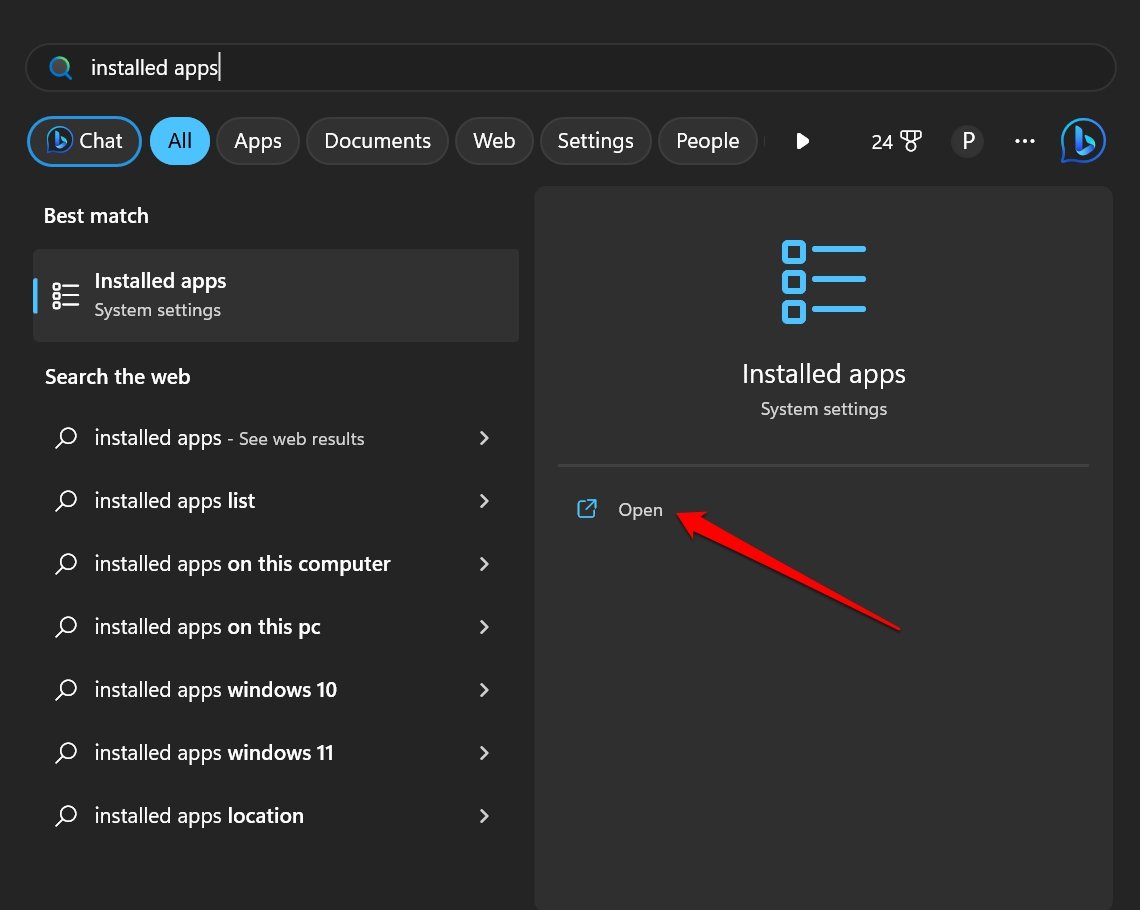
- Press Windows + S hotkeys to bring up the search.
- Type Installed Apps and click Open.

- In the installed apps search field, search for Media Player.
- Click the menu icon beside Media Player and select Uninstall.
- Launch the Microsoft Store app.
- Search for Windows Media Player.
- Click on Get to install the app back on your PC.

10. Install Latest Windows Update
Fix any existing bugs in the system version of your PC by upgrading it to the latest Windows version.
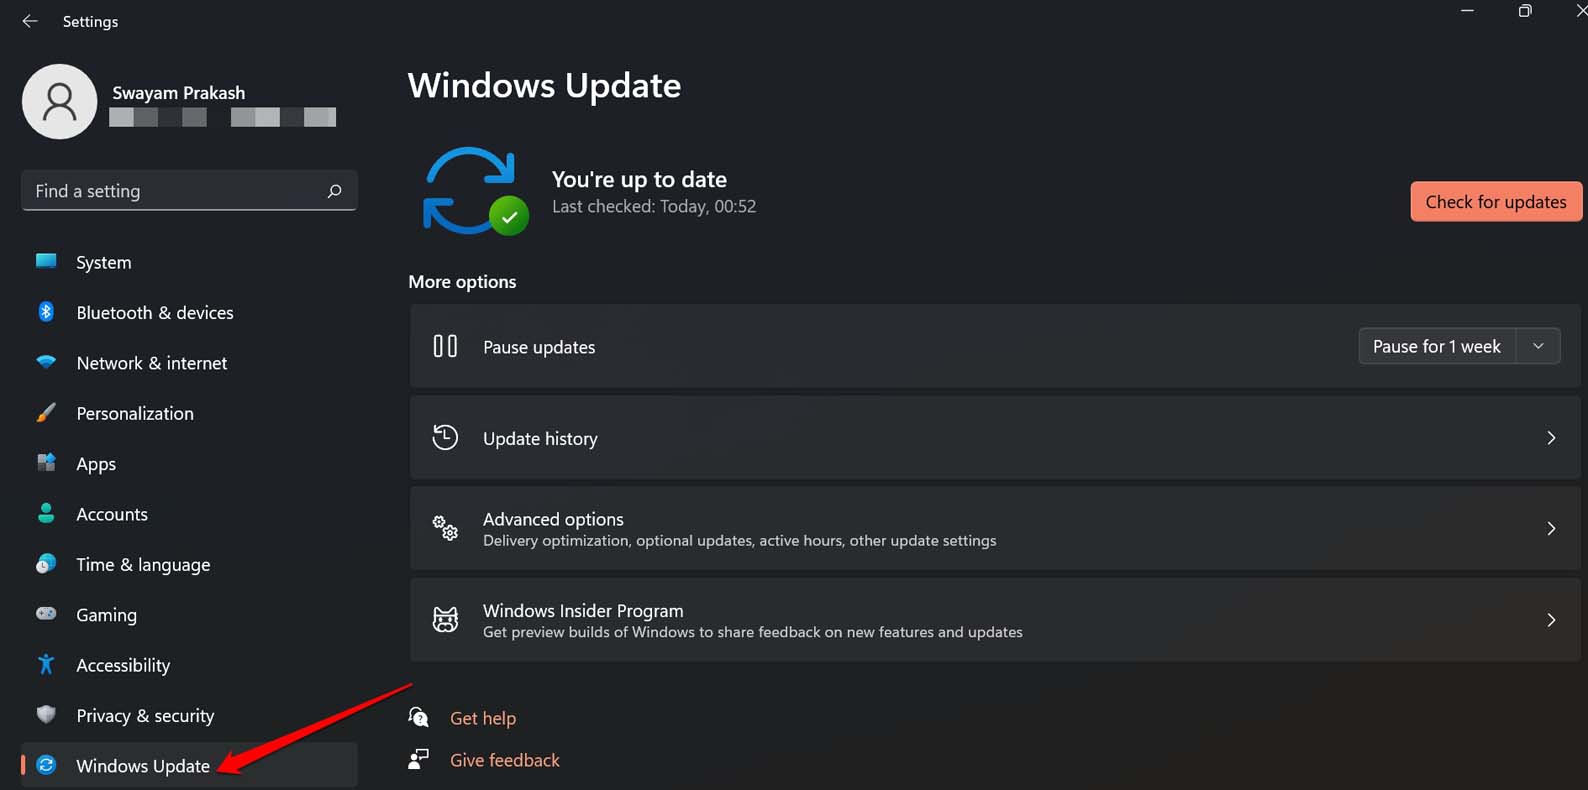
- Press Windows + I to go to the settings.
- Click on Windows Update.

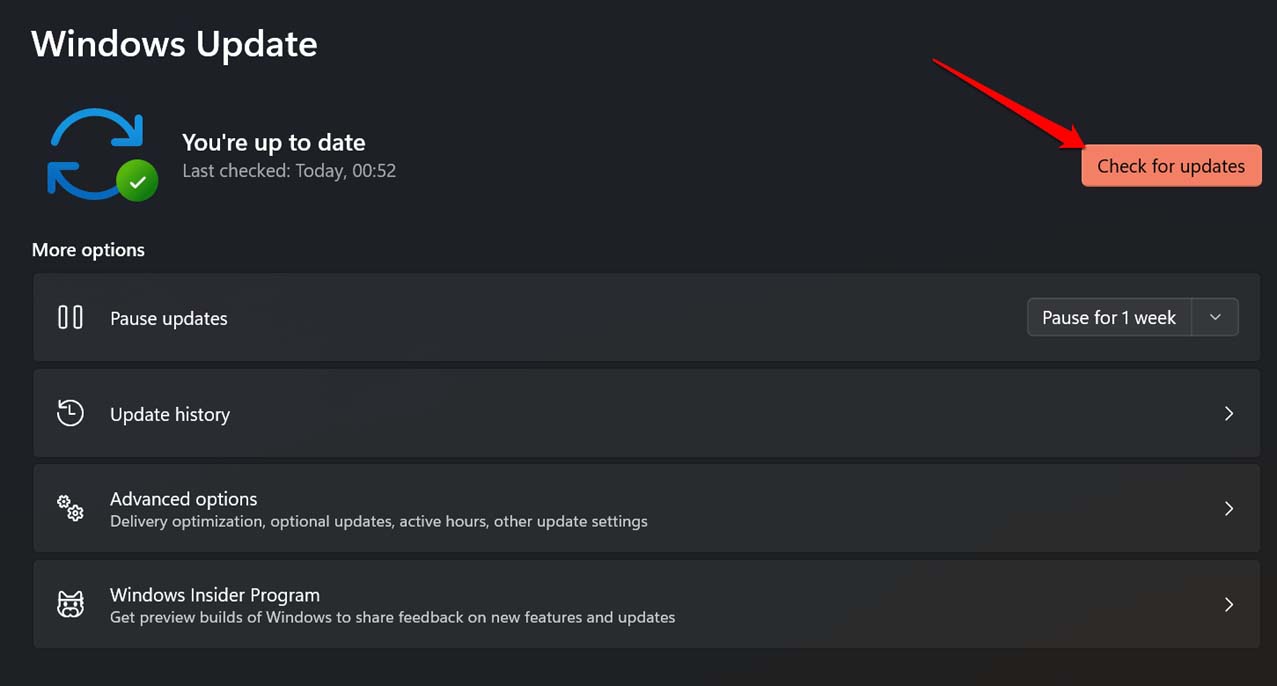
- Next, click on Check for Updates.

- If a new software update is available, click on Download and Install All.

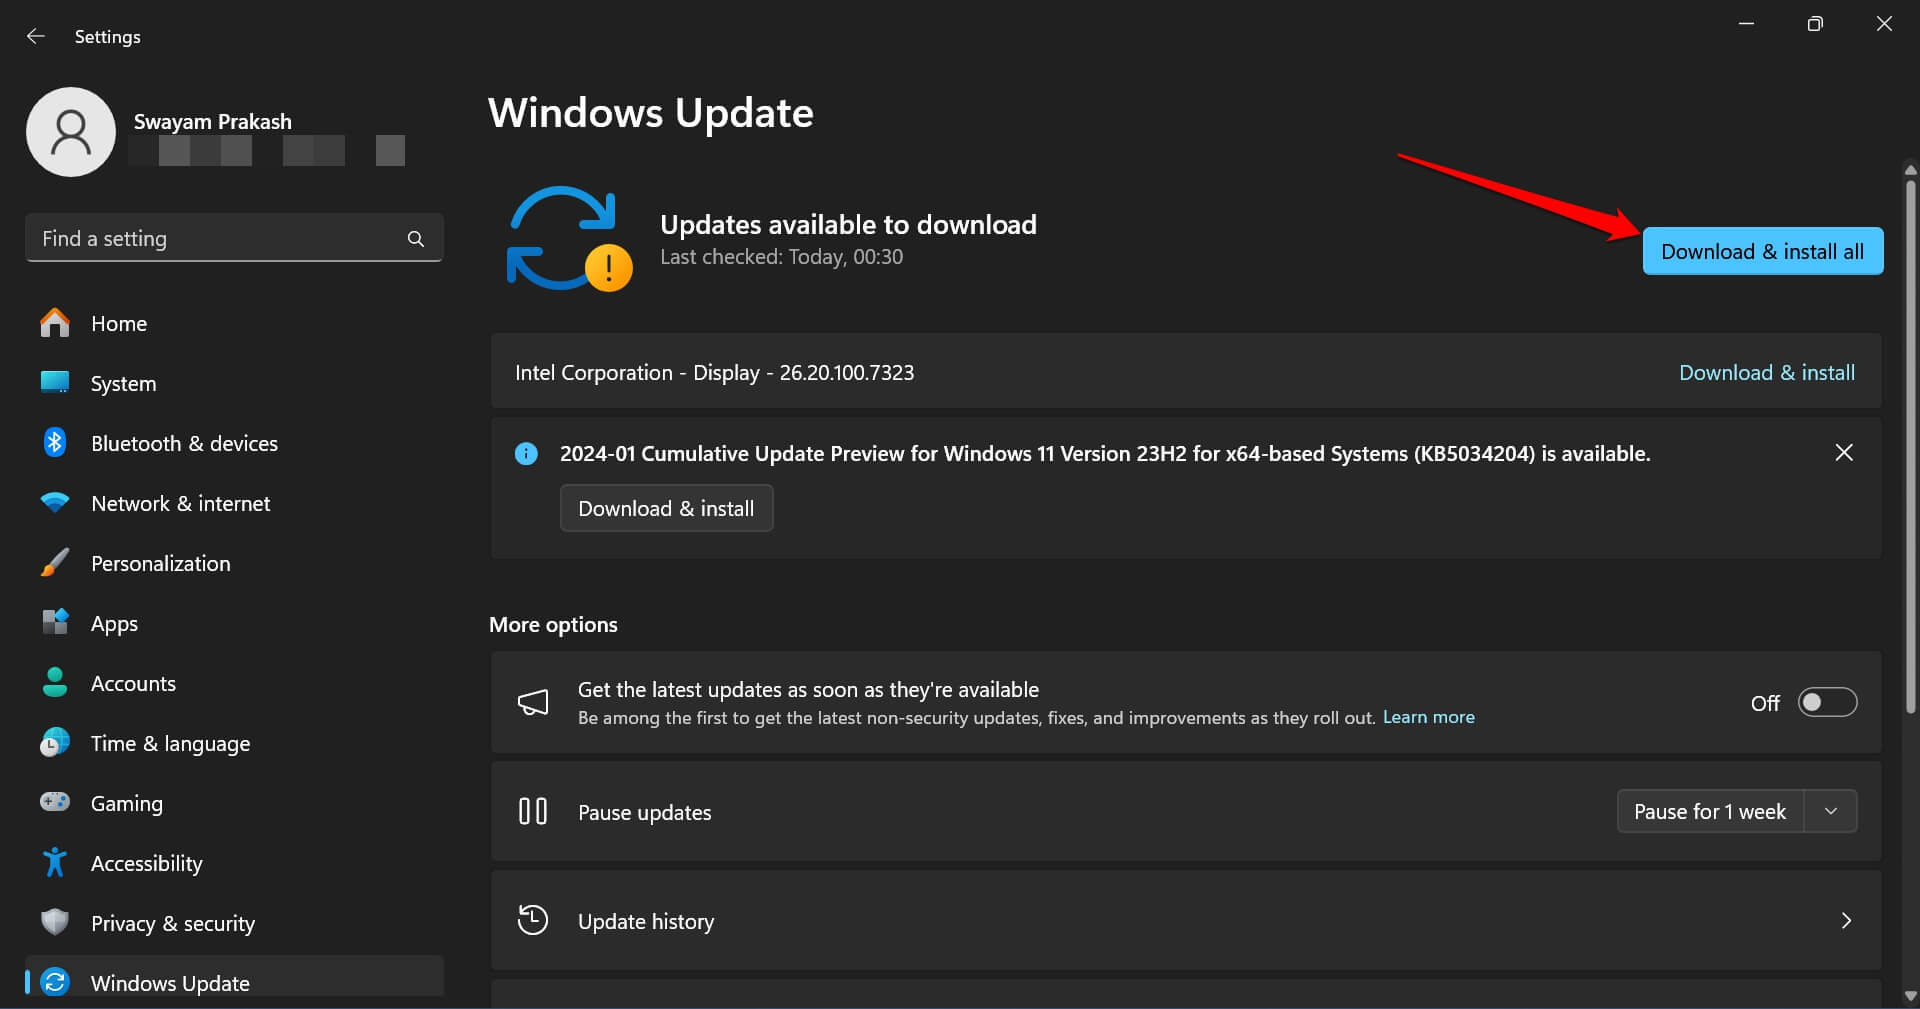
The computer will restart after installing the system update. After that, launch Windows Media Player and check if it is working.
11. Use Another Media Player
After using all the above troubleshooting tips, if Windows Media Player is still not working, use another media player. There is the acclaimed VLC Media Player, which is a free-to-use application. You may also consider using the KM Player, a notable media player supporting a wide range of audio and video formats.
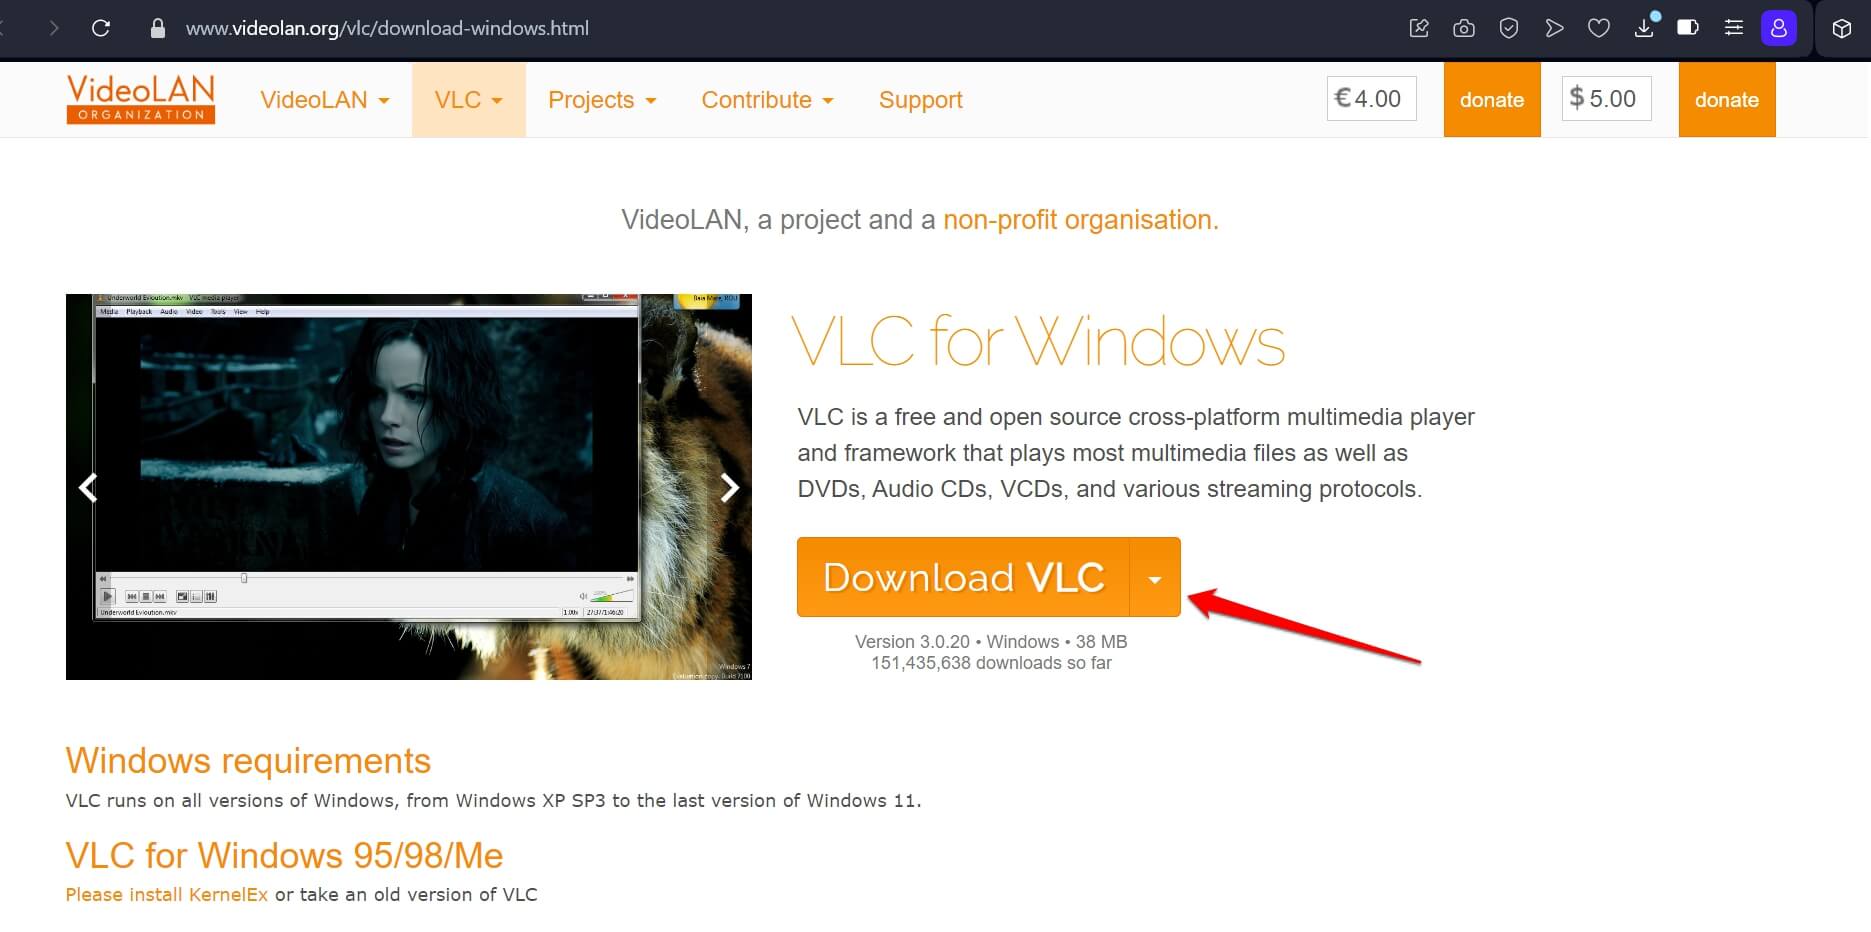
Download VLC Media Player for Windows
Bottom Line
Most likely, repairing or updating the app, and clearing the Windows Media library should resolve the “Windows Media Player Has Stopped Working” error. If not, you can try various other Media Players for Windows 11. Keep visiting DigitBin for more useful troubleshooting guides.
If you’ve any thoughts on How to Fix ‘Windows Media Player Has Stopped Working’ Error on Windows 11, then feel free to drop in below comment box. Also, please subscribe to our DigitBin YouTube channel for videos tutorials. Cheers!
Sign in to your MUO account
The Windows Media Player has always been a great app for playing music and videos on a Windows PC. This app supports various file formats and is easy to use.
Windows Media Player was once a built-in Windows app, but it doesn’t ship out of the box anymore. Because of this, the app is now prone to a lot of errors. A common issue you may encounter with this app is the “Windows Media Payer has stopped working” error.
If you’re encountering this error, let’s show you how to resolve it.
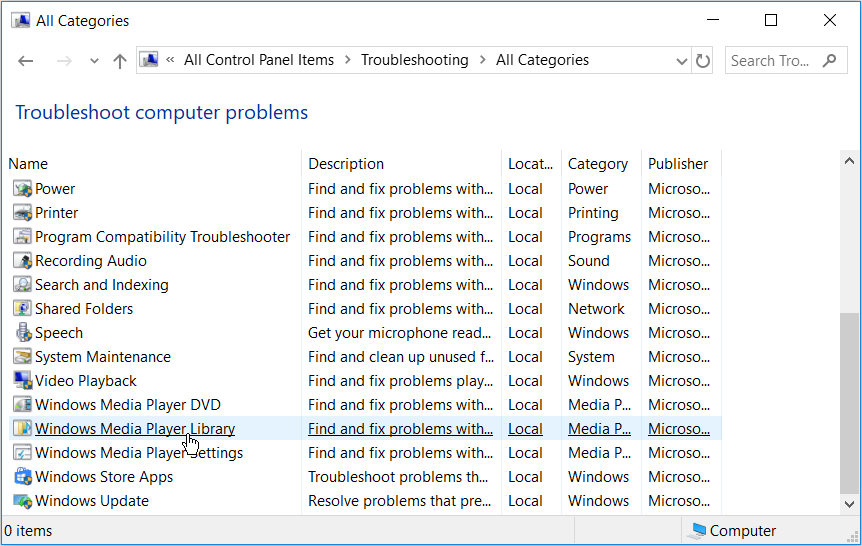
Windows has several built-in troubleshooting tools that can help you fix various system issues. One of these tools helps specifically with fixing issues with the Windows Media Player. Let’s explore how you can use this tool:
- In the Start menu search bar, type Control Panel, and select the Best match.
- Press the View by drop-down menu and select Large icons. From here, select Troubleshooting in the main window.
- In the next window, press the View all option on the left-hand side pane.
- Scroll down and select Windows Media Player Library. Press Next in the pop-up window.
- Press the Apply fix button. From there, follow the on-screen instructions to complete the process.
2. Use the Audio and Video Troubleshooters
In some cases, this error could be caused by system-specific issues. This might end up limiting the Windows Media Player’s functionality. To resolve the problem, you could use the Windows video and audio troubleshooting tools.
Here’s how you can get started with using these tools:
- Type Troubleshoot in the Start menu search bar and select the Best match.
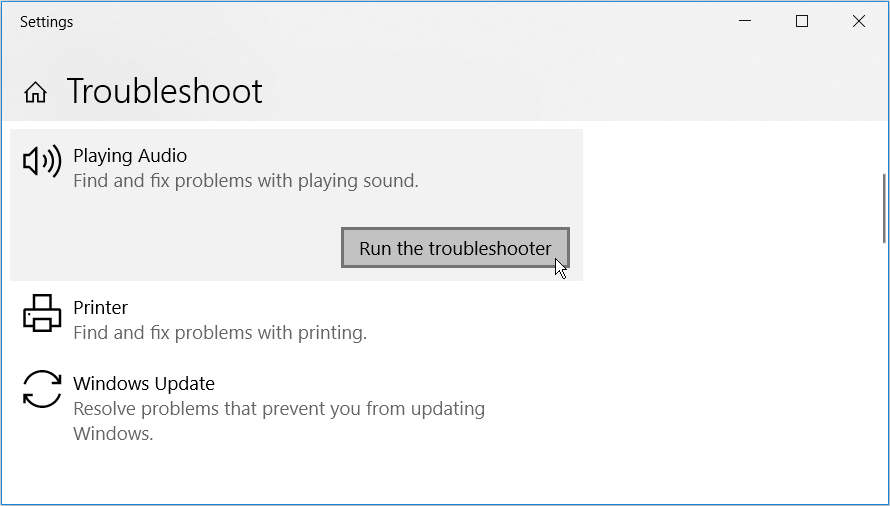
- Scroll down on the right-hand side pane, press Playing Audio, and then press Run the troubleshooter.
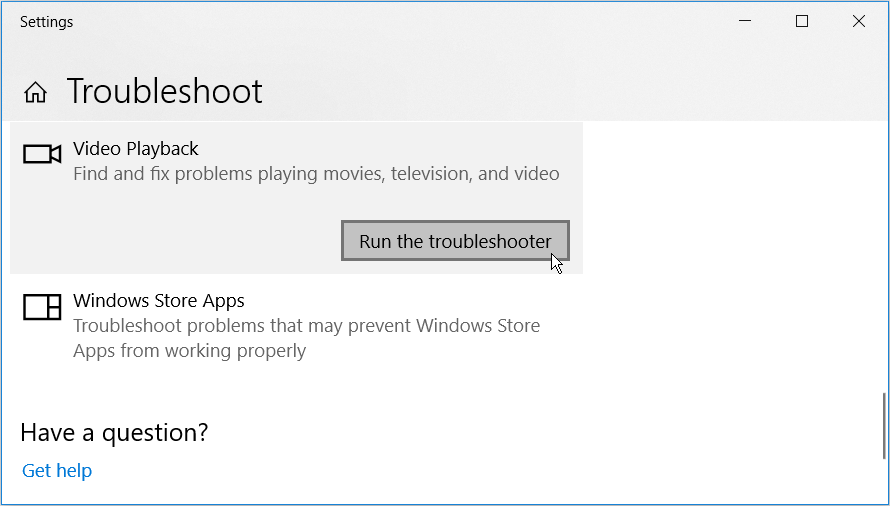
When the process is complete, scroll down and press Video Playback. Finally, press Run the troubleshooter.
Restart your PC to apply these changes.
If this is a system-specific issue, running the DISM and SFC tools could help. An SFC scan will repair corrupt or missing system files. To ensure that the SFC tool works properly, you’ll need to run the DISM tool first.
Here’s how you can run the DISM tool:
- Press the Windows key + R and type CMD.
- Press Ctrl + Shift + Enter to open an elevated Command Prompt.
- Type the following command and press Enter:
DISM /Online /Cleanup-Image /ScanHealth
When this scan is complete, type the command below and press Enter:
DISM /Online /Cleanup-Image /RestoreHealth
Restart your PC when this scan is complete.
Next, open the Command Prompt as per the previous steps. Finally, run an SFC scan by typing the following command and pressing Enter:
sfc /scannow
When this scan is complete, close the Command Prompt and restart your PC.
Windows Media Player doesn’t ship with Windows 10, but it’s included as an additional feature. Reinstalling this app could resolve the issue at hand and any other bugs it might have. You can easily reinstall this app via the system settings.
To get started, here’s what you need to do:
- Press Windows Key + X and select Apps and Features in the pop-up window.
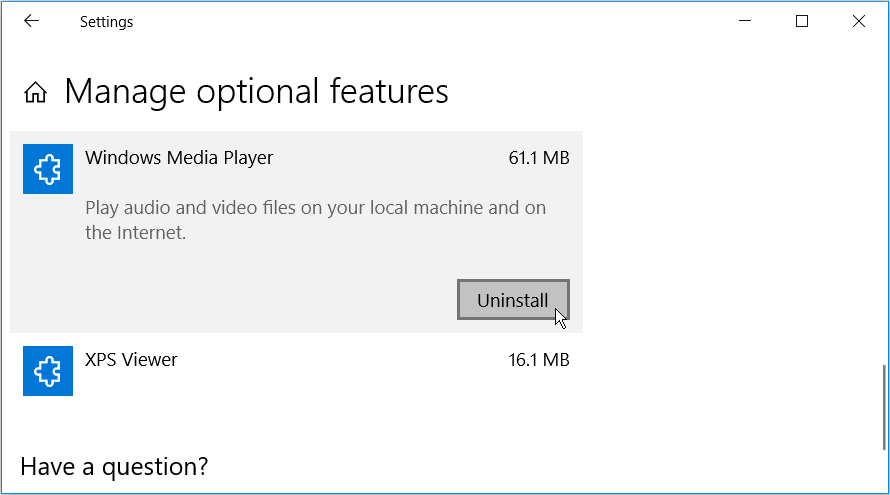
- Select Manage optional features.
- Scroll down and press the Windows Media Player option.
- Press Uninstall. Wait for the process to complete and then press Install.
The Windows Media Player is a great app, but it also has its own flaws. The “Windows Media Player Has Stopped Working” error is one prominent issue you might encounter with this app.
Fortunately, you can resolve this error using the tips we’ve provided. Also, you could consider trying other third-party media players if you’re tired of the Windows Media Player.