
Windows Vista offers considerable multimedia capabilities; it is a substantial upgrade over Windows XP. Windows Movie Maker, for example, is a far more powerful and sophisticated program than the version that shipped with Windows XP, and Windows Media Player 11 is a significant upgrade as well. In addition, Windows Vista has new graphics applications, such as the Windows Photo Gallery and the Snipping Tool.
This chapter covers Windows graphics and multimedia tools; for information about installing related hardware, see Chapter 9.
Here is an alphabetical reference of entries in this chapter:
|
Fax Cover Page Editor |
Snipping Tool |
Windows Media Player |
|
Microsoft Magnifier |
Windows DVD Maker |
Windows Movie Maker |
|
Paint |
Windows Fax and Scan |
Windows Photo Gallery |
|
Private Character Editor |
Windows Media Center |
Fax Cover Page Editor
See Chapter 10.
Microsoft Magnifier
See Chapter 10.
Paint: \windows\system32\mspaint.exe
A rudimentary image editor, used to create and modify .bmp, .jpg, .gif, .tif, .ico, and .png image files.
To open
Start All Programs Accessories Paint
Command Prompt mspaint
Description
Paint is a basic image editor (often called a «paint program») capable of creating and modifying most Windows Bitmap (.bmp), Joint Photographic Experts Group (.jpg), Compuserve Graphics Interchange Format (.gif), Tagged Image File Format (.tif), and Portable Network Graphics (.png) image files. It can open icon (.ico) files but cannot save graphics in the .ico format. In essence, Paint is to image files as Notepad is to text files (see Figure 12-1).
Figure 12-1. The Paint utility, which provides a few rudimentary tools for working with image files
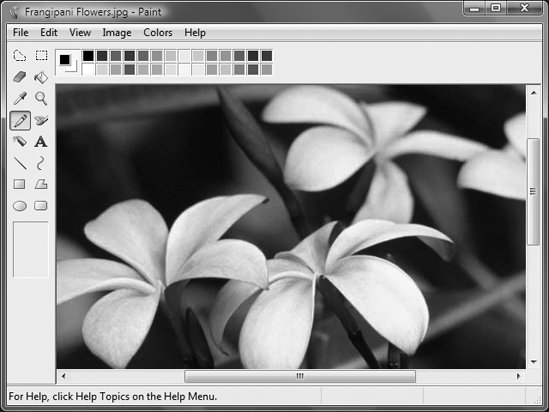
The first time you start Paint, you’ll get a blank (white) image that is 512 x 320 pixels. Depending on the size of the Paint window, you may see the entire canvas, surrounded by a gray border.
|
To change the size of the image, go to Image Attributes and enter the new dimensions in the Width and Height fields. The default units are pixels, but if you choose inches or centimeters, the size of the image will be calculated using the resolution displayed at the top of the window. |
At the top of the Paint window, you’ll see a color palette; the leftmost box shows the currently selected foreground and background colors. Choose a new foreground color by left-clicking on any color in the palette; choose a new background color by right-clicking. The roles of the foreground and background colors depend on the currently selected tool (discussed shortly). For example, if you draw a filled-in ellipse (click the ellipse tool, select the second variation from the menu that appears, then left-click and drag to draw the ellipse), the foreground color will appear as the border and the background color will be used to fill the ellipse. You can mix your own colors by going to Colors Edit Colors.
To the left of the document area is a simple toolbox. Each tool has a different function used to manipulate the image in some way. The first two tools are used to select portions of the image: the irregularly shaped dotted line selects an irregular shape and the rectangle selects a rectangle. The eraser tool works like a paintbrush, except that it paints with the background color. The paint bucket is used to fill a bounded area with a solid color. The eyedropper is used to set the foreground or background color from a selected color in the image (left-click on a color to set the foreground color, right-click to set the background color). The magnifying glass zooms in and out; left-click to zoom in and right-click to zoom out.
The pencil icon draws single-pixel-width lines, and the paintbrush draws with a variety of brush sizes, chosen in the brush palette beneath the toolbox; the left mouse button draws with the foreground color, and the right mouse button draws with the background color. The spray can draws by splattering random dots. The A tool is used to add text to an image, although once text has been applied, it becomes part of the image and can’t be changed. The line tool is used to draw a straight line between two points; with the squiggly line tool, you’ll need to first draw a straight line and then distort the line with a third click. The last four tools are shapes; choose the shape, and then choose whether it will be filled or have a border by using the brush palette below.
In addition to these basic tools, there are some other goodies. Go to File Set as Background (Tiled, Centered, or Stretched) to set the current image as the Windows Desktop wallpaper. Use View View Bitmap to temporarily fill the screen with the image (note that this works on all file types, not just bitmaps); click or press any key to go back. Entries in the Image menu let you perform some extra functions, such as flipping, rotating, and resizing the image.
Notes
-
If you’re creating an image file to be used on a web page, you must save that file using the .jpg, .png, or .gif format, a selection that is made in the File Save As box. Note that it is not enough to simply rename a file to a different format in Explorer; you must open it in Paint and save it as the new format.
-
See also
«Windows Photo Gallery»
Private Character Editor
See Chapter 10.
Snipping Tool: \windows\system32\SnippingTool.exe
Capture, annotate, and save screen captures.
To open
Start All Programs Accessories Snipping Tool
Command Prompt snippingtool
Description
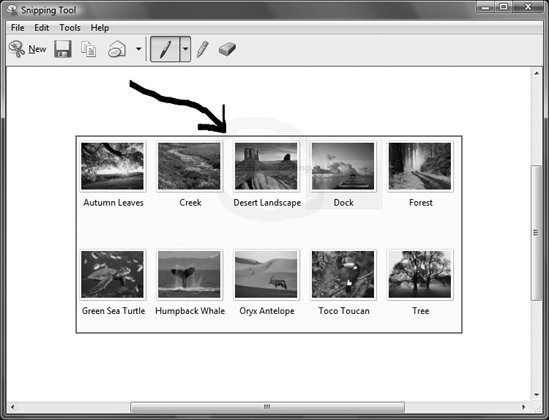
The Snipping Tool, new to Windows Vista, lets you capture any portion of your screen, annotate that screen capture, and then copy it to the Clipboard or save it as a .mht, .png, .gif, or .jpeg file. When you run the Snipping Tool a small screen appears (Figure 12-2). The rest of your screen dims, and your cursor turns into a big + sign. If you want to snip a rectangular area, use the cursor to define the area. You can instead capture a freeform area, the entire screen, or a screen or object such as the Taskbar. To do that, click New in the Snipping Tool and make your choice of screen captures.
Figure 12-2. The Snipping Tool, which lets you capture Windows screens
Next, the Snipping Tool displays your screen capture and lets you annotate it and/or save it to the Clipboard or to a file (see Figure 12-3). There’s a highlighter, pen, and eraser for annotations. To save the clip to the Clipboard, click the Copy icon; to send it via email, click the Email icon.
Figure 12-3. Annotating a screenshot with the Snipping Tool
You can also customize several Snipping Tool features by clicking the Options button when the Snipping Tool first pops up, or by choosing Tools Options from the Annotation window. You can choose options such as whether to always copy the snip to the Clipboard automatically, whether you should be prompted to save the snip when you exit, whether to display the Snipping Tool icon in the Quick Launch Toolbar, and so on.
Notes
-
The Alt-Print Screen and Ctrl-Print Screen combinations will capture your screen to the Clipboard. You can paste the contents of the Clipboard into a graphics application, such as Paint, in order to save the screen as a file.
-
If you want a more powerful screen capture program than the Snipping Tool, try SnagIt, downloadable from http://www.techsmith.com.
See also
«Clipboard,» in Chapter 3
Windows DVD Maker: \Program Files\Movie Maker\DVDMaker.exe
Create DVDs that you can watch on a TV.
To open
Start All Programs Windows DVD Maker
Command Prompt dvdmaker
Description
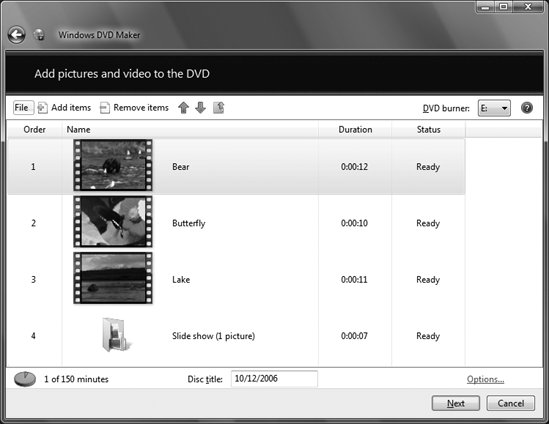
Windows DVD Maker is a simple program for creating DVDs that you can play on a TV. It features a wizard-style interface and walks you through two screens to create a DVD:
-
Add pictures and video to the DVD
-
This screen (Figure 12-4) lets you add videos and pictures to your DVD by clicking the «Add items» button; remove them by highlighting them and clicking the «Remove items» button. You can rearrange the order of the items as well. The Options link lets you choose from a variety of settings for the DVD, and for creating the DVD:
-
Choose DVD playback settings
-
Choose whether the DVD should start with a DVD menu, play the video, and then end with a DVD menu, or play the video in a continuous loop.
-
DVD aspect ratio
-
Choose between 4:3 and 16:9.
-
Video format
-
Choose between NTSC and Pal.
-
DVD burner speed
-
Choose the speed at which you burn the DVDfastest, medium, or slow. If you have trouble viewing DVDs you create, try a slower setting when you burn them.
-
Temporary file location
-
Choose where to store the temporary files used for DVD burning. If you don’t have enough space on your boot drive, you can specify another internal drive or an external USB or FireWire drive here.
Figure 12-4. Windows DVD Maker, which lets you choose videos and pictures to burn onto a DVD that you can play on a TV

-
-
Ready to burn disk
-
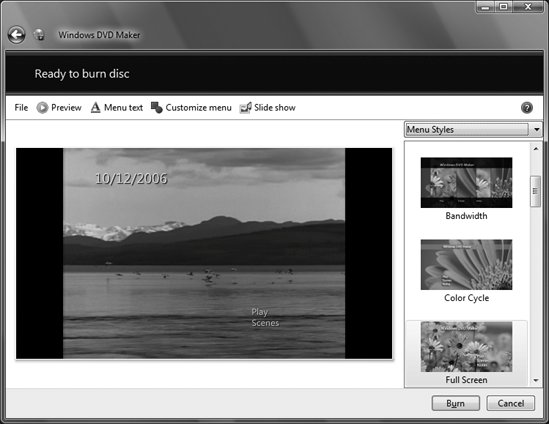
This screen (Figure 12-5) lets you customize and preview your DVD before burning it to disk. It has the following options:
-
Preview
-
As the name implies, this lets you preview what the final DVD will look like.
-
Menu text
-
This lets you change the text on the DVD menu. You can add a disc title, change the font, and choose different words for the Play, Scenes, and Notes buttons.
-
Customize menu
-
Use this option to choose pictures or videos for the foreground and background of the menu page, play an audio file while the menu is displayed, choose a button style, and change the font for the menu. You can save your settings as a new style and then use that style whenever you want.
-
Slide show
-
This lets you create a slide show out of the videos and pictures on the DVD by playing the first few seconds of each, with music. You can customize most things about the slide show, including the length of each clip, the music that plays, effects to use between clips, the order of the clips, and so on.
Figure 12-5. Finalizing the DVD before burning it to disc
The righthand side of the screen lets you choose a menu style. The Burn button, as you might imagine, burns your content to the DVD.
-
Notes
-
You can launch Windows DVD Maker directly from Windows Movie Maker so that you can easily burn DVDs of the movies you create in Windows Movie Maker. See «Windows Movie Maker,» later in this chapter, for details.
-
To use Windows DVD Maker, you have the proper video card. It must support DirectX 9 with video drivers for Windows Vista.
See also
«Windows Movie Maker»
Windows Fax and Scan
See Chapter 10.
Windows Media Center: C:Windows\ehome\ehshell.exe
Play and record media of all types, including TV.
To open
Start All Programs Windows Media Center
Command Prompt ehshell (only when youre in C:Windows\ehome\)
Description
The Windows Media Center, previously available only in a special edition of Windows XP, ships with every copy of Windows Vista Home Premium and Windows Vista Ultimate. It uses an interface unlike any other program built into Windows (Figure 12-6), and it dispenses with menus, toolbars, and the usual screen elements you’ve grown used to in Windows; you instead navigate and choose features by using your mouse or arrow keys, or if you have one, a remote control. In fact, it looks more like it’s been designed to be used with a remote control, rather than the keyboard.
Figure 12-6. The Windows Media Center, which features an interface designed to be navigated from a remote control as much as from the keyboard
Microsoft has been trying to make the Windows Media Center the center of home entertainment systems, and it has been designed to connect to TVs. Because it is supposed to have its place in the living room and has been designed to be accessed via remote control, it’s simple and intuitive to use, so there’s no need to delve into its general use in any great detail here.
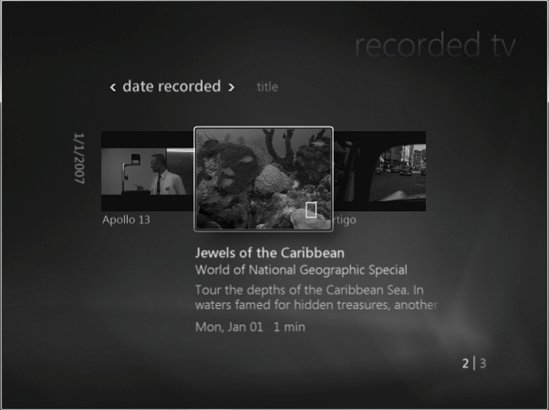
The Windows Media Center interface is self-explanatory. Scroll to the kind of media you want to watch or record (Pictures & Videos, Music, TV & Movies, and so on) and select Program Library, or Recorded TV, to view a library of all the media in that category, as you can see in Figure 12-7. Then select it to view it. The Windows Media Center uses the familiar VCR-like controls along the bottom of the screen (e.g., Play, Stop, etc.) to control your playing. You can also watch TV and play DVDs.
Figure 12-7. Viewing a library of all the media in the Recorded TV selection
To watch TV, you need to have a TV tuner card in your PC (or an external tuner) that can either play on-air signals or connect to your cable TV. After you install the card, run the Windows Media Center and choose Set Up TV from TV & Movies.
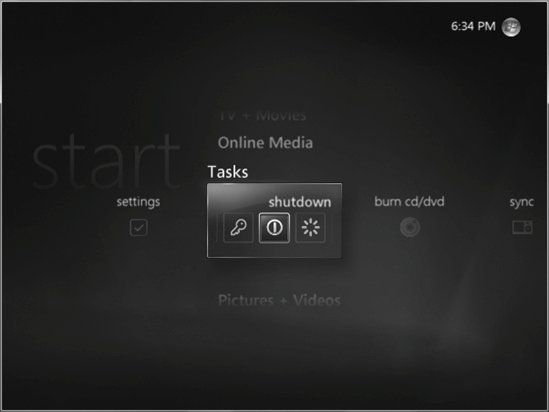
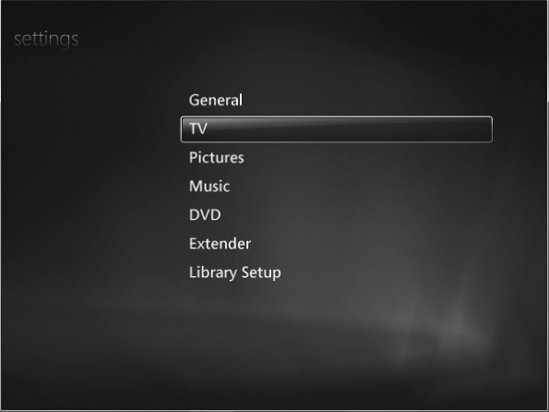
The Tasks choice lets you change settings and perform tasks that otherwise might not be obvious. Scroll to Tasks, and then select Settings (Figure 12-8). From here, you can choose settings for the way the Windows Media Center plays media, functions, and interacts with Windows Vista and hardware. Again, the settings are quite straightforward and need no further explanation.
Figure 12-8. The Windows Media Center’s Settings menu
Notes
-
The Windows Media Center and Windows Media Player perform many of the same functions and play all kinds of media. Windows Media Player, though, cannot play or record TV shows. And the Windows Media Center is not as well suited as Windows Media Player to managing media libraries, although it is well suited to playing media.
-
To connect your PC to many external devices and control them using the Windows Media Center, you can use a Windows Media Center Extender, a separate device that connects to your cable system and to your home network. You can also get a Media Center Extender for Xbox that connects your Xbox to your PC. For details, visit http://www.microsoft.com/windowsxp/mediacenter/extender/default.mspx.
See also
«Windows Media Player»
Windows Media Player: C:\Program Files\Windows Media Player\wmplayer.exe
Play back a wide variety of video and audio media files, such as .mpg movies, .mp3 songs, .wma Windows media songs, audio CD tracks, .dvr-ms recorded TV shows, media files, and other streaming media.
To open
Start All Programs Windows Media Player
Double-click on any associated media file
Command Prompt wmplayer (note: you have to be in Description
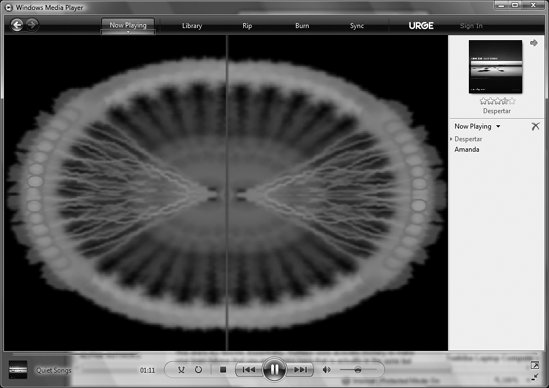
Windows Media Player is the default application used to open and play most of the types of video and audio media supported by Windows Vista (see Figure 12-9). You can open Windows Media Player from the Start menu, as well as by double-clicking on a supported media file or clicking on a link in a web page to open that video or audio clip and play it. The program isn’t configured or enabled until you launch it for the first time, at which point a simple configuration screen will appear. (For details, see «Privacy issues,» later in this entry).
Figure 12-9. Windows Media Player, which is used to play video and audio clips
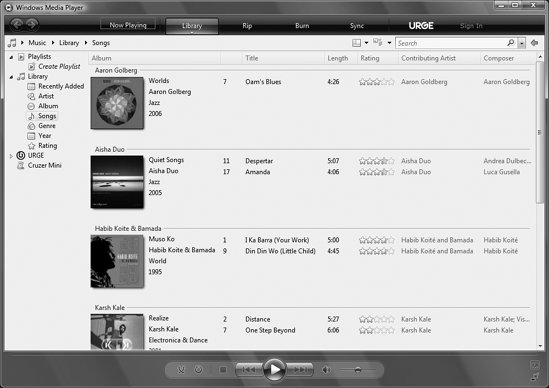
Basic operation of Windows Media Player is fairly straightforward, with the standard VCR-like controls along the bottom of the screen (e.g., Play, Stop, etc.), the current view of your media or operations in the large, middle part of the screen, and navigation on the left part of the screen. This basic view, however, changes according to your current activity.
Windows Media Player has become increasingly sophisticated with each version, and the current versionversion 11has become a kind of multimedia powerhouse, allowing you to view media of many different types; record TV shows and DVDs; «rip» music from CDs to play on your PC; burn audio CDs or data CDs or DVDs; sync with portable music players, Pocket PCs, and Smartphones or Microsoft’s own Plays4Sure devices; and buy music and videos online through Microsoft’s URGE store and other online media stores.
|
Windows Media Player doesn’t display the traditional menu, with File, View, Play, Tools, and so on. To make that menu appear, press the Alt key; to make it disappear, press the Alt key again. You can also make the traditional menu stay permanent by right-clicking on an empty portion of the toolbar and choosing Show Classic Menus. |
Across the top of the screen is a toolbar that gives you access to all of Windows Media Player’s features. To perform a function, click the main part of any button; to select options for that button, click the bottom part of the button and a down arrow will appear, revealing a drop-down menu. Here’s what you can do with each toolbar option:
-
Now Playing
-
This lets you choose options related to your current selection, and how it plays and displays media. The most important options relate to enhancements, visualizations, and plug-ins:
-
Enhancements
-
This includes adding SRS WOW effects, which let you optimize bass, stereo, and other audio effects; using a graphics equalizer to choose how to enhance and mix your music; changing your video color settings, including changing the hue, brightness, saturation, and contrast; and other similar options.
-
Visualizations
-
These are graphics displays (see Figure 12-10) that react to the music you’re playing; you can choose from dozens of different visualizations.
Figure 12-10. One of the many visualizations you can use with Windows Media Player

-
Plug-ins
-
These are add-ins that work in concert with Windows Media Playerfor example, to add surround sound to Windows Media Player. You can configure existing plug-ins or click a link to go to a web site where you can download more plug-ins.
-
-
Library
-
This lets you switch among various librariesfor example, among all of your recorded music, recorded TV shows, videos, and pictures. It also lets you create playlists and add new media to any of your libraries.
-
Rip
-
This controls your options for when you «rip» music from a CD, that is, convert its audio CD tracks to digital files that you can play on Windows Media Player. Before you place a CD in your PC to rip music from it, set your options by clicking the bottom of the Rip button, where a down arrow will appear. When you select Format from the Rip menu, you can choose from the following audio types:
-
Windows Media Audio
-
This is the default type for ripping music. Microsoft claims that Windows Media Audio files are of a superior quality to MP3s ripped at the same bit rate.
-
Windows Media Audio Pro
-
The quality of sound produced by this file type is superior to that of Windows Media Audio. However, it is not supported by as many portable music devices as Windows Media Audio or MP3 files, and so it has not caught on to the same extent.
-
Windows Media Audio (variable bit rate)
-
Using this file type, you’ll get smaller files when you record at the same bit rate as Windows Media Audio, but with the same general quality. When you use this standard, tracks will be recorded at lower bit rates than your chosen rate if recording them at that rate will not lead to a reduction in qualityfor example, if you’re listening to a less complex piece of music.
-
Windows Media Audio (lossless)
-
This file type produces files of higher sound quality than other Windows Media formatslossless means that there is no loss of quality when you record musicbut it produces files of much larger size.
-
MP3
-
This is the most common standard for recording and listening to music.
-
WAV (lossless)
-
This is a noncompressed digital format that is of a very high quality but produces files of an extremely large size.
Bit Rate, another choice on the Rip menu, lets you choose your recording bit rate. The available options will vary according to the audio type you’ve chosen. For example, if you select Windows Media Audio, you can choose bit rates between 48 Kbps and 192 Kbps, and if you select MP3, you can choose bit rates between 128 Kbps and 320 Kbps.
The Rip menu gives you several other options, including whether to start ripping music as soon as you place a CD in a drive, and whether to eject the CD after you’re done ripping. With both of these settings enabled, you can stack up your CD collection next to your PC, and the only time you’ll be distracted is when you need to insert a new disc.
-
-
Burn
-
This lets you choose the type of CD to burnan Audio CD, or a data CD or DVD. You can also choose whether to automatically eject a disk after you’re done burning. An especially important option on this menu is Apply Volume Leveling Across Tracks on Audio CD. If you’re burning an audio CD with music on it from different sources, the volume at which the music has been recorded may vary, so on your recorded CD, some tracks may be too loud and others too soft. Volume leveling will make all of the tracks on the CD you burn the same general volume.
Click the Burn button to burn your CD.
-
Sync
-
This will let you synchronize with portable music players such as Play4Sure-compliant players, with Pocket PCs and Smartphones, and with Universal Serial Bus (USB) flash drives. If you have multiple devices, you can choose which one to sync, and you can control basic sync options for the device, such as whether to include files you’ve skipped in a previous sync.
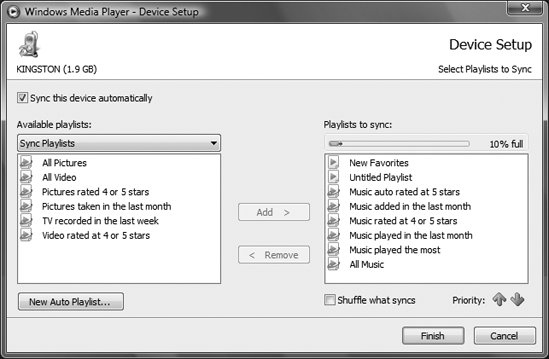
When you sync a device, it will automatically sync all of your files. But if you want it to sync only some of your files, select the device from the Sync menu and then choose Set Up Sync. A screen such as that shown in Figure 12-11 appears. Select the playlists you want to sync, remove those you don’t, and click Finish.
Figure 12-11. Customizing a sync with a portable device

At this point, you’ve set up a sync but not actually performed it. Click the Sync button to perform the sync.
-
URGE
-
This brings you to the URGE online music store, where you can buy and download music.
Sharing your media
If you have a network of two or more computers with Windows Vista on them and Windows Media Player enabled, you can set up the computers to share their media libraries so that you can play music from any other computer on the network with which you’ve enabled sharing. Windows Vista will automatically recognize any other Windows Vista PCs on your network, and a message will appear on the Taskbar telling you it’s found another PC. Click it, and a notification screen appears; to share your libraries, click Allow.
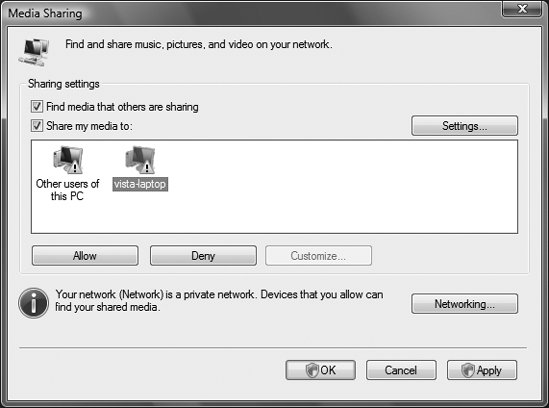
You can also customize how your media is shared (Library Media Sharing). Instead of Allow, click Sharing Settings, and the screen shown in Figure 12-12 appears. Check the box next to «Share my media to,» highlight any PC you see, and click «Allow to share libraries or «Deny» to deny library sharing.
Figure 12-12. Selecting devices with which you want to share media libraries
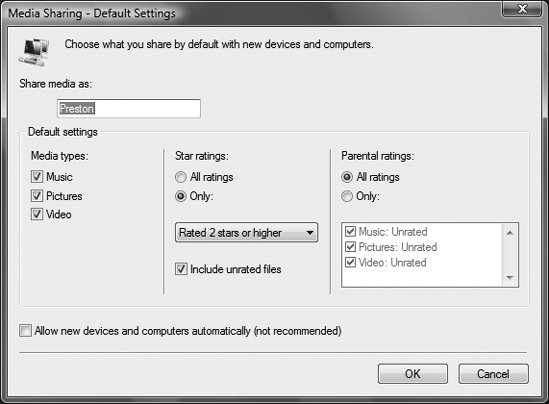
You can also further customize how you’ll share libraries with each PC. Click Settings (Figure 12-13), and you can choose which media types to share and even whether to share files above or below certain ratings.
Figure 12-13. Customizing how you share your media library
Privacy issues
In the past, there has been some controversy over whether using Windows Media Player has any privacy implications. Because of that, Microsoft has built options into the program to let you decide how Windows Media Player contacts Internet servers.
The first time you start Windows Media Player, you’ll get a choice of using the default settings (the Express option), or using custom settings, where you can customize your playback, privacy, and online store options (the Custom option). If you want to change your privacy options, select the Custom option. After you do that, the first screen you’ll see is the Select Privacy Options screen, shown in Figure 12-14.
Figure 12-14. Customizing your privacy settings
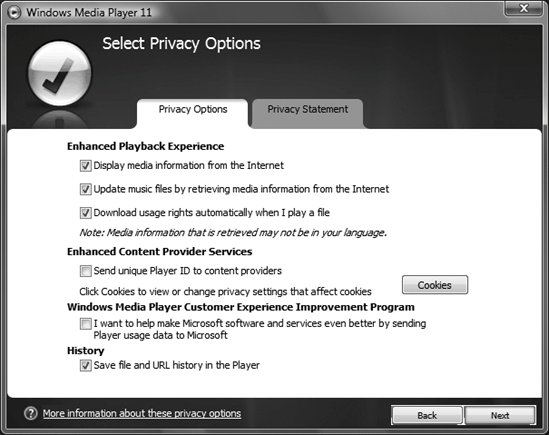
All of these settings have to do with how Windows Media Player interacts with various Internet services, and with Microsoft. Because these options send information back and forth between your PC and various servers and sites, and in some instances send information about your system to a server or site, some people worry about their privacy implications. Here are the settings you can change:
-
Enhanced Playback Experience
-
This section controls several settings related to how Windows Media Player communicates with media-related servers to handle the media on your PC. All options are enabled by default:
-
Display media information from the Internet
-
With this option enabled, Windows Media Player will communicate with servers to obtain information about your media, including song title, artist, length, album cover, and so on, and use that information inside Windows Media Player.
-
Update music files by retrieving media information from the Internet
-
With this option enabled, Windows Media Player will update any missing information in your music files by sending information about them to a Windows Media database. If the database has more information than you havefor example, if it has an artist name, a track number, and so onyour local music files will be updated from it. Note that the actual music itself will not be changed; only the information about the file will be altered.
-
Download usage rights automatically when I play a file
-
With this option enabled, Windows Media Player will automatically download media usage rights from a server if it finds that the rights on your media are out-of-date or missing. If you make this choice, you won’t be prompted to look for the rights. Note, though, that if you choose this option, some files that you can normally play but that do not have these rights associated with them may no longer play.
-
-
Enhanced Content Provider Services
-
By default, this is not enabled because it has proved to be very controversial in the past. With this option enabled, Windows Media Player will report your music and movie use to Microsoft and will place a so-called «supercookie» on your hard disk that some privacy advocates claim can leave you open to privacy invasions, something that Microsoft disputes.
-
Windows Media Player Customer Experience Improvement Program
-
This option, not enabled by default, sends information about your hardware and your usage of Windows Media Player to Microsoft. Microsoft says it uses the information in order to improve the quality of Windows Media Player, and that all information is anonymous. Users worried about their privacy usually do not enable this option.
-
History
-
This option saves your file and URL history in Windows Media Player.
You can always change these options, even after the first time you’ve set up Windows Media Player. Click the down arrow at the bottom of any button on the toolbar and select More Options from the drop-down menu. Then click the Privacy tab, and you can make your changes.
The rest of the options in the custom setup control whether to download the URGE online music store, and other options.
Notes
-
There are many options you can change for how Windows Media Player works. To select them, click the bottom of any button on the toolbar so that the down arrow and the drop-down menu appear, then choose Properties. Then click any tab to change the optionsfor example, click Burn to change burning options.
-
If you encounter a video or audio file that Windows Media Player doesn’t understand, you can usually add support for it by downloading the appropriate codec (compression/decompression driver). Right-click on the media file, select Properties, and choose the Details tab to view the name of the required codec (if available), or the file type. Then, use an Internet search engine (such as http://www.google.com) to locate the codec installer. You can also try VLC, an open source media player that seems to be able to play any media type in existence. Find it at http://www.videolan.org/vlc.
-
Use the Windows Update feature, discussed in Chapter 8, to install the latest drivers, codecs, and updates to Windows Media Player.
-
You cannot use Windows Media Player with an iPod.
Windows Movie Maker: \program files\movie maker\moviemk.exe
Capture and edit video, and create video clips.
To open
Start All Programs Windows Movie Maker
Command Prompt moviemk (you must be in the Description
Windows Movie Maker has been significantly beefed up from its Windows XP incarnation, and it is now a full-featured program for creating videos. The Windows XP and Windows Vista versions of it have become popular for creating videos uploaded to video-sharing sites such as YouTube (http://www.youtube.com).
The program can import video clips, graphics files, and sounds from a digital video camera, or from files on your hard disk or other PCs on your networks. With a digital video camera, you can create your own video clips from scratch. Windows Movie Maker (and most video editing software) can be quite complex, so I will include only an introduction here.
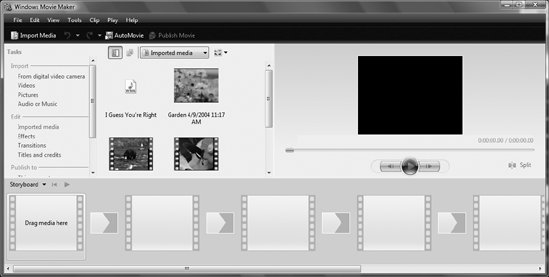
In Windows Movie Maker (Figure 12-15), on the lefthand side of the screen are the tasks you need to completein step-by-step orderto create a movie, beginning with importing various media, moving on to editing the movie, and finishing up with publishing it.
Figure 12-15. The beefed-up Windows Movie Maker, which lets you edit video clips and create movies
Here are the basics of each major step:
-
Import
-
You can import video from a digital video camera connected to your PC, via the USB or FireWire ports. You can also import video, pictures, or audio and music files from your PC, from PCs connected to your network, from storage devices attached to your PC, and from digital cameras connected to your PC. When you import any files, you’ll see thumbnails of them in the central part of your screen. The currently highlighted video or clip appears on the large window on the right side of the screen, so you can display or view it.
Once you’ve imported the videos and pictures, drag them to the storyboard at the bottom part of the screen (Figure 12-16) and drag each object into a frame.
Figure 12-16. Dragging a clip to the storyboard

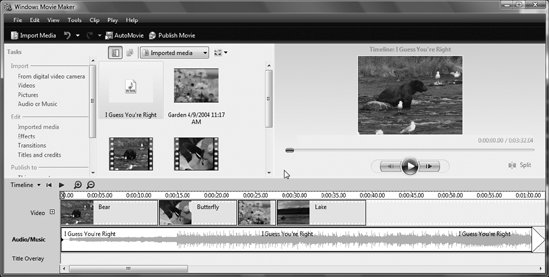
If you want your movie to have a soundtrack, apart from the sounds within each individual video clip, drag a music file onto the storyboard. When you do this, a timeline appears (Figure 12-17), showing the music clip underneath and the frames above it. You can rearrange your clips and pictures by dragging them into different locations.
Figure 12-17. The timeline from which you can coordinate music with clips and pictures
-
Edit
-
Once you have your storyboard in place, you can edit the movie in these ways:
-
Effects
-
Adds effects to clips and pictures, such as rippling, blurring, aging, panning, pixelating, posterizing, and so on. Just drag the effect onto the clip or picture.
-
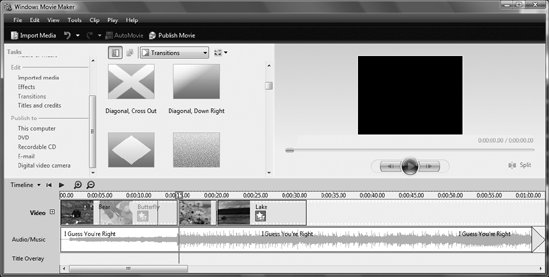
Transitions
-
Adds transitions (Figure 12-18) between clips and pictures, such as dissolves, cross-cuts, fading in and out, fanning, and so on.
Figure 12-18. Adding transitions between clips, scenes, or pictures
-
Titles and credits
-
Adds titles and credits. You can add titles at the beginning, before clips, or on top of clips.
Use the controls at the bottom of the screen to play your movie and continue to add media, effects, transitions, and so on, until you have it the way you want. The actual video project consists of clips inserted into the storyboard. Using the magnify controls to the left of the timeline, you can zoom in for more precise work or zoom out to see more of the timeline at once.
To the left of the magnify controls is the storyboard/timeline link: click it to switch between the default Storyboard view (where each clip is the same size) and the more sophisticated Timeline view (where clips are sized relative to their duration). The Timeline view (the view with the numbers across the top) is much more intuitive and easier to use, as it shows a more accurate view of the project and allows more precise control when splitting.
The video preview, shown in the upper right, allows you to view the video project as it will appear when you’re done. Click the Play button, or simply drag your mouse across the timeline to view any portion of the video project.
-
-
Publish To
-
Once you’ve gotten your movie the way you want it, click any of the links in this section to publish your movie to your computer, DVD, CD, and so on. If you publish to a DVD, it will launch Windows DVD Maker; if you publish to a recordable CD, it will burn it directly onto the CD.

There are other tools as well, notably the file menu across the top of the screen. A full description of those tools is beyond the scope of this book, but it will be worth your while to experiment with them.
You can also edit clips and graphics placed on the storyboard/timeline by right-clicking and making choices from the menu, including adding effects fading in and out, removing the graphic or clip, and so on.
Notes
-
Windows Movie Maker supports a variety of video, graphics, and audio formats, allowing you to import media from a number of different sources into your projects. Suffice it to say, if there is a major (or not-so-major) format, Windows Movie Maker will be able to import it, with one very notable exception: QuickTime (.mov) files.
-
When you delete items from Windows Movie Maker, it does not affect the original source files.
See also
«Windows DVD Maker»
Windows Photo Gallery: \program files\Windows Photo Gallery\WindowsPhotoGallery.exe
Organize, view, and edit pictures and video clips.
To open
Start All Programs Windows Photo Gallery
Command Prompt windowsphotogallery (you must be in the Description
Windows Photo Gallery (Figure 12-19) is an organizational, viewing, and editing tool for handling digital pictures and video clips. It won’t replace more powerful editing programs, but for most basic tasks such as viewing and organizing your clips, as well as for basic photo-editing tasks such as eliminating red eye, it’s perfectly serviceable.
Figure 12-19. Windows Photo Gallery, for organizing pictures and video clips
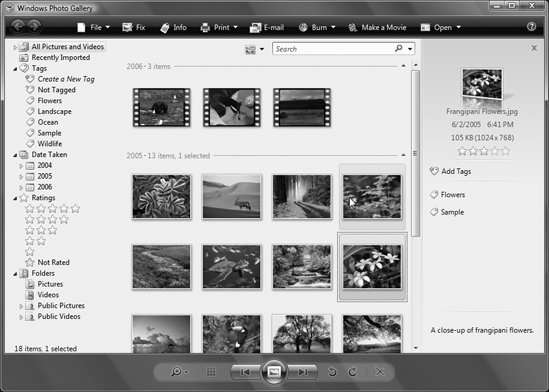
When you load Windows Photo Gallery, you may notice that not all of your pictures and video clips are in it. That’s because by default, it loads only pictures and videos from your Pictures folder (\users\username\Pictures). You can, however, add other folders, or even other individual pictures and clips, to it. To add folders, choose File Add Folder to Gallery, or open Windows Explorer and drag a folder from Windows Explorer to Windows Photo Gallery. You can also add individual pictures and clips, or groups of them, by dragging them in.
The lefthand side of the screen lets you filter the pictures and videos you’re viewing in a variety of different ways, including by tag, date, ratings, folder in which they’re located, and so on.
Right-click any picture to display a menu that lets you accomplish a variety of tasks:
-
Previewing the picture or clip in a kind of full-screen mode
-
Opening the picture or clip in a graphics or video program or player
-
Setting the file as your desktop background
-
Adding tags
-
Clearing the rating
-
Rotating the picture
-
Changing the time the picture was taken
-
Copying, deleting, and renaming the picture or clip
-
Viewing the file properties
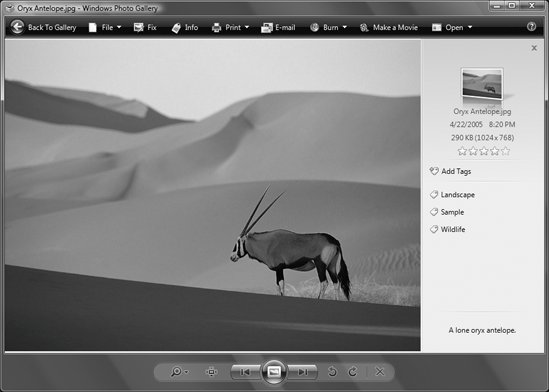
To view a single picture or video, double-click it and it will be displayed as shown in Figure 12-20. The righthand side of the screen displays the file’s details, such as size, resolution, date taken, rating, and tags. To add tags, click the Add Tags button.
Figure 12-20. Viewing an individual picture in Windows Photo Gallery
Back on the main screen, to change the way Windows Photo Gallery displays pictures and clips, click the down arrow next to the thumbnail icon just beneath the toolbar. You have a variety of options, including tiling them, displaying them as thumbnails (the default) or as thumbnails with text, grouping or sorting them in many different ways (date taken, date modified, file size, and so on), and an odd kind of Table of Contents option that lists the filter you’re currently using to summarize groups of files on the left side of the screen.
There’s also a Search box that searches through filenames, properties, and tags.
The bottom of the screen sports CD-like controls. Press the large, central Play button to play a slideshow of the pictures and clips. When you do this, it takes over your PC and plays full-screen. You can pause the show, move forward or backward, and change a variety of playing options by clicking the Options button, where you can change the speed of the show, play or mute the music, and either shuffle or loop the pictures and videos. To stop the show and return to normal view, click Exit.
Also at the bottom of the Windows Photo Gallery screen, along with the Play, Forward, and Back buttons, are several other controls. The far-right magnifying glass icon lets you change the size of the displayed thumbnails; click it and move the slider to change the thumbnail size. There are also buttons for rotating and deleting any file you highlight.
The toolbar is a particularly important feature. Here is what each button does:
-
File
-
This drops down a File menu and lets you do the normal tasks you would expect, such as copying, deleting, and renaming files. But it lets you do a lot more as well, including adding folders to the gallery and importing pictures from a camera or scanner. If you choose Share with Devices from this menu, you can share all the media in Windows Photo Gallery with other users on your network via file sharing, and find media from other PCs on the network. Oddly enough, there’s also an option for changing your screensaver settings, even though Windows Photo Gallery has nothing to do with your screensaver.
The Options choice lets you set global options for Windows Photo Gallery, including a variety of import settings for cameras, scanners, and CDs and DVDs, such as into which folder to import pictures and clips, and whether to prompt for tags when importing.
-
Fix
-
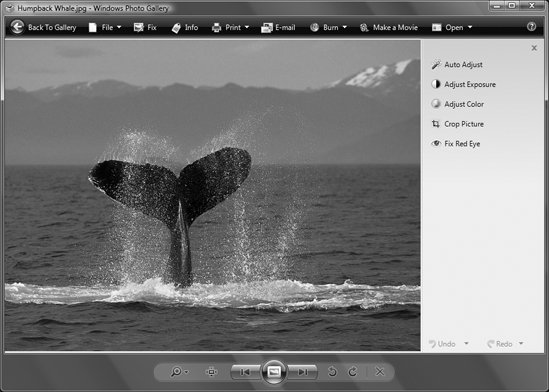
This brings you to a new screen (Figure 12-21) that has a variety of basic photo-editing tools.
Figure 12-21. Windows Photo Gallery’s photo-editing tools

You can use the following tools:
-
Auto Adjust
-
Automatically adjusts both the contrast and the color.
-
Adjust Exposure
-
Displays sliders that let you control the brightness and contrast individually.
-
Adjust Color
-
Displays sliders that let you control the color «temperature,» tint, and saturation individually. The «temperature» control makes the picture appear either warmer (more reds) by moving its slider to the right, or cooler (more blues) by moving its slider to the left. The tint selection controls what is called a color cast in the picturesthe predominant color that makes the other colors in the picture appear to be inaccurate. The saturation slider makes the colors appear more or less vivid.
-
Crop Pictures
-
Gives you a variety of tools for cropping the picture. It includes a number of predetermined crop sizes, or lets you choose your own custom crop size.
-
Fix Red Eye
-
Fixes the dreaded, ghostly looking red center in the middle of people’s eyes when a flash photograph is taken.
You can undo your changes by clicking the undo button at the bottom of the screen, and you can redo them by clicking the redo button.
-
-
Info
-
This displays a preview pane that gives you detailed information about the currently selected picture. If you want to add tags to the picture, in the preview pane click Add Tags, and type them in.
-
Print
-
From here you can either print or order photo prints to be made of the picture. If you choose to order photo prints, a wizard appears that first lets you choose which online photo site to use for ordering and then walks you through the process of uploading the picture to the site and ordering the print.
-
E-mail
-
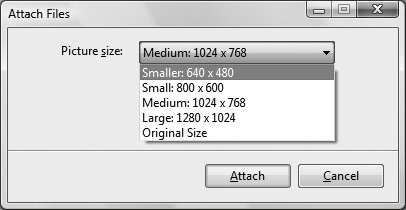
This will attach the picture to an email, and it will shrink the size to make for a smaller attachment if you want. When you click the button, you’ll first be presented with a screen (Figure 12-22) with suggested dimensions, and beneath that, the file size of the picture in kilobytes at those dimensions. Choose a different size from the drop-down list; when you do, the new file size in kilobytes will be displayed. After you choose the new size, a new email message will be created in your default email program, with the file attached to it.
Figure 12-22. Choosing new dimensions for a picture to send via email

-
Burn
-
From here, you can choose to burn your pictures to disc, in either a video DVD or a data disc.
-
Make a Movie
-
This opens Windows Movie Maker, with your selected pictures or video clips imported into it. For details about making a movie, see «Windows Movie Maker,» earlier in this chapter.
-
Open
-
This will open the selected picture or clip in any of the graphics- or video-editing programs on your PC.
Notes
-
When you double-click on a graphics file, depending on what other graphics software is installed on your hard disk, the graphic may open inside Windows Photo Gallery or in another graphics program. If you have no other graphics program installed, graphics files will open in Windows Photo Gallery. But when you install another graphics program, that other program may change defaults so that files open in it instead. To change defaults for which files Windows Photo Gallery opens, and which other graphics programs open, select Start Default Programs. For details about how to use the resulting screen, see «Default Programs Control Panel,» in Chapter 10.
-
.tif files will open in the Microsoft Office Document Imaging applet.
-
If you’ve edited a file and decide that you want to undo all your changes, choose File Revert to Original.
See also
«Paint» and «Windows Movie Maker»
From Wikipedia, the free encyclopedia
«Mspaint» redirects here. For the band, see MSPAINT (band).
Paint
|
Paint on Windows 11, with the Layers and Cocreator panel open on the side |
|
| Other names | Paintbrush (1985–1995) |
|---|---|
| Developer(s) | Microsoft |
| Stable release |
March 2025 Update (11.2503.381.0) |
| Operating system | Microsoft Windows |
| Platform | IA-32, x86-64, and ARM (historically Itanium, DEC Alpha, MIPS, and PowerPC) |
| Included with | All Microsoft Windows versions |
| Type | Raster graphics editor |
| Website | microsoft |
Microsoft Paint (commonly known as MS Paint or simply Paint) is a simple raster graphics editor that has been included with all versions of Microsoft Windows. The program opens, modifies and saves image files in Windows bitmap (BMP), JPEG, GIF, PNG, and single-page TIFF formats. The program can be in color mode or two-color black-and-white, but there is no grayscale mode. For its simplicity and wide availability, it rapidly became one of the most used Windows applications, introducing many to painting on a computer for the first time.
In July 2017, Microsoft added Paint to the list of deprecated features of Windows 10 and announced that it had become a free standalone application in Microsoft Store, with Paint 3D as its replacement. However, as a result of public demand from users, Paint has continued to be included with Windows 10 and even Windows 11, with Microsoft instead deprecating Paint 3D. Windows 11 also includes an updated version of Paint in later versions that added, among others updates, a revamped UI and dark mode support.[2]
Paint was initially programmed, licensed and adapted from PC Paintbrush made by ZSoft, by Dan McCabe at Microsoft for Windows 1.0, released in late 1985. PC Paintbrush had been previously licensed and published with the Microsoft Mouse DOS drivers from version 4 (circa 1985), to compete with Mouse Systems publishing PCPaint with its own mice in 1984. PC Paintbrush’s inclusion in version 4 of the DOS drivers replaced the previously included Microsoft bitmap color editing application «Doodle», released in 1983 with the first version of the Microsoft Mouse drivers. With improved functionality over Doodle, it competed successfully against PCPaint and Mouse Systems. Paint included with the first version of Windows, Windows 1.0 in November 1985, had 24 tools, supported only monochrome graphics, and could read and write files only in the proprietary «MSP» format. Aside from «pencil» and «shape» tools and a brush that draws in 24 «brush shapes and patterns», the toolset also contained two features unique for the time: one the ability to draw Bézier curves and the other that forces lines to be drawn on three angles to create an isometric three-quarter perspective.[3] Microsoft has since deprecated the MSP format, repurposing the MSP extension for the Windows Installer Package format.[4]
Paint was later superseded by Paintbrush in Windows 3.0, with a redesigned user interface, true color support, and support for the BMP and PCX file formats. This version was also based on a newer licensed version of PC Paintbrush by ZSoft.
Microsoft shipped an updated version of Paint with Windows 95 and Windows NT 4.0. At this point, Microsoft began updating the source code entirely from scratch and did not license any further code or versions of PC Paintbrush. This version featured an updated user interface that would carry on to later versions of Windows up to Windows Vista and allows saving and loading custom color palettes as .pal files.[5] This functionality only works correctly if the color depth of images is 16 bits per pixel (bpp) or higher. Later versions of Paint do not support this feature.
In Windows 95–98, Windows 2000 and Windows Me, Paint can open JPEG, GIF and 48-bit (16-bpp) TIF images and save images in JPEG and GIF formats when appropriate graphics filters are installed. Such plug-ins are included with Microsoft Office and Microsoft PhotoDraw. This also allows Paint to use transparent backgrounds.[6][7] Support for PCX files was dropped.[8] Starting with Windows Me, the canvas size expands automatically when larger images are opened or pasted instead of asking like in previous versions of Windows.
Windows XP and Vista
[edit]
In Windows XP and later, Paint uses GDI+ and therefore can natively save images as BMP, JPEG, GIF, TIFF and PNG without requiring additional graphics filters.[9] Support for saving and loading custom color palettes was dropped.
In Windows Vista, the toolbar icons were updated and the default color palette was changed. Paint in Windows Vista can undo a change up to 10 times, compared to 3 in previous versions; it also includes a slider for image magnification and a crop function. This version saves in JPEG format by default.[10]
The version of Paint in Windows 7 and later features a ribbon in its user interface.[11] It also features «artistic» brushes composed of varying shades of gray and some degree of transparency that give a more realistic result. To add to the realism, the oil and watercolor brushes can only paint for a small distance before the user must re-click (this gives the illusion that the paintbrush has run out of paint). In addition, Paint can now undo up to 50 subsequent changes. It also has anti-aliased shapes, which can be resized freely until they are rasterized when another tool is selected. This version supports viewing (but not saving) transparent PNG and ICO file formats and saves files in the .png file format by default.
Text can now be pasted into text boxes that don’t have enough room to display the text. A text box can then be enlarged or reshaped appropriately to fit the text if desired. Previous versions of Paint would display an error message if a user tried to paste more text than there was room for.[citation needed]
The Windows 8 version of Paint mostly corrects a long-standing defect from previous versions involving the inability to scroll the window when editing in Zoom view over 100%. However, when the user inserts text in Zoom view, they cannot move the text beyond the zoomed viewport while the text window is in edit mode with either the mouse or keyboard.
In the April 2017 «Creators Update» for Windows 10, Microsoft released Paint 3D alongside Paint. In addition to the traditional two-dimensional drawing tools, Paint 3D can import and manipulate three-dimensional models.[12][13] Three months later, on July 23, 2017, Microsoft added Paint to the list of deprecated Windows features.[14] The next day, in the wake of «an incredible outpouring of support and nostalgia», Microsoft clarified that Paint would become a free app on Microsoft Store, even though Paint 3D offers the same functionality.[15][16]
Despite the deprecation, Paint continues to be a part of all versions of Windows 10 up to version 22H2. The closest that Microsoft ever got to enacting said decision was adding a removal notice to Paint’s user interface in Windows 10 versions 1803 and 1809.[17]
In March 2021, with the release of Windows 10 Insider build 21332 to the Dev Channel, Microsoft removed Paint 3D from clean installations of the build, in addition to the 3D Objects app.[18] In April 2021, Microsoft released Windows 10 Insider build 21354, which made Paint (along with Snipping Tool) updatable from the Microsoft Store. It had also been moved from the Windows Accessories folder of the Start menu to its own section.[19][20]
In August 2021, Microsoft teased an updated version of Paint for Windows 11, featuring a refreshed user interface (UI), improved font picker, and a dark theme.[2] This newly updated version of Paint was released with Windows 11 Insider build 22468 in September 2021, and was officially released as part of the Windows 11 2022 Update in September 2022. In September 2023, Microsoft released an update that added layers, support for transparent PNG files, AI art generator and other AI tools and a background removal tool.[21][22]
Despite new features being added into Paint in Windows 11, some older features have disappeared.[which?] Paint in Windows 11 also automatically anti-aliases all fonts that are inputted using the «Text» feature. Smaller images are also harder to manipulate and work with in newer versions of Paint, as it automatically blurs images when they are resized or re-copied. This is especially noticeable when working with video game sprites and pixel art.[23] These issues are due to interpolation algorithms that Paint is using, according to Microsoft.
Paint has a few functions not mentioned in the help file: a stamp mode, trail mode, regular shapes, and moving pictures.[24] For the stamp mode, the user can select a part of the image, hold the Ctrl key, and move it to another part of the canvas. This, instead of cutting the piece out, creates a copy of it. The process can be repeated as many times as desired, as long as the Ctrl key is held down. The trail mode works exactly the same, but it uses the ⇧ Shift instead of the Ctrl key.
It is also possible to thicken or thin a line either before or simultaneously while it is being drawn via Ctrl++ (NumPad only) or Ctrl+- (NumPad only).
To crop whitespace or eliminate parts of a graphic, the blue handle in the lower right corner can be dragged to increase canvas size or crop a graphic. Users can also draw perfect shapes (which have a width equal to the height) using any shape tool by holding down the ⇧ Shift while dragging.
Older versions of Paint, such as the one bundled with Windows 3.1, featured a color-replace brush, which replaced a single color underneath the brush with another without affecting the rest of the image. In later versions of Paint, the color erase brush was removed as an option, however it can still be simulated by selecting the color to be replaced as the primary color, and the one it is replaced with as the secondary color, and then right-click dragging the erase tool.
Support for indexed palettes
[edit]
By default, almost all versions of Paint are generally unable to properly downgrade created images to indexed palettes using fewer than 24 bits per pixel. When saving an image in a format that uses indexed palettes with fewer than 24 bits per pixel, a warning message appears about the loss of quality. Paint does not utilize binary, color or grayscale dithering or palette optimization, and the image will be saved with usually irreversibly scrambled colors.
Paint is nonetheless able to correctly load and save indexed palettes in any of the supported formats if an image is opened as an 8-bit or otherwise indexed palette image. In that case, the image’s palette is preserved when saving. However, there is no way to see the actual palette; color choices for brushes, text, and erasers as well as user-defined colors will be limited to the closest available color in the indexed palette.[25]
Bundled Paint equivalents on other OSes
[edit]
- Deluxe Paint, for Amiga
- KolourPaint, for KDE
- MacPaint, for Macintosh
- Pinta, for GNOME
- Pocket Paint, for Windows CE
- Comparison of raster graphics editors
- Microsoft Fresh Paint
- GIMP
- Pixel art, a form of digital art
- ^ «Paint». Microsoft Apps. Retrieved May 12, 2025.
- ^ a b Warren, Tom (August 18, 2021). «Microsoft’s new Paint redesign for Windows 11 includes a dark mode». The Verge. Vox Media. Archived from the original on August 19, 2021. Retrieved August 19, 2021.
- ^ Davison, Patrick (December 16, 2014). «Because of the Pixels: On the History, Form, and Influence of MS Paint». Journal of Visual Culture. 13 (3): 280. doi:10.1177/1470412914544539. S2CID 61640546.
- ^ Smith, Ernie (November 15, 2021). «10 Image File Formats That Time Forgot». Vice. Archived from the original on March 10, 2022. Retrieved March 10, 2022.
- ^ «Problems Using Saved Colors with 256-Color Bitmap». Support. Microsoft. November 15, 2006. Archived from the original on January 12, 2009. Retrieved February 22, 2015.
- ^ «Want MS Paint version from Windows 98». Community. Microsoft. January 14, 2011. Archived from the original on October 27, 2016. Retrieved October 27, 2016.
- ^ «Transparency in MS Paint». 3D Realms. October 9, 2009. Archived from the original on October 27, 2016. Retrieved October 27, 2016.
- ^ «Paint Tool in Windows 98 Does Not Support .pcx Files». Support. Microsoft. January 23, 2017. Archived from the original on May 5, 2007. Retrieved December 6, 2014.
- ^ «Error message when you use Paint to open a 48-bit TIFF image file on a Windows XP-based computer». Support. Microsoft. May 23, 2006. Archived from the original on October 23, 2007. Retrieved November 20, 2013.
- ^ «I have windows Vista. Paint by default used to save as a bitmap file, but now after an update by default it saves as a JPEG file». Community. Microsoft. November 24, 2009. Archived from the original on December 9, 2014. Retrieved December 6, 2014.
- ^ Rivera, Rafael (September 16, 2008). «Short: Ribbon implemented in Windows «7» Paint». Archived from the original on September 21, 2008. Retrieved May 2, 2009.
- ^ Warren, Tom (October 7, 2016). «Microsoft’s redesigned Paint app for Windows 10 looks awesome». The Verge. Vox Media. Archived from the original on May 24, 2024. Retrieved July 25, 2017.
- ^ Hardawar, Devindra (March 29, 2017). «Microsoft’s Windows 10 Creators Update lives up to its name». Engadget. AOL. Retrieved July 25, 2017.
- ^ Gartenberg, Chaim (July 24, 2017). «Microsoft Paint is getting killed off in the Windows 10 Fall Creators Update». The Verge. Vox Media. Archived from the original on May 24, 2024. Retrieved October 12, 2020.
- ^ Saunders, Megan (July 24, 2017). «MS Paint is here to stay». Windows Blog. Microsoft. Archived from the original on August 5, 2017. Retrieved July 24, 2017.
- ^ Warren, Tom (July 25, 2017). «Microsoft Paint isn’t dead yet, will live in the Windows Store for free». The Verge. Vox Media. Archived from the original on July 30, 2017. Retrieved July 25, 2017.
- ^ Warren, Tom (April 23, 2019). «Microsoft Paint to remain part of Windows 10 after all». The Verge. Vox Media.
- ^ Woods, Rich (March 10, 2021). «Windows 10 build 21332 removes 3D Viewer and Paint 3D on clean installs». Neowin.
- ^ Tung, Liam. «Windows 10: Paint and Snipping Tool now update from the Microsoft Store». ZDNet. Archived from the original on April 11, 2021. Retrieved April 11, 2021.
- ^ Blog, Windows Insider (April 7, 2021). «Announcing Windows 10 Insider Preview Build 21354». Windows Insider Blog. Archived from the original on April 11, 2021. Retrieved April 11, 2021.
- ^ Benedetto, Antonio G. Di (September 18, 2023). «Microsoft Paint is finally adding some of Photoshop’s best features». The Verge. Retrieved September 21, 2023.
- ^ Mehdi, Yusuf (September 21, 2023). «Announcing Microsoft Copilot, your everyday AI companion». The Official Microsoft Blog. Archived from the original on September 21, 2023. Retrieved September 21, 2023.
- ^ MSFT, Brandon (October 30, 2023). «Why does resizing my pixel art in Microsoft Paint result in a blurry — Microsoft Community». Microsoft Community. Retrieved August 3, 2024.
- ^ «MS Paint Tricks». Archived from the original on October 12, 2007. Retrieved July 30, 2008.
- ^ «Windows 7 Paint: How exactly do I create custom colors AND use them». answers.microsoft.com. Archived from the original on February 10, 2021. Retrieved February 3, 2021.
Содержание
- Как улучшить рисование в Windows Media Player
- Знакомство с Windows Media Player Paint
- Что такое Windows Media Player Paint и как им пользоваться?
- Основные функции Windows Media Player Paint
- Как настроить Windows Media Player Paint под свои предпочтения
- Создание и редактирование медиа-контента в Windows Media Player Paint
- Расширенные возможности Windows Media Player Paint для профессионального использования
- Советы и хитрости по использованию Windows Media Player Paint
Windows Media Player Paint — это новое удивительное приложение, которое предлагает уникальный подход к созданию и редактированию изображений на основе обычных аудиофайлов. Это инновационный инструмент, который объединяет мир искусства и музыки, позволяя вам выразить свою творческую сторону с помощью любимых треков.
Это самый легкий, увлекательный и интересный способ создания изображений, который превращает каждую пиксель в проявление звука. Windows Media Player Paint использует звуковые волны аудиофайлов и преобразует их в цветовое кодирование, создавая уникальные и эффектные визуализации. Вы можете выбрать любой трек, прикрепить к нему изображение и наблюдать, как он воплощается в живописную картину.
Это приложение предлагает широкий спектр инструментов и функций для максимальной творческой свободы. Вы можете выбрать различные стили и кисти, регулировать цветовые настройки и насыщенность, добавлять разные фильтры и эффекты, а также редактировать и изменять изображение после его создания. Кроме того, вы можете делиться своими творениями с друзьями и семьей через социальные сети и другие платформы, чтобы показать им свой уникальный взгляд на мир искусства и музыки.
Windows Media Player Paint — это не просто еще одно приложение для рисования. Оно предлагает новый и захватывающий способ выразить себя и открыть новые грани вашей творческой воображаемости. Дайте волю своей фантазии, создавая удивительные и уникальные визуализации, которые отражают ваше настроение и стиль.
Так что давайте вместе погрузимся в мир Windows Media Player Paint и начнем создавать настоящее искусство с помощью звука!
С помощью Windows Media Player Paint вы можете не только проигрывать свои любимые медиафайлы, но и одновременно работать с графикой. Приложение предлагает широкий спектр инструментов и функций, которые помогут вам создавать чудесные и оригинальные изображения. Вы можете рисовать кистью различной толщины и цвета, добавлять текст, применять различные эффекты и многое другое.
Одной из главных особенностей Windows Media Player Paint является его простота использования. Интерфейс приложения интуитивно понятен и легок в освоении даже для новичков. Вы можете создавать и редактировать графику в режиме реального времени, в то время как ваши медиафайлы проигрываются. Это дает вам больше свободы и возможностей для воплощения ваших творческих идей.
В целом, Windows Media Player Paint — это отличный выбор для тех, кто хочет не только наслаждаться просмотром медиафайлов, но и проявить свою творческую натуру. Это уникальное приложение, которое объединяет в себе функции двух популярных программ — медиаплеера и редактора графики. Попробуйте Windows Media Player Paint и откройте для себя новые возможности в создании и редактировании графических изображений.
Для использования Windows Media Player Paint просто запустите Windows Media Player и откройте видео или аудиофайл, который вы хотите просмотреть или прослушать. Затем нажмите на кнопку «Вид» в меню плеера и выберите «Открыть панель инструментов WMPP». Это активирует панель инструментов WMPP, которая отобразится на экране.
На панели инструментов WMPP вы найдете различные инструменты для создания рисунков и добавления эффектов. Например, вы можете использовать кисть для рисования прямо на видео или аудиофайле, выбрать цвет и толщину линии, применить различные текстуры и фильтры.
Кроме того, Windows Media Player Paint имеет функцию сохранения созданных рисунков и эффектов, а также возможность обмена ими с другими пользователями. Вы можете сохранить свои творения как обычное изображение или видеофайл и поделиться ими через социальные сети или электронную почту. Это отличный способ добавить креативность и персональность к вашим проигрываемым файлам.
Вот несколько основных функций, которые доступны в Windows Media Player Paint:
- Рисование и кисти: С помощью Windows Media Player Paint вы можете рисовать на изображении при помощи различных инструментов и кистей. Вы можете выбрать различные размеры и формы кистей, а также использовать различные цвета и текстуры для создания уникальных и креативных произведений искусства.
- Форматирование и обрезка: С помощью Windows Media Player Paint вы можете форматировать изображение, изменять его размеры, обрезать его и применять различные эффекты и фильтры для придания ему уникального вида. Вы также можете добавлять текст и подписи к изображению, чтобы сделать его более информативным и удобочитаемым.
- Ретуширование и исправление ошибок: Windows Media Player Paint предлагает инструменты для ретуширования и исправления ошибок на изображении. Вы можете удалять пятна, устранять красные глаза, исправлять цветовой баланс и многое другое. Это позволяет вам улучшить качество и внешний вид изображения.
В целом, Windows Media Player Paint — это мощный и удобный инструмент для работы с изображениями. Он предоставляет широкие возможности для творчества и редактирования графики, при этом оставаясь простым и интуитивно понятным в использовании.
Один из способов настроить Windows Media Player Paint – это изменить цветовую схему плеера. Вы можете выбрать любой цвет, который вам нравится, чтобы сделать его соответствующим вашим предпочтениям. Это позволит вам создать уникальный и индивидуальный облик для вашего плеера.
Еще одной возможностью настройки Windows Media Player Paint является изменение фона плеера. Вы можете выбрать любое изображение или фотографию, которая вам нравится, и использовать ее в качестве фона плеера. Это поможет создать атмосферу, которая будет соответствовать вашим настроениям и предпочтениям.
Кроме того, вы можете изменить расположение и размер окна плеера. Вы можете настроить его так, чтобы он был отображен в определенной части экрана или изменить его размер в соответствии с вашими предпочтениями. Это позволит вам организовать ваш рабочий стол так, чтобы плеер прекрасно вписывался в общий вид.
В целом, настройка Windows Media Player Paint дает вам возможность придать вашему плееру уникальный и персонифицированный вид. Вы можете выбрать цветовую схему, изменить фон, расположение и размеры окна плеера в соответствии с вашими предпочтениями. Это поможет вам создать комфортную атмосферу просмотра и наслаждаться вашими любимыми мультимедийными файлами со стилем.
Одна из основных возможностей Windows Media Player Paint — это создание рисунков и изображений. Пользователи могут выбирать различные кисти, цвета и фигуры для создания своих произведений искусства. Программа также предоставляет функции редактирования, позволяющие изменять размер, поворачивать и обрезать изображения. Это очень полезный инструмент для тех, кто хочет создавать оригинальные и красочные изображения без необходимости использовать сложные программы рисования.
Windows Media Player Paint также предлагает возможность редактирования аудио-файлов. Пользователи могут обрезать, соединять, изменять громкость и добавлять эффекты к своим аудио-трекам. Это отличная возможность для тех, кто хочет создавать собственные мелодии или редактировать существующие аудио-файлы. Благодаря простому и интуитивно понятному интерфейсу программы, пользователи смогут быстро овладеть всеми функциями и приступить к творчеству.
Наконец, Windows Media Player Paint позволяет также редактировать видео-файлы. С его помощью пользователи могут обрезать и объединять видео-фрагменты, добавлять текст и эффекты, регулировать яркость и контрастность, а также применять различные фильтры. Это полезное приложение для тех, кто хочет создавать собственные видео-ролики или редактировать уже существующие материалы. Функциональность программы позволяет быстро и легко реализовать свои идеи и создать качественный медиа-контент.
Windows Media Player Paint — это простой и удобный инструмент для создания и редактирования медиа-контента. Благодаря его функциональности и интуитивно понятному интерфейсу пользователи могут быстро и легко создавать уникальные изображения, редактировать аудио-файлы и видео-ролики. Это отличное приложение для тех, кто хочет проявить свою креативность и создать качественный медиа-контент.
Одной из главных особенностей Windows Media Player Paint является его интуитивно понятный интерфейс, который позволяет быстро освоить базовые инструменты и функции. Вы сможете легко создавать и редактировать изображения с помощью кисти, карандаша и других инструментов рисования. Интерфейс также предлагает широкие возможности для настройки параметров инструментов, что позволяет достичь нужного эффекта в своей работе.
В Windows Media Player Paint вы найдете не только базовые инструменты для рисования, но и ряд расширенных функций, которые помогут вам создавать профессиональные и качественные изображения. Например, приложение поддерживает работу с различными слоями, что дает возможность создавать сложные композиции и добавлять специальные эффекты. Вы также сможете использовать широкий выбор инструментов для ретуширования и настройки цветовой гаммы изображений.
Кроме того, Windows Media Player Paint предлагает встроенные фильтры и эффекты, которые позволяют легко изменять внешний вид изображений. Вы сможете добавлять размытие, изменять контрастность и насыщенность, применять эффекты радиального размытия и многое другое. Эти возможности помогут вам профессионально обрабатывать изображения и создавать уникальные графические работы.
Советы и хитрости по использованию Windows Media Player Paint
Первая важная хитрость — это использование клавиш быстрого доступа. Windows Media Player Paint имеет множество функций и инструментов, и нажатие на соответствующие клавиши может значительно ускорить вашу работу. Например, нажатие клавиши «B» активирует инструмент «Кисть», а нажатие клавиши «E» позволяет вам выбрать инструмент «Ластик». Ознакомьтесь с полным списком клавиш быстрого доступа в программе и вы сможете использовать её гораздо более эффективно.
Вторая хитрость заключается в использовании слоев. Слои позволяют вам работать с разными элементами изображения независимо друг от друга. Вы можете создавать новые слои, перемещать и изменять их, чтобы получить желаемый результат. Это особенно полезно, когда вы хотите внести изменения в определенную часть изображения, не влияя на остальные части. Использование слоев может сэкономить вам время и сделать вашу работу более организованной.
Третий совет — регулярно сохраняйте свою работу. Windows Media Player Paint не имеет автоматического сохранения, поэтому важно сохранять свое изображение время от времени, чтобы избежать потери данных, если что-то пошло не так. Воспользуйтесь функцией «Сохранить как», чтобы сохранить вашу работу в качестве нового файла и сохранять прогресс после каждого важного этапа.
В недавнем обновлении страницы устаревших функций Windows, Microsoft объявила о прекращении поддержки сервисов Legacy Digital Rights Management (DRM), связанных с Windows Media Player и Silverlight, для пользователей Windows 7 и Windows 8. Это решение фактически останавливает потоковую передачу и воспроизведение контента, защищенного DRM, в этих приложениях на упомянутых операционных системах. Кроме того, это влияет на возможность воспроизведения контента с личных CD-рипов и потоковой передачи с клиента Silverlight или Windows 8 на Xbox 360, если кто-то из пользователей все еще занимается этими действиями.
Понимание DRM и его последствия
Для тех, кто может быть не знаком с терминологией, DRM, или Digital Rights Management, — это технология, предназначенная для предотвращения несанкционированного использования цифрового контента. Она играет важную роль в обеспечении того, чтобы пользователи не занимались пиратством, проблема которого остается актуальной, несмотря на доступность легального контента. В настоящее время большинство официально распространяемых фильмов, телешоу и игр включают в себя какую-либо форму DRM, если только они не рекламируются как свободные от DRM.
В дополнение к прекращению поддержки сервисов Legacy DRM, Microsoft также планирует прекратить поддержку Paint 3D в ноябре. Ходили даже слухи о том, что Панель управления может постигнуть та же участь, хотя она пока избежала этой участи. Тем не менее, удаление базовой функциональности Windows Media Player для старых версий Windows оставляет многих пользователей в состоянии беспокойства. Если Microsoft стремится позиционировать себя как медиа-компания, она должна обеспечить доступность легитимного медиа-контента в своих программных продуктах.
Как установить paint 3d на windows 8?
К сожалению, программа Paint 3D официально доступна только для Windows 10 и Windows 11. Paint 3D является частью пакета обновления Creators Update для Windows 10, и его нельзя установить на Windows 8. Если вам нужны функции для редактирования изображений, предлагаемые Paint 3D, вы можете рассмотреть альтернативные программы, совместимые с Windows 8, такие как GIMP или Adobe Photoshop.
Как соединить две фотографии в paint 3d?
Чтобы соединить две фотографии в Paint 3D, выполните следующие шаги:
1. Откройте Paint 3D и создайте новый проект.
2. В меню выберите «Вставка» и выберите первую фотографию.
3. Повторите шаг 2 для добавления второй фотографии.
4. Переместите и отрегулируйте размеры фотографий по своему усмотрению.
5. Используйте инструменты обрезки и вращения, чтобы идеально соединить изображения.
6. Сохраните результат, выбрав «Файл» > «Сохранить как».
Все способы:
- Способ 1: Меню «Пуск»
- Способ 2: Системный поиск
- Способ 3: Консольная команда
- Способ 4: «Проводник»
- Способ 5: Исполняемый файл
- Способ 6: Cortana
- Способ 7: Создание ярлыка на рабочем столе
- Вопросы и ответы: 3
Способ 1: Меню «Пуск»
Запустить штатный графический редактор Paint в Windows 10 можно через меню «Пуск». Для этого кликните по соответствующей кнопке на панели задач левой кнопкой мыши, после чего в списке всех установленных программ найдите папку «Стандартные — Windows» и откройте ее. Затем в списке выберите приложение «Paint».
Читайте также: Как сделать прозрачную картинку в Paint
Способ 2: Системный поиск
Для того чтобы самостоятельно не искать в списке программного обеспечения Paint, его можно открыть, воспользовавшись системным поиском. Для этого сначала установите курсор мыши в соответствующее поле на панели задач, после чего введите запрос «Paint» (без кавычек). В отобразившихся результатах кликните по одноименному приложению левой кнопкой мыши. После этого графический редактор сразу запустится.
Способ 3: Консольная команда
Paint в Windows 10 также открывается посредством ввода специальной команды, причем воспользоваться ею можно сразу в нескольких приложениях. Например, в окне «Выполнить». Открывается оно посредством специальной комбинации клавиш Win + R или через контекстное меню кнопки «Пуск». Во втором случае щелкните по ней правой кнопкой мыши и в появившемся списке выберите «Выполнить».
Читайте также: Как открыть окно «Выполнить» в Windows 10
Также эту команду можно ввести в «Командной строке», не обязательно ее запускать от имени администратора. Есть множество способов инициализации консоли, один из которых подразумевает поиск по системе. Для этого установите курсор в соответствующее поле на панели задач, введите запрос «Командная строка» (без кавычек), а затем в результатах щелкните левой кнопкой мыши по одноименному приложению.
Читайте также: Как открыть «Командную строку» в Windows 10
Еще ввести команду для запуска Paint можно в окне Windows PowerShell. Один из способов его вызова — использование контекстного меню кнопки «Пуск». Щелкните по ней правой кнопкой мыши и выберите соответствующий пункт из списка.
Читайте также: Как открыть Windows PowerShell в Windows 10
После того как окно для ввода команд было вызвано, открыть графический редактор Paint можно путем ввода приведенной ниже команды. Для ее выполнения не забудьте нажать клавишу Enter.
mspaint
Примечание! В примере на изображении выше команда выполняется в оболочке Windows PowerShell, если вы выбрали другую консоль для ввода запроса, интерфейс будет отличаться.
Способ 4: «Проводник»
Еще один способ открыть Paint в Windows 10 — это воспользоваться адресной строкой файлового менеджера «Проводник». При этом не обязательно указывать полный путь к исполняемому файлу программы, достаточно ввести его название. Но первостепенно требуется запустить сам «Проводник». Для этого кликните по соответствующей иконке на панели задач.

Читайте также: Как открыть «Проводник» в Windows 10
После того как окно файлового менеджера появится на экране, вставьте в адресную строку приведенную ниже команду и нажмите Enter. Сразу после этого появится окно приложения Paint.
mspaint
Способ 5: Исполняемый файл
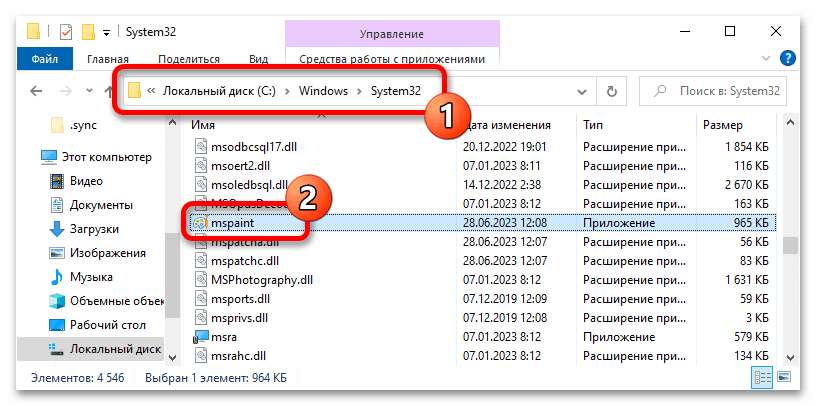
Paint — стандартная программа операционной системы, как и все другие, она имеет исполняемый файл, хранящийся на системном диске. Соответственно, запустить графический редактор можно путем его вызова. Первостепенно откройте «Проводник» и перейдите по указанному ниже пути.
C:\Windows\System32
Обратите внимание! Для удобства вы можете скопировать и вставить этот адрес в адресную строку, расположенную в верхней части окна файлового менеджера, и нажать Enter.
После того как вы будете находиться в целевой директории «System32», найдите в списке всех файлов название «mspaint» или «mspaint.exe» (в зависимости от настроек «Проводника») и запустите его двойным кликом левой кнопки мыши.
В папке «System32» находится довольно много файлов, что может затруднить поиски нужного. Для удобства вы можете воспользоваться поиском по директории. Для этого установите курсор в соответствующее поле, расположенное в верхнем правом углу окна, после чего введите запрос «mspaint» (без кавычек) и нажмите по синей стрелочке рядом. Дождитесь, пока система осуществит поиск, и в результатах дважды щелкните по искомому файлу, после этого откроется окно графического редактора.
Читайте также: Как вставить картинку в Paint
Способ 6: Cortana
Еще один способ запустить Paint в операционной системе Windows 10 — это воспользоваться предустановленным голосовым ассистентом Cortana.
Важно! Голосовой помощник Cortana по умолчанию не работает в русскоязычных регионах, поэтому, чтобы воспользоваться данным способом выполнения поставленной задачи, вам предварительно необходимо внести изменения в конфигурацию операционной системы. Подробнее об этом рассказывается в соответствующей статье на нашем сайте, при необходимости ознакомьтесь с ней, воспользовавшись ссылкой ниже.
Подробнее: Включение голосового ассистента Сortana в Windows 10
По умолчанию иконка голосового помощника на панели задач отсутствует, поэтому для удобства ее необходимо включить. Для этого вызовите контекстное меню панели задач, кликнув по ней правой кнопкой мыши, а затем в появившемся списке опций выберите пункт «Показать кнопку Кортана».
Далее нажмите по появившейся иконке левой кнопкой мыши и проговорите в микрофон фразу на английском языке:
Open Paint
После этого «Кортана» может уточнить, какую именно версию графического редактора вы желаете открыть — Paint или Paint 3D. В ответ скажите следующее:
Paint
Если голосовой помощник корректно обработает входящие данные, на экране появится окно графического редактора Paint.
Способ 7: Создание ярлыка на рабочем столе
Для удобства вызова Paint можно создать ярлык этой программы на рабочем столе операционной системы.
- Кликните по пустому месту рабочего стола правой кнопкой мыши. В появившемся контекстном меню наведите курсор на пункт «Создать», а затем в появившемся подменю выберите «Ярлык».
- В окне создания ярлыка введите в поле «Укажите расположение объекта» приведенную ниже команду. После этого щелкните по кнопке «Далее».
mspaint - В поле «Введите имя ярлыка» укажите произвольное название. В качестве примера указано наименование самой программы — «Paint». Завершите создание ярлыка, щелкнув по кнопке «Готово».

После выполнения этих действий на рабочем столе Windows 10 должен появиться значок приложения с указанным названием. Теперь для запуска «Paint» достаточно дважды кликнуть по нему левой кнопкой мыши.

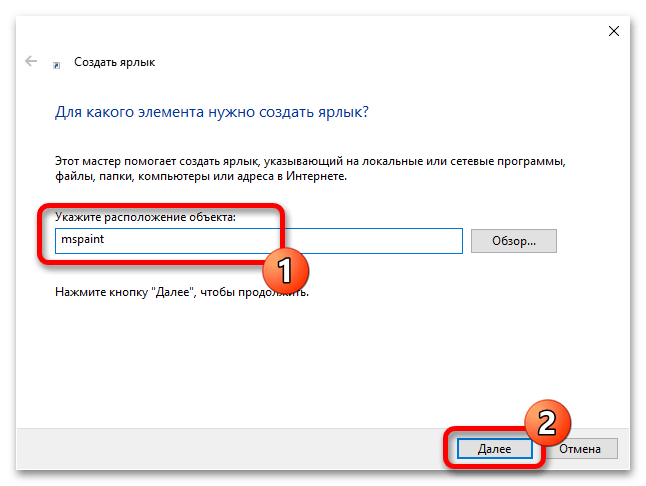
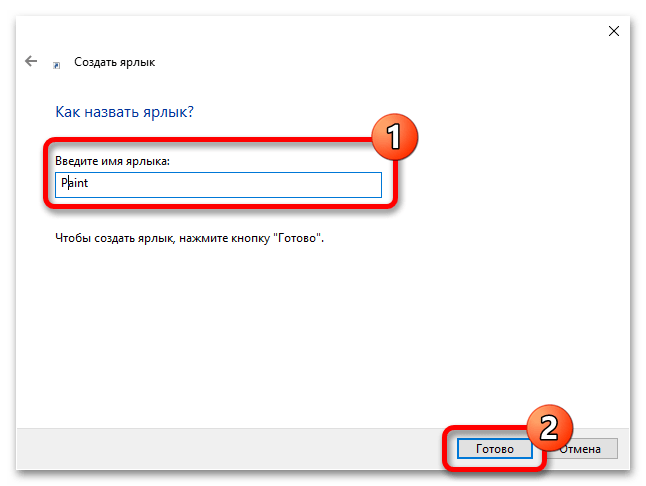
Читайте также: Как создать ярлык на рабочем столе Windows 10
Наша группа в TelegramПолезные советы и помощь