
Do you ever wish you could change the WMC start menu? Maybe move some of the tiles and strips around to different locations, add new ones, or eliminate some altogether? Today we look at how to do it using Media Center Studio.
Download and install Media Center Studio. (Download link below) You’ll also want to make sure you have Windows Media Center closed before running Media Center Studio. Many of the actions cannot be performed with Media Center open.
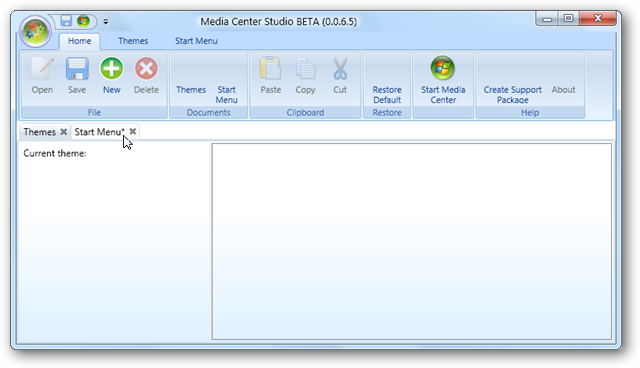
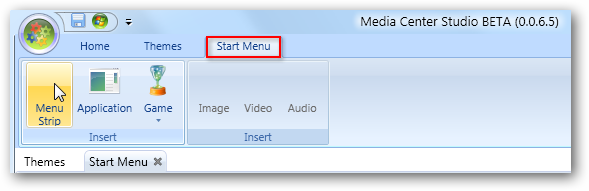
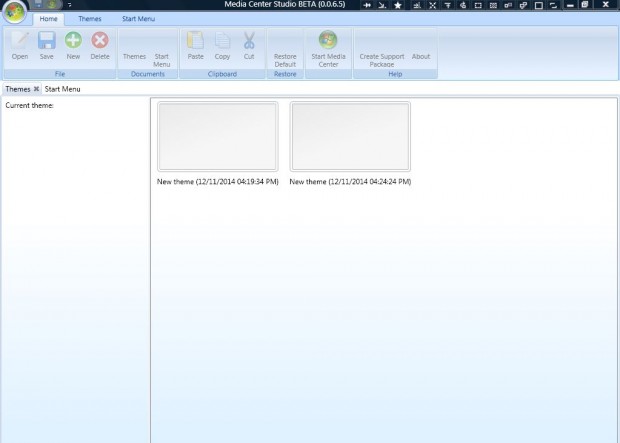
Once installed, you can open Media Center Studio from the Windows Start Menu. When you first open Media Center Studio you’ll be on the Themes tab. Click on the Start Menu tab.
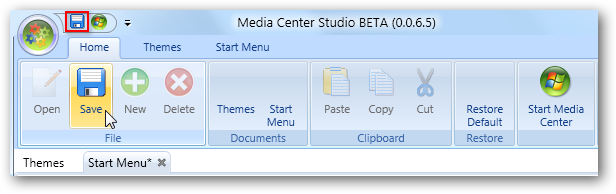
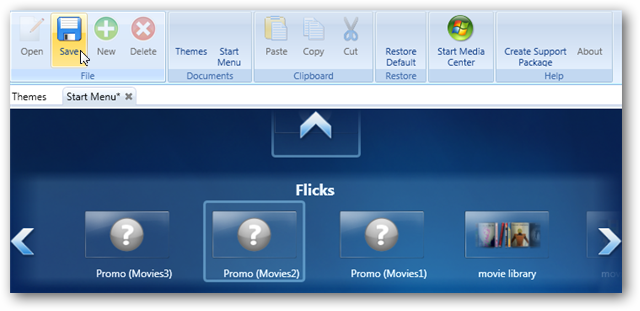
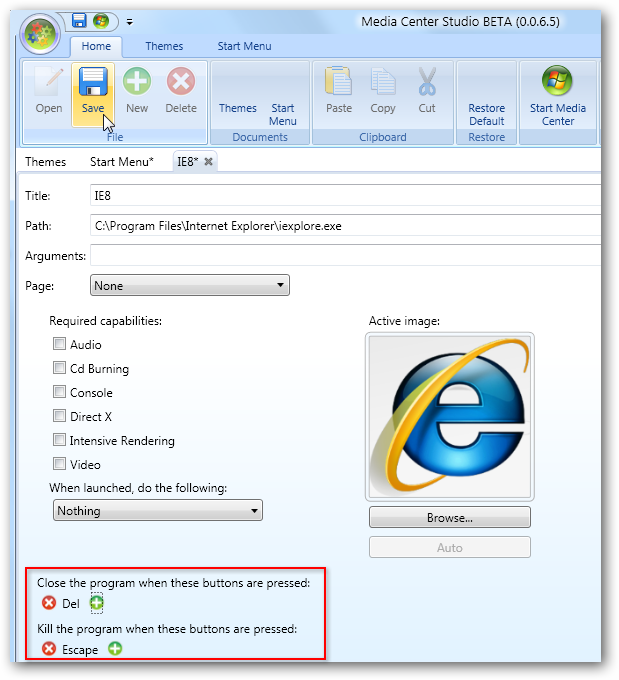
It should be noted that Media Center Studio is a Beta application, and it did crash on us a few times, so it’s a good idea to save your work frequently. You can save your changes by selecting Save on the Home tab, or by clicking the small disk icon at the top left.
We also found that that trying to launch Media Center from the Start Media Center button on the application ribbon typically didn’t work. Opening Windows Media Center from the Windows Start Menu is preferred.
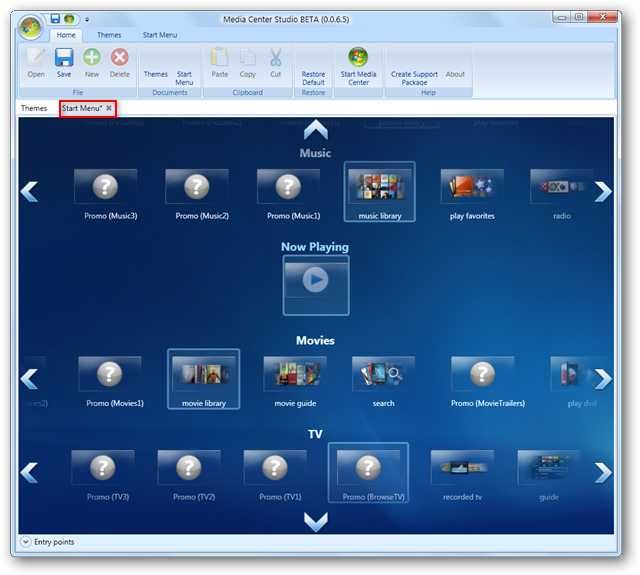
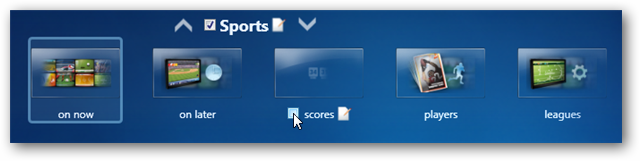
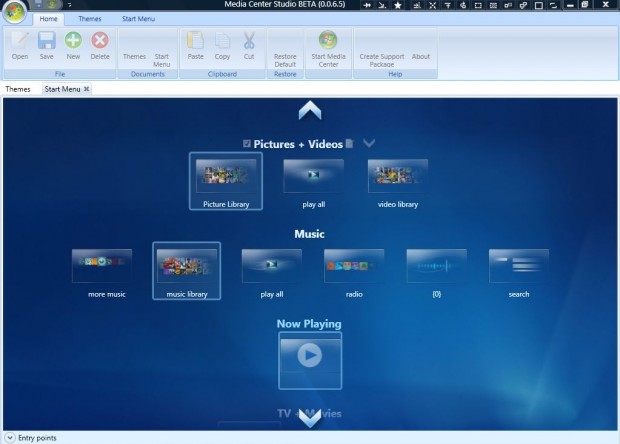
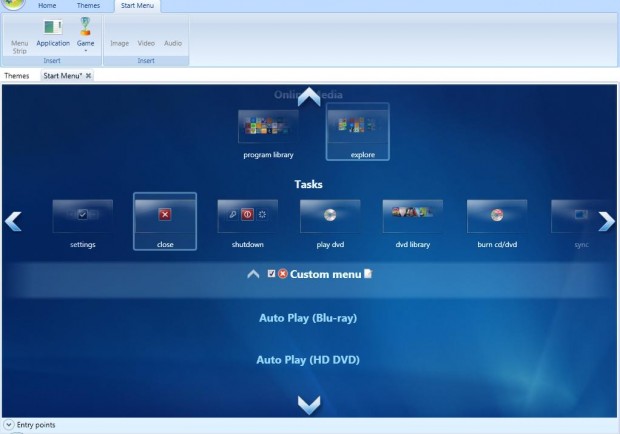
When you’re on the Start Menu tab you will see the Windows Media Center menu strips and tiles. Click the arrows located at the right, left, top, and bottom of the screen to scroll through the various menu strips.
Hiding and Removing Tiles and Menu Strips.
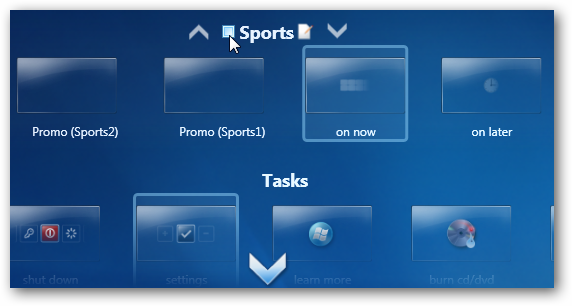
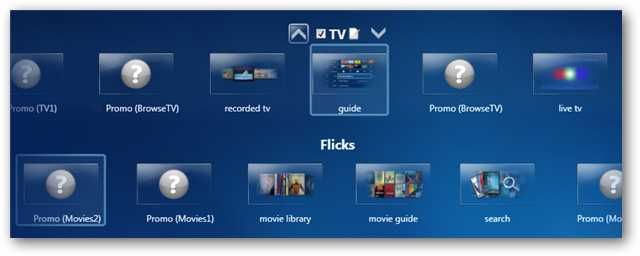
If there is an entire menu strip that you never use and would like to remove from Media Center, simply uncheck the box to the left of the the title above that menu strip.
If you’d like to hide individual tiles, uncheck the box next to the name of the individual tile.
Renaming Tiles and Strips
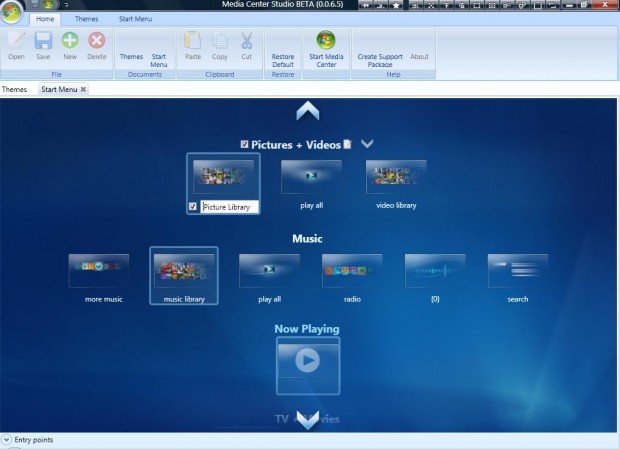
To rename a tile or menu strip, click on the small notepad icon next to the title.
Note: If you do not see a small notepad icon next to the title, then the title is not editable. This applies to many of the «Promo» tiles.
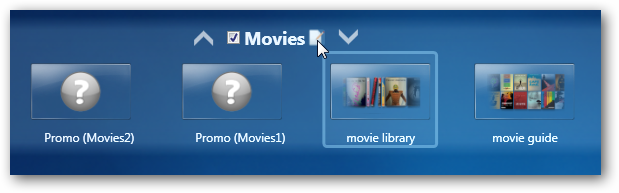
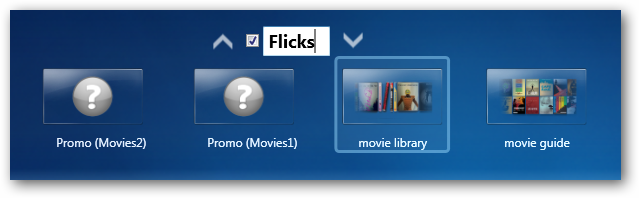
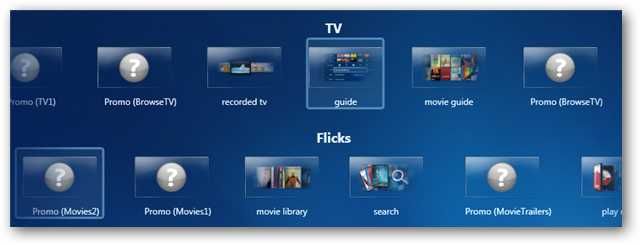
The title will turn into a text input box so that you can edit the name. Click away from the text box when finished. Here we will change the title of the default Movie strip to «Flicks.»
Change the Default Tile and Menu Strip
The Default menu strip is the strip that is highlighted, or on focus, when you open Media Center.
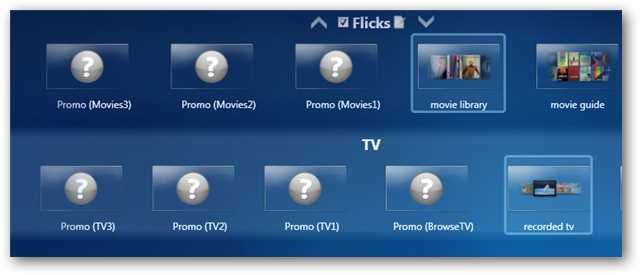
To change the default strip, simply click once on another strip to highlight it, and then save your work. In our example, I’m going to make our newly renamed «Flicks» strip the default.
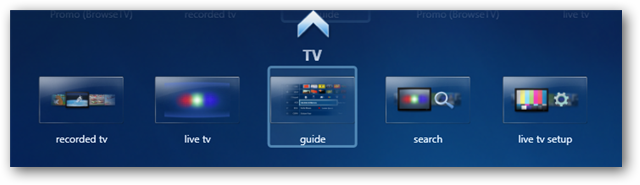
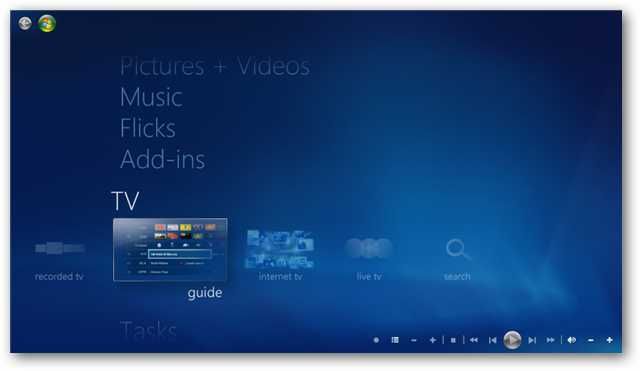
Each menu strip has a default tile. This is the tile that is active, or on focus, when you select the menu strip. To change the default tile on a strip, click once on the tile. You will see it outlined in light blue. Now just simply save your changes. In our example below, we’ve changed the default tile on the TV strip to «guide.»
Moving Tiles and Menu Strips
You can move an entire Menu Strip up or down on the screen. When you hover your mouse over the a menu strip, you will see up and down arrows appear to the right and left of the title. Click on the arrows to move the strip up or down.

You will see the menu strip appear in it’s new position.
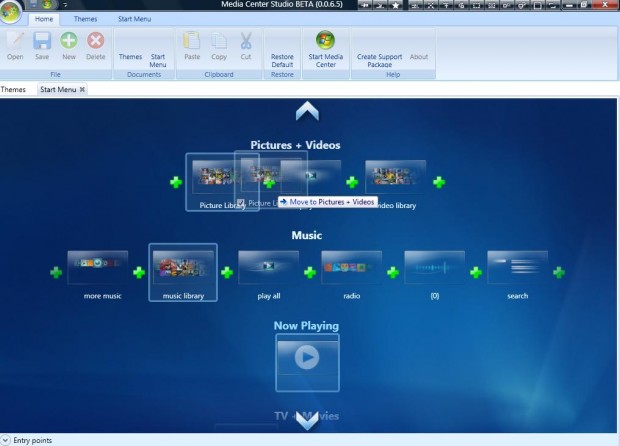
To move a tile to a new menu strip, click and drag the tile you’d like to move. When you begin to drag the tile, green plus (+) signs will appear in between the tiles. Drag and drop the tile onto to any of these green plus signs to move it to that location.
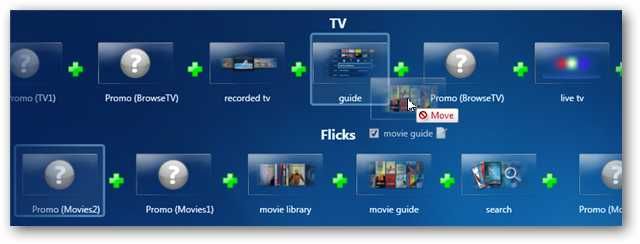
When you’ve dragged the tile over an acceptable position, you’ll see the red «Move» label next to your cursor turn to a blue «Move to» label. Now you can drop the tile into position.
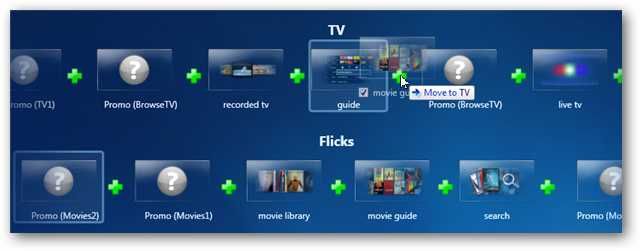
You’ll see the tile located in it’s new position.
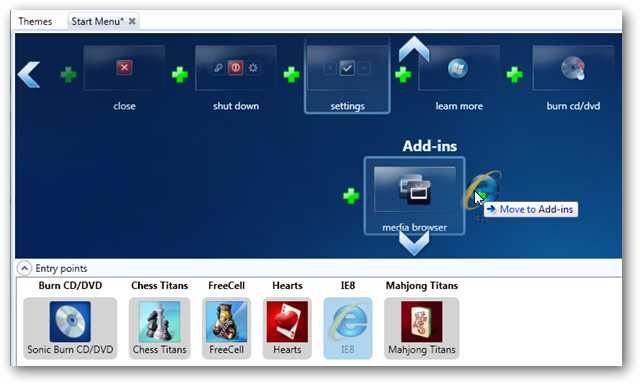
Adding a New Custom Menu Strip
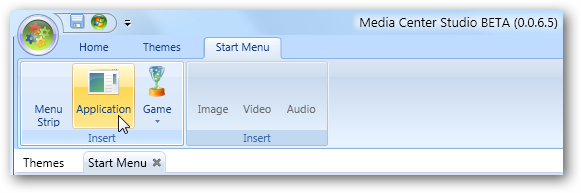
Click on the Start Menu tab and then select the Menu Strip button.
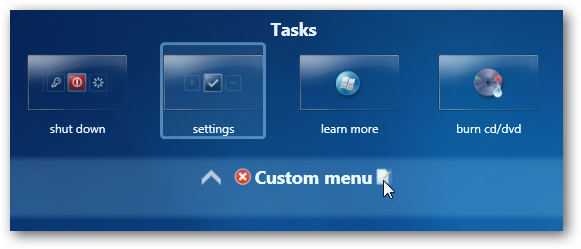
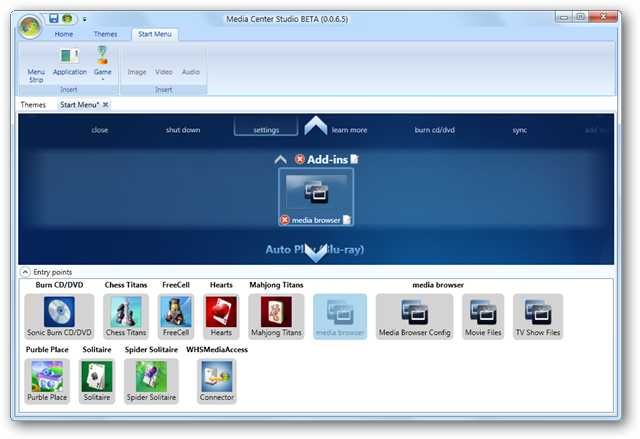
You will see a new Custom Menu strip appear on your Start Menu with the default name of Custom menu. You can change the name by clicking on the notepad icon just as we did earlier. For our example, we’ll change the name of the new strip to Add-ins.
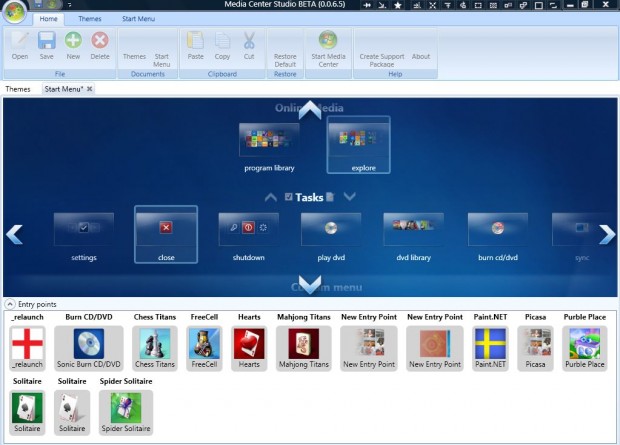
To add a new tile, click on Entry Points at the lower left of the application window.
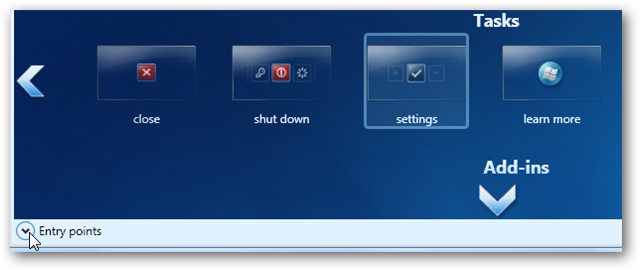
This will reveal all of your available Entry Points that can be added to the Media Center Menu. You should see the built-in Media Center Games and any Media Center Plug-ins you have added to your system.
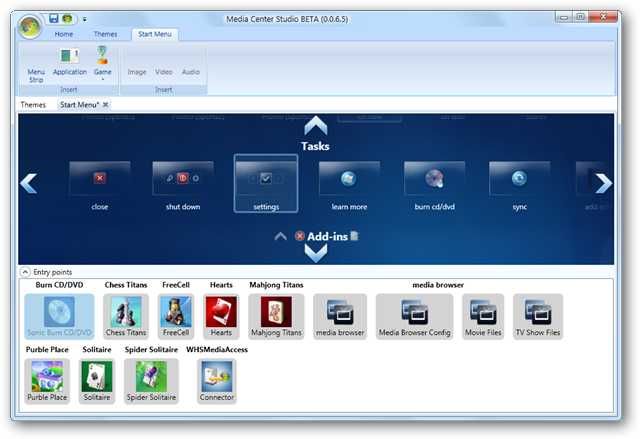
You can then drag and drop any of the Entry Points onto any of the Menu Strips. Below we’ve added Media Browser to our custom Add-ins menu strip.
You can also add additional applications to launch directly from Media Center. Click on the Application button on the Start Menu tab.
Note: Many applications may not work with your remote, but with keyboard and mouse only.
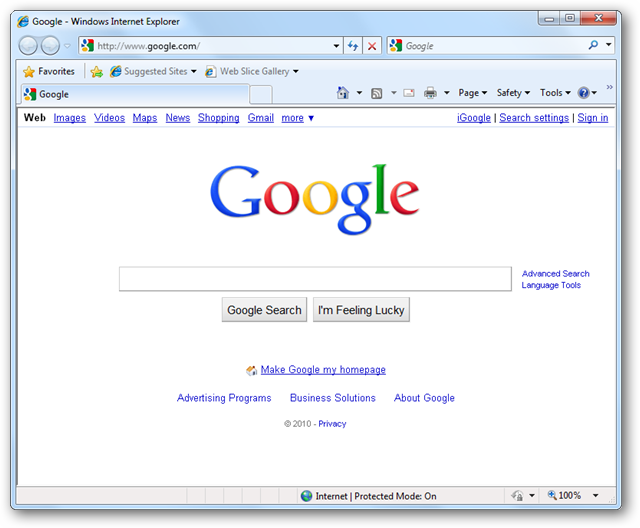
Type in a title which will appear under the tile in Media Center, and then type the path to the application. In our example, we will add Internet Explorer 8.
Note: Be sure to add the actual path to the application and not just a link on the desktop.
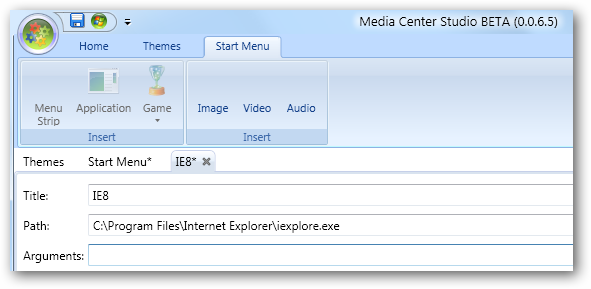
Click any of the check boxes to select any options under Required Capabilities. You can also browse to choose an image if you don’t care for the image that appears automatically.
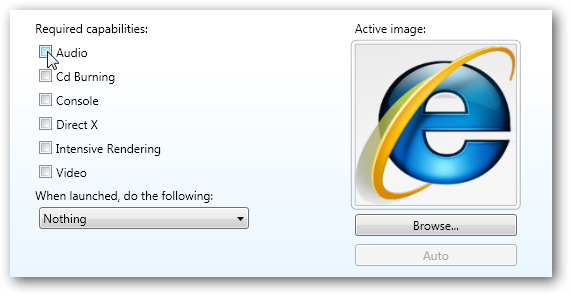
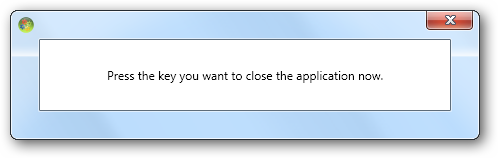
Next, you can select keyboard strokes to press to exit the application and return to Media Center. Click the green plus (+) button.
When prompted, press a key you’ll use to close the program. Repeat the process if you’d also like to select a keystroke to kill the program.
You’ll see your button programs listed below. When you’re finished, save your work and close out of Media Center Studio.
Now your new program entry point will appear in the Entry Points section. Drag the icon to the desired position on the Start Menu and save again before exiting Media Center Studio.
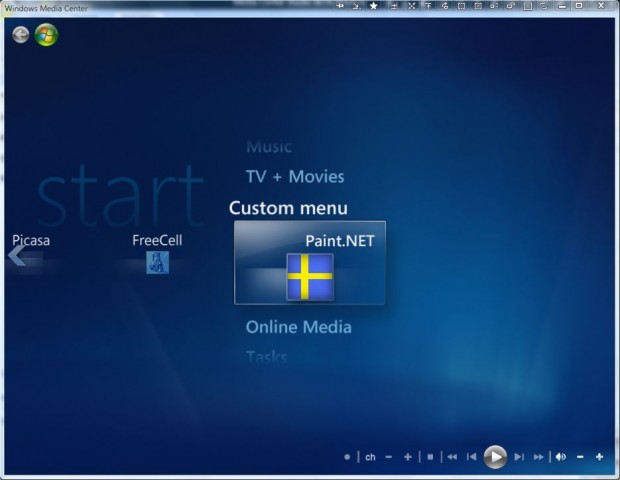
When you open Media Center you will see your new application on the start menu. Click the tile to open the application just as you would any other tile.
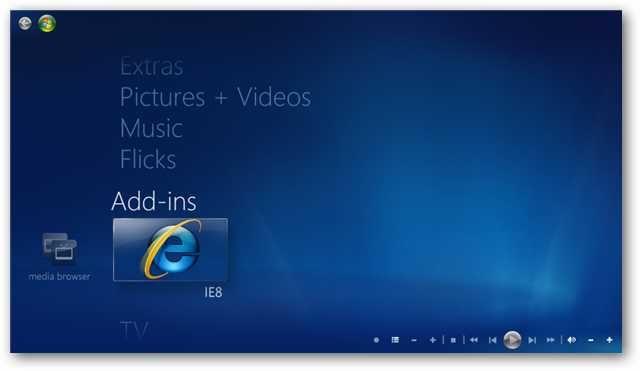
The application will open and minimize Media Center.
When you press the key you choose to close the program, Windows Media Center will automatically be restored.
Note: You can also exit the application through normal methods by clicking the red «X» or File > Exit.
Conclusion
Media Center Studio is a Beta application which the developer freely admits still has some bugs. Despite it’s flaws Media Center Studio is a powerful tool, and when it comes to customizing your Media Center start menu, it’s pretty much the only game in town. It works with both Vista and Windows 7, and according to the developer, has not been officially tested with extenders.
Media Center Studio can also be used to add custom themes to Windows 7 Media Center and we’ll be covering that in a future article.
Looking for more ways to customize your Media Center experience? Be sure to check out our earlier posts on Media Browser, as well as how to add Hulu, Boxee, and weather conditions your Windows 7 Media Center.
Download Media Center Studio [via Softpedia]
Windows Media Center is a multimedia program that allows users to enjoy music, videos, photos, and live TV on their computer. One of the key components of Windows Media Center is the Start Menu, which provides easy access to all the different features and functions of the program. While the default Start Menu layout is functional, some users may wish to customize it to better suit their needs and preferences.
Fortunately, there is a tool called Media Center Studio that allows users to easily customize the Windows Media Center Start Menu. In this article, we will discuss how to use Media Center Studio to personalize the Start Menu and create a customized experience that suits your individual tastes.
What is Media Center Studio?
Media Center Studio is a free tool developed by a community of Windows enthusiasts that allows users to customize various aspects of the Windows Media Center interface. With Media Center Studio, users can modify the Start Menu, create custom backgrounds, change the color scheme, and much more.
The tool is relatively easy to use and does not require any advanced technical knowledge. It provides a user-friendly interface that allows users to make changes to their Media Center layout quickly and easily.
How to download and install Media Center Studio
Before you can start customizing your Windows Media Center Start Menu with Media Center Studio, you will need to download and install the tool. Follow these steps to get started:
-
Visit the Media Center Studio website at http://www.adventmediacenter.com/ and click on the «Download» button.
-
Once the download is complete, open the installation file and follow the on-screen instructions to install Media Center Studio on your computer.
-
Launch the program by double-clicking on the Media Center Studio icon on your desktop or in the Start Menu.
-
You are now ready to begin customizing your Windows Media Center Start Menu!
Customizing the Windows Media Center Start Menu with Media Center Studio
Now that you have Media Center Studio installed on your computer, it’s time to start customizing the Start Menu. Follow these steps to personalize your Media Center experience:
-
Open Media Center Studio by double-clicking on the program icon.
-
In the main menu, click on the «Start Menu» tab to access the Start Menu customization options.
-
Here, you will see a list of all the items currently displayed in your Media Center Start Menu. To add a new item, click on the «+ Add» button at the bottom of the screen.
-
You can now choose from a variety of options to customize your Start Menu. For example, you can add a custom background image, change the text color, or adjust the layout of the Start Menu items.
-
Once you have made your desired changes, click on the «Save» button to apply them to your Media Center Start Menu.
-
To see your changes in action, open Windows Media Center and navigate to the Start Menu. You should now see your customized layout and settings reflected in the Start Menu.
Additional customization options
In addition to customizing the layout and appearance of the Start Menu, Media Center Studio offers a range of additional customization options to enhance your Media Center experience. Some of these options include:
-
Changing the color scheme: Media Center Studio allows you to change the color scheme of your Start Menu to match your personal preferences. You can choose from a variety of pre-set color schemes or create your own custom color scheme.
-
Adding custom backgrounds: In addition to changing the color scheme, you can also add custom background images to your Media Center Start Menu. This allows you to personalize your Start Menu with images that reflect your interests and style.
-
Rearranging menu items: Media Center Studio allows you to easily rearrange the items in your Start Menu to better suit your needs. You can move items around, group them together, or remove items that you don’t use frequently.
-
Creating custom shortcuts: With Media Center Studio, you can create custom shortcuts to your favorite programs, websites, or media files. This allows you to access your most-used items quickly and easily from the Start Menu.
Benefits of customizing the Windows Media Center Start Menu
Customizing the Start Menu in Windows Media Center with Media Center Studio offers a range of benefits for users. Some of the key advantages of personalizing your Media Center experience include:
-
Enhanced usability: By customizing the Start Menu, you can create a layout that is tailored to your needs and preferences. This can make it easier to find and access your favorite features and functions in Windows Media Center.
-
Improved aesthetics: Customizing the Start Menu allows you to create a visually appealing interface that reflects your personal style. You can choose colors, images, and layouts that make using Media Center a more enjoyable experience.
-
Increased efficiency: By adding custom shortcuts and rearranging menu items, you can streamline your workflow and access your most-used items more quickly. This can save you time and make using Windows Media Center more efficient.
-
Personalization: Customizing the Start Menu allows you to personalize your Media Center experience and make it your own. You can create a layout that reflects your interests, preferences, and style, making using Windows Media Center a more enjoyable and personalized experience.
Conclusion
Customizing the Windows Media Center Start Menu with Media Center Studio is a great way to personalize your Media Center experience and create a layout that suits your individual needs and preferences. With a range of customization options available, you can easily create a Start Menu that is tailored to your style and interests.
Whether you want to change the color scheme, add custom backgrounds, rearrange menu items, or create custom shortcuts, Media Center Studio provides the tools you need to customize your Media Center Start Menu quickly and easily. By following the steps outlined in this article, you can begin customizing your Start Menu today and enjoy a more personalized and efficient Windows Media Center experience.
The Windows Media Center Start menu includes a variety of menu strips from which you can access various media items such as pictures, video, etc. Windows Media Center doesn’t have many Start menu customization options. However, you can still customize the Start menu with the Media Center Studio software.
To add Media Center Studio to Windows, open this page and press the Download from Softpedia option. That saves the Media Center Studio Zip file, which you can extract by right-clicking it and selecting Extract All. Then choose a path for the extracted folder from which you can open the software’s window below.
Click the Start Menu tab to customize the Media Center’s menu strips and tiles. Scroll through the various menu strips by clicking the arrows at the top, bottom, right and left of the window.
Customizing the Tiles
Now you can customize the tiles of any of the menu strips. Remove tiles from the menu strips by selecting them and clicking the check boxes. Alternatively, adjust their position within the Media Center by dragging tiles to one of the green + signs in the shot below.
You can enter alternative titles for any of the tiles. Select a tile and then click the notepad icon on the right. Enter a new title for the tile in the text input box.
Adding New Menu Strips the Media Center
To add new menu strips to the Windows Media Center, click the Start Menu tab and Menu Strip. Then you’ll find a new Custom menu on the Start menu as in the shot below. You can adjust that menu strip’s position, and any other on the Start menu, by clicking the up and down arrows on the left and right of the custom menu.
Now add some tiles to the custom menu by selecting Entry points at the bottom left of the window. They will include some of the Media Center games and plug-ins. Drag some of those tiles onto the custom menu as in the shot below.
Adding New Application Tiles to the Media Center
You can also add your own application tile shortcuts to the menu strips. Select the Start Menu tab and press Application to open the window below. There enter a title for the tile, and then the path of the application for the tile to open. You can choose an image for the tile by pressing the Browse button. Select the Home tab and press the Save button to save the application tile. Then add the tile to the Start menu by clicking Entry points and dragging it onto a menu strip.

When you’ve customized the Media Center, press the Save button. Now when you open the Windows Media Center you’ll find it includes your new menu strips and application tiles as in the shot below.
Overall, Media Center Studios is a great package to customize the Windows Media Center Start menu with. With the software you can greatly expand the number of tile shortcuts in the Media Center, add new menu strips and adjust the Start menu layout. It also has other options for adding custom themes to the Media Center.
Related Posts
Matthew is a freelancer who has produced a variety of software articles for sites such as Bright Hub and Captured Snapshot. He has an A — Level in ICT, at grade C, and is proficient with a number of software packages. Matthew also has a golf blog http://amateurgolfer.blogspot.com/.
Check out his book at http://battlesofthepacificwar.blogspot.co.uk/. Battles of the Pacific War 1941 -1945 recalls where, when and how the Pacific War was won and lost within the battlefields of the Pacific.
Even though Windows Media Center offers a nice set of tools bundled in different menus ranging from Extras, Pictures+Videos, to Music, etc., many users find some options & menu items absolutely useless, thus, want to customize the Start menu along with included tools/options as per their liking. Media Center Studio is a tool for users who want to customize their Windows Media Center. It is a WMC customization tool which emulates same layout to let anyone easily change the main menu titles, while options for removing menu items are also provided to keep only most frequently used options/tools.
Additionally, with Media Center Studio, you can import themes to change the overall look of WMC. To edit the WMC Start menu, launch the application, and head over to Start Menu tab. Each menu title can be changed by clicking a small writing pad–imaged icon, navigation keys can be seen to browse through menu items spread across the screen, a check box is attached with each menu item, you can uncheck the box to disable the respective item from its menu.

Once you’ve made changes, click Save followed by Start Media Center in toolbar to view the changes made in WMC. If anything goes wrong, Restore Default option is always available to retain the default WMC menu configurations back.

The application include options to create customized menu items for WMC along with inserting image and audio files. Since it is in beta, you might encounter some problems while adding specified image / audio files or inserting a new menu item.
During testing, it changed menu titles and disabled menu items without showing any errors and lags. It supports Windows Vista and Windows 7. Testing was done on Windows 7 x86 system.
(https://www.addictivetips.com/app/uploads/2012/07/MCS-Installer.exe) Download Media Center Studio (The developer website is down so we are hosting the installer on our servers)

Некоторые пользователи не хотят вмешиваться в программную часть Windows Media Center и менять его интерфейс, и я их понимаю. Так как настройка HTPC начинается с установки всех необходимых кодеков, то могу посоветовать самый популярный пакет под названием K-Lite Codec Pack Full, но Windows Media Center не желает показывать видеофайлы с расширением MKV и AVI в разделе Фильмы, что можно исправить следующим образом:
- Откройте Windows Media Player и на вкладке «Сервис | Параметры | Быстродействие» отметьте флажком «Включить ускорение видео DXVA для файлов WMV». Для видеоформатов вы больше не можете ничего сделать, однако важный MKV все еше отсутствует.
- Инсталлируйте пакет DivX Plus Codec Pack — пакет добавит фильтр MKV на основу Media Foundation, но при установке фильтра ваш компьютер должен быть подключен к Интернету. При выборе компонентов убедитесь, что галочка стоит только перед «DivX Plus Codec Pack» — все остальное вам не потребуется.
- В отношении аудиоформатов прежде всего не хватает Dolby АСЗ и DTS. Оба используются при воспроизведении DVD и Blu-ray, но недоступны в Windows Media Center. Ситуацию можно исправить с помощью фильтра АСЗ: если во время его установки активировать драйвер ACM в 32- или 64-битной версии, это позволит задействовать фильтры от Microsoft АСЗ и DTS и для всех других форматов файлов — во всяком случае, в программе Media Center. Если же вы предпочитаете в качестве мультимедийного центра использовать другие проигрыватели, вам также потребуется отдельно выбрать «АСЗ Filter».
Настройка воспроизведения видеофайлов в Windows 7
Для того чтобы Windows 7 действительно могла воспроизвести файлы любых форматов, отключите Media Foundation и установите фильтр DirectShow. Удобнее всего воспользоваться пакетом кодеков, специально разработанным для такого случая — Shark007 Pack. Загрузите кодеки для Windows 7, а для 64-битных систем — х64 Components. Перед установкой этого пакета удалите все бесплатные кодеки, которые использовались ранее. После инсталляции Shark007 Pack его необходимо настроить. Перейдите в меню «Пуск», выберите папку Shark007Codecs и запустите от имени администратора приложение Settings Application. На вкладке «MKV» поставьте галочку в поле «Disable the «DivX Media Foundation splitter». На вкладке «SWAP» отметьте флажками «Disable Windows Media Foundation» и «Use FFDshow DXVAforWC 1 not Microsoft», а для «DirectShow» слева сверху используйте «Use FFDshow’s codec». В разделе «MPG-MP4» для «MP4 Playback» включите «Use Haali’s splitter», а для «Overall MPEG Playback 1/2 PS/TS» — «Use Gabest Blu-ray splitter». Если ваша видеокарта поддерживает аппаратное ускорение, на вкладке «Н264» слева вверху поменяйте параметры на «Do not use FFDshow», а справа — на «Use FFDShow DXVA codec». Если же такой функции нет, включите «Use FFDshow with multithreading». На вкладке «AVI» в разделе «Playback» установите «Use Haali’s splitter». В завершение подтвердите настройки в обоих модулях, нажав на вкладке «Misc» кнопку «Save ALL Settings».
Плагины для Windows Media Center
Для Windows Media Center существует большое количество различных плагинов, позволяющих настроить это средство воспроизведения в соответствии с индивидуальными потребностями. Чтобы сделать WMC главным и единственным плеером для ваших файлов, программе не хватает нескольких важных функций воспроизведения. C помощью плагина Media Control вы сможете при проигрывании менять настройки изображения, а также звуковую дорожку и субтитры. Все опции будут отображаться во время показа фильма по нажатию сочетания клавиш «Ctrl+Alt+В».
DVRMSTOOLBOX. Данная программа обрабатывает записи телепередач, сделанные с помощью Media Center. Она распознает рекламу и вырезает ее.
Media Center Studio. В настоящий момент это единственное комплексное решение для преображения интерфейса Media Center. Позволяет полностью менять меню Windows Media Center в несколько шагов. Установка — Запуск — Вкладка Start Menu — Переименование — Сохранение. Теперь ищем названия фильмов на Кинопоиске и при скачивании сразу указываем корректное имя файла – данные о видеофайле будут подгружаться автоматически (пиктограмма с обложкой, фоновое изображение, описание и т.д.).
AV ART FIXER. Эта программа связывает обложку альбома с соответствующим аудиофайлом.
CLIPSHOW. Данный плагин добавит во все ваши видеофайлы шкалу времени. Кроме того, он предлагает функцию случайного воспроизведения.
MCE Standby Tool. Эта программа решает проблемы Windows с функцией режима ожидания — например, когда Media Center должен начать запись ТВ-программы по расписанию.
Media Browser — плагин для Windows Media Center, который предназначен для организации удобного просмотра коллекции фильмов и видеозаписей имеющихся на вашем компьютере. Media Browser предлагает большое количество контента, связанного с собственными медиабиблиотеками. Этот браузер позволяет управлять ТВ- сериалами и фильмами более удобно, чем соответствующая функция в Windows Media Center. При установке плагин спросит дату, старше которой фильмы будут считаться просмотренными (будет установлена галочка). Настройки можно производить либо в самом медиацентре, либо с помощью специального мастера. Для минимальной настройки требуется указать пути к папкам с фильмами. Видеофайлы можно отсортировать по типу, также им можно присвоить возрастные ограничения.
Дополнительные возможности Media Browser:
- «родительский контроль» — возрастные ограничения для различных каталогов с фильмами, что также позволяет скрывать от детских глаз всю «клубничку» под пароль;
- возможность указать для определённых типов файлов альтернативный проигрыватель в Windows Media Center;
- вывод информации о погоде в меню;
- поддержка альтернативных тем;
- уведомление о просмотренном фильме.
Чтобы получить информацию о фильмах из интернета (сайт Кинопоиск), рекомендую использовать плагин для Media Browser — Кинопоиск (KinopoiskMetadataProvider.dll) — и наличие подключения к интернету дает возможность автоматически получать всевозможную информацию об интересующем фильме на русском языке: постеры, содержание фильма, состав актеров, кадры из фильма и т.д. Качаем свежую версию и кладём его в папку «C:\ProgramData\MediaBrowser\Plugins».
Внимание! Для работы плагина требуется называть файлы или папки, содержащие 1 видео-файл, полным русским названием, совпадающем с названием на Кинопоиске, и годом выпуска указанного в скобках. Спец. символы можно пропускать.
Подробная настройка плагина Media Browser
После установки у Media Browser появляется своя пиктограмма в стартовом меню Windows Media Center. За иконку плагина отвечает файл Application.png в папке с программой. Подписи иконки можно изменить с помощью программы Media Center Studio, описанной выше. Обратите внимание, что данный плагин позволяет в графическом режиме настроить стартовое меню WMC, переименовав или полностью исключив из него все неиспользуемые пункты (например: Дополнения, ТВ, Фильмы и т.д.). В сети можно скачать немало красивых альтернативных тем оформления для МС, которые также ставятся посредством Media Center Studio.
В комплекте с Media Browser идет собственный конфигуратор, позволяющий тонко настроить приложение, выбрать папки с видео, создать несколько категорий для более удобной сортировки, подключить плагины, настроить запуск внешнего плеера, а также включить функцию родительского контроля. Для получения доступа к дополнительному контенту откройте меню «Пуск | Все программы | Media Browser | Media Browser Configurator». Во вкладке «podcasts» вы cможете добавлять подкасты, а через раздел «plug-ins» — включить трейлер фильма в библиотеку Media Browser.
Следует добавить хотя бы одну категорию на вкладке «Media collection» и назначить ей одну или несколько папок с контентом. Здесь же можно задать иконку для категории с помощью кнопки Change Image — она будет отображаться в главном меню плагина Media Browser, если такую опцию предусматривает выбранная тема.
После запуска плагина можно убедиться, что категория успешно создана и папка включена. Внутри категории можно перемещаться по коллекции в одном из пяти режимов отображения (пункт «View»), производить сортировку по названию, дате добавления, году выхода, оценкам IMDB, продолжительности и факту просмотра. А также выбирать фильмы не по названию, а по актеру, жанру, студии, году и режиссеру, но Media Browser не определяет, о каких фильмах идет речь, когда их название указано кириллицей. Если использовать оригинальные названия с IMDB.com, информация будет получена в полном объеме с сайта themoviedb.com, но только на английском языке.
Интеграция альтернативного плеера в Windows Media Center
Встроенный в Windows Media Center плеер основан на движке Windows Media Player и имеет схожие с ним возможности. Для большинства файлов их хватает, но всегда хочется большего. Например, переключения аудиодорожек одной кнопкой при использовании любого контейнера; включения и отключения субтитров — как встроенных, так и внешних; использования тонкого масштабирования картинки с целью уменьшить черные полосы сверху и снизу, отнимающие порой больше 30% площади экрана. В таких случаях можно задействовать любой внешний плеер, который будет вызываться из МС, а после окончания просмотра управление будет возвращаться обратно в оболочку.
Переходим к настройке и интеграции внешнего плеера. Рассмотрим Media Player Classic HomeCinema (MPC HC), но на его месте может быть KMPlayer (Я предпочитаю его, но все же более популярен MPC HC). Самое главное — это наличие возможности настраивать горячие клавиши, а также использовать аппаратное ускорение для воспроизведения тяжелых форматов. MPC HC содержит встроенный декодер H.264 (AVC), отлично работающий в паре с EVR (улучшенный видеорендер) и NVIDIA ION. Хотя никто не мешает заменить его или же дополнить другими популярными декодерами — CoreAVC, Nero и ArcSoft.
Настройка плеера Media Player Classic:
- сменить язык интерфейса на русский (View → Language → Russian);
- в меню Настройки → Проигрыватель включить пункты «Показать OSD» и «Запоминать позицию в файле»;
- в меню Настройки → Полный экран активировать пункт «Запускать файлы в полноэкранном режиме»;
- если не используются внешние фильтры с поддержкой DXVA, то необходимо включить DXVA-декодеры в меню «Встроенные фильтры».
Для интеграции внешнего плеера с Media Browser требуется запустить конфигуратор, переключить режим отображения настроек с basic на advanced и добавить желаемые пары сочетаний «плеер + расширение» на вкладке external players. Конфигуратор поддерживает автомонтирование файлов ISO и автозапуск воспроизведения внешним DVD/BD-проигрывателем. Произвести такую настройку можно на вкладке extenders + iso.
Теперь при запуске воспроизведения выбранных типов файлов Media Browser будет сворачиваться и запускать внешний плеер, а после его закрытия — вновь возвращаться к каталогу. Если файл был воспроизведен не до конца, то при повторном открытии этого файла MPC HC начнет показ с того же места, на котором был прерван просмотр в последний раз.
Часть кнопок пульта RC6 работают в Media Player Classic HomeCinema без дополнительной настройки: воспроизведение, пауза, стоп, управление громкостью и переход к следующему/предыдущему файлу. Назначить любой клавише пульта любую функцию плеера можно с помощью утилиты под названием EventGhost.
EventGhost — это мощная утилита для автоматизации процессов на ПК под управлением MS Windows, производящейся за счет назначения макросов разной степени сложности на нажатие определенной кнопки пульта. EventGhost поддерживает огромное число ИК-приемников, полный перечень можно найти на сайте разработчика. Для управления плеером используются элементарные макросы в одно действие: кнопка на пульте эмулирует нажатие одной или нескольких клавиш на клавиатуре.
Пример настройки EventGhost и пульта Microsoft RC6 для управления плеером Media Player Classic Home Cinema:
- запускаем EventGhost от имени администратора, создаем новый конфигурационный файл: меню File → New;
- для работы с MCE-совместимыми приемниками добавляем соответствующий плагин: Configuration → Add Plugin → Microsoft MCE Remote;
- поскольку в нашем случае пульт будет использоваться и для управления MC, галку с Disable HID service необходимо снять;
- добавляем макрос, эмулирующий нажатие клавиш: Configuration → Add Macro → Window → Emulate Keystrokes;
- в графе Text to type прописываем необходимое сочетание в фигурных скобках, например: {Ctrl+Shift+Left}, {e} или {Alt+1};
- нажимаем на пульте кнопку, которой будет назначена новая функция, и убеждаемся, что в поле Log появилась новая запись вида MceRemote.Имя_кнопки (например, MceRemote.Forward);
- остается только перетащить эту запись из поля Log в поле Configuration непосредственно на значок нового макроса.
Шаги с четвертого по седьмой повторяются столько раз, скольким кнопкам требуется назначить новую функцию. По окончанию настройки файл конфигурации необходимо сохранить, а саму программу прописать в автозагрузку в минимизированном состоянии (File → Options → Autostart и Minimize). Обратите внимание, что корректно работать EventGhost сможет только в случае запуска с правами администратора, в связи с чем от UAC (контроль учетных записей пользователей) придется отказаться либо искать обходные пути решения этой проблемы.
Теперь остается только зайти в настройки плеера и привести Клавиатурные сочетания (Настройки → Проигрыватель → Клавиши) в соответствие с макросами EventGhost.
Вход и выход из режима сна. Проблемы и решения.
Проблема 1. По умолчанию кнопка выключения PC на пульте Microsoft RC6 переводит ПК в режим сна, однако включить его обратно можно только с кнопки на корпусе. Исправляется этот недостаток через BIOS, путем отключения функции Deep Sleep и включением опции Wake up from USB (в разных версиях BIOS название функции отличается).
Проблема 2. Другой неприятной мелочью может стать самопроизвольное включение HTPC из состояния сна, происходящее, как правило, глубокой ночью. В таком поведении «виновата» опция включения ПК для выполнения одной из задач по расписанию. Отключение: Панель управления | Электропитание | Настройка плана электропитания | Изменить дополнительные параметры питания | Сон | Разрешить таймеры пробуждения | Выключить.