
В случае, если вы не хотите, чтобы кто-то мог использовать ваш компьютер, когда вы от него отлучились, в Windows есть возможность вручную настроить время до автоматической блокировки — по истечении этого времени вход в систему потребуется выполнить заново.
В этой инструкции для начинающих подробно о методах автоматической блокировки в Windows 11/10 и настройке времени до неё. Также может быть полезен дополнительный связанный с темой материал: Возможности настройки экрана блокировки Windows в реестре.
Параметры экрана блокировки
Основной метод настройки времени до блокировки компьютера (системы) — использование параметров экрана блокировки. В Windows 11 и 10 шаги будут почти идентичными:
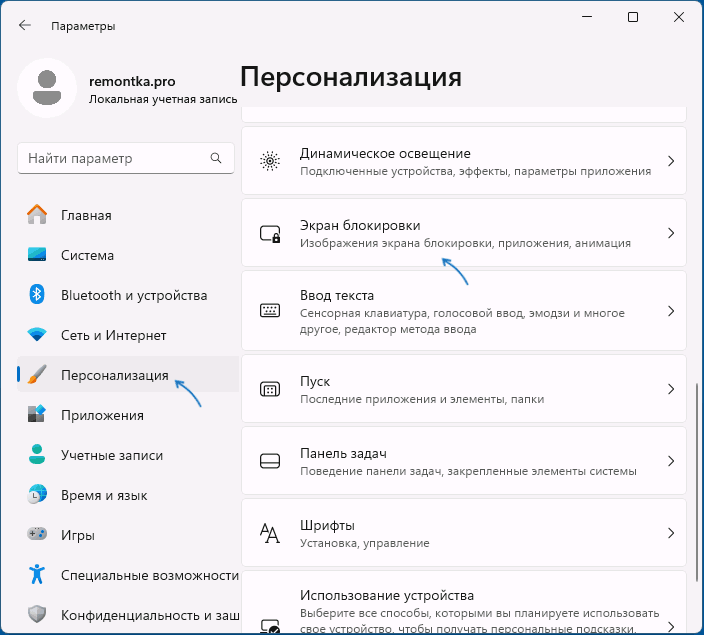
- Откройте «Параметры» (например, через контекстное меню кнопки «Пуск») — Персонализация — Экран блокировки.

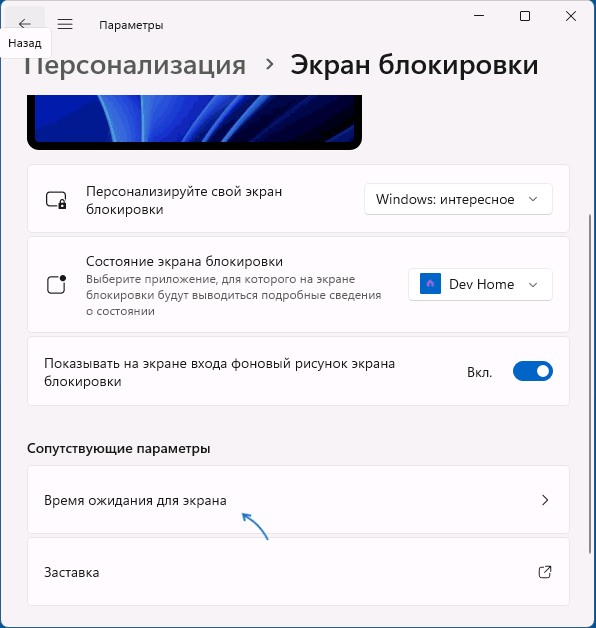
- В Windows 11 нажмите «Время ожидания для экрана» в разделе «Сопутствующие параметры», в Windows 10 — «Параметры времени ожидания для экрана».

- В разделе «Экран и спящий режим» установите время отключения экрана.
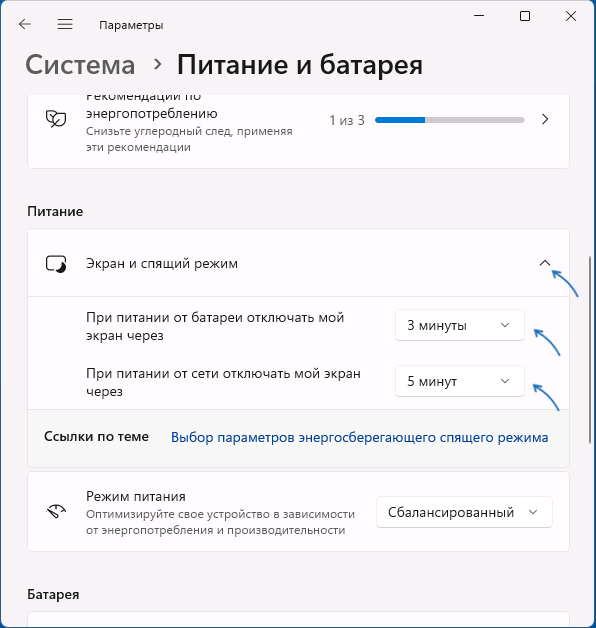
После выполнения этих действий экран ПК или ноутбука будет выключен при бездействии в течение указанного времени, а при последующем его включении по нажатии клавиш или движению мыши пользователь попадет на экран блокировки для входа в систему.
Это основной метод, доступный в системе, однако имеет свои нюансы: например, при его использовании выключается экран, что не всегда является желаемым. В этом случае можно воспользоваться дополнительным вариантом: на 2-м шаге вместо «Время ожидания для экрана» нажмите «Параметры заставки».

Вы попадете в окно настроек экранной заставки (скринсейвера), где можно выбрать заставку, указать время до её включения при бездействии системы и установить отметку «Начинать с экрана входа в систему» — чтобы после заставки потребовалось выполнять вход в систему.
Дополнительная информация
В завершение — несколько дополнительных деталей, касающихся блокировки системы автоматически или вручную:
- Вы можете заблокировать компьютер вручную с помощью сочетания клавиш Win+L или нажав по имени пользователя в меню «Пуск» и выбрав пункт «Блокировка».
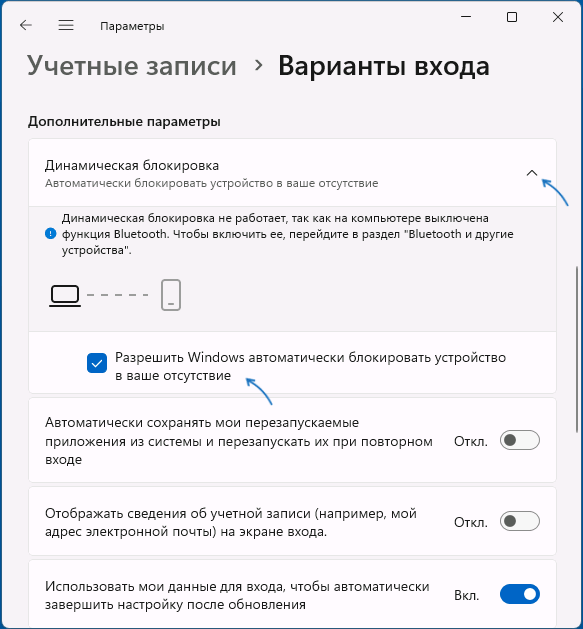
- Если ваш смартфон и компьютер связаны по Bluetooth, вы можете включить опцию «Динамическая блокировка» в разделе Параметров «Учетные записи» — «Варианты входа». В этом случае Windows будет блокироваться, когда связь с вашим мобильным устройством будет теряться.

- При необходимости можно отдельно настроить время выключения экрана на экране блокировки.
Если у вас остаются вопросы по рассмотренной теме, можно задать их в комментариях ниже, я постараюсь помочь.

Lock screen timeout determines how long your computer waits while inactive (i.e., when no mouse or keyboard input is detected) before activating the lock screen.
You can change the duration of inactivity that’s needed to pass before Windows locks your screen. Here’s what you need to know.
What Is Lockscreen Timeout?
The lock screen timeout in Windows 11 is the setting that determines how long the system waits during inactivity before displaying the lock screen. It’s designed to secure the device by locking it when it’s not in use and to save power, particularly on battery-operated devices.
A shorter timeout improves security and conserves energy by locking the device sooner during inactivity. A longer timeout keeps the device accessible for extended periods but reduces security and increases power consumption.
Adjusting this setting allows you to balance security with convenience.
You can adjust the time of inactivity needed to lock the screen in the Settings app.
- Right-click the Start menu icon and click Settings to open the Settings app. Alternatively, use the Windows + I keyboard shortcut.

- Next, click Personalization in the left-hand pane and then click Lock screen.

- Scroll down to the Related settings section and click Screen timeout.

- On the next screen, scroll down to the Power section and click Screen and sleep.

- The menu will expand, where you’ll find two options that you should pay attention to: One for when your device is on battery and another for when it’s plugged in. Choose the desired timeout duration for each option.

The change takes place immediately.
Give Your Windows 11 PC a Timeout Tune-up
Adjusting the lock screen timeout in Windows 11 improves security and saves power. Find the right balance for your lock screen’s inactivity period to keep your machine alive and the information inside away from potential threat actors.
Beyond this, you can also customize many other settings on your Windows 11 device, like the right-click context menu, the scrollbar, Search features, and a lot more.
Related Posts
- How to Fix a “This file does not have an app associated with it” Error on Windows
- How to Add OneDrive to Windows File Explorer
- How to Fix an Update Error 0x800705b4 on Windows
- How to Resolve “A JavaScript error occured in the main process” Error on Windows
- How to Fix the Network Discovery Is Turned Off Error on Windows
Ready for the best newsletter in tech?
Get daily tips, tricks, guides, and special offers delivered right to your inbox.
By default, Windows 11’s lock screen times out and switches off the monitor after just a minute. When you try to enter into your PC, you need to type in the user account password to access your desktop. It is very little time, and a lot of Windows users are not happy with this behavior. However, it is possible on Windows 11 to increase the screen time out. If you are one of those Windows users who are not happy with a one-minute screen lock, you can increase the time. In this gearupwindows article, we will guide you on increasing the Windows 11 lock screen timeout.
There are at least two ways through which you can change the lock screen timeout on Windows 11. Either use Control Panel or Settings app. Ultimately, both will do the same job.
The Control Panel does not allow you to change the lock screen timeout settings. So, you need to take the help of the Windows Registry to appear this setting under Control Panel. Then, you can increase the lock screen timeout according to your needs on your computer using Control Panel.
How do I Increase the Windows 11 Lock Screen Timeout using Control Panel?
Follow these steps to increase the Windows 11 Lock Screen Timeout through Control Panel:-
Step 1. Open Registry Editor.
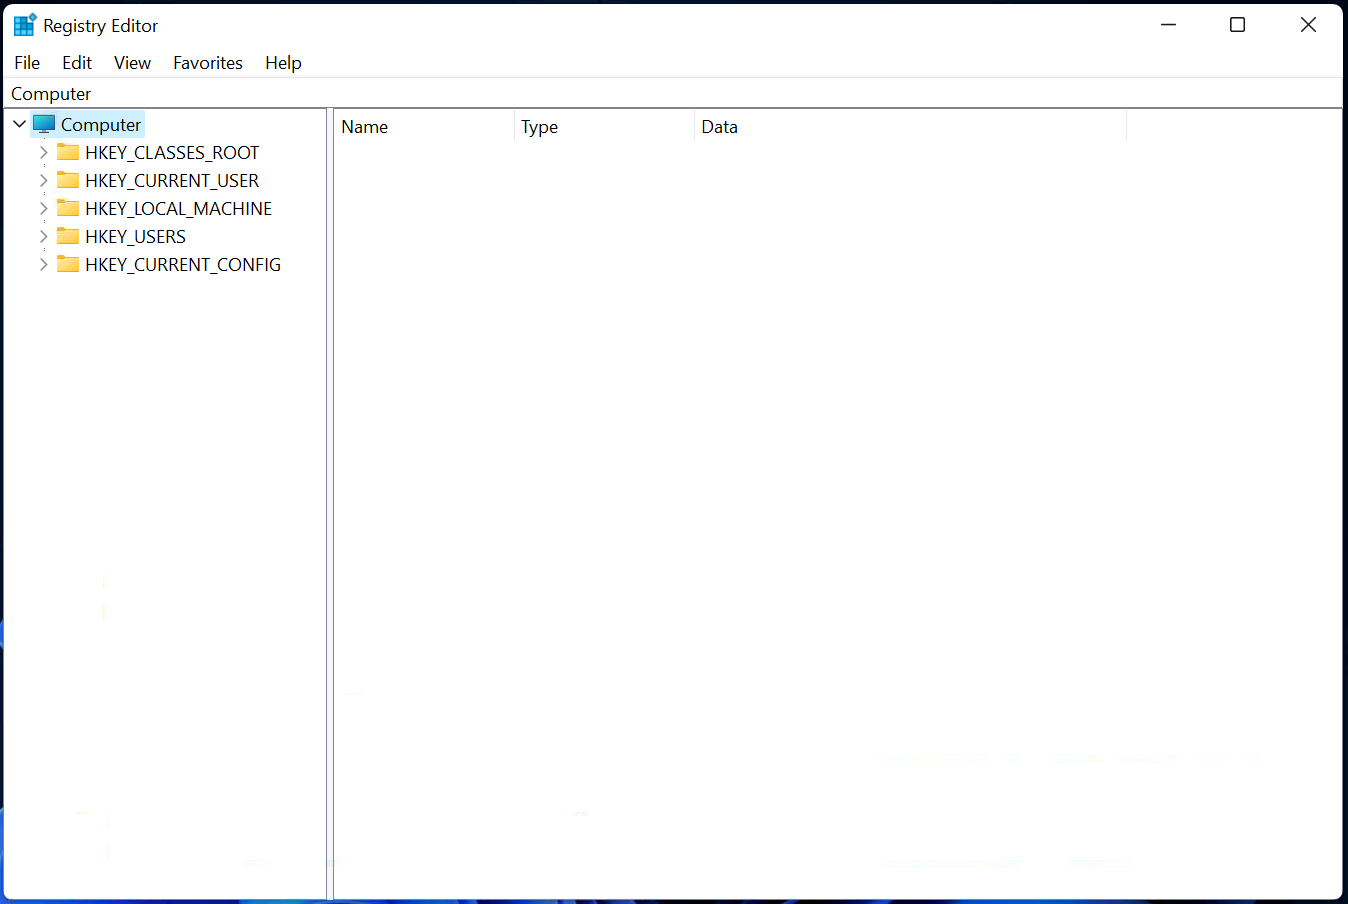
Step 2. When Registry Editor opens, navigate to the following key from the left side pane:-
Computer\HKEY_LOCAL_MACHINE\SYSTEM\CurrentControlSet\Control\Power\PowerSettings\7516b95f-f776-4464-8c53-06167f40cc99\8ec4b3a5-6868-48c2-be75-4f3044be88a7
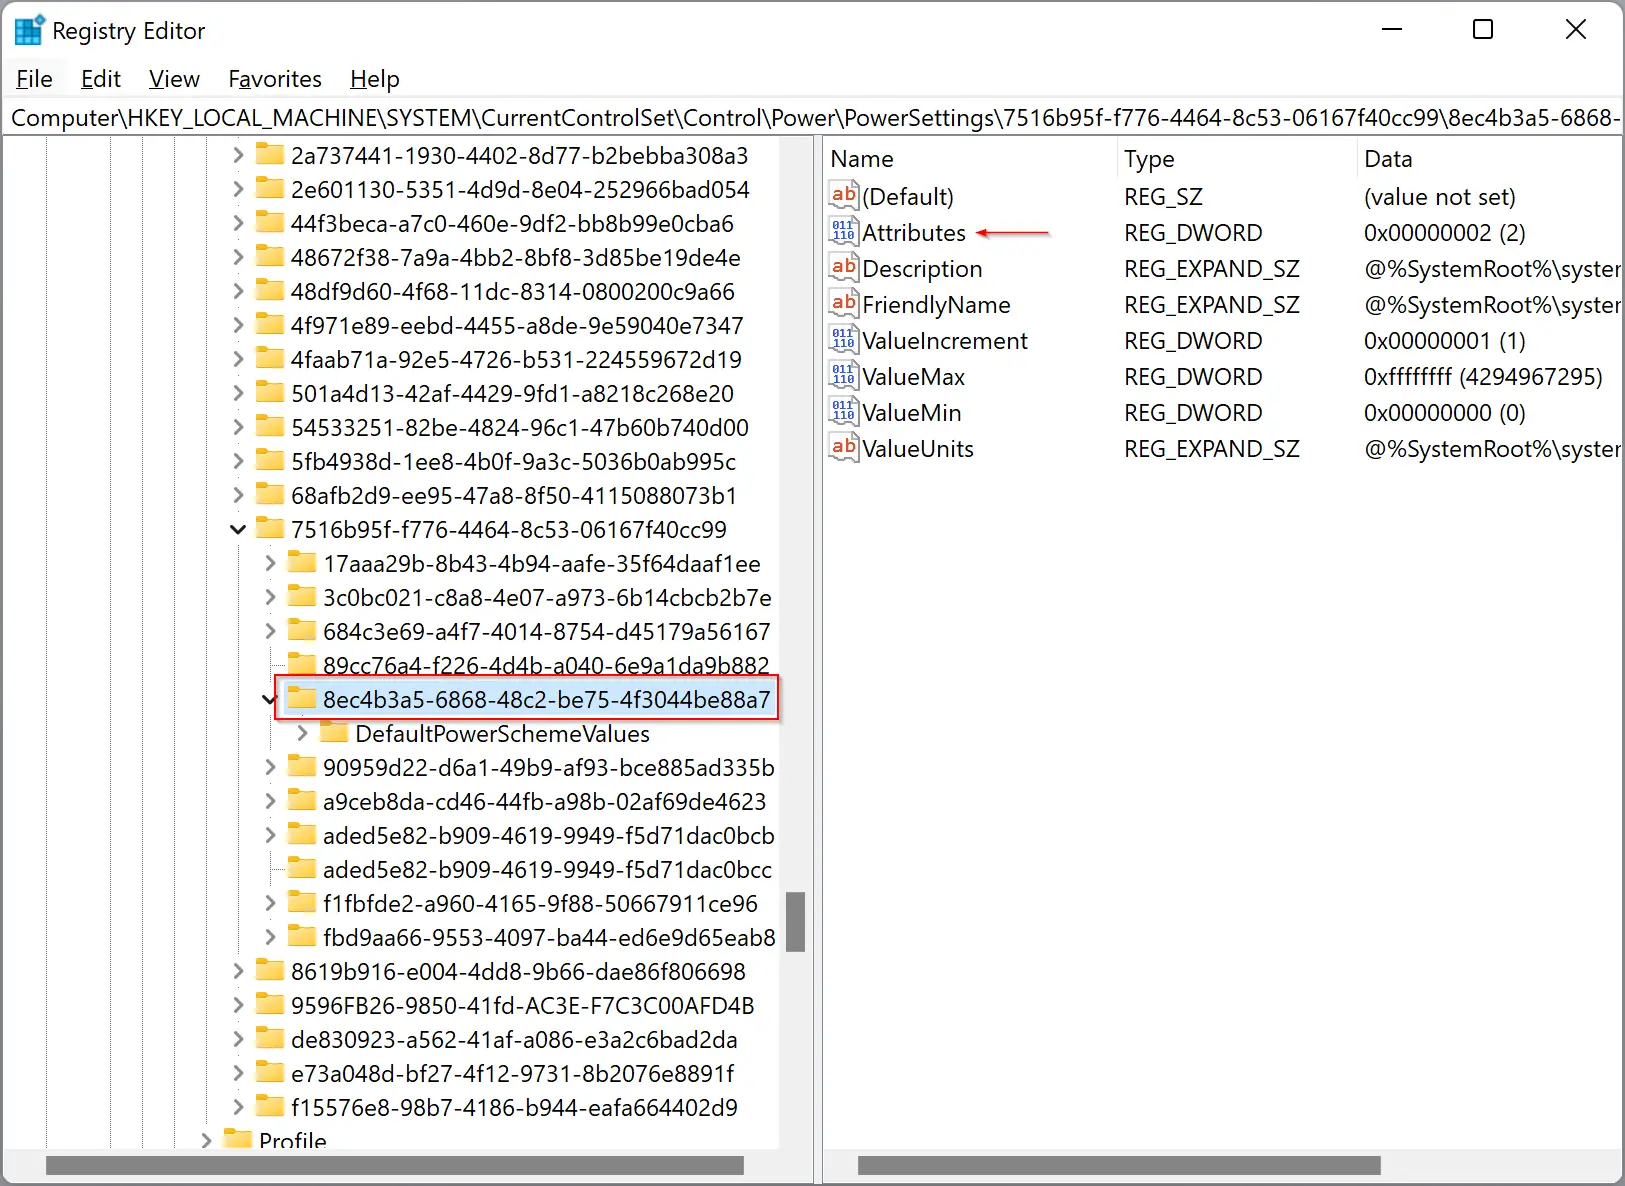
Step 3. On the right side pane, locate the Attributes DWORD (32-bit) Value and double-click to open its settings.
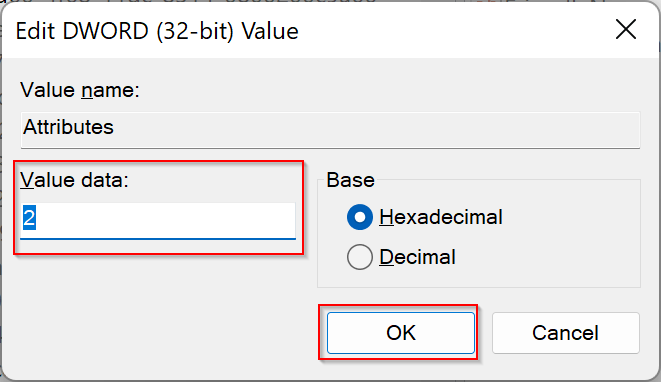
Step 4. Now enter 2 in the Value data field and then click the OK button.
That’s all. You can close the Registry Editor. Next, you need to increase the lock screen time on Control Panel.
Step 5. Open Control Panel.
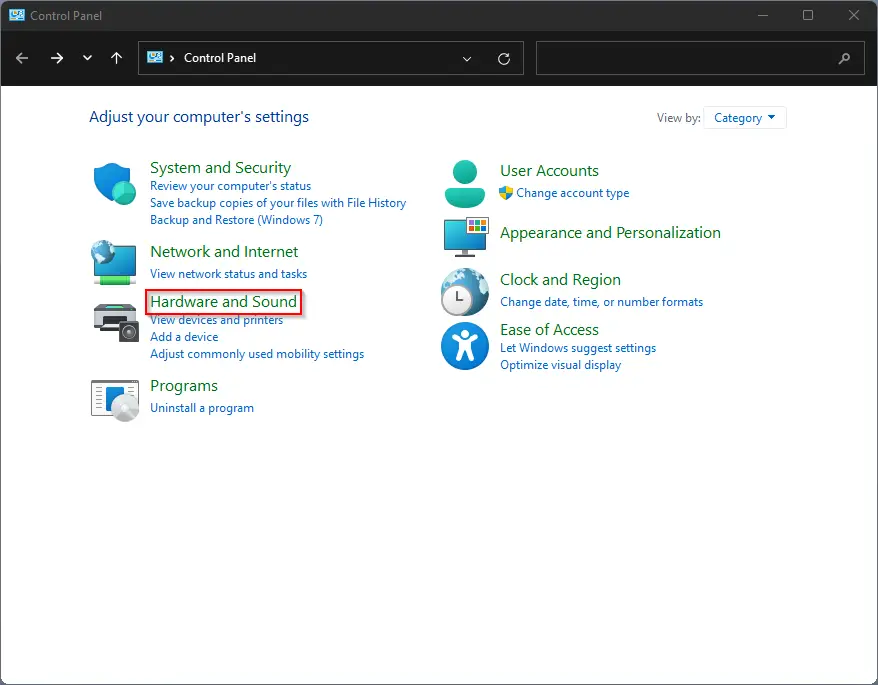
Step 6. When the Control Panel window opens, click the Hardware and Sound category.
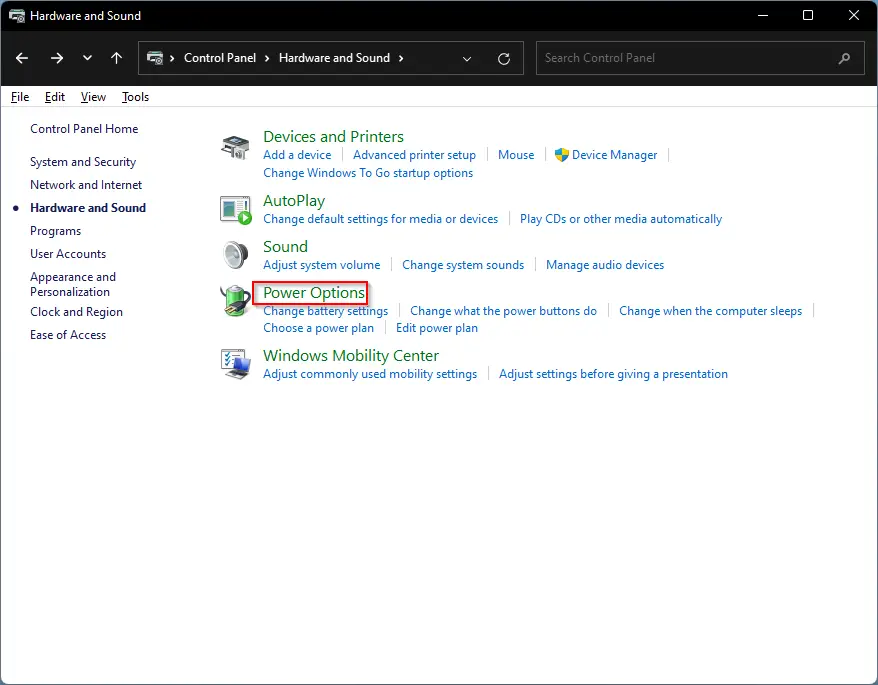
Step 7. In the next window, click the Power Options.
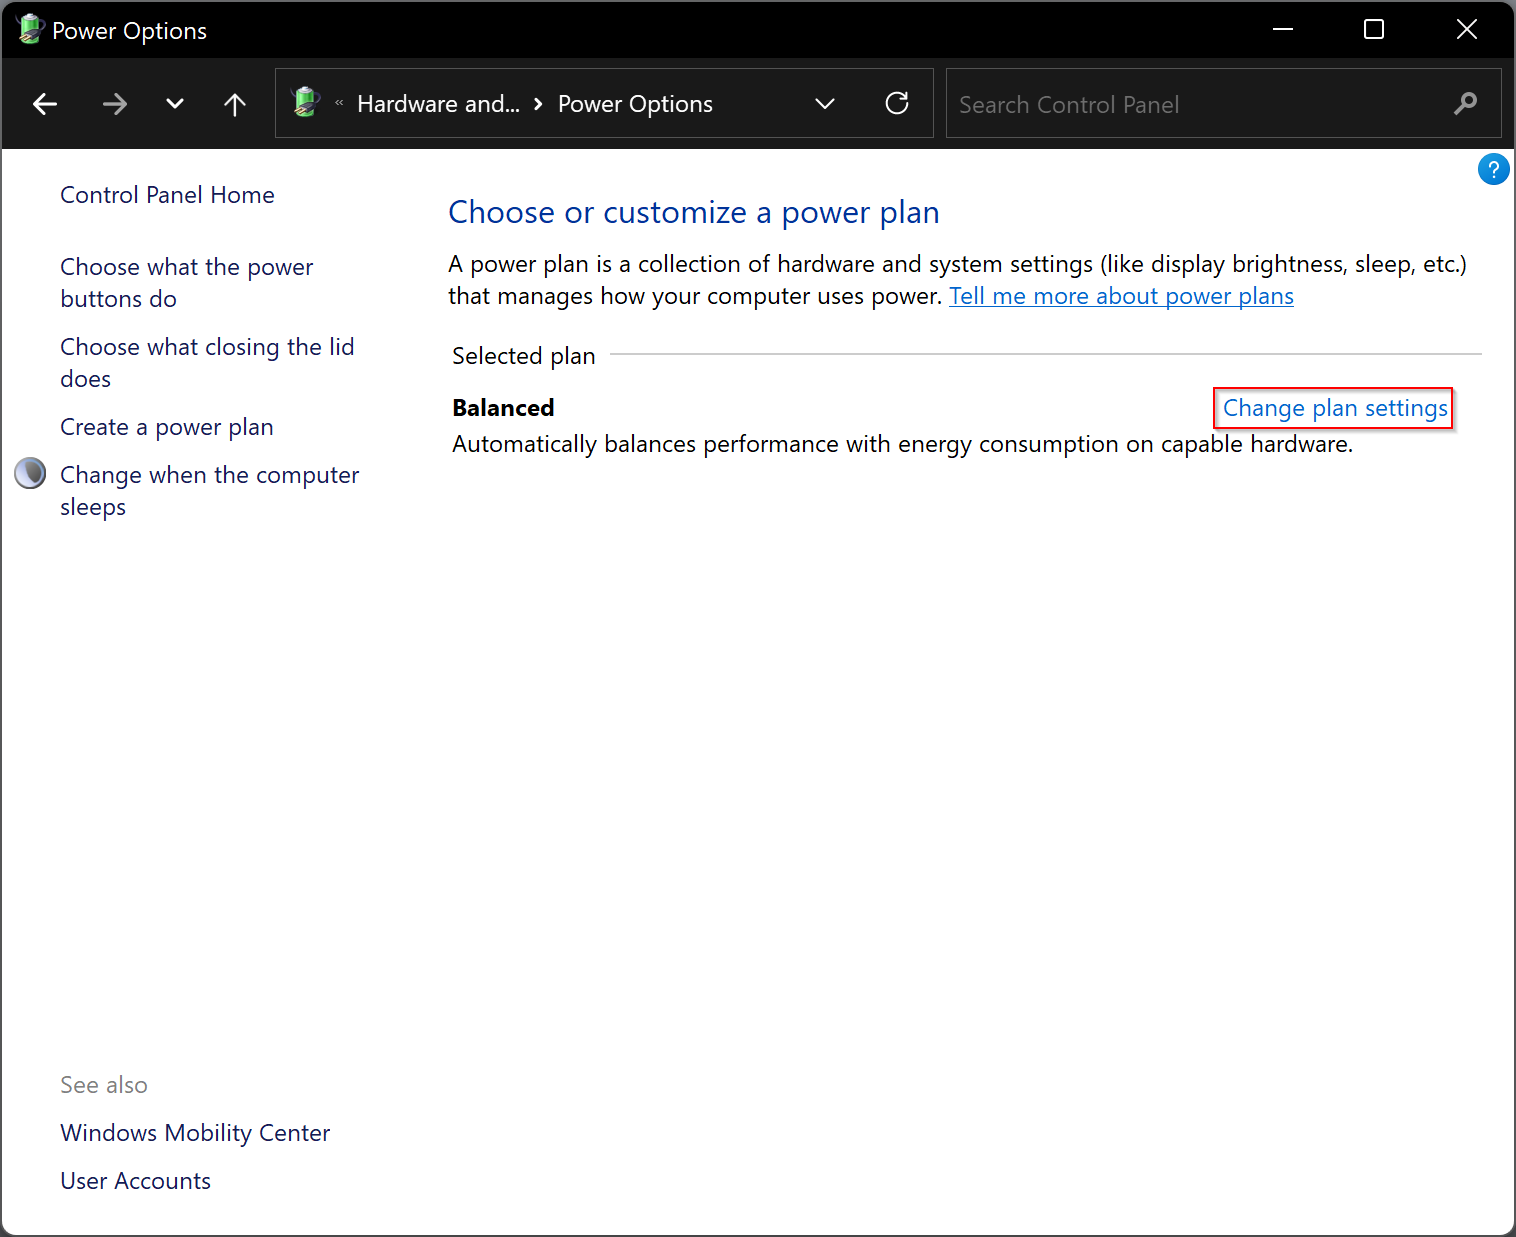
Step 8. Here, click the link labeled Change plan settings next to the Balanced option.
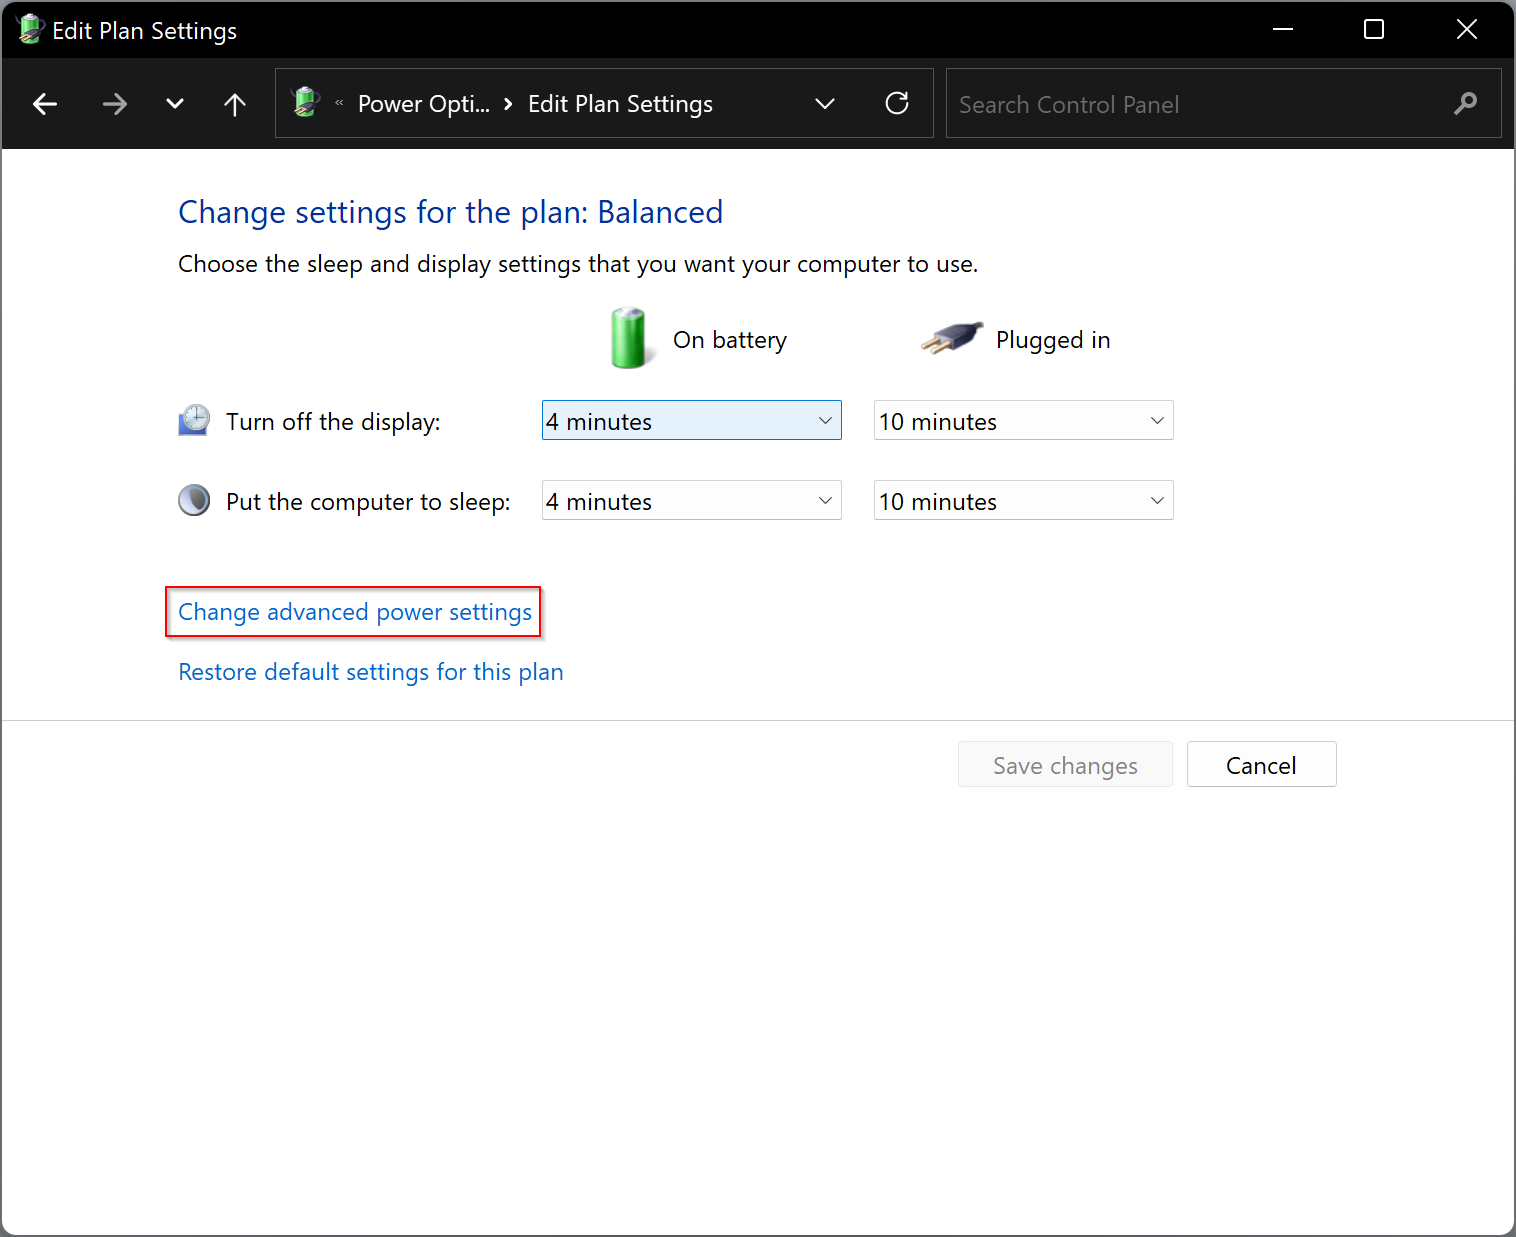
Step 9. Now, click the link Change advanced power settings.
Step 10. A new pop-up window will appear. Expand the Display and then Console lock display off timeout setting.
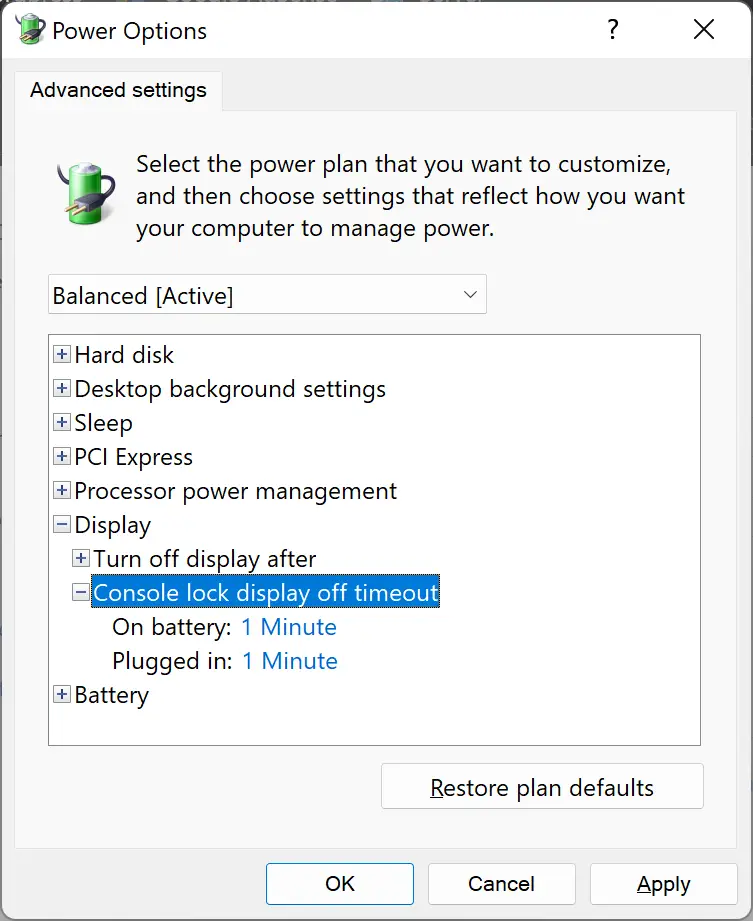
Step 11. Now, set the timeout for how many minutes you want to lock the screen.
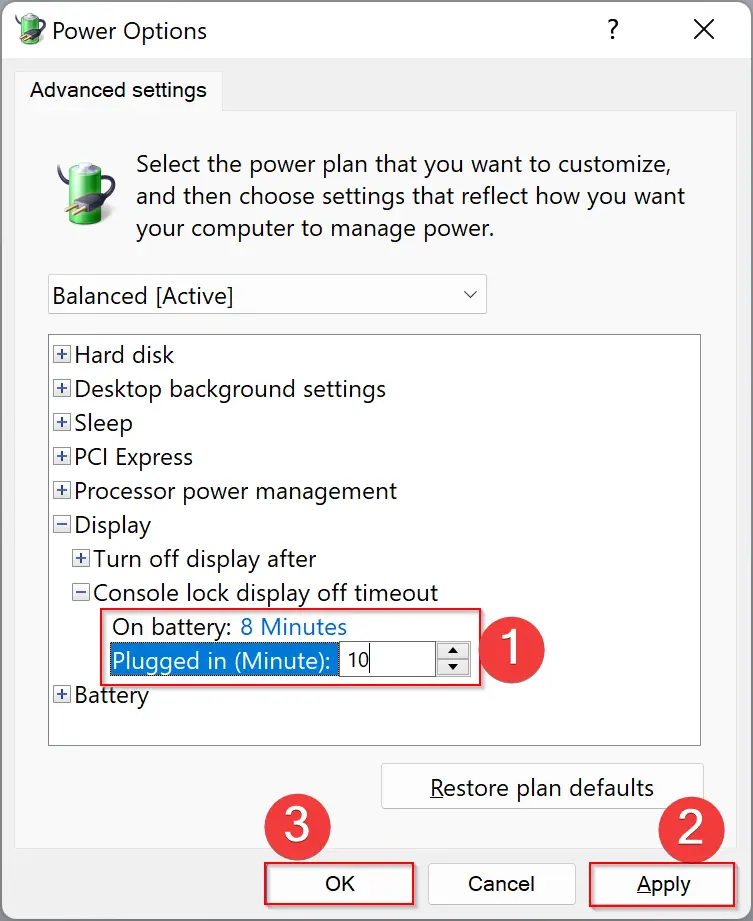
Step 12. Click Apply.
Step 13. Click OK.
Step 14. Restart your computer.
Now, the Windows 11 Lock Screen Timeout is set by you. Your PC’s screen will lock out after the time that you have specified in the above settings.
How do I Increase the Windows 11 Lock Screen Timeout via the Settings app?
Follow these steps to increase the Windows 11 Lock Screen Timeout using the Settings app:-
Step 1. Open the Settings app by pressing Windows + I keys from the keyboard or any other method that you use.
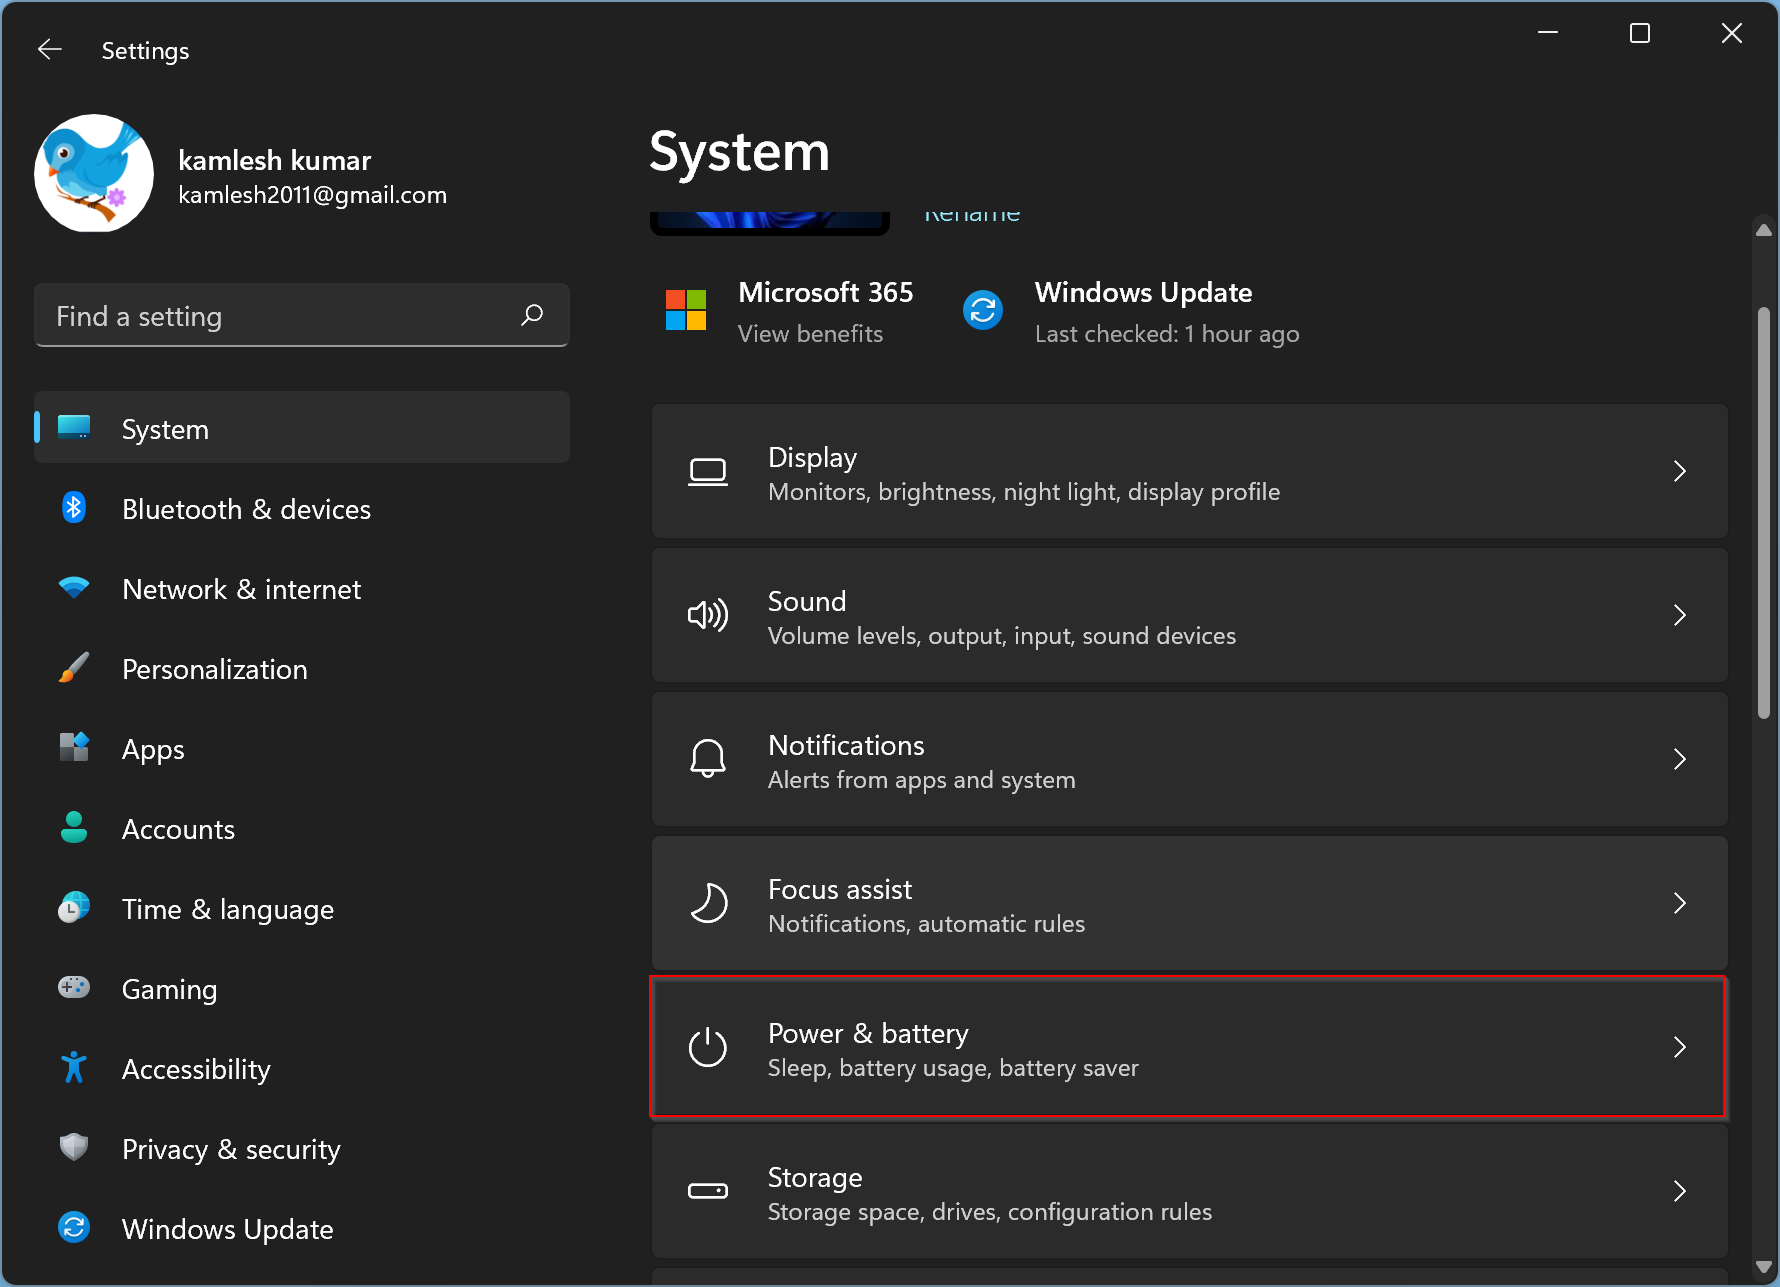
Step 2. Select the System category from the left sidebar when Windows Settings opens.

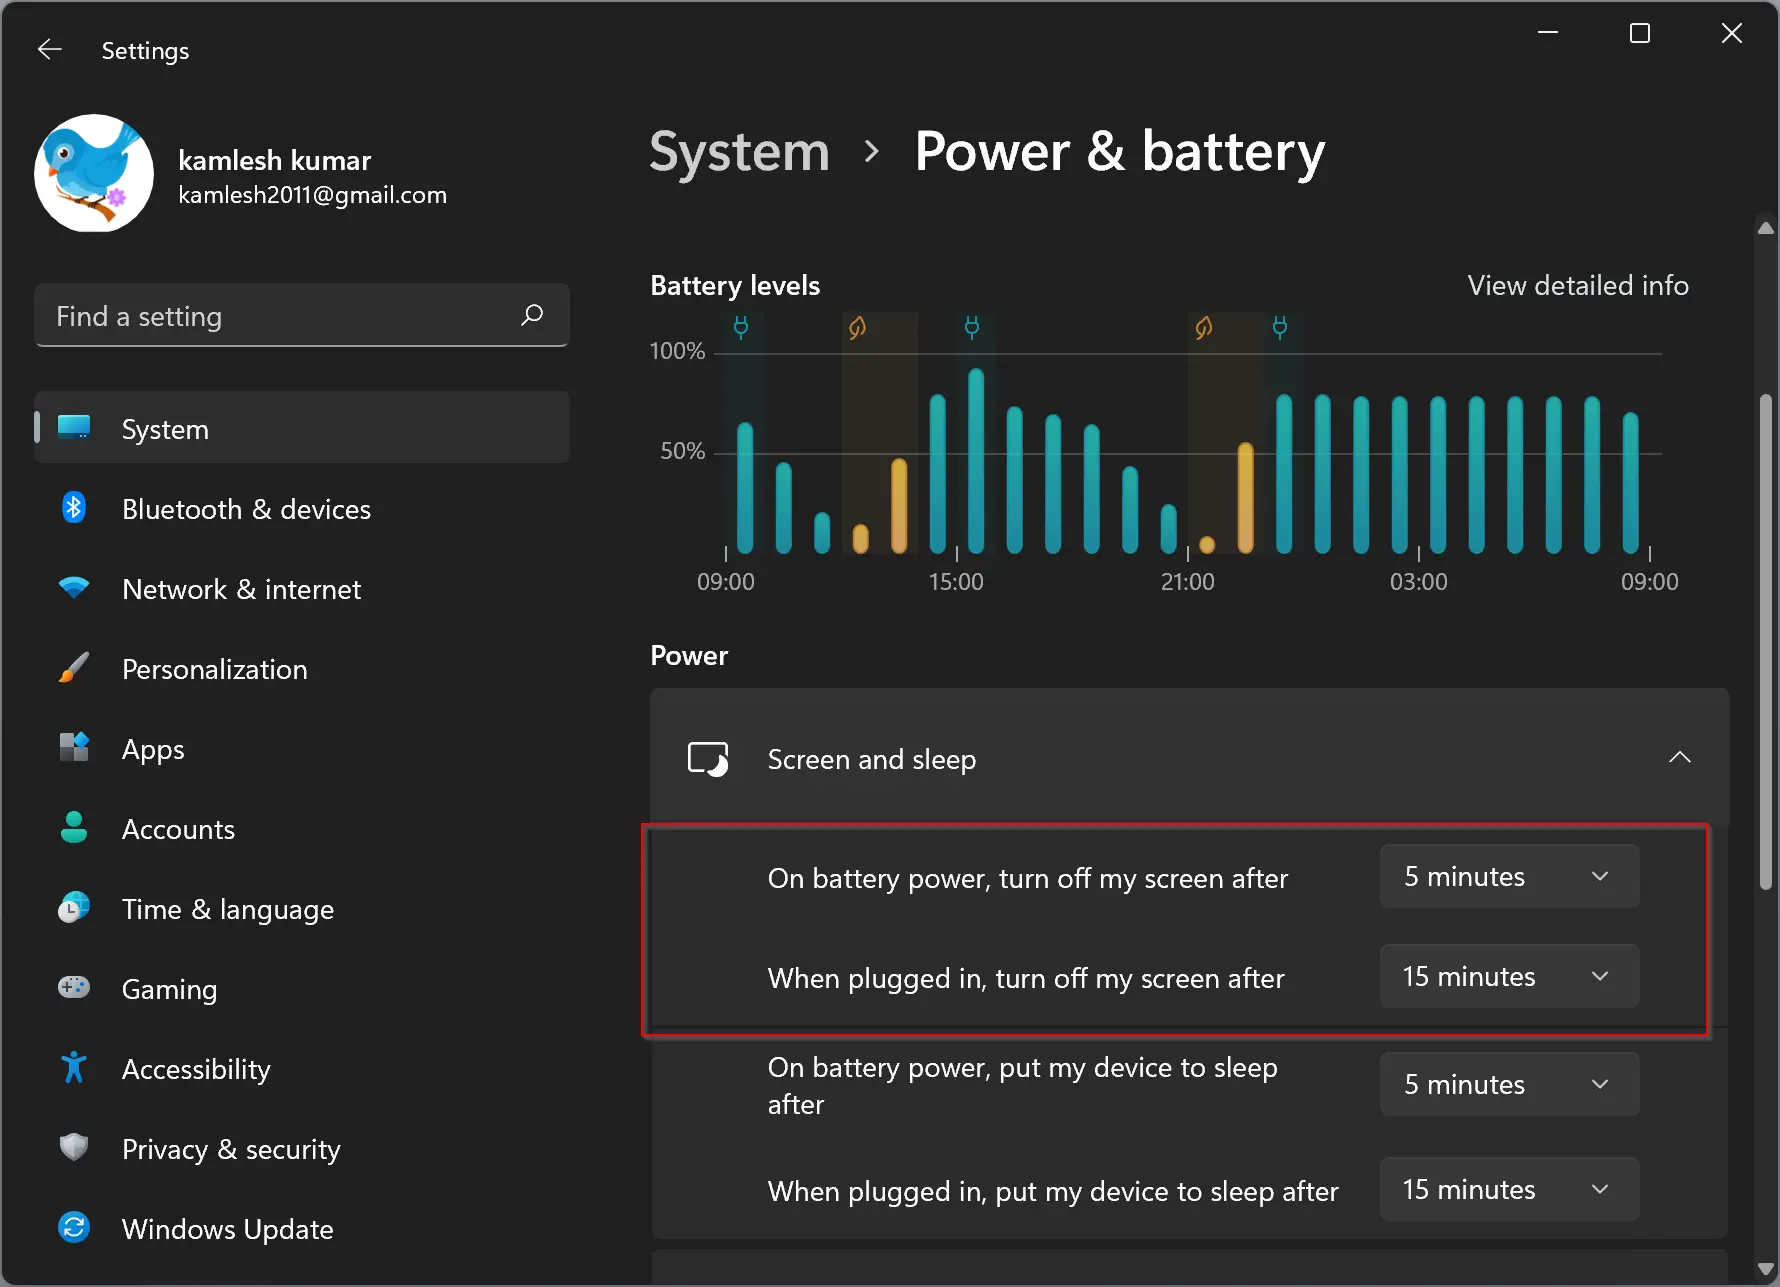
Step 3. On the right sidebar, click on the Power & battery option.
Step 4. Now, scroll down to the Power section and then click on Screen & sleep.
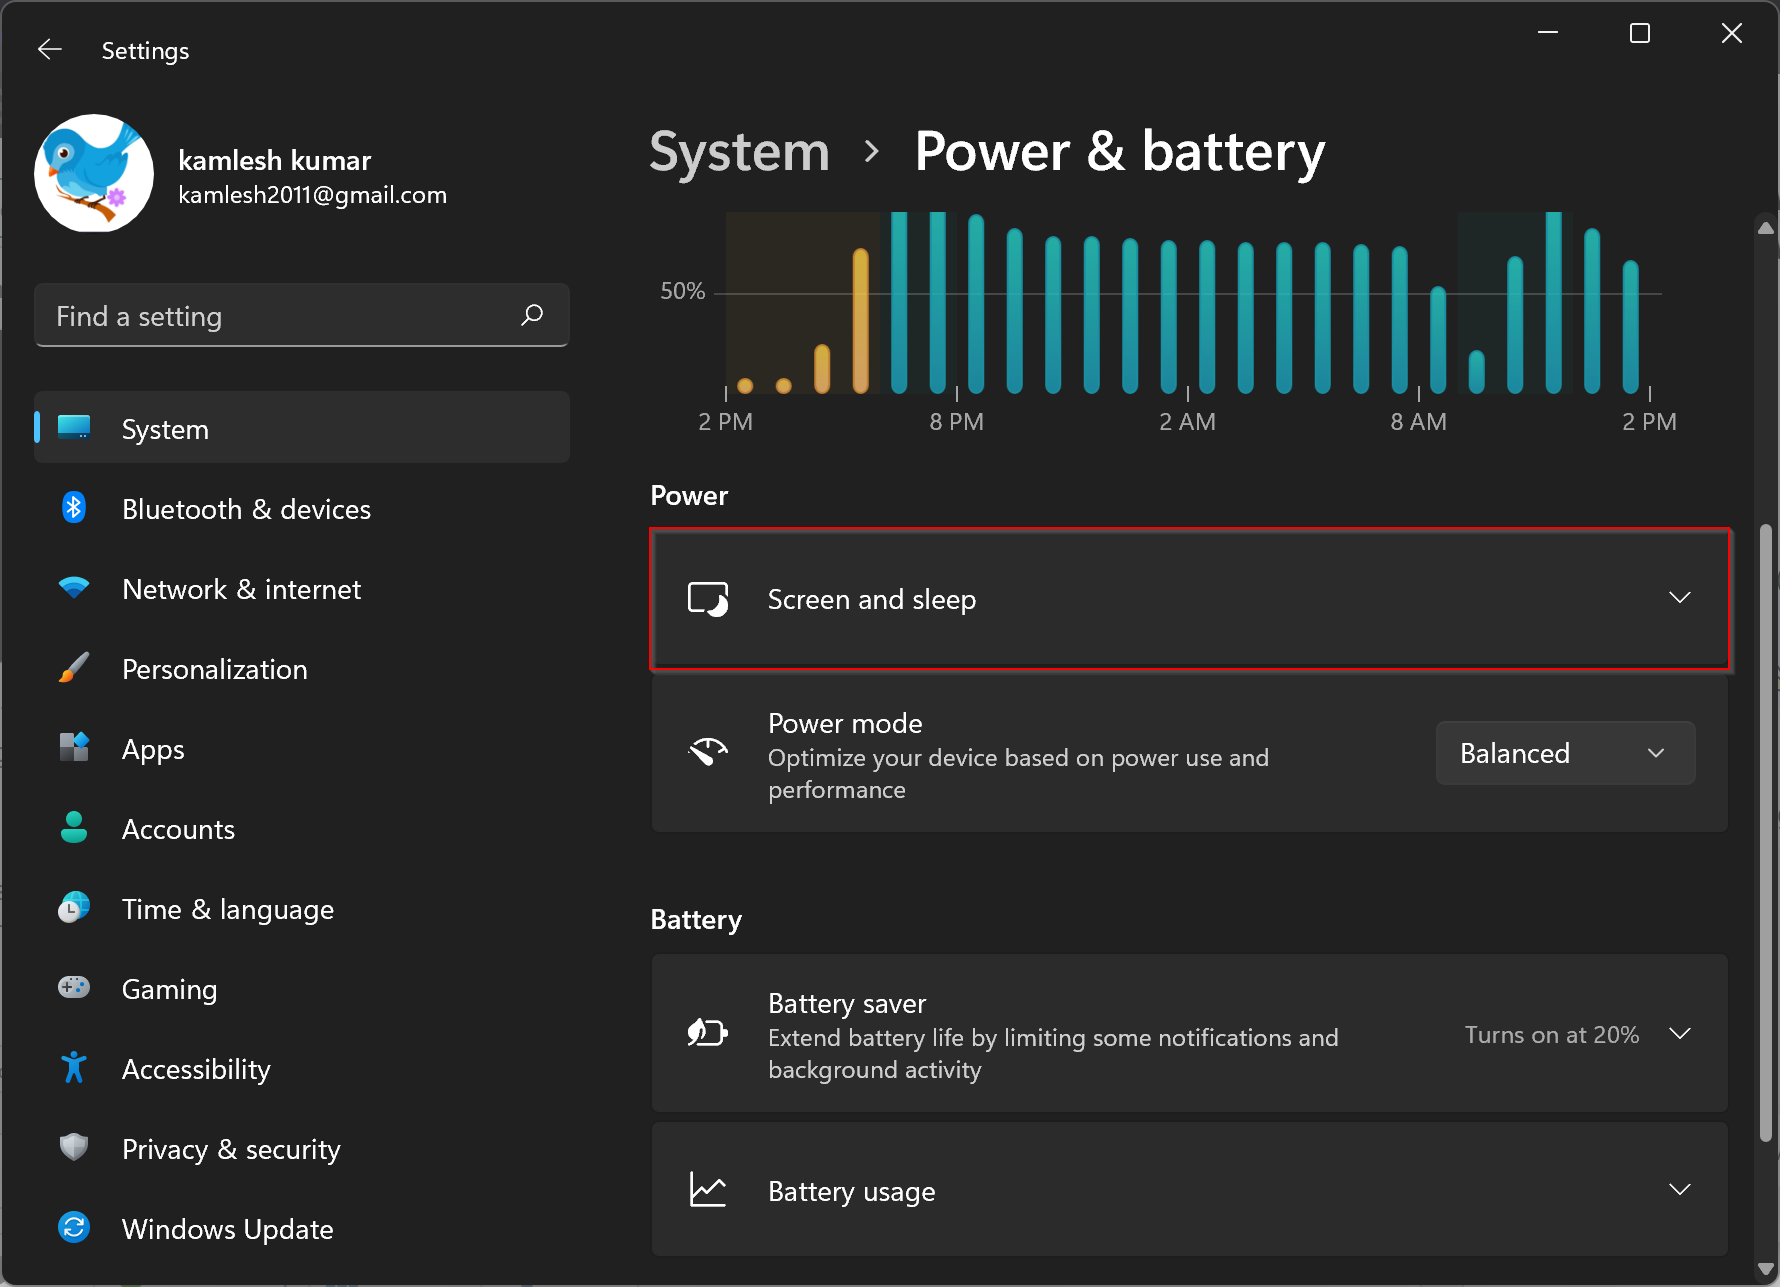
Step 5. Under Screen and sleep, select the turn-off-screen time from both drop-down menus marked in the below image.
That’s it. Now you can close the settings app safely.
Conclusion
In conclusion, Windows 11 has a default lock screen timeout of just one minute, which may not be convenient for some users. However, it is possible to increase the lock screen timeout using either the Control Panel or the Settings app. The Control Panel method requires modifying the Windows Registry, while the Settings app method is more straightforward. Users can choose the method that suits them best to set a lock screen timeout that meets their needs. By following the steps provided in this gearupwindows article, Windows 11 users can easily increase the lock screen timeout and improve their user experience.
Lock Screen timeout in Windows 11 is set to 60 seconds following the built-in configuration in Windows 11 so the display goes to sleep after the time frame ends. This is really a very short span so the screen soon extinguishes automatically if you step away from the workstation. Moreover, you have to enter the login credentials at the lock screen in order to turn the system active. Some users have found it really difficult to access Windows within this short time period. This write-up is basically for the beginners who opt to change Windows 11 Lock screen timeout so that it may not go to sleep or lock so quickly when staying idle.
Windows 11 users can change lock screen timeout and increase the interval. There are a couple of ways to do so from the Settings app, Control Panel, and tweaking the registry. All methods are described in the below segment.
Change Windows 11 Lock screen timeout
Here are 4 Ways to change Windows 11 lock screen timeout –
Way-1: Increase Screen timeout from Settings app
The settings app in Windows 11 is the best place to modify any existing system without making abnormal changes to the system. To change your computer’s lock screen timeout, access the Settings app initially. Here is how to do that –
- Press – Windows key and I.
- When the Settings app opens up, click Personalization from the left pane.
- Choose Lock screen on the right side.
- Scroll down to the Related settings area.
- Click – Screen timeout from there.
- From the following window, head towards the Power section.
- Click and expand Screen and sleep.
- Adjust the areas cited here and change the screen timeout as you want.
Note: Choose Never if you don’t want to lock the screen when the PC is plugged into the power. You can choose 5 minutes when the computer is On battery and you have to conserve battery life. All the adjustments should be carried out as per the need and keep a track of the laptop battery life.
Way-2: Tweak Windows Registry
Another easiest way to Change Windows 11 Lock screen timeout you need to make a tricky change in Windows Registry. This is a professional workaround and needs expert’s hands to accomplish. Any mistake in doing so will cause damage to the system which is irrecoverable. If you are confident enough, follow the below guidelines precisely to carry out this task –
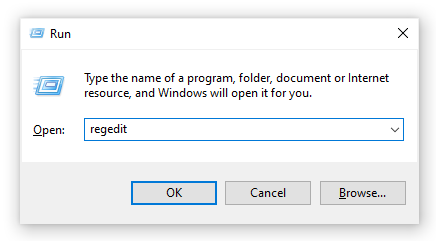
- Press – Windows + R together.
- In the Run dialog box, type – regedit. You can see How to open Registry Editor in Windows 11 (Best Ways.
- Press – Enter key and Registry Editor will be opened.
- From the left side pane of following window, navigate to below path –
“Computer\HKEY_LOCAL_MACHINE\SYSTEM\CurrentControlSet\Control\Power\PowerSettings\7516b95f-f776-4464-8c53-06167f40cc99\8EC4B3A5-6868-48c2-BE75-4F3044BE88A7”
- Once reached, move on to the right side and double-click – Attributes.
- Set the value data to 2.
- Click – OK to make the changes.
All these settings will enable an option in Windows 11, that is called “Console lock display off timeout.” Having done the previous task, you have to customize this option to change screen timeout settings. Follow the next few steps now from Control Panel –
- Press the Windows key and type – control panel.
- Select the app from the best-matched results.
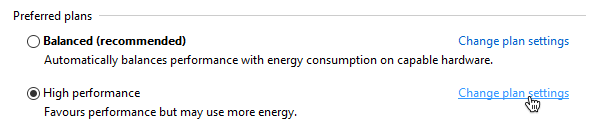
- When the app homepage is upfront, click – Power Options.
- Reach to your preferred power plan options and hit – Change plan settings.
- Click – Change advanced power settings from here.
- In this window, scroll down and expand – Display.
- When you will see Console lock display off timeout option, double-click the same to expand.
- Adjust the default time of 1 minute to any interval of screen timeout you want, in minutes.
- Click Apply and then OK.
Way-3: Adjust Lock Screen timeout – cmd commands
Windows Command Prompt is a bit advanced utility to make changes to the system using suitable commands. Before applying an appropriate command line, you need to access the Elevated Command Prompt (with Admin Privileges). You can also Change Windows 11 Lock screen timeout by executing a command too. For that, follow the way –
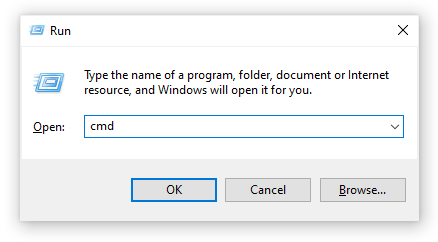
- Press – Windows + S.
- Type – cmd using keyboard.
- When Command Prompt appears in the best match result, right-click it.
- Select – Run as Administrator.
- To allow User Account Control, click – Yes.
- After being guided to the black window, enter the below command –
powercfg.exe /SETACVALUEINDEX SCHEME_CURRENT SUB_VIDEO VIDEOCONLOCK 60
- Press – Enter.
Note – In the above command, we have used 60 seconds. Change this time as per demand such as for 5 minutes, type 300 at the end of the command.
- After that, insert the following command and press Enter key –
powercfg.exe /SETACTIVE SCHEME_CURRENT
- You can press Windows + L keys in order to check the newly adjusted settings.
Important: In the second step, we have used the command line tool for using the machine with AC power plugged in. If you opt to change the timeout for tablet or laptop running on Battery, replace /SETACVALUEINDEX by /SETDCVALUEINDEX and execute.
Way-4: Using Control Panel
Control Panel holds almost advanced options to make significant changes to the system. Rather than the Settings app, you can access Control Panel as well to make adjustments to default set up if you feel it easy. To modify Windows 11 Lock screen timeout from Control Panel, follow the below guidelines –
- Click search icon from the taskbar.
- Type – control panel.
- Hit – Enter key.
- When the app shows up, make sure the View by type is set to either Small icons or Large icons.
- Click – Power Options.
- In the following window, head over to Balanced (recommended) power plan.
- Click on – Change power plan settings link.
- Change Turn off the display and Put the computer to sleep options by clicking dropdown menu.
- Select – Never while Plugged in and choose 5 minutes when on Battery to save the battery life.
- Finally, click – Save changes button.
Methods list:
Way-1: Increase Screen timeout from Settings app
Way-2: Tweak Windows Registry
Way-3: Adjust Lock Screen timeout using commands
Way-4: Using Control Panel
That’s all!!
Rick Akura
By default, Windows 10 turns off the on-screen display after a minute when the PC is locked. Learn how to disable the lock screen timeout on Windows 10.
By default, Windows 10 lock screen automatically turns off after you’ve been inactive for over a minute. This is called a timeout, and it’s implemented to save power and battery life, however, some users may be looking to spend more or even less time with the lock screen active
This is something that can be changed quite easily and quickly. All you have to do is read our article and follow the steps described below. You’ll be able to modify or disable the lock screen timeout within minutes!

What is the lock screen timeout?
In Windows 10, the lock screen has become quite advanced and a lot more useful as well. It displays the current time and date, all available local users, and even gives you the option to use Cortana and other Windows utilities. You may also choose to restart or shut down your device straight from the lock screen itself.
With more functionality, more people are looking to extend the amount of time the lock screen remains visible even while the computer is inactive. This can be used to have access to Cortana, display the time and date with the beautiful background images, or simply liven up the atmosphere instead of showing a black screen.
To be able to achieve this, you need to configure the lock screen timeout. By doing that, you’re able to give instructions to Windows 10 to not turn your screen off. It’ll stay shown even if the device is on the lock screen and doesn’t receive input for an extended amount of time.
Guide to change or disable the lock screen timeout
There are multiple ways to go about changing or disabling the lock screen timeout in Windows 10. All of these steps are easy to follow, however, some of them require a bit more time than the others. Do what feels good for you — you can always return to our article and try something else in the future.
Tip: All of these methods can be performed by anybody, as our guides are easy to follow and don’t require any previous Windows 10 experience. If you know anyone who’s experiencing issues with their system, don’t forget to recommend us!
Now, let’s start learning about disabling or modifying the lock screen timeout using a Windows 10 operating system.
Method 1: Manually make changes to the Registry and modify the lock screen timeout
The very first thing we recommend trying is making changes to the Registry. Here’s where you can find Windows’ more advanced settings, often not available elsewhere.
While the Registry seems intimidating at first, it’s actually quite simple to navigate. All you have to keep in mind is to not make any un-instructed changes. A poorly configured Registry may lead to errors on your device!
Warning: Before beginning this guide, we recommend creating a backup of your Registry. If you’re not sure how to create and import Registry backups, watch “Registry Backup, Restore, Import And Export” from Windows Ninja.
Let’s get started!
-
Press the Windows + R keys on your keyboard at the same time to bring up the Run application. Here, simply type in “Regedit” and click OK.

- Navigate the Registry Editor using the arrow icons next to each folder name on the left-side panel. Navigate to the following registry key: HKEYLOCAL_MACHINE\SYSTEM\CurrentControlSet\Control\Power\PowerSettings\7516b95f-f776-4464-8c53-06167f40cc99\8EC4B3A5-6868-48c2-BE75-4F3044BE88A7
- Double-click on the “Attributes” key seen in the right side of the window.
-
Change the value data to 2, then click the OK button. Make sure not to make any other changes!
- Now, you should be able to see the lock screen timeout option when making changes to your Power Options (jump to Method 4).
Method 2: Download the automatic Registry changes
Not confident in using the Registry yourself? No problem! You can simply apply a one-click solution to make the modifications automatically without having to worry about messing something up.
- Click here to download the “Lock Screen Timeout Hacks” file from HowTo Geek. This is a .zip file, meaning that you might need to download an application such as WinRAR or 7-Zip to access the contents.
-
Open the file you just downloaded.
-
Locate “Add Lock Screen Timeout Setting to Power Options” and double-click on it to launch it.
- Now, you should be able to see the lock screen timeout option when making changes to your Power Options (jump to Method 4).

Method 3: Enter a command using Command Prompt to change the lock screen timeout
Another powerful tool used to make more advanced changes and personalization to your device is the Command Prompt. It allows you to directly give commands to your computer via a code language. We can use this to make changes to the Power Options, allowing you to modify the lock screen timeout.
-
Press the Windows + R keys on your keyboard to open up the Run utility. Type in “cmd” and press Ctrl + Shift + Enter to launch the Command Prompt with administrative permissions.
- When the Command Prompt launches, input the following command and press Enter: powercfg.exe /SETACVALUEINDEX SCHEME_CURRENT SUB_VIDEO VIDEOCONLOCK 60.
Make sure to change “60” to the amount of time you want your lock screen to stay active for. This time is in seconds, meaning that by leaving it default, you’ll have 60 seconds before the lock screen goes into a timeout.
- Next, input the following command and press Enter once again: powercfg.exe /SETACTIVE SCHEME_CURRENT
- Close the Command Prompt. You should be able to notice that the lock screen timeout has changed.
Method 4: Use the Power Options to change the lock screen timeout
After enabling the setting with either Method 1 or Method 2, you’ll be able to use the Power Options to modify the lock screen timeout. This is what you need to do:
-
Press the Windows + R keys using your keyboard to bring up the Run utility, then type in “control” and click the OK button. This is going to open the Control Panel.
-
Make sure that your view mode is set to Category. This will allow you to see grouped settings, making navigation easier.
-
Next, click on the Hardware and Sound heading.
-
You should see another list of groups full of different settings. What you need to click on is the Power Options menu.
-
Click on the “Change plan settings” link next to whichever plan you’re using. There’s no need to change your actual plan — all we’ll do is simply modify it.
-
Click on the “Change advanced power settings” link at the bottom of the page. A new window should pop up.
- Scroll down until you see Display, then click on the plus icon to expand the section.
-
Change “Console lock display off timeout” to the number of minutes you want before your lock screen goes into a timeout. If you don’t see this setting, make sure to follow the steps in either Method 1 or Method 2.
- Click the Apply button, then close the window by clicking OK.
- You should be able to see that your lock screen timeout has been increased or decreased.

We hope that this article was able to help you learn how you can change the lock screen time out, or disable it entirely. Get more control over your device and enjoy your lock screen active for exactly as much time as you want it to!
Are you interested in learning more about Windows 10? Do you need help fixing any other Windows 10 errors and issues? You can browse our dedicated blog section and find articles about everything related to Microsoft’s groundbreaking operating system. Click here to proceed.