
Fix Windows Live Mail won’t start: Windows Live Mail is email client which comes pre-installed with Windows and many users use for personal or work purposes. Reports are coming in that after upgrading to Windows 10 or updating their system, Windows Live Mail won’t start or open. Now users are very frustrated as they heavily rely on Windows Live Mail for personal or work purposes, although they can check their email, they had a habit of using Live Mail and this extra work is not welcomed at all.
The main problem seems to be te graphic card driver which is conflicting with Windows 10 after the update and doesn’t seem to work properly. Also, sometimes the cache of Windows Live Mail seems to be corrupted which doesn’t let Windows Live Mail open and instead when clicked on the Live Mail icon it keeps on rotating and nothing happens. Anyway, don’t stress because troubleshooter is here with a nice guide which seems to fix this issue, so just follow the method one by one and at the end of this article you will be able to use Windows Live Mail normally.

Table of Contents
Make sure to create a restore point just in case something goes wrong.
Method 1: Simply end wlmail.exe and restart Windows Live Mail
1.Press Ctrl + Shift + Esc to open Task Manager.
2.Scroll down till you find wlmail.exe in the list, then the right-click on it and select End Task.

3.Re-start Windows Live Mail and see if you’re able to check if you Fix Windows Live Mail won’t start problem.
Method 2: Deleting Windows Live Mail .cache
1.Press Windows Key + R then type “%localappdata%” (without quotes) and hit Enter.
z
3.Now inside the Local folder double click on Microsoft.
4.Next, double-click Windows Live to open it.

5.Locate the .cache folder then right-click on it and select delete.
Note: Make sure to empty Recycle bin after this.
Method 3: Run Windows Live in Compatibility Mode
1.Navigate to the following folder:
C:\Program Files (x86)\Windows Live\Mail
2.Next, find the file ‘wlmail.exe‘ then right-click and select Properties.
3.Switch to Compatibility tab in Properties window.
4.Make sure to check “Run this program in compatibility mode for” and select Windows 7.
5.Click Apply followed by OK. Reboot your PC to save changes.
Method 4: Repair Windows Essentials
1.Press Windows Key + X then select Control Panel.
2.Click Uninstall a program.
3.Find Windows Essentials then right click and select Uninstall/Change.
4.You will find a Repair options make sure to select it.

5.Follow on-screen instructions to complete the repair process.

6.Close everything and reboot your PC. This may be able to Fix Windows Live Mail won’t start problem.
Method 5: Restore your PC to an earlier working time
1.Press Windows Key + R and type”sysdm.cpl” then hit enter.
2.Select System Protection tab and choose System Restore.

3.Click Next and choose the desired System Restore point.

4.Follow on screen instruction to complete system restore.
5.After reboot, you may be able to Fix Windows Live Mail won’t start.
Recommended for you:
- Fix Windows 10 Sleeps after few minutes of Inactivity
- How to Fix Windows 10 not using full RAM
- 7 Ways To Fix Windows 10 Slow Shutdown
- Fix Windows Update Database Corruption Error
That’s it you have successfully Fix Windows Live Mail won’t start but if you still have any queries regarding this post feel free to ask them in the comment’s section.
Windows Live Mail not working on Windows PC? Don’t worry, try these 100% working tactics to repair Windows Live Mail, easily & quickly.
Almost a year ago, Microsoft decided to stop the support for Windows Live Mail, which is one of the most utilized email clients among Windows PC users. But, numerous users haven’t discontinued using this outdated email client and are still using it.
However, recently, many Windows users who prefer to use the Windows Live Mail client have complained about the unresponsive behavior of the respective email client. They stated that the Windows Live Mail won’t open or launch on their Windows operating system. This can be very frustrating, particularly when Windows Live Mail (WLM) is your preferred choice as an email client. Therefore, today, we have created this guide explaining a few tested and tried tactics to fix problems with Windows Live Mail.
Easy & Quick Ways to Fix Windows Live Mail Not Working on Windows PC
If you are having problems with your best-loved vintage e-mail client i.e., Windows Live Mail, then be sure to try the below-listed resolutions. The suggested hacks will surely help you fix Windows Live Mail not working on Windows 11, 10, or older versions.
Way 1: Launch the Email Client as Administrator and in a Compatibility Mode
Many users somehow managed to fix Windows Live Mail not working issue simply by just running the program as an administrator and in compatibility mode. It may sound like a basic hack, but it can work like magic. If you have no idea, how to make certain changes, follow the steps outlined below:
Step 1: Locate the following paths.
C : Program FilesWindows Live Mail or C : Program Files(x86)Windows LiveMail
Step 2: Click right on the wlmail.exe file and choose Properties.
Step 3: Choose the Compatibility tab to proceed.
Step 4: Tick mark the box shown before the Run this program in compatibility mode for, also choose the correct Windows OS version from the drop-down menu.
Step 5: After that, check the box before Run this program as an administrator.
Step 6: Click on Ok to save the changes.
Step 7: Once done, try to relaunch the Windows Live Mail.
This should surely repair the Windows Live Mail client. But, unfortunately, the issue persists, so try another hack.
Also Read: How to Fix Gmail Temporary Error? Try Best Ways!
Way 2: Create a New Windows Live Mail Account
It’s likely to happen due to the changes that Microsoft made, perhaps your currently existing Windows Live Mail account might lapse in Windows 10. If that is the case, then you can try to remove the old account and create a new one. This might help you fix the issue. To do so, follow the steps below:
Step 1: Launch Windows Live Mail to proceed.
Step 2: After that, make a click on the Account icon and select Sign out of a Windows Live Mail option from the drop-down menu list.
Step 3: Wait for a few seconds and create a new account or sign in with an alternative email address.

Once it’s done, then test the issue and look for changes. If it didn’t help, try another solution.
Also Read: How To Backup Gmail Emails With Attachments
Way 3: Temporarily Disable Antivirus Solution
Your antivirus software can be another cause behind the Windows Live Mail won’t open on Windows 10 PC. Sometimes, the antivirus software blocks specific apps or programs from running properly as expected.
So, just ensure that Microsoft’s email client is included in the list of exceptions in your third-party antivirus solution. If in case, Windows Live Mail is not blocked by your antivirus software, then you can try to disable your antivirus in order to fix the problem. Because particular antivirus programs just are not compatible with the older version of apps. Hence, you should definitely give it a shot, especially when you are running into Windows Live Mail not working problem.
After disabling the antivirus software, check if the problem is solved. If not, then you need to move on to the next solutions to get rid of the problem.
Way 4: Update your PC Drivers
Last but not least, if you are using outdated PC drivers, then you may face numerous issues and errors like Windows Live Mail won’t open and more. Hence to resolve this error, you should try to update the outdated drivers on your PC.
In order to perform this task quickly & easily, you can use any third-party driver updater utility software like Bit Driver Updater. It is the best solution for detecting and fixing all faulty drivers on Windows PC. Bit Driver Updater automatically recognizes your system and finds the correct drivers for it.
To update drivers with Bit Driver Updater, you need to follow the steps shared below:
Step 1: Download Bit Driver Updater from the button below.
Step 2: After that, double click its executable file and follow the on-screen instructions to complete the software installation.
Step 3: Run Bit Driver Updater on your PC and click on the Scan option from the left menu pane.

Step 4: Next, wait and let the scanning be completed.
Step 5: Check the scan results and click on the Update All button to install the latest version of all PC drivers at once.

However, this requires you to upgrade to the pro version of Bit Driver Updater, which also provides a 60-days complete money-back guarantee and 24/7 technical assistance. If you are using the free version, then you can click on the Update Now button shown next to the driver you wish to update. This way you can update drivers one-by-one as its free version is partly manual.
Also Read: How to Delete Gmail Messages in Bulk
Windows Live Mail Not Working on Windows: FIXED
So, the above suggestions were some of the best and proven resolutions to fix Windows Live Mail not working on Windows PC. We hope you find this troubleshooting guide much helpful and useful. Please tell us in the comments below if you have any better suggestions regarding the same. Furthermore, drop your queries also in the comments below. We will try our level best to help you out.
In addition to this, do subscribe to our Newsletter if you want to read more informative articles just like this one. Lastly, follow us on Facebook, Twitter, Instagram, and Pinterest.
The predecessor of Microsoft Outlook, Windows Live Mail, came with many errors. Microsoft has stopped support for this feature from January 10, 2017, and recommended users move to Outlook. So, naturally, you may have experienced some errors but couldn’t turn to Microsoft support.
Fear not, as you’ll find various possible fixes for the issue in this article. Generally, running the program in Windows 7 compatibility or repairing Windows Essential Suite should resolve this issue. If not, you’ll have to use other email clients, which is still a good solution.
Why Is My Windows Live Mail Not Working
There are several possible errors for Windows Live Mail not working on your system. Your system may also be experiencing more than one error.
Following are some main reasons for Windows Live Mail not working on your computer:
- Incompatibility issues
- Improper account settings
- Restrictions in Firewall settings
- Lack of support for Windows Live Mail
How to Fix Windows Live Mail Not Working
There are a few ways of fixing this issue depending on its cause. Here are some methods that may be of help. Please apply these methods in the corresponding order.
End Process and Restart
Sometimes restarting the program will fix minor errors. You may be able to use Windows Live Mail after restarting it if you haven’t made significant changes to your system.
Follow the steps below to kill and restart this process:
- Press Ctrl + Shift + Esc to launch the Task Manager.
- Go to the Details tab (Or Processes for Windows 7, Vista, XP) and search for
wlmail.exe.
- Right-click on it and select End task or End Process.
- Then, open Windows Live Mail again and check if you still encounter the error.

Run as Admin in Compatibility Mode
The reason your Windows Live Mail is not working might be because it’s not compatible with the newer Windows versions. You can fix this issue by running this program as an administrator in compatibility mode.
Here are the steps to perform this method:
- Go to
C:\Program Files\Windows Live MailorC:\Program Files (x86)\Windows Live Mail. - Right-click on
wlmail.exeand select Properties. - Go to the Compatibility tab.
- Under Compatibility mode, check Run this program in compatibility mode for:
- Choose Windows 7 from the drop-down list.
- Check Run this program as an administrator under Settings.
- Click on Apply and Ok to apply the changes.

- Open Windows Live Mail and check if the issue persists.

Reconfigure Windows Live Mail Account
This issue may also occur due to incorrect server configuration in the Windows Live Mail account.
You might have entered the wrong settings in your account while setting it or changed it by mistake. Some connections may also require SSL or authentication, but those options may be off in your settings.
To fix this issue, please reconfigure your account to the correct settings by following the step below:
- Determine your account settings by contacting your ISP.
- Open your Windows Live Mail.
- Go to the Accounts tab and select Properties.
- Match the settings with those you received from your ISP.

- Also, find out whether the servers require SSL or authentication from your ISP. Check the options if the servers need them.

Remove Current Account and Create New One
This method is more of a workaround than a fix. If there are some issues in your current Live Mail account, you can try creating another one to bypass those issues. Here’s how you can sign in with another account:
- Open your Windows Live Mail.
- Click on the Account icon and select Sign out of Windows Live Mail.
- Then, log in with another email account and check if the program stops working.
Enable Firewall Access
One reason you can’t send or receive emails might be the Windows Firewall restricting connection to a network. Please include Windows Live Mail features in the Firewall exclusion list to solve this issue. The steps you need are as follows:
- Open the Run command (Windows + R) and enter
control. It will launch the Control Panel. - Click on System and Security in the category view and select Windows Defender Firewall.
- Click on Allow an app or feature through Windows Defender Firewall.
- Click Change settings and scroll down to find the following:
- Windows Live Communications Platform
- Windows Live Communications Platform (SSDP)
- Windows Live Communications Platform (UPnP)
- Windows Live Messenger
- Check on both Private and Public boxes for all of them. Then hit Ok.


Repair Windows Essentials 2012
Windows Live Mail is a feature that comes with the Windows Essentials suite. Repairing this program can fix many errors for Windows Live Mail.
Here are the steps to repair Windows Essentials 2012:
- Open Run command and enter
control. - In the category view, locate Programs and click on Uninstall a program under it.

- Search for Windows Essentials 2012.
- Right-click on it and select Repair or Uninstall/Change > Repair.
- Follow the on-screen instructions to repair this program.
- Restart your PC after the process finishes.

Reinstall Windows Essentials 2012
If repairing this program doesn’t fix the issue, reinstalling it may prove successful.
Note: Microsoft no longer provides Windows Essentials 2012. So, you’ll have to download an offline installer from unofficial sites to install it again. Make sure to protect your system against Malware infection before downloading the installer.
Follow the instructions below to uninstall and reinstall Windows Essentials 2012:
- Open the Control Panel and look for Programs in the category view.
- Click on Uninstall a Program under it.
- Search for Windows Essentials 2012.
- Right-click on it and select Uninstall. Then, confirm with Yes.
- Follow the on-screen instructions to uninstall this program.
- Download and run the offline installer for Windows Essentials 2012.
Tweak Registry
Some incorrect registry entries may also prevent you from sending or receiving emails. In this case, your messages will likely display, “Message cannot be displayed.“
Changing those entries will solve this issue. Here’s how you can do so:
- Enter
regeditin the Run command to open the Registry Editor. - Navigate to the location:
Computer\HKEY_CURRENT_USER\SOFTWARE\Microsoft\Windows Live Mail - Double-click on the following entries and change their Value data to 1:
- RecreateFolderIndeex
- RecreateStreamIndex
- RecreateUIDLIndex
- If the entries do not exist, click on Edit from the menu bar and select New > DWORD (32-bit) Value to create new entries. Name them as above and set their value to 1.
Note: We recommending creating a restore point before changing registry entries in case it causes system problems.
Launch System Restore
You can try to revert your system to a restore point if all the previous solutions can’t solve this issue. Please follow these directions to do so:
- Open the Run command.
- Here, type
systempropertiesprotectionand press Enter. It will direct you to the System Protection tab of System Properties. - Click on System Restore to initiate the process.

- Follow the on-screen instructions.

Use Alternative Email Clients
Since Windows no longer supports Live Mail, any previously working program would have stopped working. You can still download and use Windows Live Mail from other unofficial sources. However, we recommend using alternative email clients such as Outlook, Thunderbird, etc.
There won’t be any updates for Windows Live Mail, and Microsoft won’t provide any help when users encounter any errors. It is better to migrate to other email clients that receive regular updates and official support.
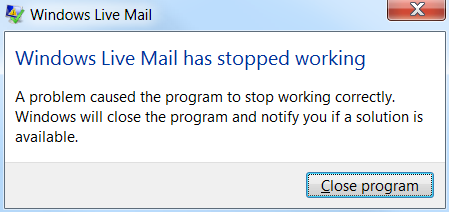
Windows Live Mail Stopped Working Error Message – Solved
Approved By Ashwani Tiwari
Published On
December 15th, 2023
Reading Time 4 Minutes Reading
Hi All, Today We are here to talk about a serious issue i.e. Windows live mail stopped working error. It can occur due to multiple reasons. Here in this post, We are going to list some question and their solutions.
Fact: Microsoft discontinued the Windows Live Mail application after Windows 7. In 2018, Microsoft also stopped providing support for Windows 7 OS.
Due to this, If a user upgrades from Windows 7 to Windows 8, 8.1, 10, and 11. Then, there is the chance to get Windows not responding after the Windows upgrade.
I know you are not here to know the history of Windows Live Mail or Windows OS. You are searching for a one-stop solution to deal with windows live mail that has stopped working error messages.
Quick Solution
Nowadays Microsoft paying more attention to MS Outlook. So, it is recommended that you should also move on the same.
Don’t worry, you can easily use your Windows live mail data. Know complete steps for Windows Live Mail to Outlook. This tool also convert WLM mail into pdf.
You can also Directly Use The Application and get it done.
Download Now Buy Now
Read this:-Rescue Windows Live Mail to External Drive and Import WLM Emails to Outlook
Windows Live Mail Not Working Try This Solution
If your Windows Live Mail freezes while replying to a mail. Then, it might be because Spell Checker is not installed.
Real Scenario of Windows Live Mail User
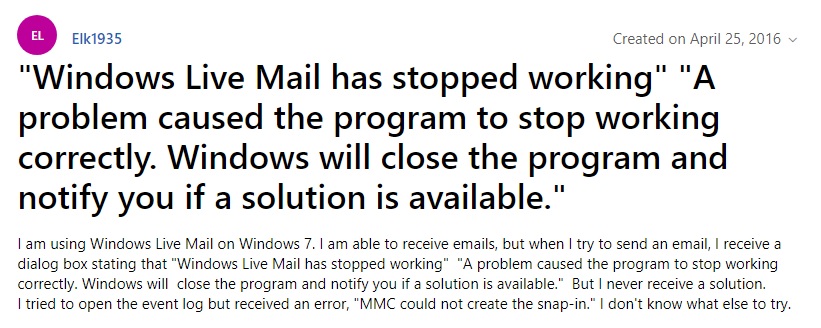
A user his name Alberto, using Windows 7 (64 bit) operating system. Everything working fine, but once I tried to replay to a mail and Windows live mail stopped working. Is it possible to fix this issue?
Now let’s talk about the solution to fix this issue. How Windows 7 live mail not working error has been resolved.
Steps to Fix Live Mail Not Working Issue
In this case, you have to install the spell checker (you can also use Debugger), and for this follow the steps listed below:
- Open Windows Live Mail on Your System
- After that, press the ALT key from the keyboard to open the menu toolbar
- Here select Tools from the menu bar and then click on Options
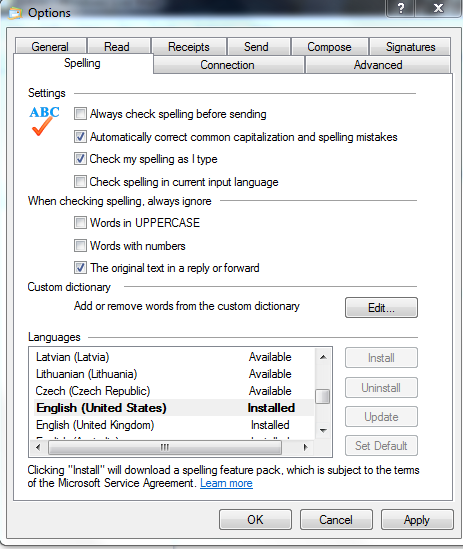
- Now click on the Spelling tab
- Here you will see a language list, select either English (United States) or English (United kingdom), After that click on “Set Default”
This solution will work only in the case of the Spell Checker not being installed. If the spell checker is installed and working fine. Then the reason behind windows lives mail not responding error. Let’s see some questions, asked on the Microsoft forum.
Note:- How to convert WLM to Office 365
Windows Live Mail Stopped Working Discussion on Microsoft Forum
Here I am going to list some screenshots of user queries and Microsoft experts’ answers. In the end, you will also get a link to the query. Simply read and understand the main reason behind windows live mail not working after the windows 10 upgrade error message.
User Query
Expert Answer
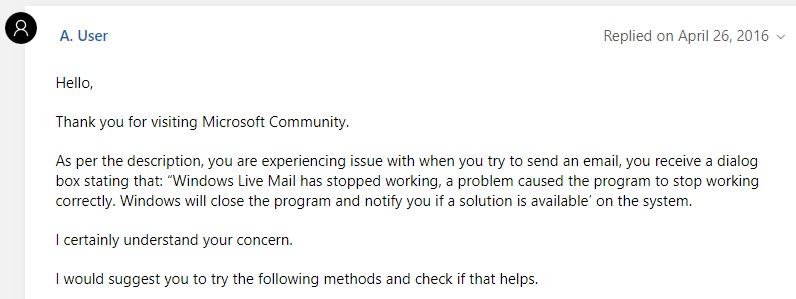
Method 1: – Fix Windows Live Mail Not Working Error
You need to perform the steps, suggested by a Microsoft expert:
Also Read:- WLM Creating Issues in Opening Attachments and WLM 2012 Crashes When Converting to Outlook 2010
Method 2: – Steps to Fix Window Live Mail Stopped Working Error Message
The above-explained solution didn’t work for you. Perform the below-listed steps:
Note: – The screen is taken from the Microsoft community forum. I have tried to explain the reasons behind windows live mail has stopped working with error messages and all possible solutions.
Some Common Questions Which I Have Covered in This Post
You may also look for this, the above-explained solution will work in this situation:
- Microsoft windows live mail has stopped working
- Windows live mail not working windows 7
- WLM has stopped working error message
- Windows live mail not responding
- WLM not working in 2020
- Windows live mail not working in windows 10
- Windows live mail not working after windows 10 upgrade
- WLM not working after windows 10 update
- Windows live mail 2012 not working after the windows 10 update
Conclusion
After reading this blog hopefully, users get the solution to Windows live mail stopped working error message. Because in this write up we have discussed some manual solutions. Also, we have mentioned an instant solution to resolve all issues related to WLM.
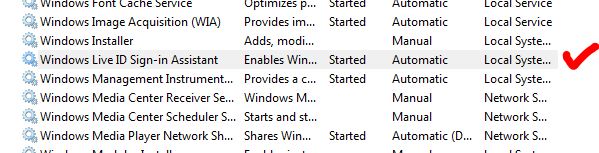
Error 0x80041161 is a Windows Live Mail error that occurs when your computer is unable to start the Windows Live Mail program. It is usually due to a service issue, which may have been disabled, not running, or possibly corrupted. Before proceeding with the steps in this guide, ensure that you are not logged into your system in Safe Mode. If you are logged into Safe Mode, your system will load with minimum graphics and only the “services and applications” required by Windows, which will interfere with the steps in this guide. The error 0x80041161 typically appears like this.
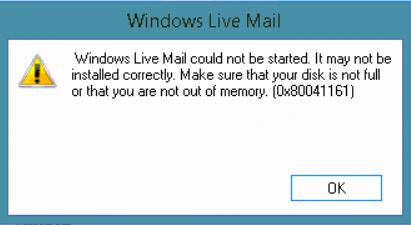
Steps to Fix Windows Live Mail Error 0x80041161.
Hold the Windows key and press R.
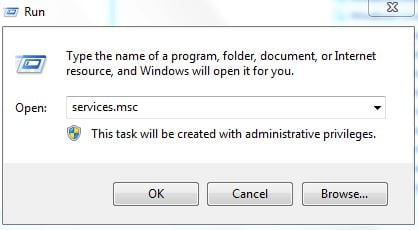
Type ‘services.msc‘ and click ‘OK‘.
Locate the service called ‘Windows Live-ID Sign Assistant‘, right-click this service, and select ‘Properties’. Make sure it is set to start automatically and the status is ‘Started’. If not, set it to start automatically and manually start it by right-clicking on this service and selecting ‘Start’.
Once completed, reopen Windows Live Mail.
If the issue is still not resolved, then it is highly possible that your Windows User Profile is corrupt, so a new user profile is required.
Click Start and type ‘Control Panel‘. Go to Control Panel and search for User Accounts settings by typing ‘User Accounts‘ in the search bar. Choose ‘Create a new user account’ and set a password if needed. Log off the current account and sign into the new account. Test Windows Live Mail; if it works there, then copy data from your old profile to the new profile found in C:\Users.
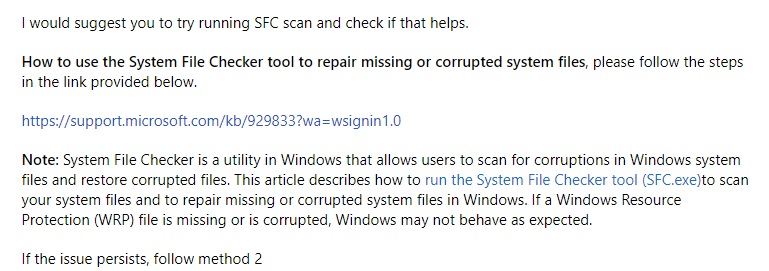
Method 2: Use the Built-in Repair Tool
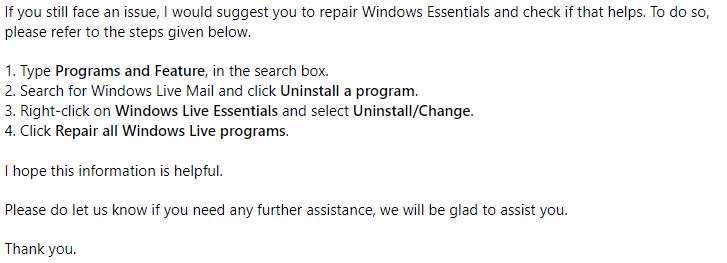
Windows Live Mail is part of the Windows Live Essentials package, and Windows has a built-in tool that can repair all of the apps in the Essentials package. Finding and using it are fairly easy as long as you follow the steps below:
- Press the Windows key on your keyboard and type “Add or Remove Programs” if you have Windows 7 or older; type “Change or Remove a Program” if you have a newer version.
- Open the result, and you should be presented with a list of software installed on your computer. Search for Windows Live Essentials; if sorted alphabetically, it should be near the bottom of the list. Double-click.
- Click on “Repair all Windows Live programs” and wait for the wizard to complete. Reboot at the end.
- Once you’ve done this, you will need to add your email account again.
- Press the Windows key, type “Mail,” and open Windows Live Mail from the list of results.
- In the lower left corner, click on the Accounts tab and select Email.
- Please type in your email address, password, and display name, and then click.
- Follow the additional steps of the wizard until it is complete. If you have multiple accounts, click “Add another email account” to add the others as well, and repeat the process as many times as necessary.
Kevin Arrows
Kevin Arrows is a highly experienced and knowledgeable technology specialist with over a decade of industry experience. He holds a Microsoft Certified Technology Specialist (MCTS) certification and has a deep passion for staying up-to-date on the latest tech developments. Kevin has written extensively on a wide range of tech-related topics, showcasing his expertise and knowledge in areas such as software development, cybersecurity, and cloud computing. His contributions to the tech field have been widely recognized and respected by his peers, and he is highly regarded for his ability to explain complex technical concepts in a clear and concise manner.