
-
Home
-
Partition Manager
- CMD List Drives: How to List Drives in Command Prompt? [Answered]
By Ariel | Follow |
Last Updated
Sometimes you may to need list all drives on your systems. How to list drives in CMD/PowerShell? This post of MiniTool provides a full guide on PowerShell/CMD list drives and a professional tool to manage your drives.
When formatting a drive or copying files from a drive to another drive, you may need to use the CMD or Windows PowerShell tool to list drives. However, many people don’t know how to list drives in Command Prompt or PowerShell, like a user from the superuser forum:
Is there a way to list the available drives from cmd.exe? (Other than manually typing c: d: …) and seeing which ones return errors.https://superuser.com/questions/139899/see-available-drives-from-windows-cli
How to List Drives in CMD
Command Prompt, also known as CMD, is the command-line interpreter in Windows operating system. You can input certain commands in the Command Prompt window to take corresponding actions. If you want to list drives of your systems, you can use the WMIC (Windows Management Instrumentation for Management) or Diskpart command.
List Drives CMD via WMIC:
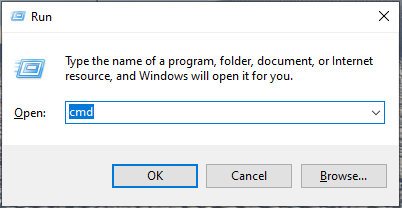
Step 1. Press Win + R keys to open the Run dialog box, and then type cmd in it and press Ctrl + Shift + Enter keys together to open the elevated Command Prompt window.
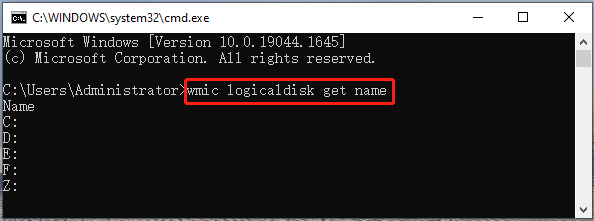
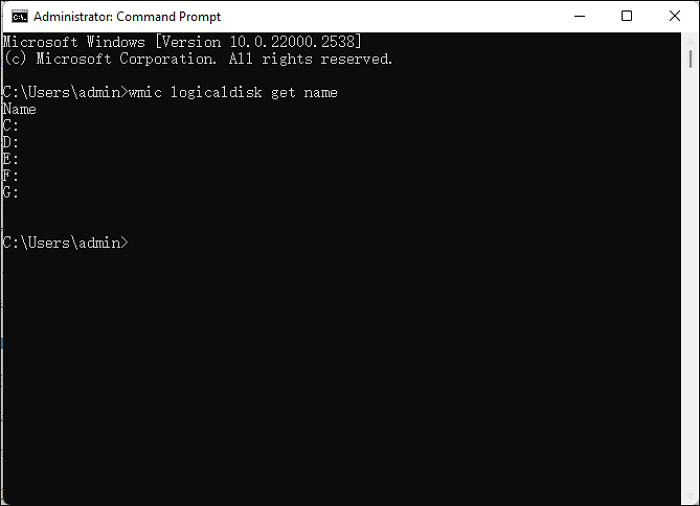
Step 2. To let CMD list drives, type one of the following commands and hit Enter.
- wmic logicaldisk get name
- wmic logicaldisk get caption
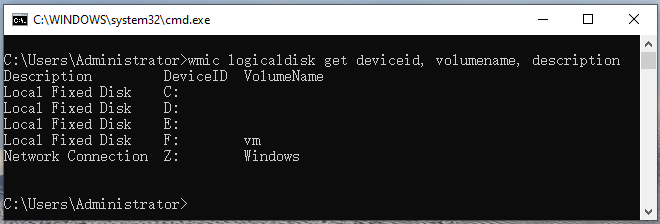
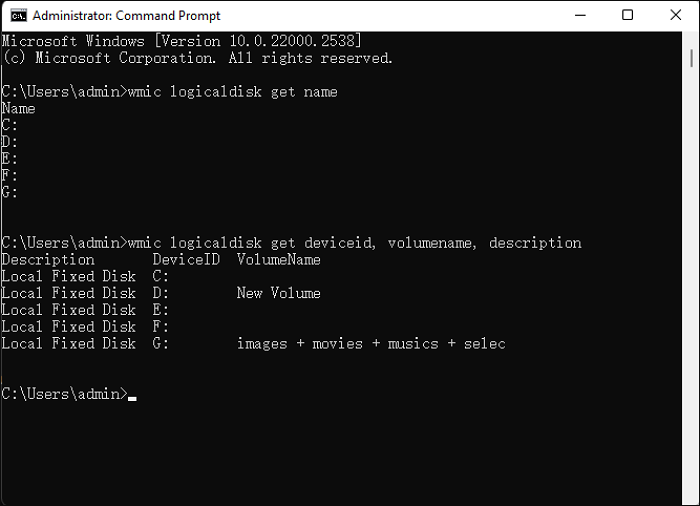
Step 3. If you want to display the Device ID and volume name, type the following command and hit Enter. Also, you can run the fsutil fsinfo drives command to list drives on your computer
wmic logicaldisk get deviceid, volumename, description
List Drives CMD via Diskpart:
DiskPart is a disk partition management tool that uses command lines to perform operations. It can be used to list drives CMD as well. Here’s how to use it.
Step 1. Open the Command Prompt window again as we explained above.
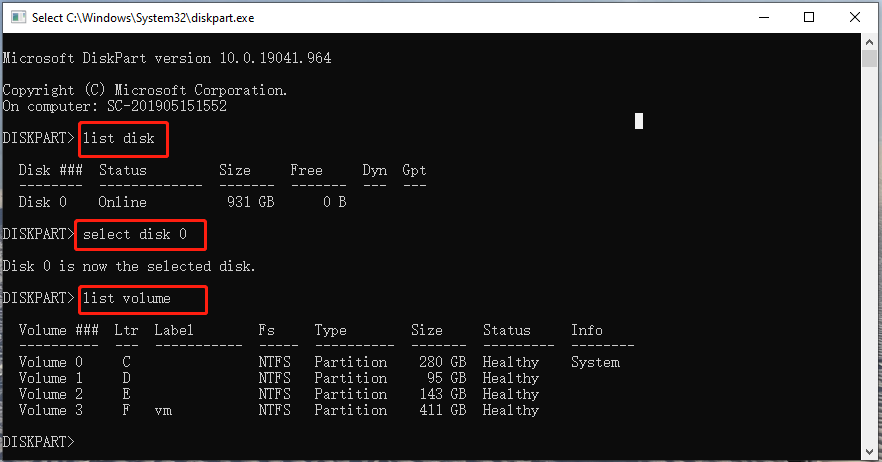
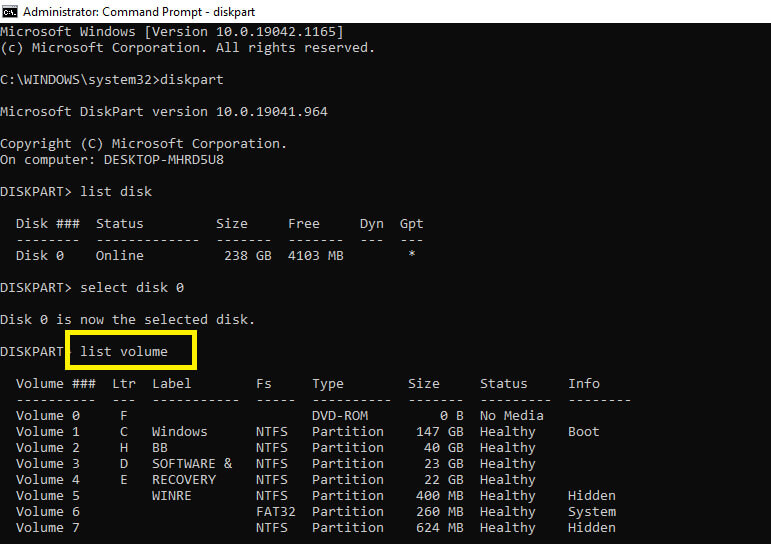
Step 2. Type the following commands in order and hit Enter after each one. Then you will see a list of drives on the disk, including partition/volume number, label, letter, file system, size, and status.
- diskpart
- list disk
- select disk *
- list volume/list partition
How to List Drives in PowerShell
PowerShell is a command-line tool like CMD. Here you can let PowerShell list drives as well. To do so, follow the steps below:
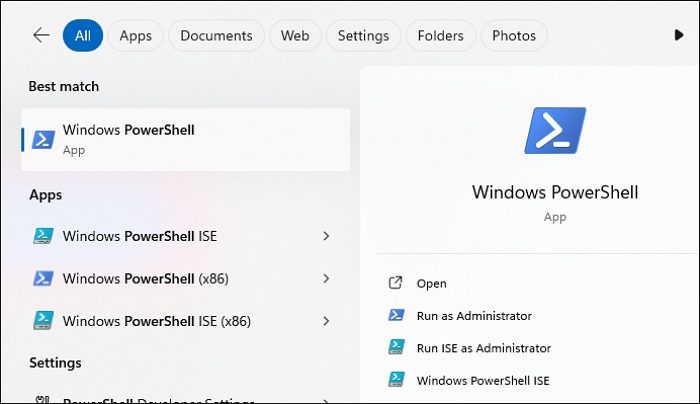
Step 1. Open the Run dialog box, and then type powershell in it and hit Enter.
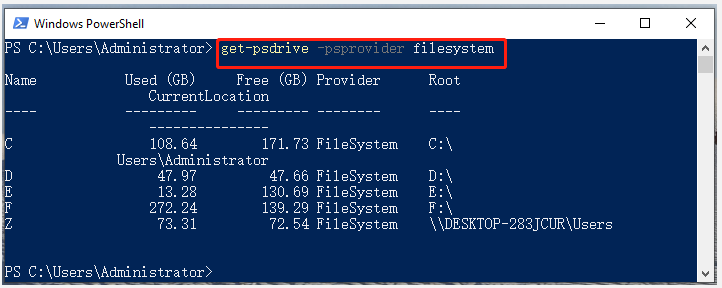
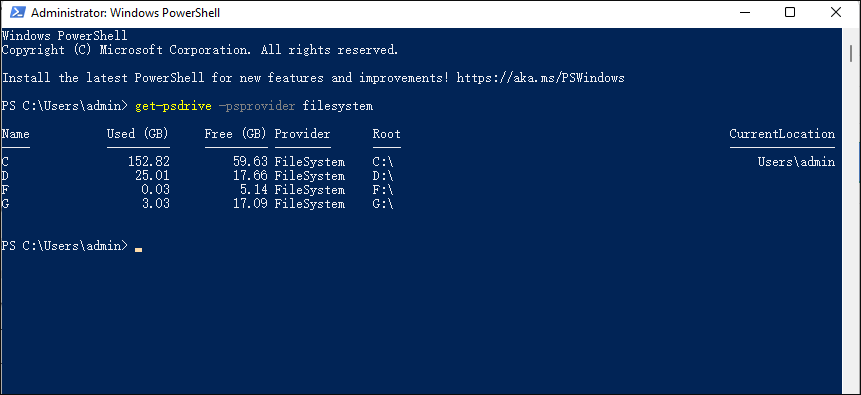
Step 2. In the Windows PowerShell window, type the following command and hit Enter.
get-psdrive -psprovider filesystem
How to let PowerShell/CMD list drive letters? Now, I believe that you already have known the answer.
Better Choice Than PowerShell/CMD List Drives
Although both of the two Windows tools can help you list drives, you may encounter some limitations to further managing drives/disks with them. For example, you can’t format a drive larger than 32GB to FAT32 using CMD. If you want to manage your hard disk or partitions more effectively, it’s highly recommended that you use a professional tool like MiniTool Partition Wizard.
MiniTool Partition Wizard DemoClick to Download100%Clean & Safe
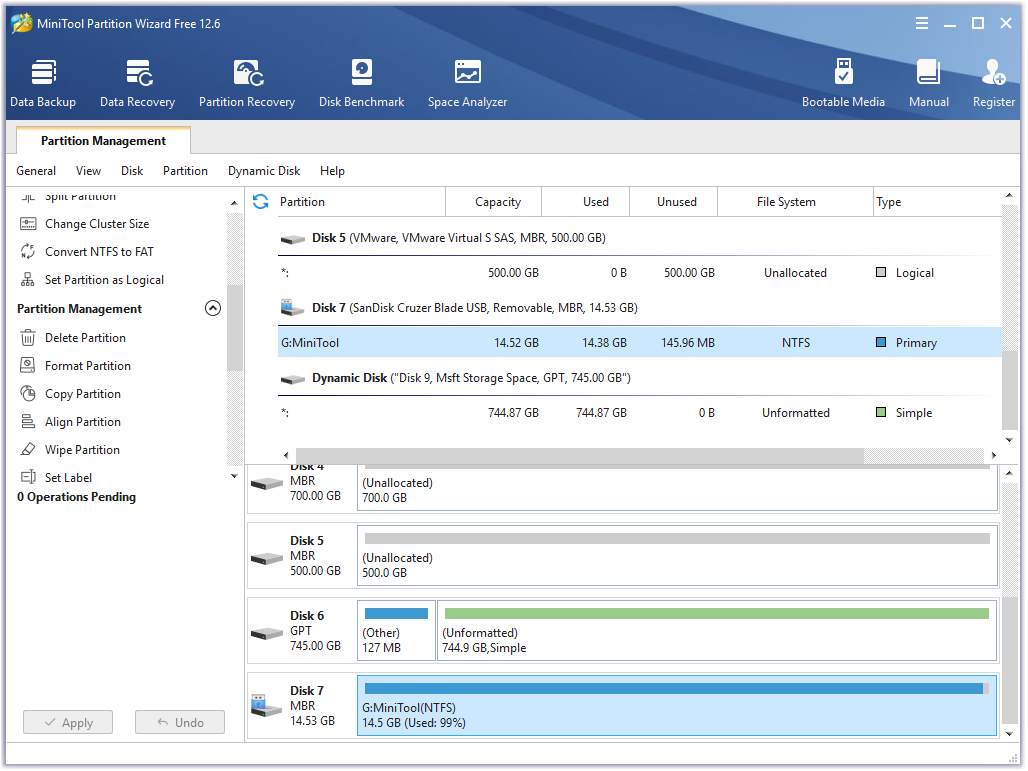
It is a popular partition manager trusted by millions of users around the world. With this tool, you can not only obtain the drive information easily but do many other powerful tasks, including create/extend/move/format/wipe partition, convert NTFS to FAT32 without data loss, convert MBR to GPT, migrate OS, rebuild MBR, recover data, etc.
About The Author
Position: Columnist
Ariel has been working as a highly professional computer-relevant technology editor at MiniTool for many years. She has a strong passion for researching all knowledge related to the computer’s disk, partition, and Windows OS. Up till now, she has finished thousands of articles covering a broad range of topics and helped lots of users fix various problems. She focuses on the fields of disk management, OS backup, and PDF editing and provides her readers with insightful and informative content.
Do you want to learn how to list drives in Command Prompt (CMD) and PowerShell? This guide from EaseUS covers two methods: using Command Prompt (cmd) and PowerShell, Windows’ built-in command-line tools.
Command Prompt and PowerShell are powerful interfaces in Windows. While the Command Prompt has long been used for executing commands, PowerShell offers advanced capabilities. Both tools let users interact with the system through text-based commands, making tasks efficient.
- Warning
- It’s important to exercise caution when working on the command line. Typos or incorrect commands can lead to unintended consequences. If you’re unsure about a command, research it further before proceeding. And always back up critical data before making system changes.
When it comes to listing drives using Command Prompt (CMD), you have two main methods: Diskpart and WMIC. Let’s learn how to list drives via CMD.
#1. Diskpart
Diskpart is a powerful command-line utility specifically designed for managing disk drives and partitions. Here’s how to list your drives using Diskpart:
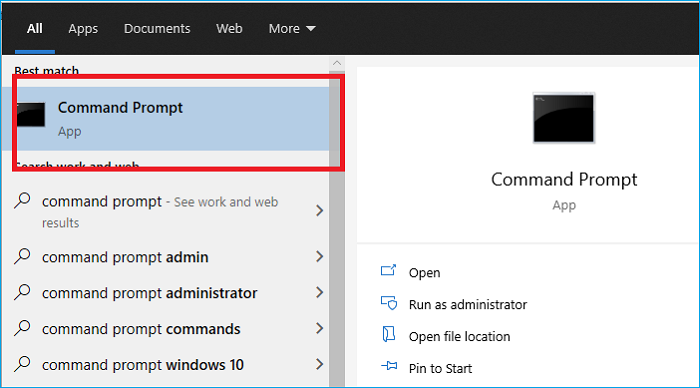
Step 1. Open Command Prompt, just type CMD in the Windows search box and click on it to open it.
Step 2. In the Command Prompt, type the following commands one by one and press «Enter» after each one.
diskpart
list disk
select disk X (Replace «X» with the disk number)
list volume/list partition
Now, you can see a list of drives on the disk, including partition/volume number, label, letter, file system, size, and status. After list drives via Diskpart, you can use this utility to perform more operations:
#2. WMIC
The WMIC (Windows Management Instrumentation for Management) is another versatile tool that allows you to query various system components, including disk drives. Here’s how to list your drives using WMIC:
Step 1. Open Command Prompt, type one of the following commands and press the «Enter» button.
wmic logicaldisk get name
wmic logicaldisk get caption
Step 2. If you want to see the Device ID and volume name, enter the following command and press «Enter.» Alternatively, you can use the fsutil fsinfo drives command to list drives on your computer.
wmic logicaldisk get deviceid, volumename, description
PowerShell List Drives
Let’s shift gears and see how PowerShell, another powerful command-line tool, works to list drives. PowerShell offers a more modern and object-oriented approach to system administration than CMD. Here’s how to list your drives using PowerShell:
Step 1. Search PowerShell in the Windows search box and click on it to open it.
Step 2. Type the following command and press the «Enter» button.
get-psdrive -psprovider filesystem
Is the information in this article useful to you? Feel free to share it with other users.
Better Alternative Than CMD/PowerShell List Drives
If you’re seeking simpler alternatives to Command Prompt and PowerShell because of their intricate command lines, EaseUS Partition Master Professional is worth considering for streamlined drive management. With its user-friendly interface, managing your drives becomes effortless.
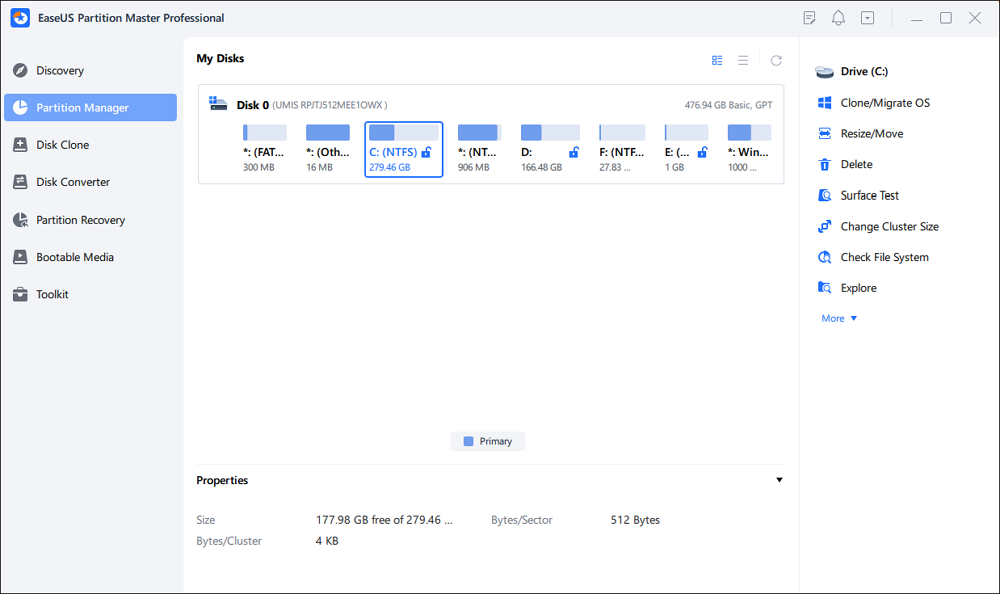
Here are some advantages of the tool:
- Convert FAT32 to NTFS without data loss.
- Support for NTFS, FAT32, exFAT, and EXT2/3/4 formats.
- Easily extend partitions with non-adjacent unallocated space.
- Securely wipe entire disks to prevent data recovery.
- Seamlessly transfer Windows system to new HDD/SSD.
- Convert disks between GPT and MBR partition styles without losing data.
Why struggle with complex command-line interfaces when you can accomplish disk management tasks easily with EaseUS Partition Master? Download this powerful tool today and experience its convenience and efficiency.
Conclusion
This guide explored two methods for listing drives in Windows: the tried-and-true Command Prompt (CMD) with its diskpart and WMIC utilities and the more modern PowerShell. While both offer powerful tools, navigating cryptic commands can be a barrier for some users.
EaseUS Partition Master simplifies drive management with a clear graphical interface. No more deciphering complex syntax! This software empowers you to not only view your drives but also perform various tasks such as formatting, extending partitions, migrating your OS, and even securely wiping disks.
Don’t forget to share knowledge with others!
List Drives in Command Prompt and PowerShell FAQs
Have questions about how to list drives in Command Prompt and PowerShell? Follow these FAQs.
1. How to get a list of all drives in CMD?
There are two main methods for listing all drives in CMD:
- Using diskpart: This utility offers a comprehensive view, including details like disk size and partition style. Follow the steps outlined in the previous section on «CMD List Drives» to utilize diskpart for listing drives.
- Using WMIC: This versatile tool provides information about logical disks (partitions with drive letters). The commands wmic logicaldisk get name or wmic logicaldisk get caption will display a list of drive letters associated with your partitions.
2. How to get disk info from CMD?
You can get disk info from CMD via diskpart:
- Open Command Prompt, type the following commands one by one and press «Enter» after each one.
- diskpart
- list disk
- select disk (Type the disk number)
- list volume/list partition
3. Are PowerShell and CMD the same?
No. CMD is a classic text-based command prompt, while PowerShell is a newer, more object-oriented tool for system administration.
To list all disks in Command Prompt (cmd), you can use the Diskpart utility followed by the ‘list disk’ command. Here’s how to do it:
diskpart
list disk
Understanding CMD Commands
What is CMD?
The Command Prompt (CMD) is a powerful tool in Windows that allows users to execute commands to perform advanced administrative tasks, troubleshoot issues, and configure system settings. It offers a text-based interface, enabling users to communicate directly with their operating system.
Using CMD is crucial for anyone looking to manage their computer efficiently, as it can speed up tasks that may take longer through the graphical interface. For advanced users, it encompasses a myriad of functions, including file management, network configuration, and disk management.
The Role of Disk Management in CMD
Disk management is a vital aspect of maintaining a healthy computer system. It involves overseeing and configuring storage devices like hard drives and solid-state drives while ensuring they function correctly. With CMD, you can easily manage your disks, including formatting, partitioning, and listing disks connected to your machine.
Mastering The List Disk Cmd Command In Minutes
Listing Disks in CMD
What Does «List Disks» Mean?
To list disks refers to checking the disks that are currently connected to your computer. This capability is particularly helpful for system administrators and advanced users who need to monitor disk usage, check disk status, and manage disk partitions. Knowing the disks connected helps you identify storage limitations or potential issues that may impact your system’s performance.
How to Access Command Prompt
Accessing Command Prompt is the first step to listing disks. Here’s how you can do it:
- Using Windows Search: Type “cmd” or “Command Prompt” in the Windows search bar. Click on it to open.
- Accessing through the Run Dialog: Press `Windows + R`, type `cmd`, and hit Enter.
- Opening CMD as an Administrator: Right-click on the Command Prompt icon in the search results and select “Run as administrator” for full privileges.
List Disk Cmd Windows: Quick Guide to Disks Management
Using the Diskpart Command
Introduction to Diskpart
Diskpart is a built-in Windows utility for disk management. It provides more comprehensive features than the standard graphical interface and allows users to manage disks, partitions, and volumes directly through commands. The command-line environment of Diskpart is especially beneficial when dealing with multiple disks or when you encounter issues that require a more hands-on approach.
Command to List Disks
To list disks in CMD, you can use the Diskpart utility. Here’s how you can do it:
- Open Command Prompt as an Administrator.
- Launch Diskpart by typing the following command:
diskpart
- Once in the Diskpart environment, type the next command to list all disks:
list disk
Example of Listing Disks
After executing the `list disk` command, you will see an output that resembles the following structure:
Disk ###  Status         Size     Free     Dyn  Gpt
--------  -------------  -------  -------  ---  ---
Disk 0    Online         476 GB   50 GB        *
Disk 1    Online         931 GB   0 B
In this output:
- Disk Number: Identifies the individual disk (e.g., Disk 0, Disk 1).
- Status: Indicates whether the disk is online or offline.
- Size: Displays the total capacity of the disk.
- Free Space: Shows the amount of unallocated space available.
- Dynamic/Basic: Designates the type of disk configuration (if applicable).
List Users in Cmd: A Quick Guide for Beginners
Additional Disk Management Commands
Show Additional Disk Information
Once you have listed the disks, you might want to retrieve more detail about a specific disk. This can be done using two commands in Diskpart:
select disk [number]
detail disk
For example, if you want to see details of Disk 0, you would execute:
diskpart
select disk 0
detail disk
This will provide comprehensive information about the selected disk, including its partitions, serial number, and more.
Exploring Diskpart Further
In addition to `list disk`, Diskpart includes numerous commands for advanced disk management:
- `list volume`: Displays all available volumes.
- `list partition`: Shows partitions on the selected disk.
- `create partition primary`: Creates a new primary partition.
Understanding these commands allows you to manage your disk configuration extensively.
List Files Cmd Windows: A Simple Guide
Listing Disk Drives in CMD
Using WMIC to List Disk Drives
An alternative to Diskpart for listing disks is using WMIC (Windows Management Instrumentation Command-line). This command can be executed directly in CMD, providing a concise overview of disk drives:
wmic diskdrive list brief
Running this command will produce an output similar to the one below, which highlights the manufacturer and size of each disk:
DeviceID     Model                          Size
-----------  --------------------------     --------
\\.\PHYSICAL0  Samsung SSD 970 EVO 500GB     500107862016
\\.\PHYSICAL1  Seagate HDD 1TB               1000204886016
Advantages of Using WMIC
WMIC can be advantageous for users who prefer a simpler and more straightforward syntax. Its output is often easier to interpret for users who aren’t accustomed to more complex command-line structures found in Diskpart. Additionally, it can provide quick insights without needing to navigate through Diskpart’s menus.
List Folders in Cmd: A Quick Guide to Navigation
Troubleshooting Common Issues
Common Mistakes When Listing Disks
While executing commands to list disks in CMD, some common errors include:
- Incorrect command usage: Ensure there are no typographical errors in your commands.
- Lack of administrator privileges: Always run CMD as an Administrator when executing Diskpart or other system-level commands.
Resolving Errors in CMD
If you encounter issues, you can troubleshoot as follows:
- Restart CMD as Administrator: If you didn’t run CMD as Administrator, exit and relaunch it with elevated privileges.
- Check Disk Connections: Ensure that the disks are properly connected to your system.
- Use the `diskpart` command: If you’re unsure, retype `diskpart` to ensure are in the right environment to start executing Diskpart commands.
How to List Drives in Cmd: A Quick Guide
Conclusion
Summary of Key Points
In this guide, you’ve learned how to list disks in CMD using various methods, including the Diskpart and WMIC commands. Understanding how to monitor and manage disks is crucial for effective system management.
Next Steps for CMD Enthusiasts
I encourage you to practice using CMD commands regularly. Explore other commands, such as those for managing files, network settings, and user accounts. The more you familiarize yourself with these utilities, the more adept you will become at troubleshooting and configuring your system.
Mastering Strings Cmd: A Quick Guide to String Manipulation
Call To Action
Join Our Community
Interested in learning more about CMD commands? Join our community to receive updates, tips, and resources geared towards mastering CMD and enhancing your technical skills.
Feedback Request
We would love to hear from you! Share your experiences or suggest topics for our future posts to help us provide the best content for you.
If you need to obtain a list of all disk drives on a Microsoft Windows system
from a
command line interface (CLI), e.g., a command prompt window, you can do so using
Windows Management Instrumentation Command-line (WMIC). You can obtain
a list of drives by opening a
command prompt window and then issuing a wmic logicaldisk get command followed by parameters relevant to the information you
wish to see. You can see a list of parameter options by issuing the command
wmic logicaldisk get /?.
C:\>wmic logicaldisk get /?

Property get operations.
USAGE:

GET [<property list>] [<get switches>]
NOTE: <property list> ::= <property name> | <property name>,  <property list>

The following properties are available:
Property                                Type                    Operation
========                                ====                    =========
Access                                  N/A                     N/A
Availability                            N/A                     N/A
BlockSize                               N/A                     N/A
Caption                                 N/A                     N/A
Compressed                              N/A                     N/A
ConfigManagerErrorCode                  N/A                     N/A
ConfigManagerUserConfig                 N/A                     N/A
Description                             N/A                     N/A
DeviceID                                N/A                     N/A
DriveType                               N/A                     N/A
ErrorCleared                            N/A                     N/A
ErrorDescription                        N/A                     N/A
ErrorMethodology                        N/A                     N/A
FileSystem                              N/A                     N/A
FreeSpace                               N/A                     N/A
InstallDate                             N/A                     N/A
LastErrorCode                           N/A                     N/A
MaximumComponentLength                  N/A                     N/A
MediaType                               N/A                     N/A
Name                                    N/A                     N/A
NumberOfBlocks                          N/A                     N/A
PNPDeviceID                             N/A                     N/A
PowerManagementCapabilities             N/A                     N/A
PowerManagementSupported                N/A                     N/A
ProviderName                            N/A                     N/A
Purpose                                 N/A                     N/A
QuotasDisabled                          N/A                     N/A
QuotasIncomplete                        N/A                     N/A
QuotasRebuilding                        N/A                     N/A
Size                                    N/A                     N/A
Status                                  N/A                     N/A
StatusInfo                              N/A                     N/A
SupportsDiskQuotas                      N/A                     N/A
SupportsFileBasedCompression            N/A                     N/A
VolumeName                              N/A                     N/A
VolumeSerialNumber                      N/A                     N/A

The following GET switches are available:

/VALUE                       - Return value.
/ALL(default)                - Return the data and metadata for the attribute.
/TRANSLATE:<table name>      - Translate output via values from <table name>.
/EVERY:<interval> [/REPEAT:<repeat count>] - Returns value every (X interval) se
conds, If /REPEAT specified the command is executed <repeat count> times.
/FORMAT:<format specifier>   - Keyword/XSL filename to process the XML results.

NOTE: Order of /TRANSLATE and /FORMAT switches influences the appearance of outp
ut.
Case1: If /TRANSLATE precedes /FORMAT, then translation of results will be follo
wed by formatting.
Case2: If /TRANSLATE succeeds /FORMAT, then translation of the formatted results
 will be done.


C:\>
For example, the results from issuing the command on a Windows 10
system to display the device ID, volume name, and description are shown
below:
C:\>wmic logicaldisk get deviceid, volumename, description
Description       DeviceID  VolumeName
Local Fixed Disk  C:        OS
CD-ROM Disc       D:
CD-ROM Disc       E:
Removable Disk    F:        EMTEC


C:\>
In the above example, drive C: is the internal disk drive in the system
and drive F: is an 8 GB USB 2.0
flash
drive. If I only want to see a particular type of drive, e.g., only
internal disk drives or only removeable
USB-attached
drives, I can add a «where»
argument to the command and specify a drive type. The
values that can be used to specify drive types are shown below:
| Value | Description |
|---|---|
| 0 | Unknown |
| 1 | No Root Directory |
| 2 | Removable Disk |
| 3 | Local Disk |
| 4 | Network Drive |
| 5 | Compact Disc |
| 6 | RAM Disk |
For instance, if I only wanted to see local disks, e.g., the internal disk
drive in the system, I could use the command below, which would only show
drive C:
C:\>wmic logicaldisk where drivetype=3 get deviceid, volumename, description
Description       DeviceID  VolumeName
Local Fixed Disk  C:        OS


C:\>
If I only wanted to see removable disks, such as
USB flash drives, attached to the system, I could use the command below:
C:\>wmic logicaldisk where drivetype=2 get deviceid, volumename, description
Description     DeviceID  VolumeName
Removable Disk  F:        EMTEC


C:\>
If I use a drive type of 5, instead, I should see
compact disc (CD) drives.
C:\>wmic logicaldisk where drivetype=5 get deviceid, volumename, description
Description  DeviceID  VolumeName
CD-ROM Disc  D:
CD-ROM Disc  E:


C:\>
In the example above, thought the output shows two
CD-ROM
drives, the system doesn’t actually have any CD-ROM drives in it nor
externally attached to it. Instead, an Android phone is connected to the
Dell laptop by a USB cable and is being reported as drives D: and E:,
though if I attempt to view the contents of those drives, I see «the device
is not ready.»
C:\>dir d:
The device is not ready.

C:\>dir e:
The device is not ready.

C:\>
You can, of course, specify other parameters on the command line. E.g.,
you can request the media type be displayed by including mediatype as a parameter. The output will then show the type of media currently
present in the logical drive. The value may not be exact for removable drives
if currently there is no media in the drive. E.g.:
C:\>wmic logicaldisk where drivetype=2 get deviceid, volumename, description, mediatype
Description     DeviceID  MediaType  VolumeName
Removable Disk  F:                   EMTEC


C:\>wmic logicaldisk where drivetype=3 get deviceid, volumename, description, mediatype
Description       DeviceID  MediaType  VolumeName
Local Fixed Disk  C:        12         OS


C:\>
C:\>wmic logicaldisk where drivetype=5 get deviceid, volumename, description, mediatype
Description  DeviceID  MediaType  VolumeName
CD-ROM Disc  D:        11
CD-ROM Disc  E:        11


C:\>
The media type values are listed below:
- Format is unknown (0)
- 5¼-Inch Floppy Disk (1)
-
5 1/4-Inch Floppy Disk — 1.2 MB — 512 bytes/sector
- 3½-Inch Floppy Disk (2)
-
3 1/2-Inch Floppy Disk — 1.44 MB -512 bytes/sector
- 3½-Inch Floppy Disk (3)
-
3 1/2-Inch Floppy Disk — 2.88 MB — 512 bytes/sector
- 3½-Inch Floppy Disk (4)
-
3 1/2-Inch Floppy Disk — 20.8 MB — 512 bytes/sector
- 3½-Inch Floppy Disk (5)
-
3 1/2-Inch Floppy Disk — 720 KB — 512 bytes/sector
- 5¼-Inch Floppy Disk (6)
-
5 1/4-Inch Floppy Disk — 360 KB — 512 bytes/sector
- 5¼-Inch Floppy Disk (7)
-
5 1/4-Inch Floppy Disk — 320 KB — 512 bytes/sector
- 5¼-Inch Floppy Disk (8)
-
5 1/4-Inch Floppy Disk — 320 KB — 1024 bytes/sector
- 5¼-Inch Floppy Disk (9)
-
5 1/4-Inch Floppy Disk — 180 KB — 512 bytes/sector
- 5¼-Inch Floppy Disk (10)
-
5 1/4-Inch Floppy Disk — 160 KB — 512 bytes/sector
- Removable media other than floppy (11)
- Fixed hard disk media (12)
- 3½-Inch Floppy Disk (13)
-
3 1/2-Inch Floppy Disk — 120 MB — 512 bytes/sector
- 3½-Inch Floppy Disk (14)
-
3 1/2-Inch Floppy Disk — 640 KB — 512 bytes/sector
- 5¼-Inch Floppy Disk (15)
-
5 1/4-Inch Floppy Disk — 640 KB — 512 bytes/sector
- 5¼-Inch Floppy Disk (16)
-
5 1/4-Inch Floppy Disk — 720 KB — 512 bytes/sector
- 3½-Inch Floppy Disk (17)
-
3 1/2-Inch Floppy Disk — 1.2 MB — 512 bytes/sector
- 3½-Inch Floppy Disk (18)
-
3 1/2-Inch Floppy Disk — 1.23 MB — 1024 bytes/sector
- 5¼-Inch Floppy Disk (19)
-
5 1/4-Inch Floppy Disk — 1.23 MB — 1024 bytes/sector
- 3½-Inch Floppy Disk (20)
-
3 1/2-Inch Floppy Disk — 128 MB — 512 bytes/sector
- 3½-Inch Floppy Disk (21)
-
3 1/2-Inch Floppy Disk — 230 MB — 512 bytes/sector
- 8-Inch Floppy Disk (22)
-
8-Inch Floppy Disk — 256 KB — 128 bytes/sector
Related articles:
-
Obtaining the model number and serial number for a HDD from the command line
Date: October 13, 2015
MoonPoint Support -
Using wmic to get disk drive information
Date: July 10, 2015
MoonPoint Support
References:
-
Win32_LogicalDisk class
Microsoft Develper Network
Для работы с DISKPART требуются права администратора системы. Утилита является мощным и небезопасными инструментом для работы с дисковыми данными. Для примера, имеем жесткий диск от ноутбука с зашифрованными разделами, которые нельзя удалить с помощью стандартных средств управления дисками в Windows.

Запускаем командную строку от имени администратора, в ней запускаем утилиту управления дисками
diskpart
Для получения списка дисков используется команда:
DISKPART> list disk
В результате получаем список дисков, присутствующих в системе. Далее выбираем нужный диск
DISKPART> select disk 2
Можно посмотреть информацию о выбранном диске
DISKPART> detail disk
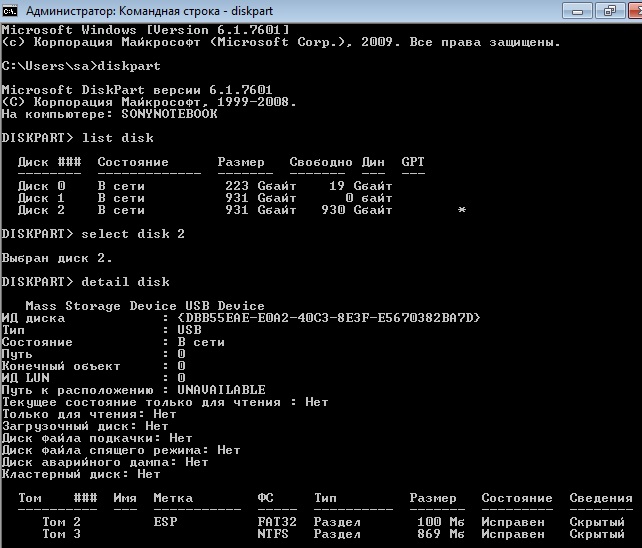
Для получения списка логических томов используется команда
DISKPART> list volume
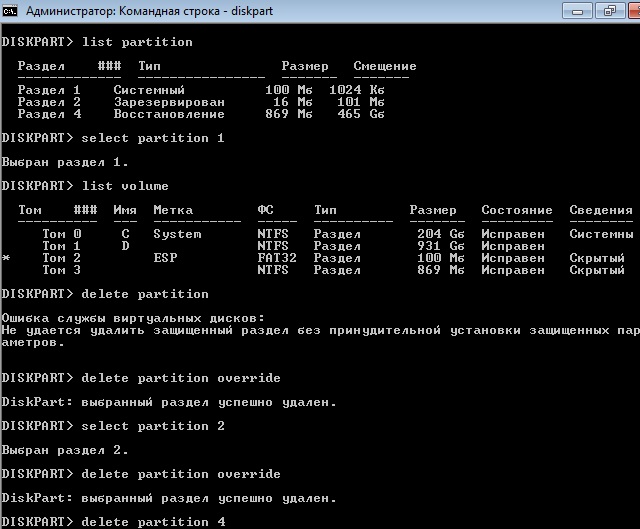
Получение списка разделов
DISKPART> list partition
Выбираем нужный раздел и пробуем его удалить
DISKPART> select partition 1
Выбран раздел 1.
DISKPART> delete partition
Ошибка службы виртуальных дисков:
Не удается удалить защищенный раздел без принудительной установки защищенных параметров.
Удалить выбранный раздел независимо от его защиты
DISKPART> delete partition override
DiskPart: выбранный раздел успешно удален.
Повторяем команды select partition и delete partition override для всех разделов диска.
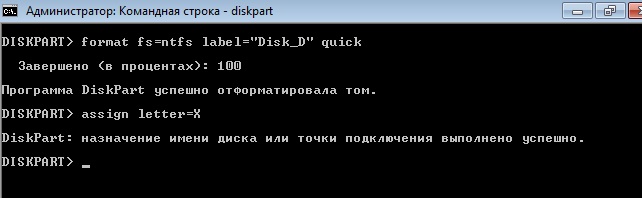
Дальше можно разметить диск штатными средствами консоли управления дисками в Windows, или здесь же.
DISKPART> create partition primary
Для быстрого форматирования раздела с использованием метки тома Disk_D и файловой системы NTFS:
DISKPART> format fs=ntfs label="Disk_D" quick
Раздел готов к использованию и ему можно присвоить букву
DISKPART> assign letter=X
25 812