
The copy Command Prompt command duplicates a file, storing the second version in a different location of your choosing.
Use the command to copy a file using its specific name and file extension or use a wildcard to copy groups of files at once, regardless of the file names or extensions. Some other command options include verification that the files were copied correctly and suppression of prompts to overwrite files of the same name.
Copy Command Availability
Copy Command Options (Windows 11 Command Prompt).
The copy command is available from within the Command Prompt in Windows 11, Windows 10, Windows 8, Windows 7, Windows Vista, and Windows XP, as well as from the Advanced Startup Options and System Recovery Options repair/recovery menus.
The availability of certain copy command switches and other command syntax might differ from operating system to operating system.
Copy Command Syntax
The command accepts the following general form:
copy [/d] [/v] [/n] [/y | /-y] [/z] [/l] [/a | /b] source [/a | /b] [+ source [/a | /b] [+ …]] [destination [/a | /b]] [/?]
See How to Read Command Syntax if you’re not sure how to interpret the copy command syntax as it’s described above or in the table below.
| Copy Command Options | |
|---|---|
| Item | Explanation |
| /d | Allows the destination file to be created decrypted. |
| /v | Verifies that new files are written correctly. |
| /n | Uses short file name, if available, when copying a file with a non-8dot3 name. |
| /y | Suppresses confirmation prompts to overwrite the destination file if it’s the same name as the source file. |
| /-y | Shows confirmation prompts to overwrite a file if the source file name is identical to the destination file name. |
| /z | Copies networked files in restartable mode. |
| /l | Copies the link to source instead of the actual file that source points to. This is only relevant if source is a symbolic link. |
| /a | Indicates an ASCII text file. |
| /b | Indicates a binary file. |
| source | This is the location and name of the file you want to copy. The source may not be a folder and you may not use wildcard characters (the asterisk). |
| destination | This is the location and/or file name that the file specified in source should be copied to. |
| /? | Use the help switch with the copy command to show detailed help about the command’s several options. |
Append files by choosing several source files but just one destination file.
Copy Command Examples
Below are several examples of how to use the copy command:
Copy to a Different Folder
copy Z:\Software\program.iso C:\Users\Jon\Downloads\Programs\
The copies program.iso from the Z: drive to the user’s Programs folder.
Take note of the space between these two commands. It’s not obvious at first, but the only spaces in this example of the copy command are after copy and between the source and destination files.
Copy and Rename
copy Y:\install\j93n.exe Y:\more\m1284.msi
You can use the copy command to rename a file and even change its file extension. In this example, the j93n.exe file copies to a new folder on the Y: drive as m1284.msi.
This isn’t a file conversion technique (i.e., the EXE file isn’t really being converted to MSI) but instead a way to make an identical copy but with the destination file saved under a different name and inside a different folder.
copy D:\i386\atapi.sy_ C:\Windows\atapi.sys
In the above example, the atapi.sy_ file, located in the i386 folder on the Windows XP installation CD, is copied to the C:\Windows directory as atapi.sys.
Unlike the Y: drive example above, this one is a bit more realistic, since copying files like that from a disc is a common practice when fixing some specific Windows problems.
Copy to Current Path
copy D:\readme.htm
In this example, the copy command has no destination specified, so the readme.htm file is copied to whatever directory you typed the copy command from.
For example, if you type copy d:\readme.htm from the C:\Windows> prompt, that HTM file will be copied to C:\Windows.
Copy Only Certain File Types
copy /y /v C:\Users\Jon\Downloads\*.mp3 C:\Users\Jon\Music\DownloadedMusic\
This command copies all MP3s (*.mp3) from the Downloads folder to the Music\DownloadedMusic\ folder, but we want to make sure that every file is copied, even if there’s already one in DownloadedMusic with the same name (/y). We’ll verify the copy (/v) to make sure Command Prompt tells us whether the files were actually copied or if an error happened in the process.
A folder has to already exist in the destination location before the copy command will copy files to it. Make new folders in Command Prompt with the mkdir command.
Merge Files Into One
copy Z:\file1.txt+Z:\file2.txt+Z:\file3.txt Z:\combined.txt
This will merge three TXT files into a new one called combined.txt. As you can see, each file that should be part of the merge needs to be separated by +, but no spaces.
You can also use the asterisk to append multiple files. So, in our example, we could replace all those .txt instances with Z:\*.txt, but only if we want to merge every single TXT file from the Z: drive.
Copy Related Commands
This command is similar to the xcopy command, but unlike copy, xcopy works on folders, too.
Of course, a command isn’t necessary if you’d rather copy a file in Windows using File Explorer.
Thanks for letting us know!
Get the Latest Tech News Delivered Every Day
Subscribe
Last Updated :
05 Apr, 2025
Have you ever needed to copy a bunch of files from one folder to another without clicking through endless windows? Or perhaps you’re looking to streamline a repetitive task with a single line of text? If so, the Command Prompt (CMD) on Windows is here to save the day! Copying files between directories is a fundamental computing task, and while graphical interfaces are convenient, CMD offers a fast, efficient alternative—especially for bulk operations or automation. In this guide, we’ll show you how to use CMD to copy files from one directory to another.
Reason to Use CMD for Copying Files from One Directory to Another
When copying files from one directory to another, using the Command Prompt (CMD) offers several advantages over relying on a graphical user interface (GUI). Below are the key reasons why CMD can be a better choice for this task:
- Speed and Efficiency: CMD allows you to copy files quickly with a single command, avoiding the slower process of navigating folders and dragging files in a graphical interface.
- Automation and Scripting: CMD supports batch scripts, enabling you to automate or schedule repetitive file copying tasks or schedule them, which isn’t possible with manual GUI methods.
- Handling Large or Numerous Files: CMD is designed to efficiently handle large sets of files or big datasets, even resuming transfers if interrupted, unlike the GUI, which may struggle.
How to Copy Files from One Directory to Another Using CMD
In this section, we will outline the step-by-step procedure for copying files between directories using the Windows Command Prompt. This guide is divided into two parts: the first part covers copying a single file, while the second part discusses copying multiple files. Let’s begin with the first part.
How to Copy Files From One Directory to Another?
Follow the below steps to copy the single file from one directory to another.
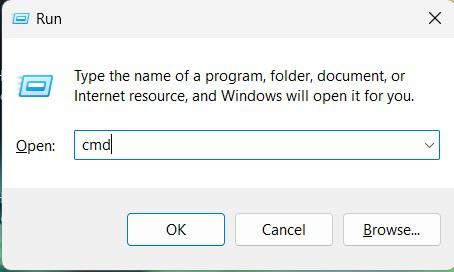
Step 1: Open CMD
- To copy a file from one directory to another using CMD, open Command Prompt by pressing Win + R, typing CMD, and pressing Enter.
Step 1: Opne File Destination
- Go to the file destination though Change Directory«cd» command or open cmd in that directory.
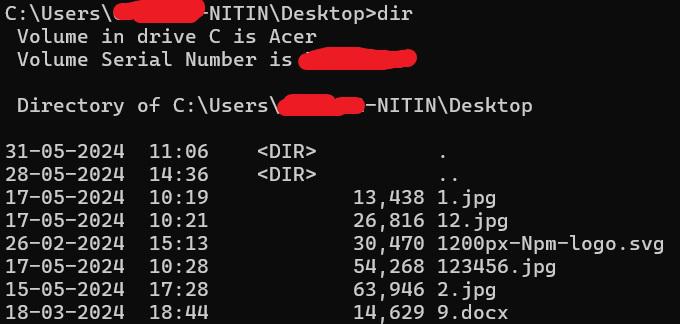
Step 2: Use Dir Command
- Now Type «dir» command to see the list of files available in that directory.
Step 3: Use Copy Command
- Now type the following command and replace <filename> with your actual file name and <destination> with where you want to paste the file.
copy <filename> <destination>

Note: If you try to copy file to C: drive, so it does not work if you have not open command prompt «Run as Administrator» permission.
How to Copy Multiple Files from One Directory to Another?
To copy multiple files at once, use the appropriate command along with its various options. Follow the steps below to transfer all files and directories to a different directory or drive.
Step 1: Open CMD
- Press WIndows button and search for CMD now, choose run with Administrator option to open CMD.
Step 2: Use XCOPY Command
- Run the following command to copy from one directory to another. Replace <source> and <destination> with current directory location from where you want to copy and location where you want to paste.
xcopy <source> <destination> /s /eAvailable Options
When copying files using the Command Prompt (CMD) in Windows, you can use a variety of options to make the process work just the way you want. Find a table of all available options that you can use ti copy files from one directory to another.
|
Parameters |
Description |
|---|---|
|
<source> |
Give you the file name and location of the file you want to copy. |
|
<destination> |
Give you the directory name and location of the destination where you want to paste the file. |
|
/w |
Display the message and wait for your response. Press any key to begin copying file(s) |
|
/p |
It will ask you where you want to create a destination file. |
|
/c |
It specifies to ignore the error if occurs. |
|
/v |
It will verify each file is same as the source and destination file. |
|
/f |
displays the source and destination of the each file. |
|
/g |
Generate a list of files to be coppied. |
|
/s |
copies the directory and sub-directory unless it is empty. |
|
/e |
Copies all subdirectories does not check whether they are empty or not. |
|
/r |
It will copy only read-only files. |
|
/h |
copies hidden files. |
|
/z |
Copies over a network in restartable mode. |
|
/? |
Display the help. |
Conclusion
One effective and powerful technique to manage your files on Windows is to use the CMD copy command to move files between folders. The copy files using CMD approach is simple and dependable, regardless of the number of files you’re copying. You may now more efficiently manage your data because you know how to use CMD to copy files from one location to another.
Указанные при описании команды COPY проблемы можно решить с помощью команды XCOPY, которая предоставляет намного больше возможностей при копировании. Необходимо отметить, правда, что XCOPY может работать только с файлами и каталогами, но не с устройствами.
Синтаксис этой команды:
XCOPY источник [результат] [ключи]Команда XCOPY имеет множество ключей, мы коснемся лишь некоторых из них. Ключ /D[:[дата]] позволяет копировать только файлы, измененные не ранее указанной даты. Если параметр дата не указан, то копирование будет производиться только если источник новее результата. Например, команда
XCOPY "C:\Мои документы\*.*" "D:\BACKUP\Мои документы" /Dскопирует в каталог ‘D:\BACKUP\Мои документы’ только те файлы из каталога ‘C:\Мои документы’, которые были изменены со времени последнего подобного копирования или которых вообще не было в ‘D:\BACKUP\Мои документы’.
Ключ /S позволяет копировать все непустые подкаталоги в каталоге-источнике. С помощью же ключа /E можно копировать вообще все подкаталоги, включая и пустые.
Если указан ключ /C, то копирование будет продолжаться даже в случае возникновения ошибок. Это бывает очень полезным при операциях копирования, производимых над группами файлов, например, при резервном копировании данных.
Ключ /I важен для случая, когда копируются несколько файлов, а файл назначения отсутствует. При задании этого ключа команда XCOPY считает, что файл назначения должен быть каталогом. Например, если задать ключ /I в команде копирования всех файлов с расширением txt из текущего каталога в несуществующий еще подкаталог TEXT,
XCOPY *.txt TEXT /Iто подкаталог TEXT будет создан без дополнительных запросов.
Ключи /Q, /F и /L отвечают за режим отображения при копировании. При задании ключа /Q имена файлов при копировании не отображаются, ключа /F — отображаются полные пути источника и результата. Ключ /L обозначает, что отображаются только файлы, которые должны быть скопированы (при этом само копирование не производится).
С помощью ключа /H можно копировать скрытые и системные файлы, а с помощью ключа /R — заменять файлы с атрибутом «Только для чтения». Например, для копирования всех файлов из корневого каталога диска C: (включая системные и скрытые) в каталог SYS на диске D:, нужно ввести следующую команду:
XCOPY C:\*.* D:\SYS /HКлюч /T позволяет применять XCOPY для копирования только структуры каталогов источника, без дублирования находящихся в этих каталогах файлов, причем пустые каталоги и подкаталоги не включаются. Для того, чтобы все же включить пустые каталоги и подкаталоги, нужно использовать комбинацию ключей /T /E.
Используя XCOPY можно при копировании обновлять только уже существующие файлы (новые файлы при этом не записываются). Для этого применяется ключ /U. Например, если в каталоге C:\2 находились файлы a.txt и b.txt, а в каталоге C:\1 — файлы a.txt, b.txt, c.txt и d.txt, то после выполнения команды
XCOPY C:\1 C:\2 /Uв каталоге C:\2 по-прежнему останутся лишь два файла a.txt и b.txt, содержимое которых будет заменено содержимым соответствующих файлов из каталога C:\1. Если с помощью XCOPY копировался файл с атрибутом «Только для чтения», то по умолчанию у файла-копии этот атрибут снимется. Для того, чтобы копировать не только данные, но и полностью атрибуты файла, необходимо использовать ключ /K.
Ключи /Y и /-Y определяют, нужно ли запрашивать подтверждение перед заменой файлов при копировании. /Y означает, что такой запрос нужен, /-Y — не нужен.
Using copy command, we can copy files from one directory to another directory. This command is similar to the Linux cp command, but it does not match with the full functionality of cp. Windows copy command can be used to copy files only, we can’t copy directories.
The syntax and usecases of copy command are explained below with examples.
Copy the contents of a file to another file
copy sourceFile destinationFile
Example: To copy a file from c:\data\file1.doc to D:\backup\file2.doc
copy c:\data\file1.doc D:\backup\file2.doc
If the destination file already exists you will be prompted for confirmation. To suppress this confirmation you can use /Y switch with copy command. This would be useful if you are executing copy command from a batch file.
c\> copy /Y c:\dir1\subdir1\file1.txt c:\dir2\subdir2\file2.txt
If the destination file exists, the above command will overwrite the same without asking the user for confirmation.
Copy file to another directory
When we specify a directory path as the destination, the files will be copied with the same name. We can assign a different name by specifying the new name in the destination path. Example is shown below.
To copy the file 1.doc loated at c:\data\documents to the directory c:\data\newdocs
c\> copy c:\data\documents\1.doc c:\data\newdocs\
Copy files with white space in name
If the file name has white space within it, we can wrap up the name in double quotes.
Example: To copy file, my resume.doc to another folder
copy "my resume.doc" D:\data\
Copy multiple files
We can’t specify multiple file names in copy command. However, we can use wildcards to identify a group of files and then copy all of them in a single command.
For example, to copy all excel files from current folder to another folder F:\backup
copy *.xls F:\backup\
To copy all files in current folder to another folder
copy * D:\dir1\dir2
Use of environment variables
We can use environment variables in the copy command to specify the path of the folders. Like USERPROFILE, SystemRoot, ProgramFiles, TEMP, WINDIR, APPDATA, HOMEPATH.
For example, to copy a file to a user’s documents folder
Copy D:\file.pdf %HOMEPATH%\Documents\
The above command copies the file to the My Documents folder of the current logged in user.
You may also want to read
- Xcopy command syntax and examples
- Robocopy command
Загрузить PDF
Загрузить PDF
Из этой статьи вы узнаете, как в Windows копировать отдельные файлы и файлы из папки с помощью командной строки.
-

Необходимо выяснить, в каком каталоге хранится файл, чтобы указать его в командной строке.
- Чтобы найти каталог, в Проводнике перейдите в папку с файлом, а затем щелкните по адресной строке в верхней части окна Проводника.
- Большинство файлов находится в следующем каталоге: [буква диска]:\Пользователи\[имя пользователя] (например, «C:\Пользователи\Иван»). В этом каталоге хранятся практически все файлы, созданные пользователем.
- Например, файл на рабочем столе находится в следующем каталоге: «C:\Пользователи\Иван\Рабочий стол», а файл в папке «Документы» в каталоге «C:\Пользователи\Иван\Документы».
-
Это необходимо, чтобы скопировать файл. Имейте в виду, что командная строка учитывает регистр букв, поэтому правильно запишите имя файла.
-
Нажмите на логотип Windows в нижнем левом углу экрана.
-
Начнется поиск утилиты «Командная строка».
-
Вы найдете этот значок в верхней части меню «Пуск». Откроется окно командной строки.
- Имейте в виду, что на общедоступном компьютере (например, в школе) вы не сможете открыть командную строку.
Реклама


-
Введите cd, а затем нажмите Пробел; клавишу ↵ Enter не нажимайте.
-
-
В командной строке вы перейдете в указанный каталог.
-
Введите copy, а затем нажмите Пробел; клавишу ↵ Enter не нажимайте.
-
Введите имя файла, а затем нажмите Пробел. Имя файла введите с расширением файла (например, .txt в случае текстового файла). Клавишу ↵ Enter не нажимайте.
- Если в имени файла есть пробелы, заключите их в кавычки. Например, имя файла «Pickles are Good.txt» в командной строке нужно ввести так: Pickles" "are" "Good.txt.
-
Введите каталог (например, C:\Пользователи\[ваше имя пользователя]\Рабочий стол, в который будет скопирован файл.
- Если не ввести конечный каталог, файл будет скопирован в ваш персональный каталог (например, «C:\Пользователи\[ваше имя пользователя]»).
-
Файл будет скопирован в указанный каталог. Чтобы открыть скопированный файл, перейдите в соответствующий каталог в окне Проводника.
Реклама


-
Введите cd, нажмите Пробел, введите каталог с папкой и нажмите ↵ Enter.
- Например, чтобы скопировать файлы из папки «Example», которая находится на рабочем столе, введите каталог C:\Пользователи\Иван\Рабочий стол.
-
Введите robocopy, а затем нажмите Пробел; клавишу ↵ Enter не нажимайте.
-
Введите имя папки, файлы из которой вы хотите скопировать, а затем нажмите Пробел. Клавишу ↵ Enter не нажимайте.
- Если в имени папки есть пробелы, заключите их в кавычки.
-
Введите каталог, в который вы хотите скопировать файлы из папки.
- Если в исходной и конечной папках много файлов, они перемешаются, потому что сама исходная папка скопирована не будет.
-
Файл из исходной папки будут скопированы в конечную папку.
Реклама


Советы
- Чтобы скопировать все файлы, которые находятся в каталоге, введите команду copy *[тип файла] (например, copy *.txt).
- Чтобы создать конечную папку и скопировать в нее сразу несколько файлов, введите каталог конечной папки (включая саму конечную папку) в сочетании с командой «robocopy».[1]
- Если скопировать файлы, которые находятся на рабочем столе, в новую папку, она будет переименована в «Рабочий стол».
Реклама
Предупреждения
- Копировать файлы и папки через командную строку довольно рискованно, если вы не знаете, что делаете. Не трогайте папки и файлы, назначение которых вам неизвестно.
Реклама
Об этой статье
Эту страницу просматривали 224 742 раза.