
-
Optionally move the old cluster
If you are using a version-specific installation directory, e.g.,
/opt/PostgreSQL/17, you do not need to move the old cluster. The graphical installers all use version-specific installation directories.If your installation directory is not version-specific, e.g.,
/usr/local/pgsql, it is necessary to move the current PostgreSQL install directory so it does not interfere with the new PostgreSQL installation. Once the current PostgreSQL server is shut down, it is safe to rename the PostgreSQL installation directory; assuming the old directory is/usr/local/pgsql, you can do:mv /usr/local/pgsql /usr/local/pgsql.old
to rename the directory.
-
For source installs, build the new version
Build the new PostgreSQL source with
configureflags that are compatible with the old cluster. pg_upgrade will checkpg_controldatato make sure all settings are compatible before starting the upgrade. -
Install the new PostgreSQL binaries
Install the new server’s binaries and support files. pg_upgrade is included in a default installation.
For source installs, if you wish to install the new server in a custom location, use the
prefixvariable:make prefix=/usr/local/pgsql.new install
-
Initialize the new PostgreSQL cluster
Initialize the new cluster using
initdb. Again, use compatibleinitdbflags that match the old cluster. Many prebuilt installers do this step automatically. There is no need to start the new cluster. -
Install extension shared object files
Many extensions and custom modules, whether from
contribor another source, use shared object files (or DLLs), e.g.,pgcrypto.so. If the old cluster used these, shared object files matching the new server binary must be installed in the new cluster, usually via operating system commands. Do not load the schema definitions, e.g.,CREATE EXTENSION pgcrypto, because these will be duplicated from the old cluster. If extension updates are available, pg_upgrade will report this and create a script that can be run later to update them. -
Copy custom full-text search files
Copy any custom full text search files (dictionary, synonym, thesaurus, stop words) from the old to the new cluster.
-
Adjust authentication
pg_upgradewill connect to the old and new servers several times, so you might want to set authentication topeerinpg_hba.confor use a~/.pgpassfile (see Section 32.16). -
Prepare for publisher upgrades
pg_upgrade attempts to migrate logical slots. This helps avoid the need for manually defining the same logical slots on the new publisher. Migration of logical slots is only supported when the old cluster is version 17.0 or later. Logical slots on clusters before version 17.0 will silently be ignored.
Before you start upgrading the publisher cluster, ensure that the subscription is temporarily disabled, by executing
ALTER SUBSCRIPTION ... DISABLE. Re-enable the subscription after the upgrade.There are some prerequisites for pg_upgrade to be able to upgrade the logical slots. If these are not met an error will be reported.
-
The new cluster must have
wal_levelaslogical. -
The new cluster must have
max_replication_slotsconfigured to a value greater than or equal to the number of slots present in the old cluster. -
The output plugins referenced by the slots on the old cluster must be installed in the new PostgreSQL executable directory.
-
The old cluster has replicated all the transactions and logical decoding messages to subscribers.
-
All slots on the old cluster must be usable, i.e., there are no slots whose pg_replication_slots.
conflictingis nottrue. -
The new cluster must not have permanent logical slots, i.e., there must be no slots where pg_replication_slots.
temporaryisfalse.
-
-
Prepare for subscriber upgrades
Setup the subscriber configurations in the new subscriber. pg_upgrade attempts to migrate subscription dependencies which includes the subscription’s table information present in pg_subscription_rel system catalog and also the subscription’s replication origin. This allows logical replication on the new subscriber to continue from where the old subscriber was up to. Migration of subscription dependencies is only supported when the old cluster is version 17.0 or later. Subscription dependencies on clusters before version 17.0 will silently be ignored.
There are some prerequisites for pg_upgrade to be able to upgrade the subscriptions. If these are not met an error will be reported.
-
All the subscription tables in the old subscriber should be in state
i(initialize) orr(ready). This can be verified by checking pg_subscription_rel.srsubstate. -
The replication origin entry corresponding to each of the subscriptions should exist in the old cluster. This can be found by checking pg_subscription and pg_replication_origin system tables.
-
The new cluster must have
max_replication_slotsconfigured to a value greater than or equal to the number of subscriptions present in the old cluster.
-
-
Stop both servers
Make sure both database servers are stopped using, on Unix, e.g.:
pg_ctl -D /opt/PostgreSQL/12 stop
pg_ctl -D /opt/PostgreSQL/17 stop
or on Windows, using the proper service names:
NET STOP postgresql-12
NET STOP postgresql-17
Streaming replication and log-shipping standby servers must be running during this shutdown so they receive all changes.
-
Prepare for standby server upgrades
If you are upgrading standby servers using methods outlined in section Step 13, verify that the old standby servers are caught up by running pg_controldata against the old primary and standby clusters. Verify that the “Latest checkpoint location” values match in all clusters. Also, make sure
wal_levelis not set tominimalin thepostgresql.conffile on the new primary cluster. -
Run pg_upgrade
Always run the pg_upgrade binary of the new server, not the old one. pg_upgrade requires the specification of the old and new cluster’s data and executable (
bin) directories. You can also specify user and port values, and whether you want the data files linked or cloned instead of the default copy behavior.If you use link mode, the upgrade will be much faster (no file copying) and use less disk space, but you will not be able to access your old cluster once you start the new cluster after the upgrade. Link mode also requires that the old and new cluster data directories be in the same file system. (Tablespaces and
pg_walcan be on different file systems.) Clone mode provides the same speed and disk space advantages but does not cause the old cluster to be unusable once the new cluster is started. Clone mode also requires that the old and new data directories be in the same file system. This mode is only available on certain operating systems and file systems.The
--jobsoption allows multiple CPU cores to be used for copying/linking of files and to dump and restore database schemas in parallel; a good place to start is the maximum of the number of CPU cores and tablespaces. This option can dramatically reduce the time to upgrade a multi-database server running on a multiprocessor machine.For Windows users, you must be logged into an administrative account, and then run pg_upgrade with quoted directories, e.g.:
pg_upgrade.exe
        --old-datadir "C:/Program Files/PostgreSQL/12/data"
        --new-datadir "C:/Program Files/PostgreSQL/17/data"
        --old-bindir "C:/Program Files/PostgreSQL/12/bin"
        --new-bindir "C:/Program Files/PostgreSQL/17/bin"
Once started,
pg_upgradewill verify the two clusters are compatible and then do the upgrade. You can usepg_upgrade --checkto perform only the checks, even if the old server is still running.pg_upgrade --checkwill also outline any manual adjustments you will need to make after the upgrade. If you are going to be using link or clone mode, you should use the option--linkor--clonewith--checkto enable mode-specific checks.pg_upgraderequires write permission in the current directory.Obviously, no one should be accessing the clusters during the upgrade. pg_upgrade defaults to running servers on port 50432 to avoid unintended client connections. You can use the same port number for both clusters when doing an upgrade because the old and new clusters will not be running at the same time. However, when checking an old running server, the old and new port numbers must be different.
If an error occurs while restoring the database schema,
pg_upgradewill exit and you will have to revert to the old cluster as outlined in Step 19 below. To trypg_upgradeagain, you will need to modify the old cluster so the pg_upgrade schema restore succeeds. If the problem is acontribmodule, you might need to uninstall thecontribmodule from the old cluster and install it in the new cluster after the upgrade, assuming the module is not being used to store user data. -
Upgrade streaming replication and log-shipping standby servers
If you used link mode and have Streaming Replication (see Section 26.2.5) or Log-Shipping (see Section 26.2) standby servers, you can follow these steps to quickly upgrade them. You will not be running pg_upgrade on the standby servers, but rather rsync on the primary. Do not start any servers yet.
If you did not use link mode, do not have or do not want to use rsync, or want an easier solution, skip the instructions in this section and simply recreate the standby servers once pg_upgrade completes and the new primary is running.
-
Install the new PostgreSQL binaries on standby servers
Make sure the new binaries and support files are installed on all standby servers.
-
Make sure the new standby data directories do not exist
Make sure the new standby data directories do not exist or are empty. If initdb was run, delete the standby servers’ new data directories.
-
Install extension shared object files
Install the same extension shared object files on the new standbys that you installed in the new primary cluster.
-
Stop standby servers
If the standby servers are still running, stop them now using the above instructions.
-
Save configuration files
Save any configuration files from the old standbys’ configuration directories you need to keep, e.g.,
postgresql.conf(and any files included by it),postgresql.auto.conf,pg_hba.conf, because these will be overwritten or removed in the next step. -
Run rsync
When using link mode, standby servers can be quickly upgraded using rsync. To accomplish this, from a directory on the primary server that is above the old and new database cluster directories, run this on the primary for each standby server:
rsync --archive --delete --hard-links --size-only --no-inc-recursive old_cluster new_cluster remote_dir
where
old_clusterandnew_clusterare relative to the current directory on the primary, andremote_diris above the old and new cluster directories on the standby. The directory structure under the specified directories on the primary and standbys must match. Consult the rsync manual page for details on specifying the remote directory, e.g.,rsync --archive --delete --hard-links --size-only --no-inc-recursive /opt/PostgreSQL/12 \ /opt/PostgreSQL/17 standby.example.com:/opt/PostgreSQLYou can verify what the command will do using rsync‘s
--dry-runoption. While rsync must be run on the primary for at least one standby, it is possible to run rsync on an upgraded standby to upgrade other standbys, as long as the upgraded standby has not been started.What this does is to record the links created by pg_upgrade‘s link mode that connect files in the old and new clusters on the primary server. It then finds matching files in the standby’s old cluster and creates links for them in the standby’s new cluster. Files that were not linked on the primary are copied from the primary to the standby. (They are usually small.) This provides rapid standby upgrades. Unfortunately, rsync needlessly copies files associated with temporary and unlogged tables because these files don’t normally exist on standby servers.
If you have tablespaces, you will need to run a similar rsync command for each tablespace directory, e.g.:
rsync --archive --delete --hard-links --size-only --no-inc-recursive /vol1/pg_tblsp/PG_12_201909212 \
      /vol1/pg_tblsp/PG_17_202307071 standby.example.com:/vol1/pg_tblsp
If you have relocated
pg_waloutside the data directories, rsync must be run on those directories too. -
Configure streaming replication and log-shipping standby servers
Configure the servers for log shipping. (You do not need to run
pg_backup_start()andpg_backup_stop()or take a file system backup as the standbys are still synchronized with the primary.) If the old primary is prior to version 17.0, then no slots on the primary are copied to the new standby, so all the slots on the old standby must be recreated manually. If the old primary is version 17.0 or later, then only logical slots on the primary are copied to the new standby, but other slots on the old standby are not copied, so must be recreated manually.
-
-
Restore
pg_hba.confIf you modified
pg_hba.conf, restore its original settings. It might also be necessary to adjust other configuration files in the new cluster to match the old cluster, e.g.,postgresql.conf(and any files included by it),postgresql.auto.conf. -
Start the new server
The new server can now be safely started, and then any rsync‘ed standby servers.
-
Post-upgrade processing
If any post-upgrade processing is required, pg_upgrade will issue warnings as it completes. It will also generate script files that must be run by the administrator. The script files will connect to each database that needs post-upgrade processing. Each script should be run using:
psql --username=postgres --file=script.sql postgres
The scripts can be run in any order and can be deleted once they have been run.
Caution
In general it is unsafe to access tables referenced in rebuild scripts until the rebuild scripts have run to completion; doing so could yield incorrect results or poor performance. Tables not referenced in rebuild scripts can be accessed immediately.
-
Statistics
Because optimizer statistics are not transferred by
pg_upgrade, you will be instructed to run a command to regenerate that information at the end of the upgrade. You might need to set connection parameters to match your new cluster.Using
vacuumdb --all --analyze-onlycan efficiently generate such statistics, and the use of--jobscan speed it up. Option--analyze-in-stagescan be used to generate minimal statistics quickly. Ifvacuum_cost_delayis set to a non-zero value, this can be overridden to speed up statistics generation usingPGOPTIONS, e.g.,PGOPTIONS='-c vacuum_cost_delay=0' vacuumdb .... -
Delete old cluster
Once you are satisfied with the upgrade, you can delete the old cluster’s data directories by running the script mentioned when
pg_upgradecompletes. (Automatic deletion is not possible if you have user-defined tablespaces inside the old data directory.) You can also delete the old installation directories (e.g.,bin,share). -
Reverting to old cluster
If, after running
pg_upgrade, you wish to revert to the old cluster, there are several options:-
If the
--checkoption was used, the old cluster was unmodified; it can be restarted. -
If the
--linkoption was not used, the old cluster was unmodified; it can be restarted. -
If the
--linkoption was used, the data files might be shared between the old and new cluster:-
If
pg_upgradeaborted before linking started, the old cluster was unmodified; it can be restarted. -
If you did not start the new cluster, the old cluster was unmodified except that, when linking started, a
.oldsuffix was appended to$PGDATA/global/pg_control. To reuse the old cluster, remove the.oldsuffix from$PGDATA/global/pg_control; you can then restart the old cluster. -
If you did start the new cluster, it has written to shared files and it is unsafe to use the old cluster. The old cluster will need to be restored from backup in this case.
-
-
The official documentation for PostgreSQL provides a guide to upgrading using pg_upgrade. However, it can be a bit like a treasure hunt with hidden traps. This gist will walk you through a clear and robust method for upgrading PostgreSQL on Windows, using the upgrade from version 14 to 16 as an example.
1. Install the New Version of PostgreSQL
Before you embark on the upgrade journey, make sure you have the new version installed. This is because the pg_upgrade utility used during the upgrade process belongs to the newer version.
To get started, visit the official download page, download the installer, and run it. A word of caution: do not overwrite the old installation, as you’ll need its binaries and data for the upgrade.
2. Stop Both PostgreSQL Services
To ensure a smooth transition, you’ll need to stop both the old and new PostgreSQL services. Here’s how you can do it:
- Press
Win+Rand type inservices.mscto open the Services application. - Look for services with names like
postgresql-{major_version}(orpostgresql-x64-{major_version}for x64 machines), and stop them manually. - Alternatively, you can use PowerShell to stop the services with these commands:
Stop-Service -Name postgresql-x64-14
Stop-Service -Name postgresql-x64-16
3. Configure Authentication
During the PostgreSQL upgrade, pg_upgrade connects to both the old and new PostgreSQL instances. However, there isn’t an obvious way to specify credentials (or perhaps there is, but it’s well-hidden). To work around this, you’ll need to temporarily modify the authentication settings in {data_dir}/pg_hba.conf.
Open the {data_dir}/pg_hba.conf file, which should resemble the following at the bottom:
# TYPE  DATABASE        USER            ADDRESS                 METHOD

# "local" is for Unix domain socket connections only
local   all             all                                     scram-sha-256
# IPv4 local connections:
host    all             all             127.0.0.1/32            scram-sha-256
# IPv6 local connections:
host    all             all             ::1/128                 scram-sha-256
# Allow replication connections from localhost, by a user with the
# replication privilege.
local   replication     all                                     scram-sha-256
host    replication     all             127.0.0.1/32            scram-sha-256
host    replication     all             ::1/128                 scram-sha-256
Change the METHOD of IPv4 and IPv6 local connections to trust, like this:
# TYPE  DATABASE        USER            ADDRESS                 METHOD

# "local" is for Unix domain socket connections only
local   all             all                                     scram-sha-256
# IPv4 local connections:
host    all             all             127.0.0.1/32            trust
# IPv6 local connections:
host    all             all             ::1/128                 trust
# Allow replication connections from localhost, by a user with the
# replication privilege.
local   replication     all                                     scram-sha-256
host    replication     all             127.0.0.1/32            scram-sha-256
host    replication     all             ::1/128                 scram-sha-256
Don’t forget to update the authentication configurations for both the old and new PostgreSQL services.
4. Create Temporary Directory
pg_upgrade requires write permission in the directory where it’s executed. You can easily solve this by creating a temporary directory, let’s say D:\Temp, and granting Write permission to «Everyone.»
5. Check Release Notes
The release notes of each PostgreSQL version list the breaking changes that may cause incompatibility issues and corresponding solutions during an upgrade. You may skip this step and come back to it when you encounter unexpected errors when executing pg_upgrade.
6. Execute pg_upgrade
Now, navigate to the temporary directory you configured in step 5 (you can run cd D:/Temp for my example).
It’s finally time to execute the actual command. Run the following command:
{new_bin_dir}/pg_upgrade.exe --old-datadir {old_data_dir} --new-datadir {new_data_dir} --old-bindir {old_bin_dir} --new-bindir {new_bin_dir} -U postgres
For example, this command expands to for my example:
D:\Program Files\PostgreSQL\16\bin\pg_upgrade.exe --old-datadir 'D:\Data\PostgreSQL\14.4' --new-datadir 'D:\Data\PostgreSQL\16' --old-bindir 'D:\Program Files\PostgreSQL\14.4\bin' --new-bindir 'D:\Program Files\PostgreSQL\16\bin' -U postgres
But don’t hit enter just yet. There’s a subtle bug: spaces in the binary path can cause issues. Typically, you’d wrap the path in quotes and use the call operator & to run the command. However, this approach doesn’t work here. When you use &, the standard input of the command isn’t redirected, leading to a bug in xcopy, an old Windows command used by pg_upgrade for copying directories.
If you run the command with &, it’s likely that the upgrade will fail when copying pg_xact from the old data directory to the new one. The log might look like this:
command: xcopy /e /y /q /r "D:/Data/PostgreSQL/14.4/pg_xact" "D:/Data/PostgreSQL/16/pg_xact\" >> "D:/Data/PostgreSQL/16/pg_upgrade_output.d/20231009T132036.390/log/pg_upgrade_utility.log" 2>&1
Invalid path
0 files copied
I discovered this after much trial and error, and you can find more details in this post.
To avoid this issue, use the PowerShell escape character ` to escape the spaces in the path of the binary. It should look like this:
D:\Program` Files\PostgreSQL\16\bin\pg_upgrade.exe --old-datadir 'D:\Data\PostgreSQL\14.4' --new-datadir 'D:\Data\PostgreSQL\16' --old-bindir 'D:\Program Files\PostgreSQL\14.4\bin' --new-bindir 'D:\Program Files\PostgreSQL\16\bin'
Now everything should work smoothly (at least to the best of my knowledge).
7. Clean Up
To wrap up the upgrade, you’ll need to revert the temporary adjustments you made. Here’s a checklist:
- Delete the temporary directory used as the current directory to execute
pg_upgrade. - Change the authentication methods of localhost back to
scram-sha-256inpg_hba.conf. - Start the new PostgreSQL service (or the old one if needed).
With these steps, you’ll have successfully upgraded PostgreSQL on Windows while ensuring a smooth transition and cleaning up any temporary changes made during the process.
Introduction
Upgrading PostgreSQL server binaries and clusters is critical for ensuring the performance, security, and stability of your database. However, the official documentation for the process is overly-complicated and involved for a straightforward upgrade while also managing to omit some vital information.
In this post, we will simplify the process of updating PostgreSQL on both Windows and Ubuntu. The step-by-step approach is intended to clarify the update process, making clear instructions available to administrators of all ability levels.
Whether you’re a new database administrator or a seasoned expert looking for a more basic upgrade method, this tutorial will provide you with the knowledge and confidence to successfully upgrade your PostgreSQL server without the need for lengthy documentation comprehension.
Note
These steps are suitable for a standalone server without need for high availability. For more advanced needs, consult the PostgreSQL upgrade documentation.
Upgrading PostgreSQL Server on Windows
Before you start
As always, make sure you have a full backup before attempting any upgrades on your database. Read through the steps first and make a plan beforehand to make sure there are no surprises on the way through.
The steps described here will require taking the database offline briefly (dependent on the size of your cluster and the hardware you’re running it on). The database will be copied to the new version and will run in parallel on a different port until you either disable the old version and change the port to the old one, or point your apps to the new port.
Upgrade Steps
1. Download and install the latest binaries
Start off downloading the latest installer from EDB’s website.
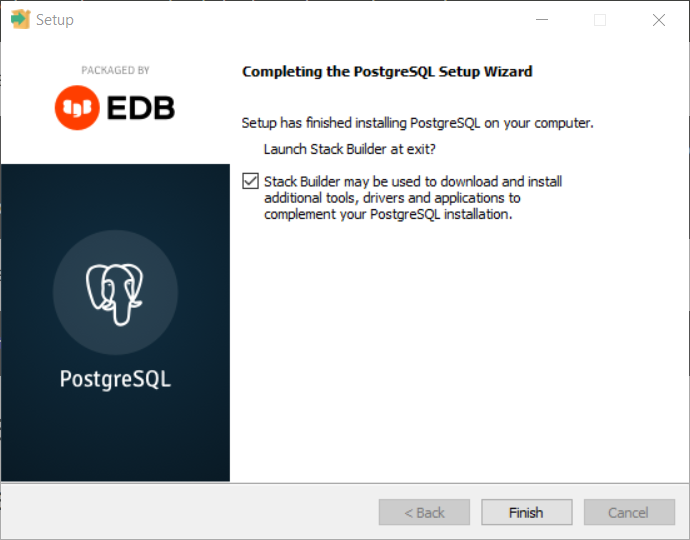
Run the installer to update your current version to the latest release in that version. The installer is self-explanatory and follows a simple wizard interface.
It will prompt you with the information about existing installations and information about upgrading.
Once the initial setup is complete, you will see a prompt to launch the Stack Builder. Choose this path and follow the next step below.
2. Install the new server version
This step does not upgrade your database but, instead, installs the necessary server and services for the new version.
You should have the Stack Builder Welcome page where you’re prompted to select the PostgreSQL installation (either local or remote):
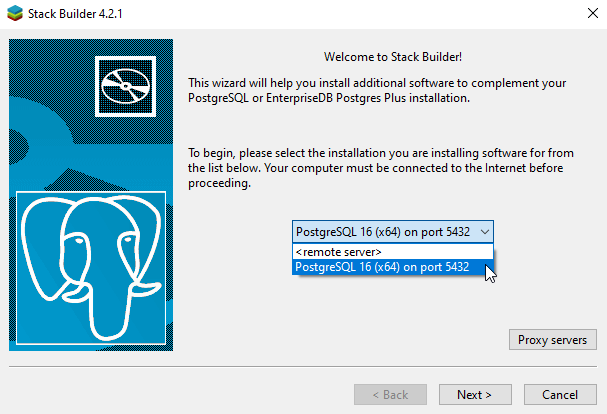
On the next page, expand the Database Server category and select the newer version you want to install.
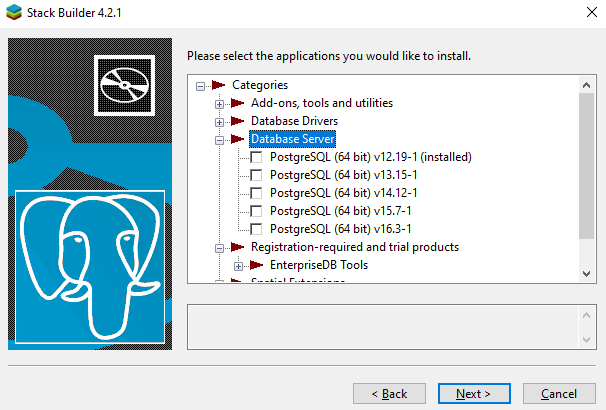
The installer will download the necessary installation package and take you through installing the new version. At the end of this, you will be prompted to start Stack Builder once again. Deselect this and finish the installation.
3. Stop PostgreSQL services
To ensure a seamless transfer, stop both the old and new PostgreSQL services.
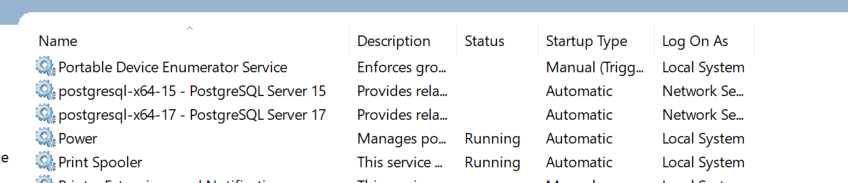
Open the Services programme (press fa-brands fa-windows+R and type services.msc).
Stop any services named postgresql-x64-<<major_version>> or (postgresql-<<major_version>> for x32 servers) manually. For my case, the old and new services were postgresql-x64-12 and postgresql-x64-16.
Alternatively, stop the services using PowerShell/command prompt with the following commands:
Copy
net stop postgresql-x64-12
net stop postgresql-x64-16
Make sure you have also closed any running instances of pgadmin.
4. Configure Authentication
pg_upgrade establishes connections to the old and new PostgreSQL instances while performing the PostgreSQL upgrade. Nevertheless, there isn’t a clear way to provide credentials. You’ll need to temporarily change the authentication settings in <<data_dir>>/pg_hba.conf for both old and new server versions in order to get around this.
Scroll to lines 114-117 to find the IPv4/IPv6 settings and change the authentication from scram-sha-256 to trusted:
data\pg_hba.conf L114-117
Copy
# IPv4 local connections:
host    all             all             127.0.0.1/32            scram-sha-256
# IPv6 local connections:
host    all             all             ::1/128                 scram-sha-256
data\pg_hba.conf L114-117 updated
Copy
# IPv4 local connections:
host    all             all             127.0.0.1/32            trusted
# IPv6 local connections:
host    all             all             ::1/128                 trusted
5. Upgrade the cluster with pg_upgrade
Start a command prompt with administrator rights.
Select a port number for the new server to run on. This can be temporary until you have determined that the upgrade was successful, but it must differ from the port number the current server is running on.
The syntax for pg_upgrade is:
Copy
"<<new_bin_dir>>\pg_upgrade.exe"
 --old-datadir="<<old_data_dir>>"
 --new-datadir="<<new_data_dir>>"
 --old-bindir="<<old_bin_dir>>"
 --new-bindir="<<new_bin_dir>>"
 --old-port=<<old_port_number>>
 --new-port=<<new_port_number>>
 -U postgres
You will need to use the paths and versions suitable for your case. In my case, I needed to use the following:
Copy
"C:\Program Files\PostgreSQL\16\bin\pg_upgrade.exe"
--old-datadir="C:\Program Files\PostgreSQL\12\data"
--new-datadir="C:\Program Files\PostgreSQL\16\data"
--old-bindir="C:\Program Files\PostgreSQL\12\bin"
--new-bindir="C:\Program Files\PostgreSQL\16\bin"
--old-port=5432 --new-port=5433
-U postgres
The program will run through consistency checks before performing the upgrade. See the note later regarding handling failures during this process.
At the end, you have a copy of your cluster running on your new server version with the port number that you specified.
6. Restart services
Reverse the temporary authentication changes you made in step 3 ( in <<data_dir>>/pg_hba.conf, set IPv4 and IPv6 authentication back to scram-sha-256 for both old and new server versions).
Restart the service for the new server (and old if still needed) either via the services panel app or from the command prompt.
7. Test the new cluster
Run through your test regime to ensure full functionality.
8. Drop the redundant clusters
Once you’ve verified that the new cluster works and you no longer require the old one, make sure the service is disabled for the old one.
If the new server is to be run on the original port that the previous server ran on, navigate to the data directory for the new server, edit postgresql.conf, L64 — change port number and restart the service.
- port = 5432
Drop the old cluster, most easily done from the pgAdmin interface (right click on the server and choose Remove Server).
Test again after dropping the cluster (and changing the port if applicable).
At this stage, you’re safe to uninstall the old server and remove any remaining files left in Program Files\PostgreSQL\xx, where xx is the old version number.
Handling Upgrade Errors
During upgrade, at the end of consistency checks, you’ll see this warning:
- If pg_upgrade fails after this point, you must re-initdb the new cluster before continuing.
What this means is that, if the upgrade encounters any errors, the process will exit out and leave a partially copied cluster in the new server.
It’s important to understand that the upgrade process is non-destructive, your original cluster is untouched at this, and any, point in the upgrade process.
Once you eliminate the source of the error, you will need to either re-initialise the new cluster, or open up pgAdmin and drop any databases other than the postgres database. From Login/Group Roles, you will also need to remove any users other than the postgres user.
To do that from the command line, you would need something along the lines of:
Copy
net stop postgresql-x64-16
del /S /Q "C:\Program Files\PostgreSQL\16\data\*"
"C:\Program Files\PostgreSQL\16\bin\initdb.exe" --pgdata="C:\Program Files\PostgreSQL\16\data"
net start postgresql-x64-16
When running the upgrade, I encountered the following failure message:
- Consult the last few lines of «C:/Program Files/PostgreSQL/16/data/pg_upgrade_output.d/20240429T123336.929/log/pg_upgrade_dump_160490.log» for the probable cause of the failure.
- Failure, exiting
The log file included the following:
- pg_restore: error: could not execute query: ERROR: could not open unaccent file «C:/Program Files/PostgreSQL/16/share/tsearch_data/deaccent.rules»: No such file or directory
- Command was: CREATE TEXT SEARCH DICTIONARY «public».»unaccent» (
- TEMPLATE = «public».»unaccent»,
- rules = ‘deaccent’ );
- — For binary upgrade, handle extension membership the hard way
- ALTER EXTENSION «unaccent» ADD TEXT SEARCH DICTIONARY «public».»unaccent»;
I’m using unaccent with my search indexing, for some reason the upgrade doesn’t copy across the de-accent rules list. Once I’d done that, I needed to re-initialise the cluster and restart the upgrade.
If you don’t remove the databases (other than postgres) from the aborted upgrade, you’ll see an error stating that the cluster database is not empty, similar to the following:
- New cluster database «<< existing database name >>» is not empty: found relation «public.some_relation_name»
- Failure, exiting
If there are users other than postgres, you will see:
- Only the install user can be defined in the new cluster.
- Failure, exiting
Upgrading PostgreSQL Server on Ubuntu
Before Starting
Make sure your Ubuntu server is updated and that you have an up-to-date backup before starting this.
This guide is for small to medium databases that don’t need high availability (always on) and can tolerate brief periods offline. For large HA clusters, you’ll need to consult the upgrade docs on using hard-links rather than binary copies etc.
I recommend making a copy of your server and making a test run first in case of any hidden ‘surprises’.
Upgrading PostgreSQL will inevitably require taking the database server offline — how long that will be will obviously be dependent on your cluster size and hardware specs. For my case, with a cluster size of 100MB, on a low spec server, it needed around 2 seconds offline.
You can check your cluster size from the psql prompt:
Copy
SELECT pg_size_pretty(sum(pg_database_size(datname))) AS "Total Cluster Size"
FROM pg_database;- Total Cluster Size
- ———————
- 103 MB
- (1 row)
While there, you can list out the databases in that cluster using \l
Copy
postgres=# \l
                                                         List of databases
     Name      |  Owner   | Encoding | Locale Provider | Collate |  Ctype  | ICU Locale | ICU Rules |       Access privileges
---------------+----------+----------+-----------------+---------+---------+------------+-----------+-------------------------------
 some_db       | postgres | UTF8     | libc            | C.UTF-8 | C.UTF-8 |            |           | =Tc/postgres                 +
               |          |          |                 |         |         |            |           | postgres=CTc/postgres        +
               |          |          |                 |         |         |            |           | some_db_admin=CTc/postgres
 postgres      | postgres | UTF8     | libc            | C.UTF-8 | C.UTF-8 |            |           |
 template0     | postgres | UTF8     | libc            | C.UTF-8 | C.UTF-8 |            |           | =c/postgres                  +
               |          |          |                 |         |         |            |           | postgres=CTc/postgres
 template1     | postgres | UTF8     | libc            | C.UTF-8 | C.UTF-8 |            |           | =c/postgres                  +
               |          |          |                 |         |         |            |           | postgres=CTc/postgres
Find Installed Instances
To find the installed versions of PostgreSQL, use the following command:
Copy
dpkg --get-selections | grep postgres- postgresql install
- postgresql-12 install
- postgresql-14 install
- postgresql-client-12 install
- postgresql-client-14 install
- postgresql-client-common install
- postgresql-common install
- postgresql-contrib install
In this example, there are two versions running. Version 12 from the previous LTS before upgrading Ubuntu, and version 14 from the current LTS.
PostgreSQL Apt Repository
In my case, the upgraded LTS had been out for a couple of years already and the current PostgreSQL server version was 16. The LTS only offered up to version 14. My goal was to hop straight from 12 to 16.
If the version available with your Ubuntu installation is not what you’re looking for, you can use the PostgreSQL Apt Repository. This repository will integrate with your existing systems and patch management providing automated updates for all supported PostgreSQL versions for the duration of PostgreSQL’s support lifecycle.
To configure your repository for automated configuration:
Copy
sudo apt install -y postgresql-common
sudo /usr/share/postgresql-common/pgdg/apt.postgresql.org.sh
You should see something similar to the following when running the above:
- This script will enable the PostgreSQL APT repository on apt.postgresql.org on your system. The distribution codename
used will be jammy-pgdg. - Press Enter to continue, or Ctrl-C to abort.
Once that has finished, you will see the message:
- You can now start installing packages from apt.postgresql.org.
Upgrade Steps
1. Upgrade the core PostgreSQL packages
- The following packages have been kept back:
- postgresql postgresql-12 postgresql-14 postgresql-contrib
- The following packages will be upgraded:
- libpq-dev libpq5 postgresql-client-12 postgresql-client-14 postgresql-client-common postgresql-common
- 6 upgraded, 0 newly installed, 0 to remove and 4 not upgraded.
2. Add version specific libraries
If you list the PostgreSQL installations again, you’ll see that even though you’ve upgraded the PostgreSQL core, there is no cluster for the latest version.
Copy
dpkg --get-selections | grep postgres- postgresql install
- postgresql-12 install
- postgresql-14 install
- postgresql-client-12 install
- postgresql-client-14 install
- postgresql-client-common install
- postgresql-common install
- postgresql-contrib install
If you want a specific version, append the version number to the package name (e.g. postgresql-16) instead of postgresql:
Copy
sudo apt -y install postgresql-16Repeat the listings and you’ll the version 16 server and client libraries have been added and that a version 16 cluster has also been added:
Copy
dpkg --get-selections | grep postgres- postgresql install
- postgresql-12 install
- postgresql-14 install
- postgresql-16 install
- postgresql-client-12 install
- postgresql-client-14 install
- postgresql-client-16 install
- postgresql-client-common install
- postgresql-common install
- postgresql-contrib install
- Ver Cluster Port Status Owner Data directory Log file
- 12 main 5432 online postgres /var/lib/postgresql/12/main /var/log/postgresql/postgresql-12-main.log
- 14 main 5433 online postgres /var/lib/postgresql/14/main /var/log/postgresql/postgresql-14-main.log
- 16 main 5434 online postgres /var/lib/postgresql/16/main /var/log/postgresql/postgresql-16-main.log
3. Stop PostgreSQL services
To safely move our database, we need to disable any services that use PostgreSQL.
Copy
sudo service postgresql stop
4. Rename the new PostgreSQL version’s default cluster.
When you install Postgres packages, a default cluster is added that you can be used. You need to rename the new PostgreSQL cluster so that the names do not clash when we update the old cluster.
Change the version number below (16) to match your new version:
Copy
sudo pg_renamecluster 16 main main_pristine
5. Upgrade the old cluster
Replace the version number below (12) to match your old version:
Copy
sudo pg_upgradecluster 12 main
6. Restart services
Start the services again with:
Copy
sudo service postgresql startYou should see that the old cluster is down and the new version of PostgreSQL is online:
Copy
$ pg_lsclusters
Ver Cluster       Port Status Owner    Data directory                       Log file
12  main          5435 down   postgres /var/lib/postgresql/12/main          /var/log/postgresql/postgresql-12-main.log
14  main          5433 online postgres /var/lib/postgresql/14/main          /var/log/postgresql/postgresql-14-main.log
16  main          5432 online postgres /var/lib/postgresql/16/main          /var/log/postgresql/postgresql-16-main.log
16  main_pristine 5434 online postgres /var/lib/postgresql/16/main_pristine /var/log/postgresql/postgresql-16-main_pristine.log
7. Test the new cluster
Run through your test regime to ensure full functionality.
8. Drop the redundant clusters
Once you’ve verified that the new cluster works and you no longer require the old one, you may remove it and the ‘pristine‘ cluster copy that we made above. In my case, since version 14 was leap-frogged, I can drop this as well:
Copy
sudo pg_dropcluster 12 main --stop
sudo pg_dropcluster 14 main --stop
sudo pg_dropcluster 16 main_pristine --stop
9. Clean up unused packages
Test again after dropping the old clusters.
Once you are happy that you have a successful upgrade, you can remove all the now-redundant packages as well:
- Reading package lists… Done
- Building dependency tree… Done
- Reading state information… Done
- The following packages will be REMOVED:
- libasn1-8-heimdal libffi7 libgssapi3-heimdal libhcrypto4-heimdal libheimbase1-heimdal libheimntlm0-heimdal libhx509-5-heimdal libicu66 libkrb5-26-heimdal
- libldap-2.4-2 libllvm10 libroken18-heimdal libssl1.1 libwind0-heimdal postgresql-12 postgresql-client-12
- 0 upgraded, 0 newly installed, 16 to remove and 3 not upgraded.
- After this operation, 162 MB disk space will be freed.
- Do you want to continue? [Y/n]
Handling Upgrade Errors
It’s important to remember that the upgrade process is non-destructive, the original cluster is untouched by this.
As with Windows upgrade errors, if for some reason you encounter an error, you will need to work through the logs and remedy the cause. Once you have done that, you will most likely need to remove the partially filled cluster before continuing.
For the Ubuntu process, it is a little easier as we just need to drop the cluster with:
Copy
sudo pg_dropcluster xx main --stopwhere xx is the new version you are upgrading to.
Conclusion
In this article, we went through installing and upgrading PostgreSQL on both Windows and Ubuntu for standard standalone servers.
We covered how to upgrade existing clusters, ensuring that your data and configurations are easily moved to the new version. In addition, we went over what to do if the update fails and how to restart it afterwards.
For Ubuntu users, we highlighted the benefits of using the PostgreSQL repository to obtain the precise release required, ensuring you have access to the latest features and security updates.
By following these steps, you can confidently upgrade your PostgreSQL server and maintain a robust database environment.
Today we will be upgrading PostgreSql from version 14 to 15, which would be considered a Major upgrade (14->15). Below, I provide step-by-step instructions on how to do this on Windows.
Step 1: Install postgres 15 on the machine, this will create a seperate folder in the install directory /14 vs /15
- Recommend you keep the postgres user password the same
Step 2: Stop both versions of pg running on the system, here is the powershell to do that
net stop postgresql-x64-14net stop postgresql-x64-15Step 3: In the /data directory of each version, keep around the existing pg_hba.config files. I typcially rename them to pg_hba.conf.org
Step 4: Drop in a new pg_hba.conf in each /data directory with the following contents, this helps security getting in the way of this upgrade, full local trust
host		all		postgres		127.0.0.1/32	trust
host		all		postgres		::1/128		trust
Step 5: Upgrade Data
Our server has the bin directories located here:
C:\\Program Files\\PostgreSQL\\14\\bin
C:\\Program Files\\PostgreSQL\\15\\bin
And our data directories located here:
D:\\Data\\PgSql\\14
D:\\Data\\PgSql\\15
To upgrade the data to 15 we will be using pg_upgrade.exe. I typically like to execute this in a temp directory to isolate the files that get generated during this process. The pattern for updating via pg_upgrade.exe is as follows:
NEWVERSION\\bin\\pg_upgrade.exe --old-datadir "OLDVERSION\\data" --new-datadir "NEWVERSION\\data" --old-bindir "OLDVERSION\\bin" --new-bindir "NEWVERSION\\bin" -U USERSo for us it would be as follows (NOTE: I’m executing this command in C:\\Temp via powershell, note the & » is just to handle the space in the executable path)
& 'C:\\Program Files\\PostgreSQL\\15\\bin\\pg_upgrade.exe' --old-datadir "D:\\Data\\PgSql\\14" --new-datadir "D:\\Data\\PgSql\\15" --old-bindir "C:\\Program Files\\PostgreSQL\\14\\bin" --new-bindir "C:\\Program Files\\PostgreSQL\\15\\bin" -U postgresStep 6: Post Upgrade: After you have a successful upgrade you still need to do a few things to get your server back up
- Copy your pg_hba.conf from the old version into your new version data directory (remove the .org also if you don’t need it)
- Update your postgresql.conf file in the new version. The install probably saw that port 5432 was in use (from the old version running) and gave you something like 5433. Change this to 5432.
- Move any SSL data over to the new version. See our ssl post here.
-
Start the new server (with powershell)
net start postgresql-x64-15 - Uninstall old version
- Clear data old version
After this, you should be up and running in version 15.
Feedback? Better Idea? General Comment?
Overview
At work I needed to upgrade from PostgreSQL from 15 to 17.
The process is not that different than upgrading in Ubuntu but there were a couple
of items that threw me off.
Perform Backup
This should be done prior to the update in case something goes wrong:
This was based on the documentation
PostgreSQL: Documentation: 17: pg_dumpall.
Note keep in mind that you should create a pgpass.conf
(or .pgpass for Linux):
This file is located C:\Users\ctyler\AppData\Roaming\postgresql
(or chmod 0600 ~/.pgpass with the right permissions).
PostgreSQL: Documentation: The Password File.
Remove admipack extension
This extension will need to be removed as it have been deprecated:
Stop Both Servers
Go to Start->Search->Serivces and stop both services:
Update pg_hba.conf
Make the following changes:
This remove the permissions so that you don’t error during upgrade.
This need to be done on both clusters.
Run pg_upgrade
Now let’s perform the upgrade.
Open PowerShell as Adminstrator.
I had to add ports and postgres user.
I got this info from
Upgrading PostgreSQL in Windows · GitHub
Once complete you should get:
Next Steps
After you verify that PostgreSQL 17 works as intended, you can then remove 15.
I would suggest having a backup strategy.
For example on Ubuntu, I use ZFS to create snapshots and push those snapshots to
a backup server and an external hard disk.
On Windows, I have a simple PowerShell script that will use pg_dump and
pg_dumpall.
pg_dump is for the tables that I need to backup monthly.
Most of the data in my databases come from other data sources and don’t really
need to be backed up.
The total downtime was only a couple of hours and I shouldn’t have a reason not
to upgrade PostgreSQL yearly.