
Все способы:
- Проверка текущей лицензии
- Способ 1: Продление пробной версии
- Способ 2: Повторный ввод ключа активации
- Способ 3: Отключение службы активации и Центра обновления Windows
- Вопросы и ответы: 2
Проверка текущей лицензии
Первоочередное действие, необходимое для выполнения при возникновении ошибки «Windows находится в режиме уведомления», — проверка срока текущей лицензии. Если вы вообще не знаете, была ли операционная система когда-то активирована, выполните следующую инструкцию:
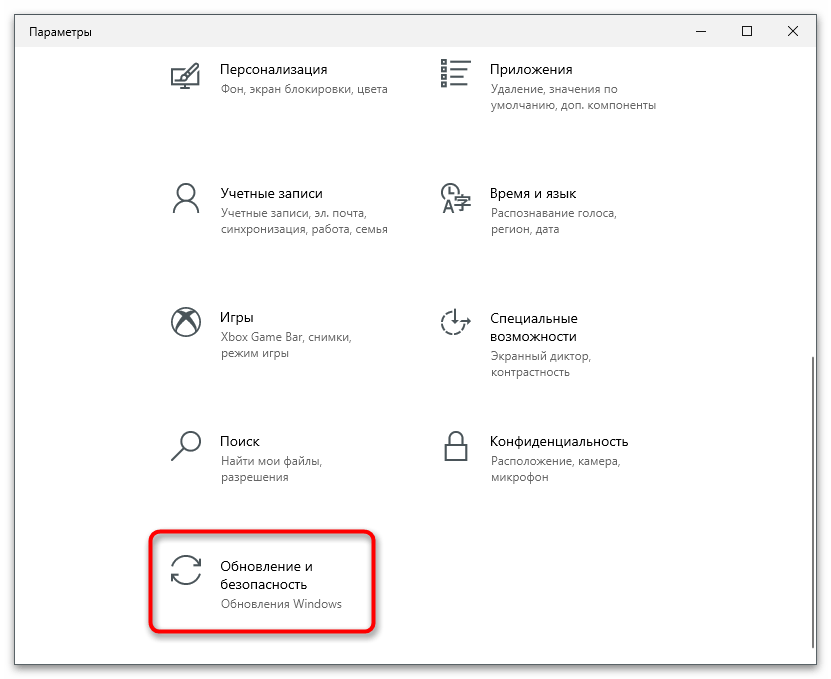
- Откройте меню «Пуск» и перейдите в приложение «Параметры».
- Нажмите левой кнопкой мыши по плитке «Обновление и безопасность».
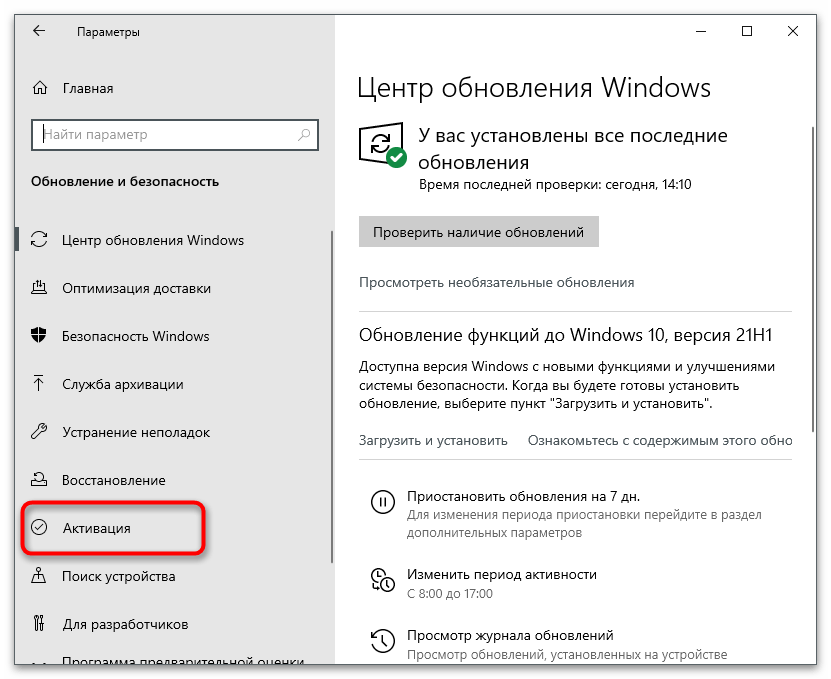
- На панели слева выберите категорию «Активация».
- Ознакомьтесь с представленной информацией. В окне могут отобразиться строчки, свидетельствующие об имеющейся лицензии или о том, что Виндовс необходимо активировать.
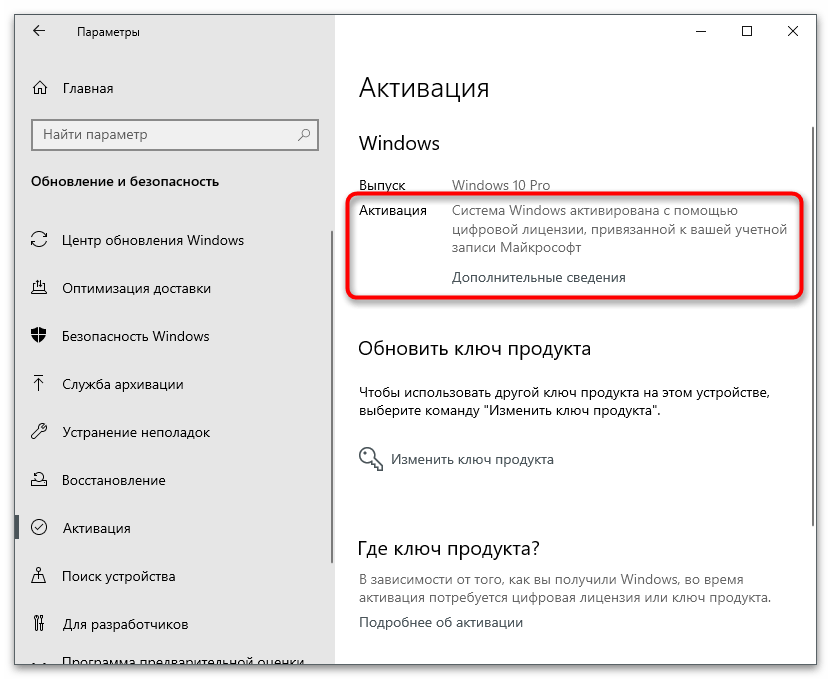
Если вдруг оказалось, что активации вовсе нет или она слетела, например, после замены компьютерных комплектующих, понадобится обновить ключ, который вы приобретали как цифровую лицензию или получили при покупке физического носителя с ОС. Детальнее об этом читайте в другом материале на нашем сайте, перейдя по следующей ссылке.
Подробнее: Активация операционной системы Windows 10
Если Windows сейчас активирована, но на экране все равно появляется соответствующее уведомление, необходимо проверить срок действия ключа, поскольку иногда он истекает (зависит от типа приобретенной лицензии).
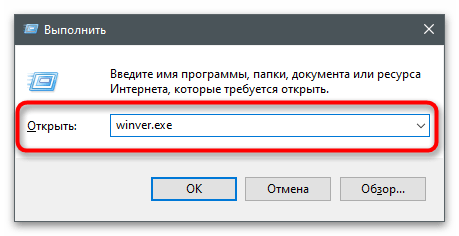
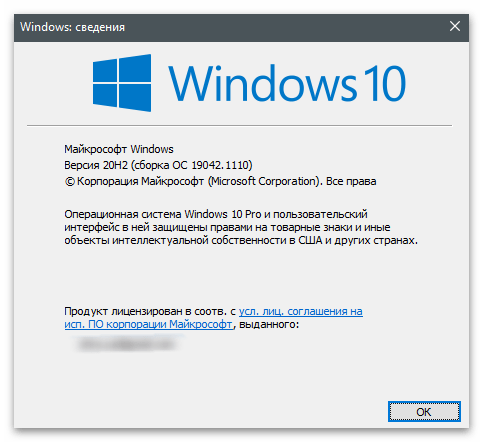
- Для этого откройте утилиту «Выполнить», зажав комбинацию клавиш Win + R. В поле введите
winver.exeи нажмите Enter. - Ознакомьтесь с представленной в новом окне информацией. Если написано, что срок действия лицензии вышел или закончится на днях, ключ необходимо обновить, перейдя к другой статье на нашем сайте по ссылке выше.
В случае когда вы используете пробную версию ОС или активировать ее не получается, понадобится найти обходной путь, выполнив один из следующих методов. Мы расскажем и об одном методе, который подходит юзерам, чей ключ активации подходит к концу или был сброшен, поэтому можете перейти сразу к Способу 2.
Способ 1: Продление пробной версии
Разработчики позволяют не более трех раз продлить использование пробной версии Windows, убрав все ограничения, к которым и относится рассматриваемое сегодня сообщение. Для этого предназначена консольная команда, активация которой происходит так:
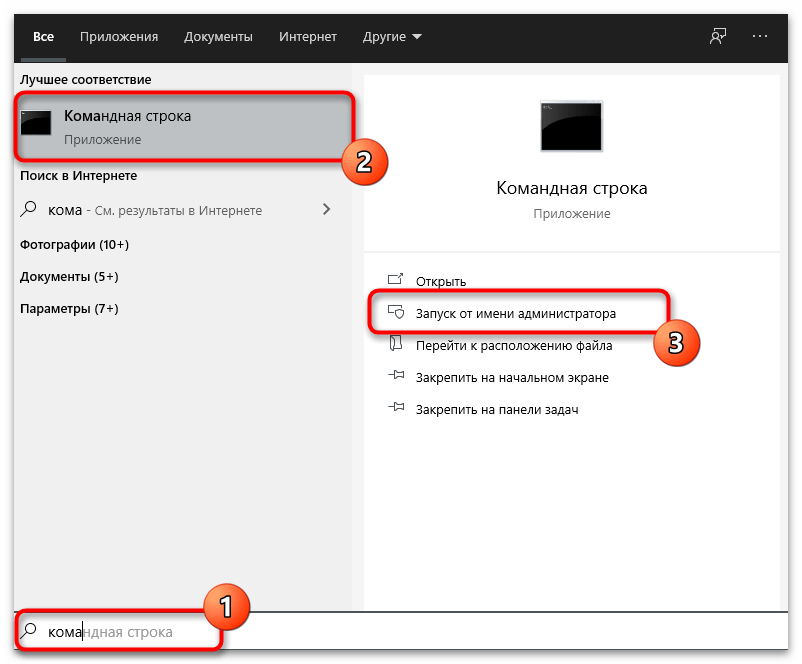
- Откройте «Пуск» и обязательно запустите «Командную строку» от имени администратора.
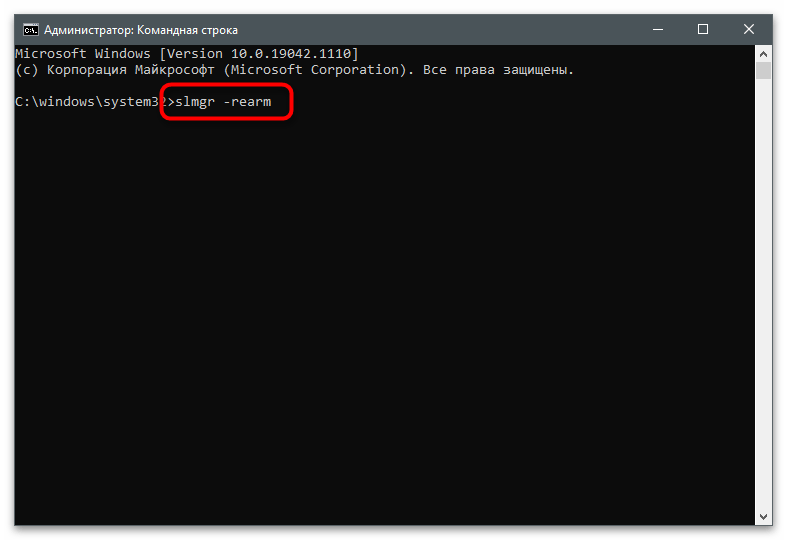
- Введите там
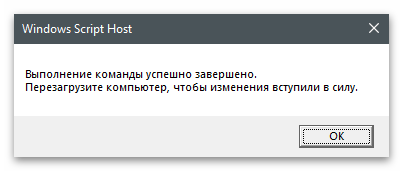
slmgr -rearmи нажмите Enter для подтверждения команды. - На экране появится уведомление об ее успешном выполнении. Перезагрузите компьютер для вступления изменений в силу.
Способ 2: Повторный ввод ключа активации
Иногда повторный ввод используемого ранее ключа позволяет избавиться от проблемы, когда Windows находится в режиме уведомления. Связано это с тем, что порой в ОС происходят сбои и ключ слетает. Исправить ситуацию не так сложно, если в наличии есть тот самый код.
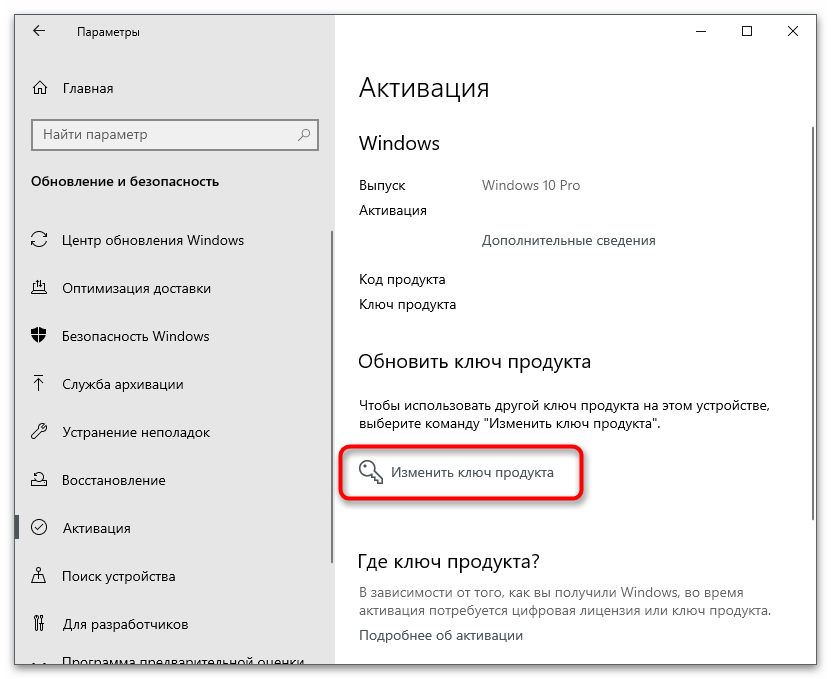
- Перейдите в приложение «Параметры» и откройте «Обновление и безопасность».
- Там вас интересует раздел «Активация».
- Нажмите по ссылке «Изменить ключ продукта».
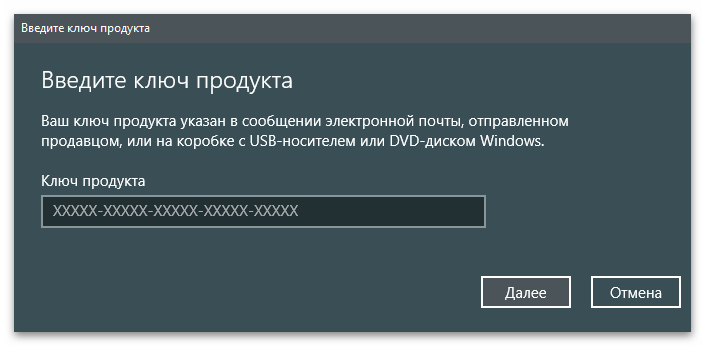
- Введите его повторно и подтвердите активацию. Если на экране появилось уведомление об успешном завершении процесса, перезагрузите ПК и проверьте текущее состояние Виндовс.


Способ 3: Отключение службы активации и Центра обновления Windows
Этот способ не решает проблему, а только позволяет избавиться от некоторых неприятных последствий, связанных с постоянным отображением на экране различных уведомлений. Используйте его только если не желаете активировать Виндовс сейчас или это не получается сделать по другим причинам.
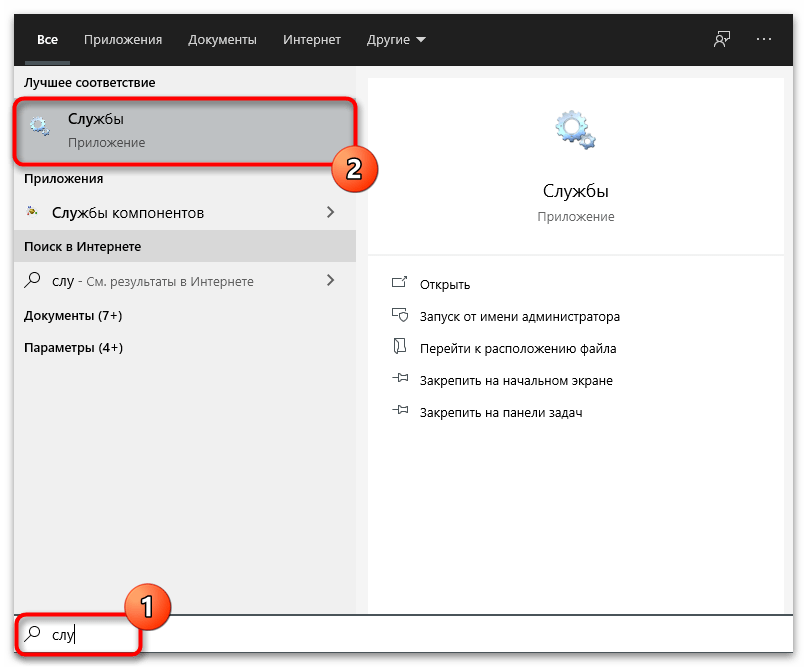
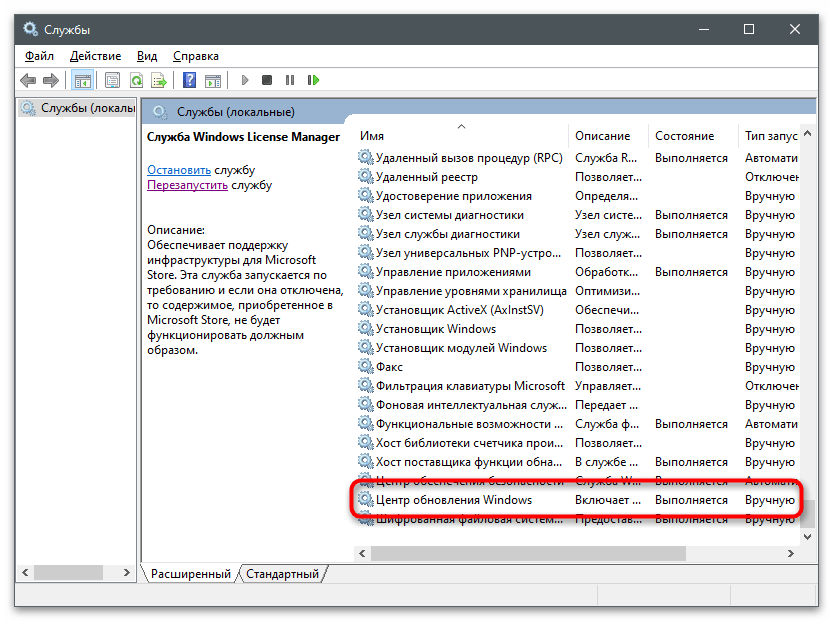
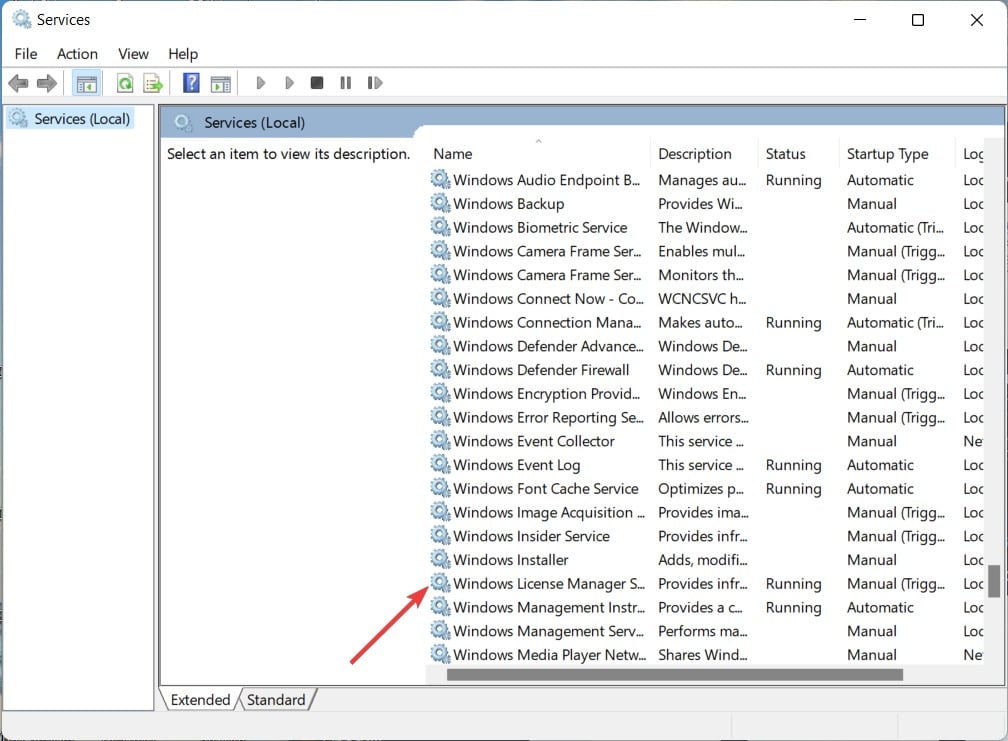
- Откройте меню «Пуск», через поиск отыщите приложение «Службы» и запустите его.
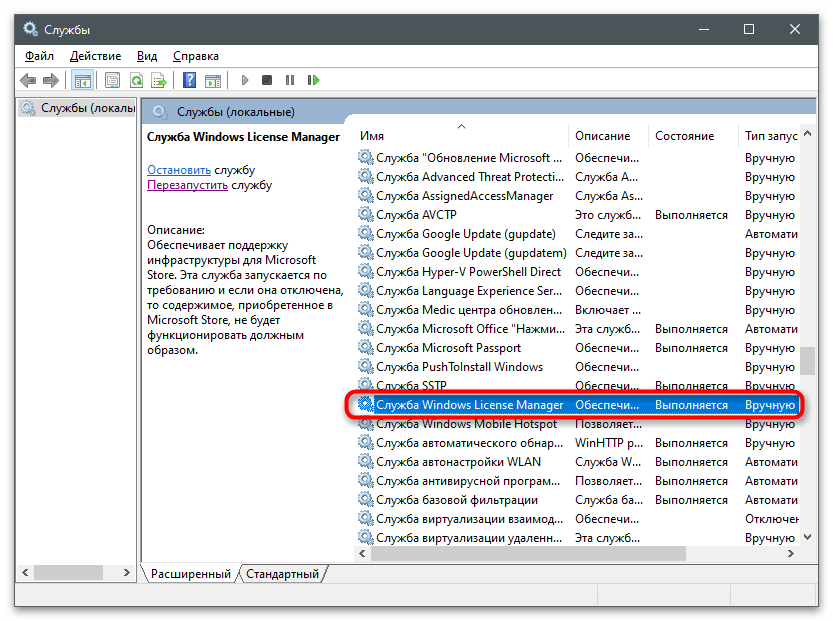
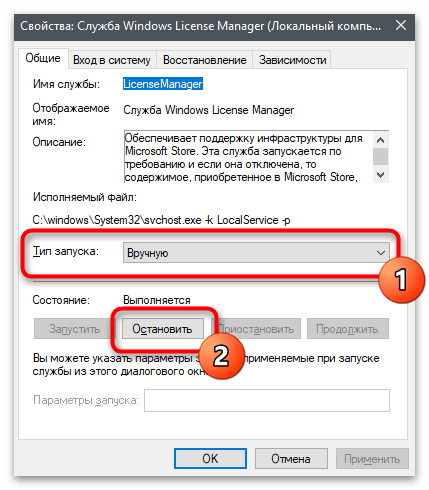
- Отыщите строку «Служба Windows License Manager» и дважды кликните по строке.
- Установите тип запуска «Вручную» и остановите выполнение службы.
- Вернитесь к предыдущему окну, найдите «Центр обновления Windows» и перейдите в свойства этой службы.
- Сделайте то же самое, остановив службу и установив ручной тип запуска.

Наша группа в TelegramПолезные советы и помощь
Readers help support Windows Report. We may get a commission if you buy through our links.
Read our disclosure page to find out how can you help Windows Report sustain the editorial team. Read more
Sometimes, Windows users are unable to change or customize themes and wallpapers, or even some apps stop working. This is due to your Windows being in Notification mode.
You’ll get a message saying that your license will expire soon. This guide will help you fix the problem.
How do I get rid of Windows Notification mode?
Before trying advanced fixes, try re-entering your activation key. Make sure that the system’s date and time are correct.
If the Windows Notification mode issue persist, keep reading:
1. Activate Windows via Settings
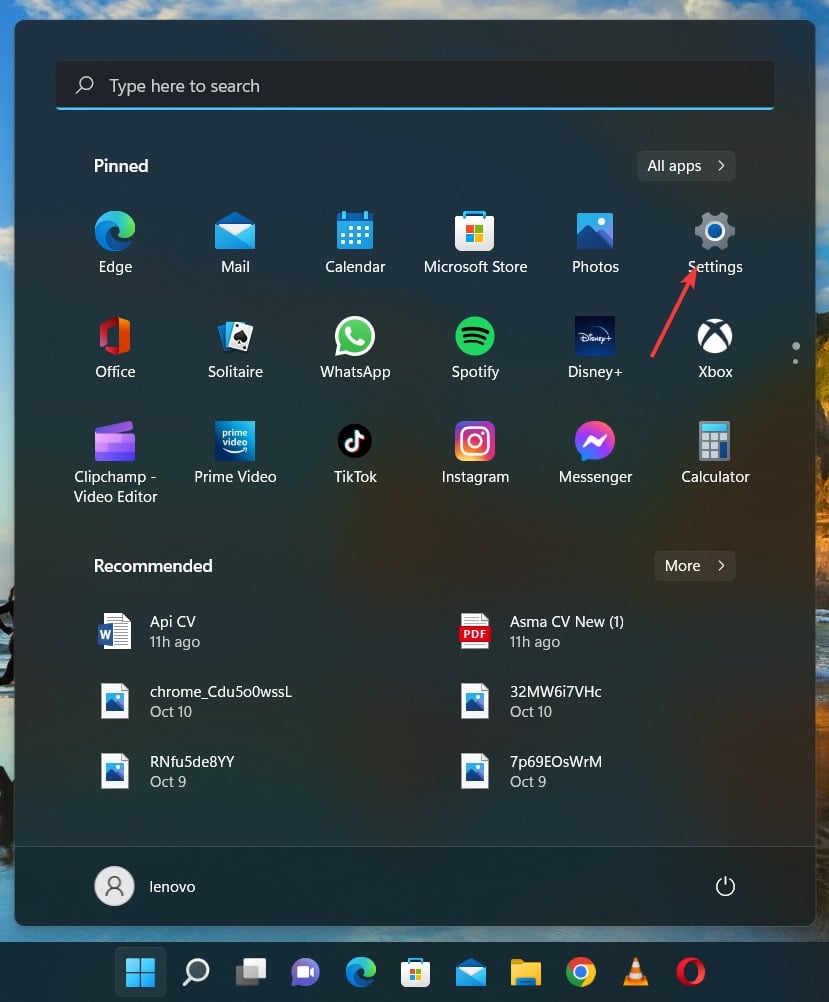
- Click on the Start button and select the Settings option.

- Inside the Settings, click on the System tab, scroll down and click on Activation.

- Then, click on Change Product Key, enter your product key, and press Activate.

Activating Windows by entering a valid product key is pretty easy; the Notification mode will clear out once you have done it.
However, a lot of people struggle with the product keys not working properly; in that case, you can check this guide for Windows activation keys not working.
2. Expand the trial version of Windows
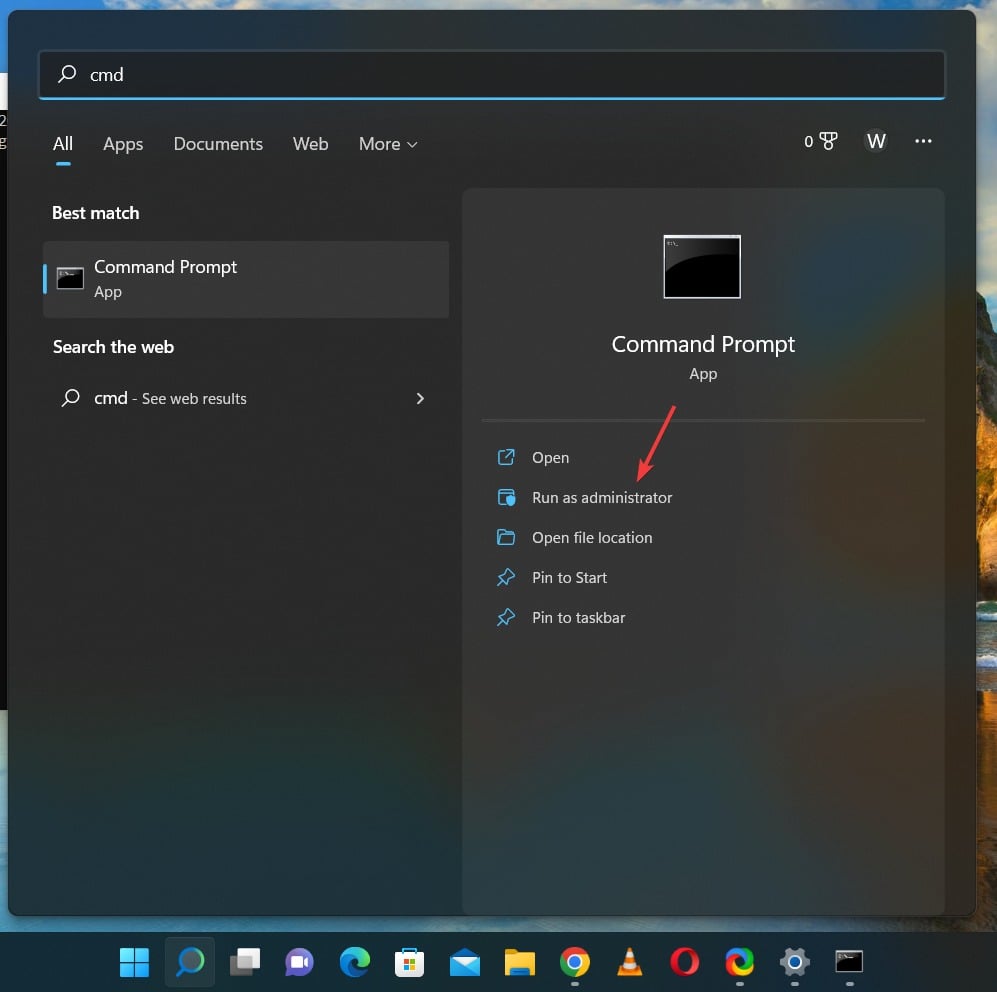
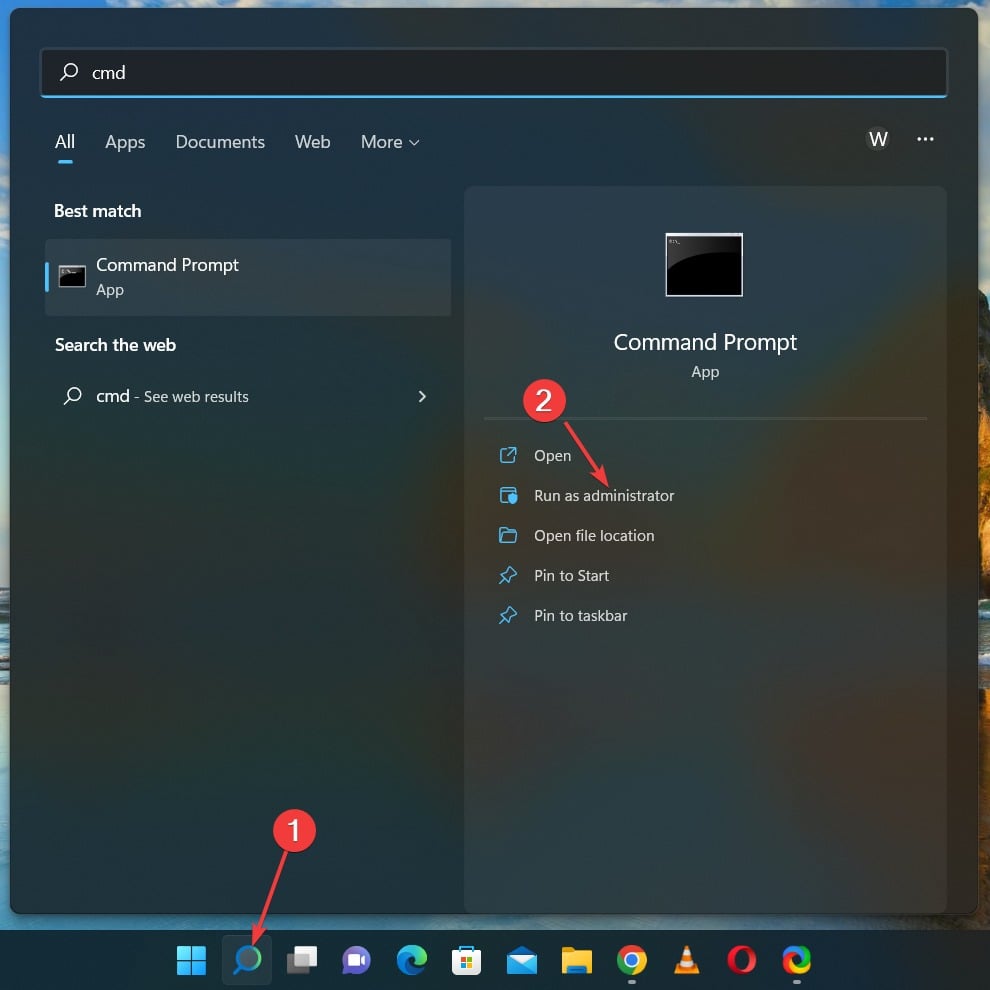
- Type cmd in the Search bar and click on Run as administrator.

- In the Command Prompt window, type the following command and press Enter:
slmgr -rearm
- When it is successfully performed, a message will appear on display. Then, restart the computer to make the modifications take effect.

Usually, developers allow users to expand the trial period of Windows thrice before restrictions are put into place.
If you are unable to run the command prompt as administrator, you need our guide to fix the Command Prompt not running as administrator on Windows 11.
- Recent Windows 11 update lets you disable profanity filter in voice typing
- Microsoft wants Windows 10 users to upgrade to Windows 11 or Copilot + PCs
- Windows 11 KB5055627 update makes File Explorer more fluid
- A few keyboard settings are moving from Control Panel to Settings app in Windows 11
Hence, if you can’t seem to activate Windows, simply expand the trial period to clear Windows Notification mode.
3. Disable the Windows License Manager Service
- Press Window + R to open the run box and type the following command, and press Enter to open the Services app:
services.msc
- Scroll and double-click on the Windows License Manager Service to open it.

- Click on the Stop button and then click on OK to confirm.


By disabling the Windows License Manager, you can get rid of the Notification mode error. Moreover, if you have an error with the expiring Windows license, you need to check our guidelines for fixing the Windows license will expire soon.
4. Phone activate your Windows
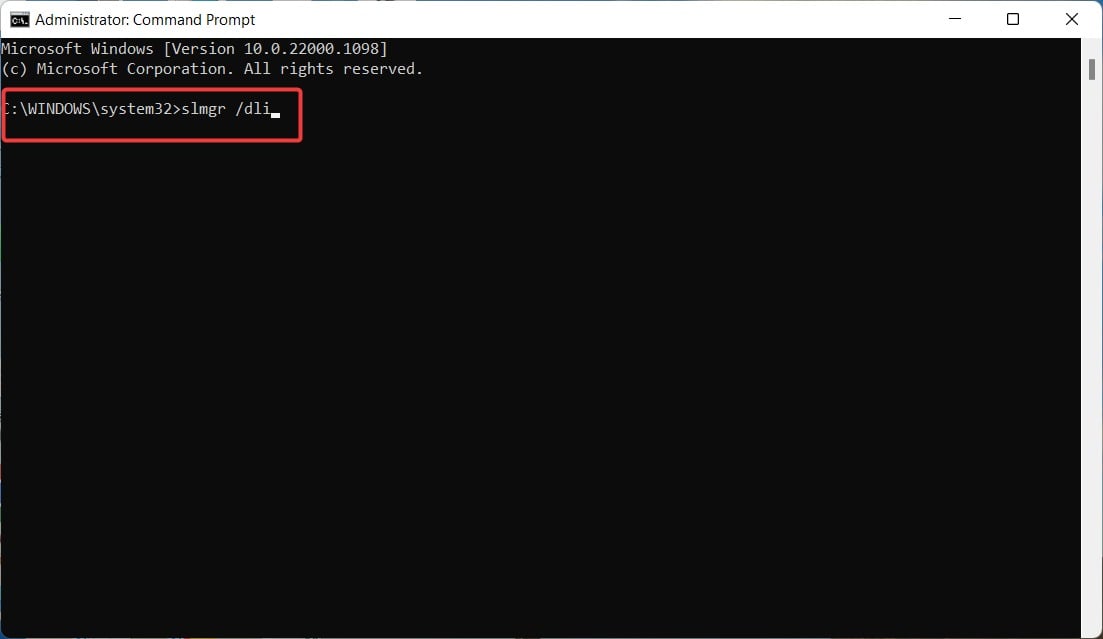
- Click on the Search icon at the bottom of your screen, type cmd, and click on Run as administrator.

- Type the following command in the command line and press Enter:
slmgr /dli
- Then you will see the Windows details with Notification Reason: 0xC004F009 (grace time expired).
- Then, type the following command and press Enter:
slui.exe 4 - Follow the on-screen prompts, and then you will receive a call from Microsoft, follow their instructions.
- Once you complete the instruction given by Microsoft on the phone call, your Windows will be activated.
Why does the Windows Notification mode show up?
The Notification mode appears when Windows is not properly activated. However, it also means that your product key has not been verified.
There are several reasons why this can happen, including not having genuine software you brought or downloaded:
- Corrupted Windows Registry – If your Windows registry is corrupt, it can cause various problems with your computer, including the Notification mode error you’re seeing.
- Incorrect date and time settings – If your date and time settings are incorrect, it can prevent Windows from being able to activate properly.
- Viruses or malware – It is possible that your computer might be infected with a virus or other type of malware; it can cause all sorts of problems, including the Notification mode error.
- Pirated Windows – If you’re using a pirated version of Windows, it’s likely the cause of your Notification mode error.
How long does Windows Notification mode usually last?
In case you have just installed Windows 11 recently, you will be able to run it smoothly for one month without activation.
This is because Windows restrictions aren’t implemented until one month after installation, but you will face several restrictions until you activate Windows.
Once you come across Windows Notification mode on your PC, the best possible fix is simply activating Windows by entering a valid product key.
However, if you are receiving an error of the product key not being used in your country, then you can use our guide for the guidance of the product key that cannot be used in your country.
We hope that this article has solved your problem. If you have any further queries in your mind, then do let us know in the comments section below.
Loredana Harsana
Windows Software Expert
Loredana is a passionate writer with a keen interest in PC software and technology. She started off writing about mobile phones back when Samsung Galaxy S II was on top of the world and she fell in love with tech of all sorts.
Whenever she’s not at her work desk, you’ll find her enjoying refreshing tea flavors, spilling stories on paper, and listening to the radio.
Meta Description: Is your Windows PC stuck in notification mode? This comprehensive guide explores the causes behind this issue, offering step-by-step troubleshooting solutions and preventative measures to restore full functionality. Learn how to fix notification problems and regain control of your Windows experience. (158 characters)
Understanding «Windows is in Notification Mode»
The phrase «Windows is in notification mode» isn’t a standard Windows error message. It’s a more general description of a situation where your system is excessively displaying notifications, or where a specific application is dominating the notification area, potentially hindering other functions. This can manifest in several ways:
- Overwhelming Notifications: A constant barrage of pop-ups from various apps, making it difficult to use your computer.
- Frozen Notification Area: The system tray (where notifications usually appear) becomes unresponsive or frozen.
- Application-Specific Issues: One particular app might be constantly sending notifications, even when its settings suggest otherwise.
Common Causes of Excessive Notifications
Several factors can contribute to a situation where it feels like Windows is perpetually in notification mode:
- Overactive Apps: Many applications, especially those related to messaging, email, or security, can be configured to send frequent notifications.
- Faulty App Settings: Incorrectly configured notification settings within individual apps can lead to an overload.
- Conflicting Software: Incompatible or conflicting software might interfere with notification processes.
- Outdated Drivers: Outdated or corrupted system drivers can sometimes disrupt notification functionality.
- System Glitches: Occasional system glitches or bugs can temporarily cause notification issues.
How to Fix «Windows is in Notification Mode»
Let’s address how to solve these notification problems. This involves a multi-pronged approach:
1. Review and Adjust App Notification Settings
This is often the most effective starting point. Carefully review the notification settings for each application individually:
- Open Settings: Go to Windows Settings (Win + I).
- Navigate to System > Notifications: Here you’ll find a master list of all applications with notification permissions.
- Customize Notifications: For each app, adjust the notification settings as needed. Turn off unnecessary notifications or limit their frequency.
2. Check for Conflicting Software
Occasionally, recently installed software can interfere with notification processes. Try these steps:
- Recent Installations: Think back to any software you’ve installed recently. If a problem began after an installation, uninstalling that software could be the solution.
- System Restore: Consider using Windows’ System Restore feature to revert to a point before the notification problems began (if applicable). This is found in Control Panel > System and Security > System > System Protection.
3. Update or Reinstall Drivers
Outdated or corrupted drivers can lead to unexpected behavior.
- Device Manager: Open Device Manager (search for it in the Windows search bar).
- Update Drivers: Check for updates for all devices, particularly those related to display or input (mouse, keyboard). If updates are available, install them. Alternatively, try uninstalling and reinstalling the drivers for your graphics card.
4. Restart Your Computer (The Simple Fix)
Often, a simple restart can resolve temporary glitches affecting notifications. Try this before moving to more complex solutions.
5. Run a System File Checker (SFC) Scan
This scan checks for and repairs corrupted system files that might be causing the issue.
- Open Command Prompt as Administrator: Search for «cmd», right-click, and choose «Run as administrator.»
- Run the scan: Type
sfc /scannowand press Enter. Allow the process to complete. Restart your computer once finished.
6. Check for Malware
In rare cases, malware can interfere with system processes, including notification handling. Run a full scan using your antivirus software.
7. Clean Boot
A clean boot starts Windows with a minimal set of drivers and startup programs. This helps isolate the source of the problem. Instructions for performing a clean boot are readily available online via a search for «Windows clean boot.»
Preventative Measures
- Regularly Review App Notifications: Regularly check and adjust app notification settings to maintain control.
- Keep Software Updated: Regularly update your operating system and applications to benefit from bug fixes and performance improvements.
- Install Reputable Software: Only install software from trusted sources to reduce the risk of malware or conflicting applications.
By following these steps, you should be able to regain control of your Windows notifications and resolve the «Windows is in notification mode» issue. Remember to restart your computer after each major troubleshooting step to ensure the changes take effect. If the problem persists, you may need to seek further assistance from Microsoft support or a qualified technician.
Many Windows users encounter the frustrating «Windows is in notification mode» message, often accompanied by limited functionality. This article will explore the causes, troubleshooting steps, and preventative measures for this issue, drawing on information and insights, while adding further analysis and practical examples. We will not directly quote ScienceDirect articles as they are unlikely to contain specific information on this particular, relatively user-level Windows issue. Instead, we’ll focus on the principles related to Windows notifications and system processes, drawing on general IT knowledge and best practices.
What does «Windows is in notification mode» mean?
This message typically appears when a critical system process is running, preventing normal user interaction. Think of it as Windows’ way of saying, «Hold on, something important is happening. I can’t let you interrupt me right now.» While the exact cause can vary, it often signals a system-level operation, such as:
- Windows Updates: The most common culprit. Major updates or driver installations can trigger this message.
- Security Scans: Antivirus or anti-malware software performing a deep scan might temporarily restrict access.
- System Restore: During a system restore process, Windows needs full control to revert system changes.
- Disk Defragmentation/Optimization: This process requires exclusive access to the hard drive.
- Background Processes: Less commonly, a resource-intensive application running in the background might trigger this message, though this is less frequent than the above.
Troubleshooting Steps:
-
Wait: The simplest solution is often the best. Be patient and let the process complete. The notification will likely disappear once the underlying task is finished.
-
Check for Updates: Open Windows Update settings to see if any updates are installing. Avoid interrupting these updates as doing so might corrupt your system.
-
Identify Running Processes: Open Task Manager (Ctrl+Shift+Esc) and check the «Processes» tab. Look for any resource-intensive applications that might be consuming significant CPU or disk usage. You can end tasks (carefully!), but be aware that ending essential system processes can lead to instability.
-
Restart Your Computer: A simple restart often resolves temporary issues that might be causing this notification. This is a good second step if waiting doesn’t resolve the issue.
-
Run a Virus Scan: While less likely, malware could be triggering this behavior. Run a full scan with your antivirus software.
-
Check for Hardware Problems: In rare cases, faulty hardware (e.g., a failing hard drive) might cause system instability, triggering the notification. Check your system logs for errors and consider running hardware diagnostics.
Preventing «Windows is in Notification Mode»:
- Schedule Updates: Configure Windows Update to install updates during off-peak hours to minimize disruption.
- Optimize Disk Performance: Regularly defragment your hard drive (if using a traditional HDD) or optimize your SSD. This can improve system responsiveness and reduce the likelihood of extended processes triggering the notification.
- Manage Background Processes: Limit the number of applications running in the background. Close unnecessary programs to free up system resources.
- Maintain Regular System Maintenance: Regular system maintenance (cleaning temporary files, checking disk space) can prevent performance issues that could lead to the message appearing.
Beyond the Message:
The «Windows is in notification mode» message is a symptom, not the problem itself. Understanding the underlying cause—be it a major update, a security scan, or a more serious system issue—is key to effective troubleshooting. Focusing on identifying and resolving the root cause will prevent future occurrences. Always exercise caution when manipulating system processes or attempting advanced troubleshooting steps. If you’re unsure, seeking help from a qualified IT professional is recommended.
(Image credit: Mauro Huculak)
On Windows 11, whether you use the «Home» or «Pro» edition, the setup must go through the activation process before accessing all the features, such as changing the desktop wallpaper.
The activation process usually happens automatically as soon as the device connects to the internet, and this is true for new devices that come pre-installed with the operating system and after reinstalling Windows 11 on a previously activated device. However, if you’re unsure whether your machine has been activated, Windows 11 includes several easy ways to check the activation state from the Settings app, Command Prompt, PowerShell, and Run command.
In this how-to guide, I will walk you through the steps to find out the activation status of Windows 11.
How to check Windows 11 activation status from Settings
To check whether Windows 11 is activated or not, use these steps:
- Open Settings.
- Click on System.
- Click the Activation page on the right side.
- Confirm the «Activation state» setting:
- Active: No action is needed. The setup is fully activated.
- No active: The system is not activated. You will have to take action.
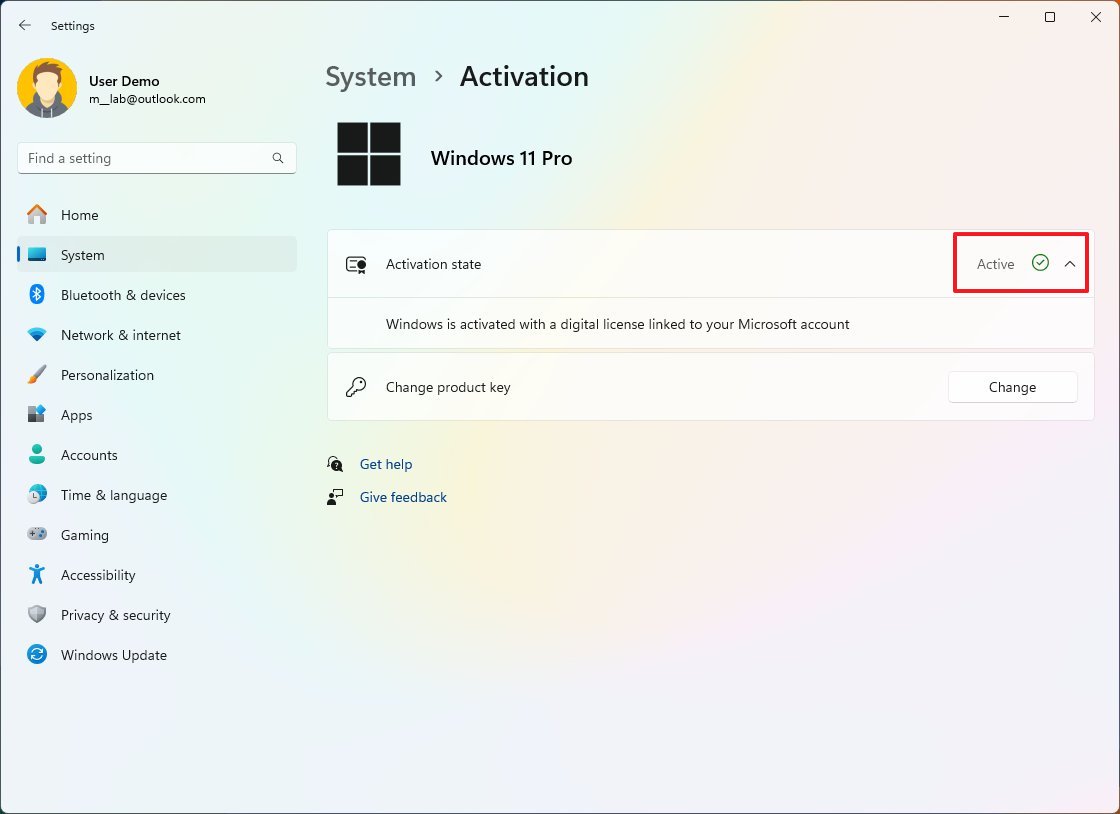
- (Optional) Click the «Activation state» setting (if activated) to confirm whether the setup is using a digital license or product key.
- Quick note: If you’re signed in with a Microsoft account, the system will more than likely be using a digital license.
Once you complete the steps, if the settings page reads «Active,» the device is fully activated.
How to check Windows 11 activation status from Command Prompt
To check the activation status of Windows 11 through Command Prompt (or PowerShell), use these steps:
- Open Start.
- Search for Command Prompt (or PowerShell) and click the top result to open the app.
- Type the following command and press Enter: slmgr /xpr
- Confirm whether Windows 11 is activated:
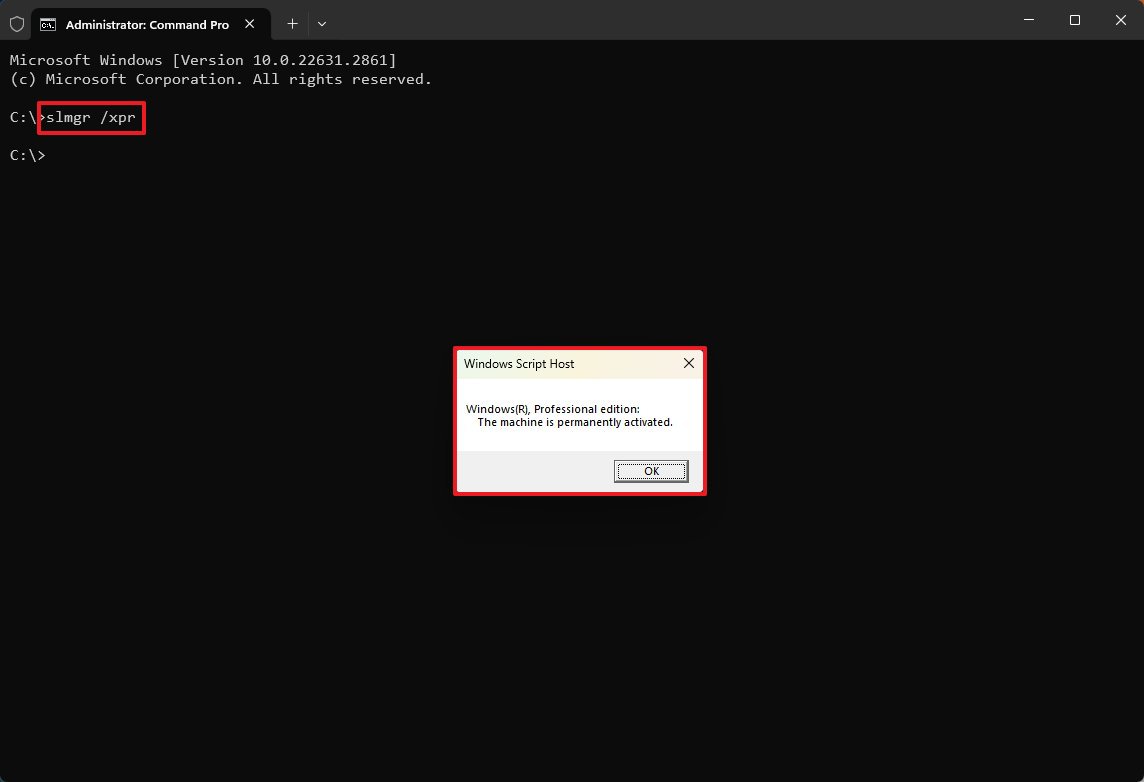
- This machine is permanently activated: No action is needed. The setup is fully activated.
- Windows is in Notification mode: The system is not activated. You will have to take action.
After you complete the steps, the command will return a «Windows Script Host» dialog, letting you know the activation state.
All the latest news, reviews, and guides for Windows and Xbox diehards.
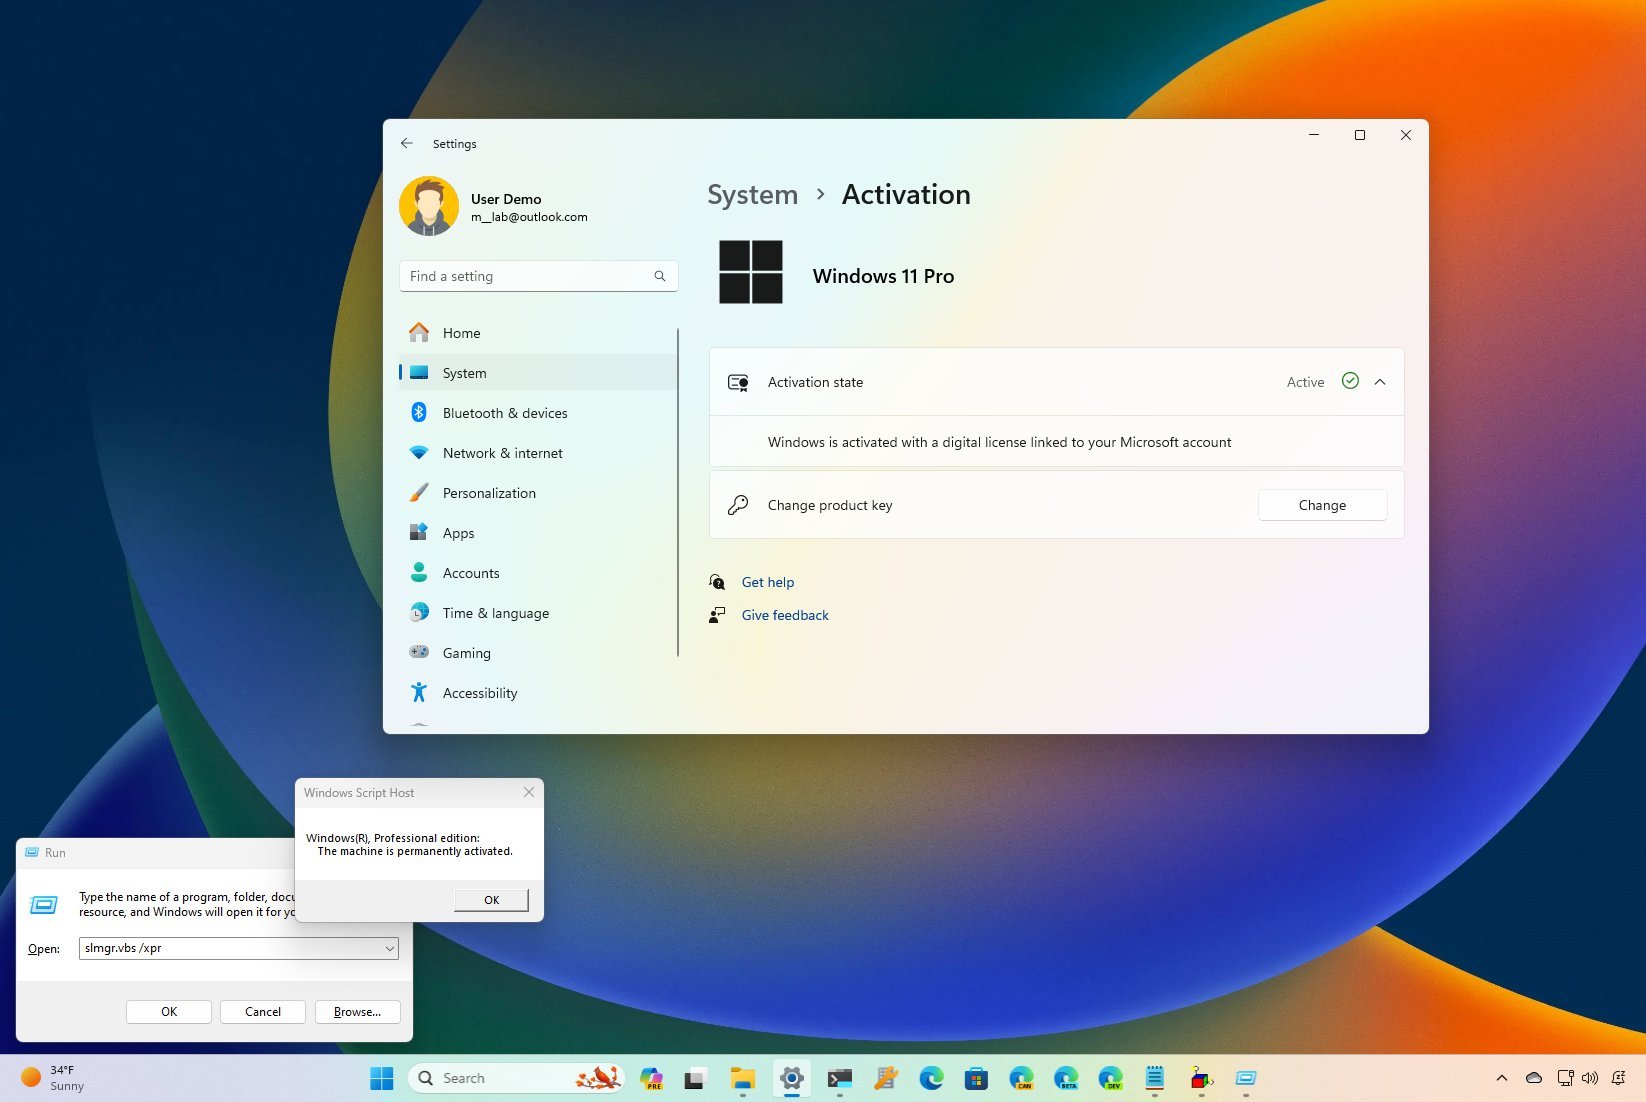
How to check Windows 11 activation status from Run
To determine the Windows activation state with the Run command, use these steps:
- Open Start.
- Search for Run and click the top result to open the app.
- Type the following command and press the OK button: slmgr.vbs /xpr
- Confirm whether Windows 11 is activated:
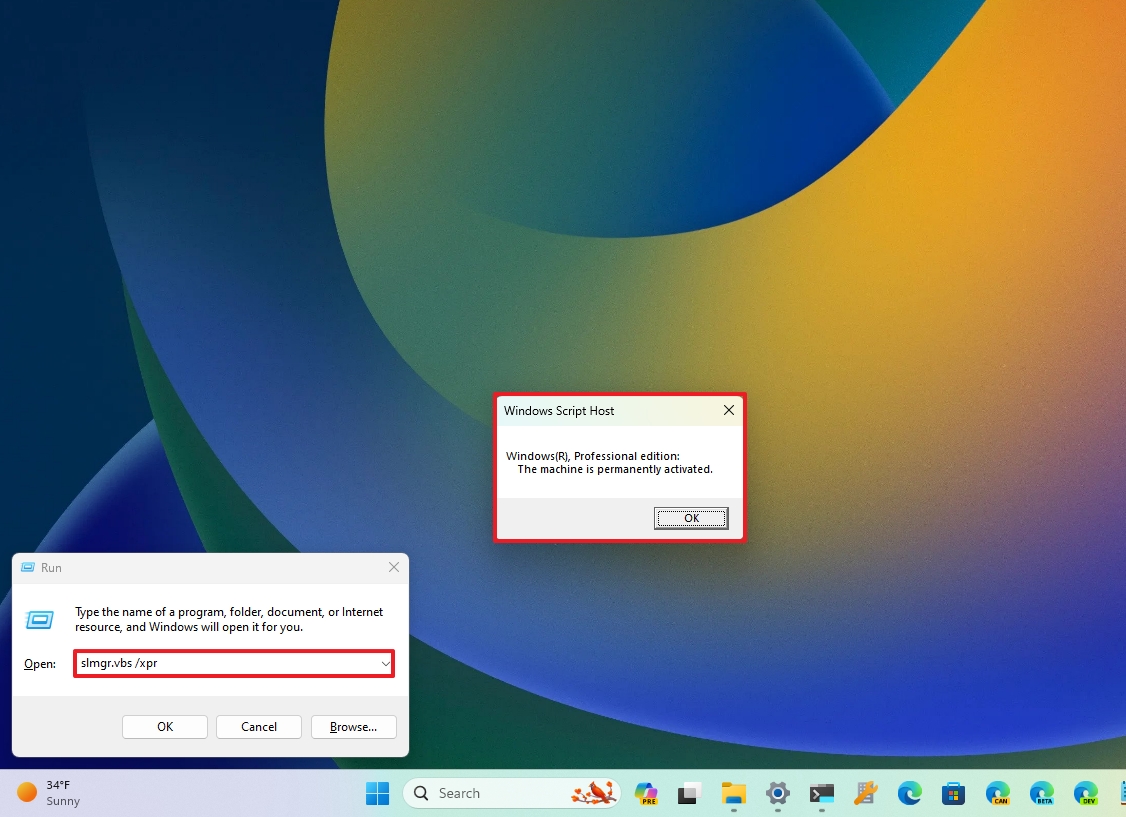
- This machine is permanently activated: No action is needed. The setup is fully activated.
- Windows is in Notification mode: The system is not activated. You will have to take action.
Once you complete the steps, similar to the command method, you will receive a «Windows Script Host» dialog with the activation information.
In addition to these methods, if your device isn’t activated, the Settings app home page will usually display the «You need to activate Windows before you can personalize your PC» message, or the desktop may also display the «Activate Windows» watermark in the bottom-right corner of the screen.
More resources
For more helpful articles, coverage, and answers to common questions about Windows 10 and Windows 11, visit the following resources:
- Windows 11 on Windows Central — All you need to know
- Windows 10 on Windows Central — All you need to know
Mauro Huculak has been a Windows How-To Expert contributor for WindowsCentral.com for nearly a decade and has over 15 years of experience writing comprehensive guides. He also has an IT background and has achieved different professional certifications from Microsoft, Cisco, VMware, and CompTIA. He has been recognized as a Microsoft MVP for many years.