
The ipconfig command is used in Windows to display information about a computer’s network interfaces.
Basic Use
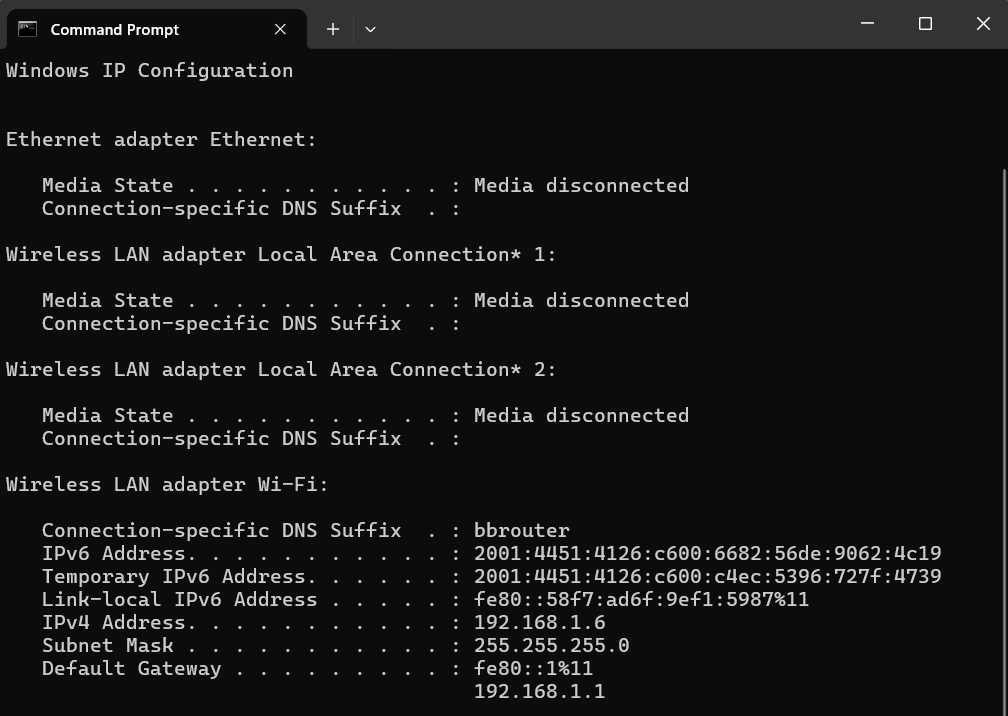
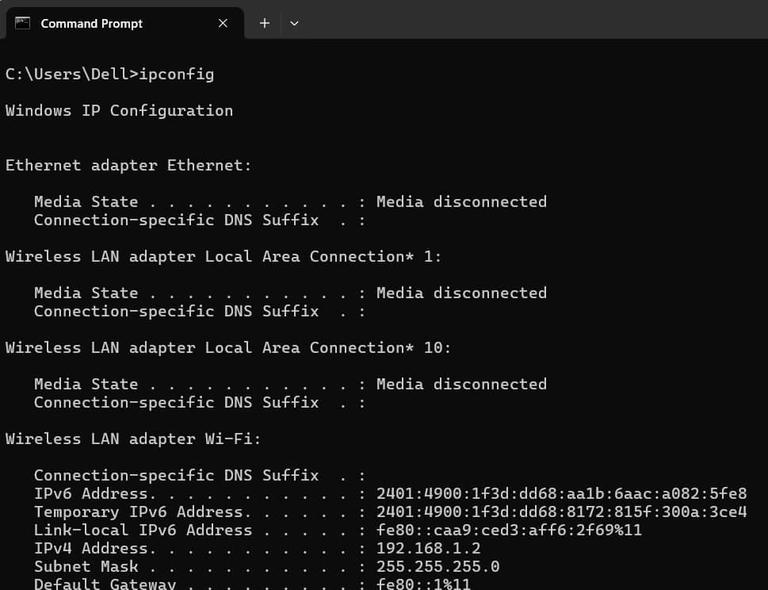
To execute the ipconfig command open the Windows Command Prompt (cmd) and type ipconfig. The command will display information about each of the network interfaces (NICs) on the computer. Here is the output for a single network interface:
C:\>ipconfig

Windows IP Configuration

Wireless LAN adapter Wi-Fi:

   Connection-specific DNS Suffix  . : xyz.st.provider.net.
   IPv6 Address. . . . . . . . . . . : 2601:0:4501:0:f064:0:d977:505f
   Temporary IPv6 Address. . . . . . : 2601:0:4501:0:648b:0:1531:fae6
   Temporary IPv6 Address. . . . . . : 2601:0:4501:0:8916:0:f988:98d
   Link-local IPv6 Address . . . . . : fe80::f064:4a1a:0:0f%5
   IPv4 Address. . . . . . . . . . . : 192.168.0.11
   Subnet Mask . . . . . . . . . . . : 255.255.255.0
   Default Gateway . . . . . . . . . : fe80::0:7eff:0:0%5
                                       192.168.0.1
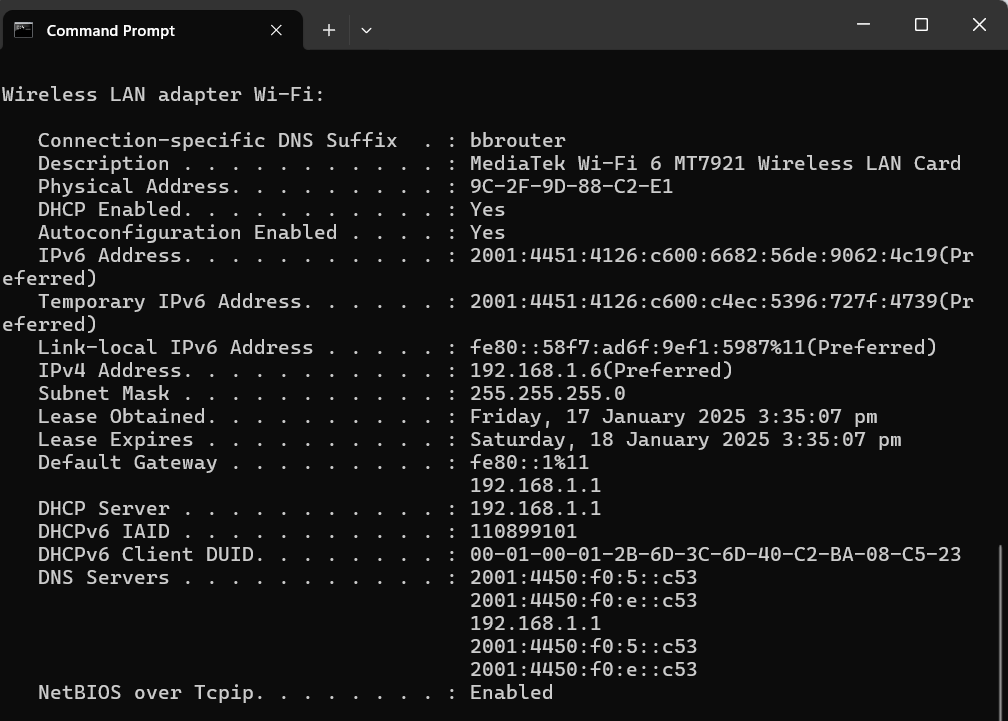
The default output includes information on the interface’s IP addresses, subnet mask, and default gateway (router). To obtain additional information such as DHCP and DNS settings use the /all option. It will also display information about the physical interface such as the MAC address and device description:
C:\>ipconfig /all

Windows IP Configuration

Wireless LAN adapter Wi-Fi:

   Connection-specific DNS Suffix  . : xys.st.provider.net.
   Description . . . . . . . . . . . : Intel(R) Dual Band
   Physical Address. . . . . . . . . : 01-02-03-04-05-06
   DHCP Enabled. . . . . . . . . . . : Yes
   Autoconfiguration Enabled . . . . : Yes
   IPv6 Address. . . . . . . . . . . : 2601:0:0:9630:f064:0:0:505f
   Temporary IPv6 Address. . . . . . : 2601:0:0:9630:0:f520:0:fae6
   Temporary IPv6 Address. . . . . . : 2601:0:0:9630:0:ab2b:0:98d
   Link-local IPv6 Address . . . . . : fe80::0:4a1a:0:505f%5
   IPv4 Address. . . . . . . . . . . : 192.168.0.11(Preferred)
   Subnet Mask . . . . . . . . . . . : 255.255.255.0
   Lease Obtained. . . . . . . . . . : Friday, April 16, 2021 10:14 AM
   Lease Expires . . . . . . . . . . : Sunday, April 18, 2021 1:16 PM
   Default Gateway . . . . . . . . . : 0::0:0:0:0%5
                                       192.168.0.1
   DHCP Server . . . . . . . . . . . : 192.168.0.1
   DHCPv6 IAID . . . . . . . . . . . : 75800000
   DHCPv6 Client DUID. . . . . . . . : 01-00-00-61-00-00-00-00-00-00-13
   DNS Servers . . . . . . . . . . . : 0:0:0::1
                                       0:0:0::2
                                       8.8.8.8
                                       1.1.1.1
   NetBIOS over Tcpip. . . . . . . . : Enabled
Common Ipconfig Options
The following table lists common options for the ipconfig command.
Using Ipconfig to Reset Your DHCP IP Address
If your network adapter is configured to obtain an IP address automatically using DHCP you can reset it by using the /release and /renew parameters for ipconfig.
C:\>ipconfig /release

C:\>ipconfig /renew
This will reset the IP address on all network interfaces on the computer. To reset the IP address of just one interface, provide its name as an argument. If the interface name contains spaces be sure to enclose it in quotes.
C:\>ipconfig /release "Wi-Fi"
One thing to note is that the interface name displayed by ipconfig is not necessarily the actual name of the interface. For example, if you try to use the name «Wireless LAN adapter Wi-Fi» to release the interface from the example above you will receive the following error:
C:>ipconfig /release "Wireless LAN adapter Wi-Fi"

Windows IP Configuration

The operation failed as no adapter is in the state permissible for
this operation.
To obtain a true list of the network interface names use the wmic command:
C:\>wmic nic get NetConnectionID
NetConnectionID

Ethernet
Wi-Fi
Bluetooth Network Connection
Note that the interface is actually called «Wi-Fi». That is the name you will need to use in ipconfig to release or renew the DHCP address for the interface.
Using Ipconfig to Display Your DNS Cache
In order to increase speed and efficiency computers often cache DNS information, at least for a short time period. You can use the /displaydns option for ipconfig to display your current DNS cache.
C:\>ipconfig /displaydns

Windows IP Configuration

forcesafesearch.google.com
    ----------------------------------------
    Record Name . . . . . : forcesafesearch.google.com
    Record Type . . . . . : 1
    Time To Live  . . . . : 56066
    Data Length . . . . . : 4
    Section . . . . . . . : Answer
    A (Host) Record . . . : 216.239.38.120
To delete all of your DNS cache entries (flush) you can use ipconfig’s /flushdns option.
C:>ipconfig /flushdns

Windows IP Configuration

Successfully flushed the DNS Resolver Cache.
Setting a Network Interface’s IP Address
While ipconfig lets you display information, it cannot be used to change an interface’s IP address. For that you can use the netsh command, however, the command is being deprecated by Microsoft, so you are better of using PowerShell.
First open PowerShell and type Get-NetIPConfiguration. Below is an example of the output for a single interface. Note the interfaces InterfaceIndex.
PS C:\> get-netipconfiguration

InterfaceAlias       : Wi-Fi
InterfaceIndex       : 5
InterfaceDescription : Intel(R) Dual Band
NetProfile.Name      : wifissid 3
IPv6Address          : 2601:0:0:9630:0:4a1a:0:505f
IPv4Address          : 192.168.0.11
IPv6DefaultGateway   : fe80::0:0:0:d58e
IPv4DefaultGateway   : 192.168.0.1
DNSServer            : 8.8.8.8
                       1.1.1.1
Next set the IP address, subnet mask, and default gateway for the interface using the New-NetIPAddress cmdlet:
PS C:\>New-NetIPAddress -InterfaceIndex 5 -IPAddress 192.168.0.100 -PrefixLength 24 -DefaultGateway 192.168.0.1
Here is a breakdown of the parameters used:
-InterfaceIndex: The index of the interface you want to update
-IPAddress: The IP address you want to assign to the interface
-PrefexLength: The number of bits used by the subnet mask
-DefaultGateway: The IP address of the computer’s default gateway (router)
Next you can use the Set-DnsClientServerAddress cmdlet to specify the DNS servers for the interface to use:
PS C:\>Set-DNSClientServerAddress -InterfaceIndex 5 -ServerAddresses ("8.8.8.8", "1.1.1.1")
Here is a breakdown of the parameters used:
-InterfaceIndex: The index of the interface you want to update
-ServerAddresses: A list of the DNS servers to assign to the interface
Links and Resources
-
Ipconfig documentation
-
Netsh documentation
-
Get-NetIPConfiguration documentation
-
New-NetIPAddress
-
Set-DNSClientServerAddress
It is not uncommon to see your network causing problems and not letting you use the internet with peace. And the issue only grows when you are a Windows user.
How many time have you seen your IT guy use the IPConfig /flushdns command to magically make the internet problems disappear?
That’s not a coincidence because Microsoft ships Windows with IPConfig, a TCP/IP utility for viewing and managing your computer’s network problems through the command line.
It can show you the network information at a glance along with a detailed report if required.
You can get a new IP assigned, view and flush DNS amongst other things.
Let us explore and learn to run all commands of IPConfig on Windows using the tutorials we have prepared for you.
Table Of Contents
- What is IPConfig?
- How to use IPConfig
- How to use IPConfig /all
- What are the parameters of IPConfig?
- Release and Renew IP address through IPConfig parameter
- Release IP address through IPConfig /Release Parameter
- Renew IP address through IPConfig /Renew Parameter
- View DNS Cache with the IPConfig command
- How to clear the DNS cache on Windows with IPConfig command
What is IPConfig?
Think of IPConfig as a way to manage the way your computer connects to the internet and other networks. IPConfig (Internet Protocol Configuration) is an application program for command line utility that is used to display/manage IP addresses assigned to your computer.
It can perform more functions by adding certain commands to it. This application has been available since Windows 98(before XP and 7) and now available on Windows 11, providing the same utility with a few additional features. You can run it on Terminal and PowerShell in Windows.
Command Prompt, also known as terminal(since Windows 10) and PowerShell are pre-installed in Windows. You can open them via the run prompt or the Start Menu search.
How to use IPConfig
We will learn to use the IPConfig program in the Terminal. You can use PowerShell for the same and it will offer you the same functionalities.
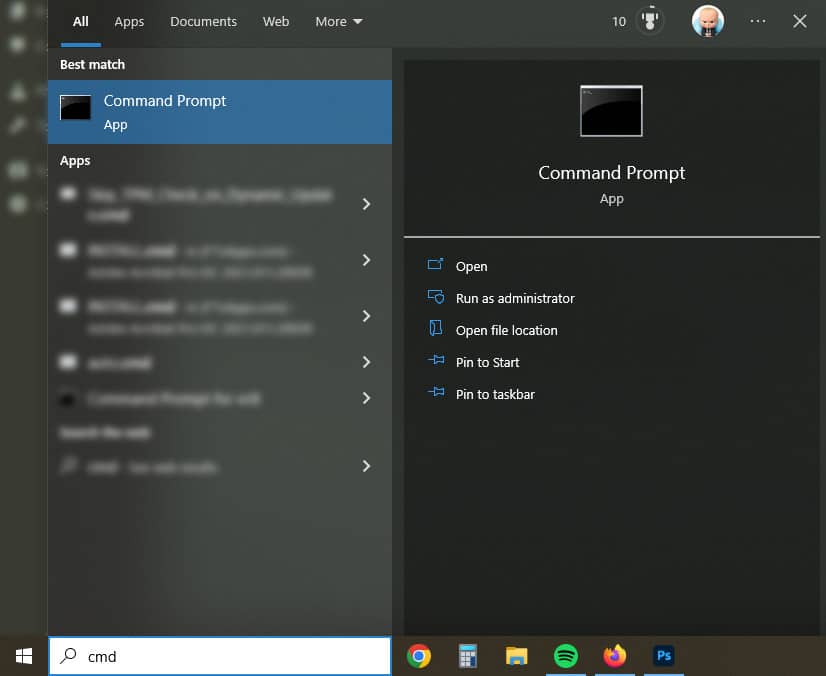
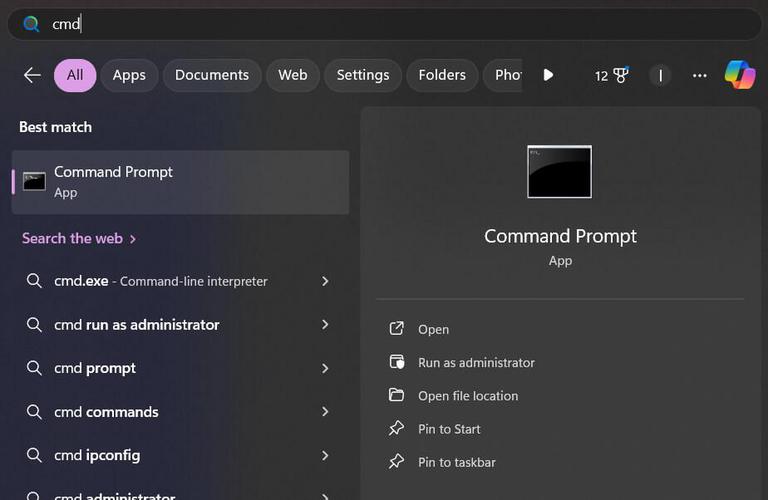
1. Go to the Start Menu Search and type cmd or command prompt.
Alternate way – Press Ctrl + R to open the run prompt and press Ctrl + Shift + Enter after typing CMD in the box.
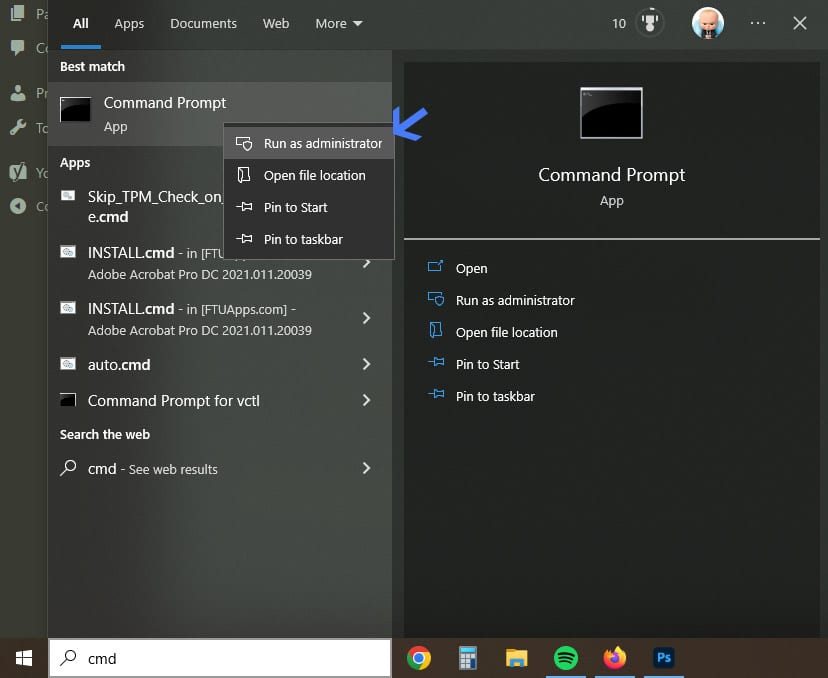
2. Right-click on the first result and select Run as administrator to open a command prompt with administrator privileges.
3. Now type the following command and press ENTER.
P.S. – The letter case does not matter. The command can be in uppercase, lowercase, or even a combination of both.
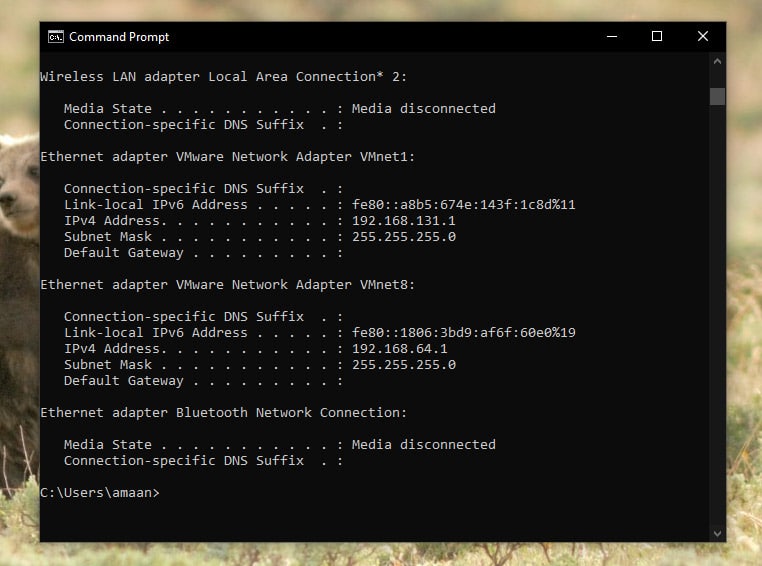
4. You will see your network information here. It will include your wired, wireless and virtual machine’s(optional) network adapter’s information.
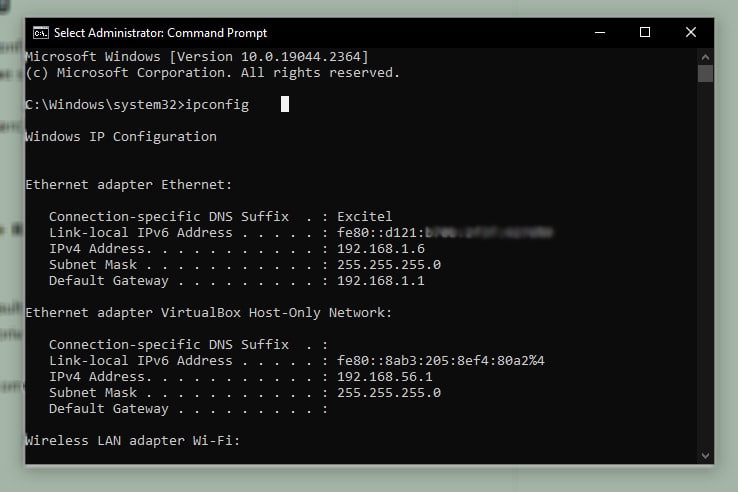
The listed information may feel difficult to understand if you are not a regular user of this tool. Let us break it down and help you understand it.
- IPv4 address: This is the IP address of your computer
- Subnet Mask: It helps in dividing the network into two parts for efficiency, speed, and security.
- Default Gateway: Here it acts like an intermediary between your computer and the internet through the router.
How to use IPConfig /all
IPConfig as a standalone command shows the network adapters’ information in brief. You can use IPConfig /all the detailed accounts of the same. Here is how to use it to view the extension information.
1. First we will clear the earlier requested information by pressing enter after typing cls.
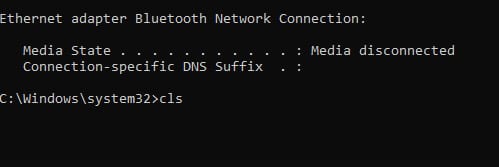
2. When the screen is clear, type in the following command.
3. A detailed list of information will appear in the command prompt. Each network adapter will have separate details under the heading.
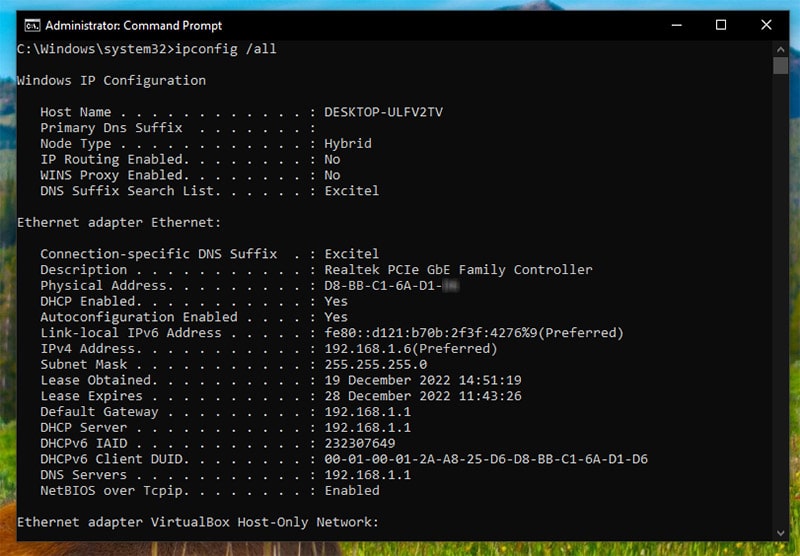
Some of these terms you should know about:
- Host Name: This is the name of your computer which appears to other computers on a network.
- Physical Address: It is the MAC address, which is the unique address of the computer to be used on a network or the internet. No two MAC addresses can be the same.
- DHCP Enabled: This means that the IP address your network connection is using is DHCP, Dynamic Host Configuration Protocol, (between DHCP and Static IP address) and it will be changed over time.
- DNS Servers: A server that is used by your computer to access a website online. A DNS server is like the internet’s phonebook which knows the numbers of all the websites.
When you type a website address, it is converted into an IP address of the website with which you want to want with.
What are the parameters of IPConfig?
IPConfig is not just a way to see network adapter information. It is capable of performing a lot of important functions that help in keeping your network adapters and internet running without hiccups.
You can use IPConfig /? to find all IPConfig commands available to you. Here is how it is done. Use cls to clear the screen before proceeding if the screen is filled with earlier requested information.
1. Type the following command and press ENTER.
2. All the IPConfig commands will appear on the screen. You will see all the available parameters to use using the IPConfig command.
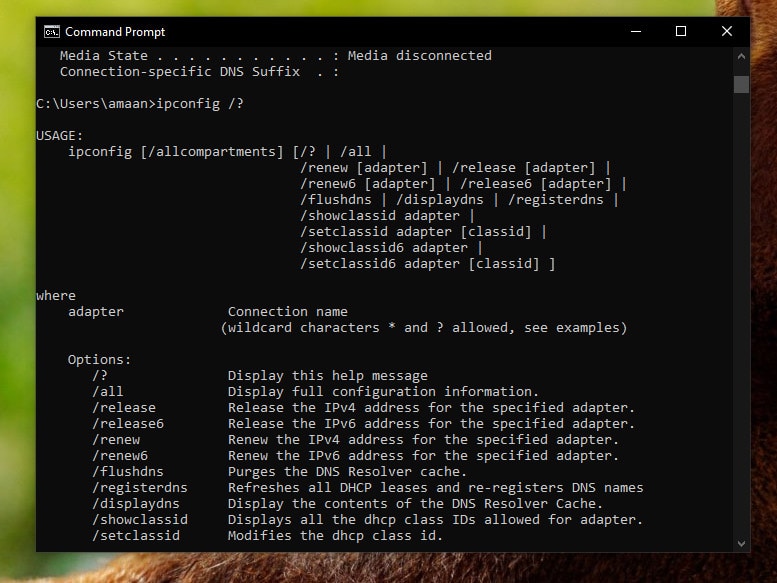
The thing to remember, these commands perform the same function. You can continue to use IPConfig and IPConfig /all to avoid typing longer parameter commands.
| IPConfig shows same as IPConfig /allcompartments |
| IPConfig /all shows same as ipconfig /allcompartments /all |
Release and Renew IP address through IPConfig parameter
Release IP address through IPConfig /Release Parameter
IP addresses are not permanent when you are using a DHCP server(because the other way is Static IP which is not cheap), which assigns you an IP for a short period of time.
The expiry period is generally after 24 hours and it normally renews on its own to get a new IP address. It may not automatically get renewed after expiry for reasons such as:
- Installed a new router or modem
- If you had a power outage
- Reconfigured the local network
- Move your computer to a different place with the addition of a new network requirement to the mix.
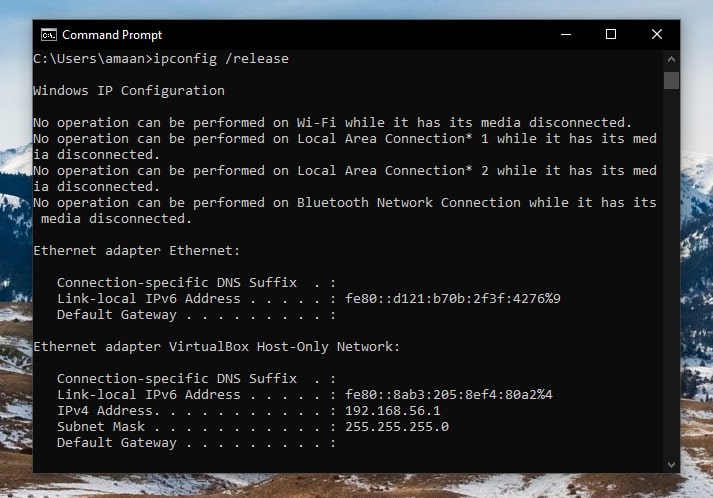
In any case you can manually release the IP address through the IPConfig /Release parameter.
Here is how you can do it through the command prompt in the following manner.
1. Open the command prompt and press ENTER after typing the following parameter command.
Note – You can release IP address of a specifc adapter by typing ipconfig /release “adapter name“. Just replace the adapter name with your adapter’s name.
2. The statements with “No operation can be…” will appear for all your adapters. Your internet will also stop working as the IP addresses of all the network adapters are released.
Renew IP address through IPConfig /Renew Parameter
We will renew the IP address using the IPConfig /renew, which will assign new IPs to all the network adapters.
3. Type the following command and press ENTER to renew the IP address.
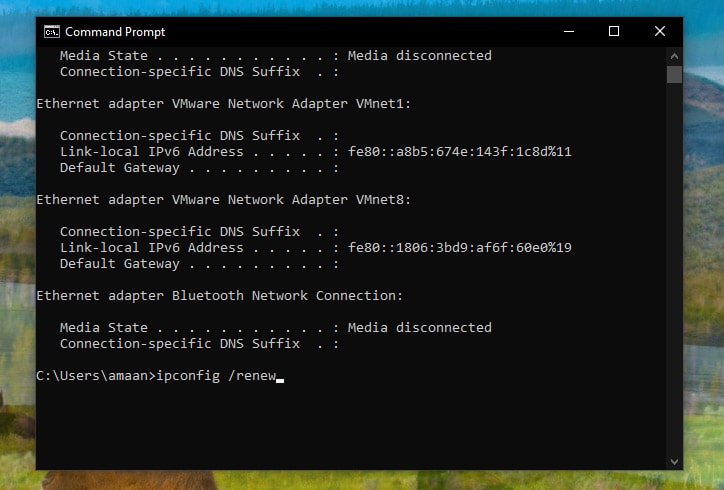
Note – You can renew IP address of a specific adapter by typing ipconfig /renew “adapter name“. Just replace the adapter name with your adapter’s name.
4. All the network adapters will get a new IP address and you can use the internet like just another regular day.
View DNS Cache with the IPConfig command
DNS, or the Domain Name System, is a system that allows people to access websites and other online resources using easily-remembered names instead of numerical IP addresses.
Think of DNS as a sort of “phonebook” for the internet. Just like you can look up a person’s phone number in a phonebook by their name, DNS allows you to look up the IP address of a website by its domain name.
This makes it much easier for people to navigate the internet, as it’s much easier to remember a name like “google.com” than it is to remember a series of numbers like “172.217.16.46”.
Similarly, the DNS cache is a temporary database that stores DNS lookup results on your computer. When you visit a website or use any other service that requires DNS resolution, your computer will first check the DNS cache to see if it has a recent record of the domain name you are trying to access.
If it does, it will use the stored IP address to connect to the website or service, which can speed up the process of resolving the domain name. When the DNS cache does not contain a record for the domain name, your computer will send a request to a DNS server to look up the IP address.
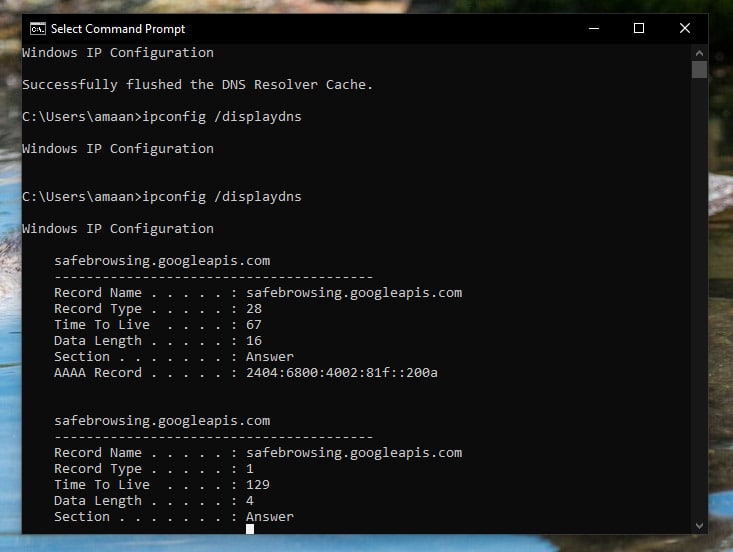
Let us view DNS cache using the IPConfig command through the command prompt.
1. Open Command Prompt, type the following command, and press ENTER.
2. You will see the DNS cache of different websites and applications here.
How to clear the DNS cache on Windows with IPConfig command
Clearing the DNS cache can help you in more ways than you can think. One reason to clear the DNS cache is to fix website loading errors. If you are experiencing errors when trying to load a particular website, clearing the DNS cache may help to resolve the issue.
It can also speed up website loading by clearing the DNS records clutter. This can also improve your privacy as your DNS cache can be looked at by other sites you visit. They can see the sites you visited earlier.
Sometimes certain sites will not load while your internet is working fine. Clearing the DNS cache can help in solving the problem.
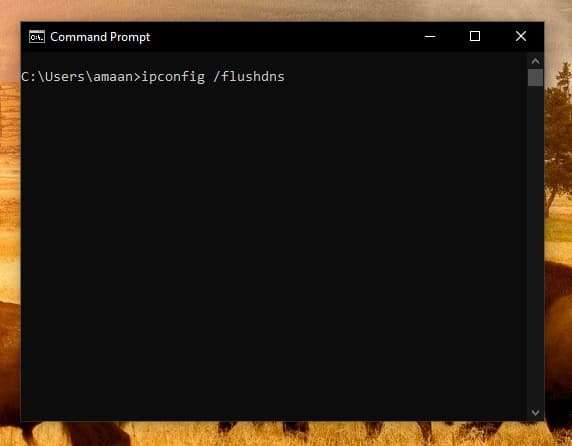
Here is how you can clear the DNS cache with the IPConfig parameter.
- Open Command Prompt and type the following command, then press ENTER.
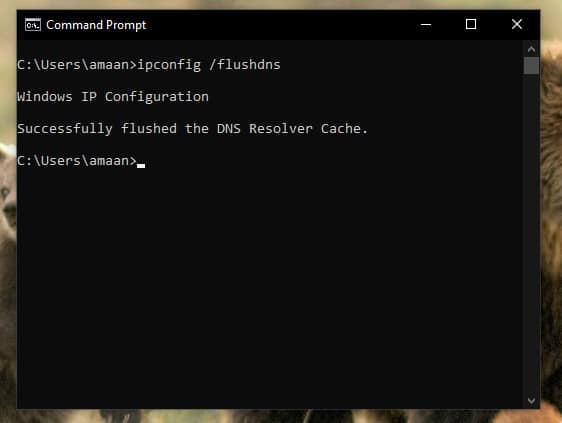
2. It will take 2 to 4 seconds, and your DNS will be cleared with the message ” Successfully flushed the DNS Resolver Cache.”
Note – Apart from the computer, Google Chrome keeps its own DNS cache which can be cleared to resolve any issues completely. On the other hand, Mozilla Firefox stores DNS cache on RAM, so it gets cleared upon closing the browser.
Over to You
This is how to run all commands of IPConfig on a Windows PC. You can clear DNS cache, and release and renew IP addresses, amongst half a dozen of other things using the parameters of IPConfig.
Keep on clearing your DNS cache every once in a while and you won’t have network problems on the computer.
If you are wirelessly connected to the internet via Wi-Fi then consider switching it off periodically to reset the network cache.

Amaan Rizwan
Anything and everything because titles should not define us. A non-fiction lover. Khalid Hosseini and Ruskin Bond fan. Aspiring to be better than yesterday.
Whether your workforce is in an office, working from home, or a mixture of both, you need a reliable network to ensure seamless digital collaboration. Network administrators need many tools in their toolbox to keep that network operating consistently.
Among the most versatile are command-line tools. They give network administrators the flexibility, speed, and precision needed to configure, monitor, troubleshoot, and secure network infrastructure effectively.
The versatile ipconfig command is one of the most used command-line tools. IPconfig is used to diagnose problems and optimize performance by helping you diagnose network connectivity issues and gather information about your computer’s configuration. With this guide to ipconfig commands, you’ll learn the most useful commands, what they do, and when to use them to streamline network administration.
What is ipconfig command used for?
The ipconfig command, short for Internet Protocol Configuration, is a command-line utility that provides detailed information about your computer’s network settings. By entering specific ipconfig commands, you can retrieve useful data such as:
Your computer’s IP address: Helps identify your device on a network, whether it’s a local area network (LAN) or the Internet.
- The date and time your computer got its IP address: Shows when your IP was assigned and when it will expire. This is useful when troubleshooting Dynamic Host Configuration Protocol (DHCP).
- The network adapter’s physical address: A unique identifier for your device, often needed for network security or device-specific configurations.
- The router your network is connected to: Identifies the device your computer uses to connect to the Internet or other networks.
- The DNS server: Shows which DNS server your computer uses to resolve website names into IP addresses.
You can also perform several actions to resolve certain network issues such as conflicts, misconfigurations, or connectivity failures. Let’s look at some of them:
Common use cases for ipconfig
- Diagnosing network connectivity issues: When your computer cannot connect to the Internet or another device, ipconfig helps determine the root cause.
- Resolving IP conflicts: In networks where devices use dynamic IP addresses, conflicts can arise if two devices are assigned the same address.
- Refreshing DNS settings: Outdated DNS settings may make it difficult (or impossible) for you to access certain websites. Running ipconfig can clear your DNS cache and ensure your system fetches the latest records.
- Configuring static IPs: ipconfig can help you identify existing network ranges, allowing you to easily set up devices like printers or servers that require a fixed IP.
- Monitoring VPN connections: For users working with VPNs, ipconfig provides details about VPN-assigned IP addresses and can assist in diagnosing connection drops.
- Network setup and testing: During initial network setups, ipconfig ensures devices have proper IP configurations and confirms that gateways and DNS servers are reachable.
As you can see, the ipconfig command is both reliable and versatile for beginners and IT professionals. Its versatility makes it indispensable for effectively maintaining and managing network performance.
How to use the ipconfig command
- To use ipconfig, you need to open Command Prompt. You can do this by simultaneously pressing the Windows key + R, typing “cmd”, and pressing Enter. Alternatively, you can type “Command Prompt” in the Start Menu search bar. For administrative tasks, make sure that you are running Command Prompt as an administrator.
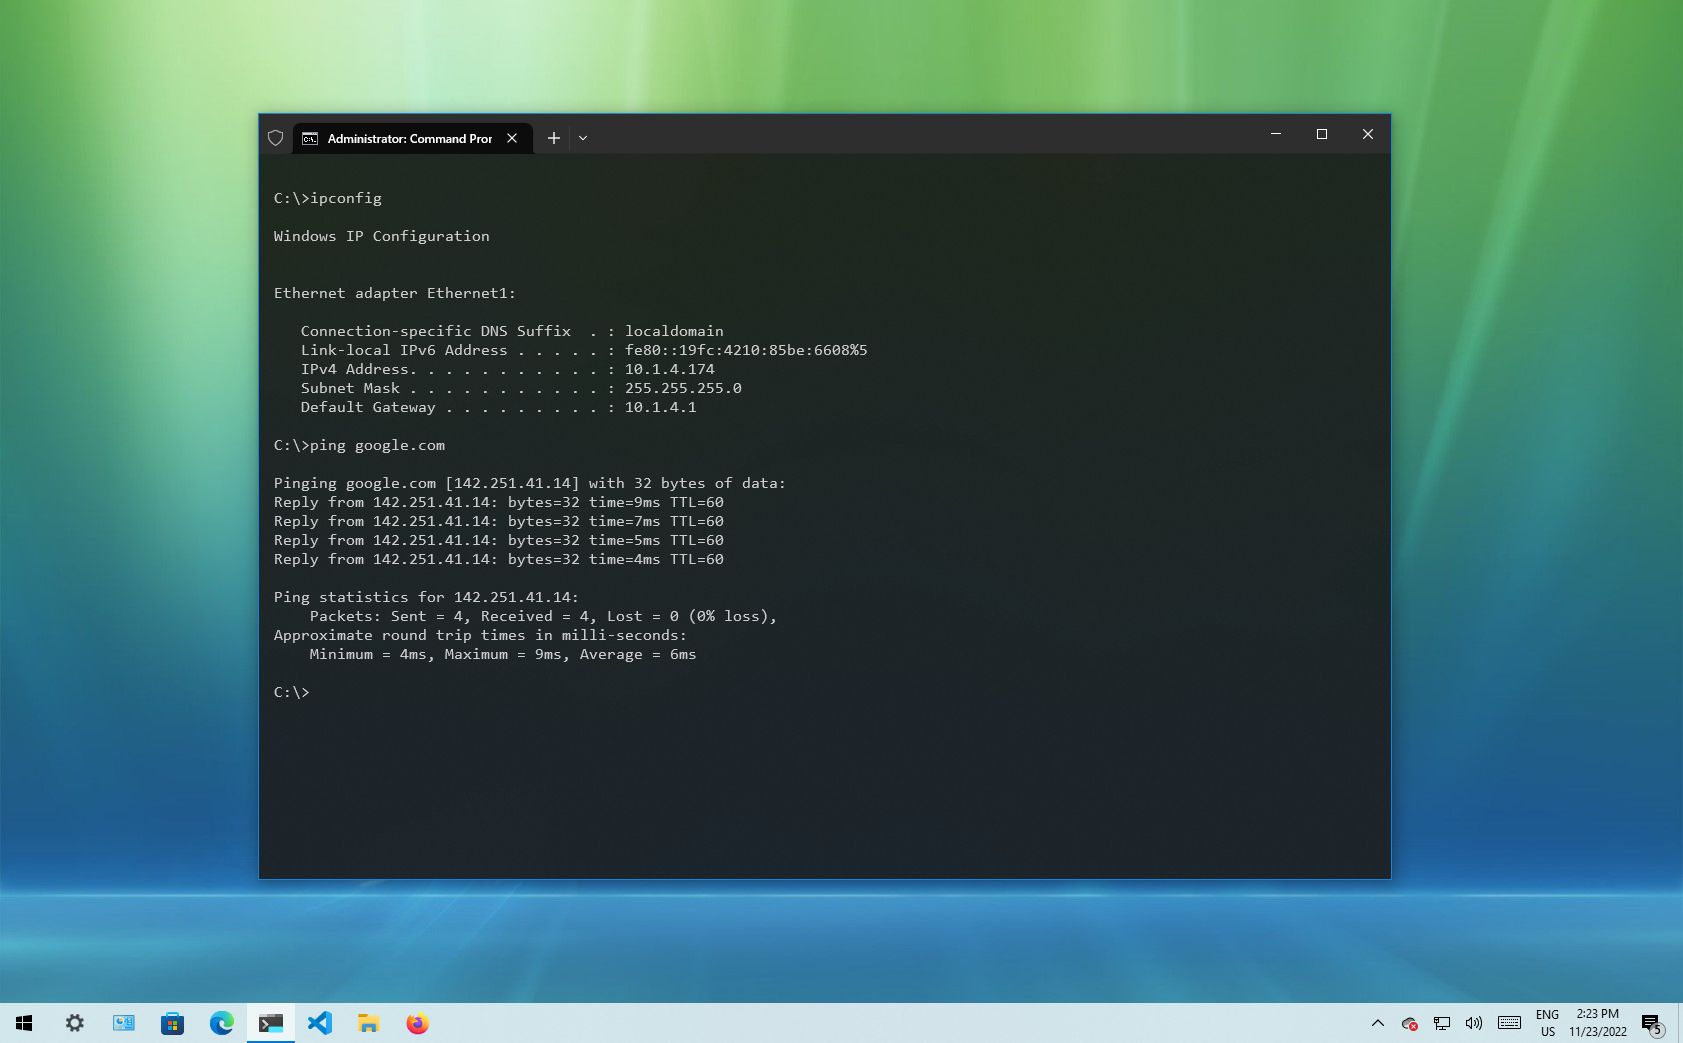
- Once in Command Prompt, type “ipconfig” and press Enter. This displays basic information about your network interfaces, including the device’s IPv4 address, subnet mask, and default gateway for each active network adapter. These details are crucial for understanding how your computer communicates within a network and with the Internet. Here’s an example:
Advantages of ipconfig and command line arguments
One of the main advantages of using ipconfig commands is the ability to quickly retrieve network configuration information without relying on graphical user interfaces (GUI). Using the command line gives you quick and efficient access to information, especially in situations where a GUI may not be available or practical.
The ipconfig command displays the full system configuration, speeding up troubleshooting. This makes it easy to spot connectivity problems or IP address conflicts and correct them.
Furthermore, ipconfig commands offer a wide range of command line arguments that allow you to customize and fine-tune your network configuration. Understanding command line arguments helps you effectively manage your network configuration and easily resolve connectivity problems.
Commonly used ipconfig commands
Let’s explore what ipconfig can do, go over some of the common parameters used with ipconfig commands, and review some of the information you can access with these commands.
What does just ipconfig do?
Executing ipconfig without parameters allows you to see the basic network information from your network adaptors. To run the command, follow these steps:
- Press the Windows key or right click on the start menu.
- Open Command Prompt or PowerShell.
- Type ipconfig and press enter.
Your screen will display information about all of your network adaptors, including ethernet, wireless, and VPN if you’re using one.
What does the ipconfig /all command do?
The ipconfig /all command is a powerful command that provides comprehensive information about all network interfaces on your computer. Follow the same steps as above to get to the Command Prompt, then type:
ipconfig /all and press enter.
Here’s an example:
This command returns a detailed list of network adapters and their respective configurations, including:
- Physical address (MAC address) of your adaptor
- IP Address of your computer
- Default gateway: the router your computer is connected to
- DNS server: the server that translates domain names to IP addresses
- DHCP Server: the router or server that hands out IP addresses
- Lease Obtained: the date and time your computer received its IP address
Examining the output of the ipconfig /all command tells you if there are any misconfigurations or potential issues that may be affecting your network connectivity.
Using ipconfig commands to release and renew your IP address
ipconfig/ release
To release the currently assigned IP address of a specific network interface, follow the steps above for the Command Prompt and type:
ipconfig /release followed by enter.
Executing the ipconfig /release command releases the IP address and makes it available for reassignment. This is useful when obtaining a new IP address due to issues like network conflicts.
ipconfig/ renew
To request a new IP address for a specific network interface, go to Command Prompt and type:
ipconfig /renew followed by enter.
This command makes your computer send a DHCP request to the network’s DHCP server, asking for a new IP address assignment.
Using these ipconfig commands in conjunction with each other can often resolve connectivity issues and ensure that your network interface is configured properly.
ipconfig /flushdns
The ipconfig /flushdns command clears the DNS resolver cache on your computer. This helps resolve caused by outdated or corrupted DNS entries, such as when a website’s IP address has changed but your system still references the old address.
What does the ipconfig displaydns command do?
To view the contents of the DNS resolver cache on your computer, type the following command in Command Prompt:
ipconfig displaydns and press enter.
The DNS resolver cache stores information about previously resolved DNS queries, such as the IP address of visited websites. The ipconfig displaydns command provides you with a list of all the DNS records stored in the cache. This is useful for troubleshooting DNS-related issues and allows you to check if the DNS resolver cache is holding outdated or incorrect information.
What is the impact of ipconfig registerdns?
To manually refresh and update the DNS resolver cache on your computer, go to Command Prompt and type:
ipconfig registerdns followed by enter.
This command directs your computer to send a registration request to the DNS server, updating the DNS records associated with your computer. The ipconfig registerdns command comes in handy when you need to troubleshoot DNS-related issues or when you want to ensure that your computer’s DNS records are up to date. Executing ipconfig registerdns lets you resolve DNS conflicts, update outdated records, and improve the overall efficiency of your DNS resolution process.
Other common commands
ipconfig /showclassaid
The ipconfig /showclassaid command displays all DHCP class IDs available for a specific adapter. DHCP class IDs are used to specify additional settings or configurations for devices on a network.
ipconfig /setclassaid
The ipconfig /setclassaid command allows you to assign a specific DHCP class ID to your network adapter. This is helpful when troubleshooting or testing specific network configurations.
ipconfig /allcompartments
The ipconfig /allcompartments command provides detailed configuration information for all network compartments. This is useful for advanced troubleshooting systems with multiple virtual or physical network environments.
ipconfig /release6
The ipconfig /release6 command releases the IPv6 address assigned to your computer. It’s the IPv6 counterpart to ipconfig /release and is essential for networks using IPv6.
ipconfig /renew6
The ipconfig /renew6 command requests a new IPv6 address from the DHCP server. This is particularly useful for troubleshooting IPv6-related connectivity issues.
ipconfig /?
The ipconfig /? command displays a complete list of all available parameters and their descriptions. It’s a quick reference for anyone learning the ipconfig command.
Watch our video on IPConfig and why it matters.
Gain insight with ipconfig
IPConfig commands are widely used, for good reason: They provide insight into network connectivity issues, allowing you to manage and troubleshoot them. When combined with a wide range of command-line arguments, config commands provide valuable information about your network configuration.
These commands also allow you to customize and fine-tune your settings, diagnose network problems, release and renew IP addresses, view DNS cache contents, and update DNS records, among other operations.
Along with ipconfig commands, other command-line arguments can also save time and automate processes. Having all of these tools in your toolbox can give you an edge in managing your network.
To maximize your computing resourced further, consider NinjaOne’s endpoint management software. It supports command-line arguments and provides features such as monitoring and alerting, software deployment, and patch management. Sign up for a free trial today.
(Image credit: Future)
Windows 10 makes it easy to connect to a network and the internet using a wired or wireless connection. However, sometimes, you may still need to manually manage settings or troubleshoot connectivity problems, which is when the built-in command-line tools can come in handy.
Regardless of the issue, Windows 10 will likely have a Command Prompt tool to help you resolve the most common problems. For instance, ipconfig and ping are among the most important tools for viewing network settings and troubleshooting connectivity issues. If you are dealing with a routing problem, the route command can display the current routing table to examine and determine related problems, and with the nslookup tool, you can diagnose DNS problems.
You also have tools like arp to troubleshoot switching problems and determine the MAC address from an IP address. The netstat command-line tool allows you to view statistics for all the connections. And you can use the netsh tool to display and change many aspects of the network configuration, such as checking the current configuration, resetting settings, managing Wi-Fi and Ethernet settings, enabling or disabling the firewall, and a lot more.
This guide highlights eight Command Prompt tools that should help you manage and troubleshoot networking problems on your device and across the network.
1. IPConfig
On Windows 10, ipconfig (Internet Protocol configuration) is among the most common networking tools that allow you to query and show current TCP/IP (Transmission Control Protocol/Internet Protocol) network configuration. The command also includes options to perform different actions, such as refreshing Dynamic Host Configuration Protocol (DHCP) and Domain Name System (DNS) settings.
Display network configuration
To get started with ipconfig on Windows 10, use these steps:
All the latest news, reviews, and guides for Windows and Xbox diehards.
- Open Start.
- Search for Command Prompt, right-click the top result, and select the Run as administrator option.
- Type the following command to view a summary of the TCP/IP network configuration and press Enter: ipconfig
- Quick tip: In Command Prompt, you can use the CLS command to clear the screen after you no longer need the information to continue running commands without clutter.
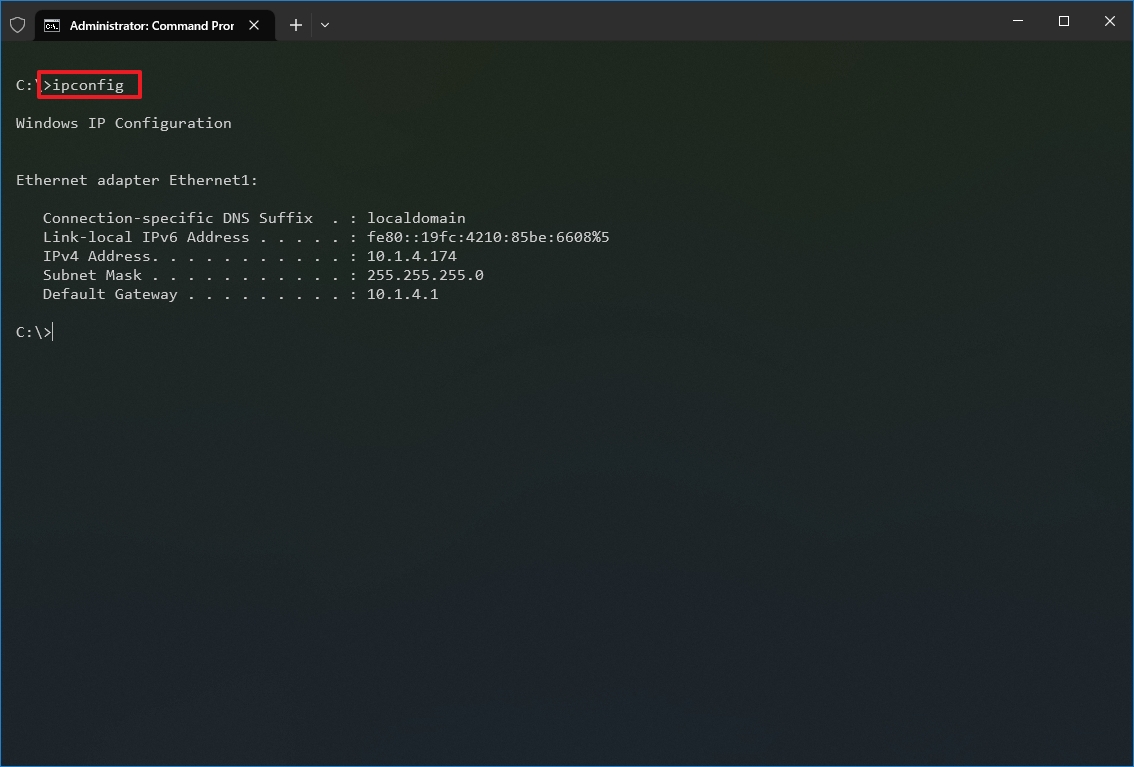
- Type the following command to view the complete TCP/IP network configuration and press Enter: ipconfig /all
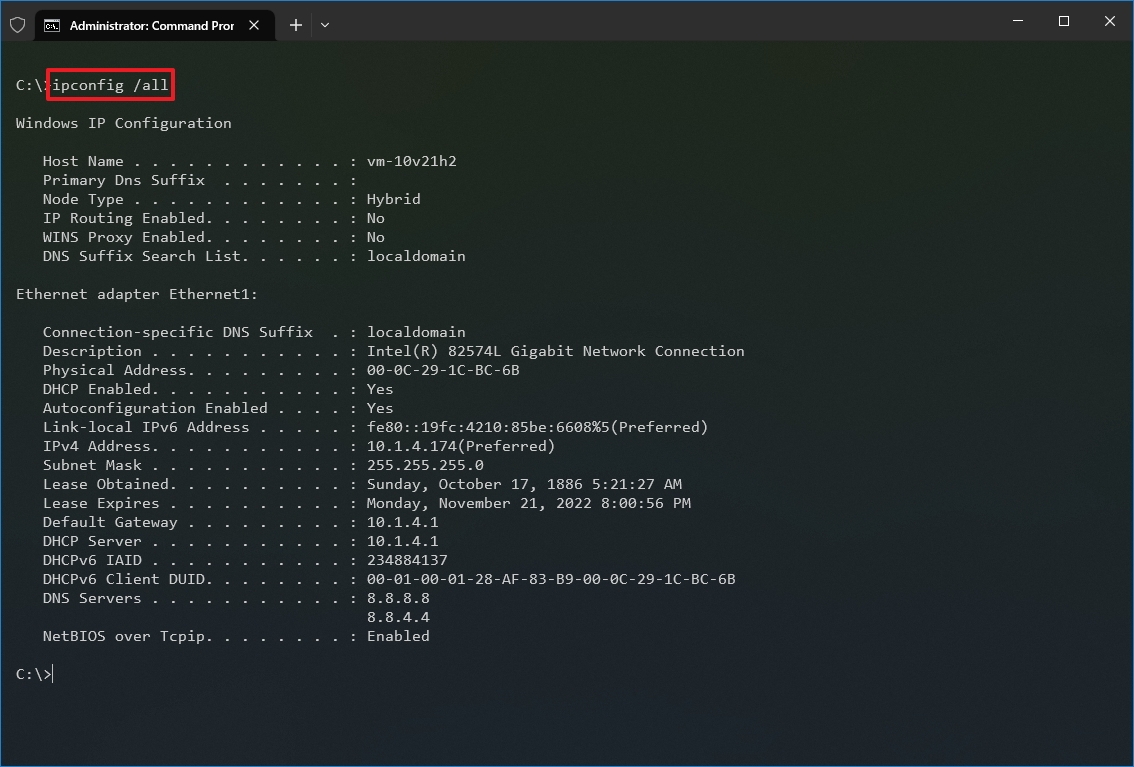
Once you complete the steps, you will have an overview of the PC’s entire TCP/IP configuration.
Refresh network settings
To release and renew the network configuration with Command Prompt, use these steps:
- Open Start.
- Search for Command Prompt, right-click the top result, and select the Run as administrator option.
- Type the following command to remove the current network configuration and press Enter: ipconfig /release
- Type the following command to reconfigure the network configuration and press Enter: ipconfig /renew
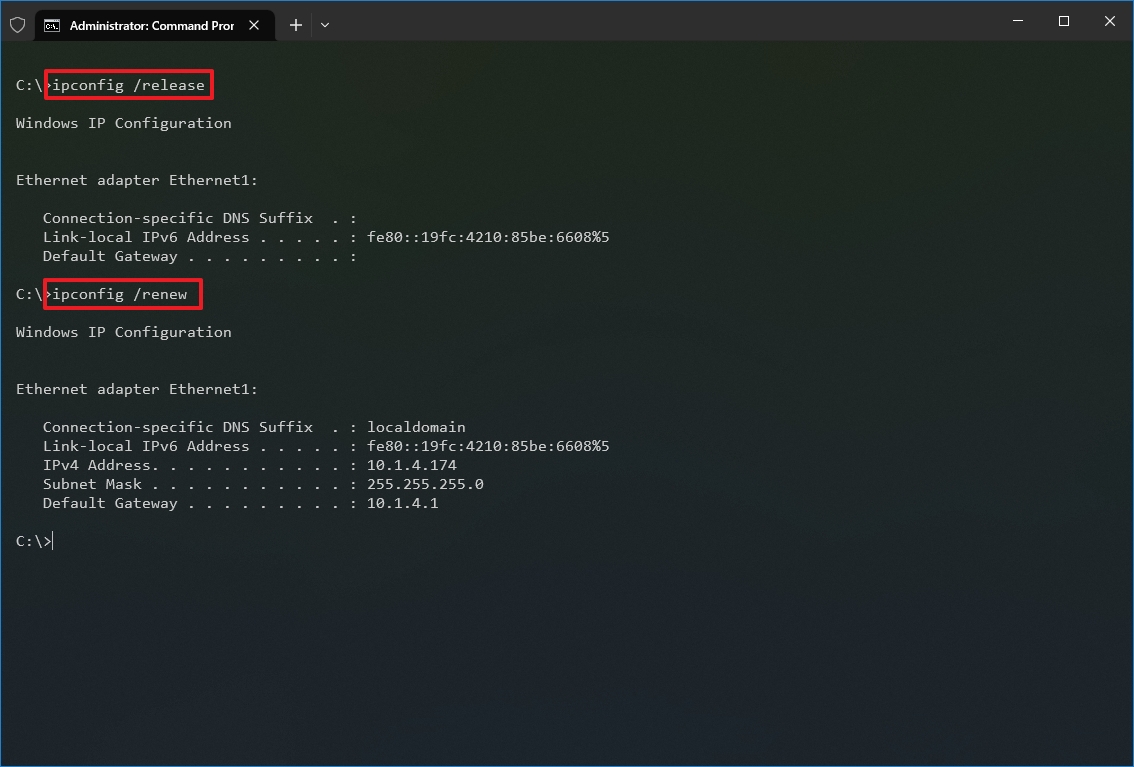
After you complete the steps, the first command will clear the current configuration, and the second command will fetch new settings from the DHCP server to resolve connectivity issues. If the dynamically assigned settings have not expired in the server, it is common to see the same IP address reconfigured on the device.
Refresh DNS settings
To flush and rebuild the current DNS cache entries on Windows 10, use these steps:
- Open Start.
- Search for Command Prompt, right-click the top result, and select the Run as administrator option.
- Type the following command to clear the DNS system cache on the device and press Enter: ipconfig /flushdns
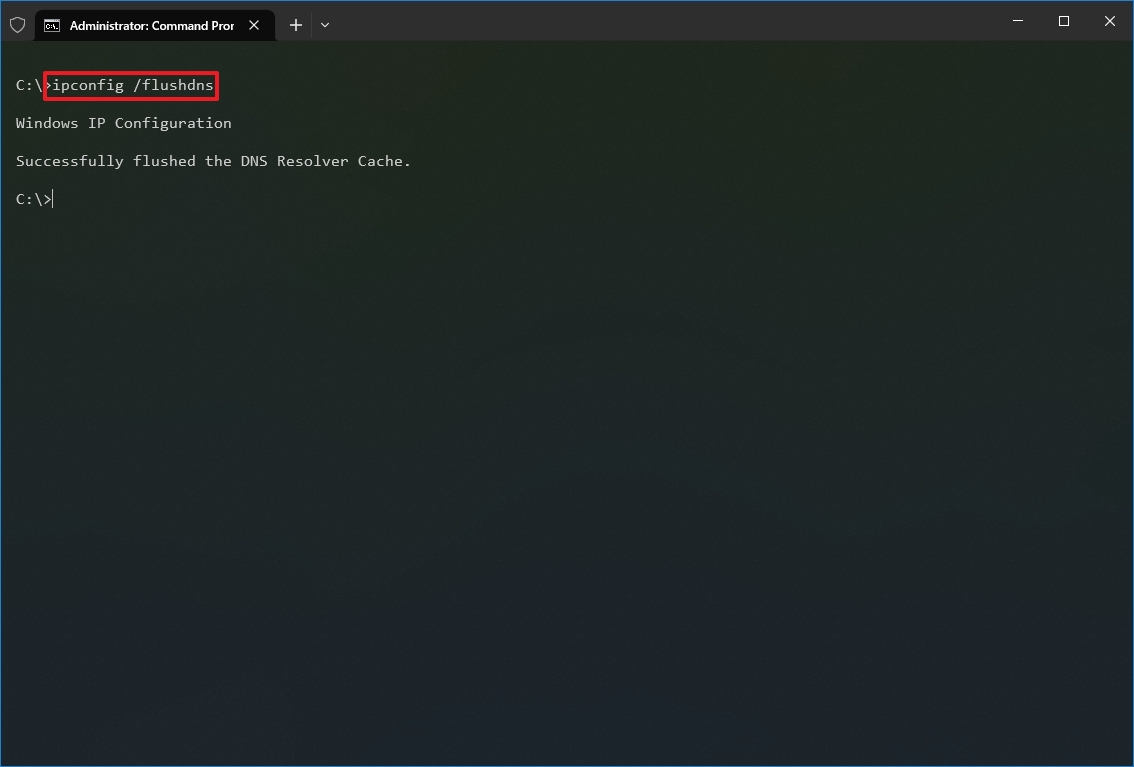
Once you complete the steps, the entries stored in the DNS cache of Windows 10 will be deleted and refreshed. Usually, this command will come in handy when you cannot connect to another computer or website using the host or domain name due to outdated information in the local cache.
2. Ping
Ping is another essential networking tool because it allows you to send ICMP (Internet Control Message Protocol) echo request messages to test the IP connectivity with other devices, whether it is another computer in the network or internet service.
Test device connectivity
To test the network connectivity with the ping command on Windows 10, use these steps:
- Open Start.
- Search for Command Prompt, right-click the top result, and select the Run as administrator option.
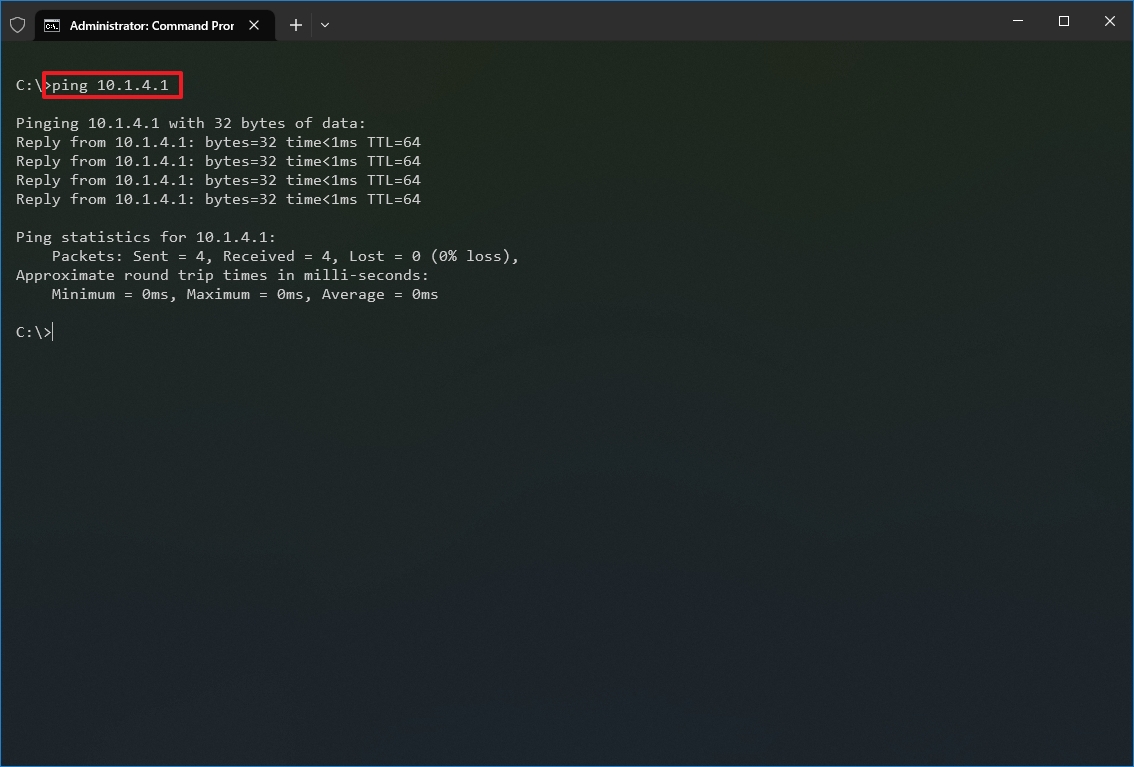
- Type the following command to send ICMP echo requests to test connectivity and press Enter: ping IP-OR-DOMAIN
In the command, replace IP-OR-DOMAIN with the actual IP address or domain name of the computer or service you want to test. For example, this command tests the communication between the local device and router: ping 10.1.4.1
- Quick tip: If you use the -a option (for example, ping -a 10.1.4.1), the command will also resolve the address to a hostname.
- (Optional) Type the following command to test the local computer networking stack and press Enter: ping 127.0.0.1 or ping loopback
- Quick note: The 127.0.0.1 is a well-known address, and it is referred to as the loopback address. When you run the command, if you get a reply, it means that the networking stack on Windows 10 is up and running. This is the same as pinging the device using its own network address.
Once you complete the steps, receiving four successful echo replies from the destination means the device can talk with the remote host. If the request times out, there is a problem between the host and the remote device.
If you are dealing with connectivity problems, start pinning the local computer to ensure the network stack is working. Then test the router’s connection to ensure the issue is not in the local network. Then try to ping a website to find out whether there is a problem with the internet connection or the remote host.
You should also know that the ping command will always time out if the remote device or service blocks the ICMP protocol.
Diagnose packet loss activity
The ping command includes many options that you can access with the «ping /?» command, and one of these options is the ability to set the time you want to run the tool, which can come in handy to examine packets lost when you are troubleshooting connectivity problems.
To run the ping command for a specific period, use these steps:
- Open Start.
- Search for Command Prompt, right-click the top result, and select the Run as administrator option.
- Type the following command to continue pinging until stopped and press Enter: ping IP-OR-DOMAIN -t
In the command, replace IP-OR-DOMAIN with the actual IP address or domain name of the computer or service you want to test. For example, this command tests the communication between the local device and router: ping 10.1.4.1 -t
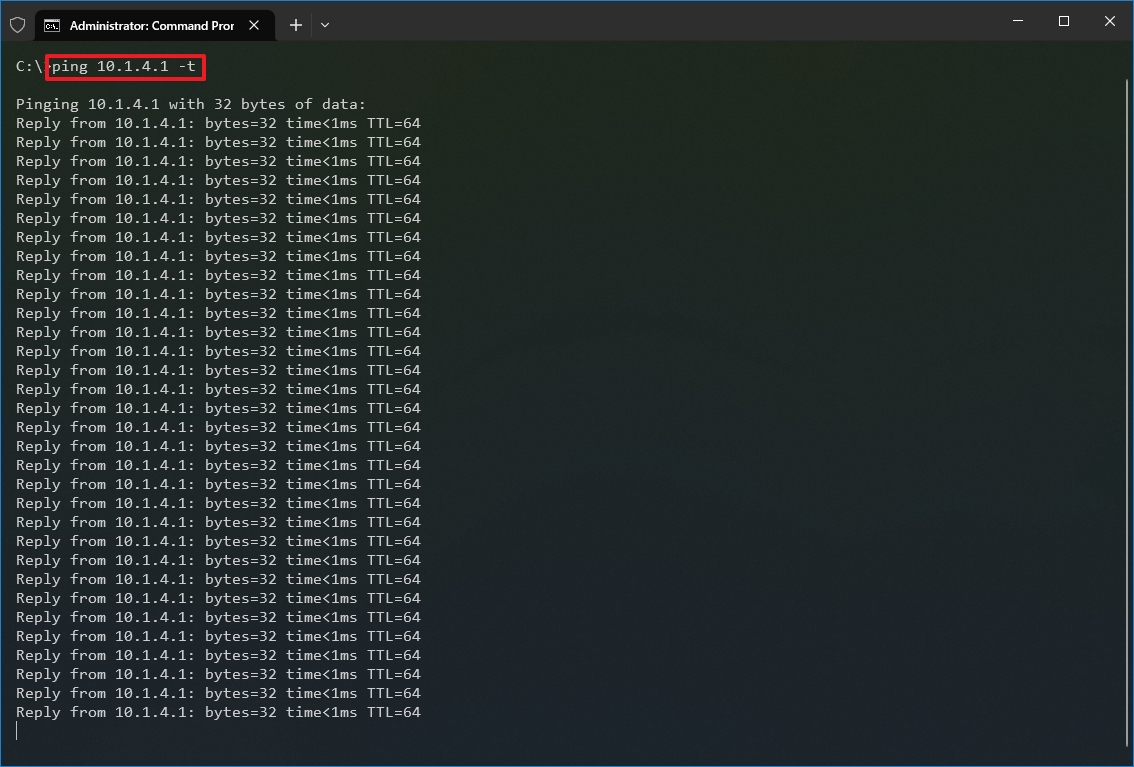
- Use the «Control + C» keyboard shortcut to stop the ping.
After you complete the steps, you will be able to see the successful and lost requests that can give you a clue on how to continue troubleshooting and resolving the connectivity problem. Administrators usually use the ping command in a local network to find out when a service goes down quickly. Also, the tool can be used as a quick way to know when the server is up and running again when restarting a server remotely.
3. Tracert
Windows 10 also includes tracert (Trace Route), a diagnostic tool to determine the network path to a destination using a series of ICMP echo requests. However, unlike the ping command, each request includes a TTL (Time to Live) value that increases by one each time, allowing to display of a list of the route the requests have taken and their duration.
To trace the route to a destination with Command Prompt on Windows 10, use these steps:
- Open Start.
- Search for Command Prompt, right-click the top result, and select the Run as administrator option.
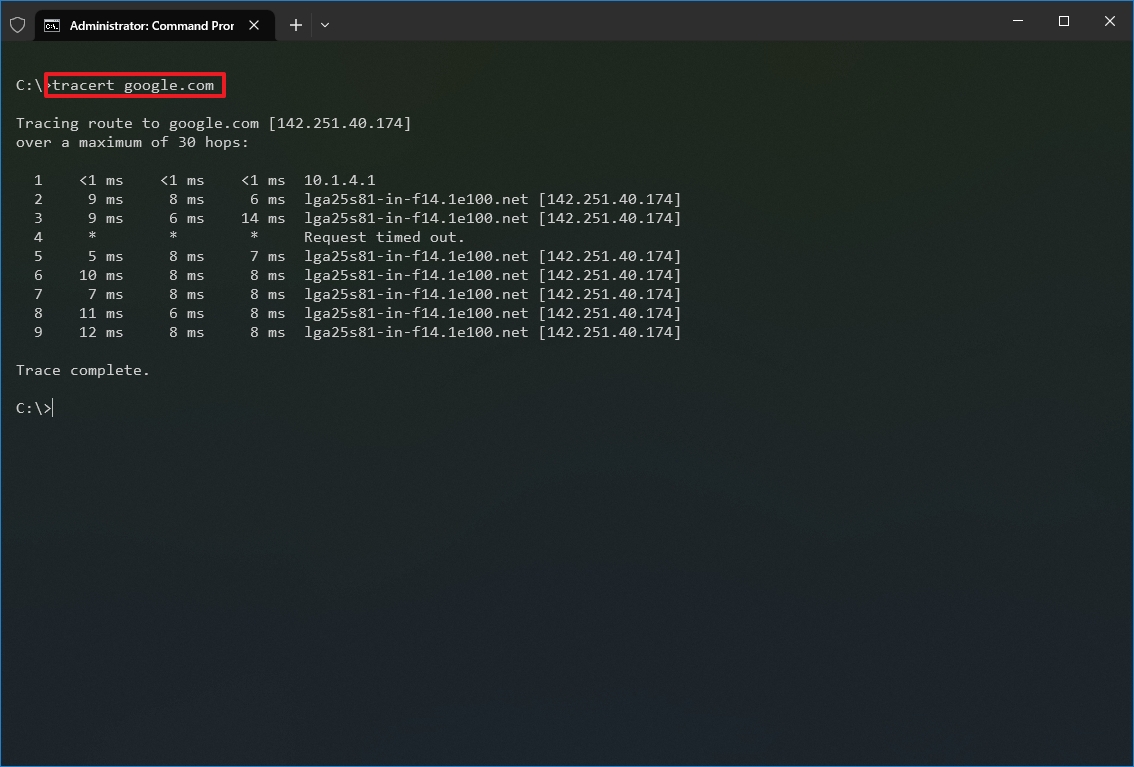
- Type the following command to understand the path taken to the destination and press Enter: tracert IP-OR-DOMAIN
In the command, replace IP-OR-DOMAIN with the actual IP address or domain name for the destination you want to troubleshoot. For example, this command allows you to view the path the packets are taking to reach Google.com: tracert google.com
- (Optional) Type the following command to adjust the hop counts to the destination and press Enter: tracert -h HOP-COUNT IP-OR-DOMAIN
In the command, replace IP-OR-DOMAIN with the actual IP address or domain name for the destination you want to troubleshoot and HOP-COUNT for the number of hops you want to trace. For example, this command puts the limit of 5 hops (nodes) to the destination: tracert -h 5 google.com
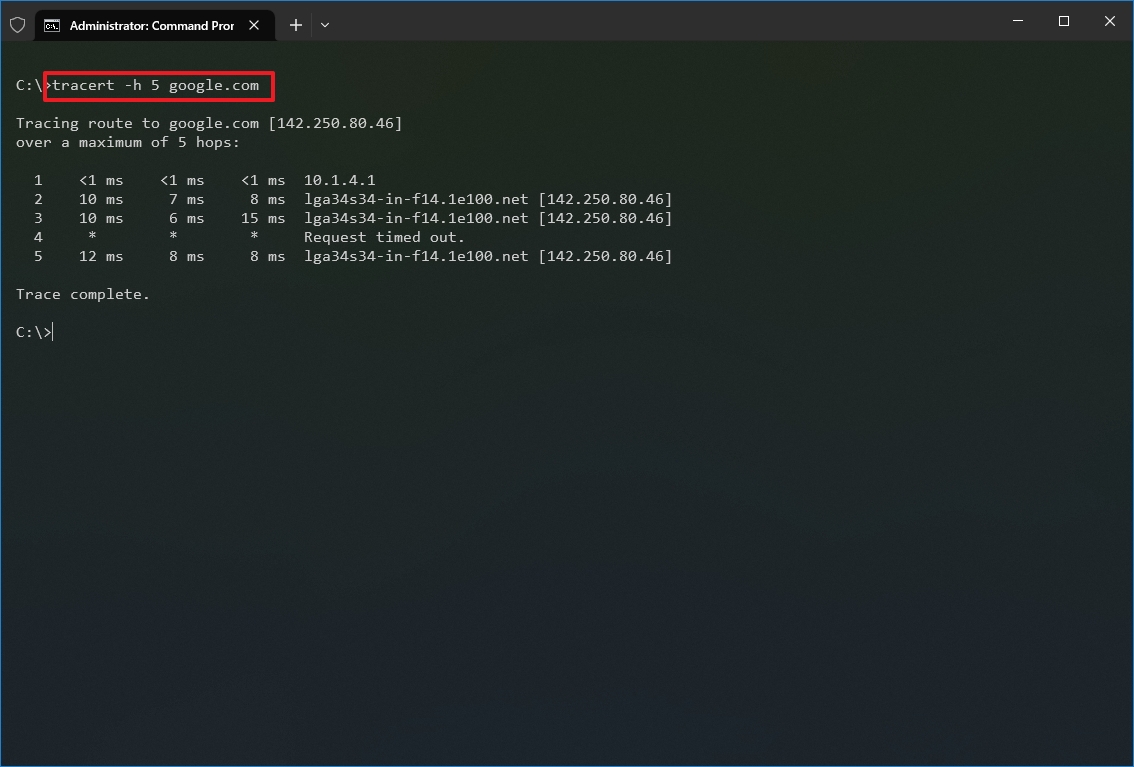
Once you complete the steps, you will know if the destination is reachable or if there is a networking problem along the way.
Similar to the ping tool, tracert includes several options, which you can view with the «tracert /?» command.
4. NSLookup
The nslookup (Name Server Lookup) tool can show valuable details to troubleshoot and resolve DNS-related issues. The tool includes an interactive and non-interactive modes. However, you will be using the non-interactive mode more often than not, which means you will type the full command to obtain the necessary information.
You can use this command to display the default DNS name and address of the local device and determine the domain name of an IP address or the name servers for a specific node.
To get started with nslookup on Windows 10, use these steps:
- Open Start.
- Search for Command Prompt, right-click the top result, and select the Run as administrator option.
- Type the following command to look up the local DNS name and address and press Enter: nslookup
- Quick note: This command also happens to open the nslookup interactive mode.
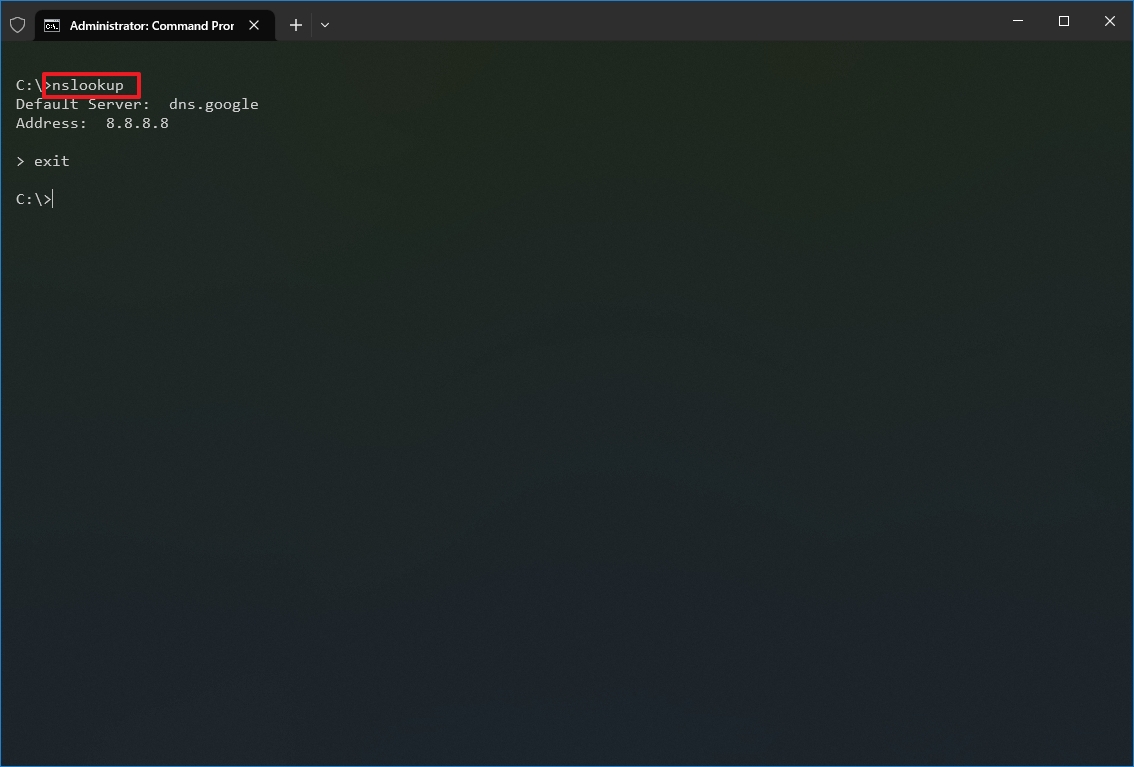
- Confirm the current DNS information.
- Type the following command to exit the interactive mode and press Enter: exit
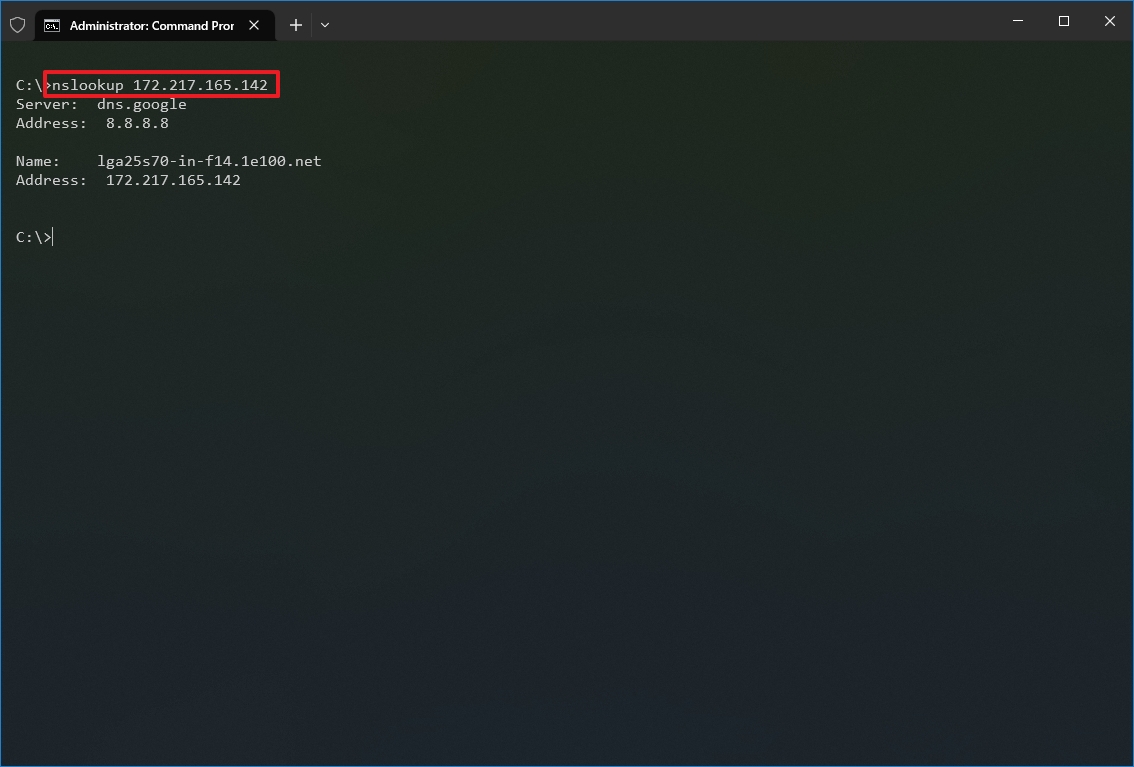
- Type the following command to determine the name and address of a specific server and press Enter: nslookup IP-ADDRESS
In the command, replace the IP-ADDRESS with the address of the remote device. For example, this command looks up the IP address 172.217.165.142 address: nslookup 172.217.165.142
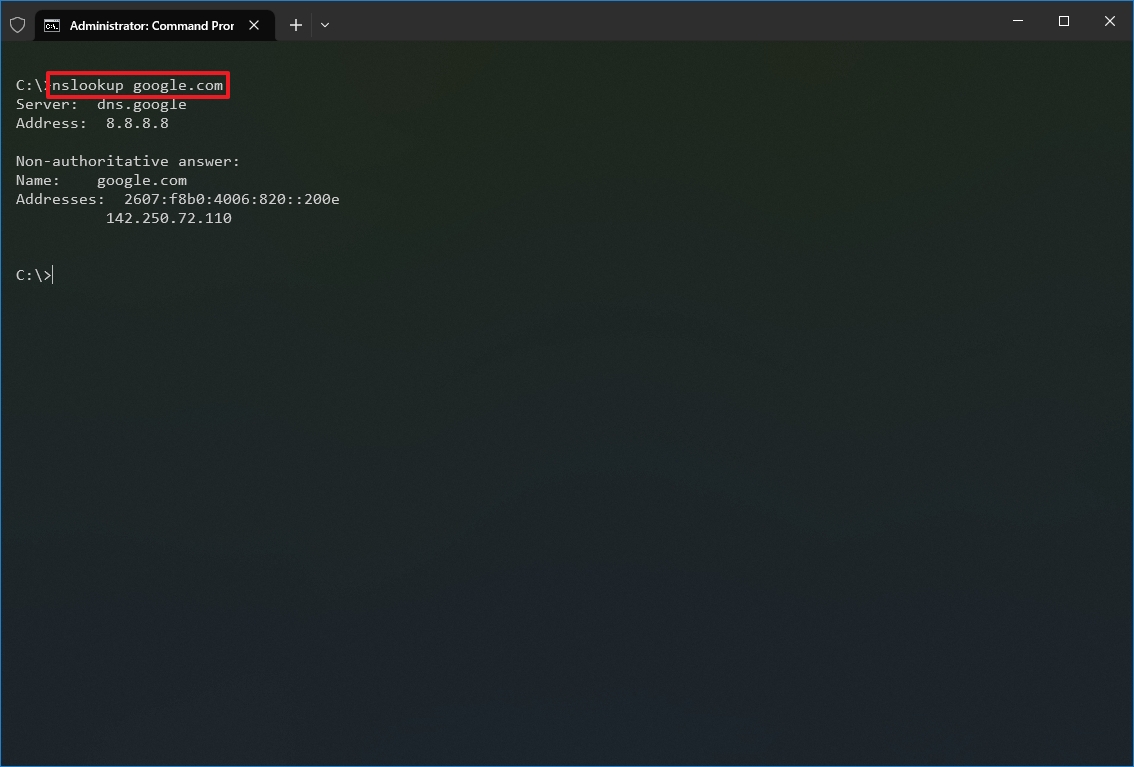
- Type the following command to determine the address of a specific server and press Enter: nslookup DOMAIN-NAME
In the command, replace the DOMAIN-NAME with the address of the remote device. For example, this command looks up the IP address Google.com address: nslookup google.com
After you complete the steps, depending on the command, you will know whether the device has a DNS resolver and the IP address or domain and vice versa of the remote host.
5. NetStat
The netstat (Network Statistics) tool displays statistics for all network connections. It allows you to understand open and connected ports to monitor and troubleshoot networking problems for Windows 10 and apps.
When using the netstat tool, you can list active network connections and listening ports. You can view network adapter and protocol statistics. You can even display the current routing table and much more.
To get started with netstat, use these steps:
- Open Start.
- Search for Command Prompt, right-click the top result, and select the Run as administrator option.
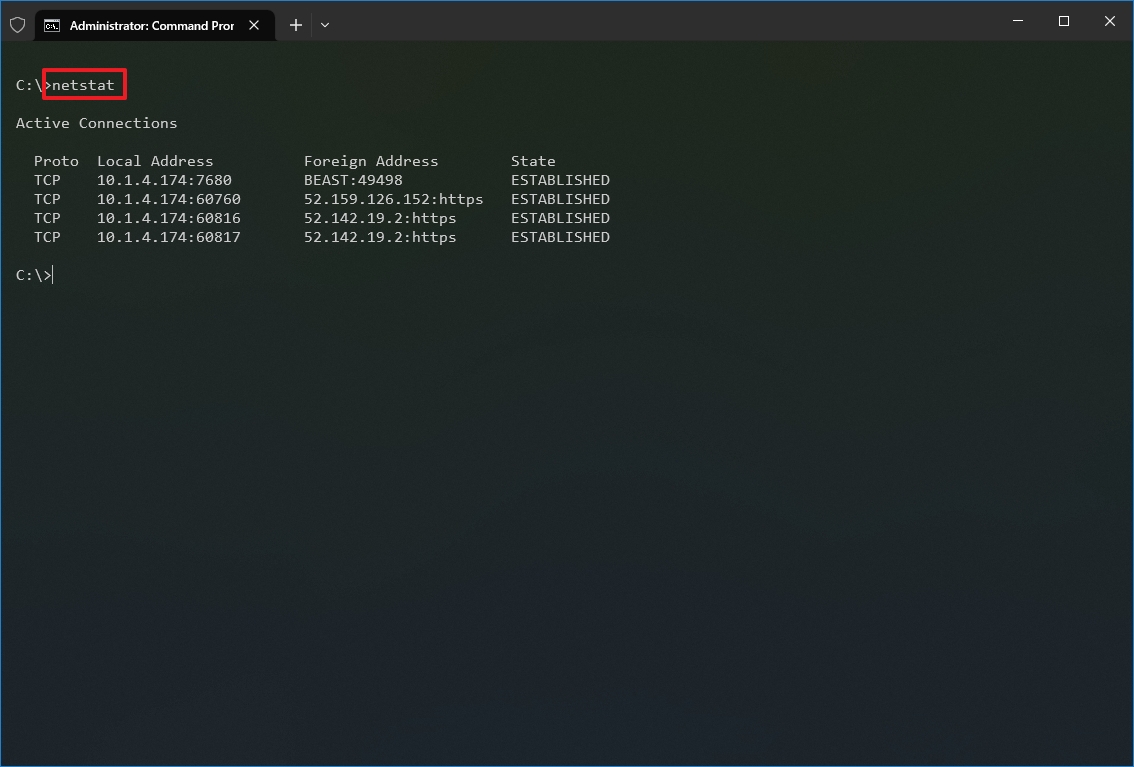
- Type the following command to show all active TCP connections and press Enter: netstat
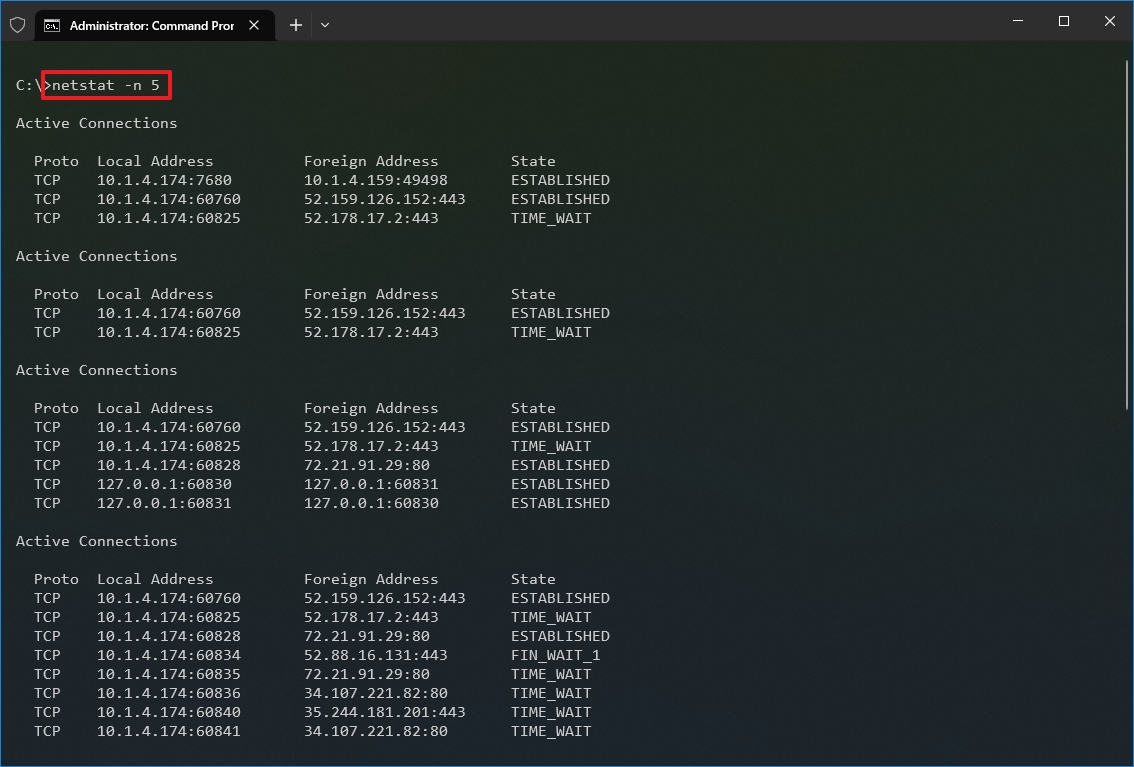
- (Optional) Type the following command to display active connections showing numeric IP address and port number instead of trying to determine the names and press Enter: netstat -n

- (Optional) Type the following command to refresh the information at a specific interval and press Enter: netstat -n INTERVAL
In the command, make sure to replace INTERVAL for the number (in seconds) you want to redisplay the information. This example refreshes the command in question every five seconds: netstat -n 5
- Quick note: When using the interval parameter, you can terminate the command using the «Ctrl + C» keyboard shortcut in the console.
Once you run the command, it will return a list of all active connections in four columns, including:
- Proto: Displays the connection protocol, including TCP or UDP.
- Local Address: Displays the device’s IP address followed by a semicolon with a port number of the connection. The double-semicolon inside brackets indicates the local IPv6 address. The «0.0.0.0» address also refers to the local address.
- Foreign Address: Shows the remote computer’s IP (or FQDN) address with the port number after the semicolon port name (for instance, https, http, microsoft-ds, wsd).
- State: Shows whether the connection is active (established), if the port has been closed (time_wait) and if the program has not closed the port (close_wait). Other statuses available include closed, fin_wait_1, fin_wait_2, last_ack, listen, syn_received, syn_send, and timed_wait.
6. ARP
Windows 10 maintains an arp (Address Resolution Protocol) table, which stores IP to Media Access Control (MAC) entries that the system has resolved. The arp tool lets you view the entire table, modify the entries, and use it to determine a remote computer’s MAC address.
Usually, you do not need to worry about MAC addresses, but there are scenarios when this information may come in handy. For example, when troubleshooting network problems at the data link layer (switching) or when restricting access or filtering content through the network for specific devices.
To get started with arp on Windows 10, use these steps:
- Open Start.
- Search for Command Prompt, right-click the top result, and select the Run as administrator option.
- Type the following command to view the current arp table cache on Windows 10 and press Enter: arp -a

- Type the following command to determine the MAC address of a remote device and press Enter: arp -a IP
In the command, make sure to replace IP with the address of the destination. For example, this command reveals the physical address of the 10.1.4.120 destination: arp -a 10.1.4.120

- Confirm the MAC (physical) address for the remote device.
After you complete the steps, you will be able to view the entire arp table and MAC address of a specific IP address.
If you want to know all the available options, use the «arp /?» command to list the available options with their corresponding descriptions.
7. Route
The route tool displays the routing table that allows Windows 10 to understand the network and communicate with other devices and services. The tool also offers some options to modify and clear the table as needed.
Like the arp tool, you typically do not have to worry about the routing table, but the command-line tool will come in handy when troubleshooting related problems.
To view or flush the routing table available on Windows 10, use these steps:
- Open Start.
- Search for Command Prompt, right-click the top result, and select the Run as administrator option.
- Type the following command to view the routing table known to Windows 10 and press Enter: route print

- Confirm the routing table information.
- (Optional) Type the following command to clear the routing table and press Enter: route -f
- Quick note: When running this command, the device will lose network connectivity since the system no longer understands the network topology. After running the command, restart the machine to allow the networking stack to rebuild the routing table. Usually, you should not have to clear the table unless you modify some of the entries and you need to reset the table.
Once you complete the steps, you will understand the routing table and how to clear the information.
You can also use the «route /?» command to view a list of available options, including options to change networking metrics, specify a gateway, add a new route, and much more. However, modifying these settings is usually not recommended unless you understand how the network works.
8. Netsh
On Windows 10, netsh (Network Shell) is a legacy command-line tool that allows you to display and change virtually any network configuration. For instance, you can use the tool to view the current network configurations, manage wireless connections, reset the network stack to fix most common problems, enable or disable the firewall, and a lot more.
To get started with the netsh command-line tool, use these steps:
- Open Start.
- Search for Command Prompt, right-click the top result, and select the Run as administrator option.
- Type the following command to view a list of the available commands (contexts) and press Enter: netsh /?
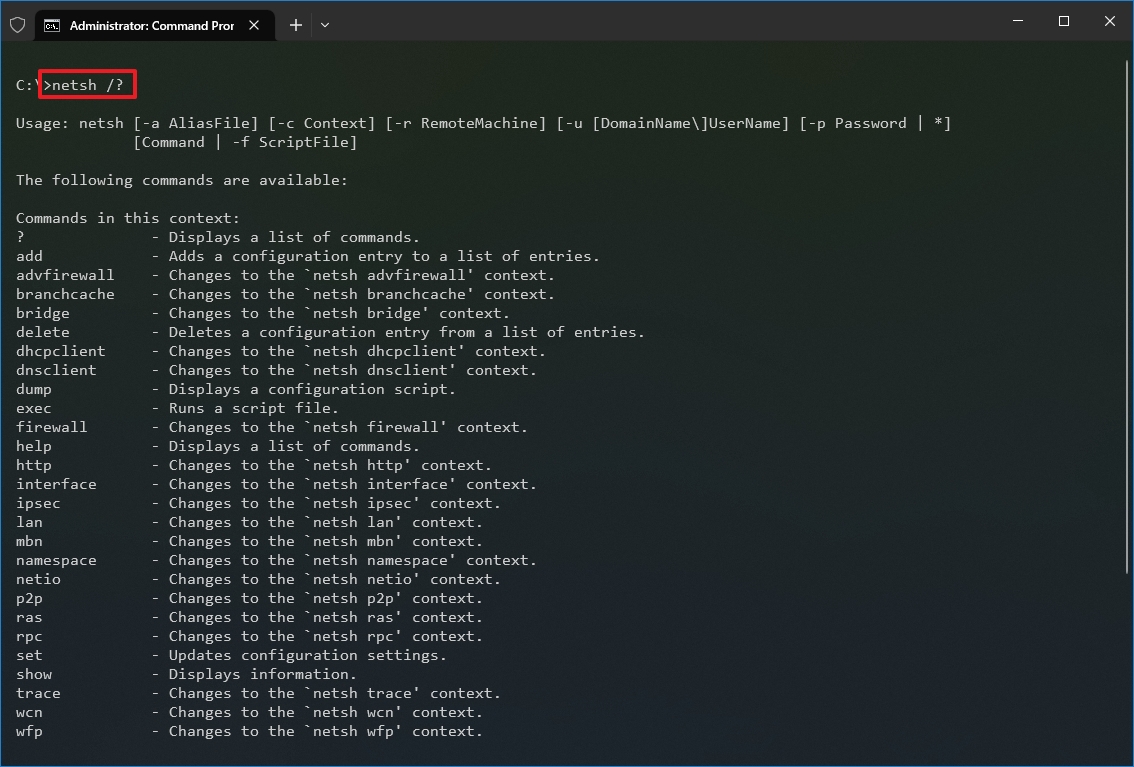
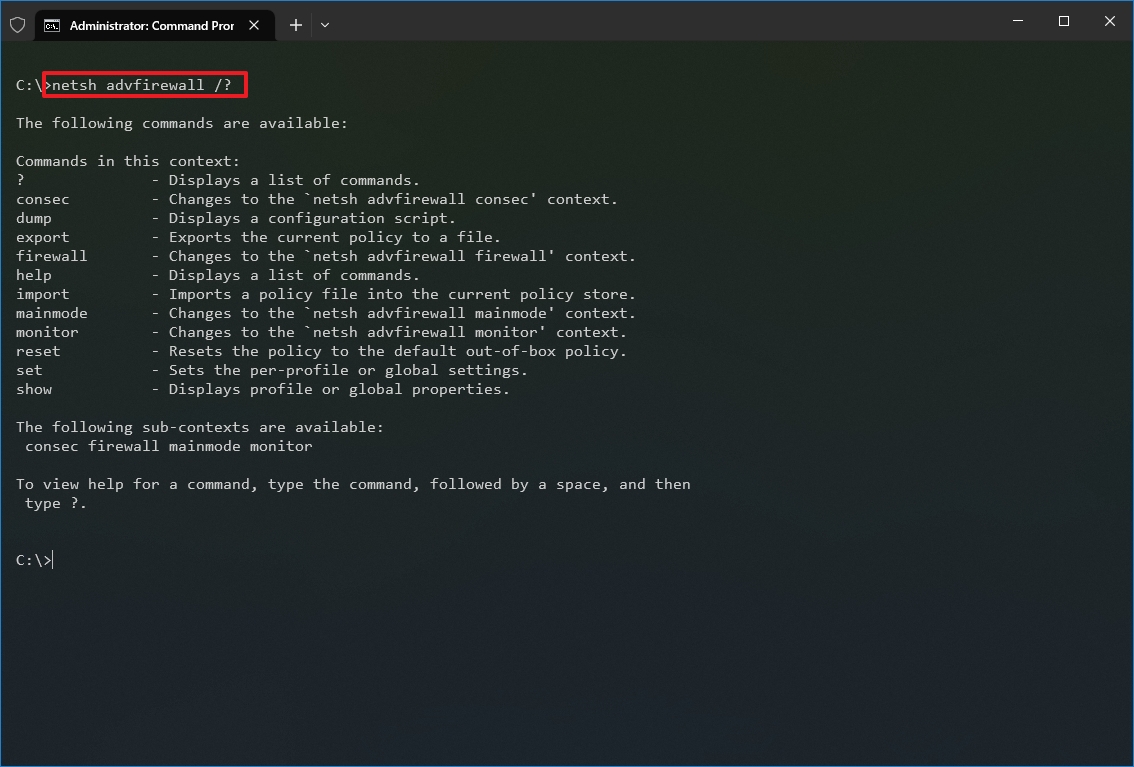
- Type the following command to view the list of available subcommands (subcontexts) for a specific option and press Enter: netsh CONTEXT-COMMAND
In the command, change the CONTEXT-COMMAND for the command that includes additional options. For example, this command shows the commands available to manage the firewall with netsh: netsh advfirewall /?
Once you complete the steps, you will know how to navigate the netsh contexts and subcontexts command to manage networking settings.
Reset system network stack
To reset the network stack to resolve common connectivity problems, use these steps:
- Open Start.
- Search for Command Prompt, right-click the top result, and select the Run as administrator option.
- Type the following command to reset the winsock stack and press Enter: netsh winsock reset
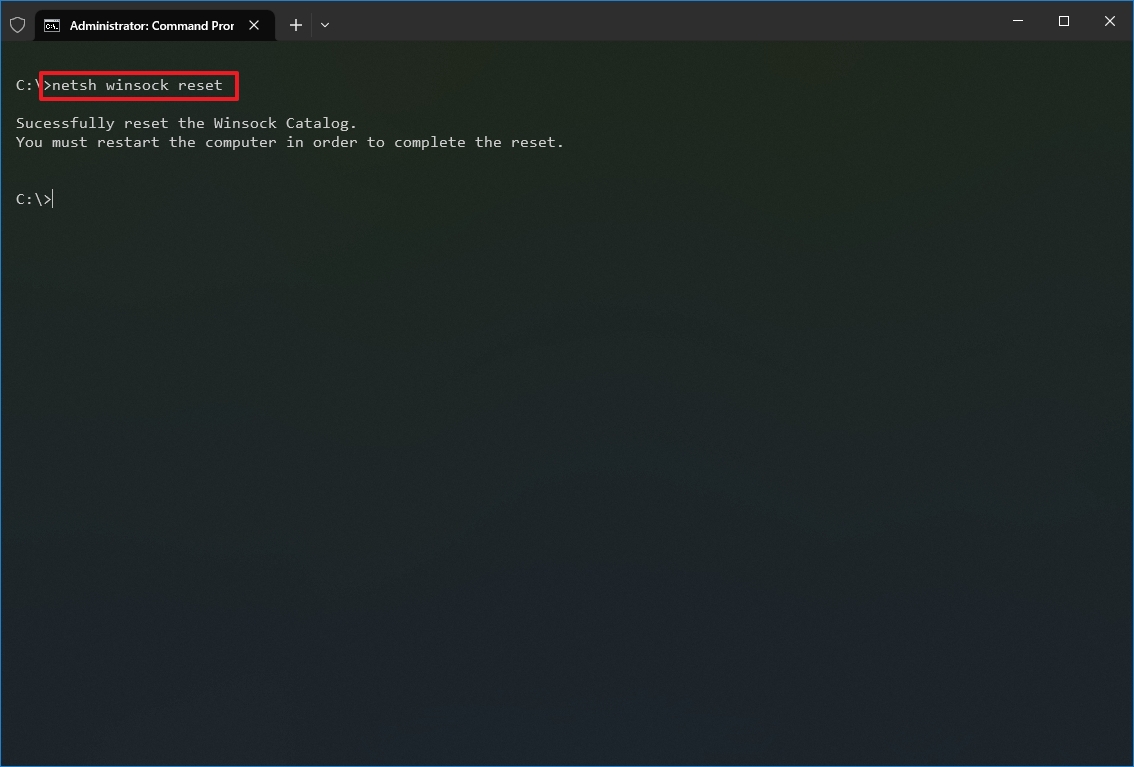
- Restart your computer.
After you complete the steps, the winsock configuration will reset, hopefully fixing the problems connecting to a network and the internet.
Export and import network configuration
To export the network configuration with netsh on Windows 10, use these steps:
- Open Start.
- Search for Command Prompt, right-click the top result, and select the Run as administrator option.
- Type the following command to export the current configuration for all the network adapters and press Enter: netsh -c interface dump>PATH\TO\EXPORTED.txt
In the command, replace the PATH\TO\EXPORTED.txt with the path and name of the file to store the configuration. For example, the following command exports the settings to the netshconfig.txt file: netsh -c interface dump>c:\netshconfig.txt
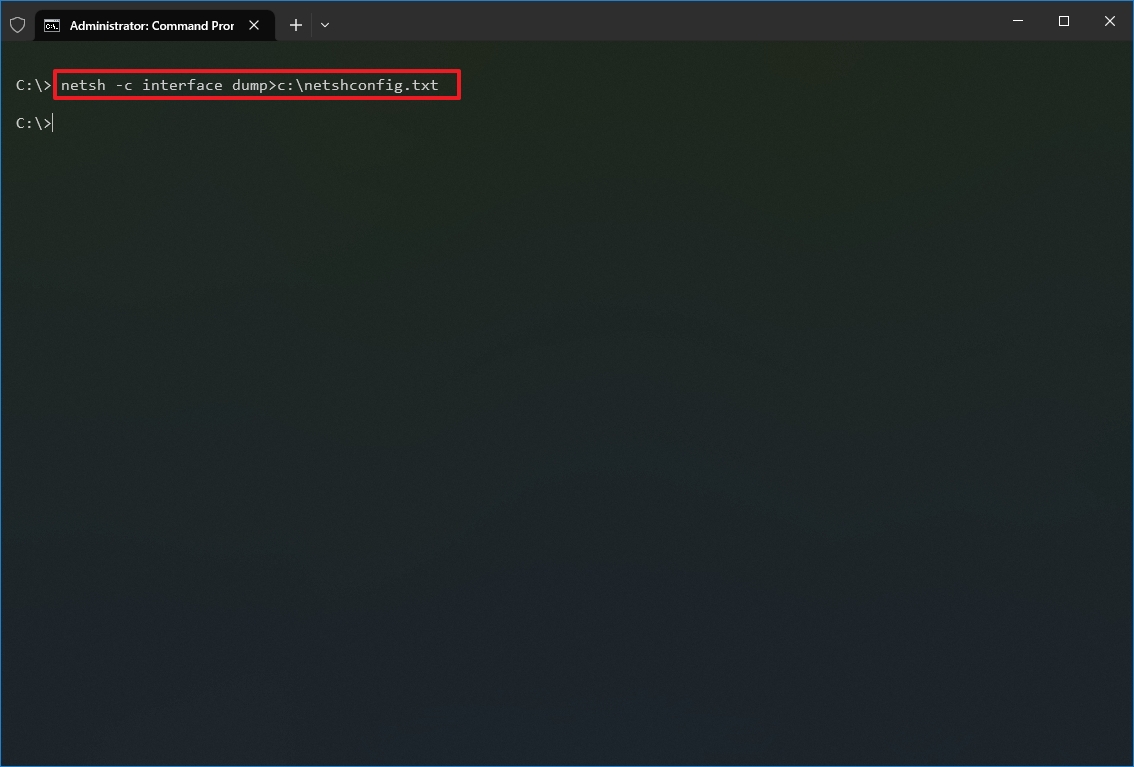
Once you complete the steps, you can open the file with any text editor to view the exported configuration.
Import network configuration
To import the network configuration settings with netsh, use these steps:
- Open Start.
- Search for Command Prompt, right-click the top result, and select the Run as administrator option.
- Type the following command to import the network configuration and press Enter: netsh -c interface dump>PATH\TO\IMPORTED.txt
In the command, replace the PATH\TO\EXPORTED.txt with the path and name of the file you want with the exported configuration. For example, the following command imports the settings from the netshconfig.txt file: netsh -f c:\netshconfig.txt
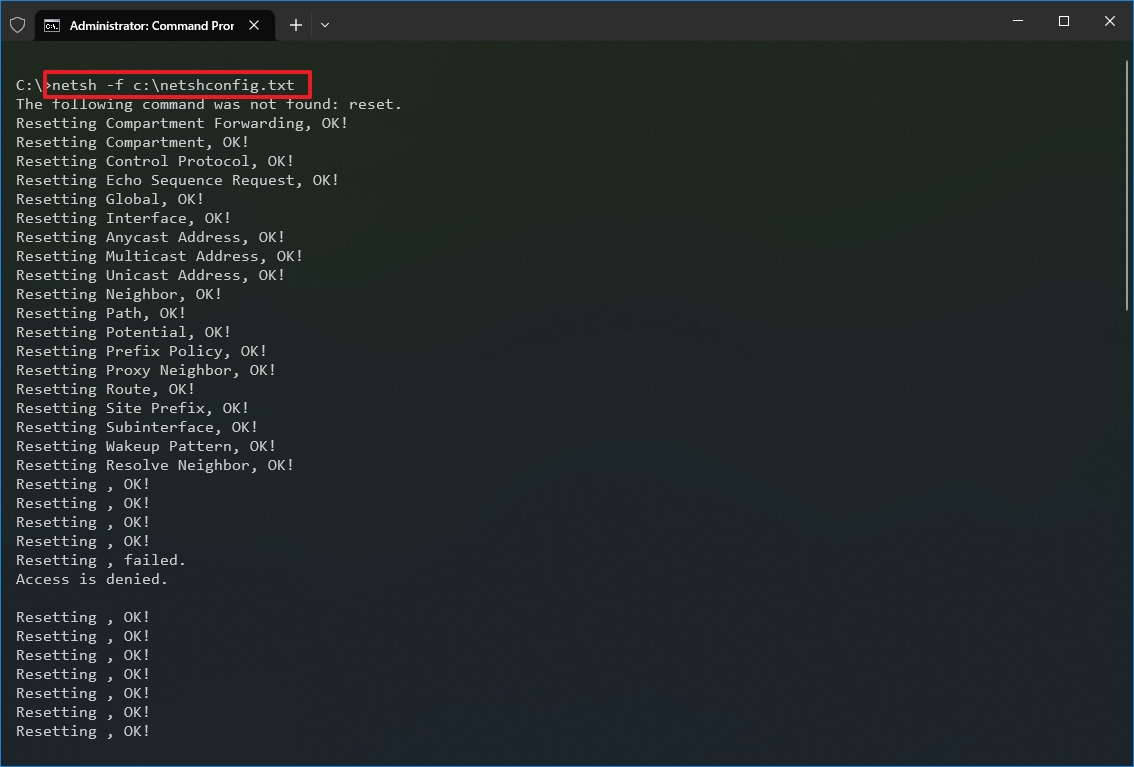
After you complete the steps, the new networking configuration will be imported and applied to Windows 10.
Enable and disable firewall
To enable the Windows 10 firewall with netsh, use these steps:
- Open Start.
- Search for Command Prompt, right-click the top result, and select the Run as administrator option.
- Type the following command to enable the default firewall and press Enter: netsh advfirewall set currentprofile state on
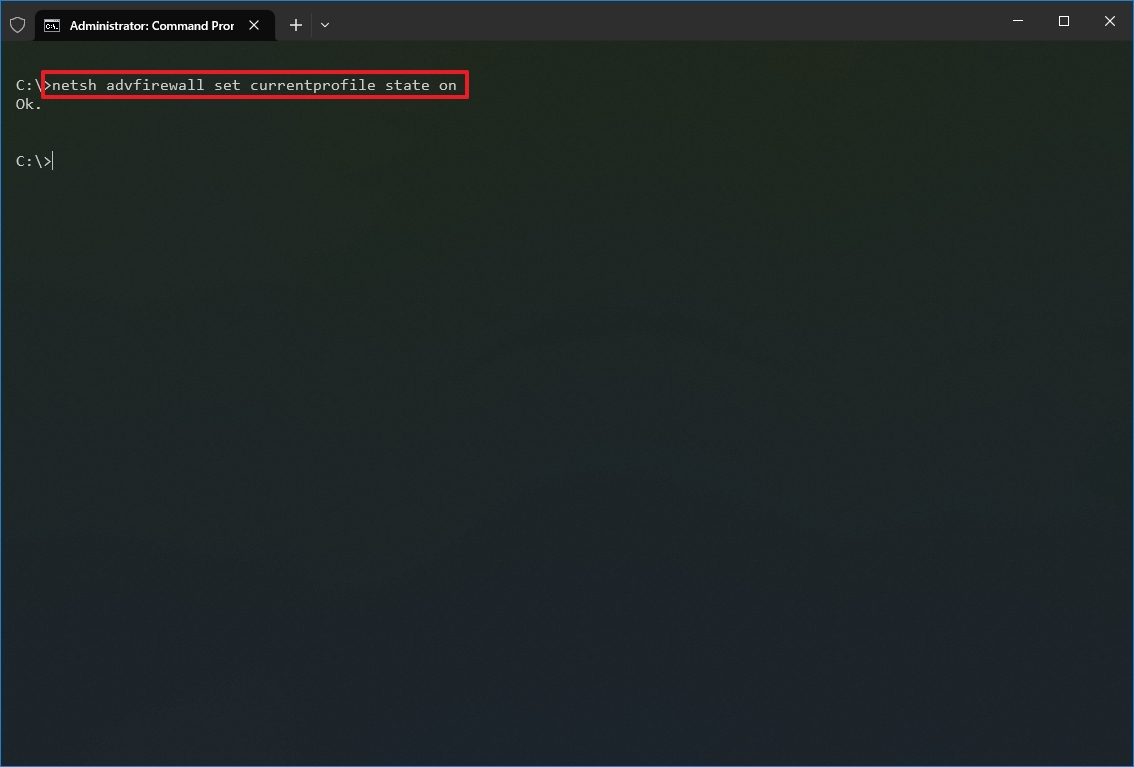
Once you complete the steps, the Windows Defender Firewall will enable on the device.
Disable firewall
To disable the Windows 10 firewall with netsh, use these steps:
- Open Start.
- Search for Command Prompt, right-click the top result, and select the Run as administrator option.
- Type the following command to disable the default firewall and press Enter: netsh advfirewall set currentprofile state off

Once you complete the steps, the Windows Defender Firewall will be disabled on the device.
On Windows 10, there are many tools you can use to change settings and troubleshoot networking issues using Command Prompt, PowerShell, and graphical applications. However, in this guide, we only focus on getting you started with some of the most common tools available in Command Prompt.
More resources
For more helpful articles, coverage, and answers to common questions about Windows 10 and Windows 11, visit the following resources:
- Windows 11 on Windows Central — All you need to know
- Windows 10 on Windows Central — All you need to know
Mauro Huculak has been a Windows How-To Expert contributor for WindowsCentral.com for nearly a decade and has over 15 years of experience writing comprehensive guides. He also has an IT background and has achieved different professional certifications from Microsoft, Cisco, VMware, and CompTIA. He has been recognized as a Microsoft MVP for many years.
Last Updated :
21 May, 2024
Have you ever wondered about your system’s IP configurations? These configurations allow you to connect the system to the network. If there’s any issue connecting to the Internet, how would you resolve it? Yes, the very first step is getting information about the system’s IP configuration.
In this article, we will understand what ‘ipconfig’ is. And what details it provides to you. Let’s understand this in greater detail:
What is ‘ipconfig’?
The term ‘ipconfig’ is short for ‘Internet Protocol Configuration,’ and this is the command that is usually used in CMD. Of interest to note here is that whenever there is a problem with a network, it is typically the network administrators who employ it to rectify it. Anyone can use it on a given system to fetch specific details.
It displays the contemporary TCP/IP network configuration values and lets you modify the Dynamic Host Configuration Protocol (DHCP) and Domain Name System (DNS) settings.
Step-by-Step: How to Use ipconfig?
Now that you have understood ‘ipconfig’ and its usage, it’s time to learn how to use it step-by-step.
Step 1: Search for cmd in the Windows search bar and type «cmd.» In the search results, you will find «Command Prompt.» Open it.
Step 2: Once you have opened the command prompt, type «ipconfig» and press ‘Enter.’
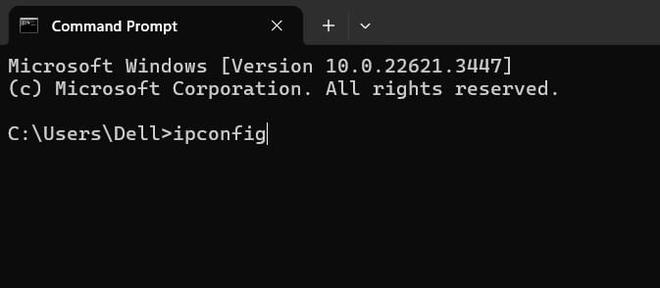
Once you press enter, a wealth of information is displayed on your screen.
It might seem overwhelming at first, but don’t we are regardless here to help you interpret it.
Understanding ipconfig Results
The results from the `ipconfig` command can be pretty extensive, but there are a few critical pieces of information that are particularly useful:
1. IPv4 Address: This is your computer’s IP address. It is your computer’s unique identity, and it allows your computer to communicate with other devices on the network.
2. Subnet Mask: It has a more sophisticated concept; it fundamentally breaks down the IP address into network and host addresses for routing of internet packets inside the network.
3. Default Gateway: This is your router’s IP address. It connects your local network to the Internet.
Wrapping It Up
To sum up, ipconfig is a robust tool that is commonly underused for network planning and troubleshooting purposes. As you get more familiar with it, you will know that you cannot do without it regarding network diagnostics.
Remember—half a loaf is better than no bread at all! Hence, when one experiences challenges associated with networking or when one just wants to know something concerning his/her internet connection parameters, one should not miss using ‘ipconfig’.