
Windows Ink WorkSpace Not Launching
-
Thread starter
Thread starterttsoldier
-
Start date
Start date
You should upgrade or use an alternative browser.
-
-
#1
I have single press on pen to open sticky notes, double press to open screen sketch and long press to open one note.
If work space opens, it works well. However, 99% of the time, after using it, it does not open again. The pen commands do not do anything (only the long press to open one note works) and even clicking on the ink workspace icon in the task bar does not open anything. If I search manually for the Sticky Notes app , it will open.
Only way to fix this is to restart. After restart it will work once then if*I try to use it again later, it will stop working again.
P.S updated to .51 and the problem is the same.
-
-
#2
New HP Spectre X360 G2 touch with Anniversary update.
Ink Workspace stops working, only way to fix is a reboot.
Did a clean install to no avail.
Thought I was going nuts !
-
-
#3
Same problem here.New HP Spectre X360 G2 touch with Anniversary update.
Ink Workspace stops working, only way to fix is a reboot.
Did a clean install to no avail.
Thought I was going nuts !
At least I’m not crazy. I guess all we can do now is submit/upvote feed back and hope for a cumulative update to fix this.
-
-
#4
-
-
#5
I have the same issue, two Surface Pro 3 one works perfectly, the other one will not launch via pen or taskbar icon.
I’ve seen a few people complaining about it in feedback hub. Hope Microsoft fixes it.
-
-
#6
-
-
#7
This seems to be fixed in 14393.187
Using 14393.1066 !! Still issue alive :eck::eck::eck::eck:
Similar threads
- Advertising
- Cookies Policies
- Privacy
- Term & Conditions
Table of Contents
How do I get the Ink Workspace app for Windows 11?
How to find the missing Ink workspace in Windows 11?
1. Enable Ink Workspace on the taskbar
2. Enable or disable Ink Workspace from the registry
3. Use the Local Group Policy Editor to disable or enable the Ink workspace
How to install the Windows Ink app in Windows 11?
Home
Common Problem
Fix Windows 11 Ink workspace missing
May 18, 2023 am 10:22 AM
task bar
Microsoft Windows Ink Workspace allows you to write on your computer just like you would on paper using features like whiteboard, Notes, and other note-taking applications.
As convenient as the Windows 11 Ink workspace is, sometimes it gets missing from the taskbar.
Unlike previous versions of Windows that locked functionality behind compatible hardware like Surface tablets and Surface Pens, this version doesn’t require you to invest in expensive hardware before taking advantage of this great feature.
Windows 11 Ink Workspace allows users to add any app to the Quick Access Toolbar—whether pen-optimized or not. You can pin up to 4 apps to your workspace.
We need to specify that the default Windows 11 installation does not come with Ink Workspace unless you specify during installation that you have a touch screen device.
So, you need to download and install the app first. This is probably one of the main reasons why you can’t find it in the first place.
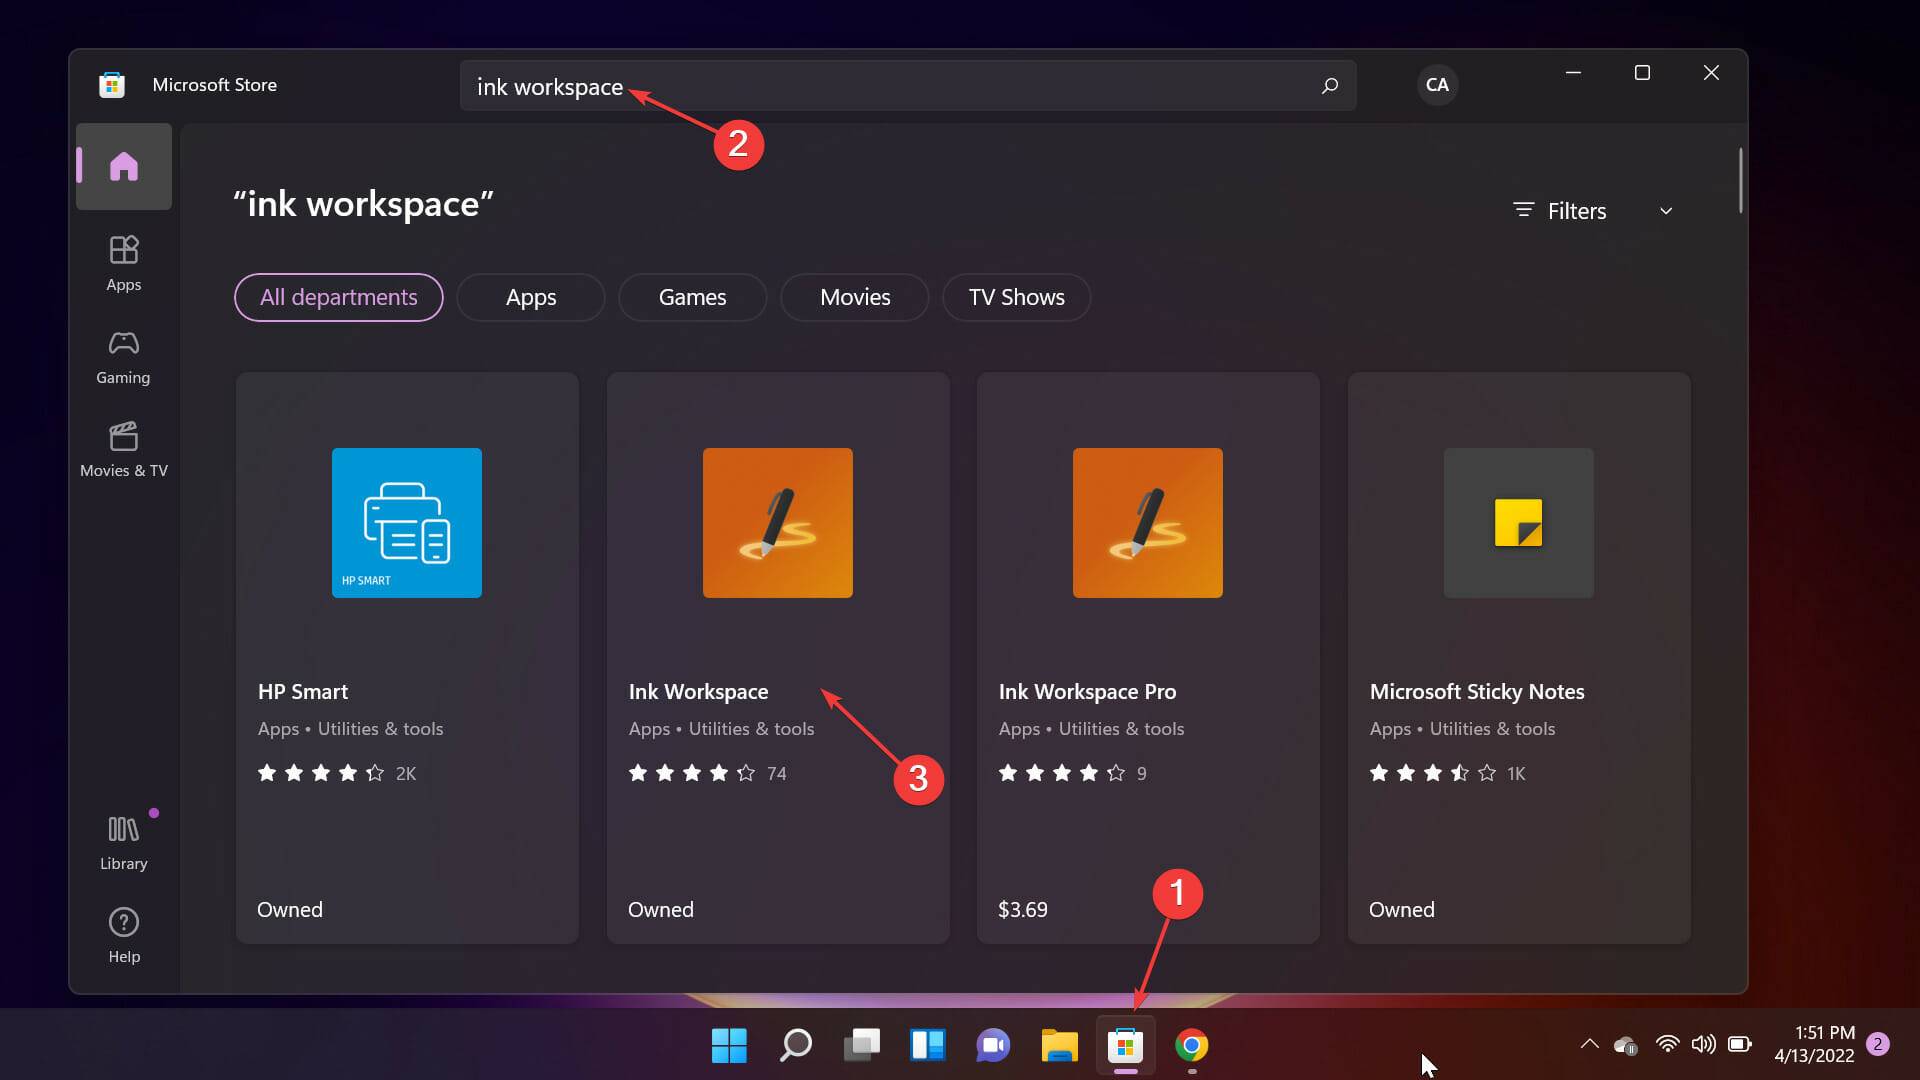
How do I get the Ink Workspace app for Windows 11?
- OpenMicrosoft Store from the taskbar, search for ink workspace, and click Apps from the results.

- Now, click on the Get button to download and install it.
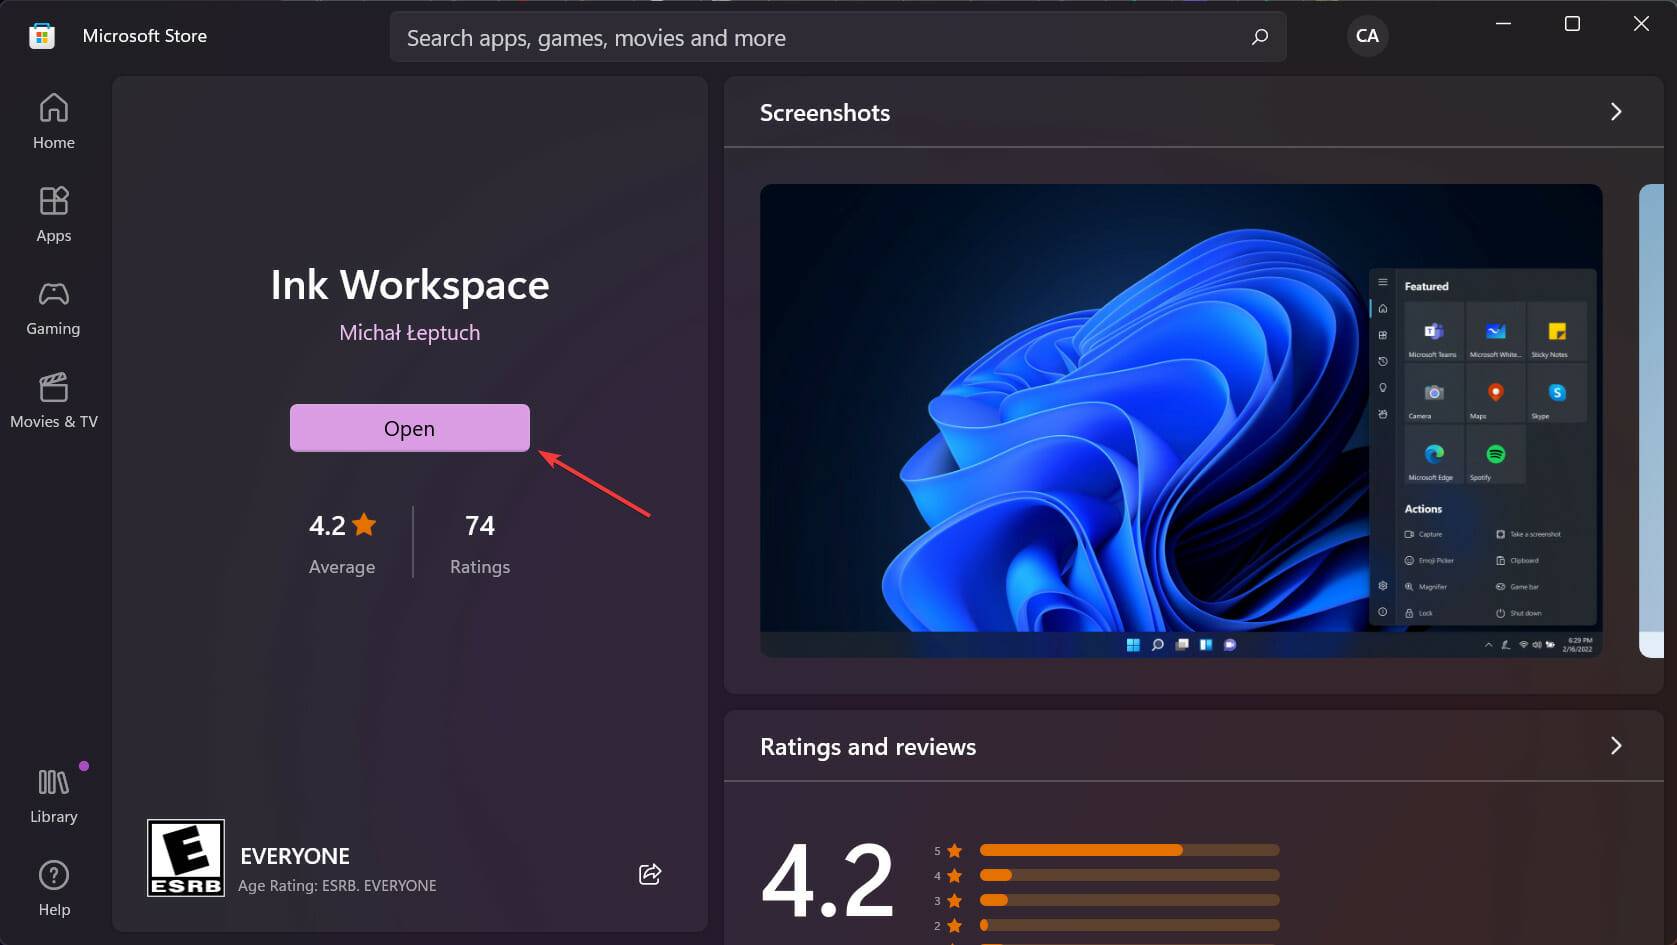
- Finally, click the «Open» button to launch it.
- Now you have the Ink Workspace app installed and running.
How to find the missing Ink workspace in Windows 11?
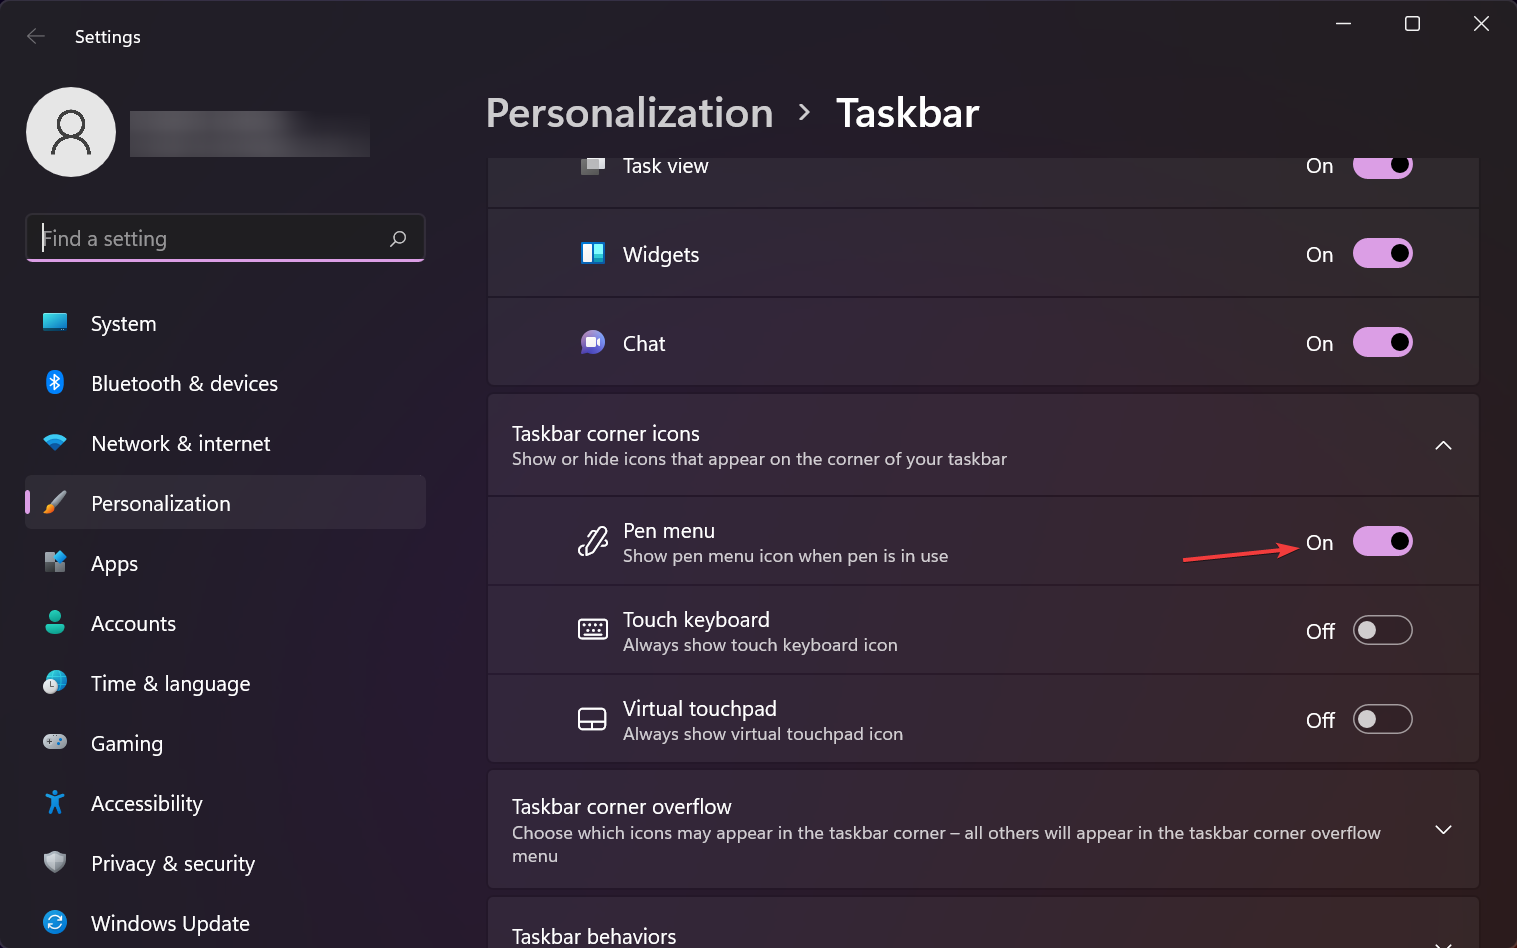
1. Enable Ink Workspace on the taskbar
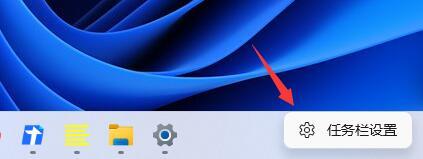
- Right-click an empty area on the taskbar, thenclick Taskbar Settings.
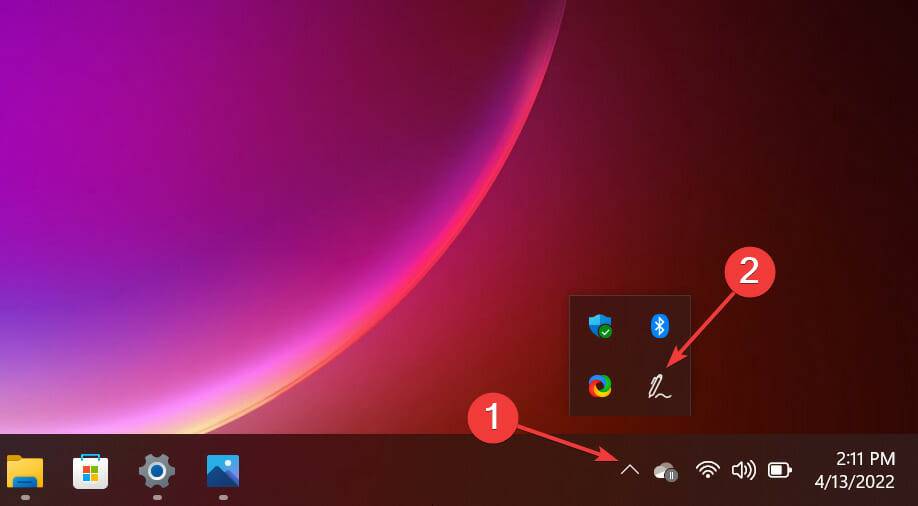
- Find Pen Menu and set it to On.
- A pen icon with a curved line will appear in the upper right corner of the taskbar.

2. Enable or disable Ink Workspace from the registry
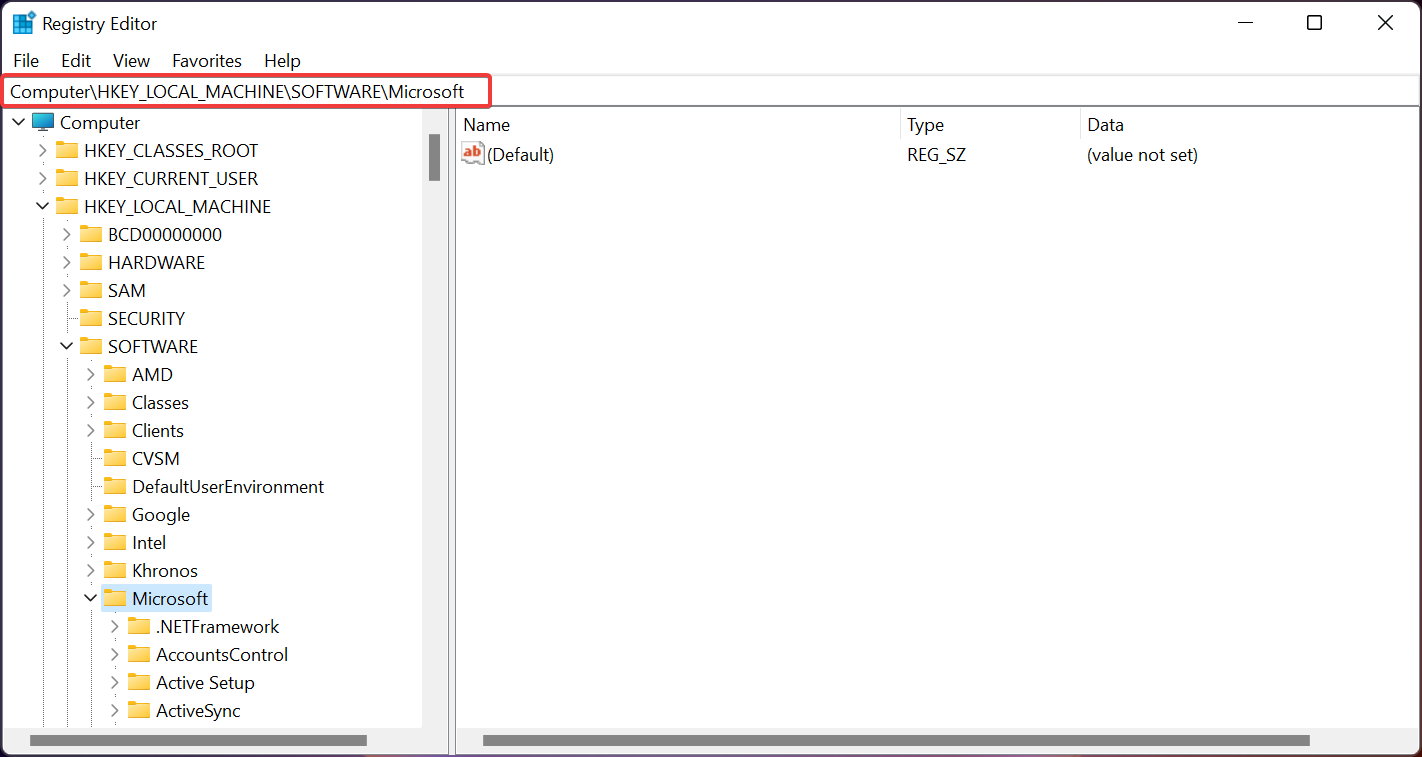
- Press Win R and type regedit and press Enter.
- Go to the following path:
<strong>Computer\HKEY_LOCAL_MACHINE\SOFTWARE\Microsoft</strong>
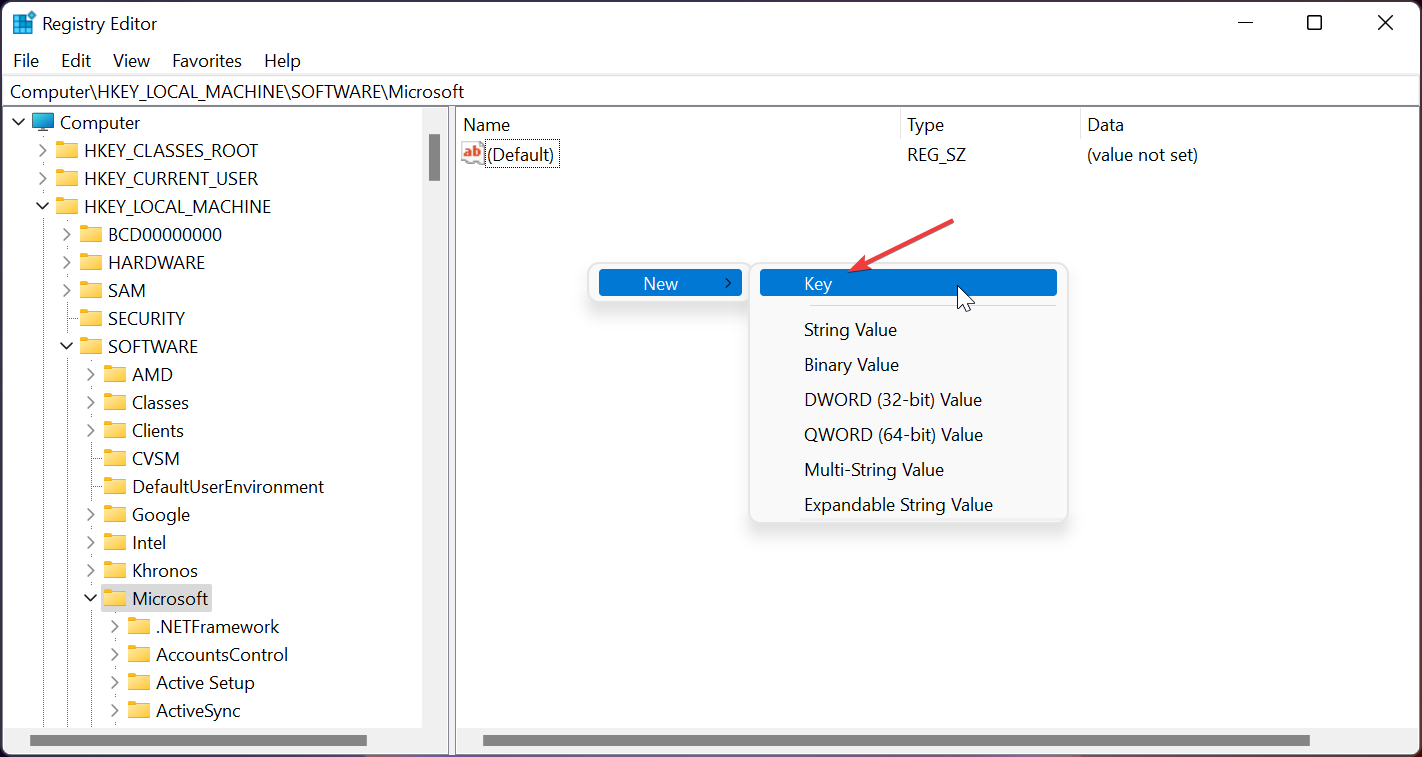
- Right click in the right pane of free space, select New from the pop-up menu, then select the key, and set the key’s name to WindowsInkWorkspace.
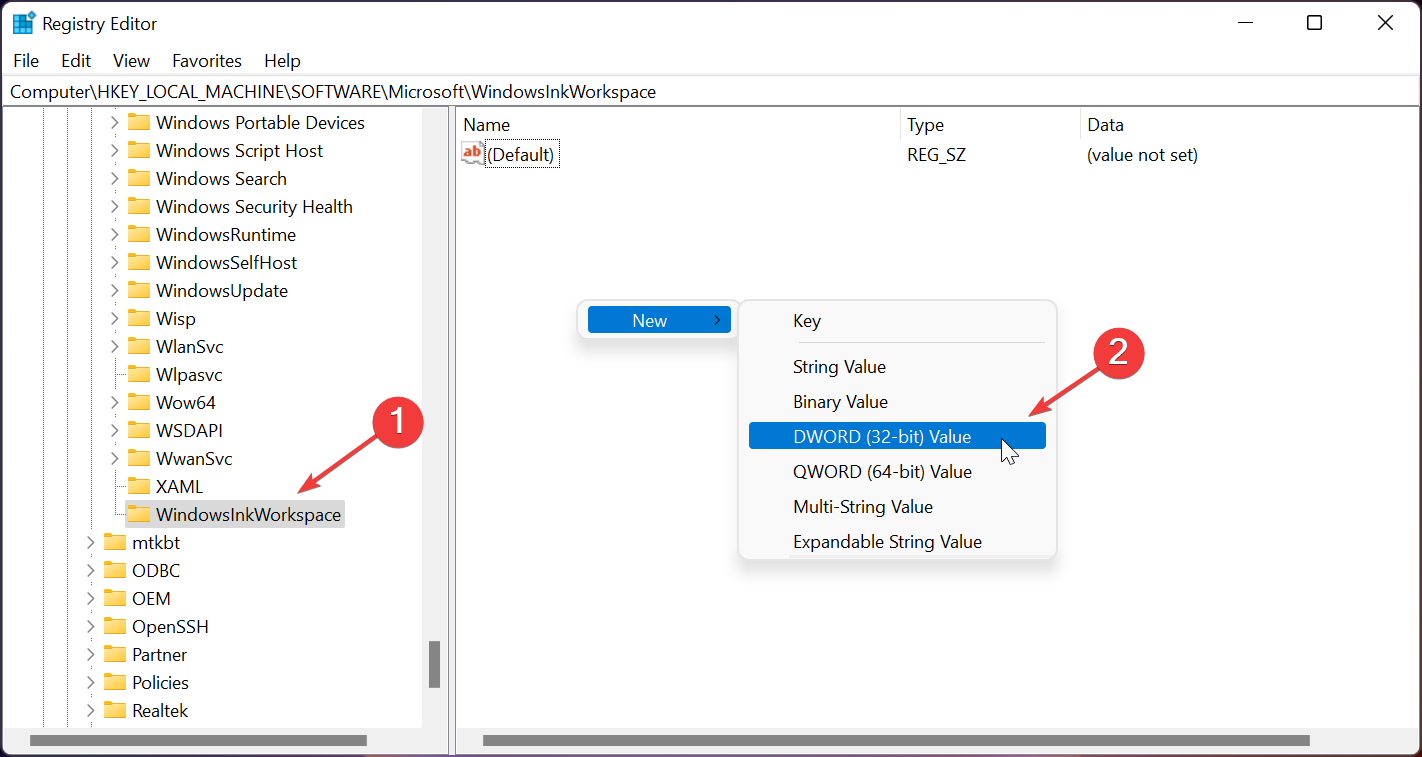
- Click New Key, then right-click an empty area in the right pane and select New, then select DWORD (32-bit) Value.
- Under the Name tab, type AllowInkWorkspace. Double-click it and change its value to 0 to disable and 1 to permanently enable.
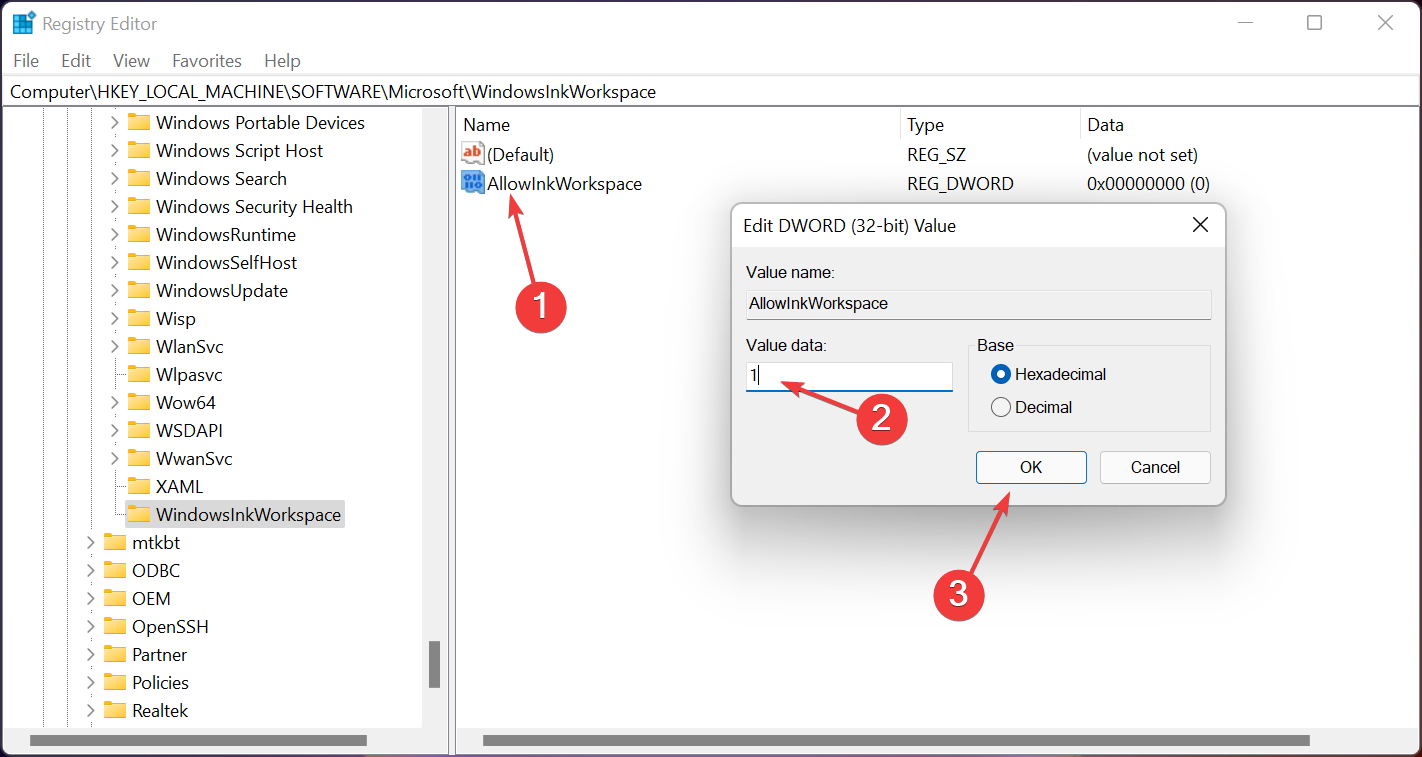
Performing this procedure will permanently disable the Windows Ink workspace.
3. Use the Local Group Policy Editor to disable or enable the Ink workspace
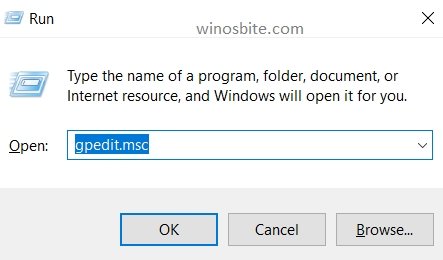
- Press Win R to open the run box and enter gpedit .msc command and then press Enter.
- Navigate to the following path:
<strong>Computer Configuration\Administrative Templates\Windows Components\Windows Ink Workspace</strong>
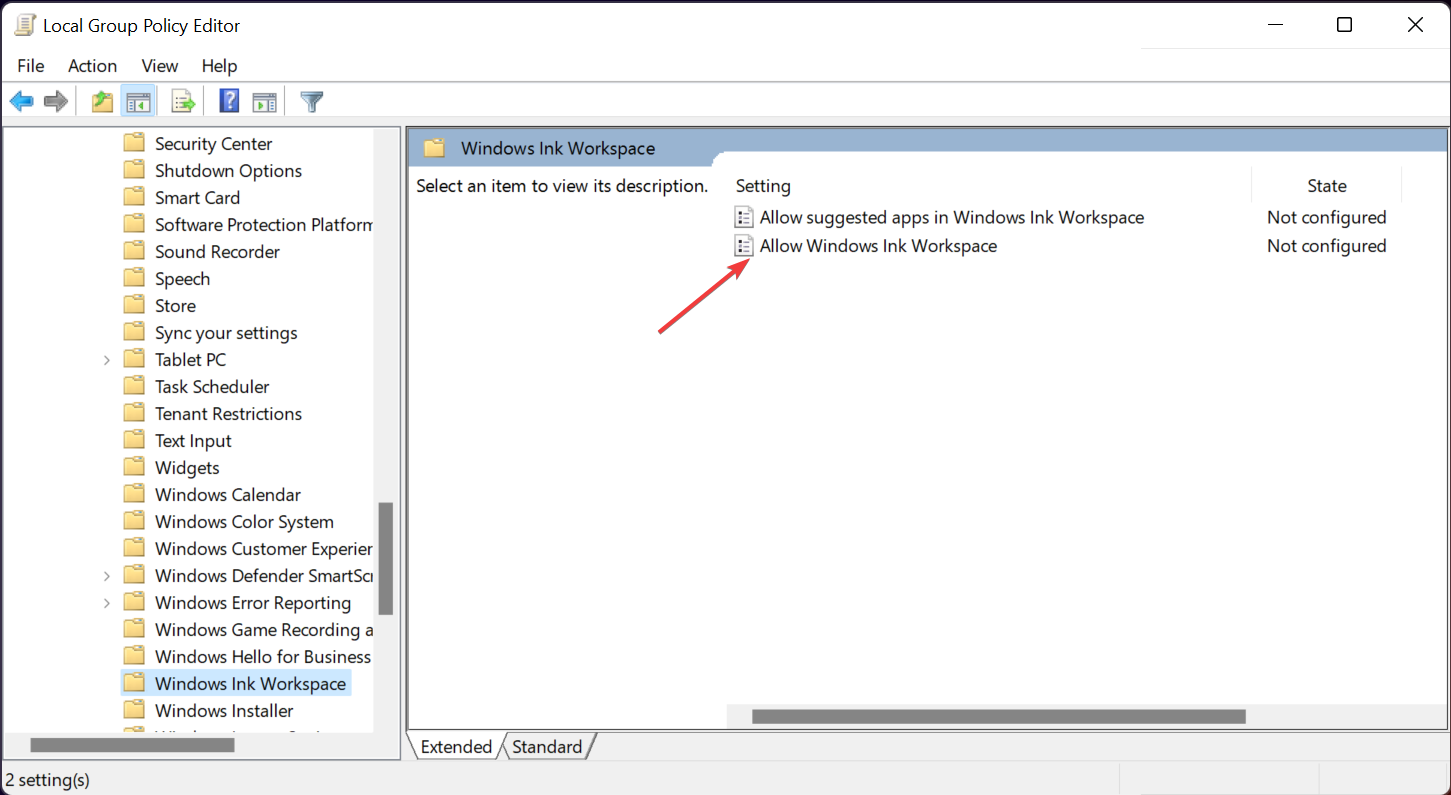
- On the right window, double-click Allow Windows Ink Workspace.
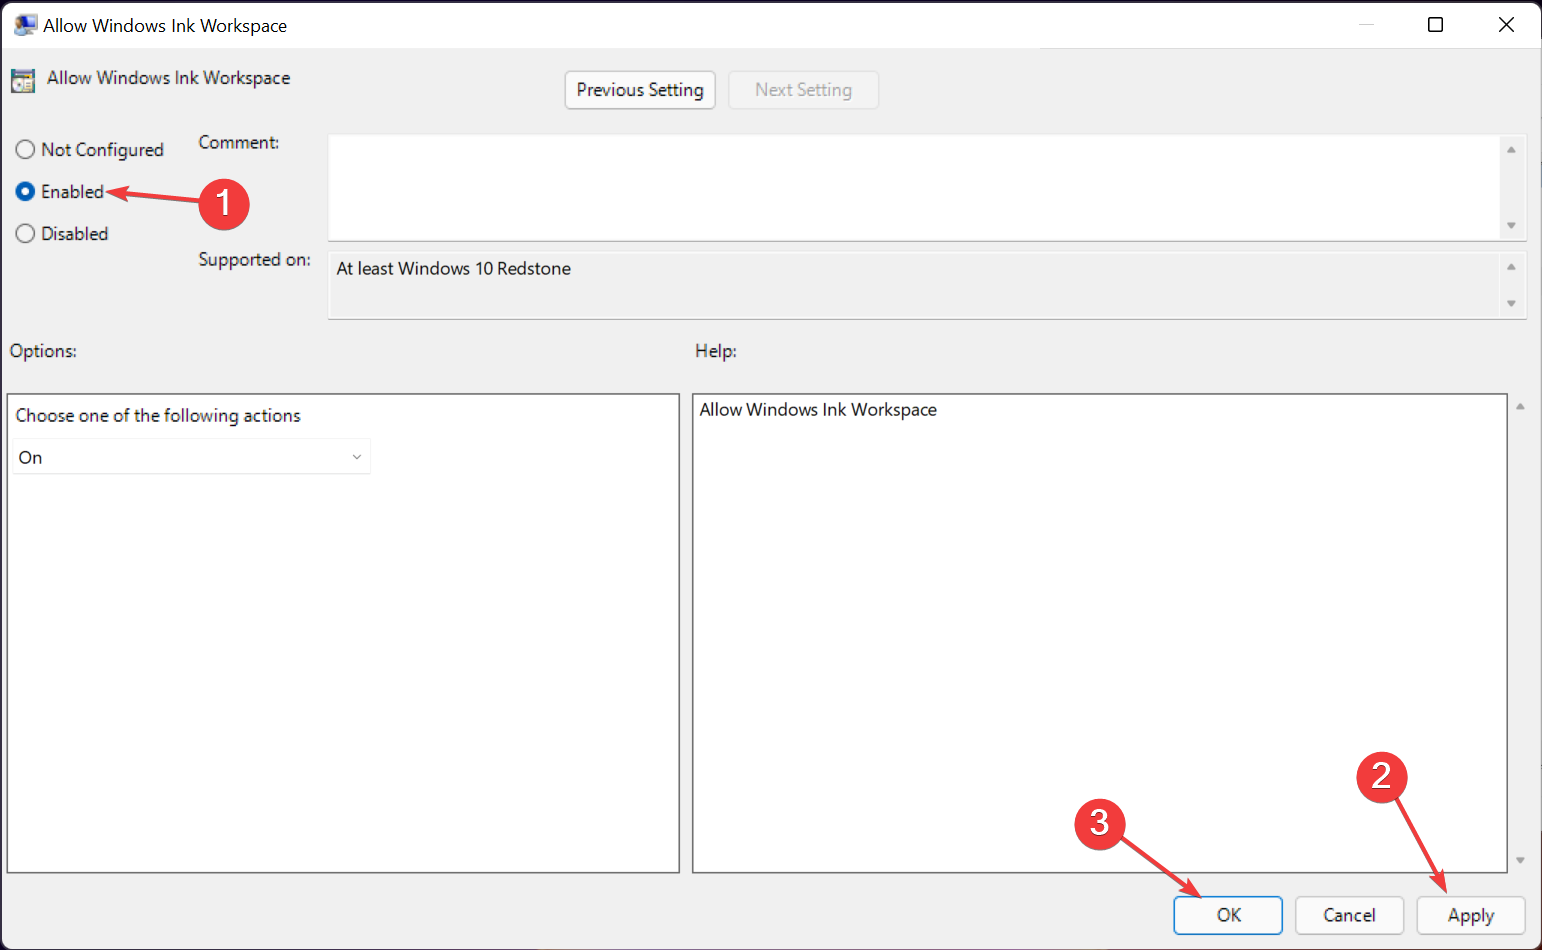
- Select the Enable or Disable option and click Apply, then click OK.
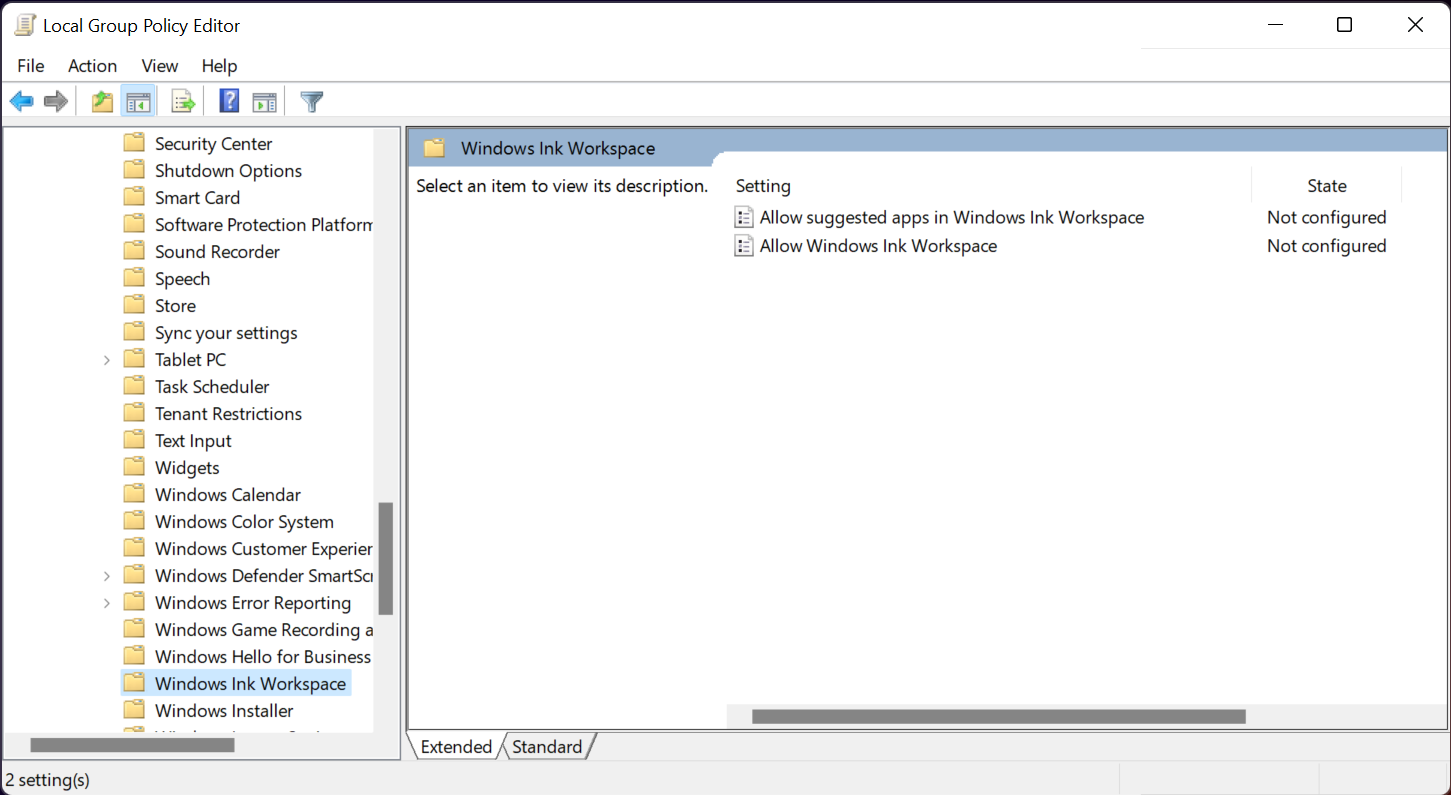
If your computer is a member of a local group, you will permanently use the Local Group Policy Editor to enable or disable the Windows 11 Ink workspace.
How to install the Windows Ink app in Windows 11?
The default applications in the Windows Ink workspace are limited. You can install additional applications to extend the functionality of your workspace. Software like this:
- Adobe Photoshop Elements 2022
- Artboard PDF
- Draw 3D
- Microsoft Magazine
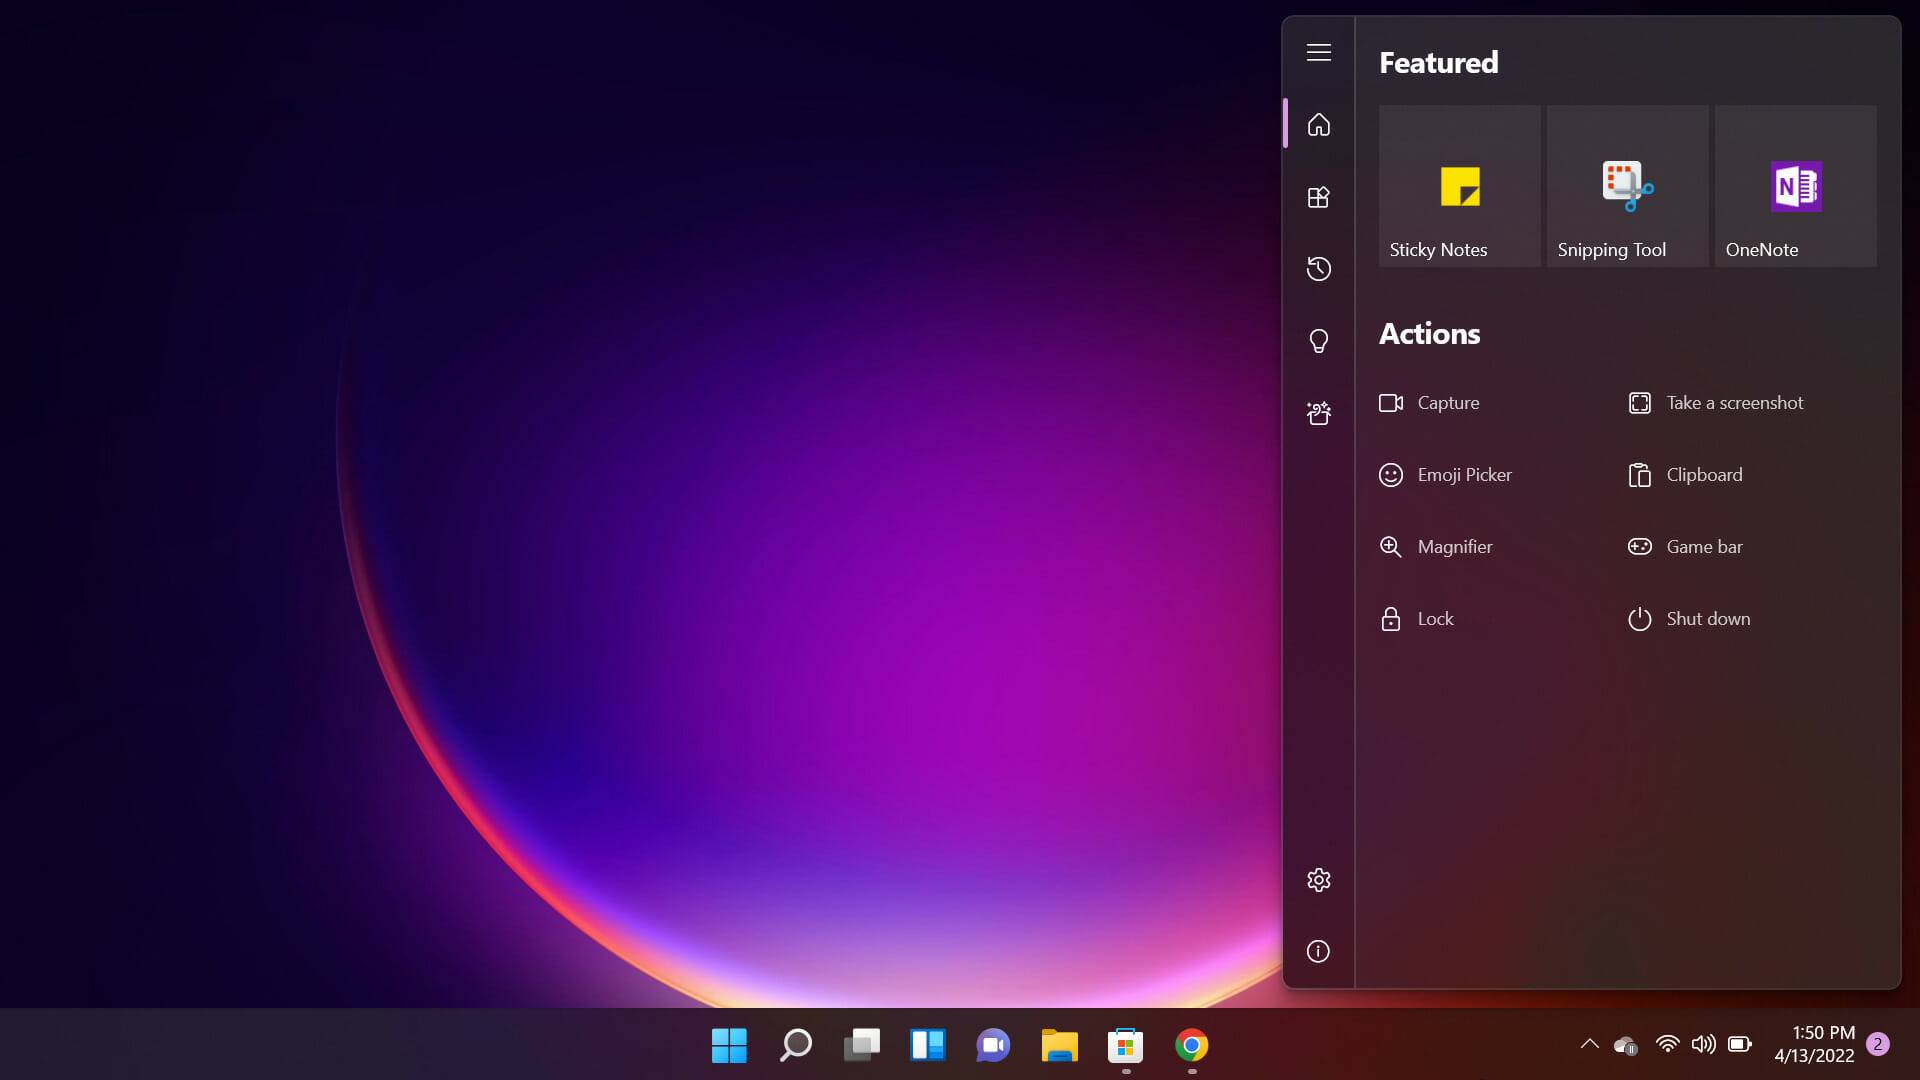
Please follow the steps below to install other applications besides the default applications in Ink Workspace.
- Click the Windows Ink workspace icon on the taskbar.
- Select under the suggestions area to get more pen apps. Alternatively, you can launch the Microsoft Store app.
- Browse the app via pen.
- Select the application and install it.
The above is the detailed content of Fix Windows 11 Ink workspace missing. For more information, please follow other related articles on the PHP Chinese website!
Statement of this Website
The content of this article is voluntarily contributed by netizens, and the copyright belongs to the original author. This site does not assume corresponding legal responsibility. If you find any content suspected of plagiarism or infringement, please contact admin@php.cn
How to disable taskbar thumbnail preview in Win11? Turn off the taskbar icon display thumbnail technique by moving the mouse
Feb 29, 2024 pm 03:20 PM
This article will introduce how to turn off the thumbnail function displayed when the mouse moves the taskbar icon in Win11 system. This feature is turned on by default and displays a thumbnail of the application’s current window when the user hovers the mouse pointer over an application icon on the taskbar. However, some users may find this feature less useful or disruptive to their experience and want to turn it off. Taskbar thumbnails can be fun, but they can also be distracting or annoying. Considering how often you hover over this area, you may have inadvertently closed important windows a few times. Another drawback is that it uses more system resources, so if you’ve been looking for a way to be more resource efficient, we’ll show you how to disable it. but
How to solve the problem of Win11 taskbar icon turning black
Jan 02, 2024 pm 04:25 PM
If we find that our taskbar icon has turned black when using win11 system, this may be because we have turned on dark mode. We only need to change it to light mode in the color settings. Here is a guide Get up and sort it out. What to do if win11 displays black taskbar icons: 1. First click on a blank space on the desktop, and then select «Personalization» in the right-click menu 2. Click «Color» on the right side of Personalization 3. Then select the mode and change it 4. After the setting is completed, we will find that our taskbar icon becomes white.
How to pin the Win11 taskbar
Jan 04, 2024 pm 04:31 PM
In previous Windows systems, we often used the function of locking the taskbar to avoid misoperation of the taskbar. However, many users found that they could no longer lock the taskbar after updating the win11 system. This is actually because Microsoft has canceled this function. The following is Just follow the editor and take a look. How to lock the taskbar in win11: Answer: Unable to lock. 1. Microsoft has canceled the function of locking the taskbar in the win11 system, so we cannot lock the taskbar now. 2. Generally speaking, we can right-click on the blank space of the taskbar to lock the taskbar. 3. But in win11 system, right-clicking on the blank space of the taskbar only has the taskbar settings option. 4. If we open the taskbar settings, the corresponding taskbar lock cannot be found.
What should I do if the Win7 taskbar does not display the icon? How to solve the problem of the computer taskbar icon disappearing
Jun 09, 2024 pm 01:49 PM
Recently, many users using Win7 system have found that the icons in the taskbar suddenly disappeared, which makes the operation very inconvenient and they do not know how to solve the problem. This article will introduce to you how to solve the problem of disappearing taskbar icons in Win7 system. Bar! Cause Analysis When encountering such a situation, there are generally two situations: one is that the taskbar on the computer does not really disappear, but is just hidden, and the other is that the taskbar does disappear. Method 1: 1. There is a situation that you need to confirm first, that is, when the mouse is placed at the bottom of the screen, the taskbar will be displayed. You can directly click the mouse on the taskbar and select «Properties». 2. In the dialog box that opens, click & on the «Hide taskbar» option.
How to reduce the height of the taskbar in win11? Tutorial on resizing the taskbar in Windows 11
Feb 29, 2024 pm 12:37 PM
When we use win11, we will find that the height of the taskbar is a bit high, which feels a bit unsightly to some users. So how to reduce the height of the win11 taskbar? Users can directly click the Registry Editor under the Start menu, and then find the Advanced folder to operate. Let this site carefully introduce to users how to adjust the taskbar size in Windows 11. How to resize the taskbar in Windows 11 First, we need to open the Registry Editor. You can open the registry editor by clicking the Start menu and entering «regedit» in the search box, or by pressing the Win+R key combination to open the Run function and entering «regedit».
How to make the Win11 taskbar black? Introduction to how to set the black taskbar in Win11
Apr 22, 2024 pm 06:40 PM
Some friends also want the taskbar to turn black after changing the dark wallpaper on their computers, but they don’t know how to do it. Let’s take a look at the specific methods below! 1. Right-click an empty area in the taskbar and select «Taskbar Settings.» 2. In the taskbar settings window, find the «Appearance» tab and click it. 3. Under the «Appearance» tab, find the «Taskbar Background» option and click the drop-down menu. 4. Select «Black». 5. Close the «Taskbar Settings» window. Taskbar beautification Xiaozhi Eye Protector is a very easy-to-use win11 transparent taskbar tool. It supports taskbar transparency, taskbar beautification, and multiple styles to beautify the taskbar interface, making your computer interface more beautiful. Xiaozhi Eye Protector Eye Baby (click to download now) Xiaozhi Eye Protection
How to expand the stacked display of the Win11 taskbar? Tutorial on stacking and expanding the Win11 taskbar
Jan 29, 2024 am 11:33 AM
When we use win11 system, we will find that our taskbar windows are merged. Many users don’t like this operation very much. So how to expand the win11 taskbar stacking? Users can directly click on the taskbar settings under the right button, and then directly find the taskbar corner overflow option in the right menu to operate. Let this site carefully introduce to users how to expand the win11 taskbar stack. How to expand taskbar stacking in Windows 11 Method 1. 1. Right-click on a blank space on the taskbar and select Taskbar Settings. 3. After clicking the taskbar corner overflow, turn on the switch for the application icon to be displayed. Method two: 1. We need to use a software to achieve this, search, download and install star by ourselves
How to solve the problem that the win11 taskbar does not respond when clicked/cannot be used
May 09, 2024 pm 06:43 PM
After upgrading to Windows 11 system, many users encountered the problem that the taskbar cannot be clicked, which has a great impact on life and work. So how to solve it specifically? Let’s take a look below! Method 1 1. First, we press the Ctrl+Shift+Esc shortcut keys on the keyboard to open the Task Manager. 2. Then click File in the upper left corner and select Run New Task. 3. After opening it, enter control and press Enter to enter the control panel. 4. Find the time and area and choose to change the date and time. 5. Change the time to September 4 or later, turn off automatic time synchronization after the setting is completed, and then restart the computer. 6. After restarting, re-enter the time settings and come to the internet time selection.
Windows ink is a feature of Microsoft Windows 10 that lets you use a digital pen or your finger to draw or write on your PC. Obviously, this feature is only available on devices with touch-sensitive screens like a convertible laptop. This is quite a useful feature that is easy to use and handy especially for an art professional or a student.
Do you want to enable or disable Windows ink? Follow the below steps to learn some simple methods to do it.

Quick Overivew
Yes, it is perfectly safe to disable or enable Windows ink. Windows ink is a feature introduced by Microsoft in Windows 10 anniversary update in 2016. As it is an additional feature, it doesn’t matter whether you keep it on or turn it off. Also, enabling or disabling this feature will not affect your PC’s performance or functionality in any way.
Below are the methods to enable or disable it on your PC.
Methods to enable or disable Windows ink in Windows 10
Using local group policy editor (If you are using Windows 10 pro version)
If you are using Windows 10 pro, you should have the group policy editor application. This is the easiest method to disable windows ink in Windows 10.
1) Press Windows + R to open the Run Command
2) Type gpedit.msc in the text field and press ENTER
3) Navigate to the following directory in the left pane
- Computer Configuration ->Administrative Templates ->Windows Components ->Windows Ink Workspace
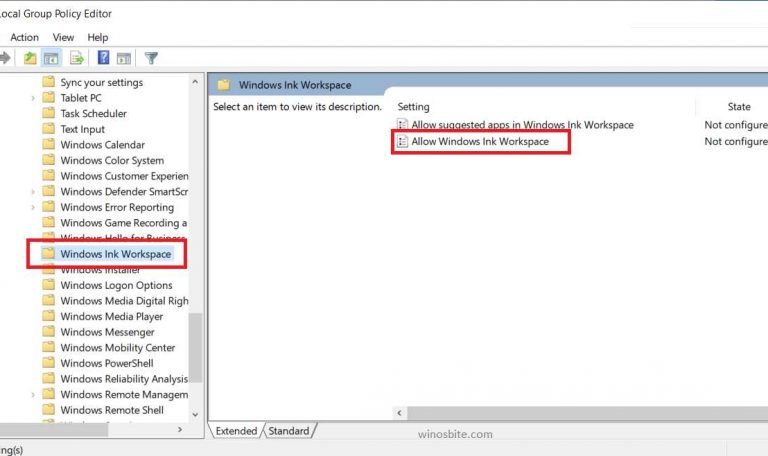
4) Now, in the right panel, open Allow Windows Ink Workspace
5) Select
- Enabled and ON if you want to enable it
- Disabled if you want to disable it
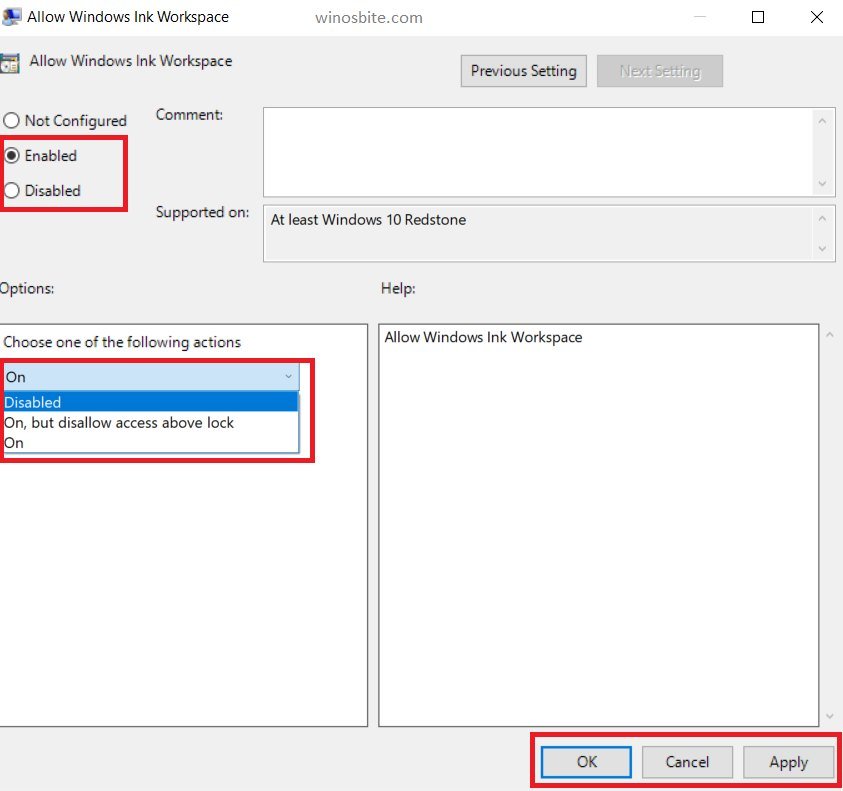
6) Apply the changes and exit the application.
If gpedit.msc is not present on your system, you might be using Windows 10 home instead of Windows 10 pro. Don’t worry, follow the method below to disable permanently or enable Windows ink on Windows 10 home.
Check how to disable gamebarpresencewriter on Windows 10 pc.
Using the Registry Editor
1) Press Windows + R to open the Run application
2) Type regedit in the text field and press ENTER to open the Registry editor

3) Go to the following location by entering the following directory in the text field at the top (or manually locate it)
- HKEY_LOCAL_MACHINE\SOFTWARE\Policies\Microsoft\WindowsInkWorkspace
If the WindowsInkWorkspace folder doesn’t exist, then right-click on Microsoft folder in the registry and create a new key by clicking on New->Key. Name the key as WindowsInkWorkspace.

4) Open the WindowsInkWorkspace key and right-click in the main panel -> New -> DWORD (32-bit) file and name it as AllowWindowsInkWorkspace (IGNORE THIS STEP IF AllowWindowsInkWorkspace WAS ALREADY PRESENT)

5) Double-click AllowWindowsInkWorkspace to open it and set its value data to 0 (for disabled) or 1 (for enabled), then click OK

6) Close the registry editor, then restart your PC.
Conclusion
That was it for the methods to enable or disable Windows ink feature on Microsoft Windows 10. In case of any queries or suggestions, don’t mind leaving a comment down below or contacting us.
In Windows 10, Microsoft added a new feature for fans of digital pens called the Windows Ink Workspace. With this new feature, you get a centralized spot built into Windows 10 for your system’s pen-friendly apps.
Many users will never see the Ink Workspace if they aren’t using a digital pen with their PC. Nevertheless, Microsoft makes it possible for non-pen users to turn on the Ink Workspace in Windows 10 and check it out.
Ian Paul Activate the Ink Workspace with a right-click.
Right-click anywhere on the taskbar and from the context menu select Show Windows Ink Workspace button. An icon of a pen writing in an “S” shape will appear in the notifications area to the far right.
Click on that and the Ink Workspace appears. By default it includes Sticky Notes—an app that’s accessible outside of Workspace—as well as some apps you may not be familiar with, such as Sketchpad and Screen Sketch.
Sketchpad is a drawing app that can be fun to play with even if you don’t have a digital pen. Tapping on Screen Sketch, meanwhile, takes a quick screenshot of your desktop—a handy tool in any event—and from there you can draw directly on the screenshot using the pen tools provided inside the app.
Ian Paul Screen Sketch for Windows 10.
If you just wanted to use Screen Sketch to take a screenshot without drawing on it, click the save icon to archive it on your hard drive. Screen Sketch includes some quick sharing options for your screenshots based on your installed apps such as Twitter, Facebook, Mail, and OneNote.
The Ink Workspace also has a section for suggested pen-enabled apps from the Windows Store, as well as your recently used apps that have pen-friendly features.
That’s about all there is to the Ink Workspace. It’s not something you necessarily need to turn on, but for those who are curious to see it in action, the Ink Workspace is only a few clicks away.