
Introduction:
In this article you will learn how to integration a IdentityServer4 with ASP.NET Core 6 to secure our API application. This article will start with of scratch of creating an empty ASP.NET Core application to build it with OpenID Framework.
Prerequisites:
Basic knowledge in building ASP.NET Core web application.
This article cover following topics
- What is Identity Server4?
- Create an ASP.NET Core project with IdetityServer4
- Adding in-Memory Configuration
- Test User
- Identity Resources
- API Scopes
- API Resource
- Clients
- Registering IdentityServer4 in ASP.NET Core
- In Memory configuration store
- Singing Credentials
- Running IdentityServer4
- Fetching Access token with POSTMAN
- Understanding the token
- Build Authentication layer in ASP.NET Core Web API with IdentityServer4
- Fetching the Token
- Accessing the API with Access token
- Summary
1. What is Identity Server4?
Identity Server4 is an open-source authentication provider with OpenID connect and OAuth2.0 framework for ASP.NET Core. It acts as a centralized authentication provider or security token server (STS). It will be ideal to go through layers when you have multiple API/microservices applications and you should have single security token server to handle the authentication so that you really don’t have to define the Authentication in each and every application.
Identity server4 is a simple and straightforward STS. The user uses the clients (ASP.NET MVC or angular or react application and so on) to access the data, these users are authenticated by Identity Server to use the client. After successful authentication, the Identity server will send a token to client. Then client should use this token to access the data from the APIs.
The identityServer4 is the implementation of OpenID Connect and OAuth 2.0 to secure mobile, native and web applications. It acts as a middleware and a single source where you can integrate with multiple application to frame the authentication layer to secure your applications.
2. Create ASP.NET Core Project with IdentityServer 4
Create an empty ASP.NET Core project with .NET 6 framework using Visual Studio.
This project will act as an actual IdentityServer
Install IdentityServer4 Package using below command with Package Manager console in Visual studio.
Install-Package IdentityServer43. Adding in-memory configuration
For demo purpose I will be adding all the configuration within the code to make it much easier for understanding
Note: This is not a case when you integrate IdentityServer4 in production. My next article on IdentityServer4 with ASP.NET Core will teach you how to make this project production ready.
Create a Class and name it as IdentityConfiguration.cs
3.1 Test User
Add the following code to the IdentityConfiguration class
  public static List<TestUser> TestUsers =>
  new List<TestUser>
  {
        new TestUser
        {
            SubjectId = "123",
            Username = "Gowtham",
            Password = "Test@123",
            Claims =
            {
                new Claim(JwtClaimTypes.Name, "Gowtham K"),
                new Claim(JwtClaimTypes.GivenName, "Gowtham"),
                new Claim(JwtClaimTypes.FamilyName, "Kumar"),
                new Claim(JwtClaimTypes.WebSite, "https://gowthamcbe.com/"),
            }
        }
    };
For demo purpose I have defined a test user. This above code will return a TestUser with some specific JWT Claims.
3.2 Identity Resource
The data like UserId, phone number, email which has something unique to a particular identity/user are the Identity Resource. Add the following code to IdentityConfigration class
public static IEnumerable<IdentityResource> IdentityResources =>
    new IdentityResource[]
    {
        new IdentityResources.OpenId(),
        new IdentityResources.Profile(),
    };
The above code will add OpenId and Profile Identity resources.
3.3 API Scopes
Scopes defines the authorization level for the user. Let’s have two scopes for now name it as api.read and api.write. You will learn more about this scope implementation in my future article on IdentityServer4. Add following code to IdentityConfigration class
public static IEnumerable<ApiScope> ApiScopes =>
    new ApiScope[]
    {
        new ApiScope("api.read"),
        new ApiScope("api.write"),
    };
3.4 API Resources
Let’s define the API Resource with Scopes and API Secrets. Ensure to hash this secret code. This secret hashed code will be saved internal within IdentityServer4.
public static IEnumerable<ApiResource> ApiResources =>
    new ApiResource[]
    {
        new ApiResource("myApi")
        {
            Scopes = new List<string>{ "api.read","api.write" },
            ApiSecrets = new List<Secret>{ new Secret("secret".Sha256()) }
        }
    };
3.5 Clients
Let’s define the clients by giving proper clientId and name. We also have to define who will be granted access to our protected resource. In our case it is myAPI. Add following code to IdentityConfigration class
public static IEnumerable<Client> Clients =>
    new Client[]
    {
        new Client
        {
            ClientId = "client",
            ClientName = "Client Credentials Client",
            AllowedGrantTypes = GrantTypes.ClientCredentials,
            ClientSecrets = { new Secret("secret".Sha256()) },
            AllowedScopes = { "api.read" }
        },
    };
4.Registering IdentityServer4 in ASP.NET Core
Let’s register IdentityServer4 in ASP.NET Core application. Open Program.cs file and add the following code.
builder.Services.AddIdentityServer()

    .AddInMemoryClients(IdentityConfiguration.Clients)
    .AddInMemoryIdentityResources(IdentityConfiguration.IdentityResources)
    .AddInMemoryApiResources(IdentityConfiguration.ApiResources)
    .AddInMemoryApiScopes(IdentityConfiguration.ApiScopes)
    .AddTestUsers(IdentityConfiguration.TestUsers);
    .AddDeveloperSigningCredential();
The above configure all the Static Resources, clients, and Users which are defined in IdentiyConfigration.cs class.
4.1 In-Memory Configuration Store
I have hardcoded the configurations of IdentityServer for a demo. All these operational and configurational data are store In-Memory. These configurations are loaded only once the application start-up mostly suitable for development.
4.2 Signing Credentials
IdentityServer needs certificates to verify it’s usage, since we don’t have certificate, we use AddDeveloperSigningCredential() extension.
app.UseIdentityServer();Complete code
using IdentityServer4.NCache.Options;
using IdentityServerCore;
using Microsoft.AspNetCore.Mvc.RazorPages.Infrastructure;

var builder = WebApplication.CreateBuilder(args);

builder.Services.AddIdentityServer()

    .AddInMemoryClients(IdentityConfiguration.Clients)
    .AddInMemoryIdentityResources(IdentityConfiguration.IdentityResources)
    .AddInMemoryApiResources(IdentityConfiguration.ApiResources)
    .AddInMemoryApiScopes(IdentityConfiguration.ApiScopes)
    .AddTestUsers(IdentityConfiguration.TestUsers)
    .AddDeveloperSigningCredential();
var app = builder.Build();
app.MapGet("/", () => "Hello World!");
app.UseRouting();
app.UseIdentityServer();


app.Run();
5. Running IdentityServer4
5.1 Fetching Access token with POSTMAN
Run the application, let’s test the token generation from postman

After successfully authorization, IdentityServer4 will returns an access token that is valid for 3600 seconds.
5.2 Understanding the token
Copy the encoded token and head over to jwt.io to decode the Access Token.
Note: Any JWTokens can be decoded, thus make sure to never add any sensitive data like password, etc on to your tokens.

6. Build Authentication layer in ASP.NET Core Web API with IdentityServer4
Let’s see how to secure the ASP.NET Web API application with IdentityServer4. Add a new ASP.NET Core Web API Project to the solution.

Install “IdentityServer4.AccessTokenValidation” package from package manager console using below command.
Install-Package IdentityServer4.AccessTokenValidationOpen up Program.cs of the Web API Project and add the following code
builder.Services.AddAuthentication("Bearer").AddIdentityServerAuthentication("Bearer", options =>
{
    options.ApiName = "myApi";
    options.Authority = "https://localhost:7136";
});
This configuration tells the program to use the authentication service(IdentityServer4 project). It act as a Authentication middleware to the pipeline.
app.UseAuthorization();
From the solution -> Set StartUp Project, choose multiple startup project and set the API and Identity server project to start.

In the API project we have default WeatherForecast GET API under WeatherForecastController. Set Authorize attribute to this controller.
    [ApiController]
    [Route("[controller]")]
    [Authorize]
Run the solution and test the WeatherForecast API with POSTMAN

The status code is 401. Since no token was passed this request is unauthorized.
6.2 Accessing the API with Access token
Let’s generate a new token as we did in previous step using https://localhost:7136/connect/token POST API and pass that token with /WeatherForecast GET API in POSTMAN

Now the authorization was successful and we got a proper response from the API.
7. Summary
In this article, we covered the basics of IdentityServer4 like Resources, Test Users, Clients, etc. Finally, we build the API project and secured it by the IdentityServer4 with the token to validate the clients.
Source code – Get here.
I hope this article will help you to get start with IdentityServer4. Please share your queries, suggestions in the comments section below.
Happy Coding!!!
Введение
На одном из моих поддерживаемых проектов недавно встала задача проанализировать возможность миграции с .NET фреймворка 4.5 на .Net Core по случаю необходимости рефакторинга и разгребания большого количества накопившегося технического долга. Выбор пал на целевую платформу .NET Core 3.0, так как, судя по утверждению разработчиков от Microsoft, с появлением релиза версии 3.0, необходимые шаги при миграции legacy кода уменьшатся в несколько раз. Особенно нас в нем привлекли планы выхода EntityFramework 6.3 для .Net Core т.е. большую часть кода, основанную на EF 6.2, можно будет оставить «как есть» в мигрированном проекте на net core.
С уровнем данных, вроде, стало понятно, однако, еще одной большой частью по переносу кода остался уровень безопасности, который, к сожалению, после беглых выводов аудита придется почти полностью выкинуть и переписать с нуля. Благо, на проекте уже использовалась часть ASP NET Identity, в виде хранения пользователей и других приделанных сбоку «велосипедов».
Тут возникает логичный вопрос: если в security часть придется вносить много изменений, почему бы сразу же не внедрить подходы, рекомендуемые в виде промышленных стандартов, а именно: подвести приложение под использование Open Id connect и OAuth посредством фреймворка IdentityServer4.
Проблемы и пути решения
Итак, нам дано: имеется JavaScript приложение на Angular (Client в терминах IS4), оно использует некоторое подмножество WebAPI (Resources), также есть база данных устаревшего ASP NET Identity с логинами пользователей, которые необходимо после обновления использовать заново (чтобы не заводить всех еще раз), плюс в некоторых случаях необходимо давать возможность входить в систему через Windows аутентификацию на стороне IdentityServer4. Т.е. бывают случаи, когда пользователи работают через локальную сеть в домене ActiveDirectory.
Основное решение миграции данных о пользователях состоит в том, чтобы вручную (или с помощью автоматизированных средств) написать скрипт миграции между старой и новой схемой данных Identity. Мы, в свою очередь, воспользовались автоматическим приложением сравнения схем данных и сгенерировали SQL скрипт, в зависимости от версии Identity целевой миграционный скрипт будет содержать разные инструкции по обновлению. Тут главное- не забыть согласовать таблицу EFMigrationsHistory, если до этого использовался EF и в дальнейшем планируется, например, расширять сущность IdentityUser на дополнительные поля.
А вот как правильно теперь сконфигурировать IdentityServer4 и настроить его совместно с Windows учетными записями будет описано ниже.
План реализации
По причинам NDA я не стану описывать, как мы добились внедрения IS4 у себя на проекте, однако, в данной статье я на простом сайте ASP.NET Core, созданном с нуля, покажу, какие шаги нужно предпринять, чтобы получить полностью сконфигурированное и работоспособное приложение, использующее для целей авторизации и аутентификации IdentityServer4.
Чтобы реализовать желаемое поведение нам предстоит совершить следующие шаги:
- Создать пустой проект ASP.Net Core и сконфигурировать на использование IdentityServer4.
- Добавить клиента в виде Angular приложения.
- Реализовать вход через open-id-connect google
- Добавить возможность выбора Windows аутентификации
По соображениям краткости все три компонента (IdentityServer, WebAPI, Angular клиент) будут находиться в одном проекте. Выбранный тип взаимодействия клиента и IdentityServer (GrantType) – Implicit flow, когда access_token передается на сторону приложения в браузере, а затем используется при взаимодействии с WebAPI. Ближе к релизу, судя по изменениям в репозитории ASP.NET Core, Implicit flow будет заменена на Authorization Code + PKCE.)
В процессе создания и изменения приложения будет широко применяться интерфейс командной строки .NET Core, он должен быть установлен в системе в месте с последней версией preview Core 3.0 (на момент написание статьи 3.0.100-preview7-012821).
Создание и конфигурирование web проекта
Выход IdentityServer версии 4, ознаменовался полным выпиливанием UI с этого фреймворка. Теперь у разработчиков появилось полное право самим определять главный интерфейс сервера авторизации. Тут есть несколько способов. Одним из популярных является использование UI из пакета QuickStart UI, его можно найти в официальном репозитории на github.
Другим, не менее удобным, способом является интеграция с ASP NET Core Identity UI, в данном случае разработчику необходимо правильно сконфигурировать соответствующие промежуточные ПО в проекте. Именно данный способ и будет описываться далее.
Начнем с создания простого web проекта, для этого выполним в командной строке следующую инструкцию:
dotnet new webapp -n IdentityServer4WebAppПосле исполнения на выходе у нас будет каркас вэб приложения, который постепенно будет доводиться до нужного нам состояния. Тут нужно сделать оговорку, что в .Net Core 3.0 для Identity используются более легковесные RazorPages, в отличии от тяжеловесного MVC.
Теперь необходимо добавить поддержку IdentityServer в наш проект. Для этого устанавливаем необходимые пакеты:
dotnet add package Microsoft.AspNetCore.ApiAuthorization.IdentityServer -v 3.0.0-preview7.19365.7
dotnet add package Microsoft.AspNetCore.Identity.EntityFrameworkCore -v 3.0.0-preview7.19365.7
dotnet add package Microsoft.EntityFrameworkCore.Tools -v 3.0.0-preview7.19362.6
dotnet add package Microsoft.EntityFrameworkCore.Sqlite -v 3.0.0-preview7.19362.6
Помимо ссылок на пакеты сервера авторизации, здесь мы добавили поддержку Entity Framework для хранения информации о пользователях в экосистеме Identity. Для простоты будем использовать базу SQLite.
Для инициализации базы создадим модель нашего пользователя и контекст базы данных, для этого объявим два класса ApplicationUser, наследуемый от IdentityUser в папке Models и ApplicationDbContext, наследуемый от: ApiAuthorizationDbContext в папке Data.
Далее необходимо сконфигурировать использование контекста EntityFramework и создать базу данных. Для этого прописываем контекст в метод ConfigureServices класса Startup:
public void ConfigureServices(IServiceCollection services)
{
  services.AddDbContext<ApplicationDbContext>(options =>options.UseSqlite(Configuration.GetConnectionString("DefaultConnection")));
    services.AddRazorPages();
}
И добавляем строку подключения в appsettings.json
"ConnectionStrings": {
    "DefaultConnection": "Data Source=data.db"
  },
Теперь можно создать первоначальную миграцию и проинициализировать схему базы данных. Тут стоит заметить, что необходим установленный tool для ef core (для рассматриваемого preview нужна версия 3.0.0-preview7.19362.6).
dotnet ef migrations add Init
dotnet ef database update
Если все предыдущие шаги были выполнены без ошибок, в вашем проекте должен появиться SQLite файл данных data.db.
На данном этапе мы уже можем полностью сконфигурировать и опробовать полноценную возможность использования Asp.Net Core Identity. Для этого внесем изменения в методы Startup. Configure и Startup.ConfigureServices.
//Startup.ConfigureServices:
services.AddDefaultIdentity<ApplicationUser>()
                .AddEntityFrameworkStores<ApplicationDbContext>();

//Startup. Configure:
app.UseAuthentication();
app.UseAuthorization();

app.UseEndpoints(endpoints =>
{
    endpoints.MapRazorPages();
});
Этими строчками мы встраиваем возможность аутентификации и авторизации в конвейер обработки запросов. А также добавляем дефолтный пользовательский интерфейс для Identity.
Осталось только подправить UI, добавим в Pages\Shared новое представление Razor view с именем _LoginPartial.cshtml и следующим содержимым:
@using IdentityServer4WebApp.Models
@using Microsoft.AspNetCore.Identity
@inject SignInManager<ApplicationUser> SignInManager
@inject UserManager<ApplicationUser> UserManager

<ul class="navbar-nav">
    @if (SignInManager.IsSignedIn(User))
    {
        <li class="nav-item">
            <a class="nav-link text-dark" asp-area="Identity" asp-page="/Account/Manage/Index" title="Manage">Hello @User.Identity.Name!</a>
        </li>
        <li class="nav-item">
            <form class="form-inline" asp-area="Identity" asp-page="/Account/Logout" asp-route-returnUrl="/">
                <button type="submit" class="nav-link btn btn-link text-dark">Logout</button>
            </form>
        </li>
    }
    else
    {
        <li class="nav-item">
            <a class="nav-link text-dark" asp-area="Identity" asp-page="/Account/Register">Register</a>
        </li>
        <li class="nav-item">
            <a class="nav-link text-dark" asp-area="Identity" asp-page="/Account/Login">Login</a>
        </li>
    }
</ul>
Вышеперечисленный код представления должен добавить в навигационную панель ссылки на область интерфейса Identity со встроенными элементами управления пользователями (ввод логина и пароля, регистрации и т.д.)
Чтобы добиться рендеринга новых пунктов меню, просто изменим файл _Layout.cshtml, добавив туда рендеринг этого частичного представления.
                    <ul class="navbar-nav flex-grow-1">
                        <li class="nav-item">
                            <a class="nav-link text-dark" asp-area="" asp-page="/Index">Home</a>
                        </li>
                        <li class="nav-item">
                            <a class="nav-link text-dark" asp-area="" asp-page="/Privacy">Privacy</a>
                        </li>
                    </ul>
                </div>
                <partial name="_LoginPartial" /> <!––Здесь––>
            </div>
И теперь попробуем запустить наше приложение и перейти по появившимся ссылкам в головном
меню, пользователю должна будет отобразиться страница с приветствием и просьбой
ввести логин и пароль. При этом можно зарегистрироваться и залогиниться – все
должно работать.

Разработчики IdentityServer4 проделали превосходную работу по усовершенствованию процедуры интеграции ASP.NET Identity и самого фреймворка сервера. Чтобы добавить возможность использования токенов OAuth2, требуется дополнить наш проект некоторыми новыми инструкциями в коде.
В предпоследней строчке метода Startup.ConfigureServices добавить конфигурацию соглашений IS4 поверх ASP.NET Core Identity:
services.AddIdentityServer()
    .AddApiAuthorization<ApplicationUser, ApplicationDbContext>();
Метод AddApiAuthorization указывает фреймворку использовать определенную поддерживаемую конфигурацию, главным образом через файл appsettings.json. На данный момент встроенные возможности по управлению IS4 не такие гибкие и следует относится к этому, как к некой отправной точке при построении своих приложений. В любом случае, можно воспользоваться перегруженной версией этого метода и более детально настроить параметры через callback.
Далее вызываем вспомогательный метод, который настраивает приложение для проверки токенов JWT, выданных фреймворком.
services.AddAuthentication()
    .AddIdentityServerJwt();
И наконец, в методе Startup.Configure добавить промежуточное ПО для
предоставления конечных точек Open ID Connect.
app.UseAuthentication();
app.UseAuthorization();
app.UseIdentityServer();//<-Сюда
Как говорилось выше по тексту, использованные вспомогательные методы читают конфигурацию в
файле настроек приложения appsettings.json, в которых мы должны добавить новую
секцию IdentityServer.
"IdentityServer": {
    "Clients": {
      "TestIdentityAngular": {
        "Profile": "IdentityServerSPA"
      }
    }
  }
В данной секции определяется клиента с именем TestIdentityAngular, которое мы присвоим будущему браузерному клиенту и определенным профилем конфигурации.
Профили приложений– это новое средство конфигурирования IdentityServer, предоставляющее несколько предопределенных конфигураций с возможностью уточнения некоторых параметров. Мы будем использовать профиль IdentityServerSPA, предназначенный для случаев, когда браузерный клиент и фреймворк расположены в одном проекте и имеют такие параметры:
- Ресурс redirect_uri, установленный на /authentication/login-callback.
- Ресурс post_logout_redirect_uri, установлен на /authentication/logout-callback.
- Набор областей включает openid, profile, для каждого ресурса API приложения.
- Набор разрешенных типов ответа OIDC — id_token token
- GrantType для клиента – Implicit
Другие возможные профили – SPA (приложение без IS4), IdentityServerJwt (API размещенное совместно с IS4), API (отдельное API).
Помимо этого конфигурация регистрирует ресурсы:
- ApiResources: один API ресурс с именем << appname>>API с указанием properties для всех клиентов (*).
- IdentityServerResources: IdentityResources.OpenId() и IdentityResources.Profile()
Как известно, IdentityServer для подписи токенов использует сертификаты, их параметры также можно задать в конфигурационном файле, так на момент тестирования мы можем использовать
тестовый x509-сертификат, для этого нужно указать его в секции «Key» файла appsettings.Development.json.
"IdentityServer": {
    "Key": {
      "Type": "Development"
    }
  }
Теперь можно сказать, что бэкэнд, позволяющий использовать IdentityServer готов и можно приступать к реализации браузерного приложения.
Реализация клиента на Angular
Наше браузерное SPA будет написано на платформе Angular. Приложение будет содержать две страницы, одна – для неавторизированных пользователей, а другая для пользователей, прошедших проверку. В примерах используется версия 8.1.2
Для начала создадим будущий каркас:
ng new ClientAppВ процессе создания нужно ответить “да” на предложение использовать роутинг. И немного стилизируем страницу через библиотеку bootstrap:
cd ClientApp
ng add bootstrap
Дальше необходимо добавить поддержку хостинга SPA в наше основное приложение. Сперва нужно подправить проект csproj – добавить информацию о нашем браузерном приложении.
<PropertyGroup>
    <TargetFramework>netcoreapp3.0</TargetFramework>

    <TypeScriptCompileBlocked>true</TypeScriptCompileBlocked>
    <TypeScriptToolsVersion>Latest</TypeScriptToolsVersion>
    <IsPackable>false</IsPackable>
    <SpaRoot>ClientApp\</SpaRoot>
    <DefaultItemExcludes>$(DefaultItemExcludes);$(SpaRoot)node_modules\**</DefaultItemExcludes>
    <BuildServerSideRenderer>false</BuildServerSideRenderer>
  </PropertyGroup>
…
<ItemGroup>
    <Content Remove="$(SpaRoot)**" />
    <None Remove="$(SpaRoot)**" />
    <None Include="$(SpaRoot)**" Exclude="$(SpaRoot)node_modules\**" />
  </ItemGroup>

<Target Name="DebugEnsureNodeEnv" BeforeTargets="Build" Condition=" '$(Configuration)' == 'Debug' And !Exists('$(SpaRoot)node_modules') ">
    <Exec Command="node --version" ContinueOnError="true">
      <Output TaskParameter="ExitCode" PropertyName="ErrorCode" />
    </Exec>
    <Error Condition="'$(ErrorCode)' != '0'" Text="Node.js is required to build and run this project. To continue, please install Node.js from https://nodejs.org/, and then restart your command prompt or IDE." />
    <Message Importance="high" Text="Restoring dependencies using 'npm'. This may take several minutes..." />
    <Exec WorkingDirectory="$(SpaRoot)" Command="npm install" />
  </Target>
После этого устанавливаем специальный пакет nuget для поддержки браузерных приложений.
dotnet add package Microsoft.AspNetCore.SpaServices.Extensions -v 3.0.0-preview7.19365.7И применяем его вспомогательные методы:
//Startup. ConfigureServices:
services.AddSpaStaticFiles(configuration =>
            {
                configuration.RootPath = "ClientApp/dist";
            });

//Startup. Configure:
app.UseSpa(spa =>
            {
                spa.Options.SourcePath = "ClientApp";

                if (env.IsDevelopment())
                {
                    spa.UseAngularCliServer(npmScript: "start");
                }
            });
Помимо вызова новых методов необходимо удалить страницы Razor Index.chtml и _ViewStart.chtml, чтобы контент теперь предоставляли сервисы SPA.
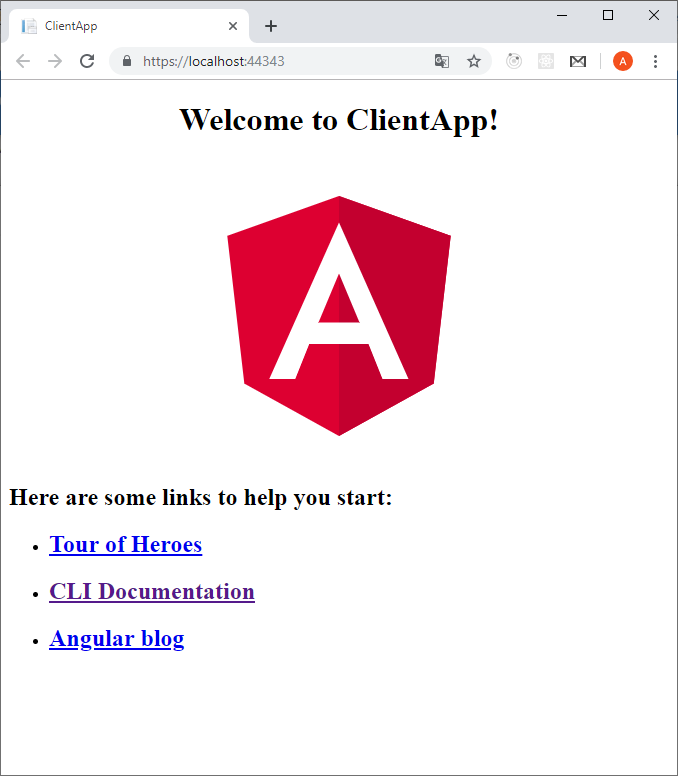
Если все было сделано в соответствии с инструкциями, при запуске приложения на экране появится дефолтная страница.
Теперь необходимо настроить роутинг, для этого добавляем в проект 2
компонента:
ng generate component Home -t=true -s=true --skipTests=true
ng generate component Data -t=true -s=true --skipTests=true
Прописываем их в таблице маршрутизации:
const routes: Routes = [
  { path: '', component: HomeComponent, pathMatch: 'full' },
  { path: 'data', component: DataComponent }
];
И изменяем файл app.component.html, чтобы правильно отобразить пункты меню.
<header>
    <nav class='navbar navbar-expand-sm navbar-toggleable-sm navbar-light bg-white border-bottom box-shadow mb-3'>
      <div class="container">
        <a class="navbar-brand" [routerLink]='["/"]'>Client App</a>
        <div class="navbar-collapse collapse d-sm-inline-flex flex-sm-row-reverse" [ngClass]='{"show": isExpanded}'>
          <ul class="navbar-nav flex-grow">
            <li class="nav-item" [routerLinkActive]='["link-active"]' [routerLinkActiveOptions]='{ exact: true }'>
              <a class="nav-link text-dark" [routerLink]='["/"]'>Home</a>
            </li>
            <li class="nav-item" [routerLinkActive]='["link-active"]'>
              <a class="nav-link text-dark" [routerLink]='["/data"]'>Web api data</a>
            </li>
          </ul>
        </div>
      </div>
    </nav>
  </header>
<div style="text-align:center">
  <h1>
    Welcome to {{ title }}!
  </h1>
</div>
<div class="router-outlet">
  <router-outlet></router-outlet>
</div>
На этом шаге можно завершить основную подготовку каркаса приложения для внедрения взаимодействия через токены, выданные IdentityServer.
Текущий этап подготовки каркаса нашего SPA можно назвать завершенным и теперь следует приступить к реализации модуля, отвечающего за взаимодействие с серверной частью по протоколам OpenID Connect и OAuth. К счастью, разработчики от Microsoft уже реализовали такой код и теперь можно просто позаимствовать этот модуль у них. Так как моя статья пишется, основываясь на предрелизе 7 ASP.NET Core 3.0, весь код мы будем брать по релизной метке «v3.0.0-preview7.19365.7» на github.
Перед импортом кода необходимо установить библиотеку oidc-client, которая
предоставляет множество интерфейсов для браузерных приложений, а также
поддерживает управление пользовательскими сессиями и токенами доступа. Для
начала работы с ней нужно установить соответствующий пакет.
npm install oidc-client@1.8.0Теперь в наше SPA необходимо внедрить модуль, инкапсулирующий полное взаимодействие по требуемым протоколам. Для этого нужно взять полностью модуль ApiAuthorizationModule из вышеуказанной метки репозитория ASP.NET Core и добавить в приложение все его файлы.
Помимо этого, необходимо импортировать его в главный модуль приложения AppModule:
@NgModule({
  declarations: [
    AppComponent,
    HomeComponent,
    DataComponent
  ],
  imports: [
    BrowserModule,
    HttpClientModule,
    ApiAuthorizationModule,//<-Сюда
    AppRoutingModule
  ],
  providers: [],
  bootstrap: [AppComponent]
})
export class AppModule { }
Для отображения новых пунктов меню в импортированном модуле есть компонент app-login-menu,
его можно полностью изменить в соответствии с вашими потребностями и добавить
ссылку на него в секцию навигации представления app.component.html.
Модуль авторизации API для конфигурирования OpenID connect клиента SPA должен использовать специальный endpoint в бэке приложения, для его реализации мы
должны выполнить такие шаги:
- Исправить ID клиента в соответствии с тем, что мы задали в конфигурационном файле appsettings.json в секции IdentityServer:Clients, в нашем случае это TestIdentityAngular, прописывается оно в первой строчке набора констант api-authorization.constants.ts.
- Добавить контроллер OidcConfigurationController, который будет непосредственно возвращать конфигурацию в браузерное приложение
Код создаваемого контроллера представлен ниже:
    [ApiController]
    public class OidcConfigurationController: ControllerBase
    {
        private readonly IClientRequestParametersProvider _clientRequestParametersProvider;

        public OidcConfigurationController(IClientRequestParametersProvider clientRequestParametersProvider)
        {
            _clientRequestParametersProvider = clientRequestParametersProvider;
        }

        [HttpGet("_configuration/{clientId}")]
        public IActionResult GetClientRequestParameters([FromRoute]string clientId)
        {
            var parameters = _clientRequestParametersProvider.GetClientParameters(HttpContext, clientId);
            return Ok(parameters);
        }
    }
Также нужно сконфигурировать поддержку API точек для приложения бэка.
//Startup.ConfigureServices:
services.AddControllers();//<- Сюда
services.AddRazorPages();

//Startup. Configure:
app.UseEndpoints(endpoints =>
            {
                endpoints.MapRazorPages();
                endpoints.MapControllers();
            });
Теперь настало время запустить приложение. На главной странице в верхнем меню должны появиться два пункта – Login и Register. Также при старте импортированный модуль авторизации запросит у серверной стороны конфигурацию клиента, которую впоследствии и будет учитывать в протоколе. Примерный вывод конфигурации показан ниже:
{
    "authority": "https://localhost:44367",
    "client_id": "TestIdentityAngular",
    "redirect_uri": "https://localhost:44367/authentication/login-callback",
    "post_logout_redirect_uri": "https://localhost:44367/authentication/logout-callback",
    "response_type": "id_token token",
    "scope": "IdentityServer4WebAppAPI openid profile"
}
Как видно, клиент при взаимодействии ожидает получить id токен и токен доступа, а также он сконфигурирован на область доступа к нашему API.
Теперь если же мы выберем пункт меню Login, нас должно редиректнуть на страницу нашего IdentityServer4 и тут мы можем ввести логин и пароль, и если они корректны, мы сразу будем перекинуты назад в браузерное приложение, которое в свою очередь получит id_token и access_token. Как видно ниже, компонент app-login-menu сам определил, что авторизация успешно завершилась, и отобразил «приветствие», а также кнопку для Logout.

При открытии в браузере «средств разработчика», можно увидеть в backstage все взаимодействие по протоколу OIDC/OAuth. Это получение информации об авторизующем сервере
через endpoint .well-known/openid-configuration и pooling активности сессии через точку доступа connect/checksession. Помимо этого, модуль авторизации настроен на механизм «тихого обновления токенов», когда при истекании времени действия токена доступа, система самостоятельно проходит шаги авторизации в скрытом iframe. Отключить автообновления токенов можно задав значение параметра includeIdTokenInSilentRenew равным «false» в файле authorize.service.ts.
Теперь можно заняться ограничением доступа неавторизированным пользователям со стороны компонентов SPA приложения, а также некоторым API контроллерам на бэке. В целях демонстрации некоторого API создадим в папке Models класс ExchangeRateItem, а так же контроллер в папке Controller, возвращающий некоторые случайные данные.
//Controller:
    [ApiController]
    public class ExchangeRateController
    {
        private static readonly string[] Currencies = new[]
        {
            "EUR", "USD", "BGN", "AUD", "CNY", "TWD", "NZD", "TND", "UAH", "UYU", "MAD"
        };

        [HttpGet("api/rates")]
        public IEnumerable<ExchangeRateItem> Get()
        {
            var rng = new Random();
            return Enumerable.Range(1, 5).Select(index => new ExchangeRateItem
            {
                FromCurrency = "RUR",
                ToCurrency = Currencies[rng.Next(Currencies.Length)],
                Value = Math.Round(1.0+ 1.0/rng.Next(1, 100),2)
                })
                .ToArray();
        }
    }

//Models:
public class ExchangeRateItem
    {
        public string FromCurrency { get; set; }

        public string ToCurrency { get; set; }

        public double Value { get; set; }
    }
Далее на стороне фронтенда создаем новый компонент, который будет получать
и отображать данные по курсам валют из только что созданного контроллера.
ng generate component ExchangeRate -t=true -s=true --skipTests=trueСодержимое компонента должно выглядеть следующим образом:
Код
import { Component, OnInit, Input } from '@angular/core';
import { HttpClient } from '@angular/common/http';
import { Observable, of, Subject } from 'rxjs';
import { catchError } from 'rxjs/operators';

@Component({
  selector: 'app-exchange-rate',
  template: `
<div class="alert alert-danger" *ngIf="errorMessage | async as msg">
  {{msg}}
</div>
<table class='table table-striped'>
  <thead>
  <tr>
    <th>From currency</th>
    <th>To currency</th>
    <th>Rate</th>
  </tr>
  </thead>
  <tbody>
  <tr *ngFor="let rate of rates | async">
    <td>{{ rate.fromCurrency }} </td>
    <td>{{ rate.toCurrency }}</td>
    <td>{{ rate.value }}</td>
  </tr>
  </tbody>
</table>

  `,
  styles: []
})
export class ExchangeRateComponent implements OnInit {
  public rates: Observable<ExchangeRateItem[]>;

  public errorMessage: Subject<string>;

  @Input() public apiUrl: string;

  constructor(private http: HttpClient) {
    this.errorMessage = new Subject<string>();
  }

  ngOnInit() {
    this.rates = this.http.get<ExchangeRateItem[]>("/api/"+this.apiUrl).pipe(catchError(this.handleError(this.errorMessage)) );
  }

  private handleError(subject: Subject<string>): (te:any) => Observable<ExchangeRateItem[]> {
    return (error) => {
      let message = '';
      if (error.error instanceof ErrorEvent) {
        message = `Error: ${error.error.message}`;
      } else {
        message = `Error Code: ${error.status}\nMessage: ${error.message}`;
      }
      subject.next(message);
      let emptyResult: ExchangeRateItem[] = [];
      return of(emptyResult);
    }
  }
}

interface ExchangeRateItem {
  fromCurrency: string;
  toCurrency: string;
  value: number;
}
Теперь осталось начать использовать его на странице app-data, просто в template записав строку <app-exchange-rate apiUrl=«rates»></app-exchange-rate>и можно снова запустить проект. Мы увидим при переходе по целевому пути, что компонент получил данные и вывел их в виде таблицы.
Далее попробуем добавить требование авторизации доступа к API контроллера, для этого у класса ExchangeRateController добавим атрибут [Authorize] и еще раз запустим SPA, однако, после того, как мы перейдем снова на компонент, вызывающий наше API, мы увидим ошибку, что свидетельствует об отсутствующих заголовках авторизации.

Для корректного добавления в исходящие запросы токена авторизации можно
задействовать Angular механизм перехватчиков Interceptors. К счастью, импортированный модуль уже содержит необходимый тип, нам нужно только зарегистрировать его в базовом модуле приложения.
providers: [
    { provide: HTTP_INTERCEPTORS, useClass: AuthorizeInterceptor, multi: true }
  ],
После этих шагов все должно корректно отработать. Если снова посмотреть инструменты разработчика, в браузере будет виден новый заголовок авторизации Bearer access_token. На бэкенде данный токен будет провалидирован IdentityServer и он же даст разрешение на вызов защищенной точки API.
В окончание примера интеграции с сервером авторизации, можно на маршрут с данными по обменным курсам в SPA поставить Guard активации, он не даст пользователям переключиться на страницу, если они в данный момент не авторизованы. Данный защитник также представлен в импортированном ранее модуле, его нужно просто навесить на целевой маршрут.
{ path: 'data', component: DataComponent, canActivate: [AuthorizeGuard] }Теперь в случае, когда пользователь не залогинился в приложении и выбрал ссылку на наш защищенный компонент, его сразу перебросит на страницу авторизации с просьбой ввести логин и пароль. Итоговый код доступен на github.
Подключение внешнего входа в систему через поставщика Google
Для подключения входа через учетные записи Google для ASP.NET core 1.1/2.0+ существует отдельный Nuget пакет Microsoft.AspNetCore.Authentication.Google, однако, в связи с изменениями в политике самой корпорации, у Microsoft есть планы для ASP.NET Core 3.0+ признать его устаревшим. И теперь подключать рекомендуется через вспомогательный метод OpenIdConnectExtensions и AddOpenIdConnect, его мы и будем использовать в данной статье.
Устанавливаем расширение OpenIdConnect:
dotnet add package Microsoft.AspNetCore.Authentication.OpenIdConnect -v 3.0.0-preview7.19365.7Чтобы начать работу, нам нужно получить два ключевых значения от Google – Id Client и Client Secret, для этого предлагается выполнить следующие шаги:
- Перейти по ссылке и выбрать кнопку « CONFIGURE A PROJECT».
- В появившемся диалоге указать Web server.
- Далее в текстовом поле «Authorized redirect URI» указать конечную точку на стороне создаваемого приложения для авторизационного редиректа Google (т.к. сейчас сайт находится по адресу https://localhost:44301/, то мы тут указываем https://localhost:44301/signin-google)
- После этого мастер отобразит значение ClientID и Client Secret.
- Если планируется развертывать сайт в интернете или другом сервере, отличном от локального, необходимо обновить URL указанный на предыдущем шаге.
Для хранения полученных ключей локально мы будем использовать Secret Manager. Чтобы сохраненные значения были доступны из приложения, необходимо выполнить следующие команды.
dotnet user-secrets init
dotnet user-secrets set "Authentication:Google:ClientId" "Должен быть ClientID"
dotnet user-secrets set "Authentication:Google:ClientSecret" "Должен быть ClientSecret"
Далее вызываем ранее указанный метод для добавления входа через поставщиков Google.
services.AddAuthentication()
.AddOpenIdConnect("Google", "Google",
o =>
{
IConfigurationSection googleAuthNSection =
Configuration.GetSection("Authentication:Google");
o.ClientId = googleAuthNSection["ClientId"];
o.ClientSecret = googleAuthNSection["ClientSecret"];
o.Authority = "https://accounts.google.com";
o.ResponseType = OpenIdConnectResponseType.Code;
o.CallbackPath = "/signin-google";
})
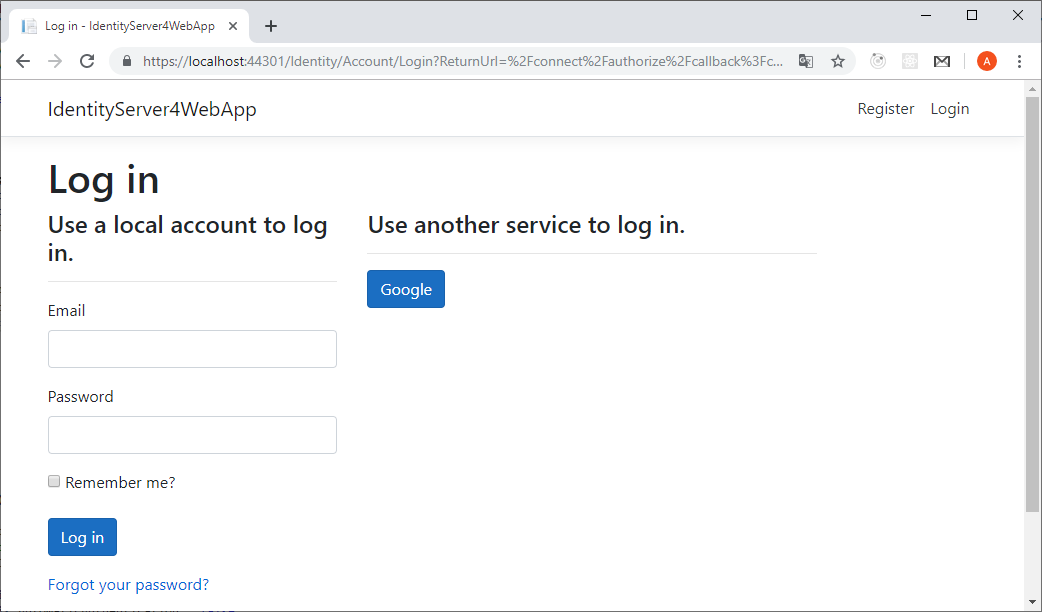
.AddIdentityServerJwt();Теперь можем запустить проект и зайти на страницу логина, там должен появиться
вариант со входом через сервисы Google. Можно его выбрать и проверить, что все нормально работает, после авторизации пользователя перекидывает снова на SPA и там он может запросить данные со страницы курсов валют.
Аналогичными способами, описанными выше, можно подключить других поставщиков OAuth аутентификации, причем добавить их в наше приложение одновременно. Полный список Nuget пакетов со вспомогательными методами можно найти по ссылке.
Доработка возможности входа под пользователями Windows
В некоторых случаях, когда SPA приложение предназначено для работы в интрасетях под управлением операционных систем Microsoft, может требоваться вход под учетными записями ActiveDirectory. В ситуации, если у нас выполняется серверный рендеринг Html в приложениях типа ASP.NET, WebForms и т.д., мы можем включить требование по Windows авторизации и работать в коде с типами WindowsIdentity, однако, с браузерными приложениями такой подход не сработает. Тут может нам помочь Identity Server, мы ему можем сказать чтобы он использовал пользователей Windows, как внешнего поставщика учетных записей и многие связанные с ними данные отображал в claims id_token и access_token. К счастью, разработчики IS4 уже нас снабдили примером, как можно добавить требуемую функциональность к разрабатываемым приложениям, этот пример можно
найти на github. Однако, его нужно будет адаптировать под наши нужды и связать с измененной инфраструктурой ASP.NET Core Identity 3.0.
В процессе внедрения нам необходимо доработать стандартный код шаблонов Identity, для этого затянем Razor шаблоны Login и ExternalLogin в наш проект (утилита CLI aspnet-codegenerator должна быть установлена глобально):
dotnet add package Microsoft.EntityFrameworkCore.SqlServer
dotnet add package Microsoft.VisualStudio.Web.CodeGeneration.Design

dotnet aspnet-codegenerator identity -dc IdentityServer4WebApp.Data.ApplicationDbContext --files "Account.Login;Account.ExternalLogin"
После выполнения вышеуказанных инструкций, в проекте появится новая Area с именем Identity и несколькими файлами внутри, в некоторые из них в дальнейшем мы и внесем изменения.
Чтобы наш новый пункт отобразился в меню внешних поставщиков, мы должны переписать фильтр возможных схем авторизации. Дело в том, что Identity берет внешних поставщиков аутентификации из IAuthenticationSchemeProvider. GetAllSchemesAsync() по предикату DisplayName != null, а вот у Windows поставщика свойство DisplayName = null. Для этого открываем модель LoginModel и в методе OnGetAsync заменяем следующий код:
ExternalLogins = (await _signInManager.GetExternalAuthenticationSchemesAsync()).ToList();
// <<Заменяем на>>
ExternalLogins =(await _schemeProvider.GetAllSchemesAsync()).Where(x => x.DisplayName != null ||(x.Name.Equals(IISDefaults.AuthenticationScheme,StringComparison.OrdinalIgnoreCase))).ToList();
Одновременно с этим внедряем через конструктор новое поле private readonly AuthenticationSchemeProvider _schemeProvider. Далее заходим во View страницы и изменяем логику отображения имен списка поставщиков Login.cshtml:
<button type="submit" class="btn btn-primary" name="provider" value="@provider.Name" title="Log in using your @provider.DisplayName account">@provider.DisplayName</button>
<<Заменяем на>>
<button type="submit" class="btn btn-primary" name="provider" value="@provider.Name" title="Log in using your @(provider.DisplayName ??provider.Name) account">@(provider.DisplayName ??provider.Name)</button>
И напоследок, включаем windows авторизацию при запуске в файле launchSettings.json
(при деплое на IIS, необходимо включить соответствующие настройки в файлах web.config).
"iisSettings": {
    "windowsAuthentication": true,
    "anonymousAuthentication": true,
    "iisExpress": {
      "applicationUrl": "http://localhost:15479",
      "sslPort": 44301
    }
  },
Теперь на странице авторизации можно увидеть кнопку «Windows» в списке внешних поставщиков.

По причине наличия хостинга SPA приложения в одном проекте с IdentityServer анонимную аутентификацию нельзя полностью отключить. Поэтому воспользуемся некоторым «костылем» и заменим атрибут [AllowAnonymous] в классе страницы LoginModel на атрибут [Authorize(AuthenticationSchemes = «Windows»)], тем самым мы сможем гарантировать, что страница сможет работать с корректным WindowsIdentity.
Теперь доработаем страницу ExternalLogin, чтобы подсистема Identity смогла корректно обрабатывать Windows пользователей. Для начала создадим новый метод ProcessWindowsLoginAsync.
Новый метод
private async Task<IActionResult> ProcessWindowsLoginAsync(string returnUrl)
        {
            var result = await HttpContext.AuthenticateAsync(IISDefaults.AuthenticationScheme);
            if (result?.Principal is WindowsPrincipal wp)
            {
                var redirectUrl = Url.Page("./ExternalLogin", pageHandler: "Callback", values: new { returnUrl });

                var props = _signInManager.ConfigureExternalAuthenticationProperties(IISDefaults.AuthenticationScheme, redirectUrl);
                props.Items["scheme"] = IISDefaults.AuthenticationScheme;

                var id = new ClaimsIdentity(IISDefaults.AuthenticationScheme);
                id.AddClaim(new Claim(JwtClaimTypes.Subject, wp.Identity.Name));
                id.AddClaim(new Claim(JwtClaimTypes.Name, wp.Identity.Name));
                id.AddClaim(new Claim(ClaimTypes.NameIdentifier, wp.Identity.Name));

                var wi = wp.Identity as WindowsIdentity;
                var groups = wi.Groups.Translate(typeof(NTAccount));
                var hasUsersGroup = groups.Any(i => i.Value.Contains(@"BUILTIN\Users", StringComparison.OrdinalIgnoreCase));

                id.AddClaim(new Claim("hasUsersGroup", hasUsersGroup.ToString()));

                await HttpContext.SignInAsync(IdentityConstants.ExternalScheme, new ClaimsPrincipal(id), props);

                return Redirect(props.RedirectUri);
            }

            return Challenge(IISDefaults.AuthenticationScheme);
        }
Новый метод подготавливает необходимую информацию из данных, полученных от операционной системы к объектам и свойствам вручную созданного принципала внешних провайдеров.
Далее переделаем метод ExternalLoginModel.OnPost на асинхронный и добавим в начала на проверку целевого провайдера:
if (IISDefaults.AuthenticationScheme == provider)
            {
                return await ProcessWindowsLoginAsync(returnUrl);
            }
В процессе подготовки Claim для Windows пользователя мы использовали один нестандартный Claim «hasUsersGroup», чтобы он был доступен в токенах ID и access, необходимо его обработать отдельно. Для этого мы воспользуемся механизмами ASP.NET Identity и сохранением его в UserClaims. Начнем с написания вспомогательного метода в классе ExternalLoginModel.
private async Task UpdateClaims(ExternalLoginInfo info, ApplicationUser user, params string[] claimTypes)
        {
            if (claimTypes == null)
            {
                return;
            }

            var claimTypesHash = new HashSet<string>(claimTypes);

            var claims = (await _userManager.GetClaimsAsync(user)).Where(c => claimTypesHash.Contains(c.Type)).ToList();

            await _userManager.RemoveClaimsAsync(user, claims);

            foreach (var claimType in claimTypes)
            {
                if (info.Principal.HasClaim(c => c.Type == claimType))
                {
                    claims = info.Principal.FindAll(claimType).ToList();
                    await _userManager.AddClaimsAsync(user, claims);
                }
            }
        }
Добавим вызов созданного кода в метод OnPostConfirmationAsync (который вызывается в момент
первого захода пользователя в систему).
result = await _userManager.AddLoginAsync(user, info);
                    if (result.Succeeded)
                    {
                        await _signInManager.SignInAsync(user, isPersistent: false);
                        _logger.LogInformation("User created an account using {Name} provider.", info.LoginProvider);

                        await UpdateClaims(info, user, "hasUsersGroup");//Сюда

                        return LocalRedirect(returnUrl);
                    }
И в метод OnGetCallbackAsync, вызывающийся при последующих входах в систему.
var result = await _signInManager.ExternalLoginSignInAsync(info.LoginProvider, info.ProviderKey, isPersistent: false, bypassTwoFactor : true);
            if (result.Succeeded)
            {
                var user = await _userManager.FindByLoginAsync(info.LoginProvider, info.ProviderKey);

                await UpdateClaims(info, user, "hasUsersGroup");//Сюда
Теперь предположим, что мы хотим ввести к нашему методу WebAPI требование наличия
клейма «hasUsersGroup». Для этого определим новую политику «ShouldHasUsersGroup»
services.AddAuthorization(options =>
            {
                options.AddPolicy("ShouldHasUsersGroup", policy => { policy.RequireClaim("hasUsersGroup");});
            });
Далее в контроллере ExchangeRateController создадим новую точку подключения и обозначим
требование только что созданного Policy.
        [Authorize(Policy = "ShouldHasUsersGroup")]
        [HttpGet("api/internalrates")]
        public IEnumerable<ExchangeRateItem> GetInternalRates()
        {
            return Get().Select(i=>{i.Value=Math.Round(i.Value-0.02,2);return i;});
        }
Создадим новый view для отображения скорректированных данных.
ng generate component InternalData -t=true -s=true --skipTests=trueЗаменим в нем template и зарегистрируем в таблице маршрутизации и в представлении верхнего меню.
//internal-data.component.ts:
template: `<app-exchange-rate apiUrl="internalrates"></app-exchange-rate> `,

//app-routing.module.ts:
{ path: ' internaldata', component: InternalDataComponent, canActivate: [AuthorizeGuard]  }

//app.component.html:
<li class="nav-item" [routerLinkActive]='["link-active"]'>
              <a class="nav-link text-dark" [routerLink]='["/internaldata"]'>Internal api data</a>
            </li>
После вышеперечисленных шагов мы можем запустить наше приложение и перейти по новой
ссылке, однако, приложение вернет нам ошибку. Дело в том, что accsee_token на данный момент
не содержит claim с именем hasUsersGroup, чтобы это исправить все нестандартные клеймы
необходимо прописывать в конфигурацию ApiResources сервера авторизации. К сожалению, в момент написания статьи, такою настройку нельзя сделать декларативно через файл appsettings.json, и поэтому придется программным путем вносить необходимое изменение в методе Startup. ConfigureServices.
services.AddIdentityServer()
                .AddApiAuthorization<ApplicationUser, ApplicationDbContext>(options =>
                {
                    var apiResource = options.ApiResources.First();
                    apiResource.UserClaims = new[] { "hasUsersGroup" };
                });
Теперь, если еще раз запустить приложение, заново зайти под windows пользователем и перейти по целевой ссылке, то новая информация должна без ошибок отобразиться в браузере.
Осталось добавить последний штрих к разрабатываемому примеру, а именно – реализовать Guard для проверки наличия claim с именем «hasUsersGroup» для маршрута роутера к «внутреннему обменному курсу». Для этого создадим Guard следующей командой:
ng generate guard AuthorizeWindowsGroupGuard --skipTests=trueИ впишем в него такой код:
Сам код
import { Injectable } from '@angular/core';
import { Observable } from 'rxjs';
import { map,tap} from 'rxjs/operators';
import { CanActivate, ActivatedRouteSnapshot, RouterStateSnapshot, Router, UrlTree } from '@angular/router';
import { AuthorizeService } from "./authorize.service";
import { ApplicationPaths, QueryParameterNames } from './api-authorization.constants';

@Injectable({
  providedIn: 'root'
})
export class AuthorizeWindowsGroupGuardGuard implements CanActivate{
  constructor(private authorize: AuthorizeService, private router: Router) {}

  canActivate(route: ActivatedRouteSnapshot, state: RouterStateSnapshot): Observable<boolean | UrlTree> |
                                                                          Promise<boolean | UrlTree> |
                                                                          boolean |
    UrlTree {
    return this.authorize.getUser().pipe(map((u: any) => !!u && !!u.hasUsersGroup)).pipe(tap((isAuthorized:boolean) => this.handleAuthorization(isAuthorized, state)));;
  }

  private handleAuthorization(isAuthenticated: boolean, state: RouterStateSnapshot) {
    if (!isAuthenticated) {
      window.location.href = "/Identity/Account/Login?" + QueryParameterNames.ReturnUrl + "=/";
    }
  }
}
И, конечно, заменим стандартный тип только что созданным в таблице маршрутизации.
{ path: 'internaldata', component: InternalDataComponent, canActivate: [AuthorizeWindowsGroupGuardGuard] Теперь осталось указать нашему IdentityServer, чтобы он возвращал помимо стандартных claims (sub, profile), еще и дополнительно созданный «hasUsersGroup». Это делается путем создания нового IdentityResource, опять-таки на момент написания статьи декларативный стиль указания IdentityResources не поддерживается и придется указывать явно через код в Startup.ConfigureServices.
  var identityResource = new IdentityResource
                    {
                        Name = "customprofile",
                        DisplayName = "Custom profile",
                        UserClaims = new[] { "hasUsersGroup" },
                    };                    identityResource.Properties.Add(ApplicationProfilesPropertyNames.Clients, "*");
                    options.IdentityResources.Add(identityResource);
Наконец-то мы достигли всех поставленных целей, теперь после запуска программы необходимо залогиниться под пользователем windows и пройти по «внутреннем курсам» в меню SPA – все должно отобразиться, а если выбрать другого пользователя, только что созданный Guard перебросит на страницу авторизации.
Заключение
Безусловно, разработчики ASP.NET Core 3.0 проделали огромную работу по упрощению внедрения некоторых стандартных сценариев интеграции с IdentityServer4, что способствует более легкой поддержке и простоте разрабатываемых решений. По причине использования в статье preview версии, некоторые вещи могут в дальнейшем быть изменены. В любом случае, постараюсь держать исходный код размещенный на github в актуальном состоянии.
Введение в ASP.NET Core Identity
Данное руководство устарело. Актуальное руководство: Руководство по ASP.NET Core 7
Последнее обновление: 14.12.2019
ASP.NET Identity представляет встроенную в ASP.NET систему аутентификации и авторизации. Данная система позволяет пользователям создавать учетные записи, аутентифицироваться, управлять учетными записями или использовать для входа на сайт
учетные записи внешних провайдеров, таких как Facebook, Google, Microsoft, Twitter и других.
Так, создадим новый проект ASP.NET Core по типу ASP.NET Core Web App (Model-View-Controller) с типом аутентификации Individual User Accounts.:
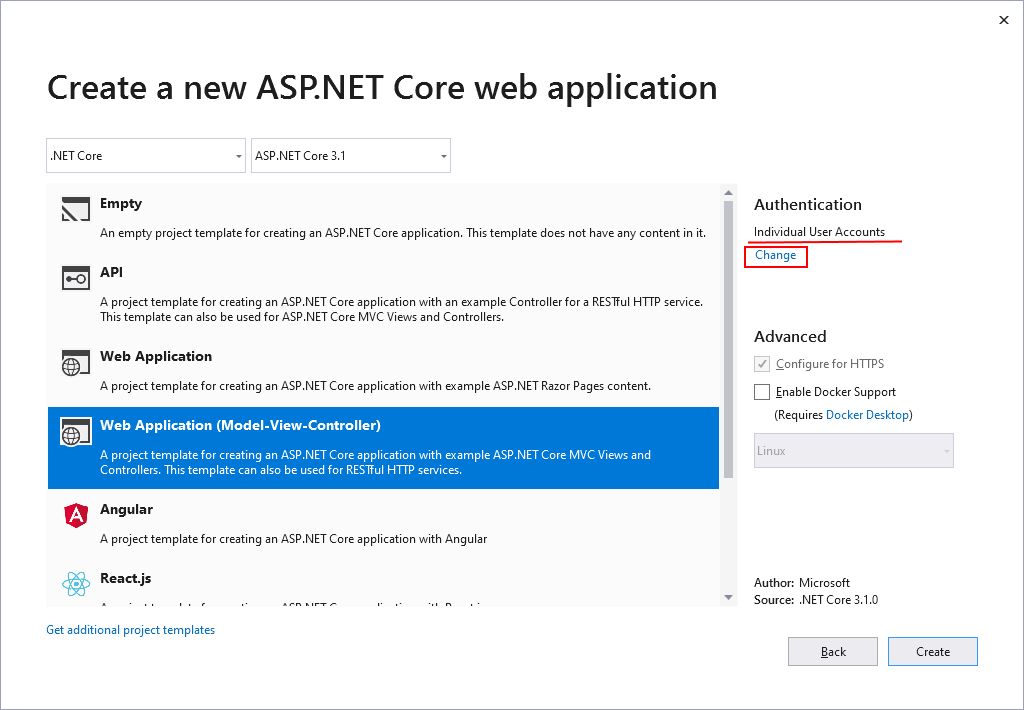
Для выбора типа аутентификации в окне выбора типа проекта в секции Authentication нажмем на ссылку Change. При нажати на эту ссылку откроется окно установки типа аутентифкации:
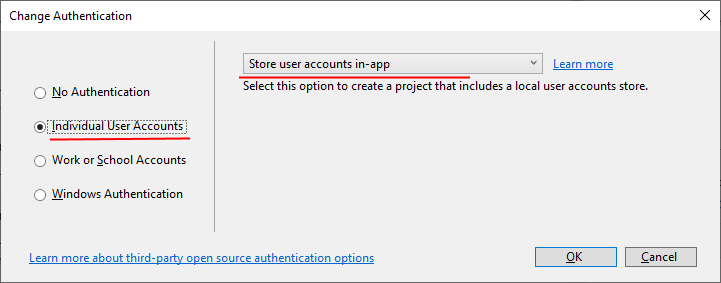
В этом окне соответственно надо указать Individual User Accounts и в центральной части
Store user accounts in-app — сохранение учетных данных пользователей в локальной базе данных.
В итоге будет следующий проект:
По большому счету сообственно от Identity здесь по умолчанию добавлено не так много функционала. В частности, добавлен
класс ApplicationDbContext — контекст данных для работы с Identity. В папке Areas->Identity->Pages
можно найти файл _ViewStart.cshtml. И есть некоторые изменения в файле Startup.
Однако в отличие от предыдущих версий ASP.NET Core в проект по умолчанию не добавляется никаких контроллеров, моделей, представлений,
которые обеспечили бы нам полноценную работу с Identity сразу после создания проекта. И весь этот функционал необходимо добвлять самим.
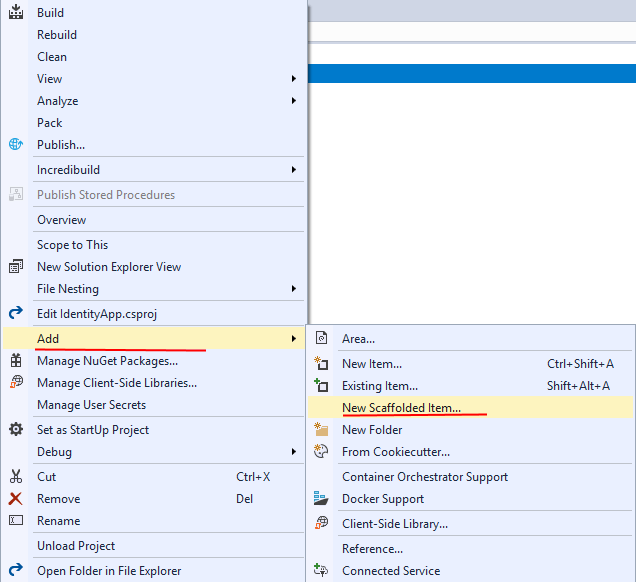
Но тем не менее Visual Studio позволяет добавить весь необходимый функционал. Для этого нажмем на название проекта правой кнопкой мыши и в
контекстном меню выберем пункт Add -> New Scaffolded Item
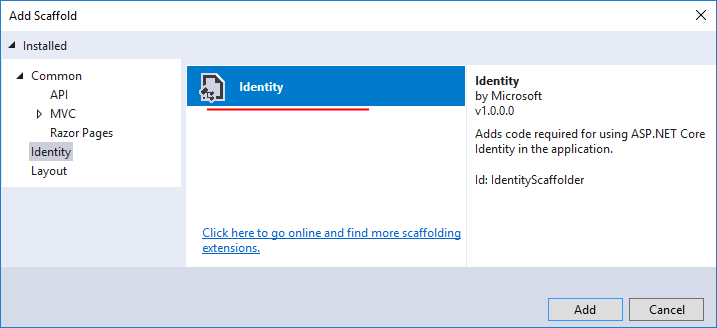
Далее в открывшемся окне выберем Idenity:
Затем отроется окно, где необходимо указать, какой именно функционал будет добавлен. Здесь очень много различных опций:
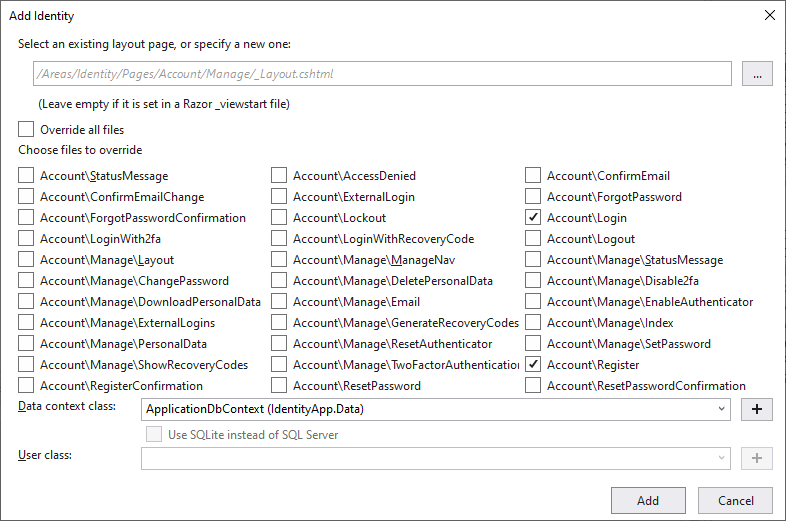
В частности, к примеру, я отметил пункты Account/Login и Account/Register, то есть функционал для регистрации и входа в приложение.
Кроме того, в поле Data context class надо указать класс контекста данных. По умолчанию при создании в проект уже добавляется
класс контекста, который можно указать в этом поле.
Опционально также можно указать путь внутри проекта к мастер-станице и класс пользователя. Но можно также оставить эти поля пустыми, как в моем случае.
После указания всех настроек нажмем на кноку Add, и в проект будет добавлен весь указанный функционал.
Поскольку я отметил пункты Account/Login и Account/Register, то в папке Areas/Idenity/Pages/Account
можно будет найти Razor-страницы Login и Register, выполняющих соответствующие функции.
Вне зависимости от того, какие функции мы отметили при добавлении Identity, весь функционал по работе с учетными записями помещается
в папку Areas/Identity. Начиная с версии ASP.NET Core 2.1 это страницы Razor Pages, которые выполняют какую-то определенную задачу — вход в систему, регистрацию и так далее.
Но чтобы все эти станицы могли выполнять свою роль, в классе Startup добавляется конфигурация Identity. В его методе ConfigureServices() в приложение добавляются сервисы Identity:
public void ConfigureServices(IServiceCollection services)
{
	//.......................

	// добавление ApplicationDbContext для взаимодействия с базой данных учетных записей
    services.AddDbContext<ApplicationDbContext>(options =>
        options.UseSqlServer(Configuration.GetConnectionString("DefaultConnection")));

    // добавление сервисов Idenity
    services.AddDefaultIdentity<IdentityUser>(options => options.SignIn.RequireConfirmedAccount = true)
                .AddEntityFrameworkStores<ApplicationDbContext>();

	//........................
}
Во-первых, здесь добавляются сервисы Entity Framework, которые используются для работы с базой данных, хранящей учетные записи. Все настройки подключения
заданы в файле appsettings.json в узле ConnectionStrings.
А в методе Configure() функционал аутентификации и авторизации на основе системы Identity становится доступным через вызовы методов UseAuthentication
и app.UseAuthorization(), как и в любой системе аутентификации и авторизации в ASP.NET Core:
public void Configure(IApplicationBuilder app, IHostingEnvironment env)
{
    //..........................

    app.UseAuthentication();
	app.UseAuthorization();

    //.................................
}
При начале работы с проектом нам надо учитывать, что он использует Entity Framework, поэтому прежде всего нам надо выполнить миграции, чтобы создать базу данных.
В проекте уже по умолчанию есть миграции, которые нам осталось применить. Для этого откроем окно Package Manager Console
и введем в командную строку следующую команду:
Update-Database
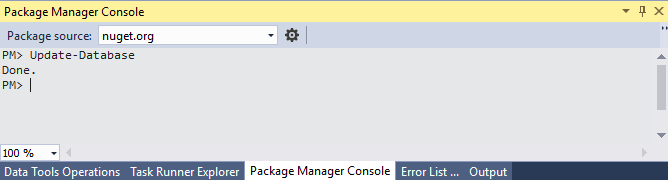
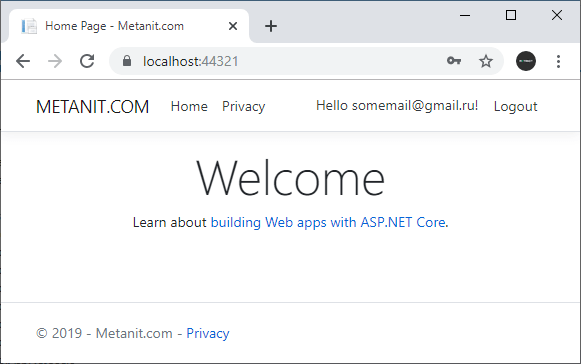
Запустим проект на выполнение. И в меню веб-страницы мы увидим дополнительные пункты для регистрации и входа на сайт:

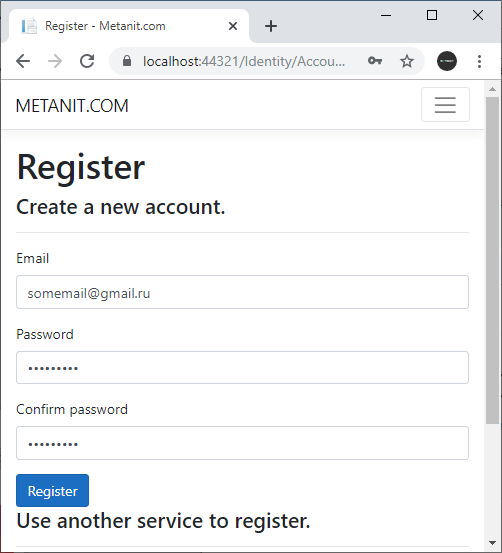
Нажмем на кнопку регистрации и перед нами откроется форма для регистрации нового пользователя. Введем в нее какие-нибудь данные:
И после регистрации в базу данных будет добавлен новый пользователь, а нас перенаправят на страницу подтверждения регистрации:
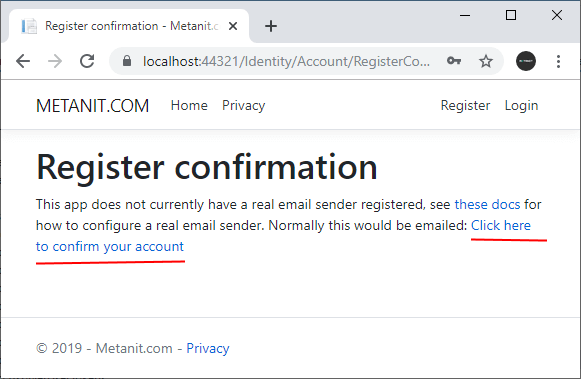
На этой странице нажмем на ссылку «Click here to confirm your account». По умолчанию при создании пользователя в базе данных в таблице пользователей в поле «EmailConfirmed» устанавливается значение False.
От этого зависит возможности пользователя. В частности, пока он не подтвердит свой email, он даже не сможет войти в приложение. По умолчанию,
в приложении нет конечно никаких возможностей по подтверждению через электонную почту. И нажатие на данную ссылку как раз симулирует
подтверждение аккаунта.
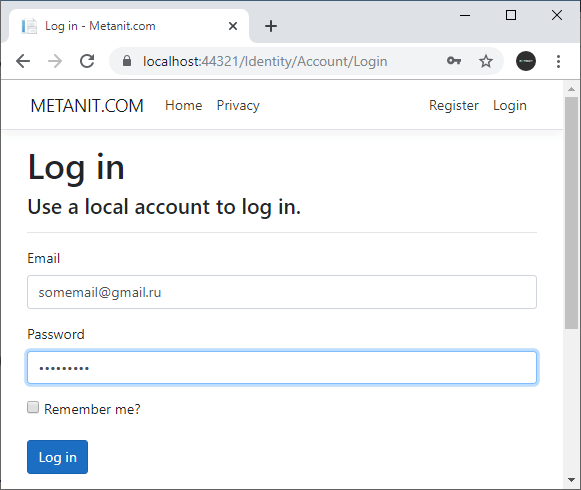
Далее с логином и паролем созданного пользователя мы сможем заходить в приложение.
При желании мы можем найти базу данных в окне SQL Server Object Explorer по имени, заданному в файле appsettings.json.
В частности, в таблице dbo.AspNetUsers, которая предназначена для хранения пользователей, мы как раз сможем обнаружить данные добавленного пользователя.
Содержание
- Варианты аутентификации пользователей в ASP.NET Core MVC
- Проект ASP.NET Core MVC с проверкой подлинности
- Где хранятся данные ASP.NET Core Identity
- Как переопределить шаблоны ASP.NET Core Identity в проекте MVC?
- Итого
Шаблон Identity — это наиболее простой способ подключения системы аутентификации пользователей в свой проект. При изучении «чистого» ASP.NET Core мы изучали вопросы аутентификации и авторизации пользователей практически с нуля, разрабатывая свою систему аутентификации. ASP.NET Core MVC, если можно так выразится, фреймворк более высокого уровня. То есть, опираясь на «чистый» ASP.NET Core, здесь для нас уже подготовлена основная инфраструктура проекта, сделана удобная система маршрутизации, есть готовые tag-хэлперы т.д. Что касается системы аутентификации пользователей, то шаблон Identity можно рассматривать как отдельную библиотеку Razor для управления аутентификацией пользователей.
При создании нового проекта ASP.NET Core MVC мы можем выбрать мы можем выбрать следующие варианты аутентификации пользователей:

- Индивидуальные учётные записи — система ASP.NET Core Identity, позволяющая аутентифицировать пользователей, как внутри приложения, так и с помощью внешних сервисов, например Google.
- Платформа удостоверений Microsoft — для аутентификации пользователей используется облачная служба удостоверений от Microsoft, включающая в себя средства аутентификации OAuth 2.0 и OpenID Connect, библиотеки для приложений и т.д.
- Windows — для аутентификации используются учётные записи Windows. Подойдет для приложений, работающих во внутренней сети компании.
Далее мы будем использовать индивидуальные учётные записи. И вначале посмотрим как выглядит проект в котором по умолчанию включена проверка подлинности.
Проект ASP.NET Core MVC с проверкой подлинности
Итак, создаем новый проект ASP.NET Core MVC и выбираем в настройках «Тип проверки подлинности» — «Индивидуальные учётные записи»

В принципе, этого будет уже достаточно, чтобы создать проект, поддерживающий аутентификацию пользователей с использованием ASP.NET Core Identity и, использующий шаблонные представления такие как страницы входа/регистрации пользователей, восстановление пароля и т.д. Но, перед этим нам необходимо создать базу данных для хранения учётных записей пользователей. По умолчанию для нас уже создана миграция с начальной настройкой БД:
Перейдем в консоль диспетчера пакетов Nuget и выполним команду Update-Database:

Теперь запустим проект и посмотрим на его внешний вид. Первым на себя обращает внимание частичное представление в котором содержатся ссылки на регистрацию и вход пользователя:

Станица регистрации нового пользователя

Можно задать какие-нибудь данные для регистрации, и после этого войти в систему. Сейчас шаблон Identity содержит различные заглушки, типа проверки email пользователя, поэтому подойдут любые регистрационные данные. После входа в систему логин пользователя появится справа вверху:

Нажав на логин можно просмотреть настройки аккаунта:

Можно поиграться с шаблоном Identity, посмотреть какие ещё шаблонные элементы присутствуют в проекте, как они работают и т.д. Мы же разберемся с тем, где хранятся все эти данные и представления, которые мы видим в приложении.
Где хранятся данные ASP.NET Core Identity
По умолчанию, ASP.NET Core Identity хранит данные пользователей в БД SQL Server настройки подключения к которой можно найти в файле appsettings.json:
"ConnectionStrings": {
  "DefaultConnection": "Server=(localdb)\\mssqllocaldb;Database=[имя_бд];Trusted_Connection=True;MultipleActiveResultSets=true"
}
Контекст базы данных в новом приложении выглядит следующим образом:
public class ApplicationDbContext : IdentityDbContext
{
    public ApplicationDbContext(DbContextOptions<ApplicationDbContext> options)
        : base(options)
    {
    }
}
Здесь IdentityDbContext — это базовый класс для контекста базы данных Entity Framework, используемого для Identity. Этот класс содержит основные свойства, необходимые для работы с ASp.NET Core Identity. Так, когда мы выполнили обновление базы данных, то на основании свойств IdentityDbContext были созданы следующие таблицы:
Чтобы увидеть эти таблицы, необходимо открыть обозреватель объектов SQL Server и выбрать базу данных, указанную в настройках соединения в файле appsettings.json. По умолчанию, при регистрации первого пользователя создаются следующие таблицы:
По умолчанию при регистрации первого пользователя создается следующий набор таблиц:
_EFMigrationsHistory— используется Entity Framework Core для миграций БДAspNetRoles— содержит определения ролейAspNetUserClaims— таблица, хранящая набор утверждений для пользователей (Claim). Эти утверждения помогают идентифицировать пользователя. Например, в качестве claim может выступать email пользователя, его Id, какие-то кастомные данные (например, отдел в котором работает пользователь) и т.д.AspNetUserLogins— таблица логинов пользователя, если используются внешние поставщики, например, GoogleAspNetUserRoles— таблица, устанавливающая для пользователей определенные ролиAspNetUsers— собственно таблица пользователей. Если мы ее откроем, то увидим данные зарегистрированного пользователяAspNetUserTokens— токены пользователя, полученные от внешних поставщиков
Следующий момент — откуда берутся все эти представления, которые мы видим, когда регистрируемся, управляем аккаунтом и т.д.? Если посмотреть на состав проекта, то можно увидеть, что область Identity, в которой, по идее должны находится представления для аутентификации, пустая:
Все эти представления мы получаем из библиотеки Microsoft.

При этом, при желании, мы можем переопределить любой элемент на своё усмотрение. В этом случае, в проекте будет использоваться наш шаблон того или иного представления.
Как переопределить шаблоны ASP.NET Core Identity в проекте MVC?
Чтобы переопределить стандартный шаблон Identity мы должны выбрать в контекстном меню проекта пункт Добавить — Создать шаблонный элемент:

В открывшемся окне выбрать пункт «Удостоверение» и нахать «Добавить»:

После этого Visual Studio сформирует необходимые шаблоны и предложит выбрать те элементы, которые мы хотим переопределить:

Здесь же мы можем указать свой контекст базы данных, который будет использоваться для хранения данных о пользователях и класс (модель) пользователя. Например, переопределим представление, отвечающее за регистрацию пользователя:

Так как у нас уже имеется в проекте контекст базы данных для пользователей, то пока нет смысла создавать новый, поэтому я указал в поле «Класс DbContext» его. После нажатия кнопки «Добавить» Visual Studio создаст необходимые шаблоны с которыми мы уже можем работать:
В файле _ValidationScriptsPartial.cshtml, в зависимости от названия среды окружения, подключаются и настраиваются скрипты для валидации модели пользователя:
<environment include="Development">
    <script src="~/Identity/lib/jquery-validation/dist/jquery.validate.js"></script>
    <script src="~/Identity/lib/jquery-validation-unobtrusive/jquery.validate.unobtrusive.js"></script>
</environment>
<environment exclude="Development">
    <script src="https://cdnjs.cloudflare.com/ajax/libs/jquery-validate/1.17.0/jquery.validate.min.js"
            asp-fallback-src="~/Identity/lib/jquery-validation/dist/jquery.validate.min.js"
            asp-fallback-test="window.jQuery && window.jQuery.validator"
            crossorigin="anonymous"
            integrity="sha384-rZfj/ogBloos6wzLGpPkkOr/gpkBNLZ6b6yLy4o+ok+t/SAKlL5mvXLr0OXNi1Hp">
    </script>
    <script src="https://cdnjs.cloudflare.com/ajax/libs/jquery-validation-unobtrusive/3.2.11/jquery.validate.unobtrusive.min.js"
            asp-fallback-src="~/Identity/lib/jquery-validation-unobtrusive/jquery.validate.unobtrusive.min.js"
            asp-fallback-test="window.jQuery && window.jQuery.validator && window.jQuery.validator.unobtrusive"
            crossorigin="anonymous"
            integrity="sha384-R3vNCHsZ+A2Lo3d5A6XNP7fdQkeswQWTIPfiYwSpEP3YV079R+93YzTeZRah7f/F">
    </script>
</environment>
а в файле _ViewImports.cshtml, как обычно, подключаются необходимые пространства имен и tag-хэлперы для работы с представлениями:
@using Microsoft.AspNetCore.Identity
@using AspMvcAuthEmpty2.Areas.Identity
@using AspMvcAuthEmpty2.Areas.Identity.Pages
@addTagHelper *, Microsoft.AspNetCore.Mvc.TagHelpers
Файл Register.cshtml, собственно, и содержит представление, используемое, когда мы жмем кнопку «Register», а также класс модели для регистрации пользователя:
Можем внести в файл представления какие-нибудь изменения, например, «руссифицировать» заголовок:

и увидеть изменения в проекте:

Итого

В этой части мы познакомились с шаблоном Identity для проекта ASP.NET Core MVC, узнали где хранятся по умолчанию данные пользователей и представления для Identity. На данный момент система аутентификации пользователей в ASP.NET Core MVC для нас выглядит как некий «черный ящик» в котором происходит какая-то «магия». В следующих частях мы разберемся с системой аутентификации более детально.
In this article, we will start learning about IdentityServer4 in ASP.NET Core and ways to integrate it to build secure solutions. We will be creating a Working Solution up from scratch taking you across various concepts and implementations of this awesome OpenID Framework. This is Part 1 of the IdentityServer4 in ASP.NET Core Series. You can find the complete source code of the implementation here.
What is IdentityServer4?
IdentityServer4 is a FREE, Open Source OpenID Connect and OAuth 2.0 framework for ASP.NET Core. In other words, it is an Authentication Provider for your Solutions. It is a framework that is built on top of OpenID Connect and OAuth 2.0 for ASP.NET Core. The main idea is to centralize the authentication provider. Let’s say you have 5 APIS / Microservices. You really don’t have to define the Authentication Logics in each and every Application. Rather, with IdentityServer4 you get to centralize the Access Control so that each and every APIs are secured by the Central IdentityServer.
Another cool feature is when a client (Web Application) wants to access a secured API, IdentityServer4 generates access tokens seamlessly to make this possible. We will talk about this further in the article.
Identity Server Concept
The idea is quite simple and straight forward. Users use the Clients (Let’s say ASP.NET Core MVC) to access the data. Users will be authenticated by IdentityServer to use the client. Once the users are authenticated to use the Client, the client sends in a request to the API Resource. Remember that both the Client and API Resources are protected by a single entity, the IdentityServer. Client requests for an access token with which it can access the API Responses. This way we are centralizing the Authentication Mechanism to a single server. Quite Interesting, yeah?
Here is a flow as described by IdentityServer documentation.

Responsibilities of IdentityServer4
Identity Server is an all in one Security Solution for your Projects. Here are it’s major features and responsibilities.
- protect your resources
- authenticate users using a local account store or via an external identity provider
- provide session management and single sign-on
- manage and authenticate clients
- issue identity and access tokens to clients
- validate tokens
IdentityServer4 Templates
There are a couple of ways to fire up IdentityServer4 Projects. The most commonly used one is Templates. This is more of a quick start solution where you install the IdentityServer4 templates using your CLI and select a template that automatically creates an implemented project for you.
PS — We will NOT be using this approach in our article, as it hides most of the complexity and you end up not knowing what actually happens behind the scene. We will implement the Server from scratch. Once you are familiar with it’s working, you are ready to use these templates.
Open your Powershell / Command Prompt on a working directory and run the following command which installs the IdentityServer4 templates globally for you.
dotnet new -i identityserver4.templates

You can see the installed IdentityServer4 templates. Now, to create a new project based off a template, run the following.
This creates an implementation of IdentityServer4 in ASP.NET Core using In-Memory User and Configurations. But there will be a lot of code we will not need / understand for our learning purpose. Thus, let’s create it all from scratch so that we understand each and every part of IdentityServer4 implementation.
What we will be Build?
- Create an IdentityServer4 Host Project with In-Memory Users & Stores (For Test Purposes)
- Build an ASP.NET Core API (This is the Resource to be protected by IdentityServer4)
- Build a Web Client that consumes the AP
Getting Started with IdentityServer4 in ASP.NET Core
Let’s start by creating a Blank Solution in Visual Studio 2019 Community.

Now, into the blank solution add in a new ASP.NET Core Empty Project. Ensure that you have selected the Empty Template. This is project which will host the actual IdentityServer.


Installing IdentityServer4 Package to ASP.NET Core Project
To the newly created project, let’s install the IdentityServer4 Package. Run the following command on the Package Manager Console.
Install-Package IdentityServer4
Adding In-Memory Configuration
We will be adding all the Configuration within our code for demonstration purposes. Note that this will not be the case when you integrate IdentityServer4 in production. This is an easier way to understand each and every component. To the root of the IdentityServer Project, add a new class and name it IdentityConfiguration.cs
public class IdentityConfiguration
{
}
Test Users
Let’s add a test user to our Configuration File. For demonstration purposes, we will define the user data in code. In another article, we will learn how to integrate Entity Framework and ASP.NET Core Identity to manage users over a database. But for now let’s keep things simple and understand the contexts.
Add in the following to the IdentityConfiguration class. This snippet returns a TestUser with some specific JWT Claims.
public static List<TestUser> TestUsers =>
new List<TestUser>
{
new TestUser
{
SubjectId = "1144",
Username = "mukesh",
Password = "mukesh",
Claims =
{
new Claim(JwtClaimTypes.Name, "Mukesh Murugan"),
new Claim(JwtClaimTypes.GivenName, "Mukesh"),
new Claim(JwtClaimTypes.FamilyName, "Murugan"),
new Claim(JwtClaimTypes.WebSite, "http://codewithmukesh.com"),
}
}
};
Identity Resources
Identity Resources are data like userId, email, a phone number that is something unique to a particular identity/user. In the below snippet we will add in the OpenId and Profile Resources. Copy this code on to your IdentityConfiguration class.
public static IEnumerable<IdentityResource> IdentityResources =>
new IdentityResource[]
{
new IdentityResources.OpenId(),
new IdentityResources.Profile(),
};
API Scopes
As mentioned earlier, our main intention is to secure an API (which we have not built yet.). So, this API can have scopes. Scopes in the context of, what the authorized user can do. For example, we can have 2 scopes for now — Read, Write. Let’s name our API as myAPI. Copy the below code to IdentityConfiguration.cs
public static IEnumerable<ApiScope> ApiScopes =>
new ApiScope[]
{
new ApiScope("myApi.read"),
new ApiScope("myApi.write"),
};
API Resources
Now, let’s define the API itself. We will give it a name myApi and mention the supported scopes as well, along with the secret. Ensure to hash this secret code. This hashed code will be saved internally within IdentityServer.
public static IEnumerable<ApiResource> ApiResources =>
new ApiResource[]
{
new ApiResource("myApi")
{
Scopes = new List<string>{ "myApi.read","myApi.write" },
ApiSecrets = new List<Secret>{ new Secret("supersecret".Sha256()) }
}
};
Clients
Finally, we have to define who will be granted access to our protected resource which in our case is myApi. Give an appropriate client name and Id. Here we are setting the GrantType as ClientCredentials.
public static IEnumerable<Client> Clients =>
new Client[]
{
new Client
{
ClientId = "cwm.client",
ClientName = "Client Credentials Client",
AllowedGrantTypes = GrantTypes.ClientCredentials,
ClientSecrets = { new Secret("secret".Sha256()) },
AllowedScopes = { "myApi.read" }
},
};
Registering IdentityServer4 in ASP.NET Core
Let’s register IdentityServer4 in ASP.NET Core DI Container. Open up Startup.cs and add the following to the ConfigureServices method. Here will be using all the Static Resources, Clients, and Users we had defined in our IdentityConfiguration class.
services.AddIdentityServer()
.AddInMemoryClients(IdentityConfiguration.Clients)
.AddInMemoryIdentityResources(IdentityConfiguration.IdentityResources)
.AddInMemoryApiResources(IdentityConfiguration.ApiResources)
.AddInMemoryApiScopes(IdentityConfiguration.ApiScopes)
.AddTestUsers(IdentityConfiguration.TestUsers)
.AddDeveloperSigningCredential();
In-Memory configuration stores
As mentioned earlier, we will be hard-coding the configurations of Identity Server to keep things simple to understand. There are a few in-memory stores to be configured. These configurations are hardcoded in the HOST Project and are loaded only once when the Application starts-up. This is mostly used for development and prototyping phases. Saying that this approach may also be valid for production scenarios if the configuration rarely changes with time,
Signing Credentials
Basically, IdentityServer needs certificates to verify it’s usage. But again, for development purposes and since we do not have any certificate with us, we use the AddDeveloperSigningCredential() extension. You can read more about it here.
Finally, in the Configure method, add the following line to add the IdentityServer Middleware.
app.UseRouting();
app.UseIdentityServer();
app.UseEndpoints(endpoints =>
{
endpoints.MapGet("/", async context =>
{
await context.Response.WriteAsync("Hello World!");
});
});
Running IdentityServer4
After configuring IdentityServer4, let’s build and run it.
Make sure to note the Post at which your IdentityServer runs. For me it is 44322. You can set your a custom port by modifying the launchsettings.json found under the Properties folder of your ASP.NET Core Project.
OpenID Discovery Document
The OpenID Connect Discovery Document is available for all OpenID Providers at /.well-known/openid-configuration. This document contains the definition of your IdentityServer such as the token endpoint (the endpoint that you POST to, to retrieve access tokens), supported scopes, the URL of the running IdentityServer, and so on.
To know more about this standardization, read here.
https://localhost:44322/.well-known/openid-configuration

Fetching Access Tokens with POSTMAN
From the Discovery Document you can know about the configured endpoint to retrieve the access token. Open up POSTMAN and send a POST request to the access token endpoint. Make sure that you have the below parameters in your Request body.

Once successfully authorized, IdentityServer4 returns you with an access token that is valid for 3600 seconds or 1 hour.
Note that we have passed in parameters like grant_type, scope of the usage, client id and secret.
Understanding the Token
Now that we have a valid access token. let’s head over to jwt.io to decode the Access Token. As another point, Any JWTokens can be decoded, thus make sure to never add any sensitive data like password, etc on to your tokens.

You can see that all the data we set are available in our Access Token. The concept, as we mentioned earlier is that we will be using this token to access the API that is protected by Identity Server.
Securing an ASP.NET Core WebAPI with IdentityServer4
In this section, we will learn how to secure an ASP.NET Core WebAPI with IdentityServer4 and access a protected endpoint using an access token.
Add a new ASP.NET Core WebAPI Project to the Solution. Please note that ideally, we would have to keep the Identity Server on a separate Solution. But for demonstration purposes, we will club it all into a single solution.
Also, ensure that while you run the solution, the first project to run is IdentityServer4. To enable multi startup projects, right click the solution and hit on properties.

Note the order at which the Projects Start.
Let’s run the Solution. On the WebAPI’s Browser, navigate to /weatherforecast. This is the default Controller that ships in with ASP.NET Core. We will use this Endpoint and secure it with IdentityServer4.

Now, go back to the WebAPI Project and install the following package via Package Manager Console.
Install-Package IdentityServer4.AccessTokenValidation
Let’s start adding the Authentication Middleware to the Pipeline. Open up Startup.cs of the WebAPI Project and add the following to the ConfigureService method.
services.AddAuthentication("Bearer")
.AddIdentityServerAuthentication("Bearer", options =>
{
options.ApiName = "myApi";
options.Authority = "https://localhost:44322";
});
Line 4 determines the name of the WebAPI Resource. Remember we had already defined this name in the Server Project Configuration?
Line 5 Suggests the URL on which the IdentityServer is up and running. It’s important to RUN IdentityServer First and then the WebAPI project followed by a client if any exists. (We will be adding a client Web project later in this article)
Finally in the Config method, add the following. Make sure that the order at which the Middleware are defined is same,
app.UseAuthentication();
app.UseAuthorization();
Now go to the default WeatherController and add an Authorize Attribute to the Controller. In this way, we have secured our WebAPI Endpoint.
[ApiController]
[Route("[controller]")]
[Authorize]
public class WeatherForecastController : ControllerBase
{
}
Fetching the Token
Open POSTMAN and send a GET Request to the weatherforecast endpoint. Ideally you should be getting a 401 Unauthorized Error.

Send a GET Request to the IdentityServer token endpoint with valid parameters. This gets you an Access Token. Remember we did this earlier? Now, we will use this token to access the Secured API Controller.
Accessing the API with Access Token
Again, Send a GET Request to the weatherforecast endpoint but this time, with an additional Authorization Header. In POSTMAN switch to the Authorization Tab and Select the Bearer Token from DropDown and paste in the Access Token that you received from IdentityServer4. Now click on Send. 200 OK

So, our API is secured using IdentityServer4. Now, we will stop using POSTMAN as our client. Instead let’s introduce a Web Project as the Client that will try to access our secured API Controller. This is going to be the most common use case of IdentityServer4. Let’s see how to achieve this.
Building a Web Client to access the Secured API
Firstly, create a new project in our solution and name it WebClient. We will be using a MVC Project with NO Authentication.

First off, install the following package.
Install-Package IdentityModel
Next, we need a service that can talk to the IdentityServer4 and request for an access token with which the MVC Project can access the API data. Get it?
In the WebClient Project. add a new folder and name it Services. here let’s add the TokenService Interface and implementation. Note that the input parameter will be a string of scope content.
public interface ITokenService
{
Task<TokenResponse> GetToken(string scope);
}
public class TokenService : ITokenService
{
private DiscoveryDocumentResponse _discDocument {get;set;}
public TokenService()
{
using(var client = new HttpClient())
{
_discDocument = client.GetDiscoveryDocumentAsync("https://localhost:44322/.well-known/openid-configuration").Result;
}
}
public async Task<TokenResponse> GetToken(string scope)
{
using (var client = new HttpClient())
{
var tokenResponse = await client.RequestClientCredentialsTokenAsync(new ClientCredentialsTokenRequest
{
Address = _discDocument.TokenEndpoint,
ClientId = "cwm.client",
Scope = scope,
ClientSecret = "secret"
});
if(tokenResponse.IsError)
{
throw new Exception("Token Error");
}
return tokenResponse;
}
}
}
Line 3, Here is the DiscoveryDocumentReponse class that comes with the package that we installed earlier.
Line 4 to 10, in the constructor we use the HTTPClient to get the Document data from the IdentityServer OpenID Configuration endpoint. Note that we are hardcoding the URLs here. Ideally, we will have to define them in appsettings.json and use IOptions pattern to retrieve them at runtime.
Remember we added some Client to our IdentityServer4 Configuration? We will be using that data here. Line 17 to 20, we define the address, clientId, Scope and Client Secret.
Now, we are expecting Weather data from our API. Thus, let’s create a new Model class to accommodate the data. In the WebClient Project. add a new class under the Models folder and name it WeatherModel. Add in the following snippet.
public class WeatherModel
{
public DateTime Date { get; set; }
public int TemperatureC { get; set; }
public int TemperatureF => 32 + (int)(TemperatureC / 0.5556);
public string Summary { get; set; }
}
Next, in the HomeController add in a new Method that basically will talk to the Secured API and get data from it. At the high level, what this controller action will do is the following —
- Use the Token Service , talk to the IdentityServer4 and retreive a valid access token.
- Set the Access Token to the HttpClient’s JWT Header.
- Use the Http Client and talk to the Secured API to get the weather data. Since we are adding in the JWT Token, we should not have any problem in authenticating the WebClient to use the WebAPI, right?
Add in the following action method.
public async Task<IActionResult> Weather()
{
var data = new List<WeatherModel>();
var token = await _tokenService.GetToken("myApi.read");
using (var client = new HttpClient())
{
client.SetBearerToken(token.AccessToken);
var result = await client.GetAsync("https://localhost:44367/weatherforecast");
if(result.IsSuccessStatusCode)
{
var model = await result.Content.ReadAsStringAsync();
data = JsonConvert.DeserializeObject<List<WeatherModel>>(model);
return View(data);
}
else
{
throw new Exception("Failed to get Data from API");
}
}
}
Next, add a new view for the Weather Method. It will be a simple View where there will be a Table that displays a list of WeatherModel data. This data will be passed to the View by the Controller.
@model List<WeatherModel>
@{
ViewData["Title"] = "Weather";
}
<h1>Weather</h1>
<table class="table table-striped">
@foreach (var weather in Model)
{
<tr>
<td>@weather.Date</td>
<td>@weather.Summary</td>
<td>@weather.TemperatureC</td>
<td>@weather.TemperatureF</td>
</tr>
}
</table>
Finally, in the Startup.cs of the WebClient Project add in the following at the ConfigureServices method to register the TokenService within the ASP.NET Core DI Container.
services.AddSingleton<ITokenService, TokenService>();
That’s about everything you have to do to Authorize your client. Now, build and run all the 3 Projects in the Following Order -> IdentityServer, WebAPI, and finally the WebClient. At the WebClient’s browser, navigate to ./home/weather. If everything goes well, you will be seeing the actual data from our Secured WebAPI.

Ok, so how do you verify that your client is actually authorized? Simple, open up a new Tab on Postman, and send a GET request to the WebAPI Endpoint. Now if your client is actually authorized, it means that POSTMAN should shout at you with a 401 Error. Thus, it’s quite evident that IdentityServer is securing our API Endpoint and authorizing our WebClient Application to consume the WebAPI. Quite Awesome, yeah?
We will wrap the article for now. In the next installment of this series, we will cover more advanced topics and implementation of IdentitySevrer4. We will be going through concepts like Adding IdentityServer4 UI to the Server Project, Securing the Client Project with IdentityServer4, Removing In-memory Stores, and Replacing them with Actual Database, Adding ASP.NET Core Identity to manage Users more efficiently, and much more. I will update the link to the next article here as soon as it becomes available. Stay Tuned.
Summary
In this detailed article, we got started with IdentityServer4 in ASP.NET Core and covered basic concepts and terminologies like Resources, Test Users, Clients. Additionally, we also built a working solution with 3 Project (Authentication Server, WebAPI, WebClient ) where the WebAPI was protected by the IdentityServer and issued tokens to a valid WebClient. You can find the entire source code of the implementation here.
Leave behind your valuable queries, suggestions in the comment section below. Also, if you think that you learned something new from this article, do not forget to share this within your developer community. Happy Coding!