
Copilot is your AI companion
Always by your side, ready to support you whenever and wherever you need it.

The Windows Identity Foundation helps simplify user access for developers by externalizing user access from applications via claims and reducing development effort with pre-built security logic and integrated .NET tools.
Important! Selecting a language below will dynamically change the complete page content to that language.
-
File Name:
Windows6.1-KB974405-x86.msu
Windows6.1-KB974405-x64.msu
Windows6.0-KB974405-x86.msu
Windows6.0-KB974405-x64.msu
File Size:
1.4 MB
1.5 MB
1.4 MB
1.5 MB
Windows Identity Foundation helps .NET developers build claims-aware applications that externalize user authentication from the application, improving developer productivity, enhancing application security, and enabling interoperability. Developers can enjoy greater productivity, using a single simplified identity model based on claims. They can create more secure applications with a single user access model, reducing custom implementations and enabling end users to securely access applications via on-premises software as well as cloud services. Finally, they can enjoy greater flexibility in application development through built-in interoperability that allows users, applications, systems and other resources to communicate via claims.
-
Supported Operating Systems
Windows Vista Service Pack 2, Windows Server 2008 Service Pack 2, Windows Server 2008 R2, Windows 7
- Microsoft® Internet Information Services (IIS) 7.0
- Microsoft® .NET Framework 3.5
See here for Windows 2003 support see here
-
This download offers you the benefits of registering with Microsoft. Click the Continue button near the top of this page to register. After you have gone through the registration process, you will be returned to this page to begin the download.
Download the x86 or x64 runtime package appropriate for your system as follows:
- For Windows Vista and Windows Server 2008, select the msu file with name starting Windows6.0.
- For Windows 7 and Windows Server 2008 R2, select the msu file with name starting Windows6.1.
We need to install the following SDK for proceeding with
further articles.
- Windows
Identity Foundation SDK 4.0
The Windows
Identity Foundation is a framework for building identity-aware
applications. The framework abstracts the WS-Trust and WS-Federation
protocols and presents to developers APIs for building security token services
and claims-aware applications. Applications can use the framework to process
tokens issued from security token services and make identity-based decisions at
the web application or web service.
The SDK integrate with Visual Studio and provides templates
to ease the tasks of developing Windows Identity based applications. We will be using this in the next article
related to Access Control AppFabric.
Download
You can download the SDK using the following Url.
http://www.microsoft.com/download/en/details.aspx?id=4451

Download the appropriate version. For Visual Studio 2010, the 4.0 version is
required.
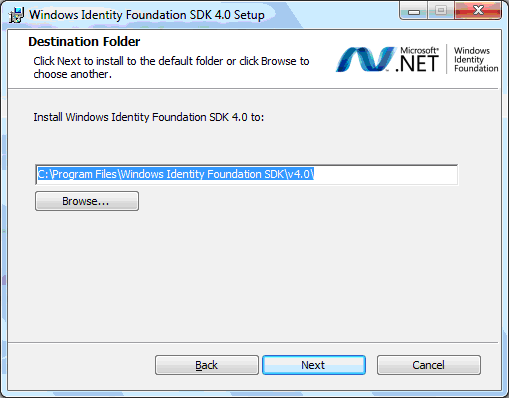
Installation
In the installation wizard please note the installation
folder as it will be required in for future use.
Post Installation
Verification
We can verify whether the
required Visual Studio extensions are installed. Open the Visual Studio and create an azure
project with a web role in it.
Right click on the web role and
you should be getting the following menu item named Add STS Reference. This is
the Secured Token Service menu option which will perform necessary assembly
reference and configuration change on execution.
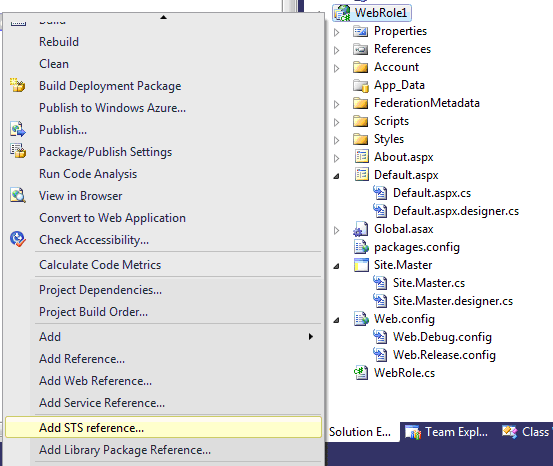
If you are able to see the
following window, then the installation was successful.

Home
> dynamics ax 2012 > how to install windows identity in windows 10
when you wants to install ax 2012 client on windows 10, you have to install all prerequisite first

you’ll see on the picture above, we have windows identity foundations missing
how to install windows identity foundation?
in earlier windows version, you can install windows identity foundation using “Windows6.1-KB974405-x64 (Windows Identity Foundation).msu” (type KB974405 in google to download the msu file)
but this wont works in windows 10,
since windows server 2012, we cannot install windows identity foundation using the msu file, you must add the feature in server management.
same case in windows 10, you must install windows identity foundation using windows features


after you install the windows foundation, the prerequisite can continued to next step

we hope this can solved the problem
-RF-
Provide feedback
Saved searches
Use saved searches to filter your results more quickly
Sign up
Appearance settings
In the previous step “Enable Internet Information Services” I mentioned that we should install the Windows Identity Foundation 3.5 feature, why?
If we plan to use/configure SharePoint Services adapter or SharePoint Online when used with SharePoint Services Client-Side Object Model (CSOM), then Windows Identity Foundation (WIF) feature is required.
WIF is required if you are planning to use:
- SharePoint Services Adapter with CSOM
- SharePoint Online with CSOM
WIF is not required if you are planning to use:
- SharePoint Services Adapter Web Service (deprecated)
- No plan to use SharePoint
Windows Identity Foundation is included with the operating system (Windows 8 and Windows Server 2012) as a Feature in Turn Windows features on or off. (if you plan to use Windows 7 and Windows Server 2008 R2 the download is available here Windows Identity Foundation):
If you didn’t previously install WIF then you should follow these steps:
- Open “Server Manager”.
- Under the “Manage” menu, select “Add Roles and Features” (or press “Add roles and features” under the Dashboard panel)
- On the Before You Begin screen, click “Next”
- On the Installation Type screen, select “Role-based or Feature-based Installation” and click “Next”
- On the Server Selection screen, select the appropriate server, leave the default options and click “Next”
- On the Server Roles screen, click “Next”
- On the Features screen, select “Windows Identity Foundation 3.5” and click “Next”

- On the Confirmation screen, select “Restart the destination server automatically if required” and click “Install”

- When the installation completes, the wizard reflects the installation status on the Results screen
- Click “Close” to exit the wizard.
Related links
- BizTalk 2013 Installation and Configuration – Important considerations before set up the server (Part 1)
- BizTalk 2013 Installation and Configuration – Enable Internet Information Services (Part 2)
- BizTalk 2013 Installation and Configuration – Install and configure SMTP Server Feature (Part 4)
- BizTalk 2013 Installation and Configuration – Install Microsoft Office Excel 2013 (Part 5)
- BizTalk 2013 Installation and Configuration – Install Visual Studio 2012 (Part 6)
- BizTalk 2013 Installation and Configuration – Install SQL Server 2012 (Part 7)
- BizTalk 2013 Installation and Configuration – Configure SQL Server Database Mail feature (Part

- BizTalk 2013 Installation and Configuration – Install and Configure BizTalk Server 2013 (Part 9)
- BizTalk 2013 Installation and Configuration – Configure SQL Server Network Configuration protocols (Part 10)
- BizTalk 2013 Installation and Configuration – Validate Mail account used by BizTalk to send BAM Alerts (Part 11)
- BizTalk 2013 Installation and Configuration – Installing BizTalk Adapter Pack (Part 12)
- BizTalk 2013 Installation and Configuration – Install and Configure Microsoft UDDI Services (Part 13)
- BizTalk 2013 Installation and Configuration – Install and Configure the Microsoft BizTalk ESB Toolkit (Part 14)
- BizTalk 2013 Installation and Configuration – Configure BizTalk Server SQL Jobs (Part 15)
- BizTalk 2013 Installation and Configuration – Configure BizTalk Server Windows Services (Part 16)

Author: Sandro Pereira
Sandro Pereira lives in Portugal and works as a consultant at DevScope. In the past years, he has been working on implementing Integration scenarios both on-premises and cloud for various clients, each with different scenarios from a technical point of view, size, and criticality, using Microsoft Azure, Microsoft BizTalk Server and different technologies like AS2, EDI, RosettaNet, SAP, TIBCO etc.
He is a regular blogger, international speaker, and technical reviewer of several BizTalk books all focused on Integration. He is also the author of the book “BizTalk Mapping Patterns & Best Practices”. He has been awarded MVP since 2011 for his contributions to the integration community.
View all posts by Sandro Pereira