

If you are like me, you have used VMware Workstation for years now and have seen it go through a tremendous amount of changes and added features and functionality. There have been a few limitations along the way that you had to consider when deciding to install VMware workstation. One of those limitations has been you could not install VMware Workstation when the Hyper-V mode was enabled on a workstation. You may wonder, why would I ever want to have both of those roles to run virtual machines on a workstation? The answer is you probably wouldn’t for VMs. However, there have been some really great advancements in the security side of things for Microsoft Windows operating systems that make use of Hyper-V technology to effectively create a barrier between malware and protected information. Exciting news today you can run VMware Workstation 15.5 with Hyper-V enabled.
What is the use case to run VMware Workstation with Hyper-V?
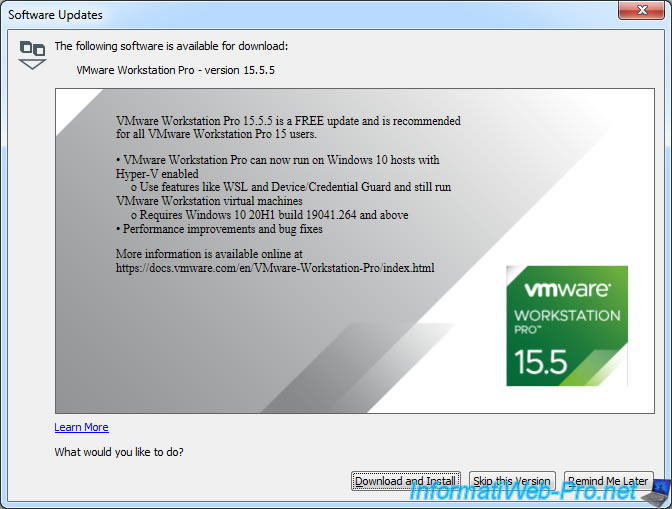
As mentioned in the outset, this isn’t so much a matter of wanting to run dedicated virtual machines with each technology. With the latest versions of Windows, Microsoft has introduced Virtualization Based Security (VBS). With VBS, Windows adds a hypervisor in between the underlying hardware and the Windows operating system.
It does this with Hyper-V. With the traditional Virtual Machine Monitor (VMM), it relies on direct access to the underlying hardware of the physical workstation. Since VMware Workstation is placed inside of Hyper-V once it is enabled, VMM no longer has access to this underlying hardware and fails to run.
How is it now possible to run VMware Workstation 15.5.5 with Hyper-V?
Working in tandem with Microsoft, VMware has rearchitected VMware Workstation to run in what is called User Level Monitor. This makes use of Microsoft’s WHP APIs. This changes the level at which the VMM runs at. Instead of running using the privileged mode level that it required before which was not compatible with Hyper-V, it is running at the user level.
With this new advancement in technology architecture with VMware Workstation and VMware Player, it can now coexist with Hyper-V on a workstation. Now users will no longer have to choose between running Hyper-V assisted security technologies on their workstation and making use of VMware Workstation for running virtual machines.
What happens if you do not have Hyper-V enabled? VMware Workstation will detect this is the case and will run as it normally ran using the privileged mode VMM.
VMware Workstation 15.5.5 Requirements
What are the requirements of taking advantage of the new architecture with VMware Workstation 15.5?
- Windows 10 20H1 build 19041.264
- VMware Workstation 15.5.5
Download Links
Where can you download the new Workstation 15.5.5 release?
- Workstation 15.5.5 Pro: Windows
- Workstation 15.5.5 Pro: Linux
Installing VMware Workstation 15.5.5 with Windows Hypervisor Platform (WHP)
Let’s take a look at a quick walk through of a workstation that I have Hyper-V installed on and see how the installation goes with VMware Workstation 15.5.5.
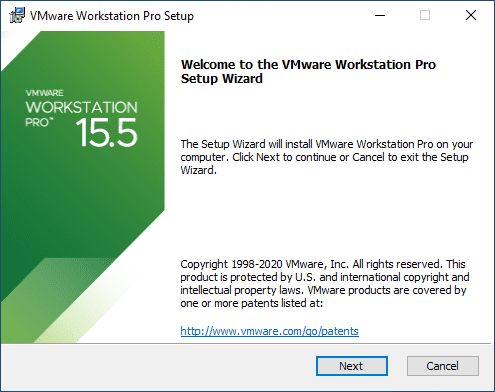
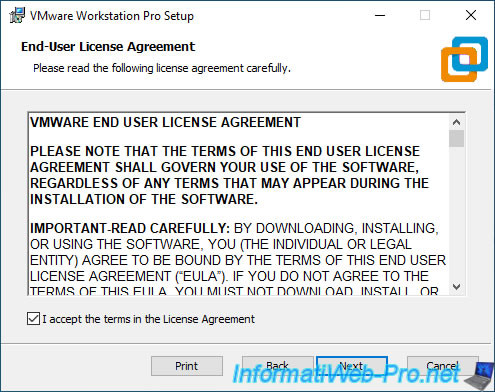
Normal stuff here, accept the EULA.

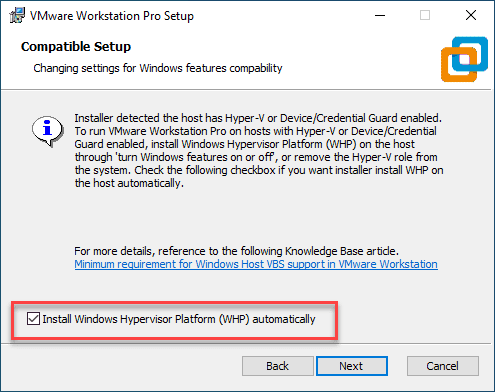
Here is the cool new stuff. The setup installer will notice that you have Hyper-V installed. It will ask you to either manually uninstall Hyper-V and install or the magic dust here what is called Windows Hypervisor Platform (WHP).
The neat thing with the installer is that it will do this automatically if you select the box.
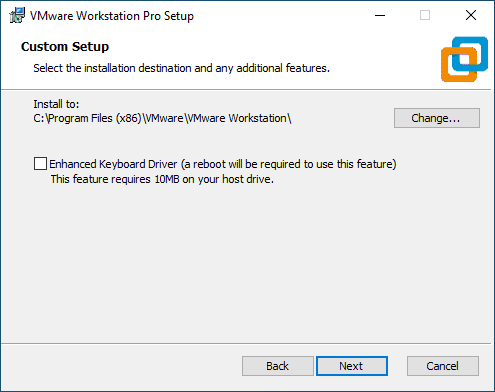
Continue on with the setup.

Wrapping Up
As was detailed in the official VMware blog post, this is quite a milestone for both VMware and Microsoft. One extremely positive thing from my perspective from this is the ability for these titans to collaborate and create something jointly that benefits everyone.
The new Windows Hypervisor Platform (WHP) is a great new component that allows this all to work and work together in a way that allows both solutions to work with the other.
Brandon Lee is the Senior Writer, Engineer and owner at Virtualizationhowto.com, and a 7-time VMware vExpert, with over two decades of experience in Information Technology. Having worked for numerous Fortune 500 companies as well as in various industries, He has extensive experience in various IT segments and is a strong advocate for open source technologies. Brandon holds many industry certifications, loves the outdoors and spending time with family. Also, he goes through the effort of testing and troubleshooting issues, so you don’t have to.
Since VMware Workstation 15.5.5, you can now use VMware Workstation and Hyper-V simultaneously if you have Windows 10 v2004 (20H1) or later.
What was not possible before : Hyper-V — Coexistence with VirtualBox or VMware Workstation
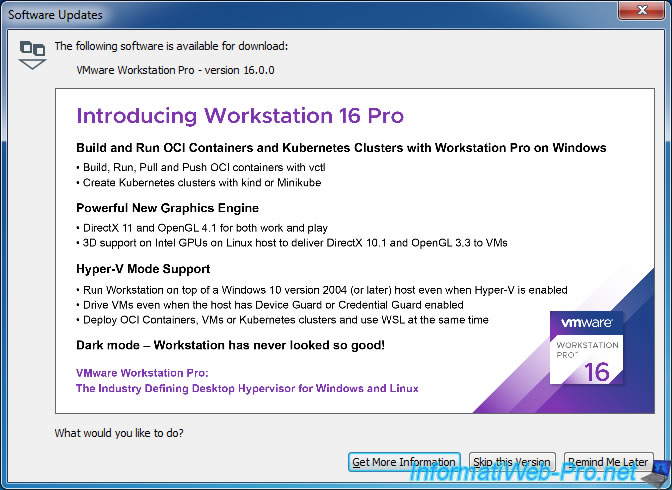
With VMware Workstation 16, this support has been updated to also support the deployment of OCI (Open Container Initiative) containers, virtual machines and Kubernetes clusters at the same time as using WSL (Windows Subsystem for Linux).
For this tutorial, we therefore installed Windows 10 Pro in version 2004 (20H1) and we activated the «Hyper-V» feature.
Note : Hyper-V is not available in the Family edition of Windows 10.
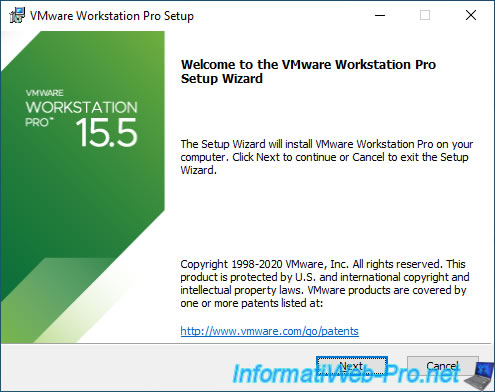
Start the installation of VMware Workstation 15.5.5 (if it’s not already installed).
Accept the license agreement.
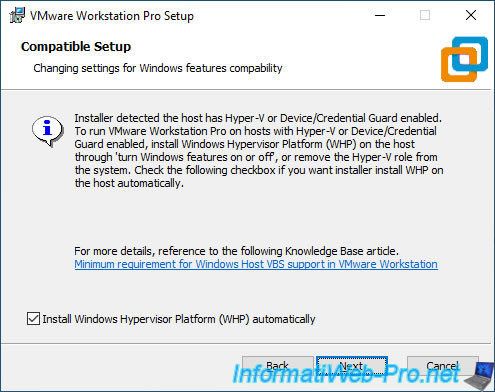
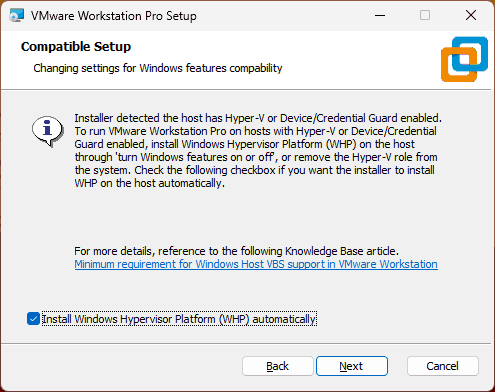
If Hyper-V is installed, but the «Windows Hypervisor Platform» (WHP) Windows feature is not installed, the «Compatible Setup» step will be displayed.
As indicated by this wizard, the installer has detected that Hyper-V is enabled. However, for VMware Workstation to function properly, you will need to install/activate the feature mentioned above.
Leave the «Install Windows Hypervisor Platform (WHP) automatically» box checked and click Next.
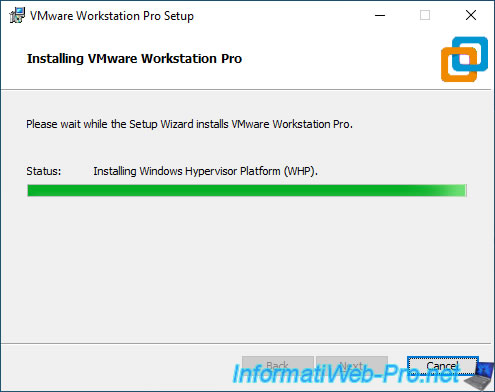
At the end of the installation of VMware Workstation Pro, you will see the «Installing Windows Hypervisor Platform (WHP)» message appears.
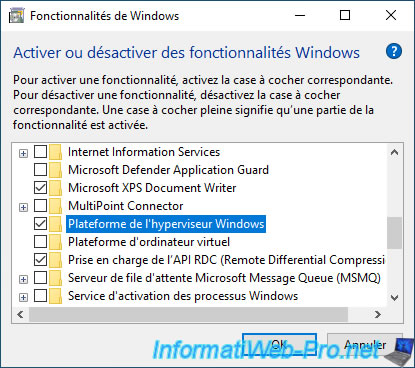
Once the installation is complete, you will see that the «Windows Hypervisor Platform» Windows feature is now activated.
If VMware Workstation was already installed before you enabled Hyper-V, be sure to enable this «Windows Hypervisor Platform» feature manually.
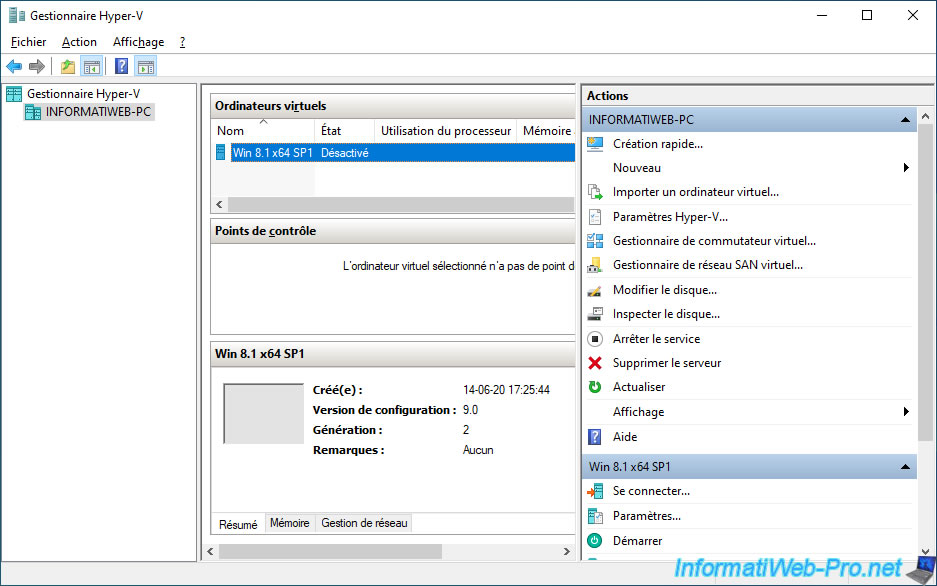
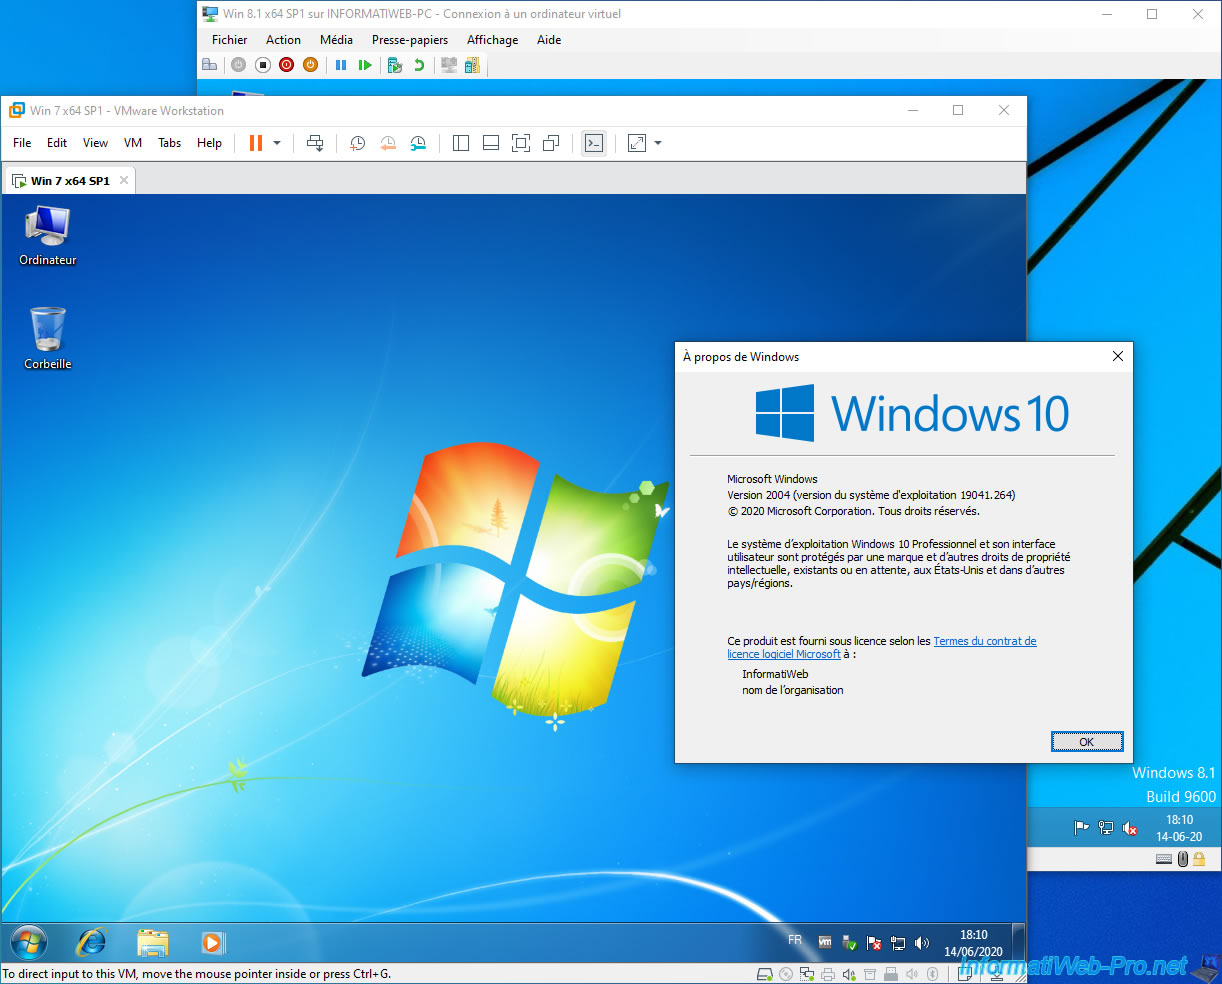
We created and installed a virtual machine via the Hyper-V manager of Windows 10 v2004 (20H1).
As shown in the image below, we are using version 15.5.5 of VMware Workstation Pro.
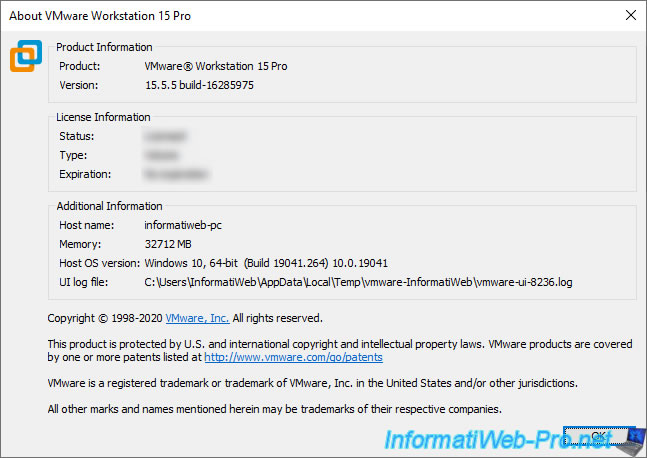
And as expected, you can use VMware and Hyper-V virtual machines simultaneously without any problem.
Update 2020 : since VMware Workstation 16, you will see this message appear when launching your virtual machines :
You are running this virtual machine with side channel mitigations enabled. Side channel mitigations provide enhanced security but also lower performance.

To disable mitigations, change the side channel mitigations setting in the advanced panel of the virtual machine settings. Refer to VMware KB article 79832 at https://kb.vmware.com/s/article/79832 for more details.
Check the «Do not show this hint again» box and click OK.
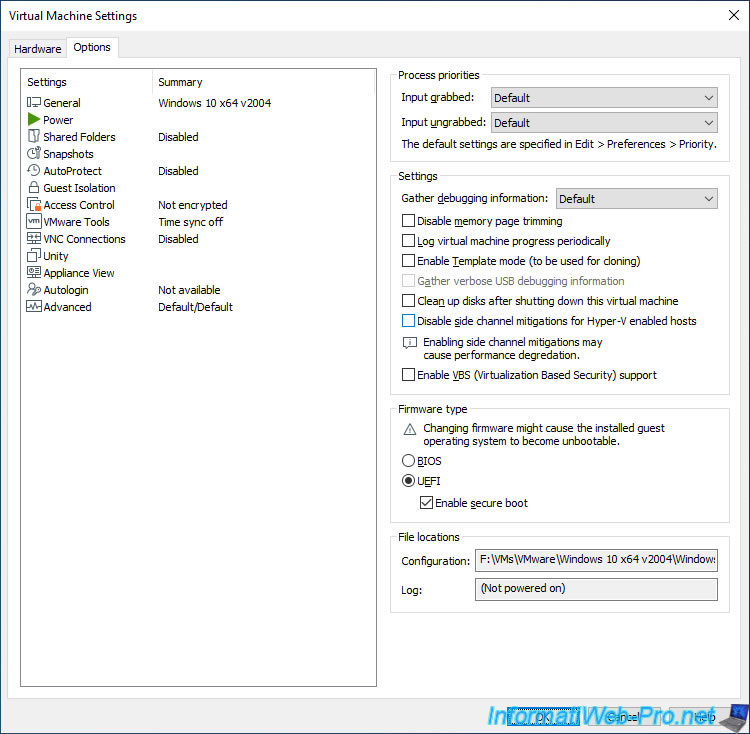
As indicated in this post, you can disable this option in the advanced settings of your virtual machine.
To do this, open the settings of your virtual machine and go to the «Options» tab.
Then, select «Advanced» and you will find the «Disable side channel mitigations for Hyper-V enabled hosts» box.
Yesterday VMware demonstrated a pre-release version of VMware Workstation with early support for the Windows Hypervisor Platform in the What’s New in VMware Fusion and VMware Workstation session at VMworld.
In Windows 10 we have introduced many security features that utilize the Windows Hypervisor. Credential Guard, Windows Defender Application Guard, and Virtualization Based Security all utilize the Windows Hypervisor. At the same time, new Developer features like Windows Server Containers and the WSL 2 both utilize the Windows Hypervisor.
This has made it challenging for our customers who need to use VMware Workstation. Historically, it has not be possible to run VMware Workstation when Hyper-V was enabled.
In the future – users will be able to run all of these applications together. This means that users of VMware workstation will be able to take advantage of all the security enhancements and developer features that are available in Windows 10. Microsoft and VMware have been collaborating on this effort, and I am really excited to be a part of this moment!
Cheers,
Ben
С недавнего времени ПО для виртуализации VMware Workstation Pro (Windows и Linux) и VMware Fusion (MacOS) стало бесплатным для личного использования. И, если виртуальные машины VirtualBox или Hyper-V вам по какой-то причине не подходят, можно опробовать этот вариант.
В этой инструкции для начинающих о том, как скачать и установить VMware Workstation Pro, создать и выполнить первоначальную настройку виртуальной машины с Windows. Действия в VMware Fusion на MacOS по большей части аналогичны и не должны вызвать каких-либо проблем даже у начинающих пользователей.
Установка
Для загрузки VMware Workstation Pro с официальной страницы на сайте требуется регистрация, а для пользователей из РФ — ещё и использование VPN.
Однако, если зайти на эту страницу, затем выбрать последнюю доступную версию, перейти далее во вложенную папку «Windows\core», вы сможете загрузить архив с установщиком VMware Workstation Pro без всего перечисленного.
Сам процесс установки можно выполнять с параметрами по умолчанию, а какие-то нюансы отсутствуют, за исключением случая, когда в Windows включен Hyper-V. В этом случае вы увидите следующее окно:
Возможные действия:
- Установить отметку «Install Windows Hypervisor Platform», в случае если дальнейшее использование Hyper-V требуется.
- Не устанавливать отметку, но в дальнейшем отключить Hyper-V в Windows.
После установки VMware Workstation Pro выполните перезагрузку компьютера и запустите VMware Workstation Pro. При первом запуске вам будет предложено ввести ключ продукта:
Выберите опцию «Use VMware Workstation for Personal Use, чтобы использовать программное обеспечение бесплатно в некоммерческих целях.
Создание виртуальной машины в VMware Workstation Pro
С учетом того, что статья «для начинающих», сначала о том, что такое виртуальная машина. Виртуальная машина, если упрощённо — это виртуальный компьютер, запущенный как обычная программа на вашем основном компьютере (хост), на котором вы можете устанавливать операционные системы (гостевая ОС), программы, работать с ним как с обычным компьютером.
Этот виртуальный компьютер может быть в разной степени изолирован от основной операционной системы, что, например, упрощает и делает более безопасным тестирование сомнительных программ, а создание снимков состояния виртуальной машины позволяет почти моментально возвращаться к её нужному рабочему состоянию.
Процесс создания виртуальной машины будет состоять из следующих шагов (предварительно имеет смысл проверить, что в БИОС включена аппаратная виртуализация, подробнее — в этой статье):
- Нажмите «Create a New Virtual Machine» (создать новую виртуальную машину).

- Выберите вариант конфигурации — Typical (стандартный, многие параметры задаются автоматически) или Custom (пользовательский, все параметры задаются вручную). Далее будет рассмотрен второй вариант. Если вы не знаете, какие значения параметров установить на каком-то из шагов, достаточно оставить значения по умолчанию: с большой вероятностью всё будет работать исправно.

- Укажите, с какой версией VMware Workstation должна быть совместима виртуальная машина. В нашем случае что-либо менять не требуется.
- Выберите, откуда будет устанавливаться операционная система в виртуальной машине: это может быть подключенный накопитель с ОС или ISO образ (Пример загрузки: как скачать ISO Windows 11).
- Укажите имя виртуальной машины (любое удобное вам) и путь к папке, где будут храниться её файлы.
- Для Windows 11 потребуется указать пароль и подтверждение пароля для виртуального модуля TPM — можно просто сгенерировать его кнопкой Generate, по умолчанию данные автоматически сохраняются в диспетчере учетных данных.
- Выберите тип загрузки — UEFI или BIOS (Legacy), при необходимости включите Secure Boot (безопасную загрузку).
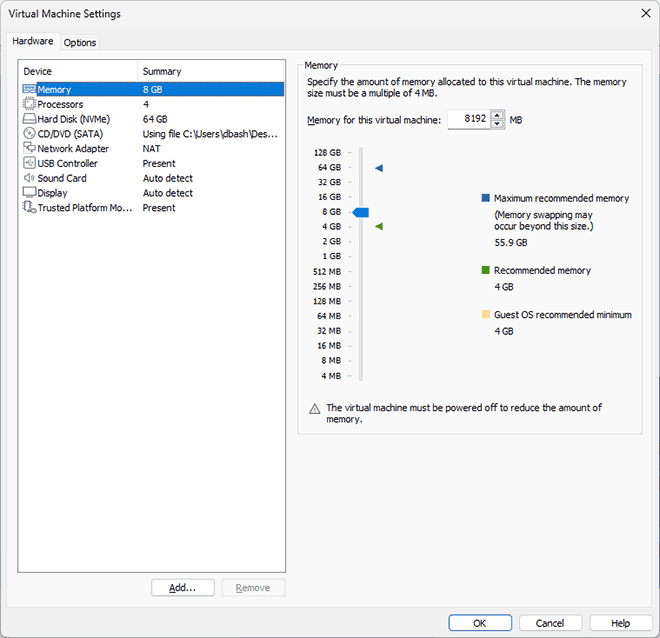
- Укажите число виртуальных процессоров и ядер на процессор. Учитывайте, что ядра и потоки выделяются из вашего центрального процессора и не следует «отдавать» их все виртуальной машине.
- Укажите объем оперативной памяти для виртуальной машины. Аналогично предыдущему пункту, она будет выделена из оперативной памяти хоста.
- Выберите тип сетевого подключения. Для начинающего пользователя лучше оставить вариант NAT (виртуальная машина будет иметь доступ в Интернет, но будет использоваться IP хоста), однако для каких-то задач может потребоваться отключить доступ к сети, включить мост (у виртуальной машины будет собственный IP-адрес в вашей локальной сети), либо создать виртуальную частную сеть между хостом и гостевой системой.
- Выберите тип контроллера виртуального диска. Здесь лучше оставить значение по умолчанию.
- Выберите тип виртуального диска: IDE, SCSI, SATA или NVMe
- Укажите, следует ли создать новый виртуальный диск, использовать уже имеющийся или же подключить физический диск в качестве диска виртуальной машины. Здесь будем использовать первый вариант.
- Укажите размер диска и тип хранения: в нескольких файлах или в единственном (Single) файле.
- Укажите место сохранения файла виртуального диска.
- Посмотрите список параметров виртуальной машины и нажмите «Finish».
- Виртуальная машина будет создана и автоматически запущена с накопителя, указанного на 4-м шаге. Далее потребуется установить операционную систему так же, как это делается на реальном компьютере (пример: Установка Windows 11).


Несмотря на то, что после последнего шага виртуальная машина создана, а гостевая система установлена, часть функциональности работать не будет.
Для того, чтобы это исправить следует установить набор средств интеграции и необходимых драйверов VMware Tools:
- Это можно сделать через меню виртуальной машины (VM — Install VMware Tools), однако при этом вы можете получить сообщение об ошибке скачивания необходимых файлов.

- Второй вариант: зайдите на страницу загрузки VMware Workstation Pro, но не в папку Core, а в папку Packages, скачайте архив tools для вашей ОС (здесь имеется в виду гостевая ОС), и распакуйте его.

Загруженный файл ISO с VMware Tools потребуется подключить в виртуальной машине: нажмите по заголовку вкладки с виртуальной машиной правой кнопкой мыши, перейдите в Removable Devices — CD\DVD — Settings и укажите путь к ISO образу.
Файл ISO будет подключен в виртуальной машине в гостевой ОС как обычный компакт диск, а уже с него можно будет запустить установщик VMware Tools:
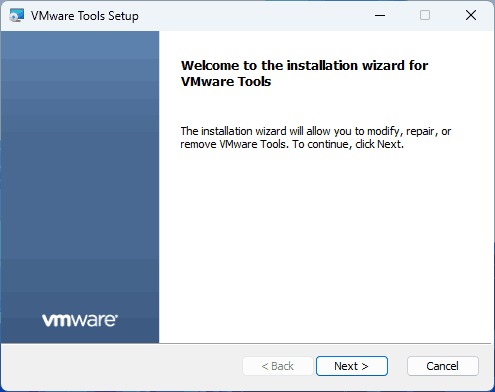
После установки VMware Tools и перезагрузки гостевой ОС виртуальной машиной можно полноценно пользоваться:
- Будут установлены необходимые драйверы в гостевой ОС, что сделает возможным использование перетаскивания и копирования-вставки файлов между хостом и гостевой ОС.
- Будет доступно использование USB-устройств с хоста: флешек, микрофонов, камер и других. Список доступных устройств хоста вы увидите в панели снизу, нажав по ним можно будет подключить их к гостевой ОС. При подключении накопителей будет появляться запрос о том, к какой системе вы хотите его подключить.
- Будет задействовано аппаратное ускорение графики (для ускорения 3D графики потребуется включить опцию в параметрах виртуальной машины в разделе Display).
Дополнительно рекомендую изучить настройки как VMware Workstation в меню Edit — Preferences, влияющие на все виртуальные машины и на ПО в целом:
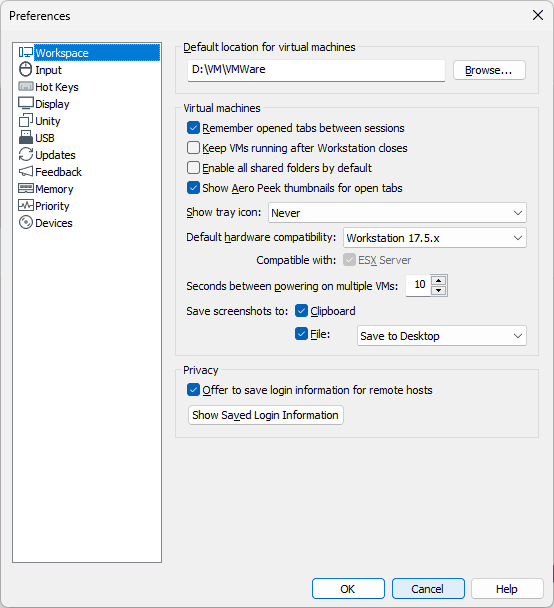
Так и самой виртуальной машины в меню VM — Settings (или в меню по правому клику на заголовке вкладки виртуальной машины), относящиеся к конкретной виртуальной машине:
Здесь на вкладке Hardware вы можете изменить аппаратные характеристики виртуальной машины, добавить новое оборудование (например, второй виртуальный диск), а на вкладке Options изменить параметры общих папок с хостом, создания снимков состояния (снэпшотов), изоляции виртуальной машины и другие. Учитывайте, что часть параметров можно изменить только при выключенной гостевой ОС.
Надеюсь, для начала использования этих сведений будет достаточно. Если же у вас есть вопросы, касающиеся VMware Workstation Pro, или я что-то упустил, вы можете оставить комментарий ниже.
When you install a virtualization application on a Windows machine on which Hyper-V or related services are installed, errors can often occur. Errors that happen when you run VMs on non-Hyper-V virtualization applications cause significant problems. This blog post explains what causes these errors, how to fix them, and how to run other virtualization applications on a computer with Hyper-V.
Background and Working Principle
After you install VMware Workstation, VMware Player, or Oracle VirtualBox on a Windows machine, you might get errors when starting a VM in these virtualization applications. The errors occur even if Hyper-V VMs are not running at that time. You can install VMware Workstation and VirtualBox, and run VMware VMs and VirtualBox VMs on the same computer, but not simultaneously. What causes this problem with Hyper-V? Let’s take a closer look.
VMware Workstation, VMware Player, and VirtualBox are type 2 hypervisors, while Hyper-V is a type 1 hypervisor. A type 2 hypervisor is installed on the operating system that is running on hardware. A type 1 hypervisor is installed on top of hardware. All hypervisors require processor virtualization extensions, which are instruction sets for hardware virtualization – Intel VT-x or AMD-V. Hyper-V takes control of virtualization extensions when Windows boots. These virtualization extensions are not available for VMware Workstation and VirtualBox when Windows loads. Only one software component can use Intel VT-x or AMD-V at a time.

This incompatibility is caused by Hyper-V because virtualization extensions are not exposed to type 2 hypervisors installed on a Windows machine where the Hyper-V role is enabled.
VMware Workstation errors:
VMware Workstation and Hyper-V are not compatible. Remove the Hyper-V role from the system before running VMware Workstation.
VMware Workstation and Device/Credential Guard are not compatible. VMware Workstation can be run after disabling Device/Credential guard.
VirtualBox errors:
BSOD, such as BSOD with SYSTEM_SERVICE_EXCEPTION
VT-x is not available (VER_VMX_NO_VMX). E_FAIL (0x80004005).
A VirtualBox VM works too slowly and uses the paravirtualisation (emulation) mode.
The most interesting situation is when a user doesn’t install Hyper-V and still encounters one of the errors mentioned earlier when using VMware Workstation or VirtualBox. The error occurs when automatic Windows updates are enabled. With the updates (Windows 10 v1607 and the appropriate Windows Server versions starting from Windows Server 2016), some new Hyper-V-related features are installed and enabled automatically without Windows user consent. These features are Device Guard and Credential Guard. Windows updates known vulnerabilities but can add issues and destroy a working configuration. That’s why many users don’t like automatic updates.
Device Guard is a group of security features in Windows. The idea of implementing this feature is to harden the execution of malicious code. Device Guard is available in Windows 10, Windows Server 2019, and Windows Server 2019. The main requirements are: UEFI running in native mode and Secure Boot enabled.
Credential Guard is a feature to minimize the impact of attacks if malicious code is already running by isolating system and user secrets to make more difficult to compromising.
Virtual Secure Mode (VSM) is a feature to leverage processor virtualization extensions that secures data in an isolated region of memory. HVCI is Hypervisor-protected code integrity. LSA is Local Security Authority.
Virtualization Based Security (VBS) is a class of technologies that uses virtualization extensions, including VSM, to provide security in Windows. The Hyper-V role is required to make these features work (Hyper-V management tools are not needed).
The hypervisor (Hyper-V) loads first, and then the operating system (Windows) loads. Hyper-V provides an abstraction layer between hardware and the operating system. A VSM allows the tagging of specific critical processes and memory used by them as they belong to a separate independent operating system controlled by Hyper-V. The principle is similar to the isolation of two VMs running on a Hyper-V host when each VM can use only the hardware resources provisioned to it.

Note: If you need a type 1 hypervisor from VMware, use VMware ESXi and VMware vSphere environment. Learn more in these blog posts: Hyper-V vs VMware, VMware Workstation vs VMware Player, and How to install ESXi on Hyper-V.
Let’s explore how to resolve the incompatibility issue of Hyper-V and other virtualization applications in detail.
Method 1: Uninstall Hyper-V in the GUI
Check system information about Windows configuration by running the following command in CMD:
msinfo32.exe
A System Information window opens. On the following screenshot, you see that Hyper-V is enabled (a hypervisor has been detected), and Device Guard Virtualization-based security is running. Now you can remove these features.

You should be aware that the following Hyper-V related features will not be available after you remove Hyper-V:
- Hyper-V
- Credential Guard and Device Guard
- Virtual Machine Platform
- Windows Sandbox
- WSL2.
Remove the Hyper-V feature in the graphical user interface (GUI) by using Control Panel, Add Roles, and Features wizard.
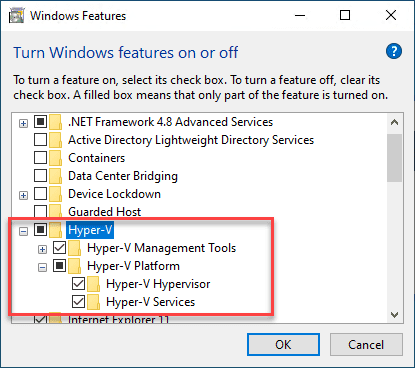
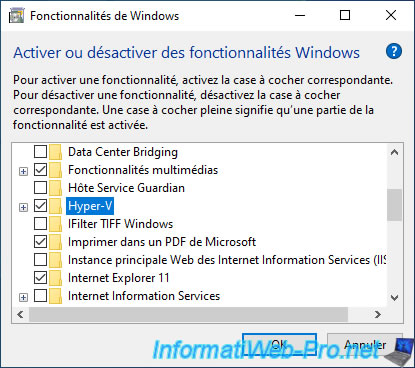
In Windows 10, open Control Panel, click Programs and Features, then click Turn Windows features on or off.
The Windows Features window opens.
Deselect the Hyper-V checkbox, and hit OK.
To finish removing Hyper-V, restart the computer.

The steps for removing Hyper-V on Windows 10 and Windows Server 2016 are similar.
In Windows Server 2016, open Server Manager and click Manage > Remove Roles and Features. In the Remove Roles and Features Wizard, go to the Server Roles step, and deselect Hyper-V. Hit Next at each step to continue. Restart is required to finish removing the Hyper-V role.

Method 2: Use PowerShell to Disable the Hyper-V Feature
You can do a similar action by using the command-line interface rather than the GUI.
Log in to PowerShell as Administrator, and run the command to disable the Hyper-V feature:
Disable-WindowsOptionalFeature -Online -FeatureName Microsoft-Hyper-V-Hypervisor
Restart your host machine:
shutdown -r -t 0
Method 3: Disable Hyper-V by Using BCDedit
The idea behind this method is to edit boot configuration data and disable booting of Hyper-V without uninstalling the Hyper-V role.
Log in to PowerShell as Administrator, or run the command from an elevated command prompt to disable Hyper-V:
bcdedit /set hypervisorlaunchtype off
If you need to re-enable Hyper-V and set the default value back, run this command:
bcdedit /set hypervisorlaunchtype auto
For more control and convenience, disable fast boot in Windows 10. Open Windows Registry Editor, and go to:
HKEY_LOCAL_MACHINE\SYSTEM\CurrentControlSet\Control\Session Manager\Power
Set the HiberbootEnabled parameter to 0
If you need to use Hyper-V VMs sometimes, create two entries for a Windows boot loader: one to boot Windows with Hyper-V and another to boot Windows without Hyper-V. Then, select the needed option before you boot Windows. This approach prevents you from running commands in PowerShell manually each time when you need to enable or disable Hyper-V.
bcdedit /copy "{current}" /d "No Hyper-V"
“The entry was successfully copied to {xxxxxxxx-xxxx-xxxx-xxxx-xxxxxxxxxxxx}.”
Copy and paste your value instead of xxxxxxxx-xxxx-xxxx-xxxx-xxxxxxxxxxxx.
bcdedit /set "{xxxxxxxx-xxxx-xxxx-xxxx-xxxxxxxxxxxx}" hypervisorlaunchtype off

Restart the computer.
Once your computer has restarted, you should see two options in Windows Boot Manager.

If you want to remove the No Hyper-V boot entry, use the /delete option for bcdedit.
Get a list of the current boot entries:
bcdedit /v
A list of all entries with their identifiers is displayed in the output. Copy the ID of the entry which you want to remove, and run the following command:
bcdedit /delete "{xxxxxxxx-xxxx-xxxx-xxxx-xxxxxxxxxxxx}"
Method 4: Uninstall the Hyper-V Role in PowerShell with dism.exe
The idea behind this method is to use the Deployment Image Servicing and Management tool in the command-line interface to uninstall Hyper-V.
Log in to CMD or PowerShell as Administrator. Run the following command to uninstall Hyper-V:
dism.exe /Online /Disable-Feature:Microsoft-Hyper-V
If you want to install Hyper-V again, use this command:
dism.exe /Online /Enable-Feature:Microsoft-Hyper-V /All

Method 5: Turn off virtualization Based Security in Windows
This method is used to disable Device Guard and Credential Guard, which are Hyper-V-related features.
Open the Group Policy Editor for a local machine. The group Policy Editor is available in Windows 10 Pro, Enterprise, and Education. In the command prompt, run gpedit.msc
Go to Local Computer Policy > Computer Configuration > Administrative Templates > System > Device Guard
Double-click Turn On Virtualization Based Security. By default, the status of this setting is Not configured.

In the window that opens, select Disabled and hit OK to save settings, and close the window.

Edit Registry as an alternative
In Windows 10 Home, where the Group Policy Editor is not present, you can disable Virtualization Based Security in Windows Registry.
Create a backup of the Windows registry before changing registry settings to avoid errors and issues.
Open Registry Editor. Run regedit in the command line that should be opened as Administrator.
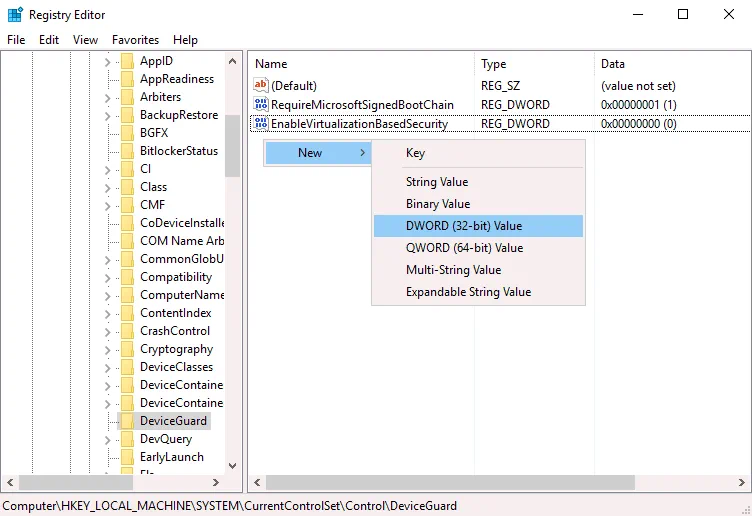
Go to HKEY_LOCAL_MACHINE > SYSTEM > CurrentControlSet > Control > DeviceGuard
Create the EnableVirtualizationBasedSecurity entry if this entry is missing. To create a new entry, right-click an empty place in the DeviceGuard directory, and in the context menu, click New > DWORD (32-bit) Value. Enter the EnableVirtualizationBasedSecurity name for this registry entry. By default, data set for this entry should be 0 (see the following screenshot). You can double-click the EnableVirtualizationBasedSecurity and set 0 manually.
Go to HKEY_LOCAL_MACHINE > SYSTEM > CurrentControlSet > Control > Lsa
Create a new registry entry in the Lsa directory. Right-click an empty space in the right pane of the Registry Editor window. In the context menu, click New > DWORD (32-bit) Value.
Enter the LsaCfgFlags name for this value. This value must be set to 0.

Close the Registry Editor, and restart your computer.
You can run the following commands in PowerShell (as Administrator) to disable Device Guard and Credential Guard on the next Windows boot.
Mont a UEFI system partition to the drive X: (select an unused volume):
mountvol X: /s
Copy the C:\Windows\System32\SecConfig.efi to X:\EFI\Microsoft\Boot\SecConfig.efi with an option to overwrite the file if the file exists. This file is a boot image for Windows security configuration tool.
copy %WINDIR%\System32\SecConfig.efi X:\EFI\Microsoft\Boot\SecConfig.efi /Y
Create a new option in the boot menu with the ID {0cb3b571-2f2e-4343-a879-d86a476d7215} and the DebugTool name:
bcdedit /create {0cb3b571-2f2e-4343-a879-d86a476d7215} /d "DebugTool" /application osloader
Set the boot option you created to boot at the previous step to \EFI\Microsoft\Boot\SecConfig.efi:
bcdedit /set {0cb3b571-2f2e-4343-a879-d86a476d7215} path "\EFI\Microsoft\Boot\SecConfig.efi"
Set Windows Boot Manager to make the new entry the default one for the next reboot. After that, reboot your Windows should go back to normal boot.
bcdedit /set {bootmgr} bootsequence {0cb3b571-2f2e-4343-a879-d86a476d7215}
Set the bootloader to pass the options DISABLE-LSA-ISO,DISABLE-VBS to the SecConfig.efi file when the bootloader launches the file.
bcdedit /set {0cb3b571-2f2e-4343-a879-d86a476d7215} loadoptions DISABLE-LSA-ISO,DISABLE-VBS
Set the partition for the booted drive to the X: drive:
bcdedit /set {0cb3b571-2f2e-4343-a879-d86a476d7215} device partition=X:
Unmount the X: drive from the system:
mountvol X: /d
Method 6: Update VMware Workstation
If you have Windows 10 version 2004 (20H1) build 19041 or newer on your physical computer, you can upgrade VMware Workstation to VMware Workstation 15.5.6 or newer and run VMware VMs on your Windows machine without disabling/uninstalling Hyper-V and Virtualization Based Security (VBS) features, including Device Guard and Credential Guard.
Due to many complaints from customers, Microsoft and VMware decided to develop a joint project that adopts Microsoft Windows Hypervisor Platform (WHP) APIs to allow type 2 hypervisors, such as VMware Workstation, to run on a host where Hyper-V is enabled. These APIs allow applications to manage CPU resources, read/write registry values, terminate CPU operation, and generate interruptions.
VMware Workstation before version 15.5.5 uses a Virtual Machine Monitor (VMM) that has direct access to a CPU and virtualization instruction sets (Intel VT-x or AMD-V). A VMM operates in a privileged mode. If Virtualization Based Security features are enabled on a Windows host, then an additional hypervisor layer (Hyper-V) is added between hardware and Windows. Hyper-V has direct access to CPU features used for hardware virtualization, and VMM has no access to CPU virtualization features.
VMware made changes in the architecture of VMware Workstation 15.5.6 to allow their product to use Microsoft WHP APIs and fix the compatibility issue. VMM can now run at the user level (not in the privileged mode) using the WHP APIs and run VMs without direct access to CPU virtualization extensions. This mode is called User Level Monitor (ULM) or a Host VBS mode. If you uninstall Hyper-V-related features from your Windows host, VMware Workstation detects it automatically, and VMM is switched to direct access of CPU virtualization extensions (running in the privileged mode).
Windows Hypervisor Platform (WHP) must be installed on a physical Windows machine where Hyper-V is enabled to allow VMware Workstation to run VMware VMs on this machine. Install the Windows Hypervisor Platform feature in Control Panel by clicking Turn Windows features on or off.
Thus, you can update Windows 10 and VMware Workstation on your physical machine to versions that support running Hyper-V-related features and VMware Workstation VMs on the same machine.
Limitations of the Host VBS mode:
- Windows Hypervisor Platform is not supported on Windows Server 2016 and other Windows Server versions and editions. As a result, VMware Workstation cannot run VMs in the host VBS mode on physical machines running Windows Server.
- Nested Virtualization is not supported. You cannot run nested VMs (VMs inside VMware Workstation VMs).
- VMware VMs can run slower.
- X86 performance monitoring counters (PMC) are not supported.
- User-mode protection keys (PKU) capability is not available.
- Restricted transactional memory (RTM) and hardware lock elision (HLE) capabilities are not available.
VirtualBox and Hyper-V
VirtualBox can co-exist with Hyper-V, Device Guard, and Credential Guard starting from VirtualBox 6.0. VirtualBox 6 can work with Hyper-V APIs similarly to VMware Workstation on Windows 10 v1803 x64.
These features must be enabled on a host Windows machine to allow VirtualBox to work with Hyper-V APIs:
- Hyper-V
- Windows Hypervisor Platform
If the Hyper-V feature is enabled, but the Windows Hypervisor Platform feature is disabled, in System > Acceleration in VM configuration summary, you can see that the Paravirtualisation mode is on. If you try to start a VM, VirtualBox reminds you that you should enable Windows Hypervisor Platform and displays the error message.
The error message:
WHvCapabilityCodeHypervisorPresent is FALSE! Make sure you have enabled the ‘Windows Hypervisor Platform’ feature.
(VERR_NEM_NOT_AVAILABLE).
VT-x is not available (VERR_VMX_NO_VMX).
If the required Hyper-V-related features in Windows are enabled, the following information is displayed for the VM in the System section:
Acceleration: VT-x/AMD-v, Nested Paging, Paravirtualization Hyper-V

The VM should start successfully. A green turtle icon is displayed in the bottom panel of the VirtualBox window. This icon indicates that a VM is running in the Hyper-V paravirtualization mode instead of the native mode that is usually used by VirtualBox when interacting directly with CPU virtualization extensions. The performance of VirtualBox VMs degrades on machines on which Hyper-V and related features are enabled. You can disable or remove Hyper-V as explained earlier to run VMs on VirtualBox in the native mode using CPU virtualization extensions directly.
Read also the VirtualBox vs Hyper-V comparison and the VirtualBox vs VMware comparison.
Conclusion
New Windows features such as Virtualization Based Security (Device Guard and Credential Guard), Windows Sandbox, WSL that use the Hyper-V engine cause a lot of problems to users, administrators, and software developers using other hypervisors such as VMware Workstation, VirtualBox, QEMU, and Google Android Emulator on Windows machines. There are two approaches to resolve these incompatibility issues: Disable/uninstall Hyper-V or use new versions of virtualization applications that support work with Hyper-V APIs, such as Windows Hypervisor Platform API provided by Microsoft.
Running VMs on VirtualBox, VMware Workstation, and other hypervisors on machines with Hyper-V by using APIs can degrade the performance of non-Hyper-V VMs. Data backup is crucial for the cases when virtualization applications fail. If you still haven’t chosen the best Hyper-V backup solution for your environment, consider NAKIVO Backup & Replication. The solution offers robust backup, ransomware protection, disaster recovery and more. Download the Free Edition to see the solution in action.