
Applies ToWindows 11 Windows 10
In most cases, Windows automatically discovers and installs both scanners connected locally and scanners located in the network. However, if a scanner isn’t automatically discovered and installed, this article covers how to manually install the scanner. Once installed, the article then covers how to scan a picture or document.
In most cases, all that needs to be done to set up a scanner in Windows is to connect the scanner to the Windows device. Plug the USB cable from the scanner into an available USB port on the Windows device and then turn on the scanner. Windows proceeds to install the scanner. If Windows doesn’t install a local scanner automatically, it can be installed manually instead:
-
Make sure the scanner is plugged into the Windows device via USB and that the scanner is turned on.
-
In the Bluetooth & devices > Printers & scanners window, select the Add device button next to Add printer or scanner.
-
Windows searches for scanners connected locally to the Windows device. The search might take a few minutes.
-
Once the local scanners are located, they’re displayed in a list in the Bluetooth & devices > Printers & scanners window. From the list, select the Add device button next to the scanner that needs to be installed.
-
Windows installs the selected scanner. Once the install finishes, the scanner appears as a device in the Bluetooth & devices > Printers & scanners window.
Tip: If a scanner is included as part of a multifunction or All-In-One printer, the scanner might appear as a printer. To confirm that Windows also detects the printer as a scanner, select the printer in the Bluetooth & devices > Printers & scanners window. If the printer is also detected as a scanner, Scanner settings is listed as an option in the Bluetooth & devices > Printers & scanners > <Printer_Name> window that opens.
If a scanner is turned on and connected to the network, Windows should find and install it automatically. Available scanners can include scanners on a network, such as Bluetooth scanners, wireless scanners, or scanners that are plugged into another device and shared on the network. If Windows doesn’t install a network scanner automatically, it can be installed manually instead:
-
In the Bluetooth & devices > Printers & scanners window, select the Add device button next to Add printer or scanner.
-
Windows searches for scanners in the network. The search might take a few minutes.
-
Once the network scanners are located, they’re displayed in a list in the Bluetooth & devices > Printers & scanners window. From the list, select the Add device button next to the scanner that needs to be installed.
-
Windows installs the selected scanner. Once the install finishes, the scanner appears as a device in the Bluetooth & devices > Printers & scanners window.
If the scanner that needs to be installed isn’t discovered and displayed in the list, select the Add a new device manually link next to The printer that I want isn’t listed. In the Add Printer window that opens, follow the instructions to add it manually.
Tips:
-
If a scanner is included as part of a multifunction or All-In-One printer, the scanner might appear as a printer. To confirm that Windows also detects the printer as a scanner, select the printer in the Bluetooth & devices > Printers & scanners window. If the printer is also detected as a scanner, Scanner settings is listed as an option in the Bluetooth & devices > Printers & scanners > <Printer_Name> window that opens.
-
If the scanner and Windows device are both connected to the network wirelessly, make sure that both are on the same wireless network/SSID.
-
For instructions on connecting a scanner with wireless capabilities to a wireless network, consult the instructions that came with the scanner or the manufacturer’s website.
To verify that the scanner is installed, make sure that the scanner is turned on and then follow these steps:
-
In the Bluetooth & devices > Printers & scanners window that opens, verify that the scanner is listed in the window.
Tip: If a scanner is included as part of a multifunction or All-In-One printer, the scanner might appear as a printer. To confirm that Windows also detects the printer as a scanner, select the printer in the Bluetooth & devices > Printers & scanners window. If the printer is also detected as a scanner, Scanner settings is listed as an option in the Bluetooth & devices > Printers & scanners > <Printer_Name> window that opens.
Once the scanner is installed, the Windows Scan app can be used to scan a picture or document. Here’s how:
-
Make sure the scanner is turned on.
-
On the Windows device, right-click on the Start menu and then select Search .
-
In the Type here to search search box, enter:
Windows Scan
-
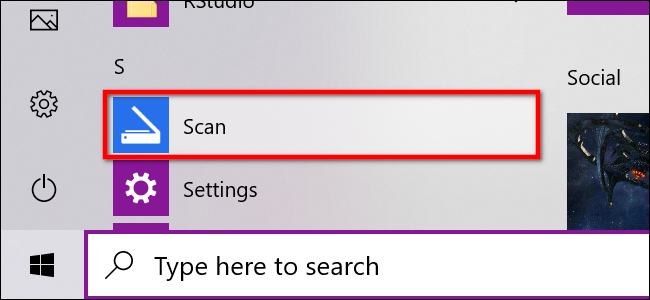
In the search results under Apps, select Scan from the results.
Note: If the Scan app doesn’t appear in the list of search results, it might not be installed. To install the Windows Scan app, install it from the Microsoft Store by selecting the following link:
Windows Scan
-
Place the document or picture to scan in the scanner based on the scanner type:
-
If the scanner has a flatbed, place the document or picture to scan face down on the scanner’s flatbed and close the cover.
-
If the scanner has a document feeder, place the document or picture to scan in the scanner’s document feeder. Consult the scanner’s documentation whether the item should be face down or face up.
Note: If a scanner has both a flatbed and a document feeder, either can be used.
-
-
In the Scan page of the Scan app, follow these steps:
-
In the Scanner drop-down menu, make sure the desired scanner is selected.
-
In the Source drop-down menu, make sure the desired source (Flatbed, Feeder, Auto-configured) is selected. In most cases, the default Auto-configured is fine. Otherwise, the Source should match where the document or picture was placed in the previous step.
-
In the File type drop-down menu, select the image file type to save the scan as. The available options are JPEG, PNG, TIFF, and Bitmap.
-
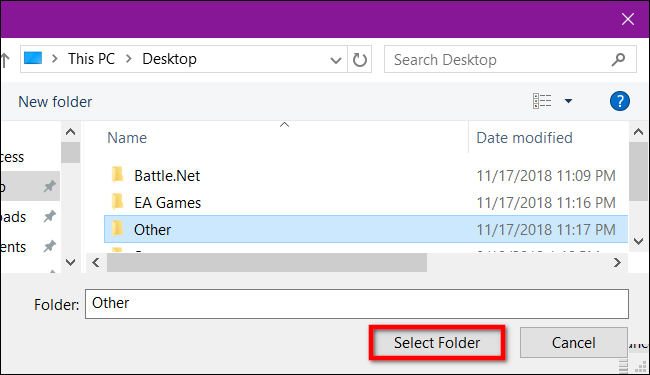
Select the Show more link to show the Save file to option. Select the link under Save file to. The Select Folder window opens. Browse to the location where scans should be saved, and then select the Select Folder button.
Note: If a save location isn’t selected, the default location the Windows Scan app saves scans to is the Pictures/Scans folder in the user folder.
-
-
To scan the document or picture, select Scan at the bottom of the Scan app window.
-
After the scanner is finished scanning the document or picture, it automatically saves the scan into the previously selected folder. Select one of the following two options at the top of the screen to continue:
-
View — Opens the scanned item in the Photos app via a new window so that the scanned item can be viewed. The scanned item can also be edited in the Photos app. Once the scanned item is finished being viewed or edited, the Photos app window can be closed.
-
Close — Finishes the current scan job in preparation for additional scan jobs.
-
-
On the Windows device, right-click on the Start menu and then select File Explorer .
-
In the File Explorer window that opens, navigate to the location selected to save scans to in the Scan a picture or document with Windows Scan app section.
Tip: If a location wasn’t selected in the Scan a picture or document with Windows Scan app section, the default location the Windows Scan app saves scans to is the Pictures/Scans folder in the user folder.
For additional information including additional troubleshooting information, go to the scanner manufacture’s website.
Need more help?
Want more options?
Explore subscription benefits, browse training courses, learn how to secure your device, and more.
(Image credit: Windows Central)
Although we’re now living in a digital world, from time to time, you may still need to scan important documents, such as handwritten letters, contracts, forms, and more, for many reasons. For instance, when you need to sign and send an agreement digitally via email, you want to convert important papers into digital files for inventory or preservation purposes, etc.
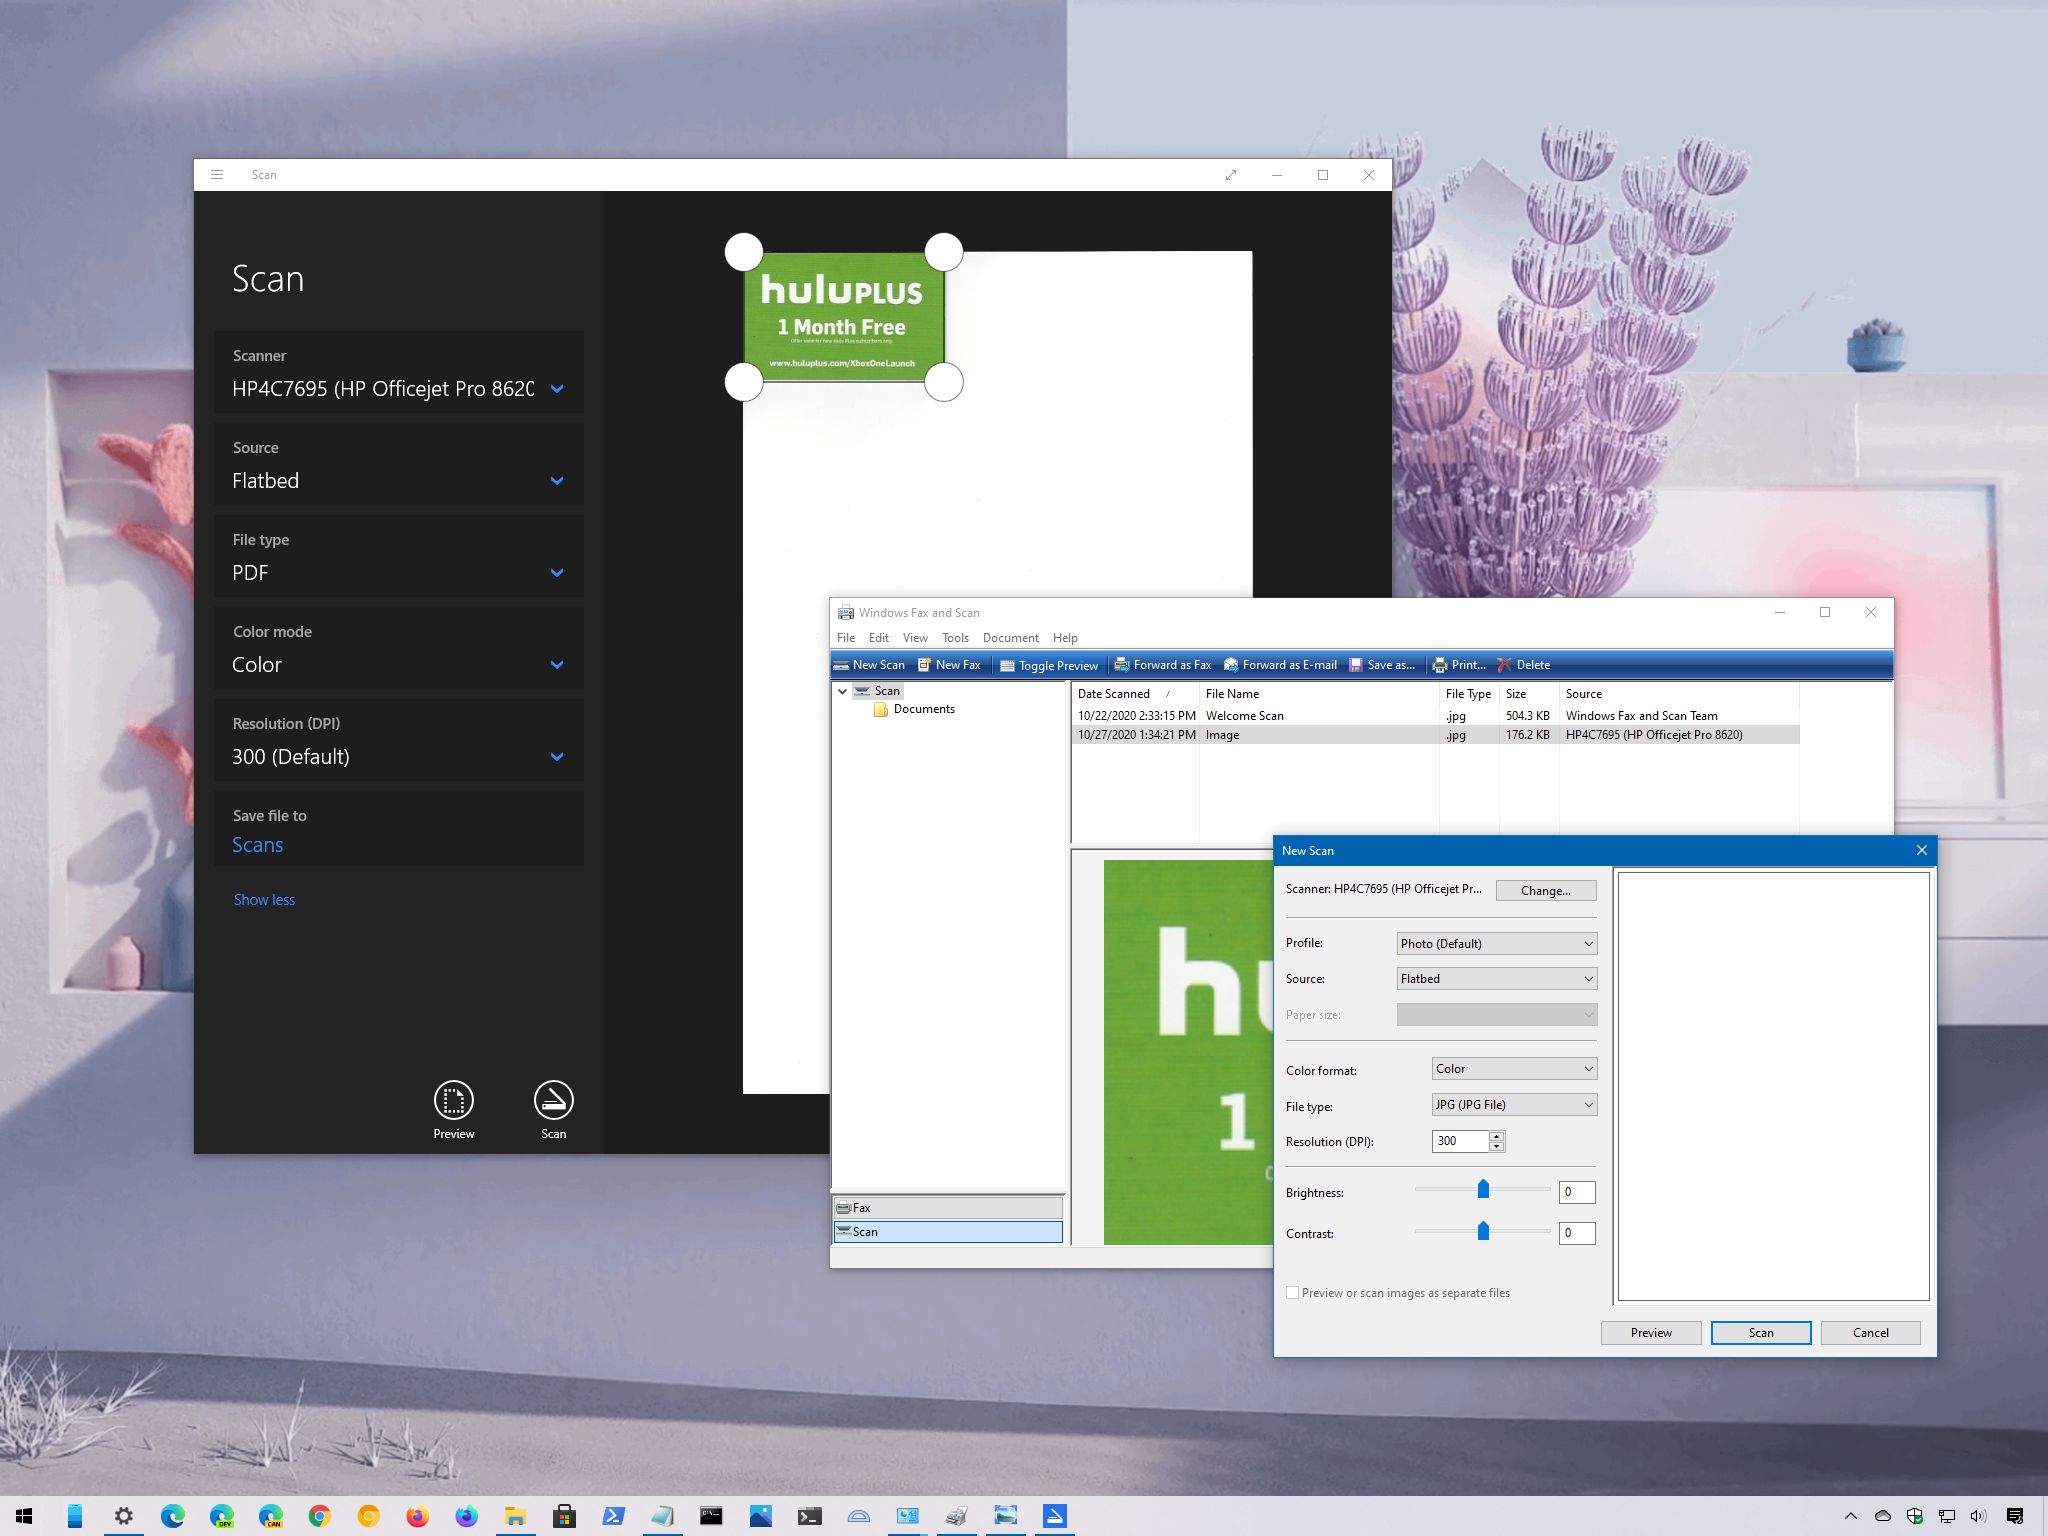
If you have a multi-function printer or standalone scanner, you can probably walk up to the device and directly scan the document (or picture) onto a USB flash drive. However, Windows 10 has two apps you can use to save you the trip to scan any documents and pictures directly onto your device without having to use the manufacturer software, whether you have a flatbed or feeder scanner.
In this Windows 10 guide, we’ll walk you through two methods to scan documents and photos on your device.
- How to scan documents using Windows Scan app
- How to scan documents using Windows Fax and Scan app
How to scan documents using Windows Scan app
Windows 10 has a modern app to scan documents using a scanner, but you must first download and install it from the Microsoft Store.
Install Windows Scan app
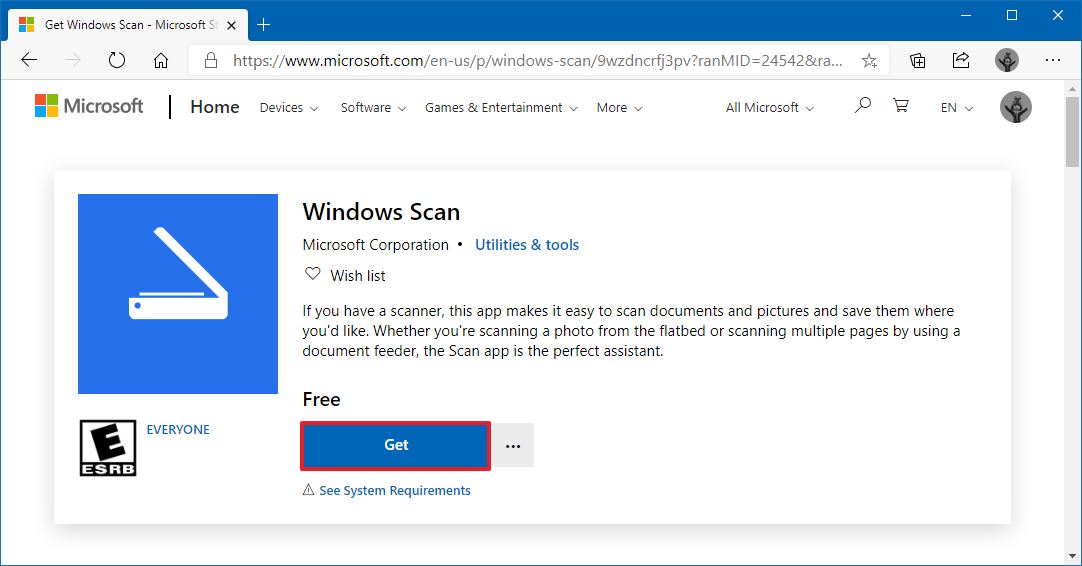
To install the Windows Scan app, use these steps:
- Open web browser.
- Use this Microsoft Store link to get the Windows Scan app.
- Click the Get button.
- Click the Open button.
- Click the Install button.
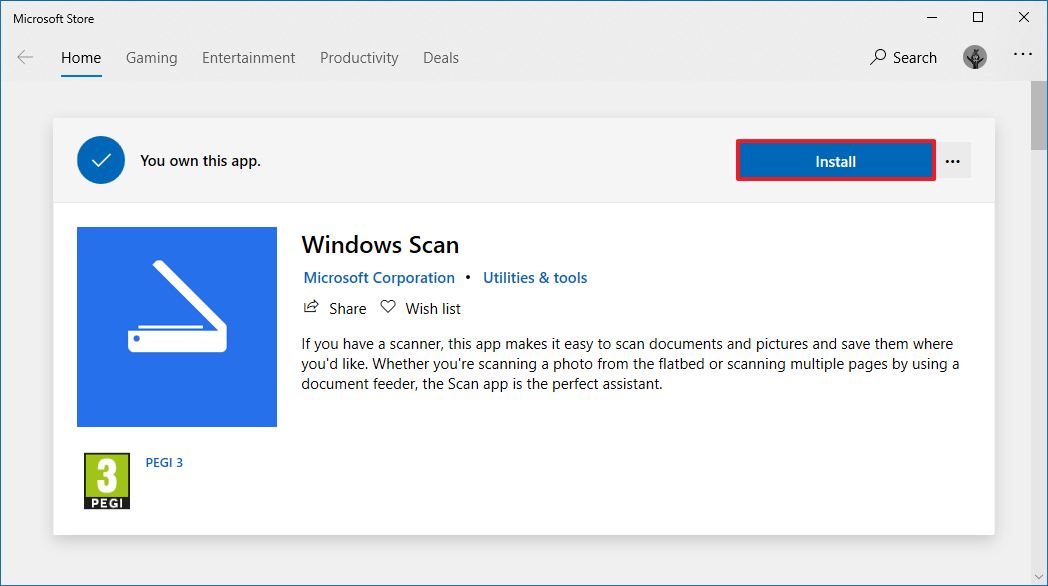
Once you complete the steps, the app will install, and you can proceed to convert documents from physical to digital.
Scan documents
To scan physical documents to PDF, JPEG, or another file format, use these steps:
All the latest news, reviews, and guides for Windows and Xbox diehards.
- Open Start.
- Search for Windows Scan and click the top result to open the app.
- Use the «Scanner» drop-down menu to select the scanning device.Quick tip: Before proceeding with the scan, make sure the scanner is powered on and connected to the computer via USB or network, depending on how you configured the device.
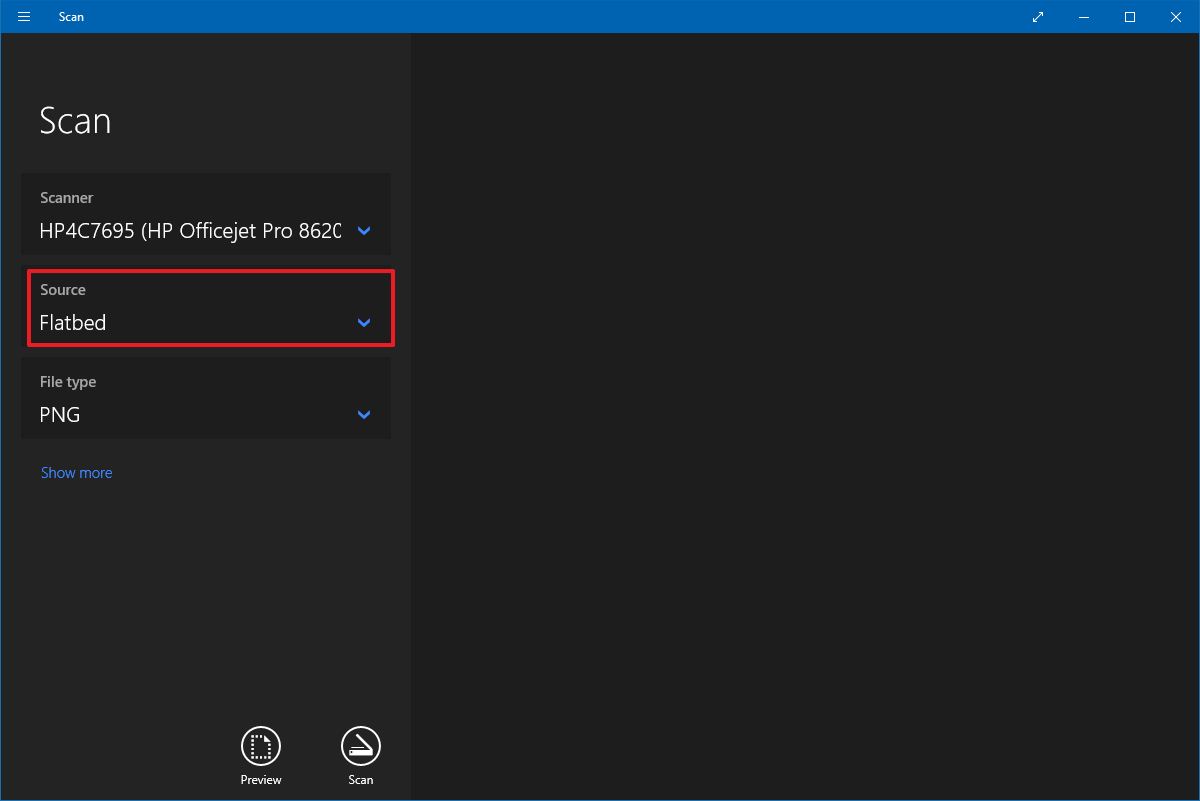
- Use the «Source» drop-down menu to select the location of the document you are trying to scan:
- Flatbed: This option will apply for most users who have a standalone scanner or multi-function printer with scanning functionality.
- Feeder: This option is for scanners that support scanning by feeding the document using the roller paper feeder. If you select this option, you’ll also be able to select two additional settings, including the ability to scan both sides and select the paper size.
- Auto-configured: This option doesn’t include additional settings, and it’ll scan the document as-is and save the output into a file.
For this guide’s purpose, we’ll be selecting the «Flatbed» option since it will apply to most users.
- Use the «File type» drop-down to select the file format to save the document scan. Options available include:
- JPEG.
- PNG.
- TIFF.
- Bitmap.
- OpenXPS.
- XPS.
- PDF.
Quick tip: Usually, you may want to select the PDF option for paper documents and JPEG when scanning images. For this guide, we’ll be selecting the «PDF» option.
- (Optional) Click the Show more option.
- Use the «Color mode» drop-down menu to select whether you want the scan. Options available include:
- Color.
- Grayscale.
- Black and white.
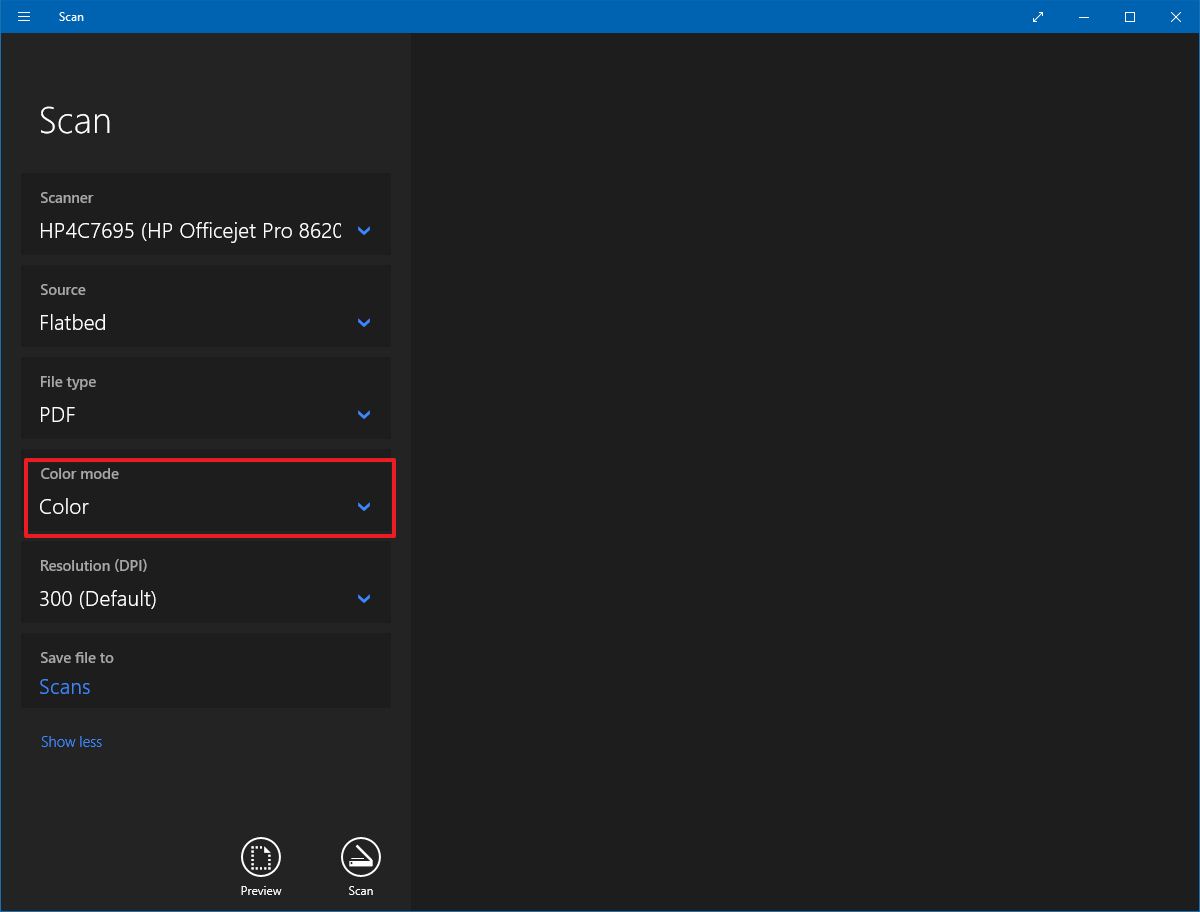
- Use the «Resolution (DPI)» drop-down menu to select the Dots Per Inch setting. The higher the DPI, the higher the resolution. (Usually, 300 DPI is suitable for most scenarios.)
- Click the Scans file to option.
- Select the destination folder.
- Click the Select Folder button.
- Click the Preview button.
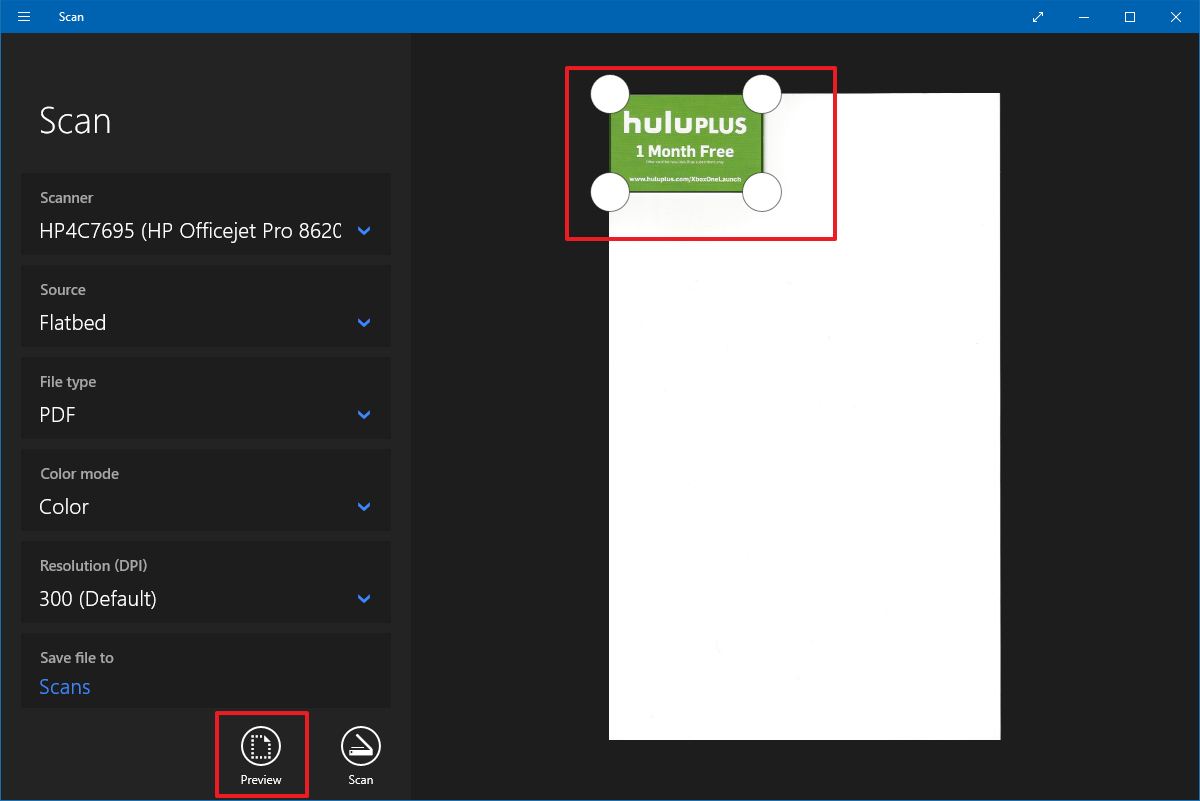
- Use the pins to crop the document (as needed).
- Click the Scan button.
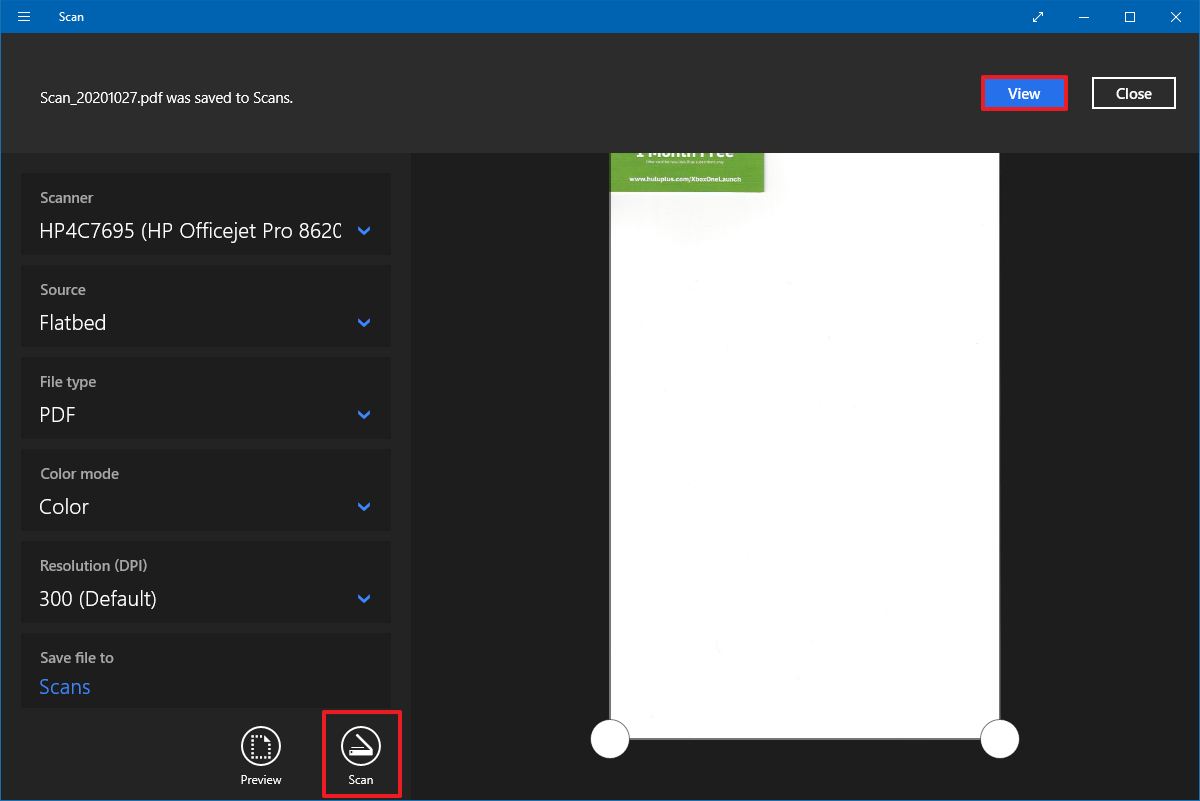
- Click the View button.
Once you complete the steps, the scanner will scan the document, and the app will save a digital copy in the Scans folder inside the Pictures profile folder unless you selected a different location.
If you scanned an image, the view option would open the file with the Photos app, and if you scanned a document as PDF, then the file will open with the default PDF viewer.
In the case that you’re in the market for a new all-in-one printer with scanning capability, then look no further than the HP OfficeJet Pro 8025 since it’s a reliable wireless printer that offers decent speed and good quality printing. Of course, it also includes a flatbed scanner with feeder functionality to scan both sides of the page. This is our best overall, but we have other picks you may want to consider.
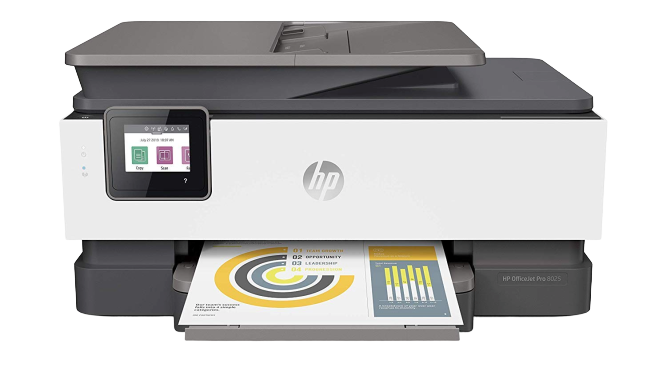
Printer and scanner
HP OfficeJet Pro 8025
It prints and scans
The OfficeJet Pro 8025 is a great solution for your home office or small business. It’s full of smarts so that you can use it with the cloud.
How to scan documents using Windows Fax and Scan app
Alternatively, you can also use the legacy Windows Fax and Scan app. The app has been available for many years, and it includes all the essential features to scan documents and images. (If you have a modem and landline, you can also use it to send and receive faxes.)
To scan a document with the Windows Fax and scan app, use these steps:
- Open Start.
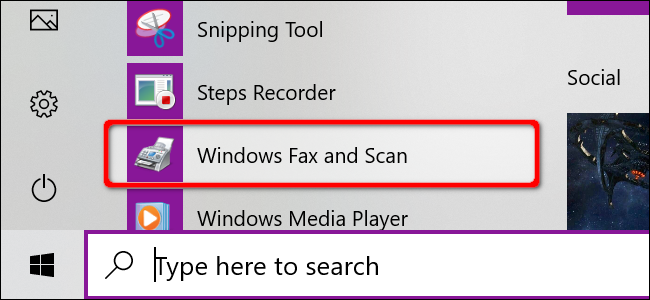
- Search for Windows Fax and Scan and click the top result to open the app.
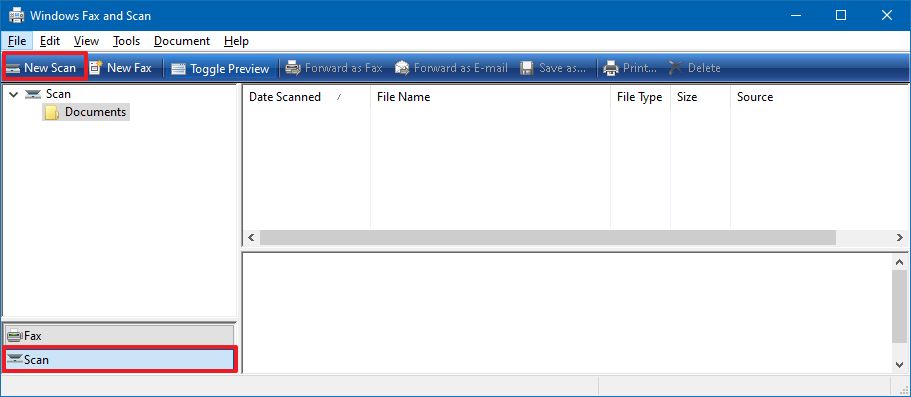
- Click the Scan option from the bottom of the page (if applicable).
- Click the New Scan button from the top-left corner.
- Click the Change button to select the scanning device (if applicable).
- Click the OK button.
- Use the Profile drop-down menu to select the profile that applies to your scan. Options available include:
- Photos.
- Documents.
For this guide, we’ll be selecting the «Documents» option.
- Use the «Source» drop-down menu to select the location of the document you are trying to scan:
- Flatbed: This option will apply for most users who have a dedicated scanner or a multi-function printer with scanning functionality.
- Feeder: This option is for scanners that support scanning by feeding the document using the roller paper feeder. If you select this option, you’ll also be able to select two additional options, including the ability to scan both sides and select the paper size.
For this guide, we’ll be selecting the «Flatbed» option.
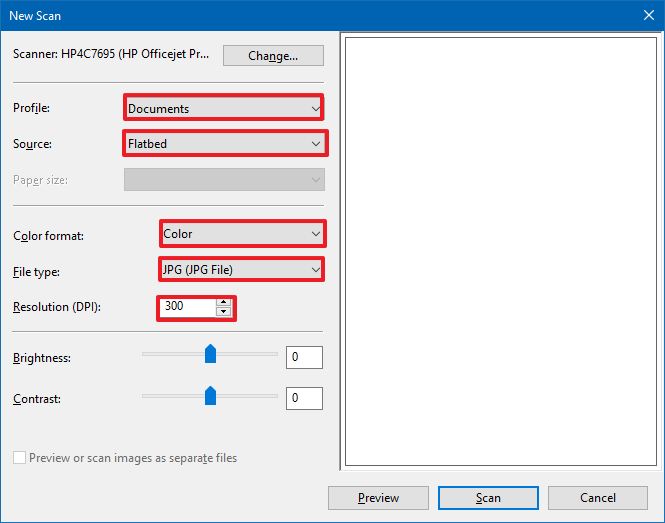
- Use the «Color format» drop-down menu to select whether you want the scan. Options available include:
- Color.
- Grayscale.
- Black and white.
- Use the «File types» drop-down menu to select the format to save the scan. Options available include:
- JPG.
- BMP.
- PNG.
- TIF.
- Use the «Resolution (DPI)» drop-down menu to specify the scan’s resolution.Quick note: When specifying the resolution, the higher the number means higher resolution, but using 300 is good enough for most scans.
- (Optional) Use the slider to control the scan brightness.
- (Optional) Use the slider to control the scan contrast.
- Click the Preview button.
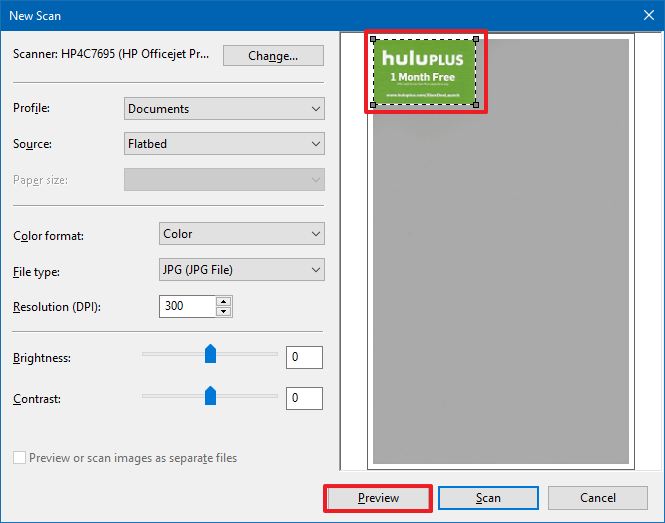
- Use the pins to crop the document (as needed).
- Click the Scan button.
- Select the image from the Windows Fax and Scan inbox to view a preview of the scan.
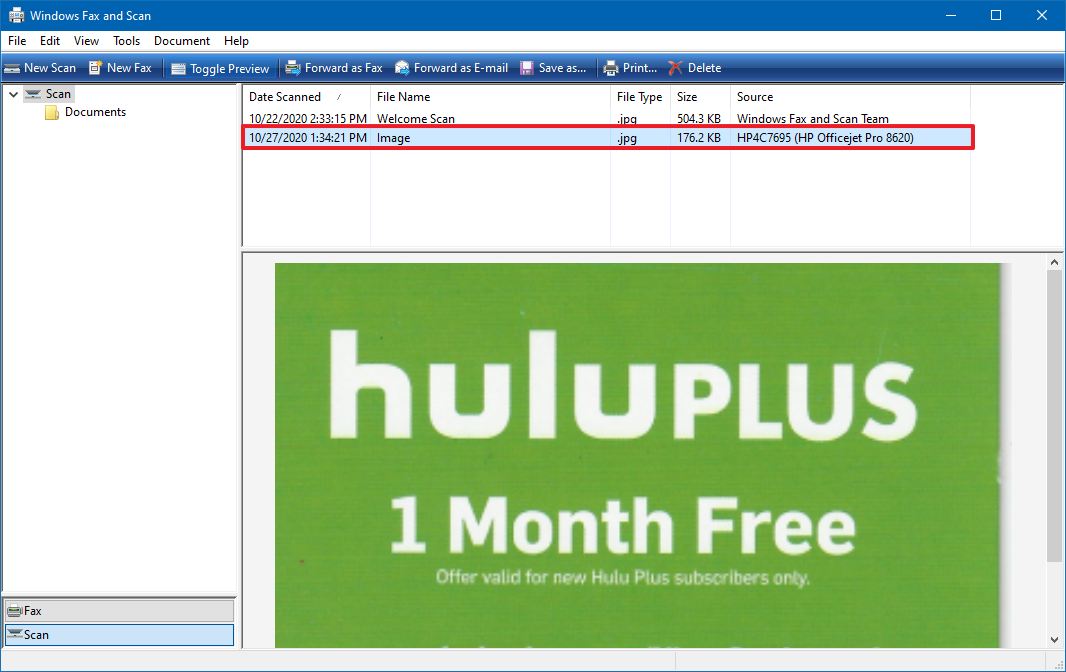
After you complete the steps, you can find the output file in the «Scanned Documents» inside the Documents folder.
We’re focusing this guide on scanning documents, but the instructions will also work to convert printed pictures into digital copies.
Mauro Huculak has been a Windows How-To Expert contributor for WindowsCentral.com for nearly a decade and has over 15 years of experience writing comprehensive guides. He also has an IT background and has achieved different professional certifications from Microsoft, Cisco, VMware, and CompTIA. He has been recognized as a Microsoft MVP for many years.
Сканирование позволяет перевести любой документ в цифровой формат, удобный для чтения, долгосрочного хранения и отправки адресату по e-mail. Сам процесс сканирования практически не зависит от моделей и производителей периферийных устройств. Единственным условием является наличие функции сканера в МФУ. Мы расскажем, как сканировать в windows 10 быстро и легко.

Сканирование документов в windows 10
Скан-копии можно получить с помощью многофункционального устройства МФУ, которое выполняет задачи принтера, сканера и копира. Современные модели имеют подключение к Wi-Fi, которое обеспечивает беспроводное соединение с ПК. Компьютер также может соединяться с МФУ через usb – разницы никакой нет. Чтобы отсканировать документ, следуем алгоритму действий:
- Скачиваем и устанавливаем программное обеспечение МФУ на свой компьютер. Обязательно проверьте наличие драйвера для функции сканера.
- В отсек для сканирования укладываем нужный документ таким образом, чтобы текст или изображение были направлены вниз. Хотя есть модели сканирующих устройств, у которых стекло располагается сверху. Читайте инструкцию.
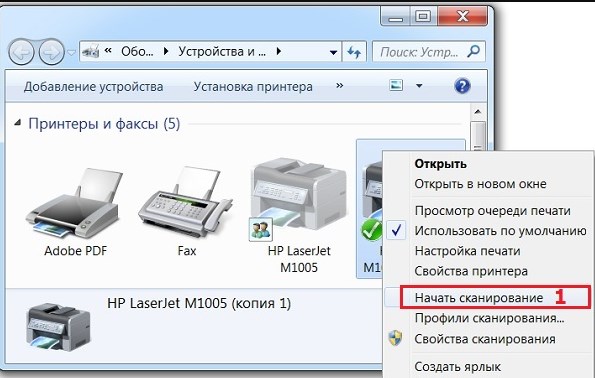
- Заходим в раздел «Устройства и принтеры» в меню Пуск. Здесь выбираем подходящее МФУ, кликаем правой кнопкой мыши и задаем «Начать сканирование».
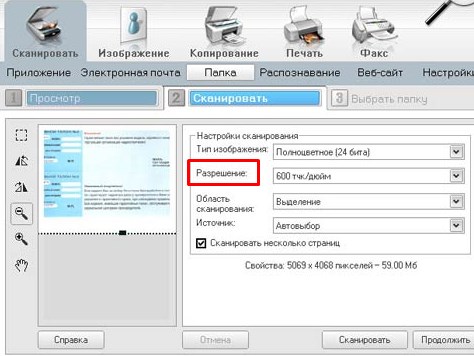
- В выпавшем окошке задаем нужные параметры сканирования. Указываем что именно будет сканироваться – текст, фото и т.д. из списка. При необходимости подкорректируйте яркость, контрастность, разрешение. Нажимайте предварительный просмотр, чтобы оценить будущий результат. Если все устраивает, начинаем процесс сканирования и сохраняем готовый файл.
Сканируем А0, А1, А2, А3, А4 в любой формат файла.
100 листов — за 10 минут по цене от 5 руб. за лист в нашем копицентре!
Параметры сканирования документов
Основным параметром отсканированных изображений является DPI – это разрешение отсканированной картинки. Чем выше этот показатель, тем качественнее, четче и ярче получается скан-копия
- От 100 до 200 dpi – невысокое качество, но довольно быстрый результат сканирования.
- От 300 до 400 dpi – оптимальный вариант для работы с текстовыми документами.
- От 500 до 600 dpi – максимально возможное качество изображения, подходит для сканирования паспортов, официальных документов с детализацией.
Какие услуги мы хотим Вам предложить
Статья о том, как сканировать в windows 10, написана при поддержке специалистов копировального центра Printside.ru

Принимаем заявки 24/7
Менеджер
Александра
Оставьте заявку, наш менеджер свяжется с Вами в ближайшее время и ответит на все интересующие вопросы.
Оставьте заявку, наш менеджер свяжется с Вами в ближайшее время и ответит на все интересующие вопросы.
Quick Links
-
Is Your Scanner Windows 10 Compatible?
A great way to preserve sensitive, written documents like W9s, contracts, and living wills is to store them digitally. This guide shows you how to scan a document in Windows 10 without installing third-party tools.
Typically, you can scan a document using the software provided by manufacturers. Printers and scanners usually ship with an optical disk containing the necessary drivers and tools. Manufacturers also make their drivers and tools available online if your PC doesn’t include an optical drive.
For instance, this guide uses Epson’s Expression Premium XP-7100 all-in-one printer as an example. In addition to drivers, the software suite installs eight separate tools for printing CD labels, scanning, updating software, and more.
Because manufacturers don’t supply identical software suites across all printers and scanners, this guide uses two «native» Windows-based tools instead: Microsoft Scan and Windows Fax and Scan.
Of course, always default to your manufacturer’s software for an experience customized to your specific scanner. If you don’t want third-party tools installed on your PC, however, Microsoft’s two solutions should do the trick.
Is Your Scanner Windows 10 Compatible?
Before moving on, we need to make a couple of points. First, your scanner’s manufacturer may supply drivers for Windows 10, but the device itself may not specifically support the platform.
For example, we tested the following tools using Canon’s PIXMA MG3520 all-in-one printer with a built-in scanner. The «recommended» drivers date back to July 2015, though Canon released a newer suite six months later. That’s still three-year-old software.
That said, the scanner portion of this AIO printer would not appear in the native Windows tools but worked correctly—using a wireless connection, in fact—through Canon’s software.
If you run into similar problems, you may have an older printer or scanner that’s not fully compatible with Windows 10. The device may also require a direct USB-based connection if used outside the manufacturer’s third-party tools. For AIO printers, you may need to tweak its networking settings, so your Windows 10 PC recognizes the scanner component in addition to the overall printer unit.
Microsoft Scan
This tool is a visual upgrade to Microsoft’s older Fax and Scan tool. It provides most of the same features, depending on your printer, but removes the fax and email components.
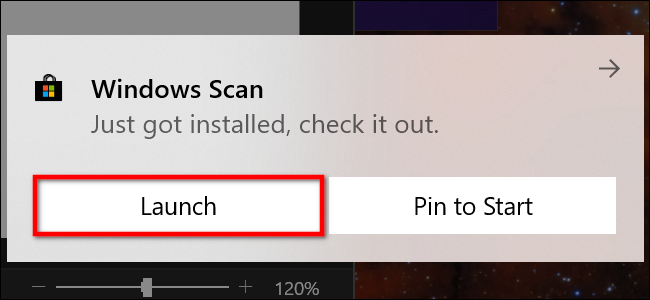
Head to the Windows Scan app listing on the Microsoft Store (free) and click the blue «Get» button. Once it installs on your PC, click the «Launch» button in the pop-up notification on Windows 10.
You can also access the new app—simply labeled as «Scan»—from the Start Menu.
With the app open, your scanner should appear listed on the left. As previously stated, this guide uses Epson’s Expression Premium XP-7100 all-in-one printer as an example. You’ll also see an option for «File Type» along with a «Show More» link. Click this link for the Scan app’s full menu.
For starters, you may see a «Source» category. Since our example printer has both a flatbed scanner and an automatic document feeder, both options are available for scanning a document. In this case, the default setting is set to «Auto-Configured.»
This «Auto-Configured» setting limits what you can do, locking you to «File Type» and «Save File To» options. If you select the «Flatbed» option as your source, or it’s the only source available, you’ll see two additional options appear on the list: «Color Mode» and «Resolution (DPI).»
With «Color Mode,» you can scan documents in full color, in grayscale, or a stark black and white. Meanwhile, the «Resolution (DPI)» setting allows you to switch from 100 to 300 DPI.
If you select «Feeder» as your scanning source, two additional options appear. As shown below, you can choose the paper size (A4, Legal, or Letter) and toggle on/off the option to scan both sides of your document.
With all three sources, the «File Type» setting provides four options: JPEG, PNG, TIFF, and Bitmap. We provide a separate article explaining the benefits of each format. In short, however, the JPEG and TIFF formats typically offer high-quality results, though TIFF files also support transparent backgrounds. PNG files are ideal for posting online, and BMP files are raw, uncompressed images.
Finally, you’ll see the «Save File To» option. It’s set to «Scans» by default and places your scanned documents in a «Scans» folder located within your «Pictures» folder. The proper path is:
C:\Users\youraccount\Pictures\Scans
Click the «Scans» link, and File Explorer appears. Here you can create a new folder or select a current location and click the «Select Folder» button.
When you’re ready to scan, insert your document into the feeder, or lift the scanner’s lid. For the latter, place the document face-down on the glass and close the lid.
With the «Flatbed» option set as your source, you can click «Preview» to test the scan and make adjustments if needed before finalizing with the «Scan» button. If you’re using the «Feeder» source, the «Preview» option does not appear.
Windows Fax and Scan
This program first appeared in Windows Vista. Unlike Microsoft’s newer Scan app, this version provides additional settings, like a built-in tool for emailing your scan, so you’re not searching for the file through the Mail app, browser, or third-party email client.
You can find the Fax and Scan program located within the Start Menu’s «Windows Accessories» folder.
Once it’s opened, click the «New Scan» option on the toolbar.
In the «New Scan» popup window, make sure the program is set to your default scanner. If not, click the «Change» button.
Next, select a scan profile: «Photo,» «Documents,» or «Last Used Settings.» As an option, click the «Add Profile» selection on the list to create a custom profile to use repeatedly.
Select your scanner’s source. This option may simply read «Flatbed.» If you have an AIO printer that includes a feeder, however, you may see two additional options: «Feeder (Scan One Side)» and «Feeder (Scan Both Sides).»
If your printer or scanner supports a feeder and you select that option, you will see a setting for the target paper size. Click the setting, and a long list of sizes appears.
Next, select your color format (Color, Grayscale, or Black and White) followed by file type (BMP, JPG, PNG, or TIF) and resolution.
For resolution, the default setting is 300, but you can manually raise or lower the number of dots the printer crams into every inch. Typically, the higher the number, the better the resolution. If you’re scanning a low-grade document, however, bumping up the resolution won’t help.
Finally, adjust the brightness and contrast accordingly.
When you’re done, click the «Preview» button to see the results. If the pre-scan looks great, then click the «Scan» button. If not, adjust your settings and click the «Preview» button again for another test. Click the «Scan» button when you’re satisfied with the settings.
Scanning documents on Windows 11 is straightforward, thanks to built-in tools that make the process easy and quick. By using the Windows Scan app or the Windows Fax and Scan utility, you can digitize documents and photos with just a few clicks. The following guide will walk you through the steps, ensuring you can scan any document with ease right from your Windows 11 computer.
Let’s dive into the detailed steps for scanning documents on Windows 11 using the Windows Scan app. This process will help you scan any physical document and save it as a digital file on your computer.
Step 1: Connect Your Scanner
Before you start, ensure your scanner is properly connected to your computer via USB or Wi-Fi.
Verify that your scanner is recognized by your computer. If it’s a Wi-Fi scanner, ensure it’s on the same network. You may need to install the scanner’s drivers, which typically come on a CD with the device or can be downloaded from the manufacturer’s website.
Step 2: Open the Windows Scan App
Access the Windows Scan app by searching for “Scan” in the Start menu and selecting the app from the results.
This app is especially user-friendly for scanning needs. If it’s not installed, you can download it from the Microsoft Store. It’s a lightweight app, so it won’t take up much space on your computer.
Step 3: Select Your Scanner
In the Scan app, choose your scanner from the list of available devices.
This ensures that the app communicates with the correct device. Sometimes, you might see more than one device listed if you’re on a network with multiple scanners. Be sure to pick the correct one.
Step 4: Choose the Scan Settings
Set your preferences such as file type, resolution, and color mode before starting the scan.
These settings determine how your scan will look. Higher resolution scans are clearer but produce larger files. Choose a format like JPEG, PNG, or PDF depending on how you plan to use the scanned document.
Step 5: Preview and Adjust
Preview your scan to make sure everything looks correct. Make any necessary adjustments to alignment or settings.
The preview function lets you see how the final scan will appear, so you can adjust the document’s position or tweak settings before committing to the scan.
Step 6: Start the Scan
Once satisfied with the settings, click the Scan button to begin scanning your document.
The scan will take a moment, depending on the resolution and complexity of the document. You can watch the progress on the screen as your document is scanned.
After completing these steps, your document will be digitized and saved to the location you specified. You’ll be able to view, edit, or share the scanned document as needed.
Tips for Scanning on Windows 11
- Always check for software updates for your scanner to ensure compatibility and performance.
- Clean the scanner glass to avoid smudges or spots on your scanned documents.
- Use the appropriate resolution settings; higher for documents you plan to print and lower for simple archiving.
- Save your scans in a format that suits your needs best, like PDF for documents or JPEG for images.
- Organize your scanned files immediately with clear filenames to make them easy to find later.
Frequently Asked Questions
How do I know if my scanner is compatible with Windows 11?
Most modern scanners are compatible, but it’s best to check with the manufacturer’s website for specific drivers or software updates.
Can I scan multiple pages into a single document?
Yes, many scanners offer an option to scan multiple pages into a single PDF file within the Scan app settings.
What if my scanner isn’t recognized?
Check the connection, ensure the drivers are installed, and try restarting your computer to resolve any recognition issues.
How do I change the file format of my scanned document?
In the Scan app, you can select the output format, such as PDF or JPEG, before you start scanning.
Do I need internet access to scan documents on Windows 11?
No, you don’t need internet access unless you are using a wireless scanner that requires a Wi-Fi connection for operation.
Summary
- Connect your scanner to the computer.
- Open the Windows Scan app.
- Select your scanner.
- Choose scan settings.
- Preview and adjust the scan.
- Start the scan.
Conclusion
Scanning on Windows 11 is a breeze once you get the hang of it. With the built-in tools like Windows Scan, you have everything you need to digitize documents right at your fingertips. Whether you’re archiving family photos or digitizing important paperwork, these steps ensure a smooth process.
Remember, practice makes perfect. The more you use these tools, the more efficient you’ll become at scanning and managing digital files. Also, consider exploring additional scanning software if you require more advanced features for professional use.
For those looking to dive deeper, the Microsoft support page offers comprehensive guides and troubleshooting tips. Now that you’ve learned the steps to scan on Windows 11, it’s time to put this knowledge into action and streamline your document management. Happy scanning!
Matthew Burleigh has been writing tech tutorials since 2008. His writing has appeared on dozens of different websites and been read over 50 million times.
After receiving his Bachelor’s and Master’s degrees in Computer Science he spent several years working in IT management for small businesses. However, he now works full time writing content online and creating websites.
His main writing topics include iPhones, Microsoft Office, Google Apps, Android, and Photoshop, but he has also written about many other tech topics as well.
Read his full bio here.