
To add Git to your system’s PATH variable, allowing you to access Git commands from any command line interface, you can use the following command depending on your operating system.
For Windows
setx PATH "%PATH%;C:\Program Files\Git\bin"
For macOS/Linux
echo 'export PATH=$PATH:/usr/local/git/bin' >> ~/.bash_profile && source ~/.bash_profile
What is PATH?
The PATH environment variable is a crucial component of operating systems used to locate executable files. Essentially, when you type a command in the terminal, the operating system searches through the directories listed in PATH to find the executable that corresponds to that command.
How PATH Works
When you enter a command, like `git`, the shell checks each directory listed in the PATH variable until it finds an executable file that matches the command. If the command is found, it executes; if not, you’ll receive an error indicating that the command is not recognized. By adding Git to your PATH, you make it accessible from any terminal session without needing to specify its installation folder each time.
Mastering Git Path: Your Quick Guide to Success
Why You Need Git in PATH
Inclusion of Git in your PATH significantly enhances your productivity as a developer. Here’s why:
Shortcuts for Productivity
With Git in PATH, you can execute Git commands from anywhere in your terminal window without navigating to Git’s installation directory. This feature saves time and effort, enabling you to focus on coding rather than file management.
Simplified Workflow
Having Git readily available in your terminal creates a seamless experience for managing your version control tasks. You’ll be able to commit changes, push to remote repositories, and pull updates with just a few keystrokes.
Common Use Cases
Consider a typical development scenario where you clone a repository, create branches, and push code changes. Having quick access to Git commands ensures you can rapidly iterate through your development processes without interruption.
Mastering Git Pathspec: Your Quick Reference Guide
How to Add Git to PATH in Different Operating Systems
Adding Git to PATH on Windows
To configure your Windows system to add Git to PATH, follow these steps:
-
Locate Git Installation: The installation path is generally `C:\Program Files\Git`. Check if Git is installed by searching for it in the Start menu.
-
Open Environment Variables:
- Right-click on ‘This PC’ and choose ‘Properties’.
- Click on ‘Advanced system settings’.
- In the System Properties window, click on the ‘Environment Variables’ button.
-
Edit the PATH Variable:
- In the Environment Variables window, find the System variables section and locate the variable named `Path`.
- Select it and click ‘Edit’.
- In the Edit Environment Variable window, click ‘New’ and add the following path:
C:\Program Files\Git\cmd -
Confirming the Setup: Open a new Command Prompt window and execute:
git --versionIf Git is correctly added to your PATH, it will display the installed version.
Adding Git to PATH on macOS
To add Git to PATH on a macOS system, follow these steps:
-
Open Terminal: You can find Terminal in Applications > Utilities or by searching with Spotlight.
-
Locate Git Installation: Typically, Git is installed at `/usr/local/git/bin`. You can verify by typing:
which git -
Edit .bash_profile or .zshrc: Depending on your shell, you’ll need to edit the appropriate configuration file. Most macOS users will use `zsh` by default.
Open the file in a text editor. If you are using `bash`, use:
nano ~/.bash_profileIf you are using `zsh`, use:
nano ~/.zshrc -
Add Git to PATH: Insert the following line at the end of the file:
export PATH=$PATH:/usr/local/git/bin -
Confirming the Setup: After saving and closing the file, refresh your terminal or execute:
source ~/.bash_profileor
source ~/.zshrcThen, confirm by typing:
git --version
Adding Git to PATH on Linux
To add Git to PATH on a Linux system, you can follow the steps outlined below:
-
Open Terminal: Access the terminal application from your application menu.
-
Locate Git Installation: You can check if Git is available and its path with:
which git -
Edit .bashrc or .profile: Open your profile configuration file. Typically, this will be `.bashrc` for most distributions.
nano ~/.bashrc -
Add Git to PATH: At the end of the file, add the following line, adjusting the path as necessary based on the output of `which git`:
export PATH=$PATH:/usr/bin/git -
Confirming the Setup: After editing the file, run:
source ~/.bashrcValidate the change by executing:
git --version
Mastering Git to GitHub: A Quick Guide
Troubleshooting Common Issues
Git Command Not Found
If you encounter a message stating that the command is not recognized, it likely indicates that Git is not correctly added to your PATH. Double-check the path you entered in the environment variable configurations.
Double-Checking PATH
To inspect your PATH settings and verify if Git is included, you can run this command on your terminal or command prompt:
echo $PATH
or on Windows:
echo %PATH%
Review the output to ensure that Git’s installation path appears.
Rebooting and Refreshing
Often, changes to PATH take effect immediately. However, in some cases, you may need to restart your terminal application or your computer to ensure the updates are recognized.
Add Git Dependency Cargo: A Quick Guide
Best Practices for Managing PATH
Keeping PATH Organized
A cluttered PATH variable can lead to confusion and command conflicts. Periodically review your PATH entries and remove any that are no longer necessary or relevant to your work.
Finding the Right Order
The order of items in your PATH can affect command execution. If multiple commands share the same name (for example, different versions of Git), the one listed first in PATH will be executed. Therefore, maintain a sensible sequence by placing the paths you use most frequently at the beginning of the list.
Add Git Bash to Windows Terminal: A Quick Guide
Conclusion
Adding Git to your PATH is an essential step for anyone serious about using Git as part of their development toolkit. By streamlining your access to Git commands, you can improve your efficiency and enhance your overall workflow. We encourage you to practice these steps and make Git a seamless part of your development process.

Download Git Bash: A Quick Guide to Get Started
Additional Resources
For those looking to further their understanding of Git and its capabilities, consider visiting the official Git documentation or exploring online courses that offer advanced tips and techniques for mastering this powerful version control tool. Continuous learning will equip you with the knowledge to make the most of Git in your projects.
SYSTEM PATH Variable
You will need administrator on the local box – to set the SYSTEM PATH variable as shown below
- Click on Advanced System Settings.
- Click on Environment Variables.
- Under System Variables, look for the path variable and click edit.
-
Add the path to git’s bin and cmd at the end of the string like this: ;C:\Program Files\Git\bin\git.exe;C:\Program Files\Git\cmd.
Gitbash shortcut using HOME as an Environment variable
Define a new ‘%HOME%’ variable. And update your shortcut to use this variable
Click this and define a new variable, HOME, with the value set to your working directory (e.g. c:\MYWINDOWSDIR\workspace\repo).
Update the gitbash shortcut to use this new variable %HOME%. Right click your gitbash shortcut and click Properties. Change the value of ‘Start in:’ field to %HOME%. Click OK.
Summary
That’s it.
guides
- Git. Краткое руководство по терминалу
- Введение
- Открытие терминала
- Linux
- Mac
- Windows (Git Bash)
- Первоначальная настройка Git
- Пути
- Переменные окружения
- Автодополнение
- Ключевые команды
- Текущий рабочий каталог
- Смена рабочего каталога
- Листинг каталога
- Создание файлов
- nano
- Vim
- VS Code
- Создание каталогов
- Перемещение файлов и каталогов
- Удаление файлов и каталогов
- На заметку
- Важность консольных сообщений
- Выход из программы вывода текста
- Копирование/вставка
- “Короткий путь”
Введение
Данное краткое руководство демонстрирует основные команды в терминале Bash:
- Bash (Linux/Mac)
- Git Bash (Windows)
Открытие терминала
Первая задача: открыть терминал сразу в нужном каталоге.
Linux
В Linux достаточно щёлкнуть правой кнопкой мыши на каталоге и выбрать пункт меню Open in Terminal или Открыть в терминале:

Mac
В Mac всё немного сложнее, необходимо настроить отображение этого пункта меню в Finder.
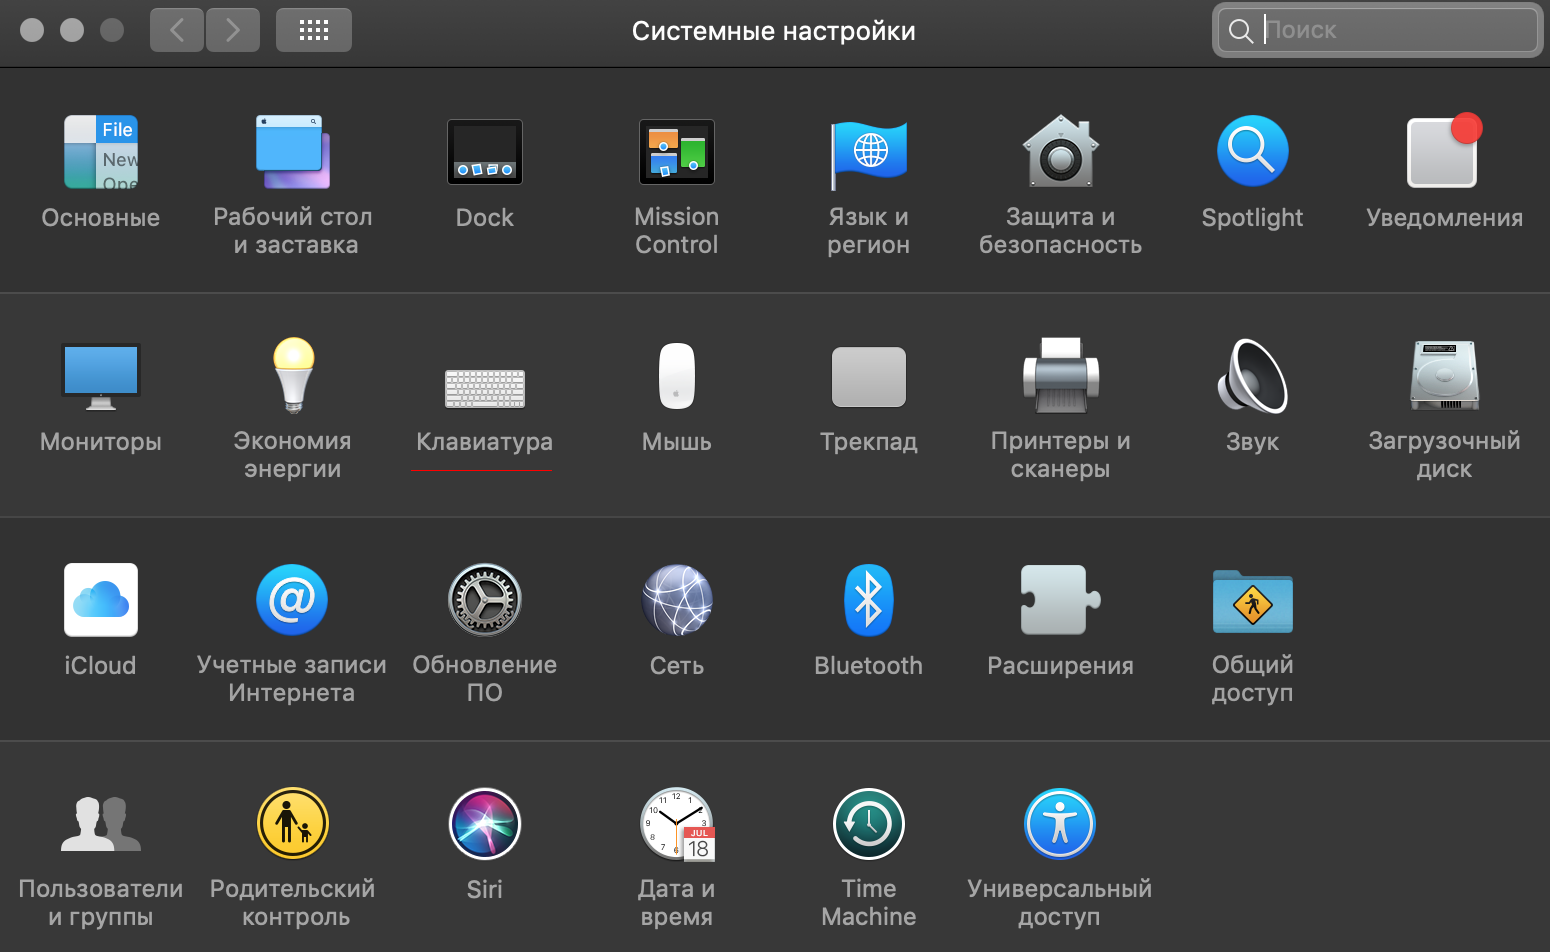
Для этого необходимо перейти в Системные настройки, затем пункт меню Клавиатура, в разделе Службы выбрать раздел Файлы и папки и поставить флажок напротив Новый терминал по адресу папки:
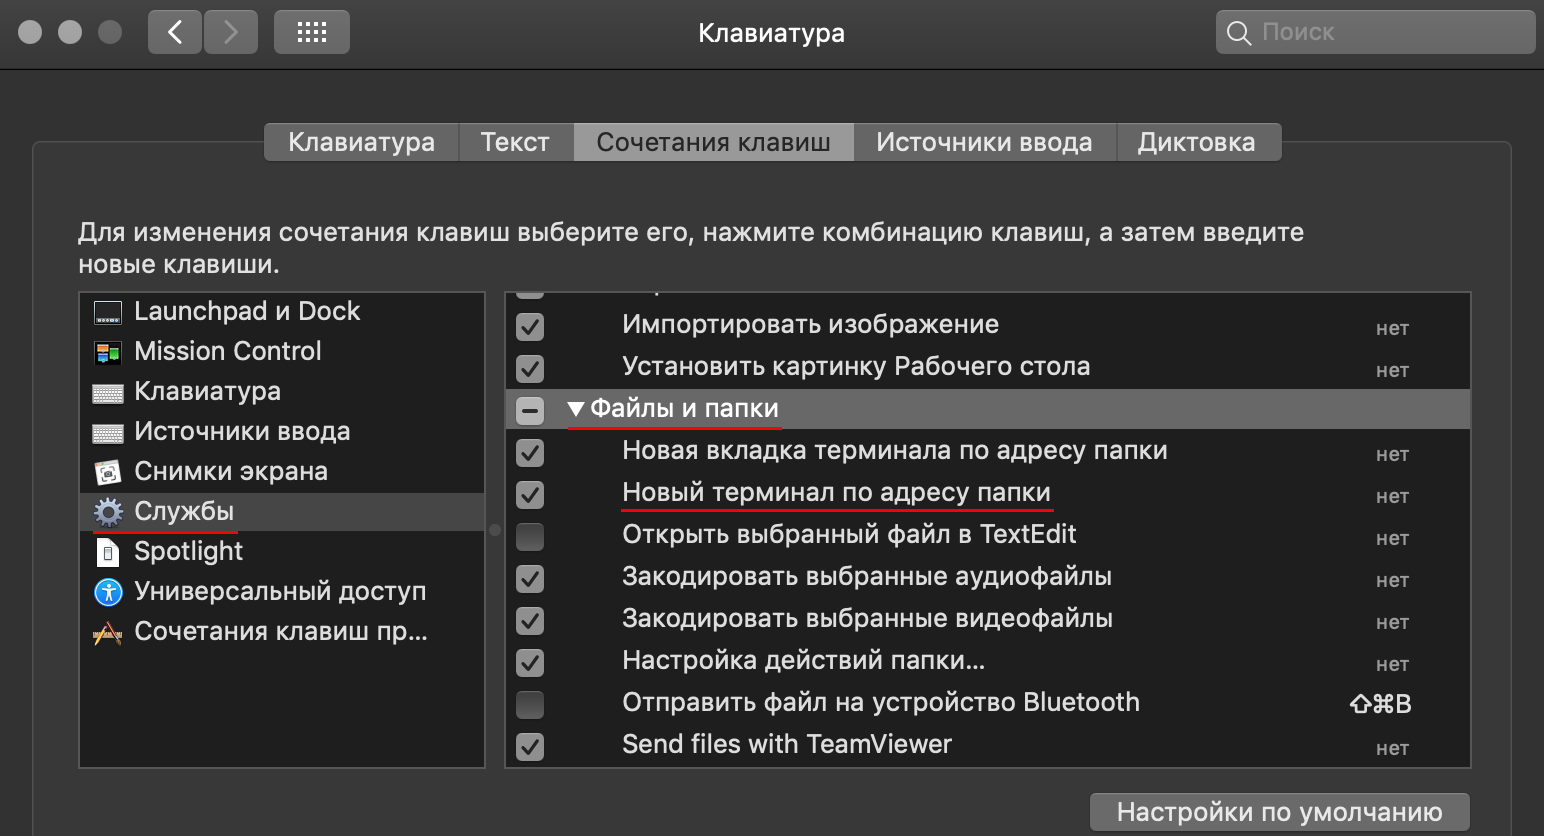
После чего при клике правой кнопкой мыши на каталоге появится необходимый пункт меню:
Windows (Git Bash)
В Windows всё достаточно просто — клик правой кнопкой мыши на каталоге и выбор Git Bash Here:

Первоначальная настройка Git
После установки Git первое, что мы сделаем — укажем наши имя и адрес электронной почты. Это важно, потому как этой информацией подписывается каждый коммит (кто сделал изменения и его электронная почта). Для настройки потребуется ввести команды:
$ git config --global user.name "Thorin Oakenshield"
$ git config --global user.email ereborsons@stone.com
Если указана опция --global, настройки применятся глобально, то есть для всех ваших действий в системе Git. Без этой опции настройки применяются локально, для текущего репозитория, и не влияют на глобальные настройки.
Пути
Одно окно терминала подразумевает, что вы можете в один момент времени находиться только в одном каталоге, который называется Current Working Directory (текущий каталог), так же как и в одном открытом окне Nautilus, Finder или проводника Windows.
Вы можете выполнять команды относительно текущего каталога или относительно абсолютного пути.
Абсолютный путь — это путь, начинающийся от корня файловой системы. Корень файловой системы обозначается символом /.
Например, в Git Bash (Windows) абсолютный путь для каталога Program Files, будет чаще всего выглядеть следующим образом: /c/Program Files/.
Для домашнего каталога в Ubuntu (Linux), абсолютный путь будет выглядеть следующим образом: /home/user/, где user — имя пользователя.
Bash (Git Bash в том числе) используют символ / для разделения каталогов.
Ещё два специальных обозначения помимо корня файловой системы:
.— обозначает текущий каталог;..— обозначает родительский каталог.
Важно: в терминале символ ` ` (пробел) является символом, разделяющим команды и опции. Поэтому если в пути есть пробел, то варианта два:
- заключать путь в кавычки, то есть
"Program Files"; - использовать символ
backslashдля экранирования пробела:Program\ Files.
Переменные окружения
Командная оболочка устанавливает ряд переменных, которые выполняют специфические функции. Так, переменная с именем PATH содержит список путей, в которых будет производиться поиск программы, если вы наберёте её название в терминале.
Для вывода содержимого конкретной переменной используется команда echo следующим образом:
Команда printenv позволяет отобразить все переменные окружения:
Видно, что в переменных окружения содержится достаточно много информации о системе.
Автодополнение
В командных оболочках работает автодополнение по клавише Tab:
- дополняются имена команд;
- дополняются пути.
Используйте автодополнение, так как оно позволяет сократить время на набор команды.
Ключевые команды
В этом разделе будут описаны ключевые команды, необходимые нам для работы. Естественно, список этот далеко не полный.
Текущий рабочий каталог
pwd — сокращение от “Print Working Directory”.
Отображение текущего рабочего каталога:
Смена рабочего каталога
cd — сокращение от “Change Directory”.
Переход в определённый каталог:
path может быть как абсолютным, так и относительным путём.
Например, перейти на каталог выше:
Перейти в подкаталог src:
Если перед путём нет слеша — он трактуется как относительный (относительно текущего каталога).
Листинг каталога
ls — сокращение от “List”.
Отображает листинг (содержимое каталога):
По умолчанию, ls не отображает файлы, начинающиеся с ., например, .gitignore. Для отображения таких файлов нужно использовать флаг -a:
Создание файлов
Для создания файлов используются специальные программы (например, для создания текстовых файлов — текстовые редакторы).
В рамках рассмотрения Bash мы рассмотрим два текстовых редактора, которые позволят вам создавать и редактировать файлы в псевдографическом режиме.
nano
nano — простой текстовый редактор.
Для того, чтобы создать файл достаточно ввести команду nano и имя файла:
Откроется редактор следующего вида:
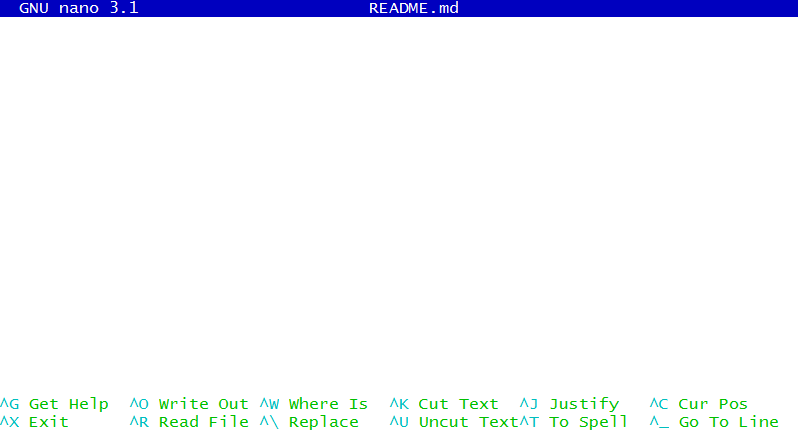
Пункты меню в нижней части вызываются с помощью горячих клавиш, где символ ^ обозначает клавишу Ctrl.
То есть чтобы записать файл и выйти следует последовательно нажать Ctrl + O (запись) и Ctrl + X (выход).
Редактор nano установлен в большинстве Unix-подобных операционных системах и Git Bash.
Vim
Редактор Vim (a programmer’s text editor) — профессиональный редактор, позволяющий достичь максимальной производительности при работе с любыми текстовыми файлами. Настолько популярен, что для любой графической среды (IDE, текстовых редакторов вроде VS Code, Atom, Sublime) всегда есть плагин, включающий возможность редактирования кода в режиме “Vim Mode”.
На освоение работы в Vim нужно потратить достаточно много времени, для этого вы можете воспользоваться интерактивным учебником vimtutor:
Мы лишь скажем, что для выхода из этого редактора (если вы всё-таки осмелились его открыть) нужно нажать клавишу Esc, затем ввести команду :q! — это позволит вам закрыть открытый файл без сохранения изменений.
VS Code
В видео-лекциях используется VS Code. В Windows вы можете правой кнопкой открыть каталог сразу в VS Code.
В Mac OS и Linux вы можете открыть терминал по адресу папки и в терминале выполнить команду code . &, которая откроет выбранный вами каталог в этом редакторе.
Если ни то, ни другое у вас не получилось, то просто откройте VS Code и через File — Open откройте нужный каталог.
Создание каталогов
mkdir — сокращения от “Make Directory”.
Позволяет создавать каталоги (создаст каталог tmp в текущем каталоге):
Стоит обратить внимание на поведение при создании нового каталога в текущей директории. После команды mkdir name ваше текущее расположение в терминале не изменится. Для того, чтобы работать внутри созданного каталога, в него требуется перейти командой cd name. Это справедливо и при клонировании удалённого репозитория с помощью команды git clone <repo_url>. Полностью склонированный репозиторий создаст каталог в текущей директории с именем проекта, в который нужно перейти командой cd repo_name.
Перемещение файлов и каталогов
mv — сокращение от “Move”.
Перемещение (переименование) файлов и каталогов:
Удаление файлов и каталогов
rm — сокращение от “Remove”.
Удаление файла:
Удаление непустого каталога:
Для удаления непустого каталога необходимо указать флаги:
-r— удалять рекурсивно;-f— не спрашивать подтверждения.
На заметку
Важность консольных сообщений
Git является консольной программой — это значит, что у неё нет графического интерфейса, привычного нам по многим оконным приложениям. Программа будет выводить всю важную информацию о своей работе в окно терминала. Обычно программа “молчит”, когда команда выполнена успешно.

При возникновении ошибок Git обязательно сообщит вам об этом, иногда даже подскажет, как поступить дальше.
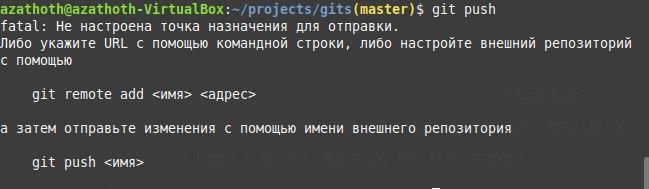
Внимательно изучая вывод программы, вы сохраняете своё время и понимаете работу программы чуть лучше. Это справедливо для всех консольных приложений.
Выход из программы вывода текста
Бывает, Git пытается нам сказать намного больше, чем умещается в окне терминала. Для этого он пользуется постраничным выводом и когда ему уже нечего выводить появляется метка конца данных (END) или :END. Например, конец вывода команды git log:
Для того чтобы покинуть программу вывода, нужно нажать клавишу q (сокращение от слова “quit” — покинуть) на английской раскладке клавиатуры.
Копирование/вставка
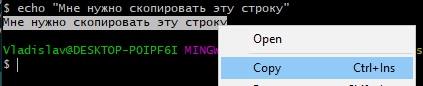
Копирование и вставка из буфера обмена в терминал отличается от тех же действий в обычных текстовых редакторах. Хорошо известная последовательность Ctrl + C и Ctrl + V нужного эффекта не даст. Некоторые последовательности символов зарезервированы в терминале как управляющие, в частности, Ctrl + C служит для прерывания процесса.
Для того чтобы скопировать выделенную область из терминала в буфер обмена, нужно использовать контекстное меню (правая кнопка мышки) или нажать Ctrl + Ins:
Для вставки в поле ввода терминала можно также воспользоваться контекстным меню мышки или зажать Shift + Ins:
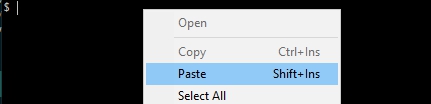
Иногда может работать вставка по нажатию на колёсико мышки (средняя кнопка).
“Короткий путь”
Зачастую навигация в терминале сводится к попеременному вводу команд листинга
и, после просмотра содержимого текущей директории, выбору следующей директории.
Но есть способ короче. Если полностью набрать имя следующей директории и нажать два раза клавишу Tab, мы сможем заглянуть внутрь этой директории не прерывая команду.
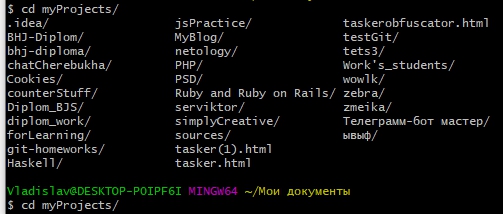
При этом уже набранный текст команды будет на новой строке, а выше мы увидим содержимое следующей директории.
- How to add git to PATH (Bash on Windows)
- Extend $PATH variable in git bash under Windows
- How to use include.path on Windows
How to add git to PATH (Bash on Windows)
Is setting my PATH different by putting it in my ~/.profile vs. going into
Control Panel —> System Properties —> Environment Variables. Yes,
completely. If you want to set …
setx PATH=%PATH%;C:\path\to\Git\bin


which git


export PATH=$PATH:/path/to/git


sudo add-apt-repository ppa:git-core/ppa
sudo apt-get update
sudo apt-get install git-core
Extend $PATH variable in git bash under Windows
I needed to add something to my Git Bash path permanently each time I open it.
It was Meld.exe path which can be added with: export PATH=$PATH:»/C/Program
Files (x86
PATH=$PATH':/c/Program Files/maven/apache-maven-3.2.5/bin'


$ echo $PATH
MANY_OTHER_PATHS:/c/Program Files/maven/apache-maven-3.2.5/bin


$ mvn
bash: mvn: command not found


export PATH=$PATH:"/C/Program Files (x86)/Meld/lib"


echo ~
How to use include.path on Windows
Teams. Q&A for work. Connect and share knowledge within a single location that
is structured and easy to search. Learn more about Teams
[user]
name = CB
email = [email protected]
[include]
path = "c:/common/git/commonConfig"


> git config --global -l


user.name=CB
[email protected]
include.path=c:/common/git/commonConfig


--[no-]includes
    Respect include.* directives in config files when looking up values. Defaults to on.


/cygdrive/c/common/git/commonConfig


/c/common/git/commonConfig


[include]
path = ~/common.gitconfigSkip to content
This post serves as a convenience for me and possibly others (probably not because nobody develops on windows) on how to manage working within Git Bash and Command Line in general within Windows 10. It can be a real pain in the neck to develop on Windows. (Updated for 11 in 2023!)
I primarily use Windows because my life is between software and business.
Git Bash Notes
- Git Bash does not always work with Windows Path. Sometimes you have to use winpty and alias to setup and run things (like Node or Python): https://stackoverflow.com/questions/32597209/python-not-working-in-the-command-line-of-git-bash
- Set your default Git Bash startup location: https://stackoverflow.com/questions/7671461/how-do-i-change-the-default-location-for-git-bash-on-windows
- Set your Git Bash for Windows to use your own bashrc settings. Git Bash for Windows now looks for a file named: .bash_profile / formerly named: .bashrc : https://stackoverflow.com/questions/6883760/git-for-windows-bashrc-or-equivalent-config-files-for-git-bash-shell
- Git Bash 2.5.0 in Windows 10. I renamed my ‘.bashrc’ -> ‘.bash_profile’ and relaunched Git Bash. Place in home directory of your user as the file itself. An existing one may already be there as generated by Git for Windows.
- Append Bash history to prevent multiple windows overwriting: https://unix.stackexchange.com/questions/1288/preserve-bash-history-in-multiple-terminal-windows
- Helpful commands:
- alias https://askubuntu.com/questions/17536/how-do-i-create-a-permanent-bash-alias
- history
- grep
- winpty
Windows PATH Tips/Instructions:
- Control Panel > System > Advanced > Environment Variables
- Edit Path to add a folder or System Variable
- Add a folder: Point the resource you need by adding a folder path without the .exe
- Add a System Variable: First point the directory and assign a variable name by adding to the System Variables. Next append the name of the variable to the Path ( ex. %JAVA%; ).
- Windows Environment Variable added without restarting (ha): https://serverfault.com/questions/8855/how-do-you-add-a-windows-environment-variable-without-rebooting
Or you know, just fucking reboot - Add things for convenience like c:/eclipse/ and then simply type eclipse to open the IDE
.bash_profile Examples:
https://www.tldp.org/LDP/abs/html/sample-bashrc.html
This file contains hidden or bidirectional Unicode text that may be interpreted or compiled differently than what appears below. To review, open the file in an editor that reveals hidden Unicode characters.
Learn more about bidirectional Unicode characters
| # If not running interactively, don’t do anything | |
| [ -z «$PS1» ] && return | |
| # Suppress message about using zsh | |
| export BASH_SILENCE_DEPRECATION_WARNING=1 | |
| # ———————————— | |
| # MOTD (Message of the Day) | |
| # What you see when Terminal opens | |
| # ———————————— | |
| echo «—————————-« | |
| echo «Loaded ~/.bash_profile» | |
| echo «» | |
| echo «To edit run: configedit» | |
| echo «To refresh run: configrefresh» | |
| echo «All aliases: alias» | |
| echo «—————————-« | |
| # ———————————— | |
| # Configure prompt | |
| # Includes special handling for git repos | |
| # ———————————— | |
| # Regular Colors | |
| Black=’\[\033[0;30m\]’ | |
| Red=’\[\033[0;31m\]’ | |
| Green=’\[\033[0;32m\]’ | |
| Yellow=’\[\033[0;33m\]’ | |
| Blue=’\[\033[0;34m\]’ | |
| Purple=’\[\033[0;35m\]’ | |
| Cyan=’\[\033[0;36m\]’ | |
| White=’\[\033[0;37m\]’ | |
| Light_Gray=’\[\033[0;37m\]’ | |
| # Reset colors | |
| NONE=’\[\033[0;0m\]’ | |
| # When in a git repo, this method is used to determine the current branch | |
| function parse_git_branch { | |
| git branch 2>/dev/null | grep ‘^*’ | sed ‘s_^..__’ | sed ‘s_\(.*\)_(\1)_’ | |
| } | |
| # When in a git repo, this method is used to determine if there are changes | |
| # Changes will be indicated in the prompt by a * | |
| function git_dirty { | |
| if [[ -n $(git status -s –ignore-submodules=dirty 2> /dev/null) ]]; then | |
| echo «*» | |
| else | |
| echo «» | |
| fi | |
| } | |
| # Design the prompt | |
| export PS1=»$Purple\w$NONE \$(parse_git_branch)$Red \$(git_dirty) $NONE\$ « | |
| # \w shows the current path | |
| # List of other placeholders you can use: | |
| # http://www.gnu.org/software/bash/manual/bash.html#Controlling-the-Prompt | |
| # ———————————— | |
| # ALIASES | |
| # ———————————— | |
| # Edit .bash_profile | |
| alias configedit=’code ~/.bash_profile’ | |
| # Force terminal to recognize changes to .bash_profile | |
| alias configrefresh=’source ~/.bash_profile’ | |
| # Ideal directory listing | |
| alias ll=»ls -laFG» | |
| # Ask before removing files | |
| alias rm=’rm -i’ | |
| # Add your own aliases here… |
My .bash_profile:
# go to the root directory of my development environment on startup
cd 'C:\dev'

# set aliases for commonly used applications
alias np='start notepad++'
alias c='code .'
alias dock='docker-compose up'
alias dockb='docker-compose.exe run app --entrypoint run build:dev'
alias histg='history | grep'
alias g='git'

# save history and persist across multiple bash windows
export HISTCONTROL=ignoredups:erasedups
shopt -s histappend
export PROMPT_COMMAND="${PROMPT_COMMAND:+$PROMPT_COMMAND$'\n'}history -a; history -c; history -r"
SSH – I no longer use this (2023) as I now run the service via Windows:
# ssh things
env=~/.ssh/agent.env

agent_load_env () { test -f "$env" && . "$env" >| /dev/null ; }

agent_start () {
(umask 077; ssh-agent >| "$env")
. "$env" >| /dev/null ; }

agent_load_env

# optional SSH key handling
# agent_run_state: 0=agent running w/ key; 1=agent w/o key; 2= agent not running
# agent_run_state=$(ssh-add -l >| /dev/null 2>&1; echo $?)

if [ ! "$SSH_AUTH_SOCK" ] || [ $agent_run_state = 2 ]; then
agent_start
ssh-add
elif [ "$SSH_AUTH_SOCK" ] && [ $agent_run_state = 1 ]; then
ssh-add
fi

unset env
My .gitconfig
[color "diff"]
meta = yellow bold
[alias]
st = status
ch = checkout
co = commit
s = status
p = pull
d = diff