
Table of Contents
Ever wanted to detect the motherboard information like manufacturer, model, version for any Windows PC? You do not need to install any third-party software to do so. The Get-CimInstance PowerShell cmdlet can get this information for you by querying Common Information Model (CIM). Back in the days, Microsoft had their own implementation of CIM known as Windows Management Instrumentation (WMI) and Get-WmiObject cmdlet was used to query WMI for information. But starting with PowerShell 3.0, Get-WmiObject cmdlet has now been superseded by Get-CimInstance.
Get motherboard information
To get the information about motherboard, open Windows PowerShell and type the following command:
Get-CimInstance -Class Win32_BaseBoard | Format-Table Manufacturer, Product, SerialNumber, Version -Auto

The above command displays the Motherboard manufacturer, Model, Serial number and Revision number for local computer.
The good news is that Get-CimInstance supports ComputerName parameter where you can specify remote computer name and get the information about that. If you want to get the information about any remote server, just add -ComputerName parameter and specify the name of computer/server as shown below:
Get-CimInstance -Class Win32_BaseBoard -ComputerName DC1 | Format-Table Manufacturer, Product, SerialNumber, Version
If you are a system admin and often need this information about any server or computer, you can continue reading and I’ll show you how to create a cmdlet that will work exactly like other Windows PowerShell cmdlets.
Get memory (RAM) information
The beauty of Get-CimInstance is that, not only motherboard, but you can query a whole lot of things from CIM. For example, to get the memory (RAM) information using PowerShell, you can use the following command:
Get-CimInstance Win32_PhysicalMemory | ft Manufacturer, Capacity, SerialNumber, BankLabel, ConfiguredClockSpeed, DeviceLocator -Auto

To get a more readable memory size and clock speed of memory, you might want to run the following command instead:
Get-CimInstance Win32_PhysicalMemory | Format-Table Manufacturer, SerialNumber, BankLabel, DeviceLocator, @{n="Size (GB)"; e={($_.Capacity/1GB)}; align="center"}, @{n="ClockSpeed (MHz)"; e={($_.ConfiguredClockSpeed)}; align="center"} -Auto
Get processor (CPU) information
To get the processor information, you could use the following command:
Get-CimInstance Win32_Processor

If the default information returned by this command isn’t enough, you could add -Property * parameter do display more detailed information.
Get operating system (OS) information
To get the operating system information, you could use the following command:
Get-CimInstance Win32_OperatingSystem | Select Caption, BuildNumber, Version, SystemDirectory

These are just a few examples of information you can get using Get-CimInstance cmdlet. There are whole lot of CIM classes that you can use to fetch the relevant and detailed information. To learn about various CIM classes, visit this official page.
Creating Get-BoardInfo PowerShell module
For this command to behave and work as native PowerShell cmdlet, you need to create a directory structure and then create a file with the same name as shown in following screenshot:
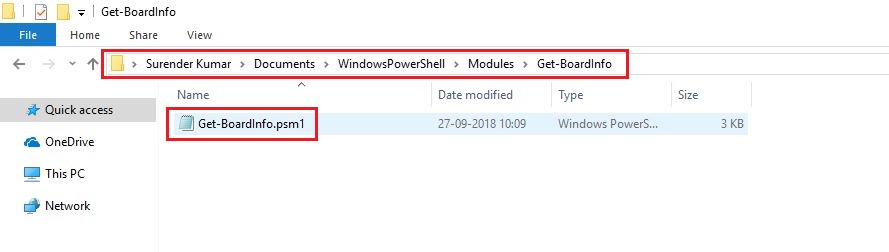
In you computer, Go to your documents directory, then create a directory like this: WindowsPowerShell\Modules\Get-BoardInfo. Inside Get-BoardInfo directory, create a file named Get-BoardInfo.psm1.
If you have already started loving PowerShell, you can directly create it by running the following PowerShell command:
ise $(New-Item $HOME\Documents\WindowsPowerShell\Modules\Get-BoardInfo\Get-BoardInfo.psm1 -Force)
This command will create a PowerShell module file and open it using PowerShell ISE at the same time.
Now, copy the following code, paste it into the PowerShell ISE, and press “Ctrl+S” to save it.
<#
.Synopsis
Gets the basic information about motherboard

.Description
The Get-BoardInfo Cmdlet displays the basic system information like Motherboard manufacturer, Model, Serial Number, Revision. The output can be formatted using format Cmdlets available in Windows PowerShell like Format-Table, Format-List.

.Parameter <ComputerName>
This is a required parameter where you need to specify one or more computer name(s)

.Example
Get-BoardInfo -ComputerName DC1, DC2 -Credential domain\admin | Format-Table -AutoSize
This command retrieves the Motherboard information about DC1 and DC2 using alternate credentials and displays the information in Table format

.Example
Get-BoardInfo -ComputerName $(Get-Content "C:\Computers.txt") | Format-Table -AutoSize
This command takes the list of Computer names from a text file and pipe each computer to Get-BoardInfo Cmdlet to retrieve the Motherboard information of all the computers

.Example
Get-BoardInfo -ComputerName $(Get-Content "C:\Computers.txt") | Export-Csv C:\BoardInfo.csv
This command takes the list of Computer names from a text file and pipe each computer to Get-BoardInfo Cmdlet to retrieve the Motherboard information of all the computers and creates a CSV report
#>
Function Get-BoardInfo{

    [CmdletBinding()]
    param(
        [Parameter(Mandatory=$true,
                   ValueFromPipeline=$true,
                   ValueFromPipelineByPropertyName=$true)]
        [Alias ('HostName','cn','Host','Computer')]
        [String[]]$ComputerName='localhost',
        [String]$Namespace = 'root\CIMV2',
        [System.Management.Automation.CredentialAttribute()]
        $Credential = Get-Credential domain\user

    )
    $BoardInfo = New-Object System.Collections.Arraylist
    foreach($Computer in $ComputerName) {
        if (Test-Connection -ComputerName $Computer -Count 2 -Quiet) {
        $BoardInfo.add($(Get-CimInstance -Class Win32_BaseBoard -ComputerName $Computer -Namespace $Namespace -Credential $Credential)) | Out-Null
    }

    else {
        Write-Host "Could not connect to $Computer" -ForegroundColor Red
         }
       }
       Write-Output $BoardInfo | Select @{Label="ComputerName";Expression="PSComputerName"},@{Label="Board Manufacturer";Expression="Manufacturer"},@{Label="Board Model";Expression="Product"},@{Label="Board SerialNumber";Expression="SerialNumber"},@{Label="Board Revision";Expression="Version"}

}
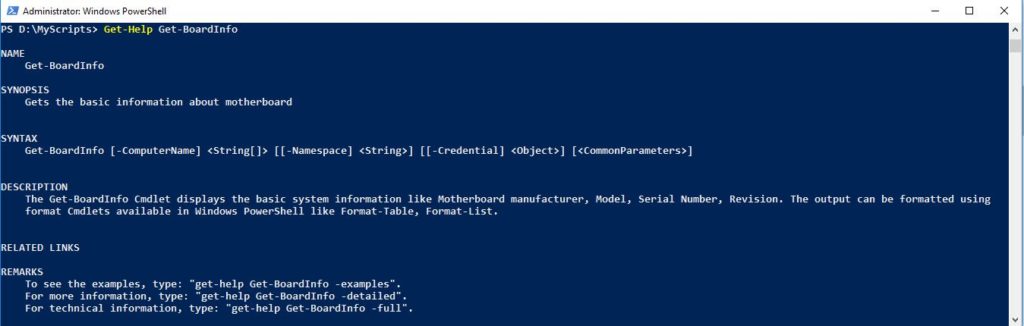
If you have done everything correctly so far, you will be able to find your Get-BoardInfo cmdlet ready. Just close your current PowerShell console and open a new one. Now, type the following command:
Get-Help Get-BoardInfo
If you see the output as shown in following image, you have created a PowerShell module properly and it will work just like other PowerShell cmdlets.
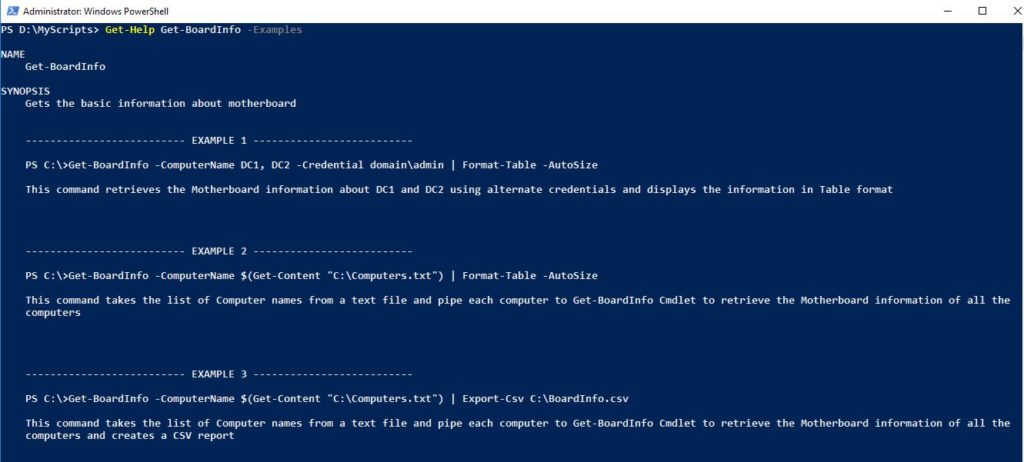
If you are familiar with PowerShell cmdlets, you will understand that you can use PowerShell’s built-in Get-Help cmdlet to know how our Get-BoardInfo cmdlet works. To see the examples on how you can use this, type the following command:
Get-Help Get-BoardInfo -Examples
You should see the examples as shown in following screenshot:
To get the information about multiple PCs like NODE01, NODE02, and NODE03, use the cmdlet as shown below:
Get-BoardInfo -ComputerName NODE01, NODE02, NODE03 | Format-Table -Auto
You can also use this cmdlet to get a list of computers stored in a text file and fetch the motherboard information about all those computers and even export that information into a CSV file.
Get-BoardInfo -ComputerName $(Get-Content "C:\Computers.txt") | Export-Csv C:\BoardInfo.csv
Pretty cool! right?
Take some time to read the examples, and you will understand what you can achieve with the PowerShell module you just created. In the same way, you could create another module for getting memory information using PowerShell and so on.
That was it for this tutorial. If you find this tutorial helpful, please leave a comment below and feel free to share it with others.
Quick Answer
- The quickest way to gather details on the motherboard installed on your existing system is to use the System Information app from Microsoft Windows.
- An easy method to gather details on your system’s motherboard without using any tool is to find and look for physical product labels on your machine indicating crucial hardware details.
- If you’re using a desktop/PC, you need to open your PC cabinet to find these engravings on the motherboard to determine their manufacturer and serial number.
If you’re here searching for a way to find your motherboard model number, you’ve either messed up your system or are absolutely curious about your machine. Nonetheless, we have exactly what you need to find details on your system’s internals. In this guide, we have demonstrated 3 easy methods to see your motherboard model details on your Windows PC or laptop. In addition, you can also learn how to speed up your old PC without installing Windows again.
Ways To See Motherboard Details on Windows PC
Use System Information App to See Motherboard Details
The quickest way to gather details on the motherboard installed on your existing system is to use the System Information app from Microsoft Windows. Here’s how you can use this app to your advantage:
1. Press the Windows key and search for the System Information app to open it.
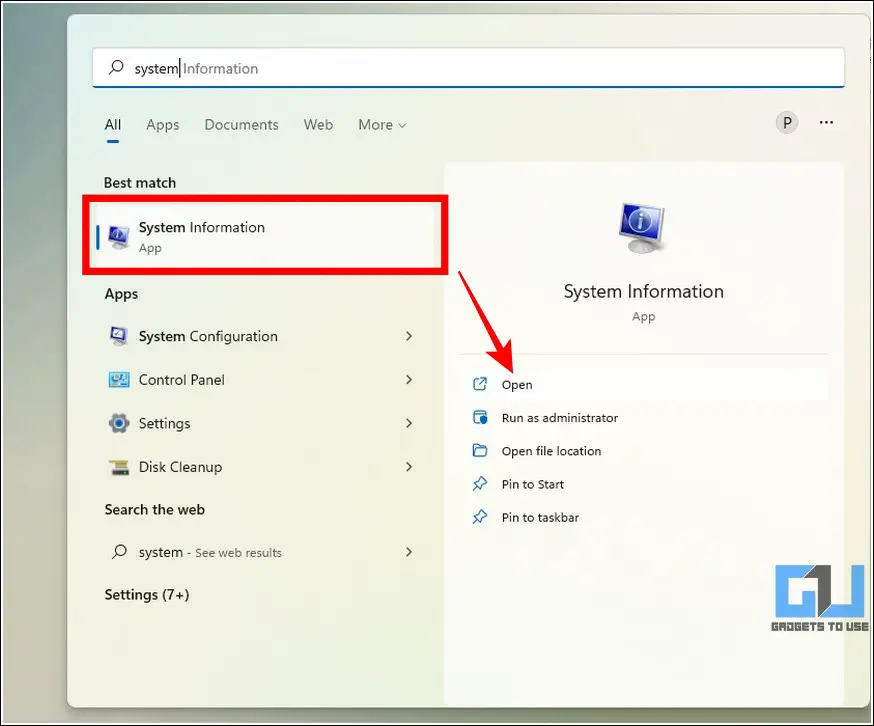
2. Expand System Summary in the left sidebar and locate the BaseBoard field information in the list e.g. BaseBoard Manufacturer, BaseBoard Product, and BaseBoard Version to gather your required motherboard details.
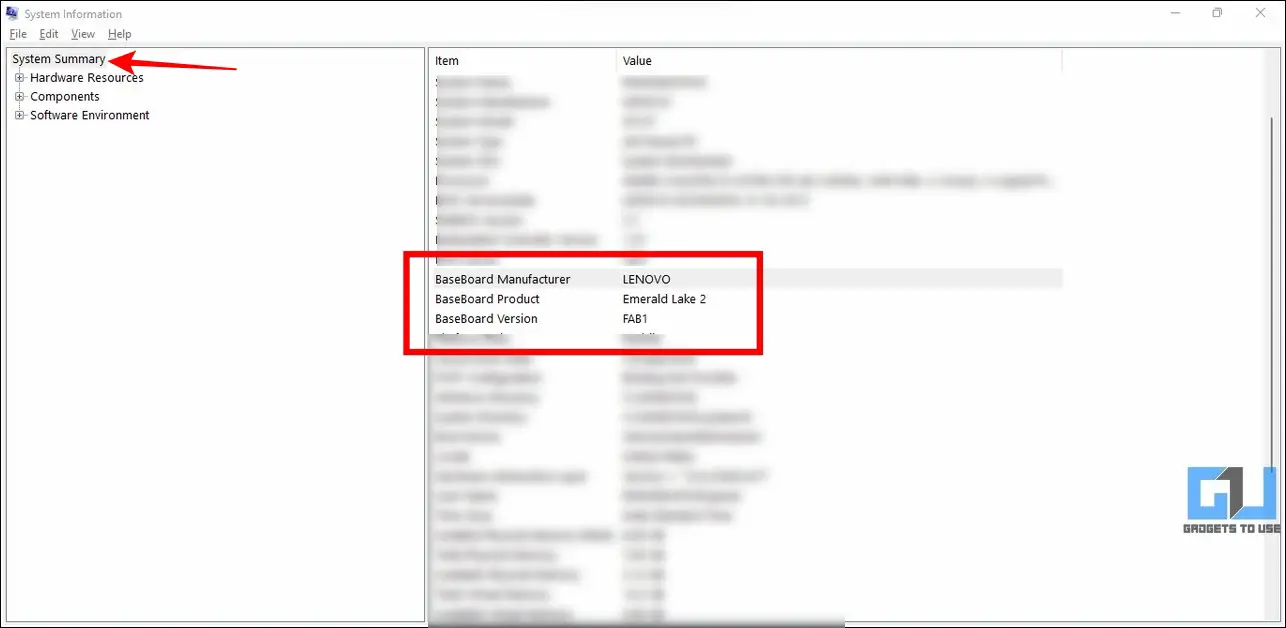
3. These fields denote the motherboard manufacturer, product name, and its version respectively. You can note down this information to include it in your search queries.
Use Windows Power Shell Tool to See Motherboard Details Quickly
Another nifty trick to quickly extract motherboard details from your Windows system is through the PowerShell utility tool. Here’s how you can grab your motherboard model details using this method:
1. Access the PowerShell tool on your Windows system by pressing the Windows key.
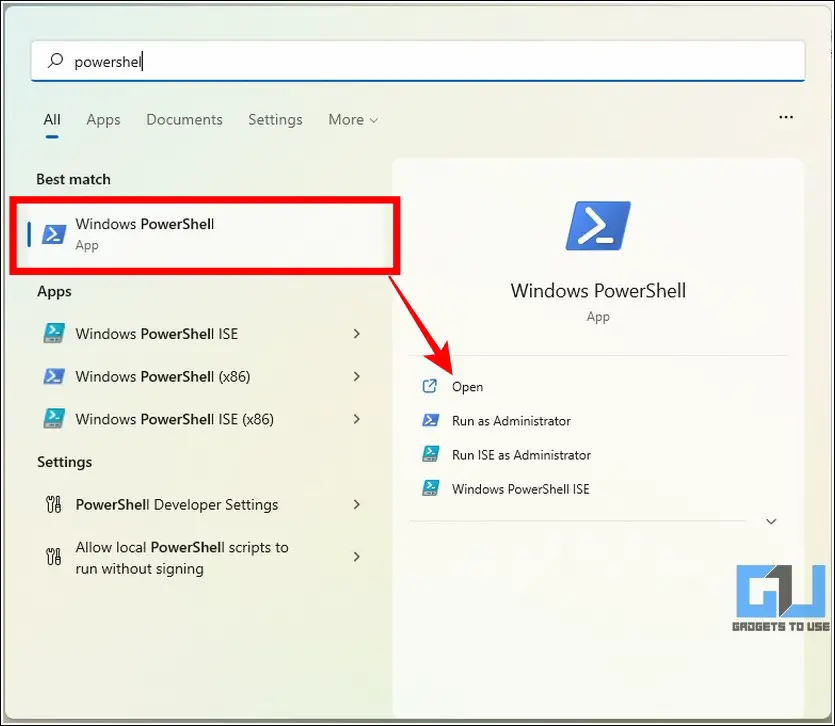
2. Next, copy and paste the following command to extract and view your system’s motherboard details.
wmic baseboard get product, Manufacturer, version, serialnumber
3. Press the enter key to execute the command.
4. That’s it. You can now view crucial motherboard details of your system such as Motherboard Manufacturer, Product Name, Serial Number, and Version.

Find the Motherboard Model of Your System Using BIOS
In addition to system tools, you can also access BIOS to grab details on your motherboard such as manufacturer, model, and serial number. Here’s how you can locate your motherboard details using BIOS:
1. Restart your system and press the BIOS key set by your manufacturer which could be F2, F10, F12, F1, or Del. If you’re unsure about it, you can find your dedicated BIOS key by following this table.
2. Next, switch to the Information tab inside the BIOS menu to find the motherboard details such as the product name and its associated serial number.
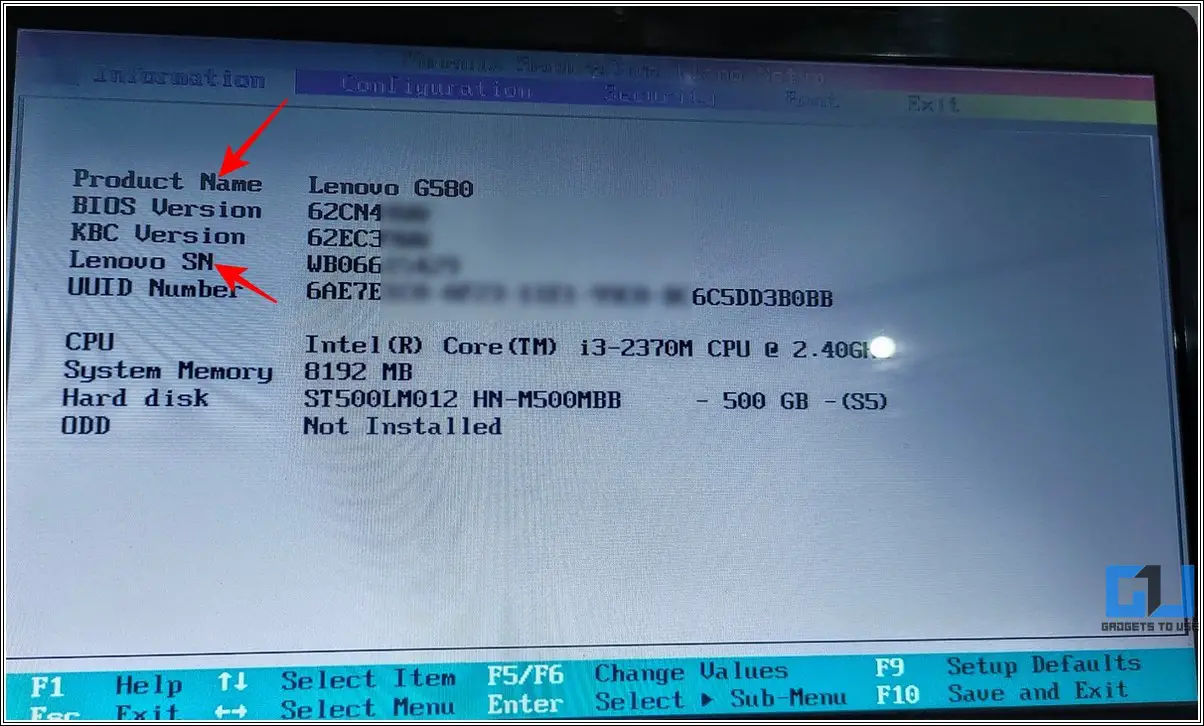
3. That’s it. You can note down these details to use them later.
Look for Physical Product Labels/Engravings
An easy method to gather details on your system’s motherboard without using any tool is to find and look for physical product labels on your machine indicating crucial hardware details. These labels are often placed outside your machine’s body or sometimes engraved/printed onto the hardware itself such as a motherboard. If you’re using a desktop/PC, you need to open your PC cabinet to find these engravings on the motherboard to determine their manufacturer and serial number.
Utilize free Third-Party Alternatives for Windows System
If you have still been unsuccessful in getting details on your system’s motherboard, then you can use some effective free third-party tools to grab them conveniently. Speccy and CPU-Z are two of the most popular tools in this domain. With that being said, let’s have a detailed look at Speccy to grab motherboard model details.
1. Download the Speccy tool on your Windows system using this link.
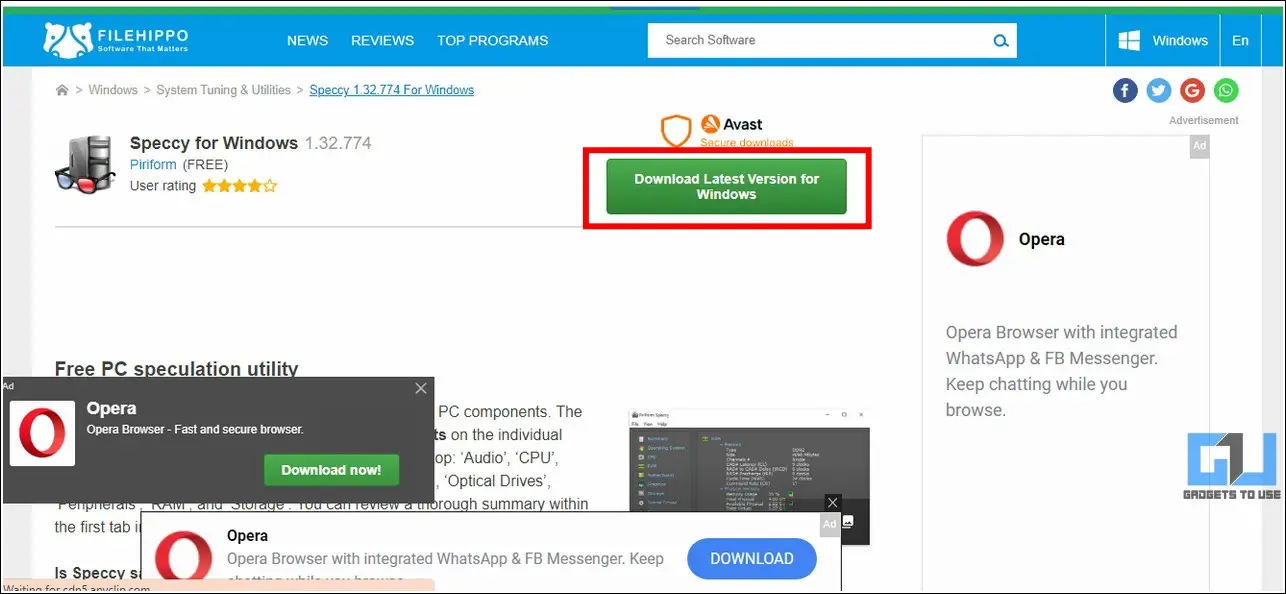
2. Open the downloaded setup and click on the Install button to install Speccy to your system.

3. Once the tool opens up, click on Summary in the left sidebar and press Motherboard to expand all its details.
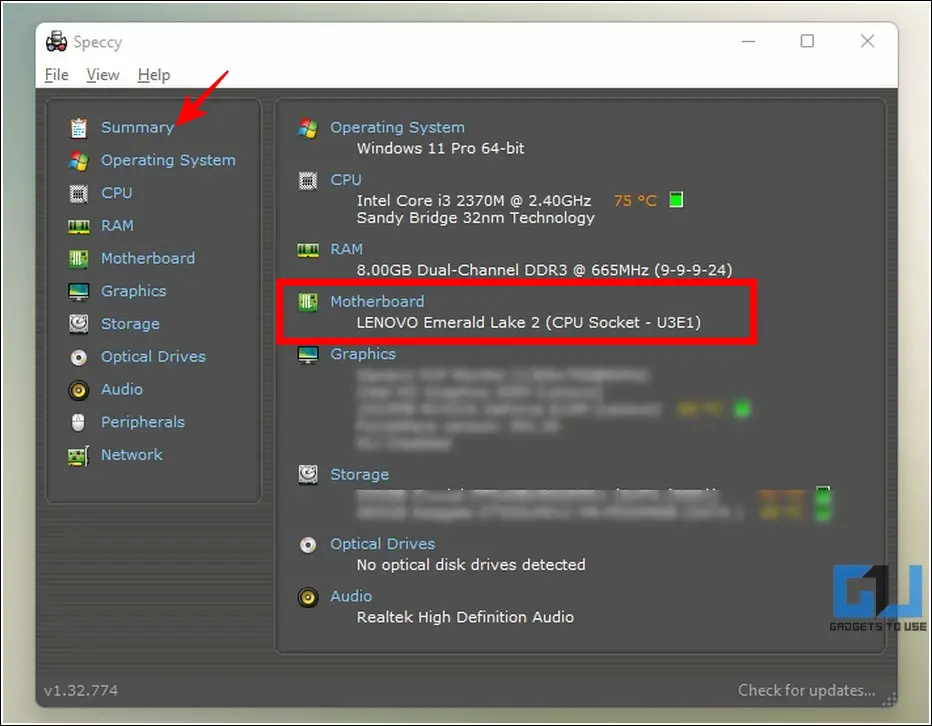
4. You can now view all the crucial motherboard details present on your PC/laptop.
5. You can achieve similar results on your motherboard by installing and using the CPU-Z tool.
Bonus Tip: Check Android Phone RAM Type, Speed, and Operating Frequency
Now that you’ve learned to grab details on your PC/laptop’s motherboard, you might be interested in checking the RAM and other hardware details of your Android phone. Follow this explainer on how to check the RAM type, speed, and operating frequency of your Android phone.
FAQs
Q1: How to check motherboard model details on Windows 10?
You can refer to the methods mentioned above to easily find all crucial information related to your motherboard on any Windows version including Windows 10.
Q2: Can you check the motherboard model in BIOS?
Yes, you can easily access the BIOS menu on your PC/laptop to know about the motherboard model details (as explained in the third method above).
Q3: Can you use CMD instead of PowerShell to find motherboard details?
Yes, you can copy and execute the same command mentioned in the PowerShell method above to Command Prompt for grabbing details on your system’s motherboard. The results remain the same in both tools.
Q4: How to find motherboard details in the Device Manager app?
The Device Manager app can only help you to give a slight idea of your motherboard’s manufacturer by finding the associated installed drivers. You can expand the System Devices tab inside the Device Manager window to find any driver associated with your laptop’s manufacturer. This method, however, will not provide you with the exact serial number or model of your motherboard.
Wrapping Up
So, that’s all for the top 5 ways to see motherboard model details on Windows PC or laptop using the above-listed methods. If this guide has successfully helped you to accomplish the same, then hit the Like button and share this with your friends to help them fix their system by researching their acquired motherboard details. Stay tuned for more informative reads and subscribe to GadgetsToUse for more quality content.
You might be interested in:
- How to Install Windows 11 on Unsupported Systems with just a Single Tool
- 2 Ways to get Windows 11 like File Explorer in Windows 10
- 11 Ways to Fix Internal SSD Not Showing Up in Windows 11/10
- 7 Ways to Check the Model and Specs of Any Windows Laptop
You can also follow us for instant tech news at Google News or for tips and tricks, smartphones & gadgets reviews, join GadgetsToUse Telegram Group or for the latest review videos subscribe GadgetsToUse YouTube Channel.
Was this article helpful?
YesNo
Your motherboard model is crucial for driver updates, component upgrades, and troubleshooting. If you’re wondering how to check motherboard model Windows 10, this guide walks you through five easy methods. Whether you’re using Windows 7 or Windows 10, we have solutions for you.
Why Do You Need to Check Your Motherboard Model?
Knowing your motherboard model helps in:
- Installing the right drivers for optimal performance.
- Checking compatibility for CPU, RAM, or GPU upgrades.
- Troubleshooting system issues efficiently.
- Finding firmware updates on the manufacturer’s support page.
1. Check Motherboard Model Using Command Prompt (CMD)
The fastest way to find motherboard model Windows 10 is through the Command Prompt.
Steps:
- Press Win + R, type
cmd, and hit Enter. - Type the following command:
wmic baseboard get product,Manufacturer,version,serialnumber - Press Enter, and your motherboard details will be displayed.
📌 Why Some Motherboards Don’t Show in CMD? Some OEM motherboards (especially in Dell, HP, and Lenovo pre-built PCs) might not show complete details. If so, try PowerShell or BIOS methods.
Pros: Quick, doesn’t require software. Cons: Might not show all details on some devices.
Also Read: How Much Does A Motherboard Replacement Cost in India
2. Check motherboard model Using System Information Tool
The System Information tool(Build in) provides a detailed hardware report.
Steps:
- Press Win + R, type
msinfo32, and hit Enter. - Look for BaseBoard Manufacturer and BaseBoard Product.
- Note the details and search online for specifications.
Pros: No need for third-party tools. Cons: May not work on older motherboards.
Also Read: Dell Laptop Motherboard Common Problems and Solutions
3. Check Motherboard Model Using PowerShell
PowerShell is a more advanced alternative to CMD.
Steps:
- Press Win + X, then click Windows PowerShell (Admin).
- Type:
Get-WmiObject Win32_BaseBoard | Format-List Product,Manufacturer,SerialNumber - Press Enter, and your motherboard details will be displayed.
Pros: Works better than CMD for detailed information. Cons: Slightly complex for beginners.
Also Read: How to Check Generation of Laptop
4. Check Motherboard Model Using BIOS
If Windows won’t boot, checking via BIOS (UEFI) is an alternative.
Steps:
- Restart your computer and press F2, F10, or DEL to enter BIOS.
- Navigate to System Information.
- Find Motherboard Model & Manufacturer details.
Pros: Works even if Windows isn’t accessible. Cons: Requires restarting your PC.
5. Check Motherboard Model Using Third-Party Software
For detailed motherboard specs, use these tools:
Best Free Tools:
- CPU-Z
- Speccy
- HWInfo
Steps:
- Download and install CPU-Z.
- Open the tool and go to the Mainboard tab.
- View your motherboard model, manufacturer, and chipset.
Pros: Provides extra details like BIOS version. Cons: Requires installation.
Checking Motherboard Model on Windows 7
If you’re using Windows 7, follow these methods:
- CMD & PowerShell methods work the same way.
- System Information (
msinfo32) is available. - Third-party tools like CPU-Z and Speccy support Windows 7.
📖 Microsoft Official Guide on hardware identification.
Case Study: How a User Identified Their Motherboard for an Upgrade
A user on the Dell Community Forums noticed that Windows 11 automatically detects the model of Dell and HP desktops after a clean install. This raises the question: Where does Windows store and retrieve motherboard information?
🔹 Where Does Windows 10/11 Read Motherboard Information From? Windows retrieves motherboard details from firmware storage, often stored in the BIOS/UEFI and accessible through WMI commands (Windows Management Instrumentation).
🔹 Why Don’t Older Dell Optiplex Motherboards Show DP/N? In modern motherboards, DP/N (Dell Part Number) is stored in the firmware chip and read by utilities like UserBenchmark. However, older Dell OptiPlex models (like the 700 series) do not show this data due to changes in how firmware stores hardware information.
📖 Read More: Dell Support Forums
Comparison Table: Best Methods to Check Motherboard Model
| Method | Speed | Requires Installation | Best For |
|---|---|---|---|
| CMD (Command Prompt) | ⚡ Fast | ❌ No | Basic details |
| System Info (msinfo32) | 🟠 Medium | ❌ No | Quick check |
| PowerShell | ⚡ Fast | ❌ No | Detailed info |
| BIOS/UEFI | 🟠 Medium | ❌ No | Non-booting PCs |
| CPU-Z, Speccy, HWInfo | 🐢 Slow | ✅ Yes | Advanced users |
🔹 Can I check my motherboard model without opening my PC?
Yes! Use CMD, PowerShell, System Info, or third-party software.
🔹 How do I check my motherboard model on Windows 7?
Same methods work—try CMD (wmic baseboard get product,Manufacturer) or CPU-Z.
🔹 What if my motherboard details don’t show up in CMD/System Info?
Try PowerShell, BIOS, or Speccy.
🔹 Why do I need to know my motherboard model?
For driver updates, CPU/RAM upgrades, and troubleshooting issues.
🔹 Can I check my motherboard model from BIOS?
Yes! Look for System Information in BIOS settings.
Conclusion
If you’ve ever asked, “How to check my motherboard model?”, now you have multiple methods. Whether using Command Prompt, PowerShell, BIOS, or third-party software, identifying your motherboard model in Windows 10 and Windows 7 is simple.
For Intel or AMD motherboards, visit their official support pages for driver updates and specifications:
📺 Watch this video tutorial for a step-by-step guide:
Как узнать модель материнской платы компьютера
Иногда может потребоваться узнать модель материнской платы компьютера, например, после переустановки Windows для последующей установки драйверов с официального сайта производителя. Сделать это можно как встроенными средствами системы, в том числе с помощью командной строки, так и используя сторонние программы (или взглянув на саму материнскую плату).
В этой инструкции — простые способы посмотреть модель материнской платы на компьютере с которыми справится даже начинающий пользователь. В данном контексте также может пригодиться: Как узнать сокет материнской платы.
- Как узнать модель материнской платы средствами Windows
- Msinfo32
- Командная строка
- Просмотр модели материнской платы в бесплатных программах
- CPU-Z
- Speccy
- AIDA64
- Визуальный осмотр материнской платы
- Видео инструкция
Узнаем модель материнской платы средствами Windows
Системные средства Windows 10, 8 и Windows 7 позволяют относительно легко получить необходимую информацию о производителе и модели материнской платы, т.е. в большинстве случаев, если система установлена на компьютере, прибегать к каким-либо дополнительными способам не придется.
Просмотр в msinfo32 (Сведения о системе)
Первый и, пожалуй, самый простой способ — использование встроенной системной утилиты «Сведения о системе». Вариант подойдет как для Windows 10 и 8.1 так и для Windows 7.
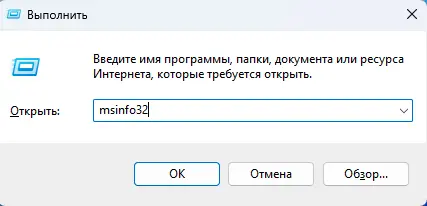
- Нажмите клавиши Win+R на клавиатуре (где Win — клавиша с эмблемой Windows), введите msinfo32 и нажмите Enter.
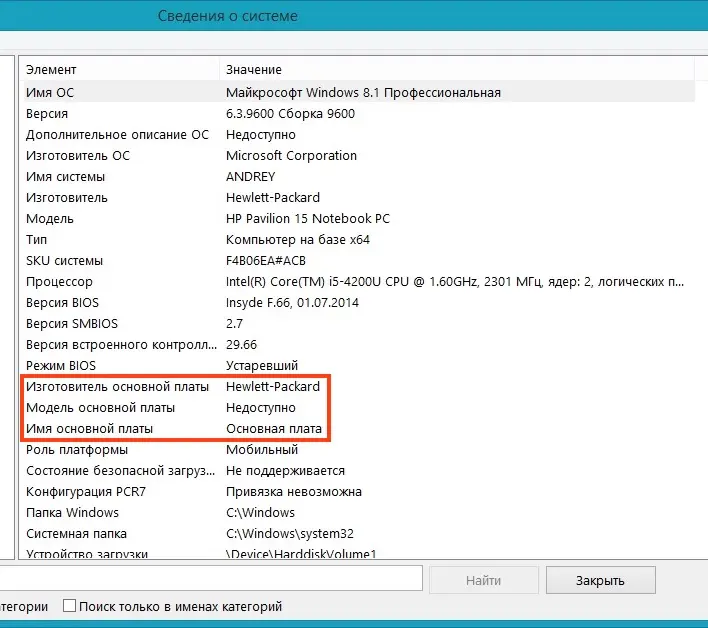
- В открывшемся окне в разделе «Сведения о системе» просмотрите пункты «Изготовитель» (это производитель материнской платы) и «Модель» (соответственно — то, что мы искали).

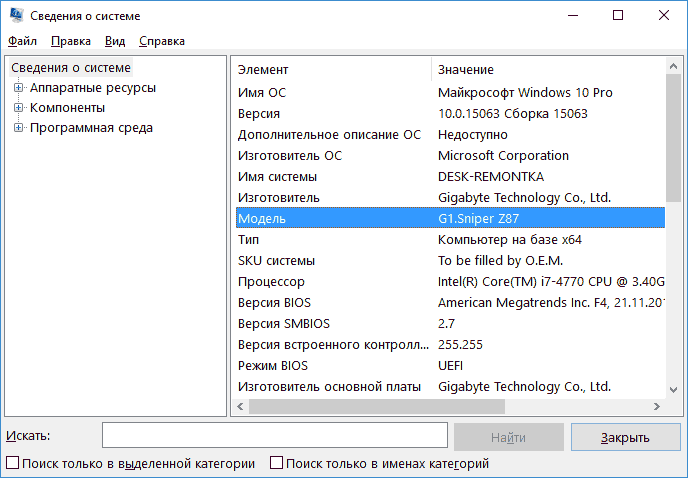
Как видите, ничего сложного и необходимая информация сразу получена.
Как узнать модель материнской платы в командной строке Windows
Второй способ посмотреть модель материнской платы без использования сторонних программ — командная строка:
- Запустите командную строку (см. Как запустить командную строку).
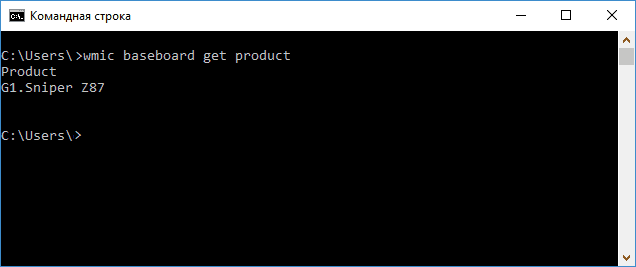
- Введите следующую команду и нажмите Enter
- wmic baseboard get product
- В результате в окне вы увидите модель вашей материнской платы.

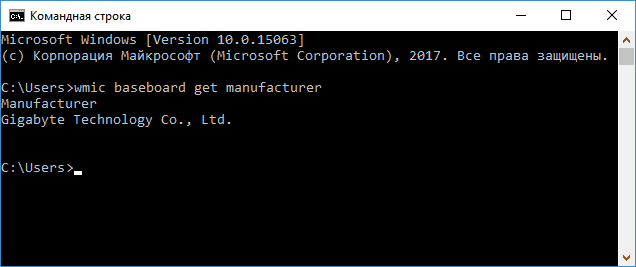
Если требуется узнать не только модель материнской платы с помощью командной строки, но и её производителя, используйте команду wmic baseboard get manufacturer тем же образом.
Просмотр модели материнской платы с помощью бесплатных программ
Также можно использовать сторонние программы, позволяющие посмотреть информацию о производителе и модели вашей материнской платы. Таких программ достаточно много (см. Программы, чтобы посмотреть характеристики компьютера), а самыми простыми на мой взгляд будут Speccy и AIDA64 (последняя — платная, но и в бесплатной версии позволяет получить нужную информацию).
CPU-Z
Бесплатная программа CPU-Z предназначена для определения подробных характеристик системы, включая модель материнской платы. Всё, что потребуется — открыть вкладку Motehrboard в программе.
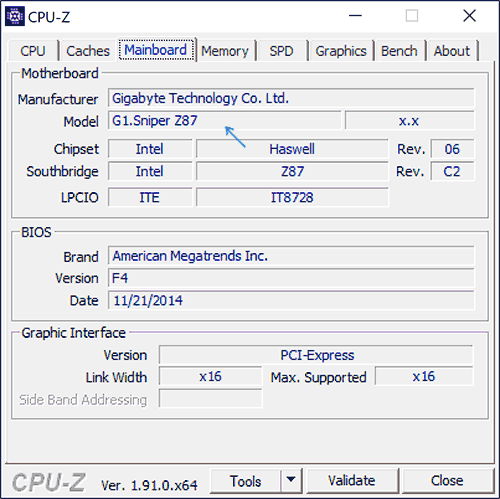
Здесь, в пункте Manufacturer будет указан производитель материнской платы, в пункте Model — её модель. По отзывам некоторых пользователей, утилита может давать более точные сведения о МП компьютера в случаях, когда другие методы не срабатывают. Скачать CPU-Z можно с официального сайта https://www.cpuid.com/softwares/cpu-z.html.
Speccy
При использовании Speccy информацию о материнской плате вы увидите уже в главном окне программы в разделе «Общая информация», соответствующие данные будут расположены в пункте «Системная плата».
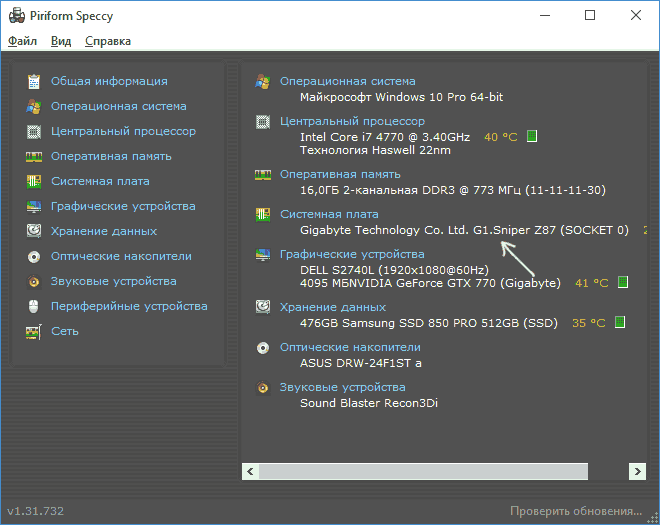
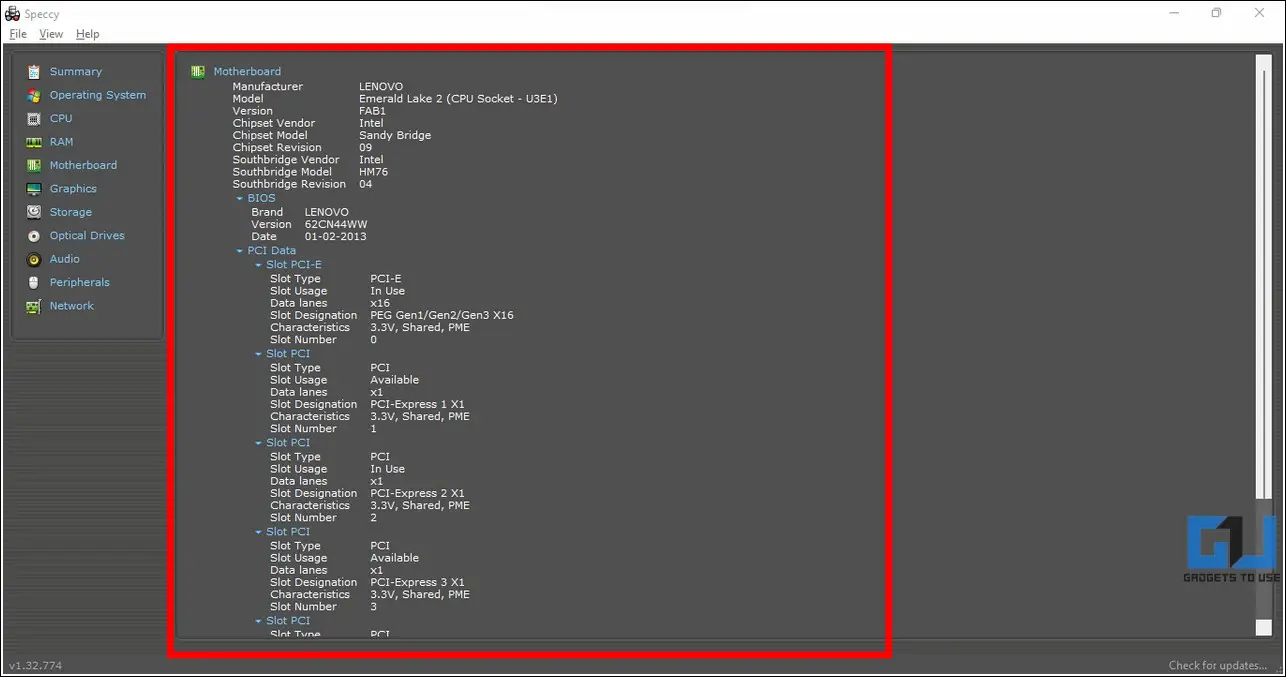
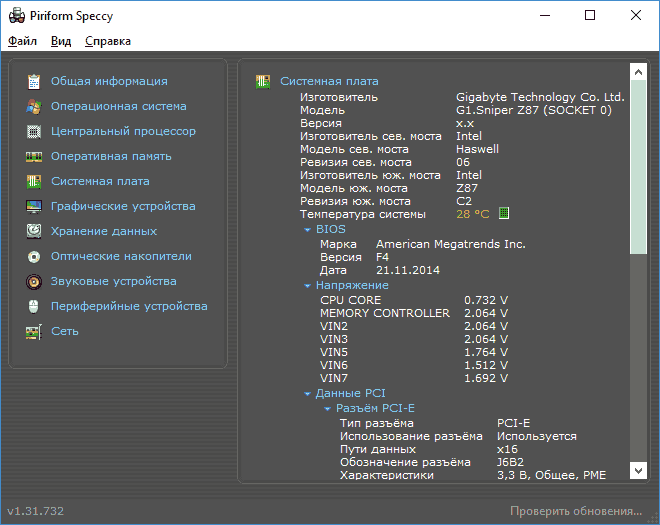
Более подробные данные о материнской плате можно посмотреть в соответствующем подразделе «Системная плата».
Скачать программу Speccy можно с официального сайта https://www.ccleaner.com/ru-ru/speccy/download (при этом на странице загрузки, внизу, можно перейти на Builds Page, где доступна portable версия программы, не требующая установки на компьютер).
AIDA64
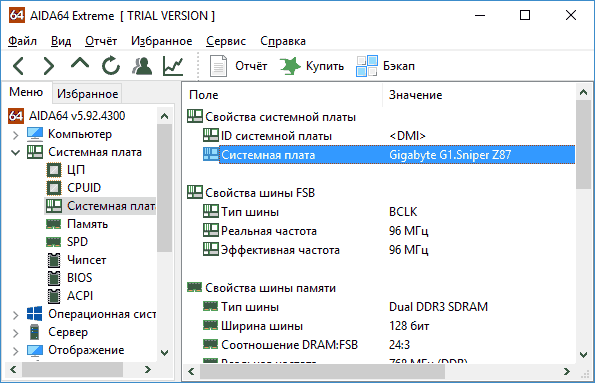
Популярная программа для просмотра характеристик компьютера и системы AIDA64 не является бесплатной, но даже ограниченная пробная версия позволяет посмотреть производителя и модель материнской платы компьютера.
Всю необходимую информацию вы можете увидеть сразу после запуска программы в разделе «Системная плата».
Скачать пробную версию AIDA64 вы можете на официальной странице загрузок https://www.aida64.com/downloads
Визуальный осмотр материнской платы и поиск ее модели
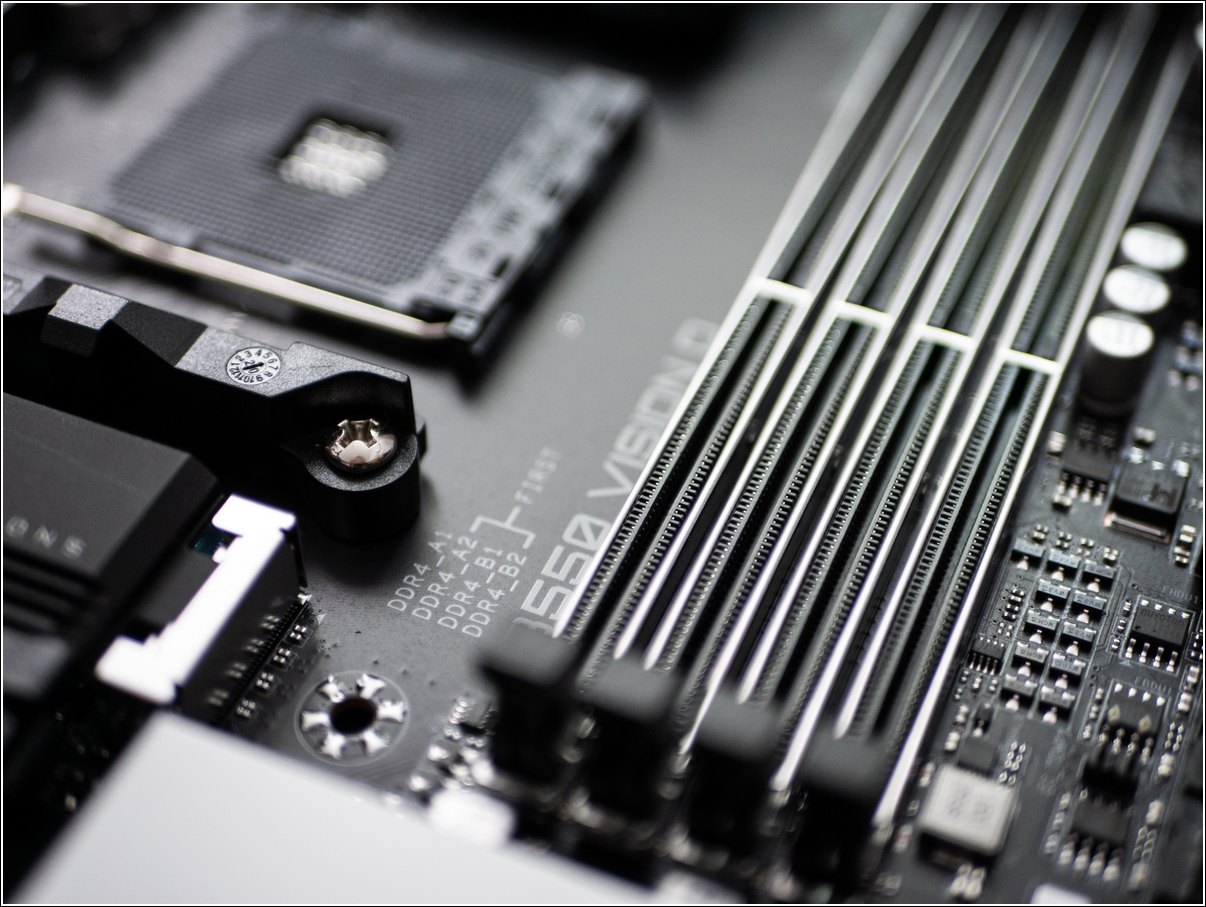
И, наконец, еще один способ на случай, если ваш компьютер не включается, что не позволяет узнать модель материнской платы ни одним из описанных выше способов. Вы можете просто взглянуть на материнскую плату, открыв системный блок компьютера, и обратить внимание на самые крупные маркировки, например, модель на моей материнской плате указана как на фото ниже.
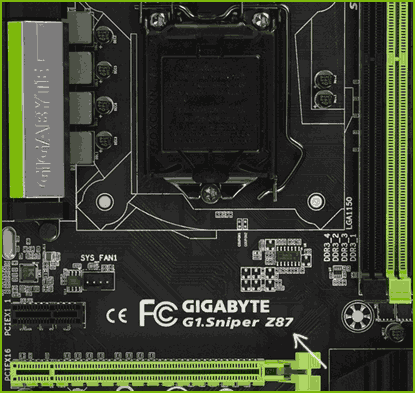
Если каких-то понятных, легко идентифицируемых как модель, маркировок на материнской плате нет, попробуйте поискать в Google те маркировки, что удалось обнаружить: с большой вероятностью, вам удастся найти, что это за материнская плата.
Видео инструкция
Надеюсь, руководство оказалось полезным. Отмечу, что в случае с материнской платой ноутбука модель может определяться специфично и поиск по ней ничего не даст, оптимальный путь, если речь идет об установке ПО под эту МП — найти официальную страницу поддержки устройства.
В этой статье мы разберём, как определить модель материнской платы вашего компьютера или ноутбука. Эта информация может быть полезна для установки драйверов (например, для сетевой карты, звука или чипсета), обновления BIOS или выбора совместимых комплектующих. Мы рассмотрим как встроенные инструменты Windows, так и сторонние приложения и утилиты, которые помогут вам быстро получить нужные данные.
Приобрести оригинальные ключи активации Windows 11 можно у нас в каталоге от 1690 ₽
Зачем нужно знать модель материнской платы?
Материнская плата — это основа любого компьютера. Она определяет, какие компоненты можно установить (процессор, оперативную память, видеокарту) и какие функции поддерживаются (например, Wi-Fi, Bluetooth, USB-C). Зная модель материнской платы, вы сможете:
— Установить правильные драйвера для всех устройств.
— Обновить BIOS для улучшения стабильности и производительности.
— Подобрать совместимые комплектующие для апгрейда.
— Устранить неполадки, связанные с оборудованием.
Способы узнать модель материнской платы
1. Использование встроенных инструментов Windows
Сведения о системе (msinfo32)
1. Нажмите Win + R, введите msinfo32 и нажмите Enter.
2. В открывшемся окне найдите раздел Сведения о системе.
3. Обратите внимание на поля:
— Изготовитель основной платы (производитель).
— Модель основной платы (название модели).
— Имя основной платы (дополнительные данные).
Примечание: Если поля пустые, это может означать, что система не смогла определить модель платы. В таком случае используйте другие методы.
Средство диагностики DirectX (dxdiag)
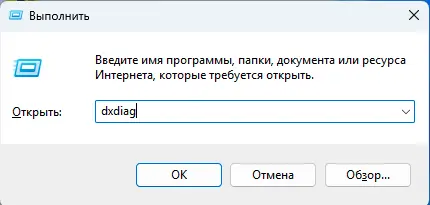
1. Нажмите Win + R, введите dxdiag и нажмите Enter.
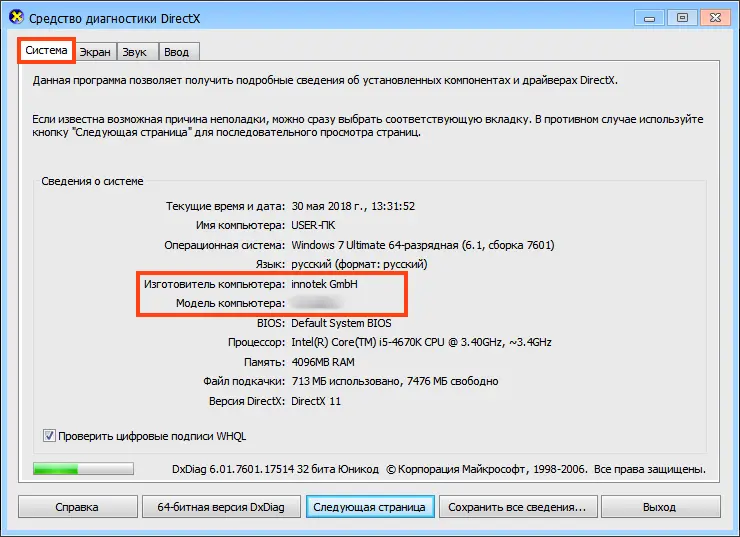
2. В открывшемся окне перейдите на вкладку Система.
3. Найдите поля:
— Изготовитель компьютера (производитель материнской платы).
— Модель компьютера (модель платы).
Примечание: На ноутбуках здесь будет указана модель устройства, а не материнской платы.
Командная строка (systeminfo)
1. Нажмите Win + R, введите cmd и нажмите Enter.
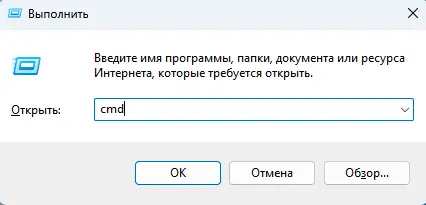
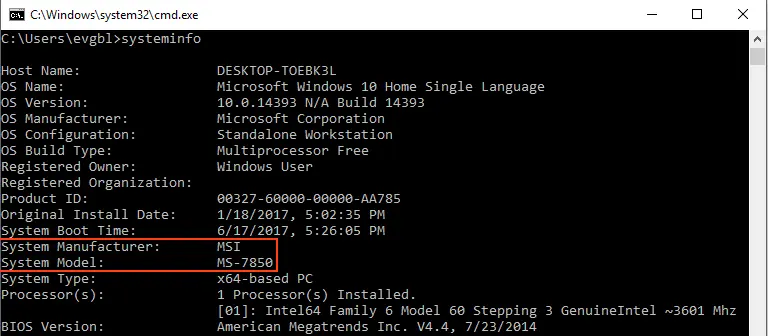
2. В командной строке введите systeminfo и нажмите Enter.
3. Найдите поля:
— Изготовитель системы (производитель платы).
— Модель системы (модель платы).
Утилита WMIC
1. Откройте командную строку (как в предыдущем способе).
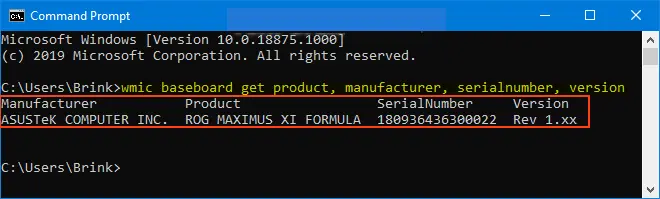
2. Введите команду: wmic baseboard get product, Manufacturer, version, serialnumber.
3. Вы увидите:
— Manufacturer (производитель).
— Product (модель платы).
— Version и SerialNumber (дополнительные данные).
2. Использование сторонних приложений
Speccy
1. Скачайте и установите приложение Speccy (доступна бесплатная версия).
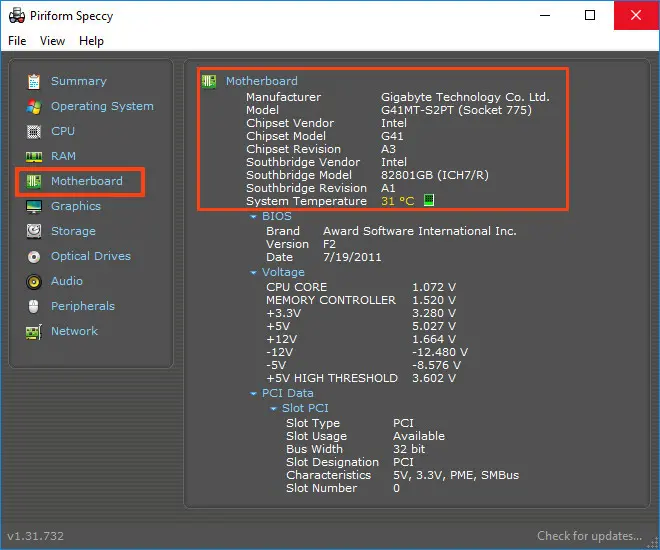
2. Запустите приложение и перейдите в раздел Motherboard.
3. Здесь вы найдёте:
— Модель и производитель платы.
— Информацию о чипсете, BIOS и слотах расширения.
CPU-Z
1. Скачайте и установите утилиту CPU-Z.
2. Перейдите на вкладку Mainboard.
3. Здесь отображается:
— Производитель и модель платы.
— Версия BIOS и чипсета.
— Возможность проверки обновлений драйверов онлайн.

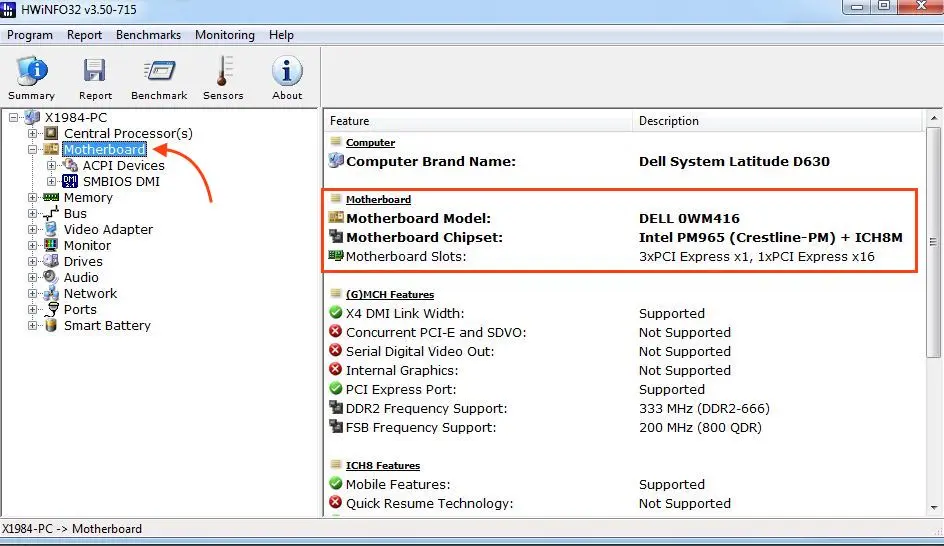
HWInfo32 Portable
1. Скачайте портативную версию приложения HWInfo32 (установка не требуется).
2. Запустите приложение и перейдите в раздел Motherboard.
3. Здесь вы найдёте подробную информацию о материнской плате, включая модель, производителя и версию BIOS.
Теперь вы знаете, как узнать модель материнской платы с помощью встроенных инструментов Windows и сторонних приложений. Эта информация поможет вам:
— Установить правильные драйвера.
— Обновить BIOS.
— Подобрать совместимые комплектующие.
— Устранить неполадки с оборудованием.
Используйте любой из описанных способов, чтобы быстро получить нужные данные и обеспечить стабильную работу вашего компьютера.