
PowerShell is an advanced shell with integration of .NET objects. It’s more than just a replacement for the older cmd.exe. It can work with .NET assemblies, process large datasets and even interact with web services.
Because of the .NET assemblies support, it can work with WinForms (or even WPF), making it possible to create scripts with GUIs.
Requirements
This has been tested to work with Windows PowerShell verion 5.1. It’s likely going to work with older versions as well, but it’s not going to work with the new cross-platform PowerShell (there are no WinForms on Linux/macOS). You can check the version with
Get-Host | Select-Object version
Enter fullscreen mode
Exit fullscreen mode
Setting up the environment
Before we can start, let’s check a few things.
The first one is the script execution policy. It controls which scripts can be run. By default, Windows blocks execution of all scripts (more on that here). We have to allow it to run local scripts that are not digitally signed. It’s possible to do this this either by going through Windows Settings > Updates & Security > For developers, checking the Change execution policy… checkbox and clicking Apply, or just executing
Set-ExecutionPolicy RemoteSigned
Enter fullscreen mode
Exit fullscreen mode
from administrator PowerShell.
Another (less important) thing is the code editor. Even though we could just write the entire script directly in PowerShell, it’s easier to use a full-featured editor with error checking and syntax highlighting. Windows already comes with PowerShell ISE (Integrated Scripting Environment), but you can use Visual Studio Code with the PowerShell extension.
Writing our script
Let’s start!
Importing the assemblies
We have to import both System.Windows.Forms and System.Drawing assemblies. It’s possible to only include the first one but we also need the 2nd to specify control sizes.
Add-Type -AssemblyName System.Windows.Forms
Add-Type -AssemblyName System.Drawing
Enter fullscreen mode
Exit fullscreen mode
You can test it by creating a blank form:
$form = New-Object System.Windows.Forms.Form
$form.ShowDialog()
Enter fullscreen mode
Exit fullscreen mode

Adding controls
Let’s make a «Hello World» form. First, we create a top-level Form object:
$form = New-Object System.Windows.Forms.Form
$form.Text = "Some form"
$form.Size = New-Object System.Drawing.Size(150, 145)
$form.AutoSize = $true
Enter fullscreen mode
Exit fullscreen mode
In PowerShell, objects are created using New-Object. You can also pass parameters to constructors, similar to the new keyword in C#. Values are assigned to properties directly. Another difference is using $true instead of just true.
Let’s add a label and a button:
$lbl1 = New-Object System.Windows.Forms.Label
$lbl1.Text = "Hello World!"
$lbl1.Location = New-Object System.Drawing.Point(30, 20);

$btn = New-Object System.Windows.Forms.Button
$btn.Text = "Close"
$btn.location = New-Object System.Drawing.Point(30, 60);
$btn.DialogResult = [System.Windows.Forms.DialogResult]::OK
Enter fullscreen mode
Exit fullscreen mode
The $btn.DialogResult line tells the form what to return when the button is clicked. You can use this to figure out whether the user clicked OK or Cancel. We also make $btn the default button and lay controls onto the form:
$form.AcceptButton = $btn
$form.controls.Add($lbl1)
$form.controls.Add($btn)
Enter fullscreen mode
Exit fullscreen mode
All that’s left is showing the form itself:
$form.ShowDialog()
Enter fullscreen mode
Exit fullscreen mode
Event handlers
In our form, $btn is the default OK button which just terminates the form. But we can use non-terminating event handlers as well. For example, let’s make it possible to click on the label:
$lbl1.Add_Click({
    [System.Windows.Forms.MessageBox]::Show("Hey!")
})
Enter fullscreen mode
Exit fullscreen mode
You can call functions from event handlers as you normally would.
Visual Styles
Something I’ve noticed with these GUI scripts is that different control styles are used when the script is run from the PowerShell console instead of VSCode. The console uses legacy rendering which falls back to using Windows 95-style controls. We need to enable Visual Styles to fix that:
[System.Windows.Forms.Application]::EnableVisualStyles()
Enter fullscreen mode
Exit fullscreen mode
From here on, you can add more controls and event handlers. If you’ve used C#/VB.NET before you can reuse large parts of that knowledge to create nicer and more powerful scripts.
That’s it for now 😉
The full script:
Add-Type -AssemblyName System.Windows.Forms
Add-Type -AssemblyName System.Drawing

[System.Windows.Forms.Application]::EnableVisualStyles()

$form = New-Object System.Windows.Forms.Form
$form.Text = "Some form"
$form.Size = New-Object System.Drawing.Size(150, 145)
$form.AutoSize = $true

$lbl1 = New-Object System.Windows.Forms.Label
$lbl1.Text = "Hello World!"
$lbl1.Location = New-Object System.Drawing.Point(30, 20);

$lbl1.Add_Click({
    [System.Windows.Forms.MessageBox]::Show("Hey!")
})

$btn = New-Object System.Windows.Forms.Button
$btn.Text = "Close"
$btn.location = New-Object System.Drawing.Point(30, 60);
$btn.DialogResult = [System.Windows.Forms.DialogResult]::OK

$form.AcceptButton = $btn
$form.controls.Add($lbl1)
$form.controls.Add($btn)

$Null = $form.ShowDialog()
Enter fullscreen mode
Exit fullscreen mode
Table of Contents
I have created many PowerShell scripts for the last couple of years. All with a single purpose to automate my IT work as much as possible. But this week I needed to create a script that could be run by the users themselves. And users and command line aren’t the best combination, so let’s take a look at using the PowerShell GUI.
The objective of this chapter is to cover the basics of creating a graphical user interface (GUI) using Windows PowerShell. Although Windows PowerShell itself does not include any GUI capabilities, it does have access to the .NET framework, including the WinForms programming interface.
Overview of WinForms
WinForms is a subset of the .NET framework designed specifically for the creation of Windows based GUIs. It allows GUI controls (such as buttons and labels) to be placed in containers (such as a form) and displayed to the user.
In addition, an event handling mechanism allows the programmer to define what actions are taken when a user interacts with a control or container (for example clicking on a button or resizing a dialog). Through the use of properties, the programmer is also able to control the appearance and behavior of controls and containers, for example changing the text displayed by a label.
In the remainder of this chapter, we will work through some examples which cover the key aspects of WinForms based GUI development using Windows PowerShell.
Loading the Winforms .NET Assembly
As outlined in the chapter entitled An Overview of Windows PowerShell 1.0 and .NET, only a few .NET assemblies are loaded into Windows PowerShell by default. As WinForms is not amongst the pre-loaded assemblies, it is necessary to load WinForms prior to creating GUIs. Assemblies are loaded using the static LoadWith PartialName method of the [reflection.assembly] class, passing through the name of the WinForms assembly as an argument:
Add-Type -AssemblyName System.Windows.Forms, System.DrawingOnce loaded, we are ready to create a simple GUI from within Windows PowerShell.
Basic Windows PowerShell GUI
Once the WinForms assembly has been loaded the next step is to create a simple example. As previously discussed, WinForms GUIs consist of containers, controls and events. With this in mind, the following example creates a form (container) and a button (control), adds the button to the form and displays the dialog:
Note
Note: Before we start creating a form is it important to know that the PowerShell script is run sequentially. So you define your form and show it. But any code after you displayed the form won’t be executed until you close the form.
Add-Type -AssemblyName System.Windows.Forms, System.Drawing
$form= New-Object Windows.Forms.Form
$button = New-Object Windows.Forms.Button
$button.text = "Click Here!"
$form.controls.add($button)
$form.ShowDialog()
When executed, the resulting dialog will appear as follows:
Windows PowerShell and WinForms Events
The next area to cover involves the handling of events. An event is typically triggered when a user interacts with a control. For example, clicking on a button control will trigger an event. Event handlers are nothing more than lines of code which define what is to happen when the event is triggered (for example, an event handler may be written to exit the application when a Close button is clicked).
In Windows PowerShell, event handlers take the form of scriptblocks, which are essentially sequences of commands wrapped in braces ({}).
Event handlers are added to a control using methods which have the following syntax:
add_<eventname> ({scriptblock})Where <eventname> is the name of the event to be handled and <scriptblock> is the code to be executed when the event is triggered. For example, to close the dialog in the above example when the button is clicked:
$button.add_click({ $form.close() })Using scriptblocks would quickly become unwieldy if all the code to be executed had to be included along with the add_<eventname> method. An alternative to this approach is to call a function instead. The following adaptation of our example defines a function called MyFunction and subsequently references it in the event handler scriptblock:
Add-Type -AssemblyName System.Windows.Forms, System.Drawing
function MyFunction
{
     $form.close()
}

$form= New-Object Windows.Forms.Form
$button = New-Object Windows.Forms.Button
$button.text = "Click Here!"
$button.add_click({MyFunction})
$form.controls.add($button)
$form.ShowDialog()
Setting WinForms Properties
WinForms components are essentially objects, and as such, have properties which can be set to alter component appearance and behavior. As with other object properties, these can be accessed using standard dot notation. In the previous example, we used this approach to set the text of the button control:
$button.text = "Click Here!"Similarly, we could set the title of the form using the form object’s text property:
$form.text = "PowerShell WinForms Example"Bringing it all Together
Now that we have seen a simple GUI created in Windows PowerShell and covered some of the basic techniques we can create a slightly more complex GUI.
The following script creates a GUI containing a label, button and text field. An event handler is configured on the button such that when it is clicked the text is extracted from the text field and used to construct a message which is then displayed on the label control.
Note
Tip: The creation of Drawing.Point objects to configure the size and location of controls on the form.
# Load the Winforms assembly
Add-Type -AssemblyName System.Windows.Forms, System.Drawing

# Create the form
$form = New-Object Windows.Forms.Form

#Set the dialog title
$form.text = "PowerShell WinForms Example"

# Create the label control and set text, size and location
$label = New-Object Windows.Forms.Label
$label.Location = New-Object Drawing.Point 50,30
$label.Size = New-Object Drawing.Point 200,15
$label.text = "Enter your name and click the button"

# Create TextBox and set text, size and location
$textfield = New-Object Windows.Forms.TextBox
$textfield.Location = New-Object Drawing.Point 50,60
$textfield.Size = New-Object Drawing.Point 200,30

# Create Button and set text and location
$button = New-Object Windows.Forms.Button
$button.text = "Greeting"
$button.Location = New-Object Drawing.Point 100,90

# Set up event handler to extarct text from TextBox and display it on the Label.
$button.add_click({
$label.Text = "Hello " + $textfield.text
})

# Add the controls to the Form
$form.controls.add($button)
$form.controls.add($label)
$form.controls.add($textfield)

# Display the dialog
$form.ShowDialog()
When adding controls to the form to display them in the GUI. You can add them one by one, or you can add all of them using AddRange property.
...
# Add the controls to the Form
$form.controls.add($button)
$form.controls.add($label)
$form.controls.add($textfield)

# Add the controls to the Form
$form.controls.AddRange(@($button,$label,$textfield))
...
Adding controls to the form
We have the following controls that we can use on our forms:
- TextBox
- Label
- Button
- PictureBox
- CheckBox
- ComboBox (Dropdown list)
- ListBox
- RadioButton
- Groupbox
- ProgressBar
- DataGridView
- ColorDialog
So, let’s create some controls on our form. Add the code below to your script. Make sure that ShowDialog is at the end of your script.
Using a textbox
The textbox control is used to accept and display an input as a single line of text. For example, the following script creates a GUI containing a label, button and text field. An event handler is configured on the button such that when it is clicked the text is extracted from the text field and used to construct a message which is then displayed on the label control.
# Load the .Net assemblies
Add-Type -AssemblyName System.Windows.Forms, System.Drawing
[System.Windows.Forms.Application]::EnableVisualStyles()

# Create the form
$form           = New-Object Windows.Forms.Form
$form.Text      = 'www.bonguides.com'
$form.Size      = New-Object System.Drawing.Size(330,150)

# Create a label control
$label           = New-Object System.Windows.Forms.Label
$label.Location  = New-Object System.Drawing.Point(30,20)
$label.Text      = 'Enter your name then click Submit button:'
$label.ForeColor = 'Blue'
$label.AutoSize  = $true

# Create a textbox control
$textbox           = New-Object System.Windows.Forms.TextBox
$textbox.Location  = New-Object System.Drawing.Point(30,40)
$textbox.Font      = New-Object System.Drawing.Font("Consolas",9,[System.Drawing.FontStyle]::Bold)
$textbox.ForeColor = 'Blue'
$textbox.AutoSize  = $true

# Create a button control
$submitButton                   = New-Object System.Windows.Forms.Button
$submitButton.BackColor         = "green"
$submitButton.text              = "Submit"
$submitButton.Size                = New-Object System.Drawing.Point (70,30)
$submitButton.location          = New-Object System.Drawing.Point(28,70)
$submitButton.ForeColor         = "#ffffff"

# Create a label control
$label1           = New-Object System.Windows.Forms.Label
$label1.Location  = New-Object System.Drawing.Point(110,77)
$label1.Font      = New-Object System.Drawing.Font("Consolas",11,[System.Drawing.FontStyle]::Bold)
$label1.ForeColor = 'Red'
$label1.AutoSize  = $true

# Event handler when click the button
$submitButton.add_click({
    $label1.Text      = 'Hello ' + $textbox.Text
})

# Add the controls to the form then display the dialog.
$form.controls.AddRange(@($textbox,$label,$label1,$submitButton))
[void]$form.ShowDialog()
Using a label
The place of the controls is based on points/pixels from the left side and the top side. So, the location 30,50 is 30 pixels from the left side and 50 points from the top side. And you can configure additional prroperties for the label control such as drawing size, font family, font size…
Add-Type -AssemblyName System.Windows.Forms, System.Drawing
$form           = New-Object Windows.Forms.Form

$label          = New-Object System.Windows.Forms.Label
$label.text     = "Select a category:."
$label.location = New-Object System.Drawing.Point(30,50)
$label.Size     = New-Object System.Drawing.Size(100,20)
$label.AutoSize = $true
$label.Font     = 'Microsoft Sans Serif,10'


$form.controls.add($label)
$form.ShowDialog()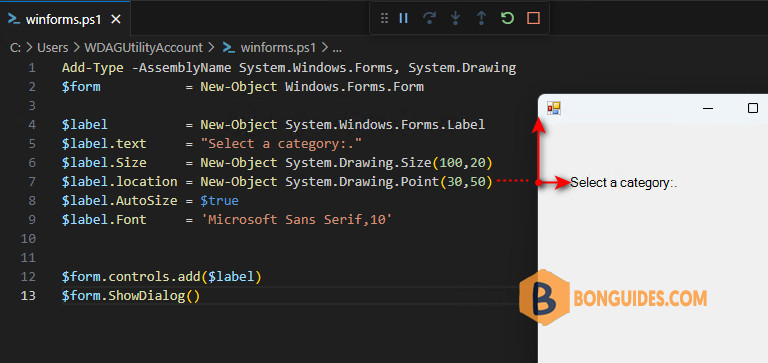
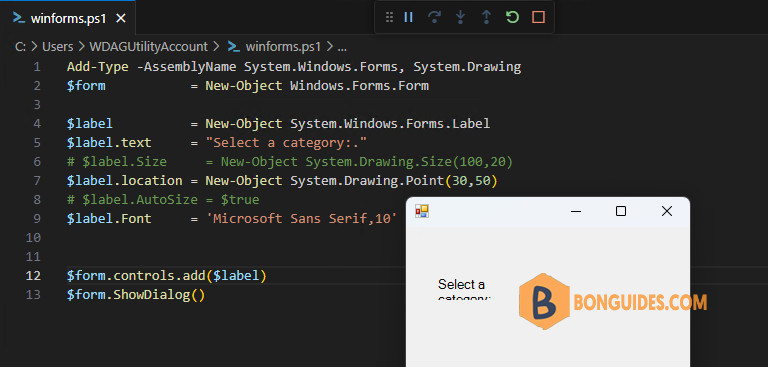
You can define the width and height of each control by $control.Size, but if your content is longer then the element it will only be partially displayed. So, by setting the Autosize to true, you are assured that the user can read the whole label.
Using a dropdown list (Combobox)
The next control you can add to the form is ComboBox (Dropdown list). The code below is pretty clear I think, we create the combo box and add the items with a single line foreach loop to the list. Again, we also define the position and I have set the size for the control.
Add-Type -AssemblyName System.Windows.Forms, System.Drawing
$form = New-Object Windows.Forms.Form
$label = New-Object System.Windows.Forms.Label
$label.Text = "Select a category:."
$label.Location = New-Object System.Drawing.Point(30,30)
$label.AutoSize = $true
$combobox = New-Object system.Windows.Forms.ComboBox
$combobox.Text = ""
$combobox.Size = New-Object Drawing.Point 150,20
$combobox.location = New-Object System.Drawing.Point(30,60)
# $combobox.Autosize = $true
# Add the items in the dropdown list
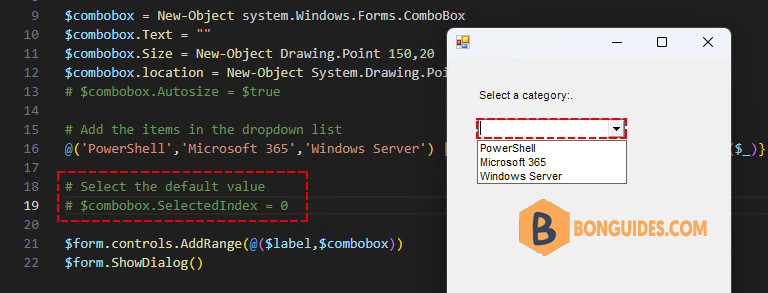
@('PowerShell','Microsoft 365','Windows Server') | ForEach-Object {$combobox.Items.Add($_)}
# Select the default value
$combobox.SelectedIndex = 0
$form.controls.AddRange(@($label,$combobox))
$form.ShowDialog()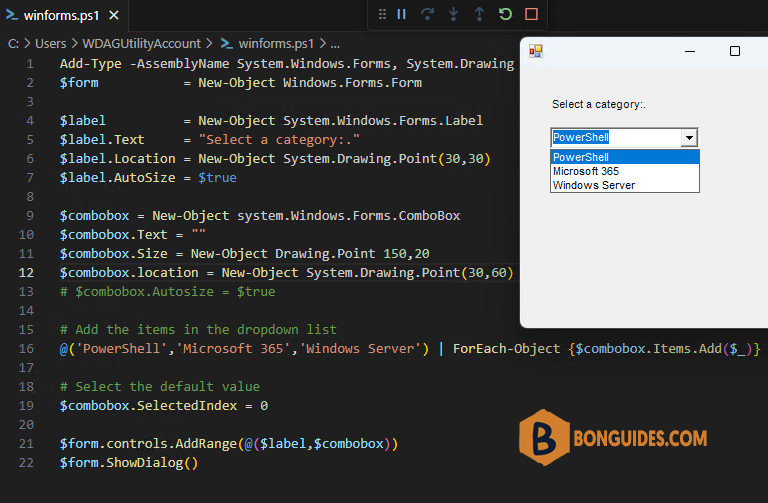
You can set a default value for your dropdown list by selecting the index. Below is output if we’re not configured the default value for the combobox.
Using a button
In the previous section, we got the handling of events when a user interacts with a control. Now, in this section we’ll get more detail with a button in a PowerShell winforms. A button can have a standard action, like (
OK, Cancel, Abort, Retry, Ignore, Yes, or No) or you can assign a custom function to it.
The buttons we are going to add are Cancel and Enter.
- Cancel button will just close the form and does nothing else.
- Enter button will run our logic to show a text. Add the buttons with the code below, again make sure you add the variables of the buttons to the $form.controls.AddRange
Add-Type -AssemblyName System.Windows.Forms, System.Drawing
[System.Windows.Forms.Application]::EnableVisualStyles()

$form           = New-Object Windows.Forms.Form
$form.Size      = New-Object System.Drawing.Size(400,200)

$label          = New-Object System.Windows.Forms.Label
$label.Text     = "Select a category:."
$label.Location = New-Object System.Drawing.Point(30,30)
$label.AutoSize = $true

$label1           = New-Object System.Windows.Forms.Label
$label1.Location  = New-Object System.Drawing.Point(30,100)
$label1.Font      = New-Object System.Drawing.Font("Consolas",11,[System.Drawing.FontStyle]::Bold)
$Label1.ForeColor = 'Blue'
$label1.AutoSize  = $true

$combobox          = New-Object system.Windows.Forms.ComboBox
$combobox.Text     = ""
$combobox.location = New-Object System.Drawing.Point(30,60)
$combobox.Size     = New-Object System.Drawing.Size(100,30)
$combobox.Autosize = $true
@('PowerShell','Microsoft 365','Windows Server') | ForEach-Object {$combobox.Items.Add($_)}

$enterButton                   = New-Object System.Windows.Forms.Button
$enterButton.BackColor         = "green"
$enterButton.text              = "Enter"
$enterButton.Size                = New-Object System.Drawing.Point (90,30)
$enterButton.location          = New-Object System.Drawing.Point(140,57)
$enterButton.ForeColor         = "#ffffff"

$cancelButton                  = New-Object system.Windows.Forms.Button
$cancelButton.BackColor        = "red"
$cancelButton.text             = "Cancel"
$cancelButton.Size             = New-Object System.Drawing.Point (90,30)
$cancelButton.location         = New-Object System.Drawing.Point(230,57)
$cancelButton.ForeColor        = "#ffffff"

$enterButton.add_click({
    $index = $combobox.SelectedIndex
    $combobox.SelectedItem = $combobox.Items[$index]
    $label1.Text = "Selected: " + $combobox.SelectedItem
})

$cancelButton.add_click({ $form.close() })

$form.controls.AddRange(@($label,$label1,$combobox,$enterButton,$cancelButton,$pictureBox))
[void]$form.ShowDialog()
Using a PictureBox
PictureBox is a rectangular region for an image. It supports many image formats. It has an adjustable size. It can access image files from your disk or from the Internet.
A picture can be loaded to the form from your local computer with ImageLocation property as follows:
# Load the .Net assemblies
Add-Type -AssemblyName System.Windows.Forms, System.Drawing
[System.Windows.Forms.Application]::EnableVisualStyles()

# Create the form
$form           = New-Object Windows.Forms.Form
$form.Text      = 'www.bonguides.com'
$form.Size      = New-Object System.Drawing.Size(300,180)
$form.AutoScale = $true
$form.AutoSize  = $true

# Create a PictureControl control
$pictureBox           = New-Object System.Windows.Forms.PictureBox
$pictureBox.Location  = New-Object System.Drawing.Point(20,20)
$pictureBox.ImageLocation = "C:\images\chart.png"
$pictureBox.AutoSize  = $true

# Add the controls to the form then display the dialog.
$form.controls.AddRange(@($pictureBox))
[void]$form.ShowDialog()
The image cannot be shown if the script runs on another computer. You can upload the image to any cloud location, get the direct link of the image then Load it into the form.
# Load the .Net assemblies
Add-Type -AssemblyName System.Windows.Forms, System.Drawing
[System.Windows.Forms.Application]::EnableVisualStyles()

# Create the form
$form           = New-Object Windows.Forms.Form
$form.Text      = 'www.bonguides.com'
$form.Size      = New-Object System.Drawing.Size(300,180)
$form.AutoScale = $true
$form.AutoSize  = $true

# Create a PictureControl control
$pictureBox           = New-Object System.Windows.Forms.PictureBox
$pictureBox.Location  = New-Object System.Drawing.Point(20,20)
$pictureBox.Load('https://bonguides.com/img/143614112023.png')
$pictureBox.AutoSize  = $true

# Add the controls to the form then display the dialog.
$form.controls.AddRange(@($pictureBox))
[void]$form.ShowDialog()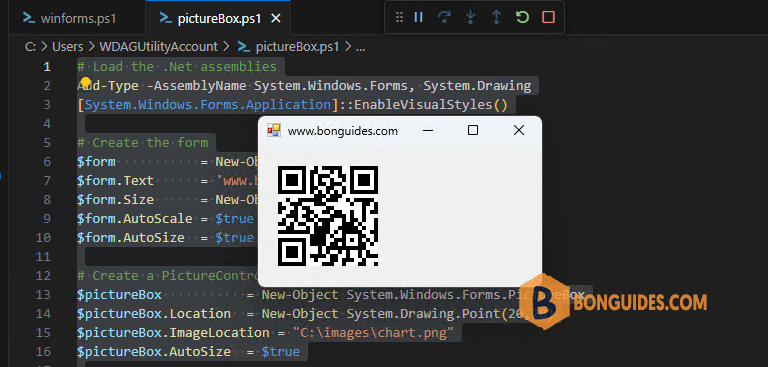
Using a checkbox
The checkbox is a very common element in forms. The most common usage I have seen for checkboxes is on a survey, or when you agree to a license agreement during a software install. The script below is a nice example of how to enable and disable the OK button by checking the checkbox.
# Load the .Net assemblies
Add-Type -AssemblyName System.Windows.Forms, System.Drawing
[System.Windows.Forms.Application]::EnableVisualStyles()

# Create the form
$form           = New-Object Windows.Forms.Form
$form.Text      = 'www.bonguides.com'
$form.Size      = New-Object System.Drawing.Size(300,180)

# Create a label
$label           = New-Object System.Windows.Forms.Label
$label.Location  = New-Object System.Drawing.Point(140,84)
$label.Font      = New-Object System.Drawing.Font("Consolas",9,[System.Drawing.FontStyle]::Bold)
$label.AutoSize  = $true

# Create your checkbox
$checkbox1          = New-Object System.Windows.Forms.checkbox
$checkbox1.Location = New-Object System.Drawing.Size(20,20)
$checkbox1.Size     = New-Object System.Drawing.Size(250,20)
$checkbox1.Text     = "Enable/Disable OK button"

# Add an OK button
$OKButton           = New-Object System.Windows.Forms.Button
$OKButton.Location  = New-Object System.Drawing.Size(20,70)
$OKButton.Size      = New-Object System.Drawing.Size(100,40)
$OKButton.Text      = "OK"
$OKButton.Enabled   = $false
$OKButton.Add_Click({$Form.Close()})

# Do something when the state of the checkbox changes
$checkbox1.Add_CheckStateChanged({
    $OKButton.Enabled   = $checkbox1.Checked
})

# Add the controls to the form then display the dialog.
$form.controls.AddRange(@($checkbox1,$OKButton,$label))
$form.ShowDialog()
Using a Groupbox
GroupBox combines a header with a box around other control. Nest a Grid within GroupBox. With a GroupBox, we can place them within a box that has a header. This makes interfaces easier to understand and interact with.
In a GroupBox we can nest another control. We used the Grid, Label, CheckBox… controls within a GroupBox. For example, we’ll create a groupbox with combobox, label, picturebox, textbox and button.
# Load the .Net assemblies
Add-Type -AssemblyName System.Windows.Forms, System.Drawing
[System.Windows.Forms.Application]::EnableVisualStyles()

# Create the form
$form           = New-Object Windows.Forms.Form
$form.Text     = 'www.bonguides.com'
$form.Size      = New-Object System.Drawing.Size(450,350)

# Create a group that will contain your radio buttons
$groupBox           = New-Object System.Windows.Forms.GroupBox
$groupBox.Location  = '20,20'
$groupBox.Size      = '400,220'
$groupBox.Text     = "Do you like Coffee?"
$groupBox.Font      = New-Object System.Drawing.Font("Consolas",9,[System.Drawing.FontStyle]::Bold)
$groupBox.SendToBack()

# Create the collection of radio buttons
$RadioButton1           = New-Object System.Windows.Forms.RadioButton
$RadioButton1.Location  = '20,40'
$RadioButton1.AutoSize  = $true
$RadioButton1.Checked   = $true
$RadioButton1.Text     = "Yes - I like Coffee."

$RadioButton2           = New-Object System.Windows.Forms.RadioButton
$RadioButton2.Location  = '20,70'
$RadioButton2.AutoSize  = $true
$RadioButton2.Checked   = $false
$RadioButton2.Text     = "No - I don't like Coffee."

$RadioButton3           = New-Object System.Windows.Forms.RadioButton
$RadioButton3.Location  = '20,100'
$RadioButton3.AutoSize  = $true
$RadioButton3.Checked   = $false
$RadioButton3.Text     = "This is not a Coffee related response."

$pictureBox = New-Object Windows.Forms.PictureBox
$pictureBox.Location = New-Object System.Drawing.Size(320,30)
$pictureBox.Load('https://bonguides.com/img/163014112023.png')
$pictureBox.Size = New-Object System.Drawing.Size(50,50)
$pictureBox.SizeMode = 'StretchImage'
$pictureBox.BringToFront()

# Create button control
$submitButton                   = New-Object System.Windows.Forms.Button
$submitButton.BackColor         = "green"
$submitButton.Text             = "Submit"
$submitButton.Size              = New-Object System.Drawing.Point (70,30)
$submitButton.Location          = New-Object System.Drawing.Point(20,260)
$submitButton.ForeColor         = "#ffffff"

$cancelButton                   = New-Object System.Windows.Forms.Button
$cancelButton.BackColor         = "red"
$cancelButton.Text             = "Cancel"
$cancelButton.Size              = New-Object System.Drawing.Point (70,30)
$cancelButton.Location          = New-Object System.Drawing.Point(100,260)
$cancelButton.ForeColor         = "#ffffff"

# Create a label control
$label1           = New-Object System.Windows.Forms.Label
$label1.Location  = New-Object System.Drawing.Point(20,140)
$label1.Text     = 'Leave a comment:'
$label1.Font      = New-Object System.Drawing.Font("Consolas",11,[System.Drawing.FontStyle]::Regular)
$label1.AutoSize  = $true

# Create a textbox control
$textbox           = New-Object System.Windows.Forms.TextBox
$textbox.Location  = New-Object System.Drawing.Point(20,163)
$textbox.Font      = New-Object System.Drawing.Font("Consolas",11,[System.Drawing.FontStyle]::Bold)
$textbox.Size      = New-Object System.Drawing.Size(350,50)

# Add radio buttons into the groupbox control
$groupBox.Controls.AddRange(@($Radiobutton1,$RadioButton2,$RadioButton3,$pictureBox,$label1,$textbox))

# Event handler when click the buttons
$submitButton.add_click({})
$cancelButton.add_click({
    $form.Close()
})

# Add the controls to the form then display the dialog.
$form.controls.AddRange(@($groupBox,$cancelButton,$submitButton))
[void]$form.ShowDialog()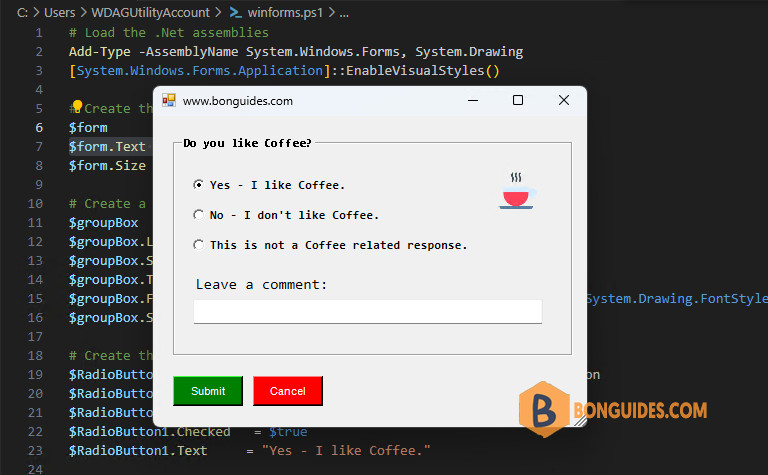
Using a RadioButton
Radio buttons are another element used when creating forms. They allow an end-user to select one option from a group. For example, you post a question on a form – Do you like coffee? – The options for the answer would be:
- Yes – I like coffee.
- No – I don’t like coffee.
- Sometimes – depending on the type of coffee.
These answers cover all the possible answers to the question. When presented to the end user you only want them to select one option from the group.
To set this up in PowerShell we have to do a few things:
- Create a group for the radio buttons,
- Create the radio buttons and give them values,
- Create the form and add the usual Submit and Cancel buttons.
The code for all of this is below:
# Load the .Net assemblies
Add-Type -AssemblyName System.Windows.Forms, System.Drawing
[System.Windows.Forms.Application]::EnableVisualStyles()

# Create the form
$form           = New-Object Windows.Forms.Form
$form.Text      = 'www.bonguides.com'
$form.Size      = New-Object System.Drawing.Size(450,350)

# Create a group that will contain your radio buttons
$groupBox           = New-Object System.Windows.Forms.GroupBox
$groupBox.Location  = '20,20'
$groupBox.Size      = '400,150'
$groupBox.Text      = "Do you like Coffee?"
$groupBox.Font      = New-Object System.Drawing.Font("Consolas",9,[System.Drawing.FontStyle]::Bold)
$groupBox.SendToBack()

# Create the collection of radio buttons
$RadioButton1           = New-Object System.Windows.Forms.RadioButton
$RadioButton1.Location  = '20,40'
$RadioButton1.AutoSize  = $true
$RadioButton1.Checked   = $true
$RadioButton1.Text      = "Yes - I like Coffee."

$RadioButton2           = New-Object System.Windows.Forms.RadioButton
$RadioButton2.Location  = '20,70'
$RadioButton2.AutoSize  = $true
$RadioButton2.Checked   = $false
$RadioButton2.Text      = "No - I don't like Coffee."

$RadioButton3           = New-Object System.Windows.Forms.RadioButton
$RadioButton3.Location  = '20,100'
$RadioButton3.AutoSize  = $true
$RadioButton3.Checked   = $false
$RadioButton3.Text      = "This is not a Coffee related response."

# Add radio buttons into the groupbox control
$groupBox.Controls.AddRange(@($Radiobutton1,$RadioButton2,$RadioButton3,$pictureBox))

$pictureBox = New-Object Windows.Forms.PictureBox
$pictureBox.Location = New-Object System.Drawing.Size(320,30)
$pictureBox.Load('https://bonguides.com/img/163014112023.png')
$pictureBox.Size = New-Object System.Drawing.Size(50,50)
$pictureBox.SizeMode = 'StretchImage'
$pictureBox.BringToFront()

# Create button control
$submitButton                   = New-Object System.Windows.Forms.Button
$submitButton.BackColor         = "green"
$submitButton.text              = "Submit"
$submitButton.Size              = New-Object System.Drawing.Point (70,30)
$submitButton.location          = New-Object System.Drawing.Point(20,190)
$submitButton.ForeColor         = "#ffffff"

$cancelButton                   = New-Object System.Windows.Forms.Button
$cancelButton.BackColor         = "red"
$cancelButton.text              = "Cancel"
$cancelButton.Size              = New-Object System.Drawing.Point (70,30)
$cancelButton.location          = New-Object System.Drawing.Point(100,190)
$cancelButton.ForeColor         = "#ffffff"

# Create a label control
$label1           = New-Object System.Windows.Forms.Label
$label1.Location  = New-Object System.Drawing.Point(20,250)
$label1.Font      = New-Object System.Drawing.Font("Consolas",11,[System.Drawing.FontStyle]::Bold)
$label1.ForeColor = 'Green'
$label1.AutoSize  = $true

# Event handler when click the buttons
# Check the current state of each radio button and respond accordingly
$submitButton.add_click({
    if ($RadioButton1.Checked) {
        # So the popup
        # [System.Windows.Forms.MessageBox]::Show("You like Coffee." , "Great")
        # Print message into the form
        $label1.Text      = "You like Coffee. Great"
    } elseif ($RadioButton2.Checked) {
            [System.Windows.Forms.MessageBox]::Show("So your not a fan of Coffee." , "Awe")
        }
      elseif ($RadioButton3.Checked) {
        [System.Windows.Forms.MessageBox]::Show("That's OK - You don't have to answer the questions" , "'No' to coffee")
      }
})

$cancelButton.add_click({
    $form.Close()
})

# Add the controls to the form then display the dialog.
$form.controls.AddRange(@($groupBox,$cancelButton,$submitButton,$label1,$pictureBox))
[void]$form.ShowDialog()
Using a ProgressBar
This indicates the progress of an operation. ProgressBar is best used on a long-running computation or task. The ProgressBar control is often used with a threading mechanism such as BackgroundWorker. It helps let your users know the application is still active. Below is the code to showing a progressbar when downloading a file. The logic is:
# Load the .Net assemblies
Add-Type -AssemblyName System.Windows.Forms, System.Drawing
[System.Windows.Forms.Application]::EnableVisualStyles()

# Create the form
$form           = New-Object Windows.Forms.Form
$form.Text      = 'www.bonguides.com'
$form.Size      = New-Object System.Drawing.Size(320,250)

# Create button control
$downloadButton                   = New-Object System.Windows.Forms.Button
$downloadButton.BackColor         = "Green"
$downloadButton.Text              = "> Click to download"
$downloadButton.Font              = New-Object System.Drawing.Font("Consolas",11,[System.Drawing.FontStyle]::Bold)
$downloadButton.Size              = New-Object System.Drawing.Point (220,50)
$downloadButton.Location          = New-Object System.Drawing.Point(40,40)
$downloadButton.ForeColor         = "#ffffff"

# Create a label control
$label1           = New-Object System.Windows.Forms.Label
$label1.Location  = New-Object System.Drawing.Point(40,140)
$label1.Font      = New-Object System.Drawing.Font("Consolas",9,[System.Drawing.FontStyle]::Bold)
$label1.ForeColor = 'Green'
$label1.AutoSize  = $true

# Create a progressbar control
$ProgressBar                        = New-Object System.Windows.Forms.ProgressBar
$ProgressBar.Location               = New-Object System.Drawing.Size(40,100)
$ProgressBar.Size                   = New-Object System.Drawing.Size(218,10)
$ProgressBar.Style                  = "Marquee"
$ProgressBar.MarqueeAnimationSpeed  = 10
$ProgressBar.Hide()

# Create the function
function PSDownloader {
    $downloadButton.BackColor   = "#1F1F1F"
    $downloadButton.Text        = "Downloading..."
    $ProgressBar.Visible        = $true
    $label1.Text                = "It could take a while to complete..."

    $job = Start-Job -ScriptBlock {
        Invoke-WebRequest 'http://ipv4.download.thinkbroadband.com/10MB.zip' -OutFile 'C:\10MB.zip'
    }
    do { [System.Windows.Forms.Application]::DoEvents() } until ($job.State -eq "Completed")
    Remove-Job -Job $job -Force

    $downloadButton.BackColor   = "Green"
    $downloadButton.Text        = "> Click to download"
    $ProgressBar.Hide()
    $label1.Text                = "Completed"
  }

# Event handler when click the buttons (call function)
$downloadButton.add_click({PSDownloader})

# Add the controls to the form then display the dialog.
$form.Controls.AddRange(@($downloadButton,$label1,$ProgressBar))
[void]$form.ShowDialog()
Using a listbox
ListBox stores several text items. It can interact with other controls. In the below example code, we create a list of DNS server, this will be used as a data source. Select a DNS server from the list then click Submit button to check online status of it.
# Load the .Net assemblies
Add-Type -AssemblyName System.Windows.Forms, System.Drawing
[System.Windows.Forms.Application]::EnableVisualStyles()

# Create the form
$form           = New-Object Windows.Forms.Form
$form.Text      = 'www.bonguides.com'
$form.Size      = New-Object System.Drawing.Size(500,400)

$label          = New-Object System.Windows.Forms.Label
$label.Location = New-Object System.Drawing.Point(20,10)
$label.Size     = New-Object System.Drawing.Size(280,20)
$label.Font     = New-Object System.Drawing.Font("Consolas",10,[System.Drawing.FontStyle]::Regular)
$label.Text     = 'Please select a DNS server:'

# Create a listbox control
$listbox           = New-Object System.Windows.Forms.ListBox
$listbox.Location  = New-Object System.Drawing.Point(20,30)
$listbox.Font      = New-Object System.Drawing.Font("Consolas",10,[System.Drawing.FontStyle]::Regular)
$listbox.Size      = New-Object System.Drawing.Size(450,70)

# Add the items in the listbox
@('8.8.8.8','8.8.4.4','1.1.1.1') | ForEach-Object {$listbox.Items.Add($_)}

# Create button control
$submitButton                   = New-Object System.Windows.Forms.Button
$submitButton.BackColor         = "Green"
$submitButton.Text              = "Submit"
$submitButton.Font              = New-Object System.Drawing.Font("Consolas",10,[System.Drawing.FontStyle]::Bold)
$submitButton.Size              = New-Object System.Drawing.Point (70,30)
$submitButton.Location          = New-Object System.Drawing.Point(20,100)
$submitButton.ForeColor         = "#ffffff"

# Create a textbox to display the output
$textboxOutput                      = New-Object system.Windows.Forms.TextBox
$textboxOutput.Multiline            = $true
$textboxOutput.Text                 = "Waiting for results..."
$textboxOutput.Font                 = New-Object System.Drawing.Font("Consolas",10,[System.Drawing.FontStyle]::Bold)
$textboxOutput.Size                 = New-Object System.Drawing.Size(450,200)
$textboxOutput.Location             = New-Object System.Drawing.Point(20,140)
$textboxOutput.BackColor            = "#1F1F1F"
$textboxOutput.ForeColor            = 'Cyan'

# Event handler when click the button
$submitButton.add_click({
    $textboxOutput.Text = (powershell -noprofile -Command "ping $($listBox.SelectedItem)" | Out-String)
})

# Add the controls to the form then display the dialog.
$form.controls.AddRange(@($listbox,$label,$submitButton,$textboxOutput))
[void]$form.ShowDialog()
The items in a listbox can be added manually or can be passed from a pipeline. For example, below code pull the list of services or list of disabled user into the listbox.
# Add the items in the listbox manualy
# @('8.8.8.8','8.8.4.4','1.1.1.1') | ForEach-Object {$listbox.Items.Add($_)}

# Pull the list of services into the listbox
Get-Service | ForEach-Object {$listbox.Items.Add($_.Name)}

# Get the list of disabled users on Active Directory
Get-ADUser -Filter {(Enabled -eq "false")} | Foreach {$listbox.Items.Add($_.Name)}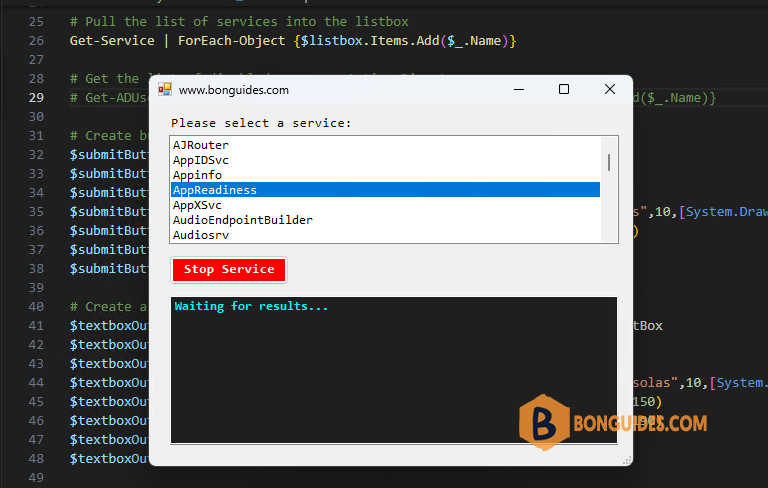
Using DataGridView Control
The DataGridView control provides a visual interface to a data object. It gives the ability to display and allow editing in a tabular format. In a GUI application, the scripters can take advantage of using this control to present the data to the user.
Below is an example of DataGridView to display the list of services on a Windows computer.
# Load the .Net assemblies
Add-Type -AssemblyName System.Windows.Forms, System.Drawing
[System.Windows.Forms.Application]::EnableVisualStyles()

# Create the form
$form           = New-Object Windows.Forms.Form
$form.Text      = 'www.bonguides.com'
$form.Size      = New-Object System.Drawing.Size(470,360)

# Get the list of services into an array
$gps = get-process | Select-Object Name,ID,Description,@{n='Memory';e={$_.WorkingSet}}
$list = New-Object System.collections.ArrayList
$list.AddRange($gps)

# Create a DataGridView control
$dataGridView = New-Object System.Windows.Forms.DataGridView
$dataGridView.Size = New-Object System.Drawing.Size(460,290)
$dataGridView.DataSource = $list
$dataGridView.ColumnHeadersVisible = $true
$dataGridView.ColumnHeadersVisible = $true
$dataGridView.AllowUserToAddRows = $true

# Add the controls to the form then display the dialog.
$form.controls.AddRange(@($dataGridView))
[void]$form.ShowDialog()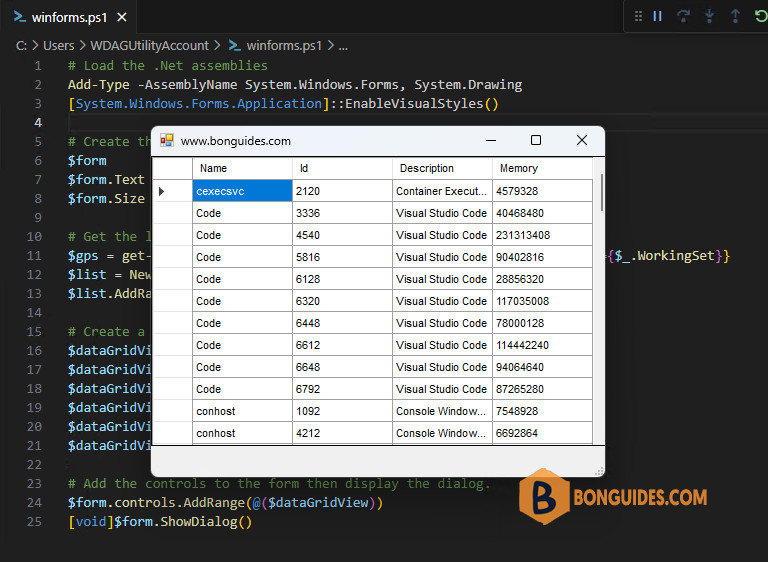
Using ColorDialog
You can allow for color selection in your PowerShell GUI with the System.Windows.Forms.ColorDialog. Below is a simple example to change the form background with ColorDialog.
# Load the .Net assemblies
Add-Type -AssemblyName System.Windows.Forms, System.Drawing
[System.Windows.Forms.Application]::EnableVisualStyles()

# Create the form
$form           = New-Object Windows.Forms.Form
$form.Text      = 'www.bonguides.com'
$form.Size      = New-Object System.Drawing.Size(400,360)

# Create colorDialog
$colorDialog = New-Object System.Windows.Forms.ColorDialog

# Create a button
$enterButton                   = New-Object System.Windows.Forms.Button
$enterButton.Size              = New-Object System.Drawing.Point (30,30)
$enterButton.FlatStyle         = [System.Windows.Forms.FlatStyle]::Flat
$enterButton.FlatAppearance.BorderSize = '0'
$enterButton.Location          = New-Object System.Drawing.Point(340,20)
$enterButton.Image             = [System.Drawing.Image]::Fromfile("E:\img\091015112023.png")

# Create event handler
$enterButton.add_click({
    $colorDialog.ShowDialog()
    $form.BackColor = $colordialog.Color
})

# Add the controls to the form then display the dialog.
$form.Controls.AddRange(@($enterButton))
[void]$form.ShowDialog()
PowerShell Forms GUI allows users to create graphical user interfaces for their scripts, making it easier for users to interact with PowerShell commands through visual elements rather than the command line.
Here’s a simple code snippet to create a basic form in PowerShell:
Add-Type -AssemblyName System.Windows.Forms

$form = New-Object System.Windows.Forms.Form
$form.Text = 'My PowerShell GUI'
$form.Size = New-Object System.Drawing.Size(300,200)

$button = New-Object System.Windows.Forms.Button
$button.Location = New-Object System.Drawing.Point(100,70)
$button.Size = New-Object System.Drawing.Size(100,30)
$button.Text = 'Click Me'
$button.Add_Click({ [System.Windows.Forms.MessageBox]::Show('Hello, World!') })

$form.Controls.Add($button)
$form.ShowDialog()
Understanding Windows Forms
What is Windows Forms?
Windows Forms is a graphical (GUI) class library included as a part of the .NET Framework, allowing developers to create rich desktop applications. It provides a straightforward way to build user interfaces by offering a wide array of pre-defined controls. Since its introduction, Windows Forms has evolved to become a staple for developers looking to create traditional desktop applications for Windows.
Creating a Basic Windows Form
To get started with PowerShell Forms GUI, you first need to utilize the System.Windows.Forms namespace, which contains classes for building forms and controls. Here’s a simple code snippet to create a basic form:
Add-Type -AssemblyName System.Windows.Forms
$form = New-Object System.Windows.Forms.Form
$form.Text = "Hello World Form"
$form.ShowDialog()
This code initializes a basic Windows Form that simply displays a dialog with the title «Hello World Form.» The `ShowDialog()` method displays the form as a modal dialog box, blocking input to other windows until the form is closed.
Mastering PowerShell Format for Effortless Command Crafting
Designing a PowerShell GUI
Essential GUI Components
Common Controls are the building blocks of any GUI. Here’s a brief overview of some significant controls you’ll often use:
- Buttons: Triggers actions when clicked, such as executing commands or submitting forms.
- TextBoxes: Allows users to input text data.
- Labels: Displays static text or information that is read-only.
- ListBoxes: Displays a list of items from which users can select.
Layout Management
Effective layout management is crucial for usability. Various layout options like `FlowLayoutPanel` and `TableLayoutPanel` can help organize your controls neatly within the form. These layouts adjust dynamically based on the size and position of individual controls, improving the overall user experience.
Example: Building a Simple Calculator
Initial Setup
To illustrate how to create a more complex GUI, we’ll build a simple calculator. Here’s how to set up the initial form:
$form = New-Object System.Windows.Forms.Form
$form.Text = "Simple Calculator"
$form.Size = New-Object System.Drawing.Size(250, 200)
# Additional setup code will go here
Adding Controls
Next, we can add buttons and text boxes for our calculator functionality. For example, we’ll add two text boxes for input and a button for the addition operation.
$num1 = New-Object System.Windows.Forms.TextBox
$num2 = New-Object System.Windows.Forms.TextBox
$result = New-Object System.Windows.Forms.TextBox
$button = New-Object System.Windows.Forms.Button

$num1.Location = New-Object System.Drawing.Point(20, 20)
$num2.Location = New-Object System.Drawing.Point(20, 60)
$result.Location = New-Object System.Drawing.Point(20, 140)
$button.Location = New-Object System.Drawing.Point(20, 100)
$button.Text = "+"
$form.Controls.Add($num1)
$form.Controls.Add($num2)
$form.Controls.Add($result)
$form.Controls.Add($button)
Event Handling
Event handling is where PowerShell Forms really shines. You can make your application interactive by responding to user actions. Here’s how to handle the button click event:
$button.Add_Click({
    $result.Text = [int]$num1.Text + [int]$num2.Text
})
This code will take the text from the two input text boxes, convert them into integers, and display the sum in the result text box when the button is clicked.
Customizing the Form
Styling and Appearance are important aspects of any GUI. You can enhance your form’s appearance by adjusting control properties, such as size, colors, and fonts:
$form.BackColor = [System.Drawing.Color]::LightGray
$button.BackColor = [System.Drawing.Color]::Green
$form.Size = New-Object System.Drawing.Size(300, 250)
Using Icons and Images is another way to make your application visually appealing. Setting an icon for your form can provide a professional touch:
$form.Icon = [System.Drawing.Icon]::ExtractAssociatedIcon("app.ico")
Mastering the PowerShell Formatter: A Quick Guide
Advanced Techniques
Integrating PowerShell Scripts with GUI
One of the most powerful features of a PowerShell Forms GUI is the capability to execute scripts from the GUI. For instance, you can run a PowerShell script when a specific action occurs, such as a button click.
Populating Data into Controls
Another advanced feature is dynamic data binding. You can populate a ListBox or ComboBox control with dynamic data from arrays or other data sources. Here’s how you would populate a ComboBox:
$comboBox = New-Object System.Windows.Forms.ComboBox
$comboBox.Location = New-Object System.Drawing.Point(20, 180)
$comboBox.Items.AddRange(@("Option 1", "Option 2", "Option 3"))
$form.Controls.Add($comboBox)
Validating User Input
Input validation is essential for maintaining the integrity of your application. When collecting user data, it’s important to ensure that the data entered meets the expected criteria:
if (-not $num1.Text -or -not $num2.Text) {
    [System.Windows.Forms.MessageBox]::Show("Both fields must be filled!")
}
Using MessageBox to display alerts can help inform users about input errors effectively.
PowerShell Format Number: Essentials Made Easy
Debugging and Error Handling
Common Errors in PowerShell GUI
While working with PowerShell Forms, you might encounter typical pitfalls, such as control placement issues or incorrect data types. Understanding these issues can save you time during development.
Implementing Error Handling
To create a smooth user experience, implementing error handling using try-catch blocks is crucial:
try {
    # Code that may cause an exception
    $result.Text = [int]$num1.Text + [int]$num2.Text
} catch {
    [System.Windows.Forms.MessageBox]::Show("An error occurred: $_")
}
This ensures that your application handles unexpected issues gracefully, providing valuable feedback to users rather than crashing.

Mastering PowerShell ToString: Quick Conversion Guide
Conclusion
In summary, creating a PowerShell Forms GUI allows you to develop rich, interactive applications that make use of PowerShell’s powerful scripting capabilities. From creating simple forms and controls to implementing advanced features like event handling and dynamic data binding, the possibilities are vast.
As you experiment with these techniques, don’t be afraid to think creatively and challenge yourself. Each project you undertake builds your skills further. For ongoing learning, explore the wealth of resources available such as books, tutorials, and online communities centered around PowerShell.
By starting today, you can create beautiful and functional GUIs that not only enhance your automation scripts but also broaden your capabilities as a developer in the PowerShell ecosystem. Happy scripting!
The default command-line interface of PowerShell script makes them difficult to use for non-technical users. You can add a simple graphical user interface (GUI) to your PowerShell scripts to make them user-friendly and to allow to perform specific tasks that require user interaction.
To add a GUI to PowerShell scripts, there are two most commonly used frameworks:
- .NET Windows Forms class (WinForms) — to create a GUI form, it is necessary to describe all the graphical elements and their properties in the script code. Then add script logic into the PowerShell code. This method is ideal for beginners and simple GUI scripts.
- Use standard Windows graphical dialogs which only allows the user to be informed and asked to make a choice.
- Windows Presentation Framework (WPF). WPF allows to quickly create a GUI form with the necessary controls in a graphical editor and export the form to an XML-based format. The appearance and logic of the script is divided into two files.
Create a GUI for PowerShell Script Using the WinForms Class
Let’s use the WinForms class to create a simple PowerShell script, which shows the last password change date for an AD user.
The overall process of creating a GUI PowerShell script using .NET Windows Forms is as follows:
- Create a PS1 script and load the Windows Forms assembly.
- Create a graphical dialog form (System.Windows.Forms.Form), set its title, size, and position.
- Add graphical controls to the form (labels, buttons, checkboxes, etc). Set their size, appearance, text, position.
- Add event handlers to control elements events (for example, a handler for a button event).
- Add a menu bar to the form (optional).
- Show the form to the user.
Start by creating a new .PS1 file (you can use the built-in PowerShell ISE, or install VSCode, or even Notepad++ as a PowerShell code editor).
Create GUI Form with PowerShell
Load the .NET System.Windows.Forms assembly:
Add-Type -assembly System.Windows.Forms
Then create a form object. The form is essentially a blank canvas for the placement of graphical elements.
$main_form = New-Object System.Windows.Forms.Form
Set the form title, width, and height (in pixels):
$main_form.Text ='GUI for my PowerShell script'

$main_form.Width = 600

$main_form.Height = 400
Now display the form on the screen:
$main_form.ShowDialog()
Run the script (press F5 in your code editor).

Add Control Items to a PowerShell Form
Now add individual interface elements to the form. The following graphical elements can be added to a form:
- Label (show a text)
- TextBox (used to get user input)
- Button
- CheckBox
- RadioButton
- ComboBox (drop down list)
- ChekedListBox
- GroupBox
- ListBox
- DataGridView
- ListView
- TreeView
- DateTimePicker
- PictureBox
- ProgressBar
- HScrollBar
- VScrollBar
- ContextMenu (right-click menu)
- Menu (top menu)
Let’s add a Label element that displays a custom text.
$Label = New-Object System.Windows.Forms.Label

$Label.Text = "AD users"

# Set font family name and size

$Label. Font = 'Microsoft Sans Serif,14'

# Set element position based on pixels from left and top of form

$Label.Location = New-Object System.Drawing.Point(0,10)

$Label.AutoSize = $true

$main_form.Controls.Add($Label)
Then add a ComboBox item to a form. This is a drop-down list control that contains the list of AD users (generated by using the Get-ADuser cmdlet from the PowerShell Active Directory module).
$ComboBox = New-Object System.Windows.Forms.ComboBox

$ComboBox.Width = 300

$Users = Get-ADuser -filter * -Properties SamAccountName

Foreach ($User in $Users)

{

$ComboBox.Items.Add($User.SamAccountName);

}

$ComboBox.Location  = New-Object System.Drawing.Point(60,10)

$main_form.Controls.Add($ComboBox)
Add two more labels:
- Label2 with a static text.
- Label3 will show the last password change date for the selected AD user.
$Label2 = New-Object System.Windows.Forms.Label

$Label2.Text = "Last Password Set:"

$Label2.Location  = New-Object System.Drawing.Point(0,40)

$Label2.AutoSize = $true

$main_form.Controls.Add($Label2)

$Label3 = New-Object System.Windows.Forms.Label

$Label3.Text = ""

$Label3.Location  = New-Object System.Drawing.Point(110,40)

$Label3.AutoSize = $true

$main_form.Controls.Add($Label3)
Now add the control Button object:
$Button = New-Object System.Windows.Forms.Button

$Button.Location = New-Object System.Drawing.Size(400,10)

$Button.Size = New-Object System.Drawing.Size(120,23)

$Button.Text = "Check"

# Set button background and font colors (optional)

# Button. BackColor = "#45fc03"

# Button. ForeColor = "#ffffff"

$main_form.Controls.Add($Button)
Insert the element code before the ShowDialog method. Run the script to see how your GUI form looks like.
Add Event Handlers to PowerShell Script
After the creation of a form with a graphical element, add some logic to the script. We will add a handler to the button click event:
$Button.Add_Click(

{

$Label3.Text =  [datetime]::FromFileTime((Get-ADUser -identity $ComboBox.selectedItem -Properties pwdLastSet).pwdLastSet).ToString('MM dd yy : hh ss')

}

)
In this case, the script gets the value of the pwdLastSet attribute of an AD user selected in the $ComboBox.
Add Custom Menu GUI in PowerShell Scripts
Then you can add a top menu to the form created earlier. For example, my menu will contain the following items:
- File
- — Save
- — Exit
- Help
- — About
The following WinForms objects are used to create the menu:
- MenuStrip – add a horizontal menu;
- ToolStripMenuItem – add menu item;
- ToolStripButton – bind action to menu item.
Create some new objects for your menu:
$menuMain         = New-Object System.Windows.Forms.MenuStrip

$mainToolStrip    = New-Object System.Windows.Forms.ToolStrip

$menuFile         = New-Object System.Windows.Forms.ToolStripMenuItem

$menuSave         = New-Object System.Windows.Forms.ToolStripMenuItem

$menuExit = New-Object System.Windows.Forms.ToolStripMenuItem

$menuHelp         = New-Object System.Windows.Forms.ToolStripMenuItem

$menuAbout        = New-Object System.Windows.Forms.ToolStripMenuItem

$toolStripOpen    = New-Object System.Windows.Forms.ToolStripButton

$toolStripSave    = New-Object System.Windows.Forms.ToolStripButton

$toolStripExit = New-Object System.Windows.Forms.ToolStripButton

$toolStripAbout = New-Object System.Windows.Forms.ToolStripButton
Insert your menu to the GUI form ($main_form):
$main_form.MainMenuStrip = $menuMain

$main_form.Controls.Add($menuMain)

[void]$mainForm.Controls.Add($mainToolStrip)
Show the first menu item:
# Show Menu Bar

[void]$main_Form.Controls.Add($menuMain)

# Menu: File

$menuFile.Text = "File"

[void]$menuMain.Items.Add($menuFile)
Then add a drop-down menu item to the File menu:
# Menu: File -> Save

$menuSave.Text         = "Save"

$menuSave.Add_Click({SaveFile})

[void]$menuFile.DropDownItems.Add($menuSave)

# Menu: File -> Exit
The Add_Click method used to perform an action when the user clicks a menu item (in this example, the script was stopped when the Exit menu was clicked):
$menuExit.Text         = "Exit"

$menuExit.Add_Click({$main_Form.Close()})

[void]$menuFile.DropDownItems.Add($menuExit)
Now add the next menu section:
# Menu: Help

$menuHelp.Text      = "Help"

[void]$menuMain.Items.Add($menuHelp)

# Menu: Help -> About

$menuAbout.Text      = "About"

$menuAbout.Add_Click({ShowAbout})

[void]$menuHelp.DropDownItems.Add($menuAbout)
Run the PowerShell script. A horizontal menu with nested sub-menu items will be displayed at the top of the form.
Add the handlers for the Click event on the rest menu items (SaveFile, OpenFile, ShowAbout). Let’s define the following PowerShell function for the About menu:
function ShowAbout {

[void] [System.Windows.Forms.MessageBox]::Show( “My simple PowerShell GUI script with dialog elements and menus v1.0”, “About script”, “OK”, “Information” )

}
Save your PowerShell script to the PS1 file. To run the PowerShell script, users can use the command:
powershell.exe -ExecutionPolicy Bypass -NoProfile -WindowStyle Hidden -File "C:\ps\posh_gui.ps1"
Or you can save this command in a BAT-file. Users can then run the .bat file to start the PowerShell script, regardless of the execution policy settings.
Hint. Or convert your PS1 script file into EXE app using the PS2EXE module:
Install-Module ps2exe -Repository PSGallery
ps2exe -inputFile “C:\PS\posh_gui.ps1” -outputFile “C:\PS\posh_gui.exe”
Using Standard Windows Dialog Boxes in PowerShell Scripts
In cases where you only need to display some popup messages or get user input, you can use the standard Windows graphical dialogs in scripts.
To display a simple modal window with text and buttons, use the MessageBox class.
Show an message box with text and OK button:
[void] [System.Windows.MessageBox]::Show( "All changes have been implemented successfully ", "Script completed", "OK", "Information" )
Display a message box that requires a response (Yes/No/Cancel):
$answer = [System.Windows.MessageBox]::Show( "Dou you want to remove this user?", " Removal Confirmation", "YesNoCancel", "Warning" )
Prompt a user for credentials and split it on two variables:
$creds = Get-Credential $UserName

$getUsername = $creds.GetNetworkCredential( ).UserName

$getPassword = $creds.GetNetworkCredential( ).Password
Building the GUI for PowerShell Scripts with Visual Studio
Then you need to create a complex GUI form with a large number of control element, use the Visual Studio with a Windows Presentation Foundation (WPF) as a simple GUI builder.
Download and install the Visual Studio Community 2022 > select .Net desktop development.
Run the Microsoft Visual Studio and create a new Project (File > New > Project). Select Visual C# > WPF App (.NET Framework) C#.

Use the Windows Forms element in the left Toolbox pane to place your control element on the form (with drag&drop).

Visual Studio generates an Extensible Application Markup Language (XAML) that contains the GUI form settings. Save this code into the file C:\PS\Script\MainWindow.xaml. Open this file using Notepad and remove the string:
x:Class="test.MainWindow”

Now you can read this XAML code from your PowerShell script and display a Windows Form.
Load the WPF assembly:
Add-Type -AssemblyName PresentationFramework

Add-Type -AssemblyName System.Windows.Forms

[xml]$XAML = Get-Content "C:\ps\gui\mainwindow.xaml"

$XAML.Window.RemoveAttribute('x:Class')

$XAML.Window.RemoveAttribute('mc:Ignorable')

$XAMLReader = New-Object System.Xml.XmlNodeReader $XAML

$MainWindow = [Windows.Markup.XamlReader]::Load($XAMLReader)

$XAML.SelectNodes("//*[@Name]") | %{Set-Variable -Name ($_.Name) -Value $MainWindow.FindName($_.Name)}
Show the form:
$xamGUI.ShowDialog()
Now add some event handlers for contol elements. For example, I want a message to appear when I click OK button.
- In the XAML file, set a name for the OK button, for example:
Name="OkButton"

- Add logic to your PowerShell script:
# Define the event handler

function OnOkButtonClick {

$null = [System.Windows.MessageBox]::Show("Button OK clicked!")

}

# Add the event handler to the "OK" button

$OkButton = $MainWindow.FindName("OkButton")

$OkButton.Add_Click({ OnOkButtonClick })

# Show the window

$MainWindow.ShowDialog() | Out-Null

Check that the action from the OnOkButtonClick function is now performed when a button is clicked on the form.

Cyril Kardashevsky
I enjoy technology and developing websites. Since 2012 I’m running a few of my own websites, and share useful content on gadgets, PC administration and website promotion.
I’ve been getting questions about how to use PowerShell and windows forms for a while from different customers and friends, so I’ve decided to write a series of posts covering the basics and show what you can do with this.
So in this post I will show you the basics on how to create a form and add two buttons to it and some text. (Complete code at the end)
Part 1:
To start with, we need to load two assemblys;
- System Windows Forms
- System Drawing
We do this by adding these two lines
[void] [System.Reflection.Assembly]::LoadWithPartialName("System.Windows.Forms")
[void] [System.Reflection.Assembly]::LoadWithPartialName("System.Drawing")
Next we need to create our main form, the window that will show when the script is run:
$MainForm = New-Object System.Windows.Forms.Form
$MainForm.Text = "First Form"
$MainForm.Size = New-Object System.Drawing.Size(800,600)
$MainForm.KeyPreview = $True
$MainForm.FormBorderStyle = "1"
$MainForm.MaximizeBox = $false
$MainForm.StartPosition = "CenterScreen"
Starting from the top in the code above, we create a new Windows Form called $MainForm and name the application “First Form”
The size of the windows should be 800*600 and we should accept input from the keyboard, such as “Enter” and “Tab”.
“BorderStyle” is a value between 1 and 7, I always use 1, but experiment to find what looks best in your eyes!
We also make sure that the user can’t maximize the window and that the application starts in the center of the screen.
Next we need to activate the form when we run the script. This is done by adding the following:
$MainForm.Add_Shown({$MainForm.Activate()})
[void] $MainForm.ShowDialog()
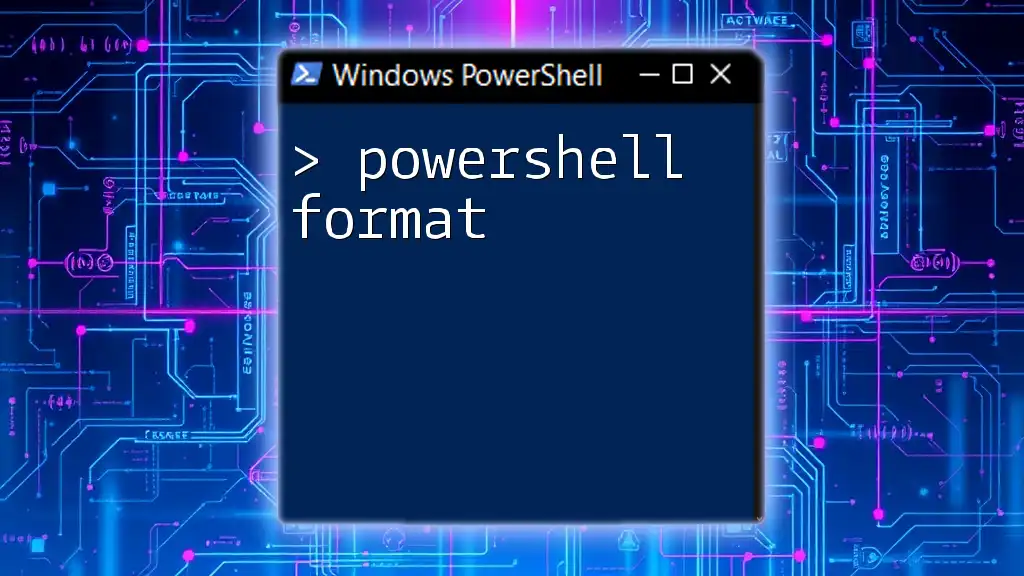
If we run the complete code that should look like the one below, this is the result we get:

[void] [System.Reflection.Assembly]::LoadWithPartialName("System.Windows.Forms")
[void] [System.Reflection.Assembly]::LoadWithPartialName("System.Drawing")

### Add Forms ###
$MainForm = New-Object System.Windows.Forms.Form
$MainForm.Text = "First Form"
$MainForm.Size = New-Object System.Drawing.Size(800,600)
$MainForm.KeyPreview = $True
$MainForm.FormBorderStyle = "1"
$MainForm.MaximizeBox = $false
$MainForm.StartPosition = "CenterScreen"

### Activate Form
$MainForm.Add_Shown({$MainForm.Activate()})
[void] $MainForm.ShowDialog()
Part 2:
The code above is a good start, but there’s not really anything we can do, more than showing a box. In this part we will resize the window, add a button and some text.
Let’s start with changing the size of the window to 400*200 by changing the line to:
$MainForm.Size = New-Object System.Drawing.Size(400,200)
Next, we need to add a button. To do this we add this code after we created to form, but before we activate it:
$Close = New-Object System.Windows.Forms.Button
$Close.Size = New-Object System.Drawing.Size(75,25)
$Close.Location = New-Object System.Drawing.Size(165,110)
$Close.Text = "Close"
$MainForm.Controls.Add($Close)
$Close.add_click({[void] $MainForm.Close()})
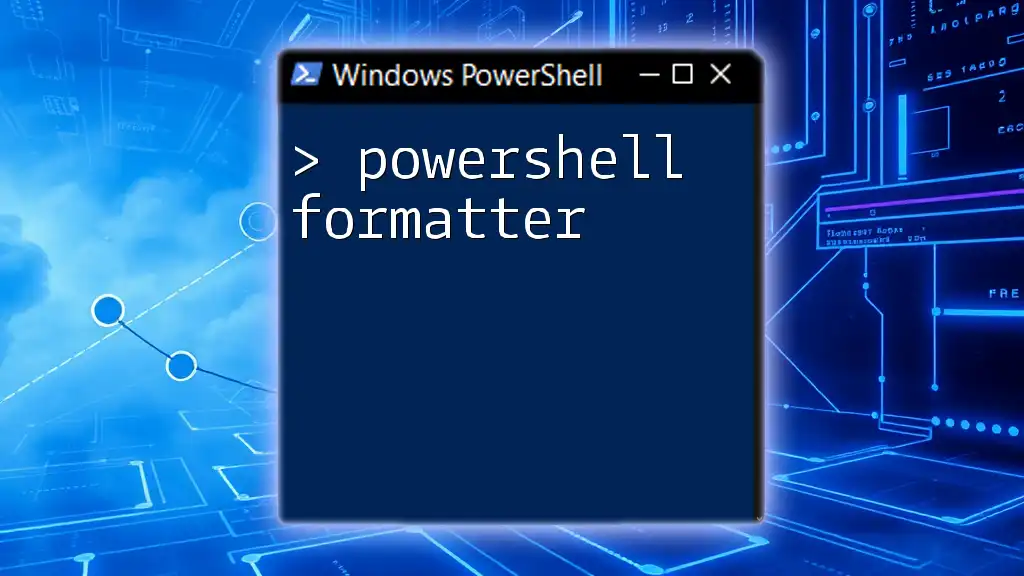
This will add a button called “Close” to our form with the size of 75*25 on the coordinates 165,110. When we press the button it will close the form by running:
[void] $MainForm.Close()
(You can also call a function by adding the name of the function between ({ <function> }))
Go ahead and run the script and try it out, the window should look like this:

Part 3:
The last part in this post will show you how to add some text as well, a window with a button isn’t that helpful unless you know what it does.
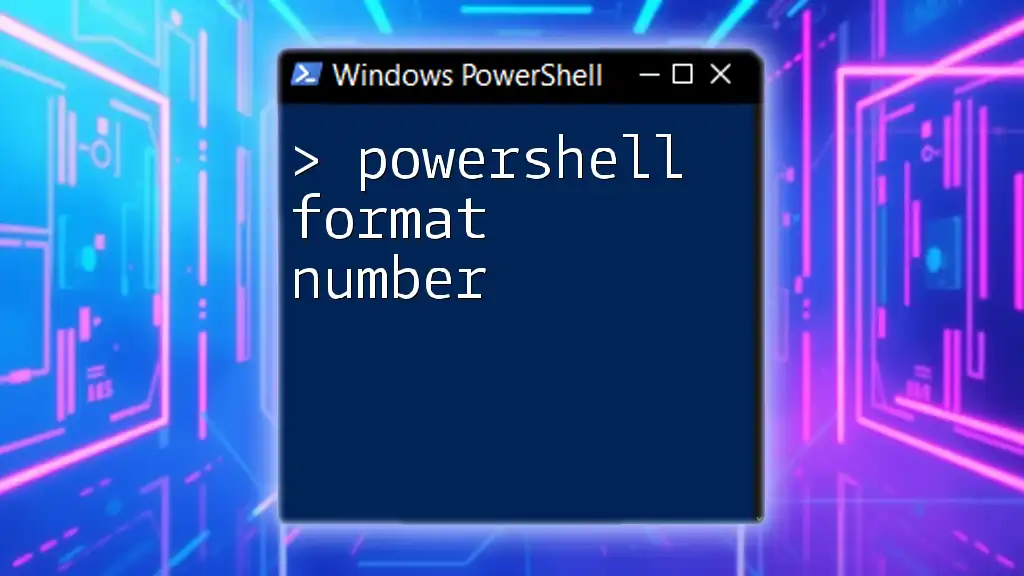
After the code that contains the button, we add this:
$Text = New-Object System.Windows.Forms.Label
$Text.Size = New-Object System.Drawing.Size(300,50)
$Text.Location = New-Object System.Drawing.Size(70,50)
$Text.Text = "Press the button to close this window"
$MainForm.Controls.Add($Text)
Now when you run the script, it will look like the following:

Stay tuned for more posts on how to use Windows Forms with PowerShell!
The complete code:
[void] [System.Reflection.Assembly]::LoadWithPartialName("System.Windows.Forms")
[void] [System.Reflection.Assembly]::LoadWithPartialName("System.Drawing")

### Add Forms ###
$MainForm = New-Object System.Windows.Forms.Form
$MainForm.Text = "First Form"
$MainForm.Size = New-Object System.Drawing.Size(400,200)
$MainForm.KeyPreview = $True
$MainForm.FormBorderStyle = "1"
$MainForm.MaximizeBox = $false
$MainForm.StartPosition = "CenterScreen"

### Add Buttons ###
$Close = New-Object System.Windows.Forms.Button
$Close.Size = New-Object System.Drawing.Size(75,25)
$Close.Location = New-Object System.Drawing.Size(165,110)
$Close.Text = "Close"
$MainForm.Controls.Add($Close)
$Close.add_click({[void] $MainForm.Close()})

### Add Lables ###
$Text = New-Object System.Windows.Forms.Label
$Text.Size = New-Object System.Drawing.Size(300,50)
$Text.Location = New-Object System.Drawing.Size(70,50)
$Text.Text = "Press the button to close this window"
$MainForm.Controls.Add($Text)

### Activate Form
$MainForm.Add_Shown({$MainForm.Activate()})
[void] $MainForm.ShowDialog()