
The Windows Update allows users to keep Windows OS up to date with the latest security patches, new features, and bug fixes from Microsoft. You can access Windows Update from the Settings app on your PC. You can also run Windows Update from CMD.
Windows Update runs automatically in the background and installs new updates when they are available. However, you can also manually check for updates at any time. This will help you get the latest features and improvements faster.
By checking regularly for new Windows updates, you can ensure your PC is running smoothly and securely, ensuring you are safe from viruses, malware, and other threats.
In this guide, you will learn how to run Windows Update from Command Prompt and PowerShell using different commands.
Table of Contents
Force Windows Update from CMD
Check for updates on all Windows versions
If you want to run Windows Update from Command Prompt, you can use the wuauclt.exe utility. This utility allows you to check for updates, download updates, and install updates from the command line. The only limitation of running Windows Update through the CMD is that it won’t show any progress. Only results are shown when the process is complete. Here is how to run Windows Update from CMD:
-
Open Command Prompt with administrative privileges
-
Run wuauclt /detectnow to check for new updates and download them
wuauclt /detectnow -
Run wuauclt /updatenow to install updates
wuauclt /updatenow -
(Optional) Run wuauclt /reportnow to report back to WSUS server (if available)
wuauclt.exe /reportnow
You can also use multiple switches in the same command:
wuauclt /detectnow /updatenowIf you want to disregard the already detected updates and force Windows Update to check for updates again immediately, you may run the following command:
wuauclt /resetauthorization /detectnowSince the command prompt does not show any progress, a better approach would be to check and install updates simultaneously. Here’s the command for this:
wuauclt /detectnow /updatenowCheck for Windows updates in Windows 11, 10
The above-mentioned command will work in all versions of Windows, including Windows 7 and Windows Server 2008 R2. But if you are using Windows 11, Windows 10 or Windows Server 2016, you can use the “UsoClient” command, which has more options than “wuauclt.” You can run UsoClient with the following switches:
-
Start checking for new updates
UsoClient /StartScan -
Start downloading updates
UsoClient /StartDownload -
Start installing updates
UsoClient /StartInstall
Force Windows Update Check using Run Command Box
I found out that the easiest way to force a Windows update check is to use a command in the Run dialog box. There are other commands from CMD and PowerShell as well, but let’s start with the easiest way to do it.
-
Open the Run Command box (Windows key + R).
-
Run the following command:
control updateCheck Windows update from the Run Command box
This will trigger the Windows Update graphical user interface which will start checking for new updates. This method works on all versions of Windows including Windows 10 and Windows 11.
There is another command that will trigger the same effect but only works in Windows 10 and 11:
ms-settings:windowsupdateRun Windows Update from PowerShell
There is no official Windows Update module for PowerShell. However, you can use “PSWindowsUpdate.” PSWindowsUpdate is a third-party module that can be used to configure Windows updates in Windows.
This module is not installed in Windows by default but you can download it from the PowerShell gallery and install and run the module to check for new updates.
Here are the three steps to run Windows Update through PowerShell:
-
Run the following command to install PSWindowsUpdate:
Install-Module PSWindowsUpdate 3")
Install PSWindowsUpdate module -
Check for available updates by running this cmdlet:
Get-WindowsUpdate 4")
Check for available Windows updates -
Now install these updates using this cmdlet:
Install-WindowsUpdate 5")
Install available Windows updates
 3")
 4")
 5")
The above-mentioned commands will only install Windows updates. If you want to update other Microsoft products, you’ll also need to enable the Microsoft Update Service. It’s pretty easy to enable it using PowerShell:
Add-WUServiceManager -MicrosoftUpdateIf you want to automatically restart your computer after installing all the updates, you can run the following command instead:
Install-WindowsUpdate -MicrosoftUpdate -AcceptAll -AutoRebootIf you don’t want to install a separate module, you can run the following command to force start Windows Update using PowerShell:
Start-Process -FilePath 'ms-settings:windowsupdate'Deploy Updates on Remote Computers
The PSWindowsUpdate PowerShell module can also be used to deploy Windows updates on remote computers. There are two commands involved in this process:
-
Create a list of computers and pass the list as a variable string using the computer names:
$computer = "comp1, comp2, comp3"You can add more computers to the string separated by commas. Replace “compX” with the name of each computer.
-
Run the following command to start checking for Windows updates on remote computers:
Invoke-WUJob -ComputerName $computer -Script {ipmo PSWindowsUpdate; Install-WindowsUpdate -MicrosoftUpdate -AcceptAll -AutoReboot} -RunNow -Confirm:$false | Out-File "\server\share\logs\$computer-$(Get-Date -f yyyy-MM-dd)-MSUpdates.log" -Force
Install Specific Updates Only
If you already know the article KB no. of the specific update you want to install, you can run the following command to install that particular update(s) only:
Get-WindowsUpdate - KBArticleID "KB5002324", "KB5002325" -InstallReplace the KB number with the one you want to install.
Prevent Specific Windows Updates from Installing
You can prevent specific updates from installing on your computer by replacing the KB numbers in the following command in PowerShell:
Install-WindowsUpdate -NotKBArticle "KB5002324, KB5002325" -AcceptAllCheck for Windows Updates using Windows Settings
To check for new updates and configure your Windows Update settings, follow the steps below:
-
Navigate to:
-
In Windows 11:
Settings app >> Windows Update
-
In Windows 10:
Settings app >> Update & Security >> Windows Update
-
-
Click “Check for updates.”
 6")
Check for pending updates
 6")
Force Windows Update to Download Already Downloaded Updates
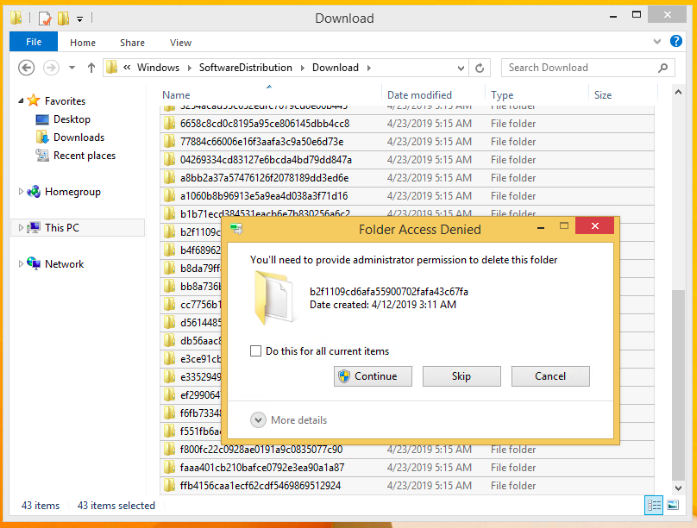
There will be times when the updates become corrupted or for other reasons, you just don’t want to install the downloaded updates. In that situation, you can easily delete the already-downloaded updates, which will force Windows Update to run again and check for and download the updates again.
The only caveat in this situation is that the update must not have been installed on your computer. If the update is already installed, Windows will detect it as installed and will not download it again. In that case, you will need to uninstall the update first and then force Windows Update to run again.
If you want to force Windows Update to re-download all the updates again, you can do this using the steps below.
-
Navigate to the following directory using File Explorer:
C:\Windows\SoftwareDistribution\Download
This folder contains all the Windows update files that Windows OS is currently downloading or recently downloaded and installed.
-
Select and delete all the files from the “Download” folder.
 7")
Delete all files in the “Download” folder -
Run Windows Update again using the above-mentioned methods.
This will force Windows Update to check for the same updates and download them again. The download and install process for new updates is completely automated. You don’t need to do anything during the download and installation process.
 7")
Manage Windows Updates using Wuinstall
Using WuInstall, IT Administrators can automate Windows updates. Wuinstall can be used to enforce Windows Updates inquiries, downloads, and installations at times when they deem them appropriate, enabling them to make the entire update process more controlled and user-friendly.
WuInstall is a strong and flexible system management tool that can be used in a WSUS-based or standalone environment. To download the latest updates using Wuinstall, you will need to download and install Wuinstall first. Follow the steps below:
-
Go to http://www.wuinstall.com/ and install the latest free version of Wuinstall on your computer.
-
Open an elevated Command Prompt.
-
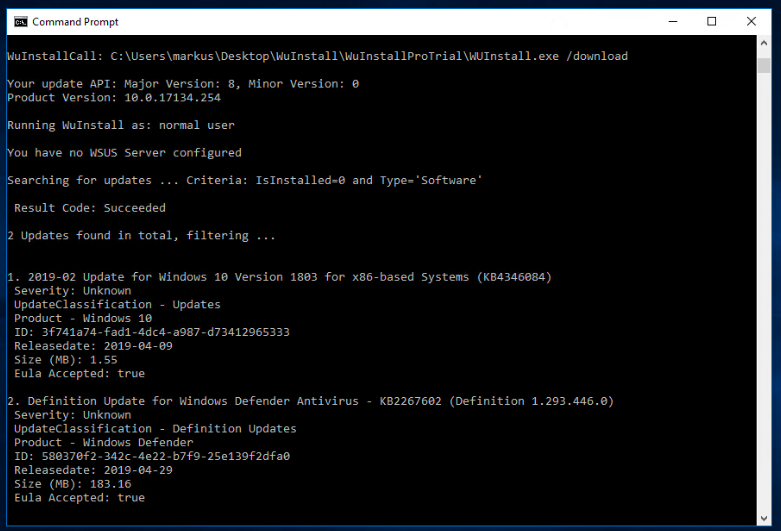
Run the following cmdlet to search for the latest available Windows updates:
wuinstall /searchThis will not only look for new updates but will also list them in the command window.
-
To download the updates, run the following command:
wuinstall /downloadThis will download all the available updates from Microsoft servers.
-
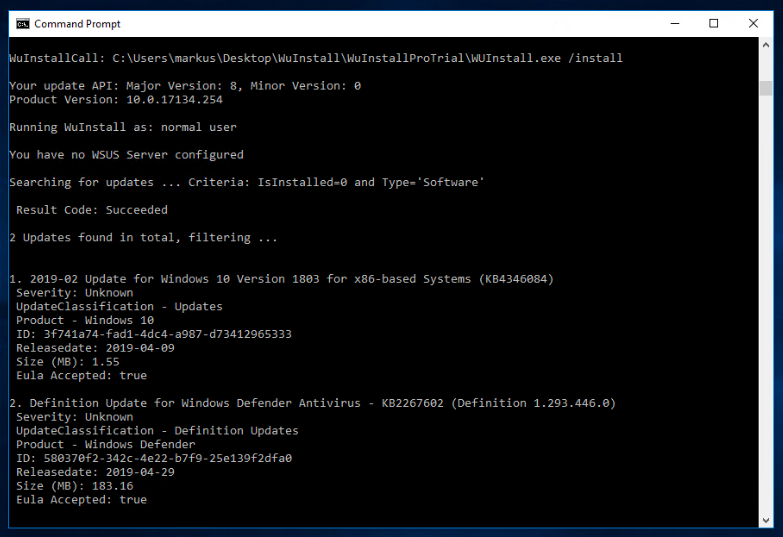
To install the updates, run the following command:
wuinstall /install
There are a few more switches that you can use with the install command:
- /quiet – will install updates without showing anything.
- /disableprompt – Disable any input from Windows.
- /autoaccepteula – Auto-accept any agreement during the update installation.
- /rebootcycle – Install updates on the next computer reboot.
Fix Corrupted Windows Updates
Sometimes Windows Update files get corrupted and the user is not able to download the files again or install the corrupted update files. In that case, we need to run a DISM command to fix the corrupted Windows Update. Here are the steps:
-
Launch the Command Prompt.
-
Run the following cmdlet:
dism.exe /Online /Cleanup-image /Restorehealth
After successfully running this command, try force downloading the updates again, and the Windows Update should start working again.
Hopefully, this will be useful in situations where you want to automate certain Windows functions. What other purposes do you want to use command line options to run Windows Update?
Run Windows Update FAQs
What is Windows Update?
Windows Update is a free Microsoft service that provides bug
fixes, security patches, and performance enhancements for Microsoft Windows operating systems. By installing these updates, users can ensure they have the latest features and security available for their operating system.
Can I use the command line to run Windows Update?
Yes, you can use Windows’ command line to run Windows Update.
What is the benefit of running Windows Update from the command line?
Running Windows Update from the command line offers flexibility,
automation, and convenience. For example, by using the command line, you can schedule updates to occur at a specific time or be triggered by an event, and even control which updates are installed.
How can I run Windows Update from the command line in Windows 10?
Follow the steps below to force Windows update with the command line:
Type cmd in the search box, choose Run as administrator, and click Yes to continue.
Type wuauclt.exe /updatenow and hit Enter.
This command will force Windows Update to check for updates and start downloading.
What is the command to run Windows Update from PowerShell?
To run Windows Update via PowerShell, enter the following command:
Start-Process -FilePath ‘ms-settings:windowsupdate’
What is “usoclient.exe” and how does it relate to Windows Update?
“Usoclient.exe” is a built-in command line tool for Windows Update that can be used to scan for updates, start updates, and even uninstall updates. It provides an alternative to Windows Update’s graphical user interface. This tool can be especially useful for IT administrators who need to run Windows Update simultaneously on multiple machines. It can be run from the command line and provides options for updating in managed environments. It also allows for more detailed control over the update process, such as setting which updates to install or uninstall.
Can Windows Update be automated using the command line?
Yes, Windows Update can be automated using the command line. This can be done by creating scripts that automatically execute Windows Update commands.
,
If you want to run Windows Update from Command Prompt or PowerShell in Windows 10/11, continue reading below.
Microsoft releases updates regularly to enhance security, fix bugs, and introduce new features that improve the functionality of Windows devices.
Windows updates are divided into 2 categories: Quality updates, which are constantly released for security reasons and to fix glitches, and Feature updates, which offer improved versions and additional features.
The usual way to update Windows 10/11 is by going to Settings > Update & Security and to check and install updates, but in some cases may needed to install updates from the command line or PowerShell if the usual way doesn’t work.

This tutorial contains instructions on how run Windows Update and install or uninstall Updates with commands in Command Prompt & PowerShell.
How to Check and Install Updates from PowerShell or Command Prompt in Windows 10/11 & Server 2016/2019.
- Part 1. Install Updates from Command Line.
- Part 2. Install Updates from PowerShell.
- Part 3. Uninstall Updates from PowerShell.
Part 1. How to Run Windows Update from Command Prompt.
In previous versions of Windows you could update Windows using the command «wuauclt /detectnow /updatenow».
In latest Windows 10 versions the command ‘WUAUCLT.EXE’ does not work anymore and has been replaced by the command ‘USOCLIENT.EXE’.
Info: The ‘USOCLIENT.EXE’ is the Update Session Orchestrator client that used to download and install Windows Updates. *
* Notes:
1. According to reports, not all Windows 10 and 11 versions support the USOCLIENT. If the same is true for your device, update your system using the PowerShell method.
2. Since USOCLIENT commands do not display anything on the screen at the time they are executed, the only way to determine if the command is working is to look at the events in the following destinations.
- C:\Windows\SoftwareDistribution\ReportingEvents.log
- Task Scheduler -> Microsoft -> Windows -> Update Orchestrator
To install updates with ‘USOCLIENT.EXE’, follow these steps:
1. Launch Command Prompt or PowerShell as an Administrator and ask Yes at the UAC prompt.
2. Force Windows to Check for Updates with one of the following commands: *
-
- UsoClient StartScan
- USOClient.exe StartInteractiveScan
* Note: Some users reported that in their case one command worked and not the other. To see which of the 2 commands works in your case open Windows Update at the same time as running the command to make sure that Windows is checking for updates.

3. After finding Updates, download them with one of the following commands:
-
- UsoClient StartDownload
- ScanInstallWait
4. Proceed to install downloaded updates with this command:
- UsoClient StartInstall
5. When the updates installed, reboot your pc with this command: *
- UsoClient RestartDevice
* Note: I suggest to wait at least 30 minutes before restarting your PC.

Part 2. How to Run Windows Update from PowerShell in Windows 10/11.
If you want to download and install Windows or Drivers updates using PowerShell commands, use the instructions below.
To Install Windows Updates from PowerShell:
1. Open PowerShell as Administrator.
2. Proceed and install the ‘PowerShell Windows Update module’ with this command and ask Yes (press ‘y’), when prompted to install any other provider needed: *
- Install-Module PSWindowsUpdate
* Notes:
1. The ‘PSWindowsUpdate’ is a necessary module to install updates from PowerShell. To see all the commands available in the module, give this command:
- Get-Command -module PSWindowsUpdate
2. By default the module only look for Windows and driver updates. If you have other Microsoft Products installed (e.g. Office), and you want to get updates for them too, give also this command:
- Add-WUServiceManager -MicrosoftUpdate

3. Then give the following command to allow the execution of scripts on your machine and ask Yes at the warning when prompted.
- Set-ExecutionPolicy -ExecutionPolicy RemoteSigned

4. Now force Windows to download and list all available updates in PowerShell. *
- Get-WindowsUpdate
5. Now proceed according to what you want:
A. To install all available Windows Updates from PowerShell give this command:
- Install-WindowsUpdate

B. To install all available Windows Updates and the updates for all other Microsoft Products, give this command:
- Install-WindowsUpdate -MicrosoftUpdate
C. To install a specific Windows Update from PowerShell, give this command and ask Yes (y) when prompted: *
- Get-WindowsUpdate -KBArticleID «KB-Number” -Install
e.g. to install the KB5005463 in this example:
- Get-WindowsUpdate -KBArticleID «KB5005463» -Install

D. To prevent a Windows Update from being installed, give this command in PowerShell:
- Get-WindowsUpdate -NotKBArticle “KB-Number” -AcceptAll
e.g. to prevent the installation of the KB5005463 in this example:
- Get-WindowsUpdate -NotKBArticle “KB5005463” -AcceptAll

E. To exclude specific categories from updating, (e.g. the «Driver updates or the Feature updates, give this command:
- Install-WindowsUpdate -NotCategory «Drivers»,»FeaturePacks» -AcceptAll
Part 3. How to Uninstall Windows Updates from PowerShell.
To remove Updates using PowerShell:
1. Open PowerShell as Administrator.
2. In the PowerShell window, give the following command to get a list of all installed updates.
- wmic qfe list brief /format:table

2. Take note of the KB number associated with the Windows Update you wish to remove.

3. Now execute the following command to remove the desired update in PowerShell:
- wusa /uninstall /kb:Number
Note: Replace ‘Number’ with the KB number of the update you want to remove. For example: to remove the KB5005635 give this command:
- wusa /uninstall /kb:5005635

That’s it! Which method worked for you?
Let me know if this guide has helped you by leaving your comment about your experience. Please like and share this guide to help others.
If this article was useful for you, please consider supporting us by making a donation. Even $1 can a make a huge difference for us in our effort to continue to help others while keeping this site free:
- Author
- Recent Posts
Konstantinos is the founder and administrator of Wintips.org. Since 1995 he works and provides IT support as a computer and network expert to individuals and large companies. He is specialized in solving problems related to Windows or other Microsoft products (Windows Server, Office, Microsoft 365, etc.).
Are you looking to get the most out of your Windows 11/10 experience? Then you should ensure that your operating system is up-to-date with the latest build. Keeping up with the latest version of Windows 11/10 ensures you have access to all of its features, security fixes, and many other improvements. In this blog post, we’ll walk through how to force update Windows 10, so you can maximize performance on your PC.
| Workable Solutions | Step-by-step Troubleshooting |
|---|---|
| Force Update via Microsoft |
|
| Force Update Windows 10 with CMD |
|
Tip 1. Force Update Windows 10 to the Latest Build from Microsoft
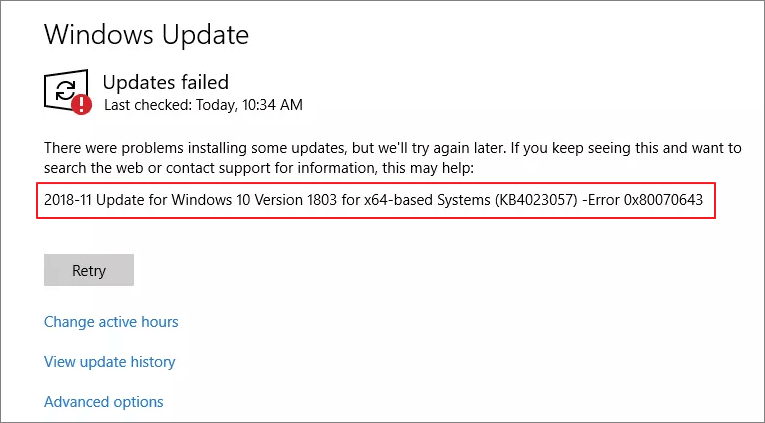
There are times that you download Windows 10 update, but Windows 10 update fails with error code 0x80070643 or other errors. Thus, you can’t update Windows 10 to the newest version in this way.
However, you can free download Windows 10 and force update to the newest Microsoft version. You can watch this video to force update Windows 10 to the newest version.
- 0:00 Introduction
- 0:46 How to update Windows 10
- 3:11 What to do after Windows 10 update
If you prefer a step-by-step guide, follow the steps below.
Step 1. Go to the Microsoft website and click «Update now».
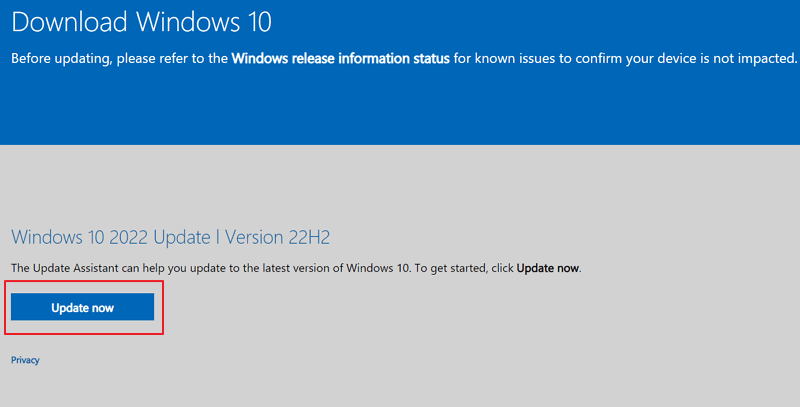
Step 2. Download the latest version of Windows 10 and open the file to install.
Step 3. Then, Windows 10 Update Assistant pops up. Follow the on-screen operations and force update Windows 10.
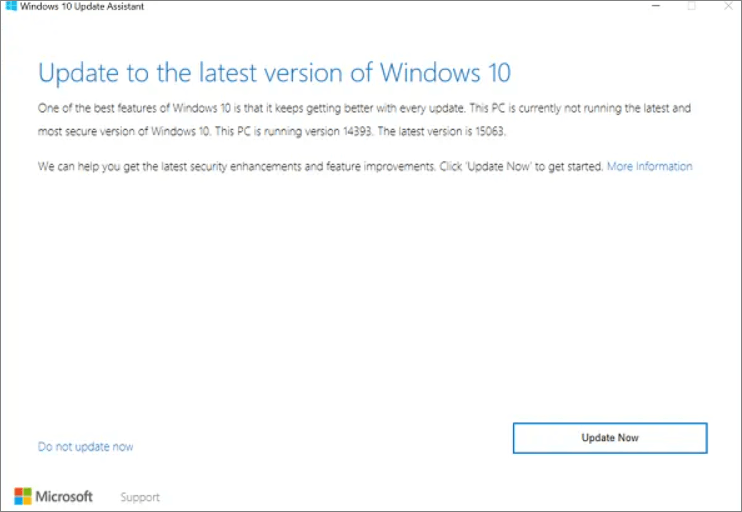
After the update, restart your computer and check your PC.
Tip 2. How to Force Update Windows 10 with CMD
For users confident with utilizing the command line viewer, force updating Windows 10 with CMD is a quick and effective way to install the latest updates. The process works by delivering a special command that downloads and installs all pending Windows updates. Follow the steps below to force update Windows 10 to the newest version.
Step 1. Run Command Prompt as administrator from the search box.
Step 2. Type wuauclt.exe /updatenow and hit Enter.
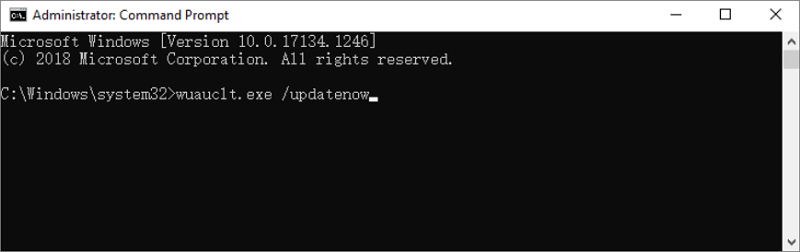
This command will force Windows 10 to check for updates and start downloading.
If you want to learn more details about Windows 10 force update, watch this video.
- 0:00 Introduction
- 0:22 Force update Windows 10
How to Recover Lost Data After Windows 10 Update
After the force update, you may lose data on your laptop or PC. You can recover lost files after Windows 10 update. All you need is EaseUS Data Recovery Wizard. This data recovery software works well in recovering deleted, formatted and other data with simple clicks.
- It can recover data from a hard drive, SSD, SD card, USB flash drive, and more.
- This software supports data recovery from Windows 11/10/8.1/8/7.
- You can perform photo recovery, video recovery, Word recovery, and file recovery with it.
Download this data recovery software and recover data after Windows 10 update.
Conclusion
A forced update is the last thing you want to do, but if you follow Tip 1 or 2 from our blog post, you can make sure your Windows 10 is up-to-date. If, by misfortune, you lost some data after Windows 10 update, don’t worry! Follow our tips to recover lost data and get your files back.
Force Windows 10 Update FAQs
Read the questions and answers below to get additional help.
1. Why is Windows 10 not getting updated?
Here are the reasons why Windows 10 won’t update:
- A file needed by Windows Update is likely damaged or missing
- A driver or other software on your PC isn’t compatible with Windows 10
- Your PC couldn’t connect to the Windows Update servers
- Your PC doesn’t meet the minimum requirements to download or install the upgrade to Windows 10
2. How do I force Windows 10 to update from the command line?
Follow the steps below to force Windows update with the command line:
- Type cmd in the search box, choose Run as administrator, and click Yes to continue.
- Type wuauclt.exe /updatenow and hit Enter.
- This command will force Windows Update to check for updates and start downloading.
3. How can I stop Windows 10 from an automatic update?
To disable Windows 10 updates in every way:
- Manually Disable Windows Update
- Change the Settings of the Group Policy Editor
- Meter Your Network Connection
- Change Update Settings Using Registry
The Windows 10 updates are a problem for many people since you either have to wait for Microsoft to give you the go on updating your system or are forced to update when you’re in the middle of a project.
However, if you want to take the matter into your own hands, this guide shows you how to force Windows to start downloading the Windows 10 update files without having to wait for Microsoft’s approval.
First, open to your Windows installation folder and navigate to the following path: “C:\Windows\SoftwareDistribution\Download” (depending on where you installed your Windows, you may need to adjust the drive letter) and delete all the files there.
1. Open Windows Update window, by hitting the Windows key, type “Windows update” and click on it.
2. Open the command prompt, by hitting the Windows key and type “cmd”. Right click on the Command Prompt icon and choose “Run as administrator”.
3. In the command prompt type (but, don’t hit enter) “wuauclt.exe /updatenow“ (this is the command to force Windows to check for updates).
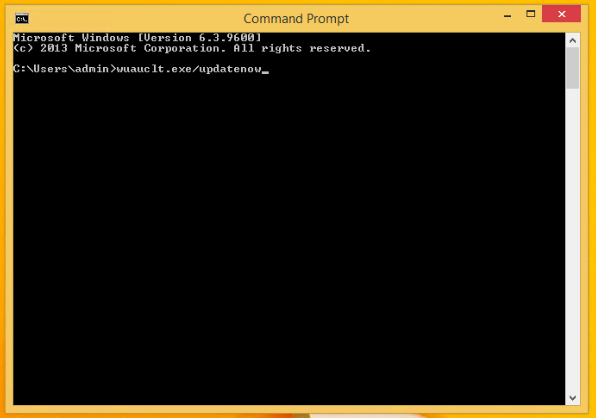
4. Back to Windows Update, click on “Check for updates” — you should see the following message “Checking for updates…”. While this is happening, go back to the command prompt and enter the command you typed at step 3.
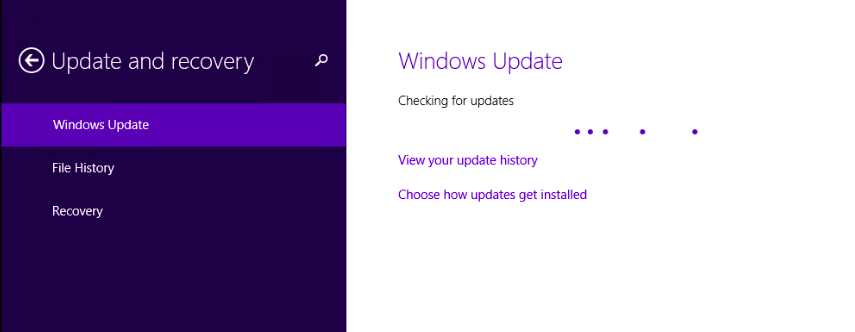
5. Now you should see the Windows update window say that it is downloading Windows 10. Make sure you back everything up before you start installing it.
As an alternative, you could also use WuInstall
WuInstall is a Windows command line tool that enables IT Administrators to script Windows updates. It makes the entire updating process more controlled and user-friendly by enabling admins to enforce the query, download, and installation of Windows Updates at times when it makes sense.
The possibilities you have with WuInstall are huge, you can use it as a standalone tool or in combination with WSUS or other system management tools, you can manage a small network with 10 machines as well as huge networks with thousands of clients or servers.
1. Download and install WuInstall software
You can get WuInstall from the website http://www.wuinstall.com — there is a free, full functional 30-day trial where you can test whether WuInstall fits your IT infrastructure. After that, you can purchase your WuInstall version either online with a credit card or contact us if you would like to purchase via PO. For details check our FAQ page.
2. Open the command prompt
Open the command prompt, by hitting the Windows key and type “cmd”. Right click on the Command Prompt icon and choose “Run as administrator”.
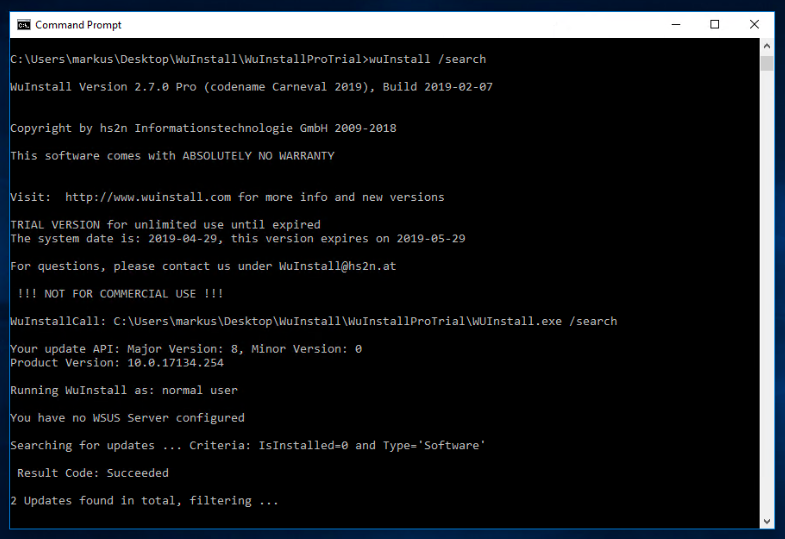
3. Search for Updates
A simple search is triggered via «wuInstall /search».
This command searches for all Microsoft Updates that are available for install on the current machine (Windows, Office, …) — in quite the same way you would also see it in the update menu of the Windows OS — and lists them on stdout.
4. Download Updates
A download of updates is triggered via «wuInstall /download«.
First, the command does a search and downloads every update of the result list to the local cache of the machine. Those updates are now ready to be installed whenever it’s convenient with the /install option. If /download is triggered on an update that is already downloaded, nothing is done. The /download option can be used to download pending updates at times when bandwidth is available.
5. Install Updates
To install updates, use the option «wuInstall /install».
It does a search first, then triggers a download for the updates (if they have not been downloaded already) in the result list and then installs the updates on the system. There are a few options like /quiet, /disableprompt or /autoaccepteula in order to suppress user interaction and make installations unattended. Updates can also be installed over reboots using the /rebootcycle option.
For additional details, please check our documentation.
Do you need more than a command line tool? Check out XEOX!
To force a Windows update using PowerShell, you can use the following command which triggers the update process on your system.
Get-WindowsUpdate -Install -AcceptAll
Understanding Windows Update
What is Windows Update?
Windows Update is a Microsoft service that provides updates for Windows operating systems and other Microsoft software. It plays a crucial role in system maintenance, enhancing security, improving performance, and introducing new features. Keeping Windows updated ensures that you have the latest protections against vulnerabilities, bugs, and potential threats.
Why Use PowerShell for Windows Updates?
While Windows Update can be managed through the graphical interface, using PowerShell offers several significant advantages. PowerShell allows users to automate tasks, manage updates remotely, and execute commands in batch processes, making it an effective tool for IT professionals and system administrators.
In situations where traditional methods may involve multiple clicks or require setting adjustments, PowerShell provides a straightforward command-line approach that can simplify and expedite the update process.
Install Windows Updates PowerShell: A Simple Guide
Preparing for Windows Update with PowerShell
Checking Windows Update Settings
Before forcing a Windows update, it’s essential to verify your update settings to ensure that updates can be downloaded and installed without hindErances. You can view your current Windows Update policy by running the following PowerShell command:
Get-WindowsUpdatePolicy
This command will display the settings applied to your system, including whether updates are automatically installed or if waiting for user intervention.
Installing Required Modules
To manage Windows updates through PowerShell effectively, you may need to install the `PSWindowsUpdate` module. This module is designed specifically for handling updates more conveniently. To install the module, you can use:
Install-Module -Name PSWindowsUpdate -Force
Ensure that you run PowerShell with administrative privileges to avoid permission errors during installation.
Understanding Microsoft.PowerShell.Commands.Internal.Format.FormatStartData
How to Force Windows Updates with PowerShell
Using the PSWindowsUpdate Module
Once the `PSWindowsUpdate` module is in place, you can easily force your system to check for updates. Use the command:
Get-WindowsUpdate
This command will search for available updates for your machine. It retrieves a list of potential updates without installing them, allowing you to assess what needs to be done.
Forcing the Installation of Updates
To install all available updates immediately, you can execute the following command:
Install-WindowsUpdate -AcceptAll -AutoReboot
The `-AcceptAll` parameter installs all updates without requiring additional confirmations, while `-AutoReboot` allows your system to restart automatically if required to complete the installation. Understanding these parameters is vital as they save time and streamline the update process.
Checking the Update History
After installing updates, you may want to review what has been applied to your system. By running the following command, you can view the history of installed updates:
Get-WindowsUpdateLog
This command generates a detailed log of updates processed, which can help in tracing any issues or simply keeping a record of what changes have taken place on your machine.
Mastering Microsoft.PowerShell.Commands.WriteErrorException
Additional PowerShell Commands for Windows Update
Forcing Updates to Specific Components
Sometimes, you may want to install a specific update rather than all available updates. By knowing the specific KB (Knowledge Base) number of the update you wish to install, you can run the following command:
Install-WindowsUpdate -KBArticleID "KBXXXXXX"
Replace `KBXXXXXX` with the actual KB number of the update. This targeted approach is useful for addressing specific issues that a particular update resolves.
Scheduling Windows Updates with PowerShell
To automate Windows updates, consider using Task Scheduler to create a scheduled task that runs your PowerShell scripts at specified intervals. Here’s a brief outline of how you can schedule updates using PowerShell commands:
- Write a script that includes the PowerShell commands for checking and installing updates.
- Use Task Scheduler to create a new task and set the trigger to your preferred time (e.g., daily or weekly).
- In the action section of the task, point it to your PowerShell script.
This automation ensures your system is updated regularly without manual intervention, maintaining security and performance.
Invoke-PowerShell: Mastering Command Execution Effortlessly
Troubleshooting Windows Update Issues
Common Issues When Using PowerShell for Updates
At times, users may encounter various issues while attempting to force updates via PowerShell. Some common problems include:
- The Windows Update service may be paused or disabled.
- Network connectivity issues might prevent update downloads.
- Conflicting applications or settings could block updates.
In these cases, troubleshooting steps may range from ensuring adequate internet connectivity to checking the Windows Update service status using:
Get-Service -Name wuauserv
Resetting Windows Update Components
If you continue to face issues, it might be beneficial to reset Windows Update components. You can do this by executing the following commands:
Get-Service wuauserv, cryptSvc, bits, msiserver | Stop-Service -Force
Get-Service wuauserv, cryptSvc, bits, msiserver | Set-Service -StartupType Manual
These commands stop the necessary services, allowing you to reset components and prepare your system for a fresh start with updates.
Mastering Wget in Windows PowerShell for Easy Downloads
Conclusion
Using PowerShell to force Windows updates provides a powerful alternative to traditional update methods, delivering efficiency and control. Commands like `Install-WindowsUpdate` and `Get-WindowsUpdate` allow for tailored management of updates that can save time and enhance security.
By incorporating the techniques outlined, you can ensure your Windows operating system is consistently up-to-date and running smoothly. Dive into PowerShell’s capabilities today, and enjoy a more streamlined update process.