
The Windows Font Cache Service is an important part of Windows, helping your computer show text faster in apps by keeping a copy of commonly used fonts ready to go. Sometimes, though, it might not work correctly — maybe it won’t start, uses too much of your computer’s brain power (CPU), or causes other issues. We’re going to talk about what this service does, the troubles you might run into, and how to sort them out, whether you’re using Windows 11 or Windows 10.
Also see: How to Limit CPU Usage of a Process in Windows 11
What does Windows Font Cache Service actually do?
The Windows Font Cache Service basically stores font caches so that the OS and apps can show fonts quicker by using the stored caches. It’s especially helpful when an app has a huge amount of text that needs to be shown on the screen.
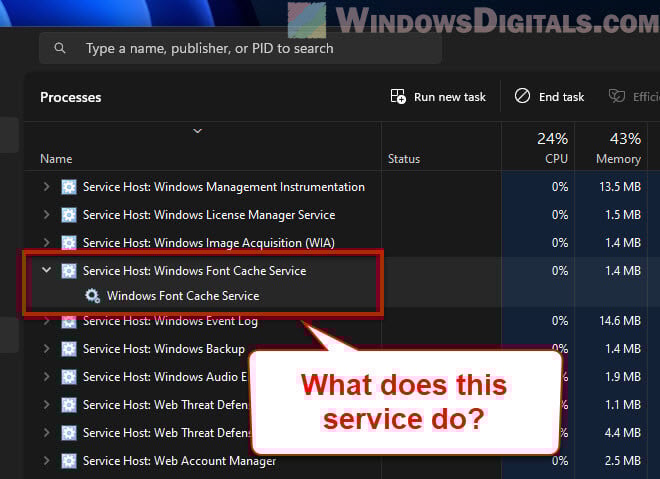
This service usually shows up as svchost.exe in your Task Manager’s Details tab because it shares a space with other system services.
Every time an app needs to show text, it asks Windows for the font data. With the Font Cache service working, this data is pulled from the cache and makes displaying the font more efficient. Even though it’s usually helpful, sometimes it can cause issues.
Linked issue: Service Host Local System High CPU, Disk or Memory Usage
What if Windows Font Cache Service won’t start?
If you get an “Error 1920 or 1921: Windows Font Cache Service failed to start” message, you might need to manually start the service yourself. This usually pops up when you’re installing something and the installer can’t get the service working. Here’s how to manually start the service:
- Hit Windows + R to open the Run box.
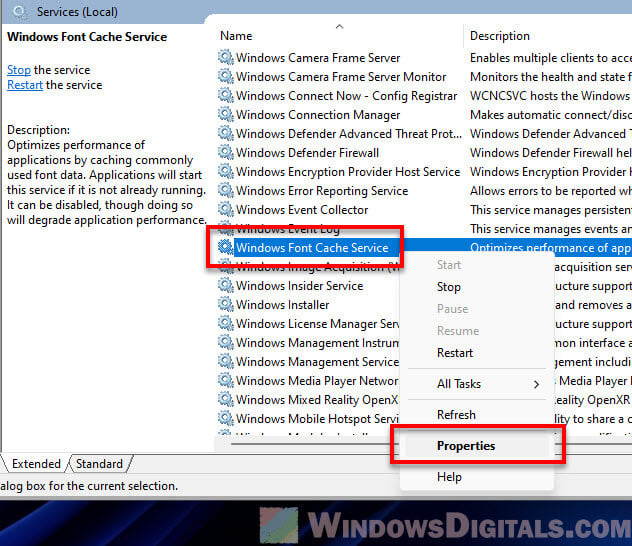
- Type “services.msc” and hit Enter to bring up the Services window.

- Look for “Windows Font Cache Service”, right-click it, and choose “Properties”.

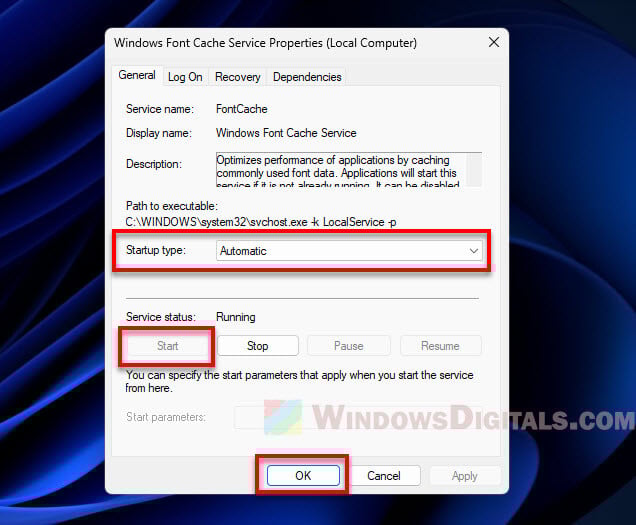
- Pick “Automatic” from the “Startup type” menu.
- Hit the “Start” button under the Service status area.

- Click “Apply” then “OK” to save your changes.

If it still won’t start after trying these steps, you might need to repair or reinstall the service.
Related concern: Why is My Memory Usage So High When Nothing is Running?
Fixing high CPU use by Windows Font Cache Service
Sometimes, the Windows Font Cache Service might unexpectedly make your CPU work harder than it should, which can slow your computer down. This could mean there’s something up with the service or the font cache.
If that’s the case, you can try clearing the font cache. Follow the steps below to do so:
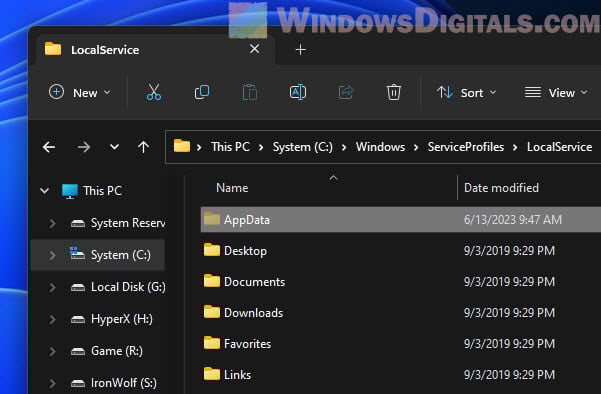
- Open “Windows Explorer”.
- Go to “C:\Windows\ServiceProfiles\LocalService\AppData\Local”. You’ll have to click through the folders since typing the path won’t work due to permissions. If you can’t see the “AppData” folder, you might need to turn on the “Show hidden files, folders, and drives” option.

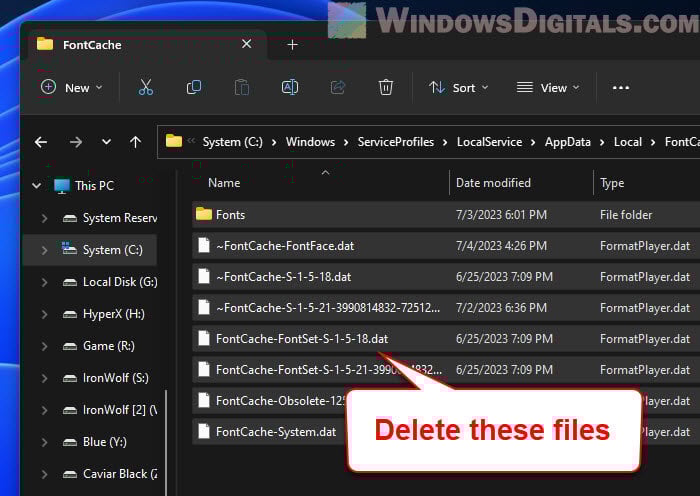
- Find a folder called “FontCache”. Open it and delete everything inside.

- Restart your computer.
After restarting, Windows will make a new font cache, which should fix the CPU hogging issue for most people.
Useful tip: 30+ Windows 11 Services to Disable for Gaming Performance
Disabling Windows Font Cache Service
The Windows Font Cache Service doesn’t normally cause too many issues. But if it’s consistently causing high CPU usage or creating other problems, you might consider turning it off. Note that this might make fonts load more slowly in your apps. Follow the steps below to disable the service:
- Press “Windows + R” to bring up the Run box.
- Type “services.msc” and hit enter. This opens the Services window.
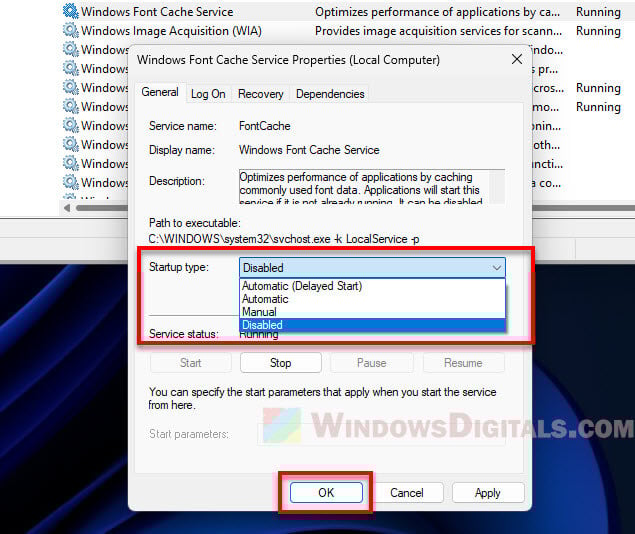
- Find the “Windows Font Cache Service” in the list, right-click on it, and choose “Properties”.
- Change the “Startup type” to “Disabled”.

- Click “Stop” to stop the service if it’s running.
- Hit “Apply” and then “OK” for the changes to take effect.
Relevant guide: How to Delete a Service in Windows 11 or 10 Using CMD
Windows Font Cache Service starts then stops
Sometimes, the Windows Font Cache Service might start up but then stop all of a sudden. This can mess with apps that need to show text. It usually means there’s an error with reading the cached font data.
Fixing these issues can often be as simple as clearing the font cache, like we talked about earlier, or reinstalling the program that’s causing problems.
How to reinstall the FontCache service (FntCache.dll)
Reinstalling the Windows Font Cache Service is a bit more complicated and should only be your last resort. You’ll need to re-register the service DLL file and restart the service.
- Hit the Windows Start button, type “cmd”, right-click on “Command Prompt” from the results, and choose “Run as administrator”.

- In the Command Prompt, type these commands one after the other, hitting Enter after each one:
net stop fontcache
cd /d %windir%\system32
regsvr32 FntCache.dll
net start fontcache


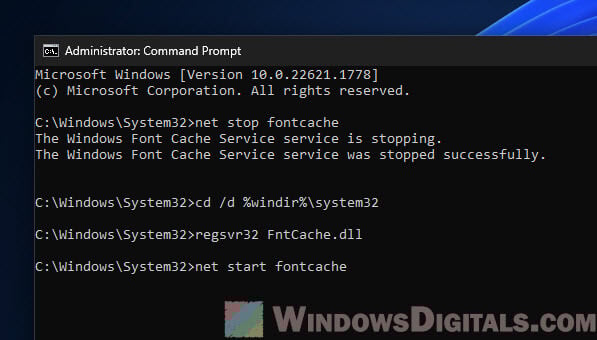
This stops the font cache service, re-registers the DLL file for the service, and then starting it up again.
Please note that these are advanced steps. Only try them if you’re sure about what you’re doing. If you’re not comfortable, it’s a good idea to ask for help from a pro. And, always make a system restore point before you start changing things, just in case something goes wrong.
Optimizes performance of applications by caching commonly used font data. Applications will start this service if it is not already running. It can be disabled, though doing so will degrade application performance.
This service also exists in Windows 10, 7 and 8.
Startup Type
| Windows 11 version | Home | Pro | Education | Enterprise |
|---|---|---|---|---|
| 21H2 | Automatic | Automatic | Automatic | Automatic |
| 22H2 | Automatic | Automatic | Automatic | Automatic |
| 23H2 | Automatic | Automatic | Automatic | Automatic |
| 24H2 | Automatic | Automatic | Automatic | Automatic |
Default Properties
| Display name: | Windows Font Cache Service |
| Service name: | FontCache |
| Type: | share |
| Path: | %WinDir%\system32\svchost.exe -k LocalService -p |
| File: | %WinDir%\system32\FntCache.dll |
| Error control: | normal |
| Group: | AudioGroup |
| Object: | NT AUTHORITY\LocalService |
| Privileges: |
|
Default Behavior
The Windows Font Cache Service is running as NT AUTHORITY\LocalService in a shared process of svchost.exe. Other services might run in the same process. If Windows Font Cache Service fails to start, the error is logged. Windows 11 startup proceeds, but a message box is displayed informing you that the FontCache service has failed to start.
Restore Default Startup Type for Windows Font Cache Service
Automated Restore
1. Select your Windows 11 edition and release, and then click on the Download button below.
2. Save the RestoreWindowsFontCacheServiceWindows11.bat file to any folder on a local drive such as SSD or a hard disk.
3. Right-click the downloaded batch file and select Properties.
4. Check the Unblock checkbox and click OK.
5. Right-click the batch file again and select Run as administrator.
6. Restart the computer to save changes.
Note. Make sure that the FntCache.dll file exists in the %WinDir%\system32 folder. If this file is missing you can try to restore it from your Windows 11 installation media.
Yea, though I walk through the valley of the shadow of death, I will fear no evil: for thou art with me; thy rod and thy staff they comfort me.
Optimizes performance of applications by caching commonly used font data. Applications will start this service if it is not already running. It can be disabled, though doing so will degrade application performance.
Default Settings
| Startup type: | Automatic |
| Display name: | Windows Font Cache Service |
| Service name: | FontCache |
| Service type: | share |
| Error control: | normal |
| Group: | AudioGroup |
| Object: | NT AUTHORITY\LocalService |
| Path: | %SystemRoot%\system32\svchost.exe -k LocalService -p |
| File: | %SystemRoot%\system32\FntCache.dll |
| Registry key: | HKEY_LOCAL_MACHINE\SYSTEM\CurrentControlSet\Services\FontCache |
| Privileges: |
|
Default Behavior
Windows Font Cache Service is a Win32 service. In Windows 10 it is starting automatically when the operating system starts. Then the Windows Font Cache Service is running as NT AUTHORITY\LocalService in a shared process of svchost.exe along with other services. If Windows Font Cache Service fails to start, the failure details are being recorded into Event Log. Then Windows 10 will start up and notify the user that the FontCache service has failed to start due to the error.
Restore Default Startup Configuration of Windows Font Cache Service
1. Run the Command Prompt as an administrator.
2. Copy the commands below, paste them into the command window and press ENTER:
sc config FontCache start= auto
sc start FontCache
3. Close the command window and restart the computer.
The FontCache service is using the FntCache.dll file that is located in the C:\Windows\system32 directory. If the file is removed or corrupted, read this article to restore its original version from Windows 10 installation media.
Возможные причины:
-
Превышение лимита трафика.
В этом случае необходимо увеличить тарифный план в биллинге, в разделе «сайты» — «подробно» формируете заявку на смену тарифного плана, в разделе «неподтверждённые заявки» в этой заявке будет рассчитана сумма доплаты необходимая для смены тарифа. Если в чём-то ошиблись, то данную заявку можете удалить и сформировать другую. Если в сформированной заявке всё правильно — подтверждайте её, при необходимости пополняйте баланс.
-
Закончился оплаченный период.
Продлите срок действия сайта в биллинге в разделе «сайты» — «подробно» укажите необходимое количество месяцев для продления и нажмите «продлить», сформированную заявку подтвердите в разделе «неподтверждённые заявки», при необходимости пополните баланс любым удобным способом в разделе «баланс».
Рекомендуем включить бесплатное SMS уведомление об изменении статуса услуг.
-
Нарушение правил хостинга.
Если возникли дополнительные вопросы — пишите в службу технической поддержки.
When you open the Task Manager on your Windows computer, you may notice a process called “Service Host: Windows Font Cache Service” running in the background. This process, also known as FontCache, is an essential component of the Windows operating system. In this article, we will explore why the Windows Font Cache Service process is running in Task Manager and its significance.

What is the Windows Font Cache Service?
The Windows Font Cache Service is responsible for managing and optimizing the font cache on your computer. Font caching is the process of storing font data in a cache to improve the performance of applications that use fonts. When you open a document or a webpage that contains text, the operating system needs to load the appropriate fonts to display the content correctly.
Font caching helps speed up this process by storing font data in a cache, eliminating the need to load the fonts from disk every time they are required. The Windows Font Cache Service ensures that the font cache is up to date and optimized for efficient font rendering.
Why is the Windows Font Cache Service Running?
The Windows Font Cache Service runs automatically in the background to ensure that the font cache is always up to date. It starts when you boot up your computer and continues running as long as the system is active. The service monitors changes to the font files on your computer and updates the font cache accordingly.
There are several reasons why the Windows Font Cache Service may be running:
- Font Installation: When you install a new font on your computer, the Windows Font Cache Service updates the font cache to include the newly installed font. This ensures that the font is available for use by applications without any delay.
- Font Removal: If you uninstall a font from your computer, the Windows Font Cache Service removes the corresponding font data from the cache. This prevents any conflicts or errors that may occur if an application tries to use a font that is no longer available.
- Font Updates: When you update a font file, the Windows Font Cache Service detects the changes and updates the font cache accordingly. This ensures that applications continue to use the latest version of the font without any issues.
- System Optimization: The Windows Font Cache Service also optimizes the font cache to improve performance. It removes any unused or outdated font data from the cache, freeing up disk space and reducing the time required to load fonts.
Should You Be Concerned?
Seeing the Windows Font Cache Service running in Task Manager is completely normal and should not be a cause for concern. It is an essential system process that ensures the smooth functioning of font rendering on your computer. However, if you notice any unusual behavior or high CPU or memory usage by the FontCache process, it may indicate a problem.
If you suspect that the Windows Font Cache Service is causing performance issues or if you want to rule out any malware or virus infections, it is recommended to scan your computer using a reliable antivirus or anti-malware software. Malwarebytes Free is a popular choice for scanning and removing malware.
Conclusion
The Windows Font Cache Service, also known as FontCache, is a crucial component of the Windows operating system. It manages and optimizes the font cache, ensuring efficient font rendering in applications. The service runs in the background to monitor font changes, update the cache, and optimize performance.
If you ever come across the Windows Font Cache Service running in Task Manager, remember that it is a normal and necessary process. However, if you experience any issues or suspect malware, it is always a good idea to scan your computer using reliable security software like Malwarebytes Free.
How to Stay Safe Online
Here are 10 basic security tips to help you avoid malware and protect your device:
-
Use a good antivirus and keep it up-to-date.
It’s essential to use a good quality antivirus and keep it up-to-date to stay ahead of the latest cyber threats. We are huge fans of Malwarebytes Premium and use it on all of our devices, including Windows and Mac computers as well as our mobile devices. Malwarebytes sits beside your traditional antivirus, filling in any gaps in its defenses, and providing extra protection against sneakier security threats.
-
Keep software and operating systems up-to-date.
Keep your operating system and apps up to date. Whenever an update is released for your device, download and install it right away. These updates often include security fixes, vulnerability patches, and other necessary maintenance.
-
Be careful when installing programs and apps.
Pay close attention to installation screens and license agreements when installing software. Custom or advanced installation options will often disclose any third-party software that is also being installed. Take great care in every stage of the process and make sure you know what it is you’re agreeing to before you click «Next.»
-
Install an ad blocker.
Use a browser-based content blocker, like AdGuard. Content blockers help stop malicious ads, Trojans, phishing, and other undesirable content that an antivirus product alone may not stop.
-
Be careful what you download.
A top goal of cybercriminals is to trick you into downloading malware—programs or apps that carry malware or try to steal information. This malware can be disguised as an app: anything from a popular game to something that checks traffic or the weather.
-
Be alert for people trying to trick you.
Whether it’s your email, phone, messenger, or other applications, always be alert and on guard for someone trying to trick you into clicking on links or replying to messages. Remember that it’s easy to spoof phone numbers, so a familiar name or number doesn’t make messages more trustworthy.
-
Back up your data.
Back up your data frequently and check that your backup data can be restored. You can do this manually on an external HDD/USB stick, or automatically using backup software. This is also the best way to counter ransomware. Never connect the backup drive to a computer if you suspect that the computer is infected with malware.
-
Choose strong passwords.
Use strong and unique passwords for each of your accounts. Avoid using personal information or easily guessable words in your passwords. Enable two-factor authentication (2FA) on your accounts whenever possible.
-
Be careful where you click.
Be cautious when clicking on links or downloading attachments from unknown sources. These could potentially contain malware or phishing scams.
-
Don’t use pirated software.
Avoid using Peer-to-Peer (P2P) file-sharing programs, keygens, cracks, and other pirated software that can often compromise your data, privacy, or both.
To avoid potential dangers on the internet, it’s important to follow these 10 basic safety rules. By doing so, you can protect yourself from many of the unpleasant surprises that can arise when using the web.